Addison-Wesley Publishing Company
Reading, Massachusetts Menlo Park, California
New York
Don Mills, Ontario
Harlow, England
Amsterdam
Bonn
Sydney
Singapore
Tokyo
Madrid
San Juan
Paris Seoul
Milan
Mexico City
Taipei
Newton Programmer's Guide
For Newton 2.0
Apple Computer, Inc.
© 1996 Apple Computer, Inc.
All rights reserved.
No part of this publication may be
reproduced, stored in a retrieval
system, or transmitted, in any form or
by any means, mechanical, electronic,
photocopying, recording, or
otherwise, without prior written
permission of Apple Computer, Inc.,
except to make a backup copy of any
documentation provided on
CD-ROM. Printed in the United
States of America.
No licenses, express or implied, are
granted with respect to any of the
technology described in this book.
Apple retains all intellectual property
rights associated with the technology
described in this book. This book is
intended to assist application
developers to develop applications
only for licensed Newton platforms.
Every effort has been made to ensure
that the information in this manual is
accurate. Apple is not responsible for
printing or clerical errors.
Apple Computer, Inc.
1 Infinite Loop
Cupertino, CA 95014
408-996-1010
Apple, the Apple logo, APDA,
AppleLink, AppleTalk, Espy,
LaserWriter, the light bulb logo,
Macintosh, MessagePad, Newton,
Newton Connection Kit, and New York
are trademarks of Apple Computer, Inc.,
registered in the United States and other
countries.
Apple Press, the Apple Press Signature,
eWorld, Geneva, NewtonScript, Newton
Toolkit, and QuickDraw are trademarks
of Apple Computer, Inc.
Acrobat, Adobe Illustrator, and
PostScript are trademarks of Adobe
Systems Incorporated, which may be
registered in certain jurisdictions.
CompuServe is a registered service
mark of CompuServe, Inc.
FrameMaker is a registered trademark
of Frame Technology Corporation.
Helvetica and Palatino are registered
trademarks of Linotype Company.
ITC Zapf Dingbats is a registered
trademark of International Typeface
Corporation.
Microsoft is a registered trademark of
Microsoft Corporation. Windows is a
trademark of Microsoft Corporation.
QuickViewTM is licensed from Altura
Software, Inc.
Simultaneously published in the
United States and Canada.
LIMITED WARRANTY ON MEDIA AND
REPLACEMENT
ALL IMPLIED WARRANTIES ON THIS
MANUAL, INCLUDING IMPLIED
WARRANTIES OF
MERCHANTABILITY AND FITNESS
FOR A PARTICULAR PURPOSE, ARE
LIMITED IN DURATION TO NINETY
(90) DAYS FROM THE DATE OF THE
ORIGINAL RETAIL PURCHASE OF
THIS PRODUCT.
Even though Apple has reviewed this
manual, APPLE MAKES NO
WARRANTY OR REPRESENTATION,
EITHER EXPRESS OR IMPLIED, WITH
RESPECT TO THIS MANUAL, ITS
QUALITY, ACCURACY,
MERCHANTABILITY, OR FITNESS
FOR A PARTICULAR PURPOSE. AS A
RESULT, THIS MANUAL IS SOLD "AS
IS," AND YOU, THE PURCHASER, ARE
ASSUMING THE ENTIRE RISK AS TO
ITS QUALITY AND ACCURACY.
IN NO EVENT WILL APPLE BE LIABLE
FOR DIRECT, INDIRECT, SPECIAL,
INCIDENTAL, OR CONSEQUENTIAL
DAMAGES RESULTING FROM ANY
DEFECT OR INACCURACY IN THIS
MANUAL, even if advised of the possibility
of such damages.
THE WARRANTY AND REMEDIES SET
FORTH ABOVE ARE EXCLUSIVE AND
IN LIEU OF ALL OTHERS, ORAL OR
WRITTEN, EXPRESS OR IMPLIED. No
Apple dealer, agent, or employee is
authorized to make any modification,
extension, or addition to this warranty.
Some states do not allow the exclusion or
limitation of implied warranties or liability
for incidental or consequential damages, so
the above limitation or exclusion may not
apply to you. This warranty gives you
specific legal rights, and you may also have
other rights which vary from state to state.
iii
Table of Contents
Figures and Tables
xxxiii
Preface
About This Book
xliii
Who Should Read This Book
xliii
Related Books
xliii
Newton Programmer's Reference CD-ROM
xliv
Sample Code
xlv
Conventions Used in This Book
xlv
Special Fonts
xlv
Tap Versus Click
xlvi
Frame Code
xlvi
Developer Products and Support
xlvii
Undocumented System Software Objects
xlviii
Chapter 1
Overview
1-1
Operating System
1-1
Memory
1-3
Packages
1-4
System Services
1-4
Object Storage System
1-5
View System
1-6
Text Input and Recognition
1-7
Stationery
1-8
Intelligent Assistant
1-8
Imaging and Printing
1-9
Sound
1-9
Book Reader
1-10
Find
1-10
Filing
1-11
iv
Communications Services
1-11
NewtonScript Application Communications
1-13
Routing Through the In/Out Box
1-13
Endpoint Interface
1-14
Low-Level Communications
1-14
Transport Interface
1-14
Communication Tool Interface
1-15
Application Components
1-15
Using System Software
1-17
The NewtonScript Language
1-18
What's New in Newton 2.0
1-18
NewtApp
1-18
Stationery
1-19
Views
1-19
Protos
1-20
Data Storage
1-20
Text Input
1-20
Graphics and Drawing
1-21
System Services
1-21
Recognition
1-22
Sound
1-22
Built-in Applications
1-22
Routing and Transports
1-23
Endpoint Communication
1-23
Utilities
1-24
Books
1-24
Chapter 2
Getting Started
2-1
Choosing an Application Structure
2-1
Minimal Structure
2-1
NewtApp Framework
2-2
Digital Books
2-3
Other Kinds of Software
2-4
Package Loading, Activation, and Deactivation
2-4
Loading
2-5
Activation
2-5
Deactivation
2-6
v
Effects of System Resets on Application Data
2-7
Flow of Control
2-8
Using Memory
2-8
Localization
2-9
Developer Signature Guidelines
2-9
Signature
2-9
How to Register
2-10
Application Name
2-10
Application Symbol
2-11
Package Name
2-11
Summary
2-12
View Classes and Protos
2-12
Functions
2-12
Chapter 3
Views
3-1
About Views
3-1
Templates
3-2
Views
3-4
Coordinate System
3-6
Defining View Characteristics
3-8
Class
3-9
Behavior
3-9
Location, Size, and Alignment
3-10
Appearance
3-20
Opening and Closing Animation Effects
3-23
Other Characteristics
3-24
Inheritance Links
3-24
Application-Defined Methods
3-26
View Instantiation
3-26
Declaring a View
3-27
Creating a View
3-28
Closing a View
3-29
View Compatibility
3-30
New Drag and Drop API
3-30
New Functions and Methods
3-30
New Messages
3-30
New Alignment Flags
3-31
vi
Changes to Existing Functions and Methods
3-31
New Warning Messages
3-32
Obsolete Functions and Methods
3-32
Using Views
3-32
Getting References to Views
3-32
Displaying, Hiding, and Redrawing Views
3-33
Dynamically Adding Views
3-33
Showing a Hidden View
3-34
Adding to the stepChildren Array
3-34
Using the AddStepView Function
3-35
Using the BuildContext Function
3-36
Creating Templates
3-36
Making a Picker View
3-37
Changing the Values in viewFormat
3-37
Determining Which View Item Is Selected
3-37
Complex View Effects
3-38
Making Modal Views
3-38
Finding the Bounds of Views
3-39
Animating Views
3-40
Dragging a View
3-40
Dragging and Dropping with Views
3-40
Scrolling View Contents
3-41
Redirecting Scrolling Messages
3-42
Working With View Highlighting
3-42
Creating View Dependencies
3-43
View Synchronization
3-43
Laying Out Multiple Child Views
3-43
Optimizing View Performance
3-44
Using Drawing Functions
3-44
View Fill
3-44
Redrawing Views
3-44
Memory Usage
3-45
Scrolling
3-46
Summary of Views 3-47
Constants 3-47
Functions and Methods 3-51

vii
Chapter 4
NewtApp Applications
4-1
About the NewtApp Framework
4-1
The NewtApp Protos
4-2
About newtApplication
4-4
About newtSoup
4-5
The Layout Protos
4-5
The Entry View Protos
4-8
About the Slot View Protos
4-9
Stationery
4-11
NewtApp Compatibility
4-11
Using NewtApp
4-12
Constructing a NewtApp Application
4-12
Using Application Globals
4-13
Using newtApplication
4-14
Using the Layout Protos
4-16
Using Entry Views
4-19
Using the Required NewtApp Install and Remove Scripts
4-21
Using Slot Views in Non-NewtApp Applications
4-22
Modifying the Base View
4-22
Using a False Entry View
4-23
Creating a Custom Labelled Input-Line Slot View
4-24
Summary of the NewtApp Framework
4-25
Required Code
4-25
Protos
4-25
Chapter 5
Stationery
5-1
About Stationery
5-1
The Stationery Buttons
5-2
Stationery Registration
5-4
Getting Information about Stationery
5-5
Compatibility Information
5-5
Using Stationery
5-5
Designing Stationery
5-5
Using FillNewEntry
5-6
Extending the Notes Application
5-7
Determining the SuperSymbol of the Host
5-7

viii
Creating a DataDef
5-8
Defining DataDef Methods
5-9
Creating ViewDefs
5-11
Registering Stationery for an Auto Part
5-13
Using the MinimalBounds ViewDef Method
5-14
Stationery Summary
5-15
Data Structures
5-15
Protos
5-15
Functions
5-17
Chapter 6
Pickers, Pop-up Views, and Overviews
6-1
About Pickers and Pop-up Views
6-1
Pickers and Pop-up View Compatibility
6-2
New Pickers and Pop-up Views
6-2
Obsolete Function
6-4
Picker Categories
6-4
General-Purpose Pickers
6-4
Using protoGeneralPopup
6-7
Map Pickers
6-8
Text Pickers
6-10
Date, Time, and Location Pop-up Views
6-17
Number Pickers
6-21
Picture Picker
6-21
Overview Protos
6-22
Using protoOverview
6-24
Using protoListPicker
6-26
Using the Data Definitions Frame in a List Picker
6-29
Specifying Columns
6-29
Having a Single Selection in a List Picker
6-30
Having Preselected Items in a List Picker
6-30
Validation and Editing in protoListPicker
6-31
Changing the Font of protoListPicker
6-33
Using protoSoupOverview
6-33
Determining Which protoSoupOverview Item Is Hit
6-33
Displaying the protoSoupOverview Vertical Divider
6-34
Roll Protos
6-35
View Classes
6-36

ix
Specifying the List of Items for a Popup
6-37
Summary
6-41
General Picker Protos
6-41
Map Pickers
6-45
Text Picker Protos
6-46
Date, Time, and Location Pop-up Views
6-50
Number Pickers
6-53
Picture Picker
6-53
Overview Protos
6-54
Roll Protos
6-57
View Classes
6-58
Functions
6-59
Chapter 7
Controls and Other Protos
7-1
Controls Compatibility
7-1
Scroller Protos
7-2
Implementing a Minimal Scroller
7-3
Automatic Arrow Feedback
7-3
Scrolling Examples
7-4
Scrolling Lines of Text
7-4
Scrolling in the Dates Application
7-5
Scrolling In a Graphics Application
7-5
Scroll Amounts
7-5
Advanced Usage
7-6
Button and Box Protos
7-6
Implementing a Simple Button
7-10
Selection Tab Protos
7-11
Gauge and Slider Protos
7-12
Implementing a Simple Slider
7-13
Time Protos
7-14
Implementing a Simple Time Setter
7-15
Special View Protos
7-16
View Appearance Protos
7-18
Status Bar Protos
7-19
Summary
7-20
Scroller Protos
7-20
Button and Box Protos
7-22
x
Selection Tab Protos
7-25
Gauges and Slider Protos
7-25
Time Protos
7-27
Special View Protos
7-28
View Appearance Protos
7-30
Status Bar Protos
7-31
Chapter 8
Text and Ink Input and Display
8-1
About Text
8-1
About Text and Ink
8-1
Written Input Formats
8-2
Caret Insertion Writing Mode
8-3
Fonts for Text and Ink Display
8-3
About Text Views and Protos
8-3
About Keyboard Text Input
8-4
The Keyboard Registry
8-5
The Punctuation Pop-up Menu
8-5
Compatibility
8-6
Using Text
8-6
Using Views and Protos for Text Input and Display
8-6
General Input Views
8-6
Paragraph Views
8-10
Lightweight Paragraph Views
8-11
Using Input Line Protos
8-12
Displaying Text and Ink
8-14
Text and Ink in Views
8-14
Using Fonts for Text and Ink Display
8-17
Rich Strings
8-22
Text and Styles
8-25
Setting the Caret Insertion Point
8-26
Using Keyboards
8-26
Keyboard Views
8-26
Using Keyboard Protos
8-28
Defining Keys in a Keyboard View
8-30
Using the Keyboard Registry
8-36
Defining Tabbing Orders
8-36
The Caret Pop-up Menu
8-38

xi
Handling Input Events
8-38
Testing for a Selection Hit
8-38
Summary of Text
8-39
Text Constants and Data Structures
8-39
Views
8-42
Protos
8-43
Text and Ink Display Functions and Methods
8-47
Keyboard Functions and Methods
8-49
Input Event Functions and Methods
8-50
Chapter 9
Recognition
9-1
About the Recognition System
9-1
Classifying Strokes
9-3
Gestures
9-4
Shapes
9-5
Text
9-6
Unrecognized Strokes
9-7
Enabling Recognizers
9-8
View Flags
9-9
Recognition Configuration Frames
9-9
View Flags vs. RecConfig Frames
9-10
Where to Go From Here
9-10
Recognition Failure
9-11
System Dictionaries
9-11
Correction and Learning
9-13
User Preferences for Recognition
9-14
Handwriting Recognition Preferences
9-15
RecToggle Views
9-18
Flag-Naming Conventions
9-19
Recognition Compatibility
9-20
Using the Recognition System
9-21
Types of Views
9-21
Configuring the Recognition System
9-22
Obtaining Optimum Recognition Performance
9-23
Accepting Pen Input
9-24
Taps and Overlapping Views
9-24
Recognizing Shapes
9-25
xii
Recognizing Standard Gestures
9-25
Combining View Flags
9-26
Recognizing Text
9-27
Recognizing Punctuation
9-28
Suppressing Spaces Between Words
9-28
Forcing Capitalization
9-29
Justifying to Width of Parent View
9-29
Restricting Input to Single Lines or Single Words
9-29
Validating Clipboard and Keyboard Input
9-29
Using the vAnythingAllowed Mask
9-30
Summary
9-31
Constants
9-31
Data Structures
9-33
Chapter 10
Recognition: Advanced Topics
10-1
About Advanced Topics in Recognition
10-1
How the System Uses Recognition Settings
10-1
ProtoCharEdit Views
10-4
Ambiguous Characters in protoCharEdit Views
10-5
Deferred Recognition
10-5
User Interface to Deferred Recognition
10-5
Programmer's Overview of Deferred Recognition
10-6
Compatibility Information
10-7
Using Advanced Topics in Recognition
10-7
Using recConfig Frames
10-8
Creating a recConfig Frame
10-9
Using RecConfig Frames to Enable Recognizers
10-10
Returning Text, Ink Text or Sketch Ink
10-10
Fine-Tuning Text Recognition
10-12
Manipulating Dictionaries
10-13
Single-Character Input Views
10-13
Creating Single-Letter Input Views
10-15
Changing Recognition Behavior Dynamically
10-17
Using protoRecToggle Views
10-19
Creating the recToggle View
10-19
Configuring Recognizers and Dictionaries for recToggle
Views
10-20
Creating the _recogSettings Slot
10-20
xiii
Providing the _recogPopup Slot
10-22
Accessing Correction Information
10-23
Using Custom Dictionaries
10-24
Creating a Custom Enumerated Dictionary
10-24
Creating the Blank Dictionary
10-25
Adding Words to RAM-Based Dictionaries
10-26
Removing Words From RAM-Based Dictionaries
10-27
Saving Dictionary Data to a Soup
10-27
Restoring Dictionary Data From a Soup
10-28
Using Your RAM-Based Custom Dictionary
10-28
Removing Your RAM-Based Custom Dictionary
10-30
Using System Dictionaries Individually
10-30
Working With the Review Dictionary
10-30
Retrieving the Review Dictionary
10-31
Displaying Review Dictionary Browsers
10-31
Adding Words to the User Dictionary
10-32
Removing Words From the User Dictionary
10-32
Adding Words to the Expand Dictionary
10-33
Removing Words From the Expand Dictionary
10-34
Retrieving Word Expansions
10-34
Retrieving the Auto-Add Dictionary
10-34
Disabling the Auto-Add Mechanism
10-35
Adding Words to the Auto-Add Dictionary
10-35
Removing Words From the Auto-Add Dictionary
10-36
Using protoCharEdit Views
10-36
Positioning protoCharEdit Views
10-36
Manipulating Text in protoCharEdit Views
10-37
Restricting Characters Returned by protoCharEdit Views
10-38
Customized Processing of Input Strokes
10-40
Customized Processing of Double Taps
10-41
Changing User Preferences for Recognition
10-41
Modifying or Replacing the Correction Picker
10-42
Using Stroke Bundles
10-42
Stroke Bundles Example
10-42
Summary of Advanced Topics in Recognition
10-44
Constants
10-44
Data Structures
10-45
Recognition System Prototypes
10-49
Additional Recognition Functions and Methods
10-54
xiv
Chapter 11
Data Storage and Retrieval
11-1
About Data Storage on Newton Devices
11-1
Introduction to Data Storage Objects
11-2
Where to Go From Here
11-6
Stores
11-6
Packages
11-7
Soups
11-7
Indexes
11-8
Saving User Preference Data in the System Soup
11-10
Queries
11-10
Querying for Indexed Values
11-10
Begin Keys and End Keys
11-12
Tag-based Queries
11-14
Customized Tests
11-14
Text Queries
11-15
Cursors
11-16
Entries
11-17
Alternatives to Soup-Based Storage
11-18
Dynamic Data
11-18
Static Data
11-19
Compatibility Information
11-20
Obsolete Store Functions and Methods
11-20
Soup Compatibility Information
11-20
Query Compatibility Information
11-23
Obsolete Entry Functions
11-24
Obsolete Data Backup and Restore Functions
11-24
Using Newton Data Storage Objects
11-25
Programmer's Overview
11-25
Using Stores
11-28
Store Object Size Limits
11-29
Referencing Stores
11-29
Retrieving Packages From Stores
11-29
Testing Stores for Write-Protection
11-30
Getting or Setting the Default Store
11-30
Getting and Setting the Store Name
11-30
Accessing the Store Information Frame
11-31
Using Soups
11-31
Naming Soups
11-31
Registering and Unregistering Soup Definitions
11-32

xv
Retrieving Existing Soups
11-33
Adding Entries to Soups
11-34
Adding an Index to an Existing Soup
11-35
Removing Soups
11-36
Using Built-in Soups
11-36
Making Changes to Other Applications' Soups
11-37
Adding Tags to an Existing Soup
11-37
Using Queries
11-37
Querying Multiple Soups
11-38
Querying on Single-Slot Indexes
11-38
Querying for Tags
11-41
Querying for Text
11-43
Internationalized Sorting Order for Text Queries
11-44
Queries on Descending Indexes
11-45
Querying on Multiple-Slot Indexes
11-47
Limitations of Index Keys
11-51
Using Cursors
11-53
Getting a Cursor
11-53
Testing Validity of the Cursor
11-53
Getting the Entry Currently Referenced by the Cursor
11-54
Moving the Cursor
11-54
Counting the Number of Entries in Cursor Data
11-56
Getting the Current Entry's Index Key
11-56
Copying Cursors
11-56
Using Entries
11-57
Saving Frames as Soup Entries
11-57
Removing Entries From Soups
11-58
Modifying Entries
11-59
Moving Entries
11-60
Copying Entries
11-60
Sharing Entry Data
11-61
Using the Entry Cache Efficiently
11-61
Using Soup Change Notification
11-63
Registering Your Application for Change Notification
11-63
Unregistering Your Application for Change Notification
11-65
Responding to Notifications
11-65
Sending Notifications
11-66
Summary of Data Storage
11-68
Data Structures
11-68
Data Storage Functions and Methods
11-71

xvi
Special-Purpose Objects for
Chapter 12
Data Storage and Retrieval
12-1
About Special-Purpose Storage Objects
12-1
Entry Aliases
12-1
Virtual Binary Objects
12-2
Parts
12-3
Store Parts
12-4
Mock Entries
12-4
Mock Stores, Mock Soups, and Mock Cursors
12-6
Using Special-Purpose Data Storage Objects
12-7
Using Entry Aliases
12-7
Using Virtual Binary Objects
12-8
Creating Virtual Binary Objects
12-8
Modifying VBO Data
12-10
VBOs and String Data
12-12
Using Store Parts
12-12
Creating a Store Part
12-13
Getting the Store Part
12-14
Accessing Data in Store Parts
12-14
Using Mock Entries
12-14
Implementing the EntryAccess Method
12-15
Creating a New Mock Entry
12-15
Testing the Validity of a Mock Entry
12-16
Getting Mock Entry Data
12-16
Changing the Mock Entry's Handler
12-16
Getting the Mock Entry's Handler
12-16
Implementing Additional Handler Methods
12-16
Summary of Special-Purpose Data Storage Objects
12-17
Data Structures
12-17
Functions and Methods
12-17
Chapter 13
Drawing and Graphics
13-1
About Drawing
13-1
Shape-Based Graphics
13-2
Manipulating Shapes
13-7
The Style Frame
13-7

xvii
Drawing Compatibility
13-8
New Functions
13-8
New Style Attribute Slots
13-8
Changes to Bitmaps
13-8
Changes to the HitShape Method
13-8
Changes to View Classes
13-9
Using the Drawing Interface
13-9
How to Draw
13-9
Responding to the ViewDrawScript Message
13-9
Drawing Immediately
13-10
Using Nested Arrays of Shapes
13-10
The Transform Slot in Nested Shape Arrays
13-11
Default Transfer Mode
13-12
Transfer Modes at Print Time
13-12
Controlling Clipping
13-12
Transforming a Shape
13-13
Using Drawing View Classes and Protos
13-14
Displaying Graphics Shapes and Ink
13-14
Displaying Bitmaps, Pictures, and Graphics Shapes
13-15
Displaying Pictures in a clEditView
13-15
Displaying Scaled Images of Other Views
13-15
Translating Data Shapes
13-16
Finding Points Within a Shape
13-16
Using Bitmaps
13-17
Making CopyBits Scale Its Output Bitmap
13-18
Storing Compressed Pictures and Bitmaps
13-18
Capturing a Portion of a View Into a Bitmap
13-18
Rotating or Flipping a Bitmap
13-19
Importing Macintosh PICT Resources
13-20
Drawing Non-Default Fonts
13-20
PICT Swapping During Run-Time Operations
13-21
Optimizing Drawing Performance
13-22
Summary of Drawing
13-23
Data Structure
13-23
View Classes
13-23
Protos
13-24
Functions and Methods
13-26

xviii
Chapter 14
Sound
14-1
About Newton Sound
14-1
Event-related Sounds
14-2
Sounds in ROM
14-2
Sounds for Predefined Events
14-2
Sound Data Structures
14-3
Compatibility
14-3
Using Sound
14-4
Creating and Using Custom Sound Frames
14-4
Creating Sound Frames Procedurally
14-5
Cloning Sound Frames
14-5
Playing Sound
14-5
Using a Sound Channel to Play Sound
14-5
Playing Sound Programmatically
14-6
Synchronous and Asynchronous Sound
14-7
Advanced Sound Techniques
14-8
Pitch Shifting
14-9
Manipulating Sample Data
14-10
Summary of Sound
14-11
Data Structures
14-11
Protos
14-11
Functions and Methods
14-12
Sound Resources
14-12
Chapter 15
Filing
15-1
About Filing
15-1
Filing Compatibility Information
15-9
Using the Filing Service
15-10
Overview of Filing Support
15-10
Creating the Labels Slot
15-11
Creating the appName Slot
15-11
Creating the appAll Slot
15-12
Creating the appObjectFileThisIn Slot
15-12
Creating the appObjectFileThisOn Slot
15-12
Creating the appObjectUnfiled Slot
15-12
Specifying the Target
15-13

xix
Creating the labelsFilter slot
15-14
Creating the storesFilter slot
15-14
Adding the Filing Button
15-14
Adding the Folder Tab View
15-14
Customizing Folder Tab Views
15-15
Defining a TitleClickScript Method
15-15
Implementing the FileThis Method
15-15
Implementing the NewFilingFilter Method
15-16
Using the Folder Change Notification Service
15-18
Creating the doCardRouting slot
15-18
Using Local or Global Folders Only
15-19
Adding and Removing Filing Categories
Programmatically
15-19
Interface to User-Visible Folder Names
15-19
Summary
15-20
Data Structures for Filing
15-20
Application Base View Slots
15-20
Filing Protos
15-21
Filing Functions and Methods
15-22
Application-Defined Filing Functions and Methods
15-22
Chapter 16
Find
16-1
About the Find Service
16-1
Compatibility Information
16-6
Using the Find Service
16-6
Technical Overview
16-6
Global and Selected Finds
16-9
Checklist for Adding Find Support
16-10
Creating the title Slot
16-11
Creating the appName Slot
16-11
Using the Finder Protos
16-11
Implementing Search Methods
16-14
Using the StandardFind Method
16-15
Using Your Own Text-Searching Method
16-16
Finding Text With a ROM_CompatibleFinder
16-17
Implementing the DateFind Method
16-18
Adding Application Data Sets to Selected Finds
16-19
Returning Search Results
16-21
xx
Implementing Find Overview Support
16-21
The FindSoupExcerpt Method
16-21
The ShowFoundItem Method
16-22
Replacing the Built-in Find Slip
16-24
Reporting Progress to the User
16-24
Registering for Finds
16-25
Summary
16-26
Finder Protos
16-26
Functions and Methods
16-28
Application-Defined Methods
16-28
Chapter 17
Additional System Services
17-1
About Additional System Services
17-1
Undo
17-1
Undo Compatibility
17-2
Idler Objects
17-2
Change Notifications
17-2
Online Help
17-3
Alerts and Alarms
17-3
User Alerts
17-3
User Alarms
17-3
Periodic Alarms
17-4
Alarms Compatibility
17-5
Progress Indicators
17-5
Automatic Busy Cursor
17-5
Notify Icon
17-5
Status Slips With Progress Indicators
17-6
Power Registry
17-7
Power Compatibility Information
17-7
Using Additional System Services
17-7
Using Undo Actions
17-8
The Various Undo Methods
17-8
Avoiding Undo-Related "Bad Package" Errors
17-9
Using Idler Objects
17-9
Using Change Notification
17-10
Using Online Help
17-10

xxi
Using Alerts and Alarms
17-11
Using the Notify Method to Display User Alerts
17-11
Creating Alarms
17-11
Obtaining Information about Alarms
17-12
Retrieving Alarm Keys
17-12
Removing Installed Alarms
17-13
Common Problems With Alarms
17-13
Using the Periodic Alarm Editor
17-14
Using Progress Indicators
17-15
Using the Automatic Busy Cursor
17-15
Using the Notify Icon
17-15
Using the DoProgress Function
17-16
Using DoProgress or Creating Your Own
protoStatusTemplate
17-18
Using protoStatusTemplate Views
17-18
Using the Power Registry
17-24
Registering Power-On Functions
17-24
Registering Login Screen Functions
17-25
Registering Power-Off Functions
17-25
Using the Battery Information Functions
17-26
Summary of Additional System Services
17-27
Undo
17-27
Idlers
17-27
Notification and Alarms
17-27
Reporting Progress
17-28
Power Registry
17-29
Chapter 18
Intelligent Assistant
18-1
About the Assistant
18-1
Introduction
18-1
Input Strings
18-2
No Verb in Input String
18-2
Ambiguous or Missing Information
18-4
The Task Slip
18-4
Programmer's Overview
18-5
Matching Words With Templates
18-8
The Signature and PreConditions Slots
18-10

xxii
The Task Frame
18-11
The Entries Slot
18-11
The Phrases Slot
18-11
The OrigPhrase Slot
18-12
The Value Slot
18-12
Resolving Template-Matching Conflicts
18-13
Compatibility Information
18-14
Using the Assistant
18-15
Making Behavior Available From the Assistant
18-15
Defining Action and Target Templates
18-15
Defining Your Own Frame Types to the Assistant
18-16
Implementing the PostParse Method
18-17
Defining the Task Template
18-18
Registering and Unregistering the Task Template
18-19
Displaying Online Help From the Assistant
18-19
Routing Items From the Assistant
18-20
Summary
18-21
Data Structures
18-21
Templates
18-21
Developer-Supplied Task Template
18-22
Developer-Supplied Action Templates
18-25
Developer-Supplied Target Templates
18-27
Assistant Functions and Methods
18-27
Developer-Supplied Functions and Methods
18-28
Application Base View Slots
18-28
Chapter 19
Built-in Applications and System Data
19-1
Names
19-2
About the Names Application
19-2
Names Compatibility
19-3
Using the Names Application
19-4
Adding a New Type of Card
19-4
Adding a New Data Item
19-4
Adding a New Card Layout Style
19-5
Adding New Layouts to the Names Application
19-6
Using the Names Methods and Functions
19-6
Using the Names Soup
19-7
Using the Names Protos
19-7

xxiii
Dates
19-8
About the Dates Application
19-8
Dates Compatibility
19-9
Using the Dates Application
19-10
Adding Meetings or Events
19-11
Deleting Meetings and Events
19-12
Finding Meetings or Events
19-13
Moving Meetings and Events
19-14
Getting and Setting Information for Meetings or Events
19-15
Creating a New Meeting Type
19-17
Examples of Creating New Meeting Types
19-19
Miscellaneous Operations
19-20
Controlling the Dates Display
19-21
Using the Dates Soups
19-22
To Do List
19-22
About the To Do List Application
19-22
To Do List Compatibility
19-23
Using the To Do List Application
19-23
Creating and Removing Tasks
19-24
Accessing Tasks
19-24
Checking-Off a Task
19-25
Miscellaneous To Do List Methods
19-26
Using the To Do List Soup
19-26
Time Zones
19-27
About the Time Zones Application
19-27
Time Zone Compatibility
19-27
Using the Time Zone Application
19-28
Obtaining Information About a City or Country
19-28
Adding a City to a Newton Device
19-29
Using Longitude and Latitude Values
19-30
Setting the Home City
19-30
Notes
19-30
About the Notes Application
19-31
Notes Compatibility
19-31
Using the Notes Application
19-32
Creating New Notes
19-32
Adding Stationery to the Notes Application
19-33
Using the Notes Soup
19-33

xxiv
Fax Soup Entries
19-34
About Fax Soup Entries
19-34
Using Fax Soup Entries
19-34
Prefs and Formulas Rolls
19-35
About the Prefs and Formulas Rolls
19-35
Prefs and Formulas Compatibility
19-36
Using the Prefs and Formulas Interfaces
19-36
Adding a Prefs Roll Item
19-36
Adding a Formulas Roll Item
19-36
Auxiliary Buttons
19-36
About Auxiliary Buttons
19-36
Auxiliary Buttons Compatibility
19-36
Using Auxiliary Buttons
19-37
Icons and the Extras Drawer
19-38
About Icons and the Extras Drawer
19-38
Extras Drawer Compatibility
19-39
Using the Extras Drawer's Interface for Icon Management
19-39
Using Extras Drawer Cursors
19-40
Changing Icon Information
19-40
Adding a Soup Icon
19-40
Removing a Soup Icon
19-41
Creating a Script Icon
19-42
Using the Soupervisor Mechanism
19-43
System Data
19-44
About System Data
19-44
Using System Data
19-44
Functions for Accessing User Configuration Data
19-45
Storing Application Preferences in the System Soup
19-45
Summary
19-46
Constants and Variables
19-46
User Configuration Variables
19-47
Protos
19-48
Soup Formats
19-49
Functions and Methods
19-53
xxv
Chapter 20
Localizing Newton Applications
20-1
About Localization
20-1
The Locale Panel and the International Frame
20-1
Locale and ROM Version
20-2
How Locale Affects Recognition
20-2
Using the Localization Features of the Newton
20-3
Defining Language at Compile Time
20-3
Defining a Localization Frame
20-4
Using LocObj to Reference Localized Objects
20-4
Use ParamStr Rather Than "&" and "&&" Concatenation
20-5
Measuring String Widths at Compile Time
20-6
Determining Language at Run Time
20-6
Examining the Active Locale Bundle
20-6
Changing Locale Settings
20-7
Creating a Custom Locale Bundle
20-7
Adding a New Bundle to the System
20-8
Removing a Locale Bundle
20-8
Changing the Active Locale
20-9
Using a Localized Country Name
20-9
Summary: Customizing Locale
20-9
Localized Output
20-10
Date and Time Values
20-10
Currency Values
20-13
Summary of Localization Functions
20-14
Compile-Time Functions
20-14
Locale Functions
20-14
Date and Time Functions
20-14
Utility Functions
20-15
Chapter 21
Routing Interface
21-1
About Routing
21-1
The In/Out Box
21-1
The In Box
21-2
The Out Box
21-3
Action Picker
21-3

xxvi
Routing Formats
21-5
Current Format
21-8
Routing Compatibility
21-8
Print Formats
21-8
Using Routing
21-8
Providing Transport-Based Routing Actions
21-9
Getting and Verifying the Target Object
21-10
Getting and Setting the Current Format
21-11
Supplying the Target Object
21-12
Storing an Alias to the Target Object
21-13
Storing Multiple Items
21-14
Using the Built-in Overview Data Class
21-14
Displaying an Auxiliary View
21-15
Registering Routing Formats
21-16
Creating a Print Format
21-18
Page Layout
21-18
Printing and Faxing
21-19
Creating a Frame Format
21-21
Creating a New Type of Format
21-22
Providing Application-Specific Routing Actions
21-22
Performing the Routing Action
21-24
Handling Multiple Items
21-24
Handling No Target Item
21-25
Sending Items Programmatically
21-26
Creating a Name Reference
21-27
Specifying a Printer
21-28
Opening a Routing Slip Programmatically
21-29
Supporting the Intelligent Assistant
21-30
Receiving Data
21-31
Automatically Putting Away Items
21-31
Manually Putting Away Items
21-33
Registering to Receive Foreign Data
21-34
Filing Items That Are Put Away
21-34
Viewing Items in the In/Out Box
21-34
View Definition Slots
21-35
Advanced Alias Handling
21-36
Summary of the Routing Interface
21-37
Constants
21-37
Data Structures
21-37

xxvii
Protos
21-38
Functions and Methods
21-39
Application-Defined Methods
21-40
Chapter 22
Transport Interface
22-1
About Transports
22-1
Transport Parts
22-2
Item Frame
22-2
Using the Transport Interface
22-5
Providing a Transport Object
22-5
Installing the Transport
22-5
Setting the Address Class
22-6
Grouping Transports
22-7
Sending Data
22-8
Sending All Items
22-9
Converting an E-Mail Address to an Internet Address
22-9
Receiving Data
22-9
Handling Requests When the Transport Is Active
22-12
Canceling an Operation
22-13
Obtaining an Item Frame
22-13
Completion and Logging
22-16
Storing Transport Preferences and Configuration
Information
22-17
Extending the In/Out Box Interface
22-17
Application Messages
22-19
Error Handling
22-20
Power-Off Handling
22-20
Providing a Status Template
22-21
Controlling the Status View
22-23
Providing a Routing Information Template
22-25
Providing a Routing Slip Template
22-26
Using protoFullRouteSlip
22-27
Using protoAddressPicker
22-31
Providing a Preferences Template
22-33
Summary of the Transport Interface
22-36
Constants
22-36
Protos
22-36
Functions and Methods
22-39

xxviii
Chapter 23
Endpoint Interface
23-1
About the Endpoint Interface
23-1
Asynchronous Operation
23-2
Synchronous Operation
23-3
Input
23-3
Data Forms
23-4
Template Data Form
23-5
Endpoint Options
23-7
Compatibility
23-7
Using the Endpoint Interface
23-8
Setting Endpoint Options
23-8
Initialization and Termination
23-10
Establishing a Connection
23-11
Sending Data
23-11
Receiving Data Using Input Specs
23-12
Specifying the Data Form and Target
23-13
Specifying Data Termination Conditions
23-14
Specifying Flags for Receiving
23-15
Specifying an Input Time-Out
23-16
Specifying Data Filter Options
23-16
Specifying Receive Options
23-17
Handling Normal Termination of Input
23-17
Periodically Sampling Incoming Data
23-18
Handling Unexpected Completion
23-18
Special Considerations
23-18
Receiving Data Using Alternative Methods
23-19
Streaming Data In and Out
23-20
Working With Binary Data
23-20
Canceling Operations
23-21
Asynchronous Cancellation
23-21
Synchronous Cancellation
23-22
Other Operations
23-22
Error Handling
23-23
Power-Off Handling
23-23
Linking the Endpoint With an Application
23-24
Summary of the Endpoint Interface
23-25
Constants and Symbols
23-25
Data Structures
23-26
Protos
23-28
Functions and Methods
23-30

xxix
Chapter 24
Built-in Communications Tools
24-1
Serial Tool
24-1
Standard Asynchronous Serial Tool
24-1
Serial Tool with MNP Compression
24-4
Framed Asynchronous Serial Tool
24-4
Modem Tool
24-6
Infrared Tool
24-8
AppleTalk Tool
24-9
Resource Arbitration Options
24-10
AppleTalk Functions
24-12
The Net Chooser
24-13
Summary
24-16
Built-in Communications Tool Service Option Labels
24-16
Options
24-16
Constants
24-18
Functions and Methods
24-21
Chapter 25
Modem Setup Service
25-1
About the Modem Setup Service
25-1
The Modem Setup User Interface
25-2
The Modem Setup Process
25-3
Modem Communication Tool Requirements
25-4
Defining a Modem Setup
25-5
Setting Up General Information
25-5
Setting the Modem Preferences Option
25-5
Setting the Modem Profile Option
25-6
Setting the Fax Profile Option
25-7
Summary of the Modem Setup Service
25-9
Constants
25-9

xxx
Chapter 26
Utility Functions
26-1
Compatibility
26-2
New Functions
26-2
New Object System Functions
26-2
New String Functions
26-3
New Array Functions
26-3
New Sorted Array Functions
26-3
New Integer Math Functions
26-4
New Financial Functions
26-4
New Exception Handling Functions
26-4
New Message Sending Functions
26-4
New Deferred Message Sending Functions
26-4
New Data Stuffing Functions
26-5
New Functions to Get and Set Globals
26-5
New Debugging Functions
26-5
New Miscellaneous Functions
26-5
Enhanced Functions
26-6
Obsolete Functions
26-6
Summary of Functions and Methods
26-7
Object System Functions
26-7
String Functions
26-8
Bitwise Functions
26-9
Array Functions
26-9
Sorted Array Functions
26-9
Integer Math Functions
26-10
Floating Point Math Functions
26-10
Financial Functions
26-12
Exception Functions
26-12
Message Sending Functions
26-12
Deferred Message Sending Functions
26-12
Data Extraction Functions
26-13
Data Stuffing Functions
26-13
Getting and Setting Global Variables and Functions
26-13
Debugging Functions
26-13
Miscellaneous Functions
26-14

xxxi
Appendix
The Inside Story on Declare
A-1
Compile-Time Results
A-1
Run-Time Results
A-2
Glossary
GL-1
Index
IN-1


xxxiii
Figures and Tables
Chapter 1
Overview
1-1
Figure 1-1
System software overview
1-2
Figure 1-2
Communications architecture
1-12
Figure 1-3
Using components
1-16
Chapter 3
Views
3-1
Figure 3-1
Template hierarchy
3-3
Figure 3-2
View hierarchy
3-5
Figure 3-3
Screen representation of view hierarchy
3-6
Figure 3-4
View system coordinate plane
3-7
Figure 3-5
Points and pixels
3-7
Figure 3-6
Bounds parameters
3-11
Figure 3-7
View alignment effects
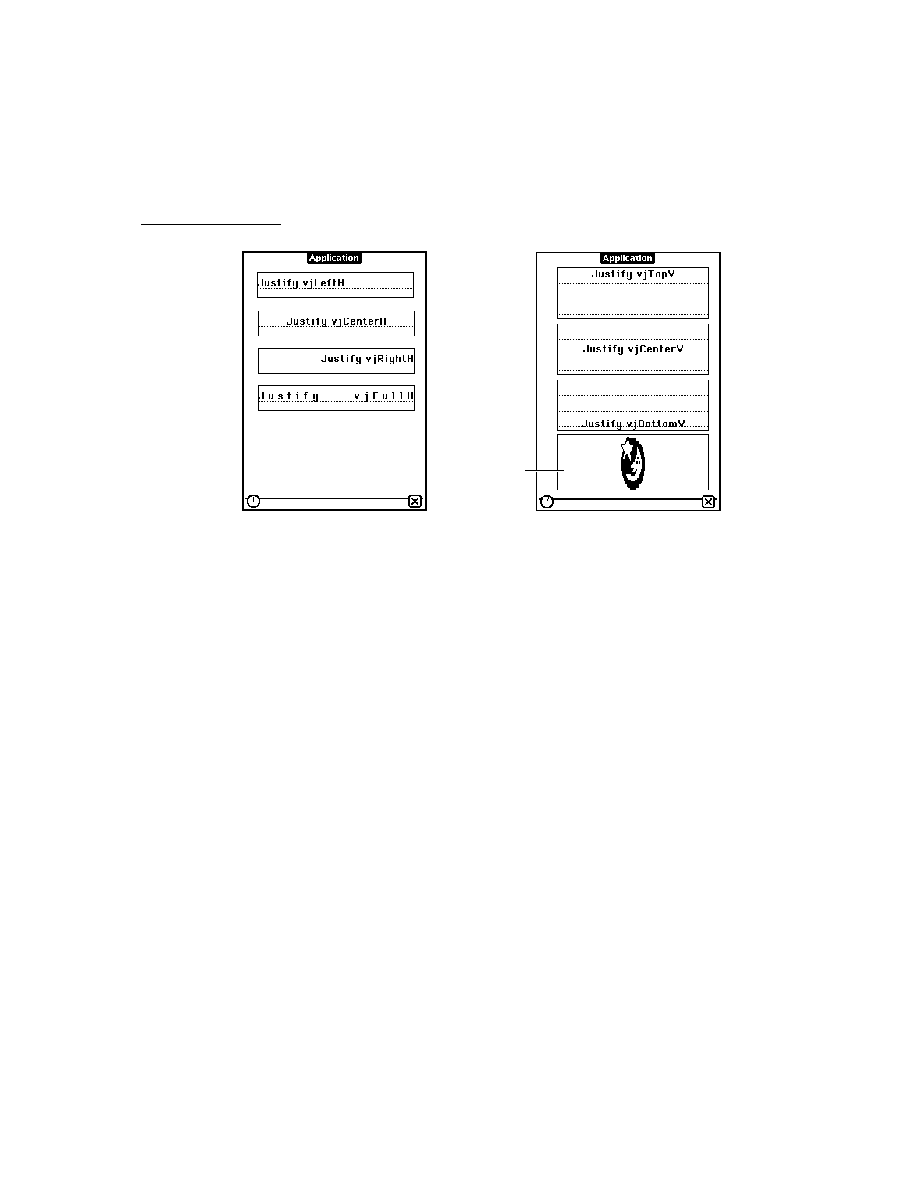
3-18
Figure 3-8
Transfer modes
3-22
Table 3-1
viewJustify
constants
3-14
Chapter 4
NewtApp Applications
4-1
Figure 4-1
The main protos in a NewtApp-based application
4-3
Figure 4-2
A roll-based application (left) versus a card-based
application
4-6
Figure 4-3
Calls is an example of a page-based application
4-7
Figure 4-4
Multiple entries visible simultaneously
4-8
Figure 4-5
An Information slip
4-9
Figure 4-6
The smart name view and system-provided
people picker
4-11
Figure 4-7
The message resulting from a
nil
value for
forceNewEntry
4-17
Figure 4-8
The overview slots
4-17
Figure 4-9
The information button and picker.
4-20
xxxiv
Chapter 5
Stationery
5-1
Figure 5-1
The IOU extension in the New picker
5-3
Figure 5-2
The IOU extension to the Notes application
5-3
Figure 5-3
The Show menu presents different views of
application data
5-4
Figure 5-4
The default viewDef view template
5-12
Chapter 6
Pickers, Pop-up Views, and Overviews
6-1
Figure 6-1
A
protoPopupButton
example
6-5
Figure 6-2
A
protoPopInPlace
example
6-5
Figure 6-3
A
protoLabelPicker
example
6-5
Figure 6-4
A
protoPicker
example
6-6
Figure 6-5
A
protoGeneralPopup
example
6-6
Figure 6-6
A
protoTextList
example
6-7
Figure 6-7
A
protoTable
example
6-7
Figure 6-8
A
protoCountryPicker
example
6-9
Figure 6-9
A
protoProvincePicker
example
6-9
Figure 6-10
A
protoStatePicker
example
6-9
Figure 6-11
A
protoWorldPicker
example
6-10
Figure 6-12
A
protoTextPicker
example
6-10
Figure 6-13
A
protoDateTextPicker
example
6-11
Figure 6-14
A
protoDateDurationTextPicker
example
6-12
Figure 6-15
A
protoDateNTimeTextPicker
example
6-13
Figure 6-16
A
protoTimeTextPicker
example
6-13
Figure 6-17
A
protoDurationTextPicker
example
6-14
Figure 6-18
A
protoTimeDeltaTextPicker
example
6-14
Figure 6-19
A
protoMapTextPicker
example
6-15
Figure 6-20
A
protoUSstatesTextPicker
example
6-15
Figure 6-21
A
protoCitiesTextPicker
example
6-16
Figure 6-22
A
protoLongLatTextPicker
example
6-16
Figure 6-23
A
protoDatePopup
example
6-17
Figure 6-24
A
protoDatePicker
example
6-17
Figure 6-25
A
protoDateNTimePopup
example
6-18
Figure 6-26
A
protoDateIntervalPopup
example
6-18
Figure 6-27
A
protoMultiDatePopup
example
6-19
Figure 6-28
A
protoYearPopup
example
6-19
Figure 6-29
A
protoTimePopup
example
6-19
Figure 6-30
A
protoAnalogTimePopup
example
6-20
Figure 6-31
A
protoTimeDeltaPopup
example
6-20
Figure 6-32
A
protoTimeIntervalPopup
example
6-20
Figure 6-33
A
protoNumberPicker
example
6-21
Figure 6-34
A
protoPictIndexer
example
6-21

xxxv
Figure 6-35
A
protoOverview
example
6-22
Figure 6-36
A
protoSoupOverview
example
6-23
Figure 6-37
A
protoListPicker
example
6-24
Figure 6-38
A
ProtoListPicker
example
6-26
Figure 6-39
Creating a new name entry
6-27
Figure 6-40
Highlighted row
6-27
Figure 6-41
Selected row
6-27
Figure 6-42
Pop-up view displayed over list
6-28
Figure 6-43
Slip displayed for gathering input
6-28
Figure 6-44
A
protoRoll
example
6-35
Figure 6-45
A
protoRollBrowser
example
6-36
Figure 6-46
Example of an expandable text outline
6-36
Figure 6-47
Example of a month view
6-37
Figure 6-48
Cell highlighting example for
protoPicker
6-40
Table 6-1
Item frame for strings and bitmaps
6-38
Table 6-2
Item frame for string with icon
6-38
Table 6-3
Item frame for two-dimensional grid
6-39
Chapter 7
Controls and Other Protos
7-1
Figure 7-1
A
protoHorizontal2DScroller
view
7-2
Figure 7-2
A
protoLeftRightScroller
view
7-2
Figure 7-3
A
protoUpDownScroller
view
7-3
Figure 7-4
A
protoHorizontalUpDownScroller
view
7-3
Figure 7-5
A
protoTextButton
view
7-6
Figure 7-6
A
protoPictureButton
view
7-7
Figure 7-7
A
protoInfoButton
view
7-7
Figure 7-8
A
protoOrientation
view
7-7
Figure 7-9
A cluster of
protoRadioButtons
7-8
Figure 7-10
A cluster of
protoPictRadioButtons
7-8
Figure 7-11
A
protoCloseBox
view
7-8
Figure 7-12
A
protoLargeCloseBox
view
7-9
Figure 7-13
A
protoCheckBox
view
7-9
Figure 7-14
A
protoRCheckBox
view
7-9
Figure 7-15
A
protoAZTabs
view
7-11
Figure 7-16
A
protoAZVertTabs
view
7-11
Figure 7-17
A
protoSlider
view
7-12
Figure 7-18
A
protoGauge
view
7-12
Figure 7-19
A
protoLabeledBatteryGauge
view
7-12
Figure 7-20
A
clGaugeView
view
7-13
Figure 7-21
A
protoDigitalClock
view
7-14
Figure 7-22
A
protoNewSetClock
view
7-15

xxxvi
Figure 7-23
A
protoAMPMCluster
view
7-15
Figure 7-24
A
protoDragger
view
7-16
Figure 7-25
A
protoDragNGo
view
7-16
Figure 7-26
A
protoGlance
view
7-17
Figure 7-27
A
protoStaticText
view
7-17
Figure 7-28
A
protoBorder
view
7-18
Figure 7-29
A
protoDivider
view
7-18
Figure 7-30
A
protoTitle
view
7-18
Figure 7-31
A
protoStatus
view
7-19
Figure 7-32
A
protoStatusBar
view
7-19
Table 7-1
Scroller bounds frame slots
7-4
Chapter 8
Text and Ink Input and Display
8-1
Figure 8-1
The Punctuation pop-up menu
8-5
Figure 8-2
An example of a
protoLabelInputLine
8-13
Figure 8-3
The Recognition menu
8-15
Figure 8-4
Resized and recognized ink
8-16
Figure 8-5
A paragraph view containing an ink word
and text
8-25
Figure 8-6
The built-in alphanumeric keyboard
8-26
Figure 8-7
The built-in numeric keyboard
8-27
Figure 8-8
The built-in phone keyboard
8-27
Figure 8-9
The built-in time and date keyboard
8-27
Figure 8-10
An example of a
protoKeyboard
8-29
Figure 8-11
The keyboard button
8-29
Figure 8-12
The small keyboard button
8-30
Figure 8-13
A generic keyboard view
8-31
Figure 8-14
Keyboard codes
8-34
Figure 8-15
Independent tabbing orders within a parent view
8-37
Table 8-1
Views and protos for text input and display
8-4
Table 8-2
viewStationery
slot value for
clEditView
children
8-9
Table 8-3
Font family symbols
8-18
Table 8-4
Font style (face) values
8-18
Table 8-5
Built-in font constants
8-19
Table 8-6
Font packing constants
8-21
Table 8-7
Rich string functions
8-24
Table 8-8
Key descriptor constants
8-34

xxxvii
Chapter 9
Recognition
9-1
Figure 9-1
Recognizers create units from input strokes
9-5
Figure 9-2
Recognition-related view flags
9-9
Figure 9-3
Text-corrector picker
9-14
Figure 9-4
Handwriting Recognition preferences
9-16
Figure 9-5
Text Editing Settings slip
9-17
Figure 9-6
Fine Tuning handwriting preferences slips
9-17
Figure 9-7
Handwriting Settings slip
9-18
Figure 9-8
Use of
protoRecToggle
view in the Notes
application
9-19
Chapter 10
Recognition: Advanced Topics
10-1
Figure 10-1
Example of
protoCharEdit
view
10-4
Figure 10-2
User interface to deferred recognition, with
inverted ink
10-6
Figure 10-3
Single-character editing box specified by
rcBaseInfo
frame
10-13
Figure 10-4
Two-dimensional array of input boxes specified by
rcGridInfo
frame
10-14
Figure 10-5
One
recToggle
controls all views
10-21
Figure 10-6
Each
recToggle
view controls a single input
view
10-21
Figure 10-7
Example of a
protoCharEdit
view
10-36
Table 10-1
Recognition failure in paragraph or edit view controlled
by
recToggle
10-12
Table 10-2
Symbols appearing in the
_recogPopup
slot
10-22
Chapter 11
Data Storage and Retrieval
11-1
Figure 11-1
Stores, soups and union soups
11-4
Figure 11-2
An index provides random access and imposes
order
11-11
Figure 11-3
Using
beginKey
and
endKey
values to specify an
index subrange
11-12
Figure 11-4
Using
beginExclKey
and
endExclKey
values to
specify a subrange
11-13
Figure 11-5
Cursor presents discontiguous index key values
contiguously
11-16
Figure 11-6
Cursor operations on descending index
11-46
Figure 11-7
Specifying ends of a descending index
11-47
Table 11-1
Effect of functions and methods on entry cache
11-63

xxxviii
Chapter 12
Special-Purpose Objects for Data Storage and Retrieval
12-1
Table 12-1
Parts and type identifiers
12-4
Chapter 13
Drawing and Graphics
13-1
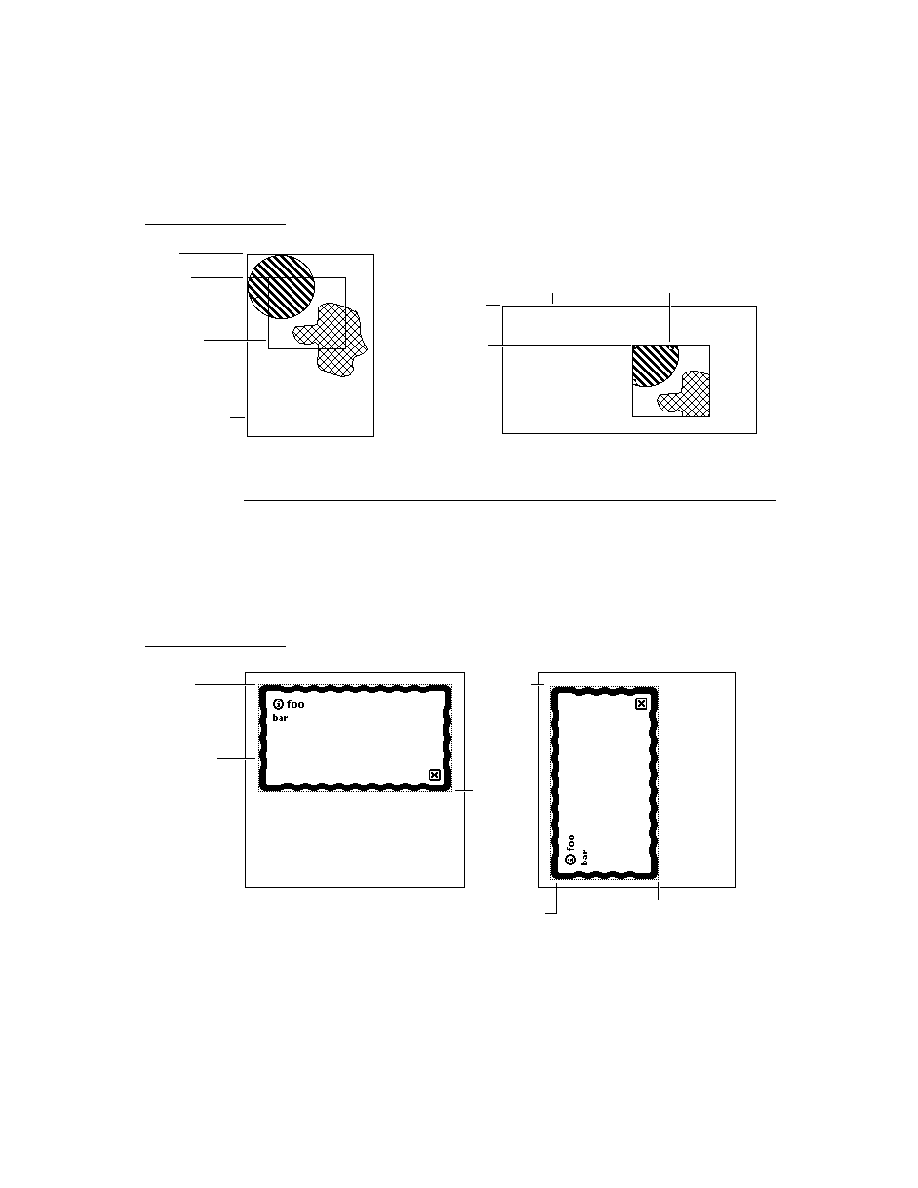
Figure 13-1
A line drawn with different bit patterns and
pen sizes
13-3
Figure 13-2
A rectangle
13-3
Figure 13-3
An oval
13-4
Figure 13-4
An arc and a wedge
13-4
Figure 13-5
A rounded rectangle
13-5
Figure 13-6
A polygon
13-6
Figure 13-7
A region
13-6
Figure 13-8
A simple picture
13-7
Figure 13-9
Example of nested shape arrays
13-11
Figure 13-10
Example of
ViewIntoBitmap
method
13-19
Figure 13-11
Example of
MungeBitmap
method
13-19
Table 13-1
Summary of drawing results
13-11
Chapter 15
Filing
15-1
Figure 15-1
Two examples of filing button views
15-2
Figure 15-2
Filing slip
15-3
Figure 15-3
Creating a local folder
15-4
Figure 15-4
Filing slip without external store
15-5
Figure 15-5
Filing slip for
'onlyCardRouting
15-5
Figure 15-6
A
protoNewFolderTab
view
15-6
Figure 15-7
A
protoClockFolderTab
view
15-7
Figure 15-8
Choosing a filing filter
15-8
Chapter 16
Find
16-1
Figure 16-1
The system-supplied Find slip
16-2
Figure 16-2
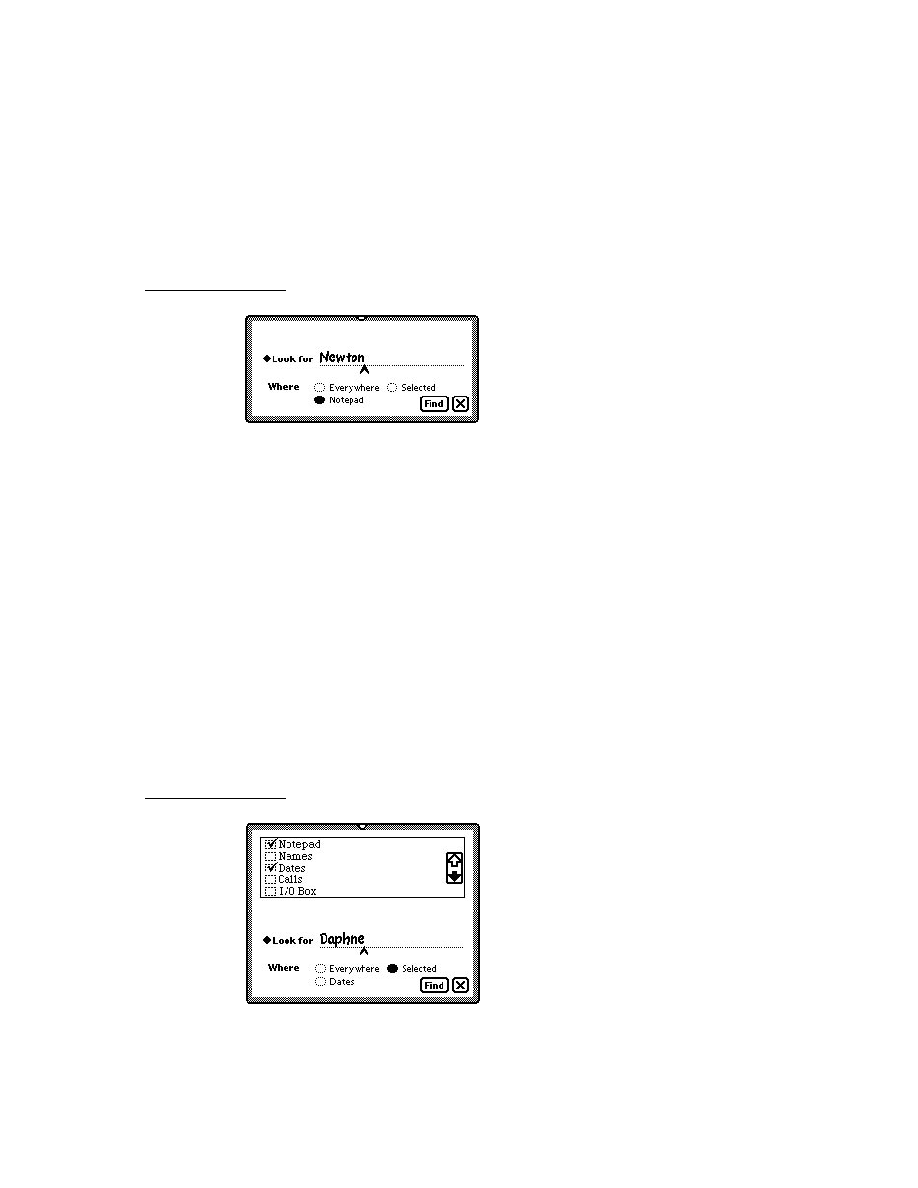
Specifying text or date searches in the Find slip
16-2
Figure 16-3
A local Find operation
16-3
Figure 16-4
Searching selected applications
16-3
Figure 16-5
Progress slip
16-4
Figure 16-6
The Find overview
16-5
Figure 16-7
Find status message
16-5
Figure 16-8
Strings used in a Find overview
16-8

xxxix
Figure 16-9
The
ShowFoundItem
method displays the view of an
overview item
16-9
Figure 16-10
Typical status message
16-24
Table 16-1
Overview of
ROM_SoupFinder
methods
16-13
Chapter 17
Additional System Services
17-1
Figure 17-1
User alert
17-3
Figure 17-2
Alarm slip with Snooze button
17-4
Figure 17-3
A view based on protoPeriodicAlarmEditor
17-4
Figure 17-4
Busy cursor
17-5
Figure 17-5
Notify icon
17-5
Figure 17-6
Progress slip with barber pole gauge
17-6
Figure 17-7
A user alert
17-11
Figure 17-8
Built-in status view configurations
17-20
Chapter 18
Intelligent Assistant
18-1
Figure 18-1
Assist slip
18-3
Figure 18-2
The Please picker
18-3
Figure 18-3
Calling task slip
18-4
Figure 18-4
Simplified overview of the Assistant's matching
process
18-7
Chapter 19
Built-in Applications and System Data
19-1
Figure 19-1
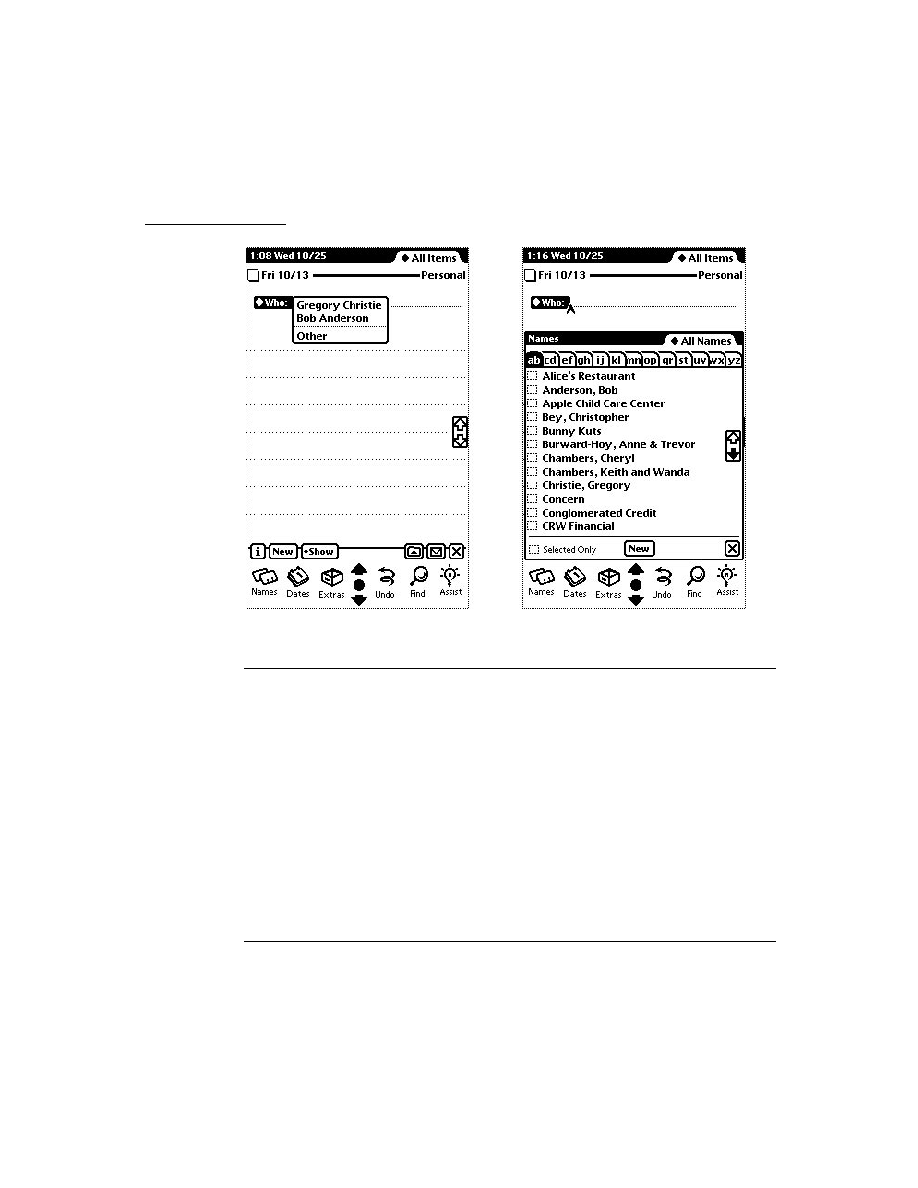
Names application Card and All Info views
19-3
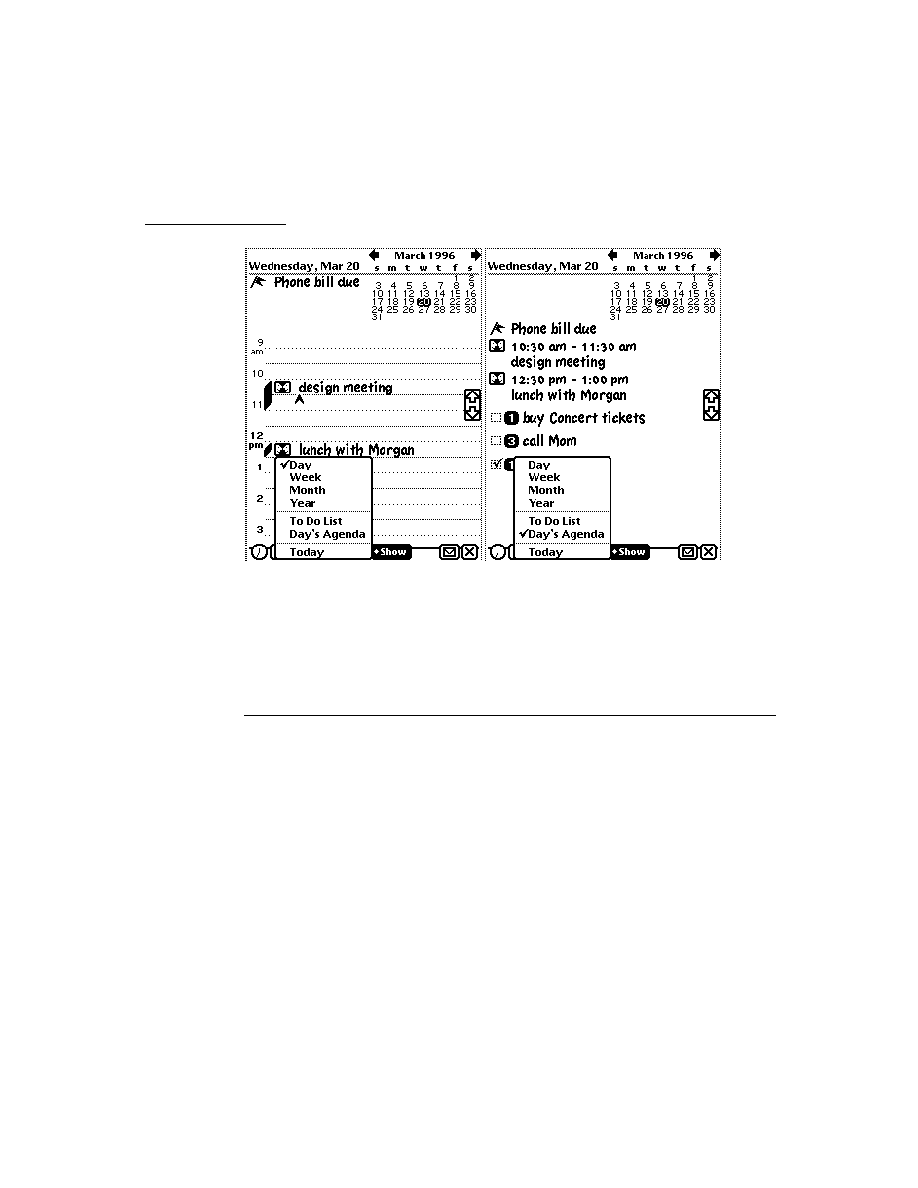
Figure 19-2
Dates application Day and Day's Agenda views
19-9
Figure 19-3
The To Do List application
19-23
Figure 19-4
The Time Zones application
19-27
Figure 19-5
Time Zones application's All Info view
19-28
Figure 19-6
Notes note and Checklist views
19-31
Figure 19-7
Note added using
NewNote
method
19-33
Figure 19-8
Custom Prefs and Formulas Panels
19-35
Figure 19-9
The Notes application with and without an auxiliary
button
19-37
Figure 19-10
The information slips for an application's soup that do
and do not support the soupervisor mechanism (note
extra filing button)
19-39

xl
Chapter 20
Localizing Newton Applications
20-1
Figure 20-1
The Locale settings in Preferences
20-2
Table 20-1
Using the
kIncludeAllElements
constant
20-13
Chapter 21
Routing Interface
21-1
Figure 21-1
In Box and Out Box overviews
21-2
Figure 21-2
Action picker
21-3
Figure 21-3
Transport selection mechanism for action picker
21-6
Figure 21-4
Format picker in routing slip
21-7
Figure 21-5
Auxiliary view example
21-15
Table 21-1
Routing data types
21-7
Chapter 22
Transport Interface
22-1
Figure 22-1
Status view subtypes
22-22
Figure 22-2
Routing information view
22-26
Figure 22-3
protoFullRouteSlip
view
22-27
Figure 22-4
Complete routing slip
22-29
Figure 22-5
protoPeoplePicker
view
22-31
Figure 22-6
Address picker with remembered names
22-32
Figure 22-7
Address picker set up by Intelligent Assistant
22-32
Figure 22-8
Information picker and preferences view
22-33
Figure 22-9
protoTransportPrefs
view
22-34
Figure 22-10
Print preferences
22-35
Table 22-1
Status view subtypes
22-21
Chapter 23
Endpoint Interface
23-1
Table 23-1
Data form applicability
23-5
Table 23-2
Input spec slot applicability
23-13

xli
Chapter 24
Built-in Communications Tools
24-1
Figure 24-1
Default serial framing
24-5
Figure 24-2
NetChooser view while searching
24-14
Figure 24-3
NetChooser view displaying printers
24-14
Table 24-1
Summary of serial options
24-2
Table 24-2
Summary of serial tool with MNP options
24-4
Table 24-3
Summary of framed serial options
24-5
Table 24-4
Summary of modem options
24-7
Table 24-5
Summary of Infrared Options
24-8
Table 24-6
Summary of AppleTalk options
24-10
Table 24-7
Resource arbitration options
24-11
Table 24-8
AppleTalk functions
24-13
Chapter 25
Modem Setup Service
25-1
Figure 25-1
Modem preferences view
25-3
Table 25-1
Summary of configuration string usage
25-7
Chapter 26
Utility Functions
26-1
Table 26-1
Summary of copying functions
26-2
Appendix
The Inside Story on Declare
A-1
Figure A-1
Declare example
A-3


xliii
P R E F A C E
About This Book
This book, Newton Programmer's Guide, is the definitive guide to Newton
programming, providing conceptual information and instructions for using the
Newton application programming interfaces.
This book is a companion to Newton Programmer's Reference, which provides
comprehensive reference documentation for the routines, system prototypes, data
structures, constants, and error codes defined by the Newton system. Newton
Programmer's Reference is included on the CD-ROM that accompanies this book.
Who Should Read This Book
0
This guide is for anyone who wants to write NewtonScript programs for the
Newton family of products.
Before using this guide, you should read Newton Toolkit User's Guide to learn how
to install and use Newton Toolkit, which is the development environment for
writing NewtonScript programs for Newton. You may also want to read The
NewtonScript Programming Language either before or concurrently with this
book. That book describes the NewtonScript language, which is used throughout
the Newton Programmer's Guide.
To make best use of this guide, you should already have a good understanding of
object-oriented programming concepts and have had experience using a high-level
programming language such as C or Pascal. It is helpful, but not necessary, to have
some experience programming for a graphic user interface (like the Macintosh
desktop or Windows). At the very least, you should already have extensive
experience using one or more applications with a graphic user interface.
Related Books
0
This book is one in a set of books available for Newton programmers. You'll also
need to refer to these other books in the set:
Newton Toolkit User's Guide. This book comes with the Newton Toolkit
development environment. It introduces the Newton development environment
and shows how to develop applications using Newton Toolkit. You should read
this book first if you are a new Newton application developer.

xliv
P R E F A C E
The NewtonScript Programming Language. This book comes with the Newton
Toolkit development environment. It describes the NewtonScript programming
language.
Newton Book Maker User's Guide. This book comes with the Newton Toolkit
development environment. It describes how to use Newton Book Maker and
Newton Toolkit to make Newton digital books and to add online help to Newton
applications.
Newton 2.0 User Interface Guidelines. This book contains guidelines to help
you design Newton applications that optimize the interaction between people
and Newton devices.
Newton Programmer's Reference CD-ROM
0
This book is accompanied by a CD-ROM disc that contains the complete text of
Newton Programmer's Reference. Newton Programmer's Reference is the
comprehensive reference to the Newton programming interface. It documents all
routines, prototypes, data structures, constants, and error codes defined by the
Newton system for use by NewtonScript developers.
The companion CD-ROM includes three electronic versions of Newton
Programmer's Reference. The CD-ROM contains these items, among others:
The complete Newton Programmer's Reference in QuickView format for the
Mac OS -- the same format used by the Macintosh Programmer's Toolbox
Assistant. In this format, you can use the extremely fast full-text searching
capabilities and ubiquitous hypertext jumps to find reference information quickly.
The complete Newton Programmer's Reference in Windows Help format. This
format provides quick and convenient access to the reference information for
developers working on Windows platforms.
The complete Newton Programmer's Reference in Adobe Acrobat format. This
format provides a fully formatted book with page-numbered table of contents,
index, and cross-references. You can print all or portions of the book, and you can
also view it online. When viewing online, you can use the indexed search facilities
of Adobe Acrobat Reader 2.1 for fast lookup of any information in the book.
The companion CD-ROM also includes an Adobe Acrobat version of this book,
Newton Programmer's Guide, and a demo version of the Newton Toolkit
development environment for the Mac OS.

xlv
P R E F A C E
Sample Code
0
The Newton Toolkit development environment, from Apple Computer, includes
many sample code projects. You can examine these samples, learn from them, and
experiment with them. These sample code projects illustrate most of the topics
covered in this book. They are an invaluable resource for understanding the topics
discussed in this book and for making your journey into the world of Newton
programming an easier one.
The Newton Developer Technical Support team continually revises the existing
samples and creates new sample code. The latest sample code is included each
quarter on the Newton Developer CD, which is distributed to all Newton Developer
Program members and to subscribers of the Newton monthly mailing. Sample
code is updated on the Newton Development side on the World Wide Web (
http:/
/dev.info.apple.com/newton
) shortly after it is released on the Newton
Developer CD. For information about how to contact Apple Computer regarding
the Newton Developer Program, see the section "Developer Products and Support,"
on page xlvii.
The code samples in this book show methods of using various routines and
illustrate techniques for accomplishing particular tasks. All code samples have been
compiled and, in most cases, tested. However, Apple Computer does not intend that
you use these code samples in your application.
To make the code samples in this book more readable, only limited error handling
is shown. You need to develop your own techniques for detecting and handling errors.
Conventions Used in This Book
0
This book uses the following conventions to present various kinds of information.
Special Fonts
0
This book uses the following special fonts:
Boldface. Key terms and concepts appear in boldface on first use. These terms
are also defined in the Glossary.
Courier typeface
. Code listings, code snippets, and special identifiers in
the text such as predefined system frame names, slot names, function names,
method names, symbols, and constants are shown in the Courier typeface to
distinguish them from regular body text. If you are programming, items that
appear in Courier should be typed exactly as shown.

xlvi
P R E F A C E
Italic typeface. Italic typeface is used in code to indicate replace-
able items, such as the names of function parameters, which you must replace
with your own names. The names of other books are also shown in italic type,
and rarely, this style is used for emphasis.
Tap Versus Click
0
Throughout the Newton software system and in this book, the word "click"
sometimes appears as part of the name of a method or variable, as in
ViewClickScript
or
ButtonClickScript
. This may lead you to believe that
the text refers to mouse clicks. It does not. Wherever you see the word
"click" used this way, it refers to a tap of the pen on the Newton screen (which is
somewhat similar to the click of a mouse on a desktop computer).
Frame Code
0
If you are using the Newton Toolkit (NTK) development environment in conjunction
with this book, you may notice that this book displays the code for a frame (such as
a view) differently than NTK does.
In NTK, you can see the code for only a single frame slot at a time. In this book,
the code for a frame is presented all at once, so you can see all of the slots in the
frame, like this:
{
viewClass: clView,
viewBounds: RelBounds( 20, 50, 94, 142 ),
viewFlags: vNoFlags,
viewFormat: vfFillWhite+vfFrameBlack+vfPen(1),
viewJustify: vjCenterH,
ViewSetupDoneScript: func()
:UpdateDisplay(),
UpdateDisplay: func()
SetValue(display, 'text, value);
};
If while working in NTK, you want to create a frame that you see in the book,
follow these steps:
1. On the NTK template palette, find the view class or proto shown in the book.
Draw out a view using that template. If the frame shown in the book contains a
_proto
slot, use the corresponding proto from the NTK template palette. If the
frame shown in the book contains a
viewClass
slot instead of a
_proto
slot,
use the corresponding view class from the NTK template palette.

xlvii
P R E F A C E
2. Edit the
viewBounds
slot to match the values shown in the book.
3. Add each of the other slots you see listed in the frame, setting their values to the
values shown in the book. Slots that have values are attribute slots, and those
that contain functions are method slots.
Developer Products and Support
0
The Apple Developer Catalog (ADC) is Apple Computer's worldwide source for
hundreds of development tools, technical resources, training products, and
information for anyone interested in developing applications on Apple computer
platforms. Customers receive the Apple Developer Catalog featuring all current
versions of Apple development tools and the most popular third-party development
tools. ADC offers convenient payment and shipping options, including site
licensing.
To order products or to request a complimentary copy of the Apple Developer
Catalog, contact
Apple Developer Catalog
Apple Computer, Inc.
P.O. Box 319
Buffalo, NY 14207-0319
If you provide commercial products and services, call 408-974-4897 for
information on the developer support programs available from Apple.
For Newton-specific information, see the Newton developer World Wide Web page
at:
http://dev.info.apple.com/newton
Telephone
1-800-282-2732 (United States)
1-800-637-0029 (Canada)
716-871-6555 (International)
Fax
716-871-6511
AppleLink
ORDER.ADC
Internet
World Wide Web
http://www.devcatalog.apple.com

xlviii
P R E F A C E
Undocumented System Software Objects
0
When browsing in the NTK Inspector window, you may see functions, methods,
and data objects that are not documented in this book. Undocumented functions,
methods, and data objects are not supported, nor are they guaranteed to work in
future Newton devices. Using them may produce undesirable effects on current
and future Newton devices.

Operating System
1-1
C H A P T E R 1
Overview
1
Figure 1-0
Table 1-0
This chapter describes the general architecture of the Newton system software,
which is divided into three levels, as shown in Figure 1-1 (page 1-2).
The lowest level includes the operating system and the low-level communications
system. These parts of the system interact directly with the hardware and perform
basic operations such as memory management, input and output, and task switching.
NewtonScript applications have no direct access to system services at this level.
The middle level consists of system services that NewtonScript applications can
directly access and interact with to accomplish tasks. The system provides
hundreds of routines that applications can use to take advantage of these services.
At the highest level are components that applications can use to construct their user
interfaces. These reusable components neatly package commonly needed user
interface objects such as buttons, lists, tables, input fields, and so on. These
components incorporate NewtonScript code that makes use of the system services
in the middle level, and that an application can override to customize an object.
Operating System
1
The Newton platform incorporates a sophisticated preemptive, multitasking
operating system. The operating system is a modular set of tasks performing
functions such as memory management, task management, scheduling, task to task
communications, input and output, power management, and other low-level
functions. The operating system manages and interacts directly with the hardware.
A significant part of the operating system is concerned with low-level communication
functions. The communication subsystem runs as a separate task. It manages the
hardware communication resources available in the system. These include serial,
fax modem, AppleTalk networking, and infrared. The communication architecture
is extensible, and new communication protocols can be installed and removed at
run time, to support additional services and external devices that may be added.

C H A P T E R 1
Overview
1-2
Operating System
Figure 1-1
System software overview
Newton Hardware
Operating System
Operating
System
System Services
Find
Filing
Sound
Book Reader
Routing and Transport
Endpoint Communications
Imaging and Printing
Intelligent Assistant
Text Input and Recognition
View System
Object Storage System
Application Components
NewtonScript Application Program
User Interface Components
Low-level
Communications
System
Stationery

C H A P T E R 1
Overview
Operating System
1-3
Another operating system task of interest is the Inker. The Inker task is responsible
for gathering and displaying input from the electronic tablet overlaying the screen
when the user writes on the Newton. The Inker exists as a separate task so that the
Newton can gather input and display electronic ink at the same time as other
operations are occurring.
All Newton applications, including the recognition system, built-in applications,
and applications you develop, run in a single operating system task, called the
Application task.
NewtonScript applications have no direct access to the operating system level of
software. Access to certain low-level resources, such as communications, is
provided by higher-level interfaces.
Memory
1
It is helpful to understand the use of random access memory (RAM) in the system,
since this resource is shared by the operating system and all applications. Newton
RAM is divided into separate domains, or sections, that have controlled access.
Each domain has its own heap and stack. It is important to know about three of
these domains:
The operating system domain. This portion of memory is reserved for use by the
operating system. Only operating system tasks have access to this domain.
The storage domain. This portion of memory is reserved for permanent,
protected storage of user data. All soups, which store the data, reside here, as
well as any packages that have been downloaded into the Newton. To protect the
data in the storage domain from inadvertent damage, it can only be accessed
through the object storage system interface, described in Chapter 11, "Data
Storage and Retrieval." If the user adds a PCMCIA card containing RAM, Flash
RAM, or read-only memory (ROM) devices, the memory on the card is used to
extend the size of the storage domain.
The storage domain occupies special persistent memory; that is, this memory is
maintained even during a system reset. This protects user data, system software
updates, and downloaded packages from being lost during system resets. The
used and free space in the storage domain is reported to the user in the Memory
Info slip in the Extras Drawer.
The application domain. This portion of memory is used for dynamic memory
allocation by the handwriting recognizers and all Newton applications. A fixed
part of this domain is allocated to the NewtonScript heap. The NewtonScript
heap is important because most objects allocated as a result of your NewtonScript
application code are allocated from the NewtonScript heap. These are the only
memory objects to which you have direct access. The NewtonScript heap is
shared by all applications.

C H A P T E R 1
Overview
1-4
System Services
The system performs automatic memory management of the NewtonScript heap.
You don't need to worry about memory allocation or disposal in an application.
The system automatically allocates memory when you create a new object in
NewtonScript. When references to an object no longer exist, it is freed during the
next garbage collection cycle. The system performs garbage collection
automatically when it needs additional memory.
The Newton operating system optimizes use of memory by using compression.
Various parts of memory are compressed and decompressed dynamically and
transparently, as needed. This occurs at a low level, and applications don't need to
be concerned with these operations.
Packages
1
A package is the unit in which software is installed on and removed from the
Newton. Packages can combine multiple pieces of software into a single unit. The
operating system manages packages, which can be installed from PCMCIA cards,
from a serial connection to a desktop computer, a network connection, or via
modem. When a package comes into the Newton system, the system automatically
opens it and dispatches its parts to appropriate handlers in the system.
A package consists of a header, which contains the package name and other
information, and one or more parts, which contain the software. Parts can include
applications, communication drivers, fonts, and system updates (system software
code loaded into RAM that overrides or extends the built-in ROM code). A
package can also export objects for use by other packages in the system, and can
import (use) objects that are exported by other packages.
Packages are optionally stored compressed on the Newton. Compressed packages
occupy much less space (roughly half of their uncompressed size), but applications
in compressed packages may execute somewhat slower and use slightly more
battery power, because of the extra work required to decompress them when they
are executed.
For more information about packages, refer to Chapter 11, "Data Storage and
Retrieval."
System Services
1
The Newton system software contains hundreds of routines organized into
functional groups of services. Your application can use these routines to accomplish
specific tasks such as opening and closing views, storing and retrieving data,
playing sounds, drawing shapes, and so on. This section includes brief descriptions
of the more important system services with which your application will need to
interact. Note that communications services are described in a separate section
following this one.

C H A P T E R 1
Overview
System Services
1-5
Object Storage System
1
This system is key to the Newton information architecture. The object storage
system provides persistent storage for data.
Newton uses a unified data model. This means that all data stored by all applications
uses a common format. Data can easily be shared among different applications,
with no translation necessary. This allows seamless integration of applications with
each other and with system services.
Data is stored using a database-like model. Objects are stored as frames, which are
like database records. A frame contains named slots, which hold individual pieces
of data, like database fields. For example, an address card in the Names application
is stored as a frame that contains a slot for each item on the card: name, address,
city, state, zip code, phone number, and so on.
Frames are flexible and can represent a wide variety of structures. Slots in a single
frame can contain any kind of NewtonScript object, including other frames, and
slots can be added or removed from frames dynamically. For a description of
NewtonScript objects, refer to The NewtonScript Programming Language.
Groups of related frames are stored in soups, which are like databases. For example,
all the address cards used by the Names application are stored in the Names soup,
and all the notes on the Notepad are stored in the Notes soup. All the frames stored
in a soup need not contain identical slots. For example, some frames representing
address cards may contain a phone number slot and others may not.
Soups are automatically indexed, and applications can create additional indexes on
slots that will be used as keys to find data items. You retrieve items from a soup by
performing a query on the soup. Queries can be based on an index value or can
search for a string, and can include additional constraints. A query results in a
cursor--an object representing a position in the set of soup entries that satisfy the
query. The cursor can be moved back and forth, and can return the current entry.
Soups are stored in physical repositories, called stores. Stores are akin to disk
volumes on personal computers. The Newton always has at least one store--the
internal store. Additional stores reside on PCMCIA cards.
The object storage system interface seamlessly merges soups that have the same
name on internal and external stores in a union soup. This is a virtual soup that
provides an interface similar to a real soup. For example, some of the address cards
on a Newton may be stored in the internal Names soup and some may be stored in
another Names soup on a PCMCIA card. When the card is installed, those names
in the card soup are automatically merged with the existing internal names so the
user, or an application, need not do any extra work to access those additional
names. When the card is removed, the names simply disappear from the card file
union soup.

C H A P T E R 1
Overview
1-6
System Services
The object storage system is optimized for small chunks of data and is designed to
operate in tight memory constraints. Soups are compressed, and retrieved entries
are not allocated on the NewtonScript heap until a slot in the entry is accessed.
You can find information about the object storage system interface in Chapter 11,
"Data Storage and Retrieval."
View System
1
Views are the basic building blocks of most applications. A view is simply a
rectangular area mapped onto the screen. Nearly every individual visual item you
see on the screen is a view. Views display information to the user in the form of
text and graphics, and the user interacts with views by tapping them, writing in
them, dragging them, and so on. A view is defined by a frame that contains slots
specifying view attributes such as its bounds, fill color, alignment relative to other
views, and so on.
The view system is what you work with to manipulate views. There are routines to
open, close, animate, scroll, highlight, and lay out views, to name just a few
operations you can do. For basic information about views and descriptions of all
the routines you can use to interact with the view system, refer to Chapter 3, "Views."
An application consists of a collection of views all working together. Each application
has an application base view from which all other views in the application
typically descend hierarchically. In turn, the base view of each application installed
in the Newton descends from the system root view. (Think of the hierarchy as a
tree structure turned upside down, with the root at the top.) Thus, each application
base view is a child of the root view. We call a view in which child views exist the
parent view of those child views. Note that occasionally, an application may also
include views that don't descend from the base view but are themselves children of
the root view.
The system includes several different primitive view classes from which all views
are ultimately constructed. Each of these view classes has inherently different
behavior and attributes. For example, there are view classes for views that contain
text, shapes, pictures, keyboards, analog gauges, and so on.
As an application executes, its view frames receive messages from the system and
exchange messages with each other. System messages provide an opportunity for a
view to respond appropriately to particular events that are occurring. For example,
the view system performs default initialization operations when a view is opened.
It also sends the view a
ViewSetupFormScript
message. If the view includes a
method to handle this message, it can perform its own initialization operations in
that method. Handling system messages in your application is optional since the
system performs default behaviors for most events.

C H A P T E R 1
Overview
System Services
1-7
Text Input and Recognition
1
The Newton recognition system uses a sophisticated multiple-recognizer
architecture. There are recognizers for text, shapes, and gestures, which can be
simultaneously active (this is application-dependent). An arbitrator examines the
results from simultaneously active recognizers and returns the recognition match
that has the highest confidence.
Recognition is modeless. That is, the user does not need to put the system in a
special mode or use a special dialog box in order to write, but can write in any
input field at any time.
The text recognizers can handle printed, cursive, or mixed handwriting. They can
work together with built-in dictionaries to choose words that accurately match what
the user has written. The user can also add new words to a personal dictionary.
Depending on whether or not a text handwriting recognizer is enabled, users can
enter handwritten text that is recognized or not. Unrecognized text is known as ink
text. Ink text can still be manipulated like recognized text--words can be inserted,
deleted, moved around, and reformatted--and ink words can be intermixed with
recognized words in a single paragraph. Ink words can be recognized later using
the deferred recognition capability of the system.
The shape recognizer recognizes both simple and complex geometric objects,
cleaning up rough drawings into shapes with straight lines and smooth curves. The
shape recognizer also recognizes symmetry, using that property, if present, to help
it recognize and display objects.
For each view in an application, you can specify which recognizers are enabled and
how they are configured. For example, the text recognizer can be set to recognize
only names, or names and phone numbers, or only words in a custom dictionary
that you supply, among other choices.
Most recognition events are handled automatically by the system view classes, so
you don't need to do anything in your application to handle recognition events,
unless you want to do something special. For example, when a user writes a word
in a text view, that view automatically passes the strokes to the recognizer, accepts
the recognized word back, and displays the word. In addition, the view automatically
handles corrections for you. The user can double-tap a word to pop up a list of
other possible matches for it, or to use the keyboard to correct it.
For information on methods for accepting and working with text input, refer to
Chapter 8, "Text and Ink Input and Display." For information on controlling
recognition in views and working with dictionaries, refer to Chapter 9, "Recognition."

C H A P T E R 1
Overview
1-8
System Services
Stationery
1
Stationery is a capability of the system that allows applications to be extended by
other developers. The word "stationery" refers to the capability of having different
kinds of data within a single application (such as plain notes and outlines in the
Notepad) and/or to the capability of having different ways of viewing the same data
(such as the Card and All Info views in the Names file). An application that supports
stationery can be extended either by adding a new type of data to it (for example,
adding recipe cards to the Notepad), or by adding a new type of viewer for existing
data (a new way of viewing Names file entries or a new print format, for example).
To support stationery, an application must register with the system a frame, called a
data definition, that describes the data with which it works. The different data
definitions available to an application are listed on the pop-up menu attached to the
New button. In addition, an application must register one or more view definitions,
which describe how the data is to be viewed or printed. View definitions can
include simple read-only views, editor-type views, or print formats. The different
view definitions available in an application (not including print formats) are listed
on the pop-up menu attached to the Show button.
Stationery is well integrated into the NewtApp framework, so if you use that frame-
work for your application, using stationery is easy. The printing architecture also
uses stationery, so all application print formats are registered as a kind of stationery.
For more information about using stationery, see Chapter 5, "Stationery."
Intelligent Assistant
1
A key part of the Newton information architecture is the Intelligent Assistant. The
Intelligent Assistant is a system service that attempts to complete actions for the
user according to deductions it makes about the task that the user is currently
performing. The Assistant is always instantly available to the user through the
Assist button, yet remains nonintrusive.
The Assistant knows how to complete several built-in tasks; they are Scheduling
(adding meetings), Finding, Reminding (adding To Do items), Mailing, Faxing,
Printing, Calling, and getting time information from the Time Zones map. Each of
these tasks has several synonyms; for example, the user can write "call," "phone,"
"ring," or "dial" to make a phone call.
Applications can add new tasks so that the Assistant supports their special capabilities
and services. The Newton unified data model makes it possible for the Assistant to
access data stored by any application, thus allowing the Assistant to be well integrated
in the system.
For details on using the Intelligent Assistant and integrating support for it into your
application, see Chapter 18, "Intelligent Assistant."

C H A P T E R 1
Overview
System Services
1-9
Imaging and Printing
1
At the operating system level, the Newton imaging and printing software is based
on an object-oriented, device-independent imaging model. The imaging model is
monochrome since the current Newton screen is a black-and-white screen.
NewtonScript application programs don't call low-level imaging routines directly
to do drawing or image manipulation. In fact, most drawing is handled for
applications by the user interface components they incorporate, or when they call
other routines that display information. However, there is a versatile set of
high-level drawing routines that you can call directly to create and draw shapes,
pictures, bitmaps, and text. When drawing, you can vary the pen thickness, pen
pattern, fill pattern, and other attributes. For details on drawing, refer to Chapter 13,
"Drawing and Graphics."
The Newton text imaging facility supports Unicode directly, so the system can be
easily localized to display languages using different script systems. The system is
extensible, so it's possible to add additional fonts, font engines, and printer drivers.
The high-level interface to printing on the Newton uses a model identical to that
used for views. Essentially, you design a special kind of view called a print format
to specify how printed information is to be laid out on the page. Print formats use a
unique view template that automatically adjusts its size to the page size of the
printer chosen by the user. When the user prints, the system handles all the details
of rendering the views on the printer according to the layout you specified.
The Newton offers the feature of deferred printing. The user can print even though
he or she is not connected to a printer at the moment. An object describing the print
job is stored in the Newton Out Box application, and when a printer is connected
later, the user can then select that print job for printing. Again, this feature is
handled automatically by the system and requires no additional application
programming work.
For information on how to add printing capabilities to an application, refer to
Chapter 21, "Routing Interface."
Sound
1
The Newton includes a monophonic speaker and can play sounds sampled at rates
up to 22 kHz. You can attach sounds to particular events associated with a view,
such as showing it, hiding it, and scrolling it. You can also use sound routines to
play sounds synchronously or asynchronously at any other time.
Newton can serve as a phone dialer by dialing phone numbers through the speaker.
The dialing tones are built into the system ROM, along with several other sounds
that can be used in applications.

C H A P T E R 1
Overview
1-10
System Services
Besides the sounds that are built into the system ROM, you can import external
sound resources into an application through the Newton Toolkit development
environment.
For information about using sound in an application, see Chapter 14, "Sound."
Book Reader
1
Book Reader is a system service that displays interactive digital books on the
Newton screen. Digital books can include multiple-font text, bitmap and vector
graphics, and on-screen controls for content navigation. Newton digital books
allow the user to scroll pages, mark pages with bookmarks, access data directly by
page number or subject, mark up pages using digital ink, and perform text searches.
Of course, the user can copy and paste text from digital books, as well as print text
and graphics from them.
Newton Press and Newton Book Maker are two different development tools that
you use to create digital books for the Newton. Nonprogrammers can easily create
books using Newton Press. Newton Book Maker is a more sophisticated tool that
uses a text-based command language allowing you to provide additional services to
the user or exercise greater control over page layout. Also, using Book Maker, you
can attach data, methods, and view templates to book content to provide customized
behavior or work with the Intelligent Assistant.
The Book Maker application can also be used to create on-line help for an
application. The installation of on-line help in an application package requires
some rudimentary NewtonScript programming ability; however, nonprogrammers
can create on-line help content, again using only a word processor and some basic
Book Maker commands.
Refer to the book Newton Book Maker User's Guide for information on Book
Reader, the Book Maker command language, and the use of Newton Toolkit to
create digital book packages and on-line help. Refer to the Newton Press User's
Guide for information on using Newton Press.
Find
1
Find is a system service that allows users to search one or all applications in the
system for occurrences of a particular string. Alternatively, the user can search for
data time-stamped before or after a specified date. When the search is completed,
the Find service displays an overview list of items found that match the search
criteria. The user can tap an item in the list and the system opens the corresponding
application and displays the data containing the selected string. Users access the
Find service by tapping the Find button.

C H A P T E R 1
Overview
Communications Services
1-11
If you want to allow the user to search for data stored by your application, you
need to implement certain methods that respond to find messages sent by the
system. You'll need to supply one method that searches your application's soup(s)
for data and returns the results in a particular format, and another method that
locates and displays the found data in your application if the user taps on it in the
find overview. The system software includes routines and templates that help you
support find in your application. For details on supporting the Find service, refer to
Chapter 16, "Find."
Filing
1
The Filing service allows users to tag soup-based data in your application with
labels used to store, retrieve, and display the data by category. The labels used to
tag entries are represented as folders in the user interface; however, no true
hierarchical filing exists--the tagged entries still reside in the soup. Users access
the filing service through a standard user interface element called the file folder
button, which looks like a small file folder.
When the user chooses a category for an item, the system notifies your application
that filing has changed. Your application must perform the appropriate application-
specific tasks and redraw the current view, providing to the user the illusion that the
item has been placed in a folder. When the user chooses to display data from a
category other than the currently displayed one, the system also notifies your
application, which must retrieve and display data in the selected category.
The system software includes templates that help your application implement the
filing button and the selector that allows the user to choose which category of data
to display. Your application must provide methods that respond to filing messages
sent by the system in response to user actions such as filing an item, changing the
category of items to display, and changing the list of filing categories. For details
on supporting the Filing service, refer to Chapter 15, "Filing."
Communications Services
1
This section provides an overview of the communications services in Newton
system software 2.0.
The Newton communications architecture is application-oriented, rather than
protocol-oriented. This means that you can focus your programming efforts on
what your application needs to do, rather than on communication protocol details.
A simple high-level NewtonScript interface encapsulates all protocol details, which
are handled in the same way regardless of which communication transport tool you
are using.
C H A P T E R 1
Overview
1-12
Communications Services
The communication architecture is flexible, supporting complex communication
needs. The architecture is also extensible, allowing new communication transport
tools to be added dynamically and accessed through the same interface as existing
transports. In this way, new communication hardware devices can be supported.
The Newton communications architecture is illustrated in Figure 1-2.
Figure 1-2
Communications architecture
Figure 1-2 shows four unique communications interfaces available for you to use:
routing interface
endpoint interface
Hardware devices
Communication tools
NewtonScript
Transport
Application
Routing interface
In/out box
Transport interface
Endpoint object
Endpoint interface
Low-level communications system
Serial
Modem MNP
IR
FAX
ATalk
...
Modem Radio Keybd GSM CDPD
...
...

C H A P T E R 1
Overview
Communications Services
1-13
transport interface
communication tool interface
The first two, routing and endpoint interfaces, are available for NewtonScript
applications to use directly.
The transport interface is a NewtonScript interface, but it isn't used directly by appli-
cations. A transport consists of a special kind of application of its own that is installed
on a Newton device and that provides new communication services to the system.
The communication tool interface is a low-level C++ interface.
These interfaces are described in more detail in the following sections.
NewtonScript Application Communications
1
There are two basic types of NewtonScript communications an application can do.
The most common type of communication that most applications do is routing
through the In/Out Box. As an alternative, applications can use the endpoint interface
to control endpoint objects.
Typically, an application uses only one of these types of communication, but
sometimes both are needed. These two types of communication are described in
the following sections.
Routing Through the In/Out Box
1
The routing interface is the highest-level NewtonScript communication interface.
The routing interface allows an application to communicate with the In/Out Box
and lets users send data and receive data from outside the system. In applications,
users access routing services through a standard user interface element called the
Action button, which looks like a small envelope. Users access the In/Out Box
application through icons in the Newton Extras Drawer. The In/Out Box provides a
common user interface for all incoming and outgoing data in the system.
The routing interface is best suited for user-controlled messaging and transaction-
based communications. For example, the Newton built-in applications use this
interface for e-mail, beaming, printing, and faxing. Outgoing items can be stored in
the Out Box until a physical connection is available, when the user can choose to
transmit the items, or they can be sent immediately. Incoming items are received in
the In Box, where the user can get new mail and beamed items, for example.
For information on the routing interface, refer to Chapter 21, "Routing Interface."
The In/Out Box makes use of the transport and endpoint interfaces internally to
perform its operations.
If you are writing an application that takes advantage of only the transports
currently installed in the Newton system, you need to use only the routing

C H A P T E R 1
Overview
1-14
Communications Services
interface. You need to use the transport or endpoint interfaces only when writing
custom communication tools.
Endpoint Interface
1
The endpoint interface is a somewhat lower-level NewtonScript interface; it has no
visible representation to the Newton user. The endpoint interface is suited for
real-time communication needs such as database access and terminal emulation. It
uses an asynchronous, state-driven communications model.
The endpoint interface is based on a single proto--
protoBasicEndpoint
--that
provides a standard interface to all communication tools (serial, fax modem,
infrared, AppleTalk, and so on). The endpoint object created from this proto
encapsulates and maintains the details of the specific connection. This proto
provides methods for
interacting with the underlying communication tool
setting communication tool options
opening and closing connections
sending and receiving data
The basic endpoint interface is described in Chapter 23, "Endpoint Interface."
Low-Level Communications
1
There are two lower-level communication interfaces that are not used directly by
applications. The transport and communication tool interfaces are typically used
together (along with the endpoint interface) to provide a new communication
service to the system.
These two interfaces are described in the following sections.
Transport Interface
1
If you are providing a new communication service through the use of endpoints
and lower-level communication tools, you may need to use the transport interface.
The transport interface allows your communication service to talk to the In/Out
Box and to make itself available to users through the Action button (envelope icon)
in most applications.
When the user taps the Action button in an application, the Action picker appears.
Built-in transports available on the Action picker include printing, faxing, and
beaming. Any new transports that you provide are added to this list.
For more information, refer to Chapter 22, "Transport Interface."

C H A P T E R 1
Overview
Application Components
1-15
Communication Tool Interface
1
Underlying the NewtonScript interface is the low-level communications system.
This system consists of a communications manager module and several code
components known as communication tools. These communication tools interact
directly with the communication hardware devices installed in the system. The
communication tools are written in C++ and are not directly accessible from
NewtonScript--they are accessed indirectly through an endpoint object.
The built-in communication tools include:
Synchronous and asynchronous serial
Fax/data modem (data is V.34 with MNP/V.42 and fax is V.17 with Class 1, 2,
and 2.0 support)
Point-to-point infrared--called beaming (Sharp 9600 and Apple IR-enhanced
protocols)
AppleTalk ADSP protocol
For information about configuring the built-in communication tools through the
endpoint interface, refer to Chapter 24, "Built-in Communications Tools."
Note that the communications manager module, and each of the individual
communication tools, runs as a separate operating system task. All NewtonScript
code is in a different task, called the Application task.
The system is extensible--additional communication tools can be installed at run
time. Installed tools are made available to NewtonScript client applications through
the same endpoint interface as the built-in tools.
At some point, Apple Computer, Inc. may release the tools and interfaces that
allow C++ communication tool development.
Application Components
1
At the highest level of system software are dozens of components that applications
can use to construct their user interfaces and other nonvisible objects. These
reusable components neatly package commonly needed user interface objects such
as buttons, lists, tables, input fields, and so on. These components incorporate
NewtonScript code that makes use of other system services, and which an
application can override to customize an object.
These components are built into the Newton ROM. When you reference one of
these components in your application, the code isn't copied into your application--
your application simply makes a reference to the component in the ROM. This
conserves memory at run time and still allows your application to easily override
any attributes of the built-in component. Because you can build much of your

C H A P T E R 1
Overview
1-16
Application Components
application using these components, Newton applications tend to be much smaller
in size than similar applications on desktop computers.
A simple example of how you can construct much of an application using
components is illustrated in Figure 1-3. This simple application accepts names and
phone numbers and saves them into a soup. It was constructed in just a few minutes
using three different components.
The application base view is implemented by a single component that includes the
title bar at the top, the status bar at the bottom, the clock and the close box, and the
outer frame of the application. The Name and Phone input lines are each created
from the same component that implements a simple text input line; the two buttons
are created from the same button component. The only code you must write to
make this application fully functional is to make the buttons perform their actions.
That is, make the Clear button clear the input lines and make the Save button get
the text from the input lines and save it to a soup.
Figure 1-3
Using components
The components available for use by applications are shown on the layout palette
in Newton Toolkit. These components are known as protos, which is short for
"prototypes." In addition to the built-in components, Newton Toolkit lets you create
your own reusable components, called user protos. The various built-in components
are documented throughout the book in the chapter containing information related
to each proto. For example, text input protos are described in Chapter 8, "Text and
Ink Input and Display;" protos that implement pickers and lists are described in
Chapter 6, "Pickers, Pop-up Views, and Overviews;" and protos that implement
controls and other miscellaneous protos are described in Chapter 7, "Controls and
Other Protos."

C H A P T E R 1
Overview
Using System Software
1-17
The NewtApp framework consists of a special collection of protos that are designed
to be used together in a layered hierarchy to build a complete application. For more
information about the NewtApp protos, refer to Chapter 4, "NewtApp Applications."
Using System Software
1
Most of the routines and application components that comprise the Newton system
software reside in ROM, provided in special chips contained in every Newton
device. When your application calls a system routine, the operating system executes
the appropriate code contained in ROM.
This is different from traditional programming environments where system
software routines are accessed by linking a subroutine library with the application
code. That approach results in much larger applications and makes it harder to
provide new features and fix bugs in the system software.
The ROM-based model used in the Newton provides a simple way for the
operating system to substitute the code that is executed in response to a particular
system software routine, or to substitute an application component. Instead of
executing the ROM-based code for some routine, the operating system might
choose to load some substitute code into RAM; when your application calls the
routine, the operating system intercepts the call and executes the RAM-based code.
RAM-based code that substitutes for ROM-based code is called a system update.
Newton system updates are stored in the storage memory domain, which is
persistent storage.
Besides application components, the Newton ROM contains many other objects
such as fonts, sounds, pictures, and strings that might be useful to applications.
Applications can access these objects by using special references called magic
pointers. Magic pointers provide a mechanism for code written in a development
system separate from the Newton to reference objects in the Newton ROM or in
other packages. Magic pointer references are resolved at run time by the operating
system, which substitutes the actual address of the ROM or package object for the
magic pointer reference.
Magic pointers are constants defined in Newton Toolkit. For example, the names of
all the application components, or protos, are actually magic pointer constants. You
can find a list of all the ROM magic pointer constants in the Newton 2.0 Defs file,
included with Newton Toolkit.

C H A P T E R 1
Overview
1-18
The NewtonScript Language
The NewtonScript Language
1
You write Newton applications in NewtonScript, a dynamic object-oriented
language developed especially for the Newton platform, though the language is
highly portable. NewtonScript is designed to operate within tight memory
constraints, so is well suited to small hand-held devices like Newton.
NewtonScript is used to define, access, and manipulate objects in the Newton
system. NewtonScript frame objects provide the basis for object-oriented features
such as inheritance and message sending.
Newton Toolkit normally compiles NewtonScript into byte codes. The Newton
system software contains a byte code interpreter that interprets the byte codes at
run time. This has two advantages: byte codes are much smaller than native code,
and Newton applications are easily portable to other processors, since the
interpreter is portable. Newton Toolkit can also compile NewtonScript into native
code. Native code occupies much more space than interpreted code, but in certain
circumstances it can execute much faster.
For a complete reference to NewtonScript, refer to The NewtonScript Programming
Language.
What's New in Newton 2.0
1
Version 2.0 of the Newton System Software brings many changes to all areas.
Some programming interfaces have been extended; others have been completely
replaced with new interfaces; and still other interfaces are brand new. For those
readers familiar with previous versions of system software, this section gives a
brief overview of what is new and what has changed in Newton 2.0, focusing on
those programming interfaces that you will be most interested in as a developer.
NewtApp
1
NewtApp is a new application framework designed to help you build a complete,
full-featured Newton application more quickly. The NewtApp framework consists
of a collection of protos that are designed to be used together in a layered hierarchy.
The NewtApp framework links together soup-based data with the display and
editing of that data in an application. For many types of applications, using the
NewtApp framework can significantly reduce development time because the protos
automatically manage many routine programming tasks. For example, some of the
tasks the protos support include filing, finding, routing, scrolling, displaying an
overview, and soup management.

C H A P T E R 1
Overview
What's New in Newton 2.0
1-19
The NewtApp framework is not suited for all Newton applications. If your
application stores data as individual entries in a soup, displays that data to the user
in views, and allows the user to edit some or all of the data, then it is a potential
candidate for using the NewtApp framework. NewtApp is well suited to "classic"
form-based applications. Some of the built-in applications constructed using the
NewtApp framework include the Notepad and the Names file.
Stationery
1
Stationery is a new capability of Newton 2.0 that allows applications to be extended
by other developers. If your application supports stationery, then it can be extended by
others. Similarly, you can extend another developer's application that supports
stationery. You should also note that the printing architecture now uses stationery,
so all application print formats are registered as a kind of stationery.
Stationery is a powerful capability that makes applications much more extensible
than in the past. Stationery is also well integrated into the NewtApp framework, so
if you use that framework for your application, using stationery is easy. For more
information about stationery, see the section "Stationery" (page 1-8).
Views
1
New features for the view system include a drag-and-drop interface that allows you
to provide users with a drag-and-drop capability between views. There are hooks to
provide for custom feedback to the user during the drag process and to handle
copying or moving the item.
The system now includes the capability for the user to view the display in portrait
or landscape orientation, so the screen orientation can be changed (rotated) at any
time. Applications can support this new capability by supporting the new
ReorientToScreen
message, which the system uses to alert all applications to
re-layout their views.
Several new view methods provide features such as bringing a view to the front or
sending it to the back, automatically sizing buttons, finding the view bounds
including the view frame, and displaying modal dialogs to the user.
There is a new message,
ViewPostQuitScript
, that is sent to a view (only on
request) when it is closing, after all of the view's child views have been destroyed.
This allows you to do additional clean-up, if necessary. And, you'll be pleased to
know that the order in which child views receive the
ViewQuitScript
message
is now well defined: it is top-down.
Additionally, there are some new
viewJustify
constants that allow you to
specify that a view is sized proportionally to its sibling or parent view, horizontally
and/or vertically.

C H A P T E R 1
Overview
1-20
What's New in Newton 2.0
Protos
1
There are many new protos supplied in the new system ROM. There are new
pop-up button pickers, map-type pickers, and several new time, date, and duration
pickers. There are new protos that support the display of overviews and lists based
on soup entries. There are new protos that support the input of rich strings (strings
that contain either recognized characters or ink text). There are a variety of new
scroller protos. There is an integrated set of protos designed to make it easy for you
to display status messages to the user during lengthy or complex operations.
Generic list pickers, available in system 1.0, have been extended to support bitmap
items that can be hit-tested as two-dimensional grids. For example, a phone keypad
can be included as a single item in a picker. Additionally, list pickers can now
scroll if all the items can't fit on the screen.
Data Storage
1
There are many enhancements to the data storage system for system software 2.0.
General soup performance is significantly improved. A tagging mechanism for
soup entries makes changing folders much faster for the user. You can use the
tagging mechanism to greatly speed access to subsets of entries in a soup. Queries
support more features, including the use of multiple slot indexes, and the query
interface is cleaner. Entry aliases make it easy to save unique references to soup
entries for fast access later without holding onto the actual entry.
A new construct, the virtual binary object, supports the creation and manipulation
of very large objects that could not be accommodated in the NewtonScript heap.
There is a new, improved soup change-notification mechanism that gives applications
more control over notification and how they respond to soup changes. More precise
information about exactly what changed is communicated to applications. Soup
data can now be built directly into packages in the form of a store part. Additionally,
packages can contain protos and other objects that can be exported through magic
pointer references, and applications can import such objects from available packages.
Text Input
1
The main change to text input involves the use of ink text. The user can choose to
leave written text unrecognized and still manipulate the text by inserting, deleting,
reformatting, and moving the words around, just as with recognized text. Ink words
and recognized words can be intermixed within a single paragraph. A new string
format, called a rich string, handles both ink and recognized text in the same string.
There are new protos,
protoRichInputLine
and
protoRichLabelInputLine
, that you can use in your application to allow
users to enter ink text in fields. In addition, the view classes
clEditView
and

C H A P T E R 1
Overview
What's New in Newton 2.0
1-21
clParagraphView
now support ink text. There are several new functions that
allow you to manipulate and convert between regular strings and rich strings. Other
functions provide access to ink and stroke data, allow conversion between strokes,
points, and ink, and allow certain kinds of ink and stroke manipulations.
There are several new functions that allow you to access and manipulate the
attributes of font specifications, making changing the font attributes of text much
easier. A new font called the handwriting font is built in. This font looks similar to
handwritten characters and is used throughout the system for all entered text. You
should use it for displaying all text the user enters.
The use of on-screen keyboards for text input is also improved. There are new
proto buttons that your application can use to give users access to the available
keyboards. It's easier to include custom keyboards for your application. Several
new methods allow you to track and manage the insertion caret, which the system
displays when a keyboard is open. Note also that a real hardware keyboard is
available for the Newton system, and users may use it anywhere to enter text. The
system automatically supports its use in all text fields.
Graphics and Drawing
1
Style frames for drawing shapes can now include a custom clipping region other
than the whole destination view, and can specify a scaling or offset transformation
to apply to the shape being drawn.
Several new functions allow you to create, flip, rotate, and draw into bitmap
shapes. Also, you can capture all or part of a view into a bitmap. There are new
protos that support the display, manipulation, and annotation of large bitmaps such
as received faxes. A new function,
InvertRect
, inverts a rectangle in a view.
Views of the class
clPictureView
can now contain graphic shapes in addition to
bitmap or picture objects.
System Services
1
System-supplied Filing services have been extended; applications can now filter the
display of items according to the store on which they reside, route items directly to
a specified store from the filing slip, and provide their own unique folders. In
addition, registration for notification of changes to folder names has been simplified.
Two new global functions can be used to register or unregister an application with
the Find service. In addition, Find now maintains its state between uses, performs
"date equal" finds, and returns to the user more quickly.
Applications can now register callback functions to be executed when the Newton
powers on or off. Applications can register a view to be added to the user preferences
roll. Similarly, applications can register a view to be added to the formulas roll.

C H A P T E R 1
Overview
1-22
What's New in Newton 2.0
The implementation of undo has changed to an undo/redo model instead of two
levels of undo, so applications must support this new model.
Recognition
1
Recognition enhancements include the addition of an alternate high-quality
recognizer for printed text and significant improvements in the cursive recognizer.
While this doesn't directly affect applications, it does significantly improve
recognition performance in the system, leading to a better user experience. Other
enhancements that make the recognition system much easier to use include a new
correction picker, a new punctuation picker, and the caret insertion writing mode
(new writing anywhere is inserted at the caret position).
Specific enhancements of interest to developers include the addition of a
recConfig
frame, which allows more flexible and precise control over
recognition in individual input views. A new proto,
protoCharEdit
, provides a
comb-style entry view in which you can precisely control recognition and restrict
entries to match a predefined character template.
Additionally, there are new functions that allow you to pass ink text, strokes, and
shapes to the recognizer to implement your own deferred recognition. Detailed
recognition corrector information (alternate words and scores) is now available
to applications.
Sound
1
The interface for playing sounds is enhanced in Newton 2.0. In addition to the
existing sound functions, there is a new function to play a sound at a particular
volume and there is a new
protoSoundChannel
object. The
protoSoundChannel
object encapsulates sounds and methods that operate on
them. Using a sound channel object, sound playback is much more flexible--the
interface supports starting, stopping, pausing, and playing sounds simultaneously
through multiple sound channels.
Built-in Applications
1
Unlike in previous versions, the built-in applications are all more extensible in
version 2.0. The Notepad supports stationery, so you can easily extend it by adding
new "paper" types to the New pop-up menu. The Names file also supports stationery,
so it's easy to add new card types, new card layout styles, and new data items to
existing cards by registering new data definitions and view definitions for the
Names application. There's also a method that adds a new card to the Names soup.

C H A P T E R 1
Overview
What's New in Newton 2.0
1-23
The Dates application includes a comprehensive interface that gives you the ability
to add, find, move, and delete meetings and events. You can get and set various
kinds of information related to meetings, and you can create new meeting types for
the Dates application. You can programmatically control what day is displayed as
the first day of the week, and you can control the display of a week number in the
Calendar view.
The To Do List application also includes a new interface that supports creating new
to do items, retrieving items for a particular date or range, removing old items, and
other operations.
Routing and Transports
1
The Routing interface is significantly changed in Newton 2.0. The system builds
the list of routing actions dynamically, when the user taps the Action button. This
allows all applications to take advantage of new transports that are added to the
system at any time. Many hooks are provided for your application to perform
custom operations at every point during the routing operation. You register routing
formats with the system as view definitions. A new function allows you to send
items programmatically.
Your application has much more flexibility with incoming items. You can choose to
automatically put away items and to receive foreign data (items from different
applications or from a non-Newton source).
The Transport interface is entirely new. This interface provides several new protos
and functions that allow you to build a custom communication service and make it
available to all applications through the Action button and the In/Out Box. Features
include a logging capability, a system for displaying progress and status information
to the user, support for custom routing slips, and support for transport preferences.
Endpoint Communication
1
The Endpoint communication interface is new but very similar to the 1.0 interface.
There is a new proto,
protoBasicEndpoint
, that encapsulates the connection
and provides methods to manage the connection and send and receive data.
Additionally, a derivative endpoint,
protoStreamingEndpoint
, provides the
capability to send and receive very large frame objects.
Specific enhancements introduced by the new endpoint protos include the ability to
handle and identify many more types of data by tagging the data using data forms
specified in the
form
slot of an endpoint option. Most endpoint methods can now
be called asynchronously, and asynchronous operation is the recommended way to
do endpoint-based communication. Support is also included for time-outs and
multiple termination sequences. Error handling is improved.

C H A P T E R 1
Overview
1-24
What's New in Newton 2.0
There have been significant changes in the handling of binary (raw) data. For input,
you can now target a direct data input object, resulting in significantly faster
performance. For output, you can specify offsets and lengths, allowing you to send
the data in chunks.
Additionally, there is now support for multiple simultaneous communication
sessions.
Utilities
1
Many new utility functions are available in Newton 2.0. There are several new
deferred, delayed, and conditional message-sending functions. New array functions
provide ways to insert elements, search for elements, and sort arrays. Additionally,
there's a new set of functions that operate on sorted arrays using binary search
algorithms. New and enhanced string functions support rich strings, perform
conditional substring substitution, tokenize strings, and perform case-sensitive
string compares. A new group of functions gets, sets, and checks for the existence
of global variables and functions.
Books
1
New Book Reader features include better browser behavior (configurable
auto-closing), expanded off-line bookkeeping abilities, persistent bookmarks, the
ability to remove bookmarks, and more efficient use of memory.
New interfaces provide additional ways to navigate in books, customize Find
behavior, customize bookmarks, and add help books. Book Reader also supports
interaction with new system messages related to scrolling, turning pages, installing
books, and removing books. Additional interfaces are provided for adding items to
the status bar and the Action menu.

Choosing an Application Structure
2-1
C H A P T E R 2
Getting Started
2
Figure 2-0
Table 2-0
This chapter describes where to begin when you're thinking about developing a
Newton application. It describes the different kinds of software you can develop
and install on the Newton and the advantages and disadvantages of using different
application structures.
Additionally, this chapter describes how to create and register your developer
signature.
Before you read this chapter, you should be familiar with the information described
in Chapter 1, "Overview."
Choosing an Application Structure
2
When you create an application program for the Newton platform, you can use one
of the following basic types of application structures:
minimal predefined structure, by basing the application on a view class of
clView
or the
protoApp
proto
highly structured, by basing the application on the NewtApp framework of protos
highly structured and specialized for text, by building a digital book
Alternatively, you might want to develop software that is not accessed through an
icon in the Extras Drawer. For example, you might want to install stationery, a
transport, or some other kind of specialized software that does something like
creating a soup and then removing itself.
These various approaches to software development are discussed in the following
sections.
Minimal Structure
2
The minimalist approach for designing a Newton application starts with an empty
or nearly empty container that provides little or no built-in functionality--thus the
"minimalist" name. This approach is best suited for specialized applications that
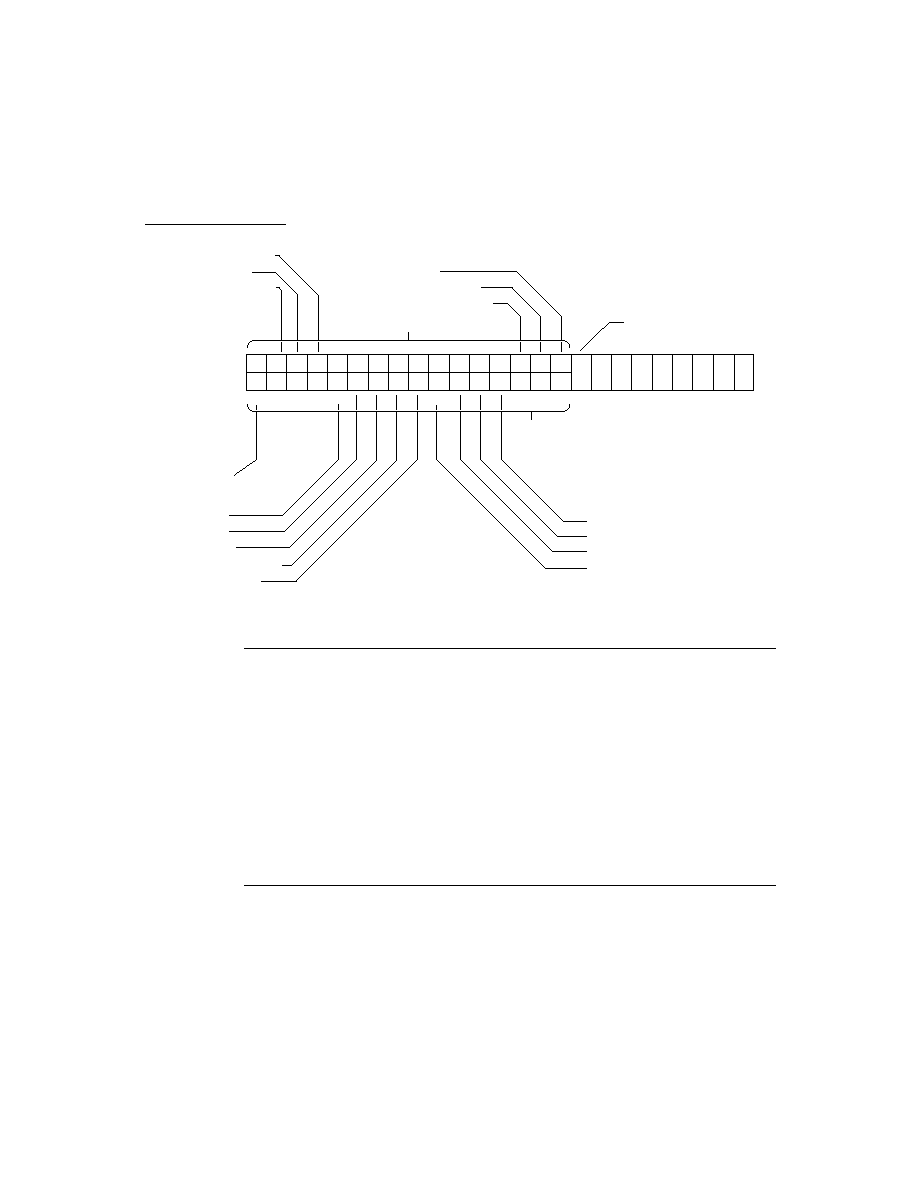
C H A P T E R 2
Getting Started
2-2
Choosing an Application Structure
don't follow the "classic" form-based model. For example, some types of
applications that might use this approach include games, utilities, calculators, and
graphics applications.
The advantage of using the minimalist approach is that it's simple and small.
Usually you'd choose this approach because you don't need or want a lot of
built-in support from a comprehensive application framework, along with the extra
size and overhead that such support brings.
The disadvantage of the minimalist approach is that it doesn't provide any support
from built-in features, like the NewtApp framework does. You get just a simple
container in which to construct your application.
To construct an application using the minimalist approach, you can use the view
class
clView
or the proto
protoApp
as your application base view. The view
class
clView
is the bare minimum you can start with. This is the most basic of the
primitive view classes. It provides nothing except an empty container. The
protoApp
provides a little bit more, it includes a framed border, a title at the top,
and a close box so the user can close it. For details on these objects, see
clView
(page 1-1) and
protoApp
(page 1-2) in Newton Programmer's Reference.
Neither of these basic containers provide much built-in functionality. You must add
functionality yourself by adding other application components to your application.
There are dozens of built-in protos that you can use, or you can create your own
protos using NTK. Most of the built-in protos are documented in these two chapters:
Chapter 6, "Pickers, Pop-up Views, and Overviews,"and Chapter 7, "Controls and
Other Protos." Note also that certain protos in the NewtApp framework can be
used outside of a NewtApp application. For information on NewtApp protos, see
Chapter 4, "NewtApp Applications."
NewtApp Framework
2
NewtApp is an application framework that is well suited to "classic" form-based
applications. Such applications typically gather and store data in soups, display
individual soup entries to users in views, and allow the user to edit some or all of
the data. For example, some types of applications that might use NewtApp include
surveys and other data gathering applications, personal information managers, and
record-keeping applications. Some of the built-in applications constructed using
NewtApp include the Notepad, Names file, In/Out Box, Calls, and Time Zones.
The advantage of NewtApp is that it provides a framework of protos designed to
help you build a complete, full-featured Newton application more quickly than if
you started from scratch. The NewtApp protos are designed to be used together in a
layered hierarchy that links together soup-based data with the display and editing
of that data in an application. For many types of applications, using the NewtApp
framework can significantly reduce development time because the protos

C H A P T E R 2
Getting Started
Choosing an Application Structure
2-3
automatically manage many routine programming tasks. For example, some of the
tasks the protos support include filing, finding, routing, scrolling, displaying an
overview, and soup management.
The disadvantage of NewtApp is that it is structured to support a particular kind of
application--one that allows the creation, editing, and display of soup data. And
particularly, it supports applications structured so that there is one data element
(card, note, and so on) per soup entry. If your application doesn't lend itself to that
structure or doesn't need much of the support that NewtApp provides, then it
would be better to use a different approach to application design.
For details on using the NewtApp framework to construct an application, see
Chapter 4, "NewtApp Applications."
Digital Books
2
If you want to develop an application that displays a large amount of text, handles
multiple pages, or needs to precisely layout text, you may want to consider making
a digital book instead of a traditional application. In fact, if you are dealing with a
really large amount of text, like more than a few dozen screens full, then you could
make your job much easier by using the digital book development tools.
Digital books are designed to display and manipulate large amounts of text and
graphics. Digital books can include all the functionality of an application--they
can include views, protos, and methods that are executed as a result of user actions.
In fact, you can do almost everything in a digital book that you can do in a more
traditional application, except a traditional application doesn't include the text
layout abilities.
The advantage of using a digital book structure is that you gain the automatic text
layout and display abilities of Book Reader, the built-in digital book reading appli-
cation. Additionally, the book-making tools are easy to use and allow you to quickly
turn large amounts of text and graphics into Newton books with minimal effort.
The disadvantage of using a digital book is that it is designed to support a
particular kind of application--one that is like a book. If your application doesn't
lend itself to that structure or doesn't need much of the text-handling support that
Book Reader provides, then it would be better to use a different approach to
application design.
For information on creating digital books using the Book Maker command
language and/or incorporating NewtonScript code and objects into digital books,
see Newton Book Maker User's Guide. For information on creating simpler digital
books see Newton Press User's Guide.

C H A P T E R 2
Getting Started
2-4
Package Loading, Activation, and Deactivation
Other Kinds of Software
2
There are other kinds of software you can develop for the Newton platform that are
not accessed by the user through an icon in the Extras drawer. These might include
new types of stationery that extend existing applications, new panels for the
Preferences or Formulas applications, new routing or print formats, communication
transports, and other kinds of invisible applications. Such software is installed in a
kind of part called an auto part (because its part code is
auto
).
You can also install a special kind of auto part that is automatically removed after it
is installed. The
InstallScript
function in the auto part is executed, and then it
is removed. (For more information about the
InstallScript
function, see the
section "Package Loading, Activation, and Deactivation" beginning on page 2-4.)
This kind of auto part is useful to execute some code on the Newton, for example,
to create a soup, and then to remove the code. This could be used to write an installer
application that installs just a portion of the data supplied with an application. For
example, you might have a game or some other application that uses various data
sets, and the installer could let the user choose which data sets to install (as soups)
to save storage space.
Any changes made by an automatically removed auto part are lost when the
Newton is reset, except for changes made to soups, which are persistent.
For additional information about creating auto parts and other kinds of parts such
as font, dictionary, and store parts, refer to Newton Toolkit User's Guide.
Package Loading, Activation, and Deactivation
2
When a package is first loaded onto the Newton store from some external source,
the system executes the
DoNotInstallScript
function in each frame part in
the package. This function gives the parts in the package a chance to prevent
installation of the package. If the package is not prevented from being installed,
next it is activated.
When a package containing an application or auto part is activated on the Newton,
the system executes a special function in those parts: the
InstallScript
function. A package is normally activated as a result of installing it--by inserting a
storage card containing it, by moving it from one store to another, by downloading
it from a desktop computer, by downloading it via modem or some other communi-
cation device, or by soft resetting the Newton device. Packages can also exist in an
inactive state on a Newton store, and such a package can be activated by the user at
a later time.
When a package is deactivated, the system executes another special function in
each of the application and auto parts in the package: the
RemoveScript
function. A package is normally deactivated when the card it resides on is removed,

C H A P T E R 2
Getting Started
Package Loading, Activation, and Deactivation
2-5
when it is moved to another store (it is deactivated then reactivated), or when the
user deletes the application icon in the Extras Drawer. Packages can also be
deactivated without removing them from the store.
When a package is removed as a result of the user deleting it from the Extras
Drawer, the system also executes the
DeletionScript
function in each of the
package frame parts. This occurs before the
RemoveScript
function is executed.
The following sections describe how to use these functions.
Loading
2
The
DoNotInstallScript
function in a package part is executed when a
package is first loaded onto a Newton store from some external source (this does
not include inserting a storage card containing the package or moving it between
stores). This function applies to all types of frame parts (for example, not store parts).
This method gives the parts in the package a chance to prevent installation of the
entire package. If any of the package parts returns a non-
nil
value from this
function, the package is not installed and is discarded.
You should provide the user with some kind of feedback if package installation is
prevented, rather than silently failing. For example, to ensure that a package is
installed only on the internal store you could write a
DoNotInstallScript
function like the following:
func()
begin
if GetStores()[0] <> GetVBOStore(ObjectPkgRef('foo)) then
begin
GetRoot():Notify(kNotifyAlert, kAppName,
"This package was not installed.
It can be installed only onto the internal store.");
true;
end;
end
Activation
2
The
InstallScript
function in a package part is executed when an application
or auto part is activated on the Newton or whenever the Newton is reset.
This function lets you perform any special installation operations that you need to
do, any initialization, and any registration for system services.

C H A P T E R 2
Getting Started
2-6
Package Loading, Activation, and Deactivation
IMPORTANT
Any changes that you make to the system in the
InstallScript
function must be reversed in the
RemoveScript
function. For example, if you register your
application for certain system services or install print formats,
stationery, or other objects in the system, you must reverse
these changes and remove or unregister these objects in the
RemoveScript
function. If you fail to do this, such changes
cannot be removed by the user, and if your application is on a
card, they won't be able to remove the card without getting a
warning message to put the card back.
Only applications and auto parts use the
InstallScript
function. Note that the
InstallScript
function takes one extra argument when used for an auto part.
Applications built using the NewtApp framework require special
InstallScript
and
RemoveScript
functions. For details, see Chapter 4,
"NewtApp Applications."
Deactivation
2
The
RemoveScript
function in a package part is executed when an application or
auto part is deactivated.
This function lets you perform any special deinstallation operations that you need
to do, any clean-up, and any unregistration for system services that you registered
for in the
InstallScript
function.
Note that automatically removed auto parts do not use the
RemoveScript
function since such auto parts are removed immediately after the
InstallScript
is executed--the
RemoveScript
is not executed.
In addition to the
RemoveScript
function, another function,
DeletionScript
,
is executed when the user removes a package by deleting it from the Extras
Drawer. This function applies to all types of frame parts, and is actually executed
before the
RemoveScript
function.
The
DeletionScript
function is optional. It lets you do different clean-up
based on the assumption that the user is permanently deleting a package, rather
than simply ejecting the card on which it happens to reside. For example, in the
DeletionScript
function, you might want to delete all the soups created by the
application--checking with the user, of course, before performing such an
irreversible operation.

C H A P T E R 2
Getting Started
Effects of System Resets on Application Data
2-7
Effects of System Resets on Application Data
2
Two kinds of reset operations--hard resets and soft resets--can occur on Newton
devices. All data in working RAM (the NewtonScript heap and the operating
system domain) is erased when a hard or soft reset occurs.
Unless a hard reset occurs, soups remain in RAM until they are removed explicitly,
even if the Newton device is powered down. Soups are not affected by soft resets,
as they are stored in the protected storage domain. The remainder of this section
describes reset operations in more detail and suggests ways to ensure that your
application can deal with resets appropriately.
A hard reset occurs at least once in the life of any Newton device--when it is
initially powered on. The hard reset returns all internal RAM to a known state: all
soups are erased, all caches are purged, all application packages are erased from
the internal store, application RAM is reinitialized, the NewtonScript heap is
reinitialized, and the operating system restarts itself. It's the end (or beginning) of
the world as your application knows it.
Note
Data on external stores is not affected by a hard reset.
A hard reset is initiated only in hardware by the user. Extreme precautions have
been taken to ensure that this action is deliberate. On the MessagePad, the user
must simultaneously manipulate the power and reset switches to initiate the
hardware reset. After this is accomplished, the hardware reset displays two dialog
boxes warning the user that all data is about to be erased; the user must confirm
this action in both dialog boxes before the hard reset takes place.
It is extremely unlikely that misbehaving application software would cause a hard
reset. However, a state similar to hardware reset may be achieved if the battery that
backs up internal RAM is removed or fails completely.
It's advisable to test your application's ability to install itself and run on a system
that has been initialized with a hard reset. The exact sequence of steps required to
hard reset a Newton device is documented in its user guide.
Newton devices may also perform a soft reset operation. A soft reset erases all data
stored by applications in the NewtonScript heap, for example all data stored in
slots in views or other frames in memory. A soft reset also reinitializes the data
storage system frames cache, while leaving soup data intact. Any frames in the
cache are lost, such as new or modified entries that have not been written back to
the soup. A soft reset can be initiated in software by the operating system or from
hardware by the user.

C H A P T E R 2
Getting Started
2-8
Flow of Control
When the operating system cannot obtain enough memory to complete a requested
operation, it may display a dialog box advising the user to reset the Newton device.
The user can tap the Reset button displayed in the dialog box to reset the system, or
can tap the Cancel button and continue working.
The user may also initiate a soft reset by pressing a hardware button provided for
this purpose. This button is designed to prevent its accidental use. On the
MessagePad, for example, it is recessed inside the battery compartment and must
be pressed with the Newton pen or similarly-shaped instrument.
A soft reset may also be caused by misbehaving application software. One way to
minimize the occurrence of unexpected resets is to utilize exception-handling code
where appropriate.
The only way applications can minimize the consequences of a soft reset is to be
prepared for one to happen at any time. Applications need to store all permanent
data in a soup and write changed entries back to the soup as soon as is feasible.
It's advisable to test your application's ability to recover from a soft reset. The
exact sequence of steps required to soft-reset a particular Newton device is
documented in its user guide.
Flow of Control
2
The Newton system is an event-driven, object-oriented system. Code is executed in
response to messages sent to objects (for example, views). Messages are sent as a
result of user events, such as a tap on the screen, or internal system events, such as
an idle loop triggering. The flow of control in a typical application begins when the
user taps on the application icon in the Extras Drawer. As a result of this event, the
system performs several actions such as reading the values of certain slots in your
application base view and sending a particular sequence of messages to it.
For a detailed discussion of the flow of control and the order of execution when an
application "starts up," see the section "View Instantiation" beginning on page 3-26.
Using Memory
2
The tightly-constrained Newton environment requires that applications avoid
wasting memory space on unused references. As soon as possible, applications
should set to
nil
any object reference that is no longer needed, thereby allowing
the system to reclaim the memory used by that object. For example, when an
application closes, it needs to clean up after itself as much as possible, removing its
references to soups, entries, cursors, and any other objects. This means you should
set to
nil
any application base view slots that refer to objects in RAM.
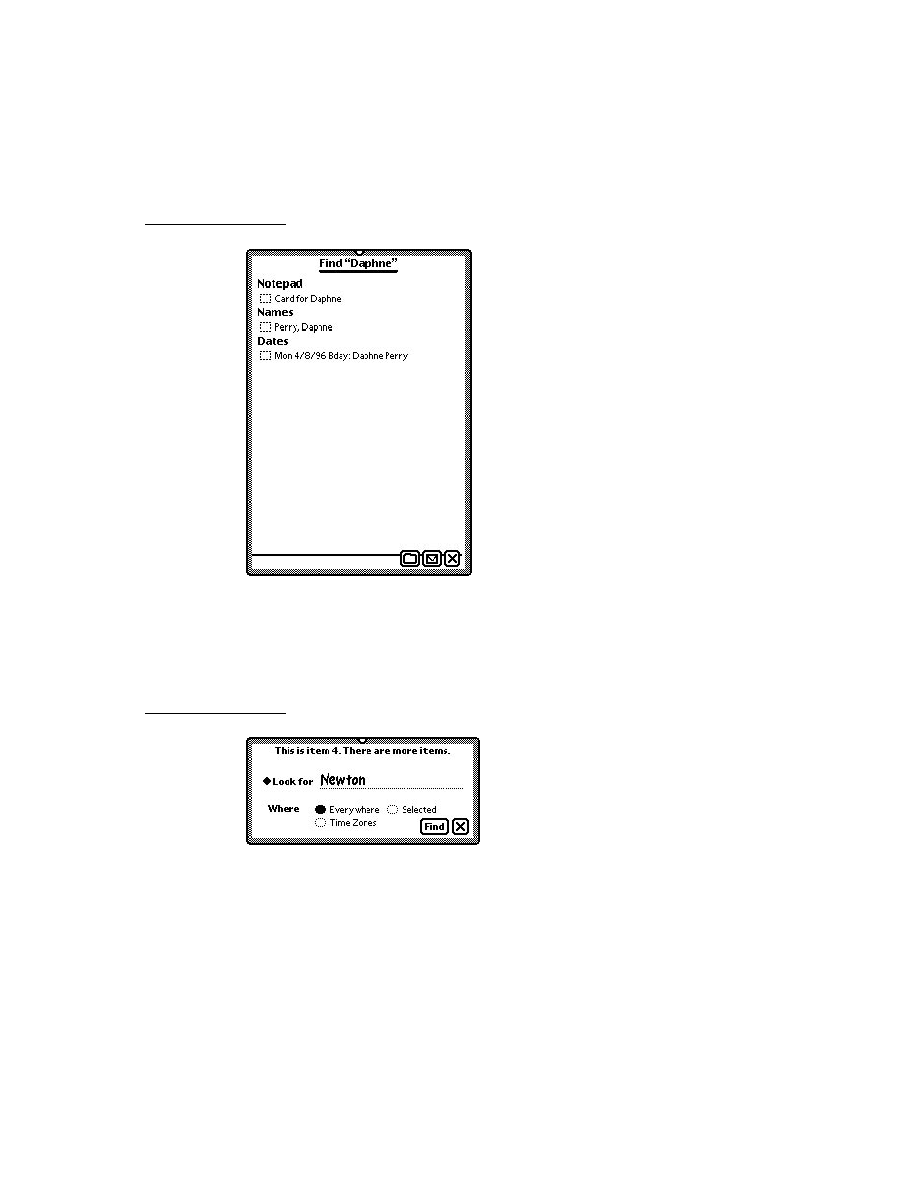
C H A P T E R 2
Getting Started
Localization
2-9
IMPORTANT
If you don't remove references to unused soups, entries, cursors,
and other objects, the objects will not be garbage collected,
reducing the amount of RAM available to the system and
other applications.
Localization
2
If your application displays strings, and you want your application to run on
localized Newton products, you should consider localizing your application. This
involves translating strings to other languages and using other formats for dates,
times, and monetary values.
There are some features of NTK that make string localization simple, allowing you
to define the language at compile time to build versions in different languages
without changing the source files. Refer to Newton Toolkit User's Guide for more
information.
For details on localizing an application, see Chapter 20, "Localizing Newton
Applications."
Developer Signature Guidelines
2
To avoid name conflicts with other Newton application, you need to register a
single developer signature with Newton DTS. You can then use this signature as
the basis for creating unique application symbols, soup names and other global
symbols and strings according to the guidelines described in this section.
Signature
2
A signature is an arbitrary sequence of approximately 4 to 10 characters. Any
characters except colons (:) and vertical bars(|) can be used in a signature. Case is
not significant.
Like a handwritten signature, the developer signature uniquely identifies a Newton
application developer. The most important characteristic of a signature is that it is
unique to a single developer, which is why Newton DTS maintains a registry of
developer signatures. Once you have registered a signature with Newton DTS it is
yours, and will not be assigned to any other developer.

C H A P T E R 2
Getting Started
2-10
Developer Signature Guidelines
Examples of valid signatures include
NEWTONDTS
Joe's Cool Apps
1NEWTON2DTS
What the #$*? SW
How to Register
2
To register your signature, you need to provide the following information to the
Newton Development Information Group at Apple.
Company Name:
Contact Person:
Mailing Address:
Phone:
Email Address:
Desired Signature 1st choice:
Desired Signature 2nd choice:
Send this information to the e-mail address
or send it via US Mail to:
NewtonSysOp
c/o: Apple Computer, Inc.
1 Infinite Loop, M/S: 305-2A
Cupertino, CA 95014
USA
Application Name
2
The application name is the string displayed under your application's icon in the
Extras drawer. Because it is a string, any characters are allowed.
This name does not need to be unique, because the system does not use it to
identify the application. For example, it is possible for there to be two applications
named
Chess
on the market. The application name is used only to identify the
application to the user. If there were in fact two applications named
Chess
installed on the same Newton device, hopefully the user could distinguish one from
the other by some other means, perhaps by the display of different icons in the
Extras drawer.

C H A P T E R 2
Getting Started
Developer Signature Guidelines
2-11
Examples of valid application names include
Llama
Good Form
2 Fun 4 U
Chess
Note
It's recommended that you keep your application
names short so that they don't crowd the names
of other applications in the Extras drawer.
Application Symbol
2
The application symbol is created by concatenating the application name, a
colon (
:
), and your registered developer signature. This symbol is not normally
visible to the end user. It is used to uniquely identify an application in the system.
Because application symbols contain a colon (
:
), they must be enclosed by vertical
bars (
|
) where they appear explicitly in NewtonScript code.
Examples of valid application symbols include:
'|Llama:NEWTONDTS|
'|2 Fun 4 U:Joe's Cool Apps|
You specify the application symbol in the Output Settings dialog of NTK. At the
beginning of a project build, NTK 1.5 or newer defines a constant for your project
with the name
kAppSymbol
and sets it to the symbol you specify as the
application symbol. Use of this constant throughout your code makes it easier to
maintain your code.
At the end of the project build, if you've not created a slot with the name
appSymbol
in the application base view of your project, NTK creates such a slot
and places in it the application symbol. If the slot exists already, NTK doesn't
overwrite it.
Package Name
2
The package name is usually a string version of the application symbol. The
package name may be visible to the user if no application name is provided.
Package names are limited to 26 characters, so this places a practical limit on the
combined length of application names and signatures.

C H A P T E R 2
Getting Started
2-12
Summary
Summary
2
View Classes and Protos
2
clView
2
aView := {
viewClass: clView, // base view class
viewBounds:
boundsFrame
, // location and size
viewJustify:
integer
, // viewJustify flags
viewFlags:
integer
, // viewFlags flags
viewFormat:
integer
, // viewFormat flags
...
}
protoApp
2
anApp := {
_proto: protoApp, // proto application
title:
string
, // application name
viewBounds:
boundsFrame
, // location and size
viewJustify:
integer
, // viewJustify flags
viewFlags:
integer
, // viewFlags flags
viewFormat:
integer
, // viewFormat flags
declareSelf: 'base, // do not change
...
}
Functions
2
Application-Defined Functions
2
InstallScript(
partFrame
) // for application parts
InstallScript(
partFrame
,
removeFrame
) // for auto parts
DeletionScript()
DoNotInstallScript()
RemoveScript(
frame
)

About Views
3-1
C H A P T E R 3
Views
3
Figure 3-0
Table 3-0
This chapter provides the basic information you need to know about views and how
to use them in your application.
You should start with this chapter if you are creating an application for Newton
devices, as views are the basic building blocks for most applications. Before
reading this chapter, you should be familiar with the information in Newton Toolkit
User's Guide and The NewtonScript Programming Language.
This chapter introduces you to views and related items, describing
views, templates, the view coordinate system, and the instantiation process for
creating a view
common tasks, such as creating a template, redrawing a view, creating special
view effects, and optimizing a view's performance
view constants, methods, and functions
About Views
3
Views are the basic building blocks of most applications. Nearly every individual
visual item you see on the screen--for example, a radio button, or a checkbox--is
a view, and there may even be views that are not visible. Views display information
to the user in the form of text and graphics, and the user interacts with views by
tapping them, writing in them, dragging them, and so on.
Different types of views have inherently different behavior, and you can include
your own methods in views to further enhance their behavior. The primitive view
classes provided in the Newton system are described in detail in Table 2-2 (page 2-4)
in the Newton Programmer's Reference.
You create or lay out a view with the Newton Toolkit's graphic editor. The Newton
Toolkit creates a template; that is, a data object that describes how the view will
look and act on the Newton. Views are then created from templates when the
application runs on the Newton.

C H A P T E R 3
Views
3-2
About Views
This section provides detailed conceptual information on views and other items
related to views. Specifically, it covers the following:
templates and views and how they relate to each other
the coordinate system used in placing views
components used to define views
application-defined methods that the system sends to views
the programmatic process used to create a view
new functions, methods, and messages added for 2.0 as well as modifications to
existing view code
Templates
3
A template is a frame containing a description of an object. (In this chapter the
objects referred to are views that can appear on the screen.) Templates contain data
descriptions of such items as fields for the user to write into, graphic objects,
buttons, and other interactive objects used to collect and display information.
Additionally, templates can include methods, which are functions that give the
view behavior.
Note
A template can also describe nongraphic objects like
communication objects. Such objects have no visual
representation and exist only as logical objects.
An application exists as a collection of templates, not just a single template. There
is a parent template that defines the application window and its most basic
features. From this parent template springs a hierarchical collection of child
templates, each defining a small piece of the larger whole. Each graphic object,
button, text field, and so on is defined by a separate template. Each child template
exists within the context of its parent template and inherits characteristics from its
parent template, though it can override these inherited characteristics.
Within the Newton object system, a template for a view exists as a special kind of
frame; that is, a frame containing or inheriting a particular group of slots
(
viewClass
,
viewBounds
,
viewFlags
, and some other optional slots) that
define the template's class, dimensions, appearance, and other characteristics.
Templates are no different from any other frames, except that they contain or
inherit these particular slots (in addition to others). For more information about
frames, slots, and the NewtonScript language, see The NewtonScript Programming
Language.

C H A P T E R 3
Views
About Views
3-3
Figure 3-1 shows a collection of template frames that might make up an application.
The frame at the top represents the highest-level parent template. Each template
that has children contains a
viewChildren
(or
stepChildren
) slot whose
value is an array of references to its child templates.
Figure 3-1
Template hierarchy
Arrows indicate
a reference to objects
Child Template
{Slot:
data
Slot:
data
.
.
.
}
Child Template
{Slot:
data
Slot:
data
.
.
.
}
Child Template
{Slot:
data
Slot:
data
.
.
.
}
Child Template
{Slot:
data
Slot:
data
.
.
.
viewChildren:
[
frameRef, frameRef]
}
Parent Template
{Slot:
data
Slot:
data
.
.
.
viewChildren:
[
frameRef, frameRef]
}

C H A P T E R 3
Views
3-4
About Views
Views
3
A template is a data description of an object. A view is the visual representation of
the object that is created when the template is instantiated. The system reads the
stored description in the template and creates a view on the screen--for example, a
framed rectangle containing a title.
Besides the graphic representation you see on the screen, a view consists of a
memory object (a frame) that contains a reference to its template and also contains
transient data used to create the graphic object. Any changes to view data that occur
during run time are stored in the view, not in its template. This is an important point--
after an application has started up (that is, once the views are instantiated from their
templates), all changes to slots occur in the view; the template is never changed.
This distinction between templates and views with respect to changing slot values
occurs because of the NewtonScript inheritance mechanism. During run time,
templates, containing static data, are prototypes for views, which contain dynamic
data. To understand this concept, it is imperative that you have a thorough
understanding of the inheritance mechanism as described in The NewtonScript
Programming Language.
You can think of a template as a computer program stored on a disk. When the
program starts up, the disk copy (the template) serves as a template; it is copied
into dynamic memory, where it begins execution. Any changes to program
variables and data occur in the copy of the program in memory (the view), not in
the original disk version.
However, the Newton system diverges from this metaphor in that the view is not
actually a copy of the template. To save RAM use, the view contains only a reference
to the template. Operations involving the reading of data are directed by reference
to the template if the data is not first found in the view. In operations in which data
is written or changed, the data is written into the view.
Because views are transient and data is disposed of when the view is closed, any
data written into a view that needs to be saved permanently must be saved elsewhere
before the view disappears.
A view is linked with its template through a
_proto
slot in the view. The value of
this slot is a reference to the template. Through this reference, the view can access
slots in its template. Templates may themselves contain
_proto
slots which
reference other templates, called protos, on which they are built.
Views are also linked to other views in a parent-child relationship. Each view
contains a
_parent
slot whose value is a reference to its parent view; that is, the
view that encloses it. The top-level parent view of your application is called the

C H A P T E R 3
Views
About Views
3-5
application base view. (Think of the view hierarchy as a tree structure in which
the tree is turned upside down with its root at the top. The top-level parent view is
the root view.)
Figure 3-2 shows the set of views instantiated from the templates shown in
Figure 3-1. Note that this example is simplified in that it shows a separate template
for each view. In practice, multiple views often share a single template. Also, this
example doesn't show templates that are built on other protos.
Figure 3-2
View hierarchy
Arrows indicate a
reference to parent/child
Templates
(permanent, read-only)
Views
(transient, writable)
Arrows indicate a
reference to protos
Parent View
{_proto:
.
.
.
}
Child Template C
{
.
.
.
}
Child Template B
{
.
.
.
}
Child Template D
{
.
.
.
}
Parent Template
{
.
.
.
viewChildren:[]
}
Child Template A
{
.
.
.
viewChildren:[]
}
Child View B
{
.
_parent:
_proto:
.
}
Child View A
{_parent:
_proto:
.
.
.
}
Child View D
{
.
_parent:
_proto:
.
}
Child View C
{_parent:
_proto:
.
.
.
}

C H A P T E R 3
Views
3-6
About Views
Figure 3-3 shows an example of what this view hierarchy might represent on
the screen.
Figure 3-3
Screen representation of view hierarchy
The application base view of each application exists as a child of the system root
view. The root view is essentially the blank screen that exists before any other
views are drawn. It is the ancestor of all other views that are instantiated.
Coordinate System
3
The view coordinate system is a two-dimensional plane. The (0, 0) origin point of
the plane is assigned to the upper-left corner of the Newton screen, and coordinate
values increase to the right and (unlike a Cartesian plane) down. Any pixel on the
screen can be specified by a vertical coordinate and a horizontal coordinate.
Figure 3-4 (page 3-7) illustrates the view system coordinate plane.
Views are defined by rectangular areas that are usually subsets of the screen. The
origin of a view is usually its upper-left corner, though the origin can be changed.
The coordinates of a view are relative to the origin of its parent view--they are not
screen coordinates.
It is helpful to conceptualize the coordinate plane as a two-dimensional grid.
The intersection of a horizontal and vertical grid line marks a point on the
coordinate plane.
Note the distinction between points on the coordinate grid and pixels, the dots
that make up a visible image on the screen. Figure 3-5 illustrates the relationship
between the two: the pixel is down and to the right of the point by which it
is addressed.
Parent
View
Child B
Child A
Child C
Child D

C H A P T E R 3
Views
About Views
3-7
Figure 3-4
View system coordinate plane
Figure 3-5
Points and pixels
6
6
5
4
3
2
1
1
2
3
4
5
6
6
5
4
3
2
1
5
4
3
2
1
h
v
Grid lines
Point
Pixel

C H A P T E R 3
Views
3-8
About Views
As the grid lines are infinitely thin, so a point is infinitely small. Pixels, by contrast,
lie between the lines of the coordinate grid, not at their intersections.
This relationship gives them a definite physical extent, so that they can be seen on
the screen.
Defining View Characteristics
3
A template that describes a view is stored as a frame that has slots for view
characteristics. Here is a NewtonScript example of a template that describes a view:
{viewClass: clView,
viewBounds: RelBounds( 20, 50, 94, 142 ),
viewFlags: vNoFlags,
viewFormat:vfFillWhite+vfFrameBlack+vfPen(1),
viewJustify: vjCenterH,
viewFont: simpleFont10,
declareSelf: 'base,
debug: "dialer",
};
Briefly, the syntax for defining a frame is:
{
slotName
:
slotValue
,
slotName
:
slotValue
,
...};
where slotName is the name of a slot, and slotValue is the value of a slot. For more
details on NewtonScript syntax, refer to The NewtonScript Programming Language.
Frames serving as view templates have slots that define the following kinds of view
characteristics:
Class
The
viewClass
slot defines the class of graphic object from
which the view is constructed.
Behavior
The
viewFlags
slot defines other primary view behaviors
and controls recognition behavior.
Location, size, and alignment
The
viewBounds
and
viewJustify
slots define the
location, size, and alignment of the view and its contents.
Appearance
The
viewFormat
slot defines the frame and fill
characteristics. The
viewFillPattern
and
viewFramePattern
slots control custom patterns.
Transfer modes used in drawing the view are controlled
by the
viewTransferMode
slot.

C H A P T E R 3
Views
About Views
3-9
Opening and closing animation effects
The
viewEffect
slot defines an animation to be performed
when the view is displayed or hidden.
Other attributes
Some other slots define view characteristics such as font,
copy protection, and so on.
Inheritance links
The
_proto
,
_parent
,
viewChildren
, and
stepChildren
slots contain links to a view's template,
parent view, and child views.
These different categories of view characteristics are described in the following
sections.
Class
3
The
viewClass
slot defines the view class. This information is used by the
system when creating a view from its template. The view class describes the type
of graphic object to be used to display the data described in the template. The view
classes built into the system serve as the primitive building blocks from which all
visible objects are constructed. The view classes are listed and described in Table 2-2
(page 2-4) in the Newton Programmer's Reference.
Behavior
3
The
viewFlags
slot defines behavioral attributes of a view other than those that
are derived from the view class. Each attribute is represented by a constant defined
as a bit flag. Multiple attributes are specified by adding them together, like this:
vVisible+vFramed
Note that in the NTK viewFlags editor, multiple attributes are specified simply by
checking the appropriate boxes.
Some of the
viewFlags
constants are listed and described in Table 2-4 (page 2-11)
in the Newton Programmer's Reference. There are also several additional constants
you can specify in the
viewFlags
slot that control what kinds of pen input (taps,
strokes, words, letters, numbers, and so on) are recognized and handled by the view.
These other constants are described in "Recognition" (page 9-1).
View behavior is also controlled through methods in the view that handle system
messages. As an application executes, its views receive messages from the system,
triggered by various events, usually the result of a user action. Views can handle
system messages by having methods that are named after the messages. You
control the behavior of views by providing such methods and including code that
operates on the receiving view or other views.
For a detailed description of the messages that views can receive, and information
on how to handle them, see "Application-Defined Methods" (page 3-26)."

C H A P T E R 3
Views
3-10
About Views
Handling Pen Input
3
The use of the
vClickable viewFlags
constant to control pen input is
important to understand, so it is worth covering here, even though it is discussed in
more detail in "Recognition" (page 9-1). The
vClickable
flag must be set for a
view to receive input. If this flag is not set for a view, that view cannot accept any
pen input.
If you have a view whose
vClickable
flag is not set, pen events, such as a tap,
will "fall through" that view and be registered in a background view that does
accept pen input. This can cause unexpected results if you are not careful. You
can prevent pen events from registering in the wrong view by setting the
vClickable
flag for a view and providing a
ViewClickScript
method in the
view that returns non-
nil
. This causes the view to capture all pen input within
itself, instead of letting it "fall through" to a different view. If you want to capture
pen events in a view but still prevent input (and electronic ink), do not specify any
other recognition flags besides
vClickable
.
If you want strokes or gestures but want to prevent clicks from falling through up
the parent chain, return the symbol
'skip.
This symbol tells the view system not
to allow the stroke to be processed by the parent chain, but instead allows the
stroke to be processed by the view itself for recognition behavior.
Several other
viewFlags
constants are used to control and constrain the recognition
of text, the recognition of shapes, the use of dictionaries, and other input-related
features of views. For more information, refer to "Recognition" (page 9-1).
Location, Size, and Alignment
3
The location and size of a view are specified in the
viewBounds
slot of the view
template. The
viewJustify
slot affects the location of a view relative to other
views. The
viewJustify
slot also controls how text and pictures within the view
are aligned and limits how much text can appear in the view (one line, one word,
and so on).
The
viewOriginX
and
viewOriginY
slots control the offset of child views
within a view.
View Bounds
3
The
viewBounds
slot defines the size and location of the view on the screen. The
value of the
viewBounds
slot is a frame that contains four slots giving the view
coordinates (all distances are in pixels). For example:
{left:
leftValue
,
top:
topValue
,
right:
rightValue
,
bottom:
bottomValue
}

C H A P T E R 3
Views
About Views
3-11
leftValue
The distance from the left origin of the parent view to the left
edge of the view.
topValue
The distance from the top origin of the parent view to the top
edge of the view.
rightValue
The distance from the left origin of the parent view to the
right edge of the view.
bottomValue
The distance from the top origin of the parent view to the
bottom edge of the view.
Note
The values in the
viewBounds
frame are interpreted as
described here only if the view alignment is set to the default
values. Otherwise, the view alignment setting changes the way
viewBounds
values are used. For more information, see "View
Alignment" (page 3-13).
As shown in Figure 3-6, all coordinates are relative to a view's parent, they are not
actual screen coordinates.
Figure 3-6
Bounds parameters
When you are using the Newton Toolkit (NTK) to lay out views for your applica-
tion, the
viewBounds
slot is set automatically when you drag out a view in the
layout window. If you are writing code in which you need to specify a
viewBounds
slot, you can use one of the global functions such as
SetBounds
or
RelBounds
,
which are described in "Finding the Bounds of Views" (page 3-39).
View
Parent View
Top
Bottom
Left
Right

C H A P T E R 3
Views
3-12
About Views
View Size Relative to Parent Size
3
A view is normally entirely enclosed by its parent view. You shouldn't create a
view whose bounds extend outside its parent's bounds. If you do create such a view,
for example containing a picture that you want to show just part of, you need to set
the
vClipping
flag in the
viewFlags
slot of the parent view.
If you do not set the
vClipping
flag for the parent view, the behavior is
unpredictable. The portions of the view outside the parent's bounds may or may
not draw properly. All pen input is clipped to the parent's bounds.
Note that the base views of all applications (all root view children, in fact) are
automatically clipped, whether or not the
vClipping
flag is set.
If your application base view is very small and you need to create a larger floating
child view, for example, a slip, you should use the
BuildContext
function. This
function creates a special view that is a child of the root view. To open the view,
you send the
Open
message to it.
Using Screen-Relative Bounds
3
Newton is a family of products with varying screen sizes. If you want your
application to be compatible with a variety of individual Newton products, you
should design your application so that it sizes itself dynamically (that is, at run
time), accounting for the size of the screen on which it is running, which could be
smaller or larger than the original Newton MessagePad screen.
You may want to dynamically size the base view of your application so that it
changes for different screen sizes, or you may want it to remain a fixed size on all
platforms. In the latter case, you should still check the actual screen size at run
time to make sure there is enough room for your application.
You can use the global function
GetAppParams
to check the size of the screen at
run time. This function returns a frame containing the coordinates of the drawable
area of the screen, as well as other information (see "Utility Functions Reference"
(page 23-1) in the Newton Programmer's Reference for a description). The frame
returned looks like this:
{appAreaLeft: 0,
appAreaTop: 0,
appAreaWidth: 240,
appAreaHeight: 320,
...}
The following example shows how to use the
ViewSetupFormScript
method in
your application base view to make the application a fixed size, but no larger than
the size of the screen:

C H A P T E R 3
Views
About Views
3-13
viewSetupFormScript: func()
begin
local b := GetAppParams();
self.viewbounds := RelBounds(
b.appAreaLeft,
b.appAreaTop,
min(200, b.appAreaWidth), // 200 pixels wide max
min(300, b.appAreaHeight)); // 300 pixels high max
end
Don't blindly size your application to the full extents of the screen. This might look
odd if your application runs on a system with a much larger screen.
Do include a border around your application base view. That way, if the application
runs on a screen that is larger than the size of your application, the user will be able
to clearly see its boundaries.
The important point is to correctly size the application base view. Child views are
positioned relative to the application base view. If you have a dynamically sizing
application base view, make sure that the child views also are sized dynamically, so
that they are laid out correctly no matter how the dimensions of the base view
change. You can ensure correct layout by using parent-relative and sibling-relative
view alignment, as explained in the next section, "View Alignment."
One additional consideration you should note is that on a larger screen, it may be
possible for the user to move applications around. You should not rely on the
top-left coordinate of your application base view being fixed. To prevent this from
happening check your application's current location when you work with global
coordinates. To do this, send the
GlobalBox
message to your application base view.
View Alignment
3
The
viewJustify
slot is used to set the view alignment and is closely linked in
its usage and effects with the
viewBounds
slot.
The
viewJustify
slot specifies how text and graphics are aligned within the
view and how the bounds of the view are aligned relative to its parent or sibling
views. (Sibling views are child views that have a common parent view.)
In the
viewJustify
slot, you can specify one or more alignment attributes,
which are represented by constants defined as bit flags. You can specify one
alignment attribute from each of the following groups:
horizontal alignment of view contents (applies to views of class
clParagraphView
and
clPictureView
only)
vertical alignment of view contents (applies to views of class
clParagraphView
and
clPictureView
only)

C H A P T E R 3
Views
3-14
About Views
horizontal alignment of the view relative to its parent or sibling view
vertical alignment of the view relative to its parent or sibling view
text limits
For example, you could specify these alignment attributes for a button view that has
its text centered within the view and is placed relative to its parent and sibling views:
vjCenterH+vjCenterV+vjSiblingRightH+vjParentBottomV+oneLineOnly
If you don't specify an attribute from a group, the default attribute for that group
is used.
The view alignment attributes and the defaults are listed and described in Table 3-1.
The effects of these attributes are illustrated in Figure 3-7, following the table.
Sibling setting are not used if the view has not previous setting, instead the parent
settings are used.
Table 3-1
viewJustify
constants
Constant
Value
Description
Horizontal alignment of view contents
vjLeftH
0
Left alignment (default).
vjCenterH
2
Center alignment (default for
clPictureView
only).
vjRightH
1
Right alignment.
vjFullH
3
Stretches the view contents to fill the entire view width.
Vertical alignment of view contents
1
vjTopV
0
Top alignment (default).
vjCenterV
4
Center alignment (default for
clPictureView
only).
vjBottomV
8
Bottom alignment.
vjFullV
12
For views of the
clPictureView
class only;
stretches the picture to fill the entire view height.
Horizontal alignment of the view relative to its parent or sibling view
2
vjParentLeftH
0
The left and right view bounds are relative to the
parent's left side (default).
continued

C H A P T E R 3
Views
About Views
3-15
vjParentCenterH
16
The difference between the left and right view bounds
is used as the width of the view. If you specify zero
for left, the view is centered in the parent view. If you
specify any other number for left, the view is offset
by that much from a centered position (for example,
specifying left = 10 and right = width+10 offsets the
view 10 pixels to the right from a centered position).
vjParentRightH
32
The left and right view bounds are relative to the
parent's right side, and will usually be negative.
vjParentFullH
48
The left bounds value is used as an offset from the left
edge of the parent and the right bounds value as an
offset from the right edge of the parent (for example,
specifying left = 10 and right = 10 leaves a 10-pixel
margin on each side).
vjSiblingNoH
0
(Default) Do not use sibling horizontal alignment.
vjSiblingLeftH
2048
The left and right view bounds are relative to the
sibling's left side.
vjSiblingCenterH
512
The difference between the left and right view bounds
is used as the width of the view. If you specify zero
for left, the view is centered in relation to the sibling
view. If you specify any other number for left,
the view is offset by that much from a centered
position (for example, specifying left = 10 and
right = width+10 offsets the view 10 pixels to the
right from a centered position).
vjSiblingRightH
1024
The left and right view bounds are relative to the
sibling's right side.
vjSiblingFullH
1536
The left bounds value is used as an offset from the left
edge of the sibling and the right bounds value as an
offset from the right edge of the sibling (for example,
specifying left = 10 and right = 10 indents the view
10 pixels on each side relative to its sibling).
Vertical alignment of the view relative to its parent or sibling view
3
vjParentTopV
0
The top and bottom view bounds are relative to the
parent's top side (default).
continued
Table 3-1
viewJustify
constants (continued)
Constant
Value
Description

C H A P T E R 3
Views
3-16
About Views
vjParentCenterV
64
The difference between the top and bottom view
bounds is used as the height of the view. If you
specify zero for top, the view is centered in the parent
view. If you specify any other number for top,
the view is offset by that much from a centered
position (for example, specifying top = 10 and
bottom = height10 offsets the view 10 pixels above
a centered position).
vjParentBottomV
128
The top and bottom view bounds are relative to the
parent's bottom side.
vjParentFullV
192
The top bounds value is used as an offset from the top
edge of the parent and the bottom bounds value as an
offset from the bottom edge of the parent (for
example, specifying top = 10 and bottom = 10 leaves
a 10-pixel margin on both the top and the bottom).
vjSiblingNoV
0
(Default) Do not use sibling vertical alignment.
vjSiblingTopV
16384
The top and bottom view bounds are relative to the
sibling's top side.
vjSiblingCenterV
4096
The difference between the top and bottom view
bounds is used as the height of the view. If you
specify zero for top, the view is centered in relation to
the sibling view. If you specify any other number for
top, the view is offset by that much from a centered
position (for example, specifying top = 10 and
bottom = height10 offsets the view 10 pixels above a
centered position).
vjSiblingBottomV
8192
The top and bottom view bounds are relative to the
sibling's bottom side.
vjSiblingFullV
12288
The top bounds value is used as an offset from the top
edge of the sibling and the bottom bounds value as an
offset from the bottom edge of the sibling (for
example, specifying top = 10 and bottom = 10
indents the view 10 pixels on both the top and the
bottom sides relative to its sibling).
continued
Table 3-1
viewJustify
constants (continued)
Constant
Value
Description

C H A P T E R 3
Views
About Views
3-17
1
For views of the
clParagraphView
class, the vertical alignment constants
vjTopV
,
vjCenterV
, and
vjBottomV
apply only to paragraphs that also have the
oneLineOnly viewJustify
flag set.
2
If you are applying horizontal sibling-relative alignment and the view is the first child, it is positioned according
to the horizontal parent-relative alignment setting.
3
If you are applying vertical sibling-relative alignment and the view is the first child, it is positioned according to
the vertical parent-relative alignment setting.
Text limits
noLineLimits
0
(Default) No limits, text wraps to next line.
oneLineOnly
8388608
Allows only a single line of text, with no wrapping.
oneWordOnly
16777216
Allows only a single word. (If the user writes another
word, it replaces the first.)
Indicate that a bounds value is a ratio
vjNoRatio
0
(Default) Do not use proportional alignment.
vjLeftRatio
67108864
The value of the slot
viewBounds.left
is
interpreted as a percentage of the width of the parent
or sibling view to which this view is horizontally
justified.
vjRightRatio
134217728
The value of the slot
viewBounds.right
is
interpreted as a percentage of the width of the parent
or sibling view to which this view is horizontally
justified.
vjTopRatio
268435456
The value of the slot
viewBounds.top
is
interpreted as a percentage of the height of the parent
or sibling view to which this view is vertically
justified.
vjBottomRatio
536870912
The value of the slot
viewBounds.bottom
is
interpreted as a percentage of the height of the parent
or sibling view to which this view is vertically
justified.
vjParentAnchored
256
The view is anchored at its location in its parent view,
even if the origin of the parent view is changed. Other
sibling views will be offset, but not child views with
this flag set.
Table 3-1
viewJustify
constants (continued)
Constant
Value
Description

C H A P T E R 3
Views
3-18
About Views
Figure 3-7
View alignment effects
Horizontal alignment of view contents
Vertical alignment of view contents
Justify v jFullV
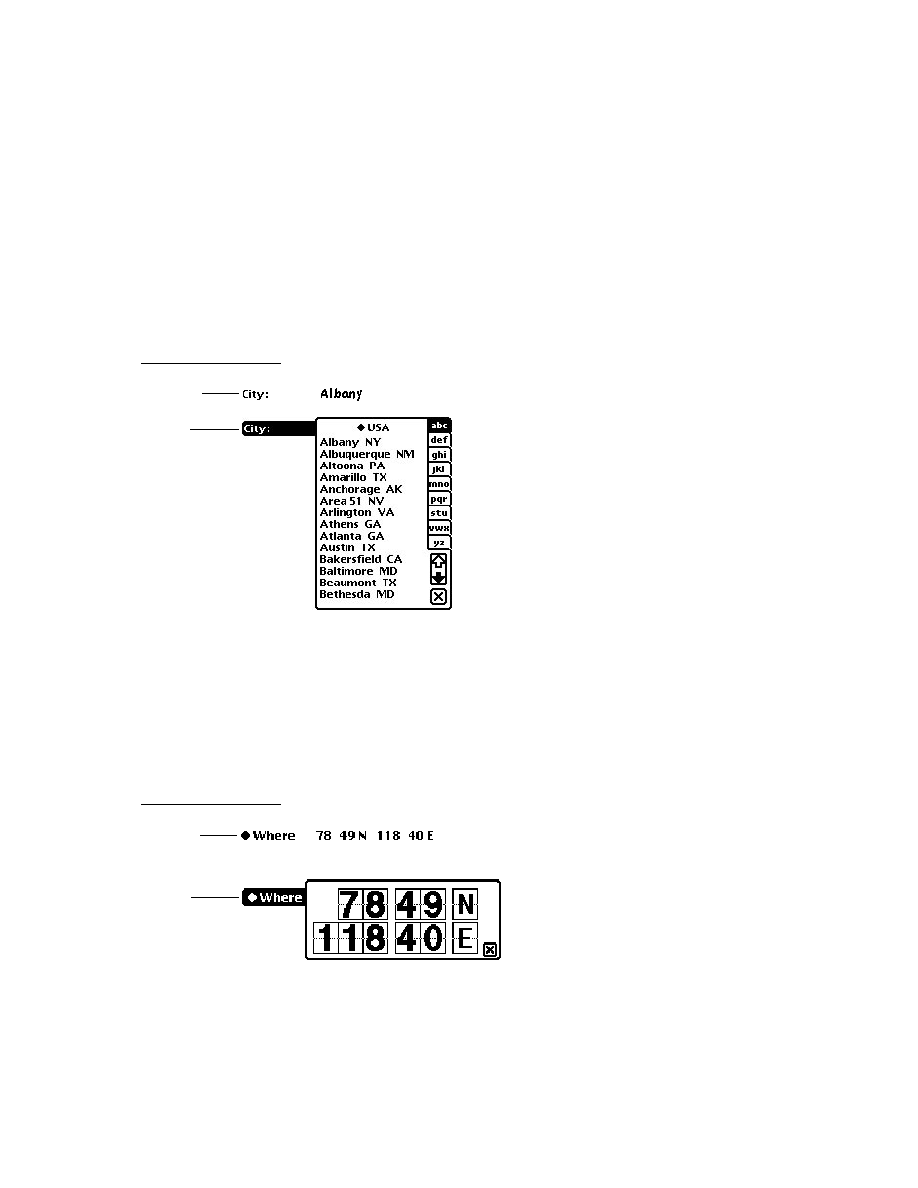
C H A P T E R 3
Views
About Views
3-19
Figure 3-7
View alignment effects (continued)
View Alignment effects2
Figure 3-7 continued
Basic Views / Newton Programmer's Guide
Frame size 410 points wide, 200 points deep.
Apple Computer Inc.
Peggy Kunz, Illustrator
Adobe Illustrator 5.0
Horizontal alignment of the view
relative to its parent view
Horizontal alignment of the view
relative to its sibling view
Parent
viewBounds:
{left:0. Top:25,
Right:175,
Bottom:75}
viewBounds:
{left:0. Top:100,
Right:175,
Bottom:150}
viewBounds:
{left:175.
Top:175, Right:0,
Bottom:225}
viewBounds:
{left:0. Top:250,
Right:0,
Bottom:300}
Sibling View
Each of the
paragraph views
has the same
viewBounds:
{Left:0,
Top:23,
Right:185,
Bottom:43}
Vertical alignment of the view
relative to its parent view
Vertical alignment of the view
relative to its sibling view
Parent View
vjParentTopV
viewBounds:
{left:5. Top:0,
Right:45,
Bottom:40}
vjParentCenterV
viewBounds:
{left:0. Top:100,
Right:175,
Bottom:150}
vjParentBottomV
viewBounds:
{left:105.
Top:40,
Right:145,
Bottom:0}
vjParentFullV
viewBounds:
{left:165.
Top:40,
Right:205,
Bottom:40}
Sibling View
Each of the
paragraph views
has the same
viewBounds:
{Left:31,
Top:0,
Right:215,
Bottom:20}

C H A P T E R 3
Views
3-20
About Views
viewOriginX and viewOriginY Slots
3
These slots can be read but not written or set. Instead, use
Setorigin
to set the
origin offset for a view. For more information, see "Scrolling View Contents"
(page 3-41).
If you use these slots to specify an offset, the point you specify becomes the new
origin. Child views are drawn offset by this amount. This is useful for displaying
different portions of a view whose content area is larger than its visible area.
Appearance
3
The
viewFormat
slot defines view attributes such as its fill pattern, frame pattern,
frame type, and so on. Custom fill and frame patterns are defined using the
viewFillPattern
and
viewFramePattern
slots.
The
viewTransferMode
slot controls the appearance of the view when it is drawn
on the screen; that is, how the bits being drawn interact with bits on the screen.
View Format
3
The
viewFormat
slot defines visible attributes of a view such as its fill pattern,
frame type, and so on. In the
viewFormat
slot, you can specify one or more
format attributes, which are represented by constants defined as bit flags. You can
specify one format attribute from each of the following groups:
view fill pattern
view frame pattern
view frame thickness
view frame roundness
view frame inset (this is the white space between the view bounds and view frame)
view shadow style
view line style (these are solid or dotted lines drawn in the view to make it look
like lined paper)
Multiple attributes are specified by adding them together like this:
vfFillWhite+vfFrameBlack+vfPen(2)+vfLinesGray
Note that the frame of a view is drawn just outside of the view bounding box, not
within it.
The fill for a view is drawn before the view contents and the frame is drawn after
the contents.

C H A P T E R 3
Views
About Views
3-21
IMPORTANT
Many views need no fill pattern, so you may be inclined to set the
fill pattern to "none" when you create such a view. However, it's
best to fill the view with white, if the view may be explicitly
dirtied (in need of redrawing) and if you don't need a transparent
view. This increases the performance of your application because
when the system is redrawing the screen, it doesn't have to update
views behind those filled with a solid color such as white.
However, don't fill all views with white, since there is some small
overhead associated with fills; only use this technique if the view
is one that is usually dirtied.
Also, note that the application base view always appears opaque,
as do all child views of the root view. That is, if no fill is set for
the application base view, it automatically appears to be filled
with white.
The view format attributes are listed and described in Table 2-5 (page 2-13) in the
Newton Programmer's Reference.
Custom Fill and Frame Patterns
3
Custom fill and custom view frame patterns are set for a view by using the
vfCustom
flag, as shown in Table 2-5 (page 2-13) in the Newton Programmer's
Reference, and by using following two slots:
viewFillPattern
Sets a custom fill pattern that is used to fill the view.
viewFramePattern
Sets a custom pattern that is used to draw the frame lines
around the view, if the view has a frame.
You can use custom fill and frame patterns by setting the value of the
viewFillPattern
and
viewFramePattern
slots to a binary data structure
containing a custom pattern. A pattern is simply an eight-byte binary data structure
with the class
'pattern
.
You can use this NewtonScript trick to create binary pattern data structures "on
the fly":
DefineGlobalConstant('myPat,SetLength(SetClass(Clone
("\uAAAAAAAAAAAAAAAA"),'pattern), 8));
This code clones a string, which is already a binary object, and changes its class to
'pattern
. The string is specified with hexadecimal character codes whose binary
representation is used to create the pattern. Each two-digit hex code creates one
byte of the pattern.

C H A P T E R 3
Views
3-22
About Views
Drawing Transfer Mode for Views
3
The
viewTransferMode
slot specifies the transfer mode to be used for
drawing in the view. The transfer mode controls how bits being drawn are placed
over existing bits on the screen. The constants that you can specify for the
viewTransferMode
slot are listed and described in Table 2-6 (page 2-14) in
the Newton Programmer's Reference.
The transfer mode is used to specify how bits are copied onto the screen when
something is drawn in a view. For each bit in the item to be drawn, the system finds
the existing bit on the screen, performs a Boolean operation on the pair of bits, and
displays the resulting bit.
The first eight transfer modes are illustrated in Figure 3-8. The last transfer mode,
in addition to those shown,
modeMask
, is a special one, and its effects are
dependent on the particular picture being drawn and its mask.
Figure 3-8
Transfer modes
In Figure 3-8, the Source item represents something being drawn on the screen.
The Destination item represents the existing bits on the screen. The eight patterns
below these two represent the results for each of the standard transfer modes.
modesNotCopy
modesNotOr
modesNotXor
modesNotBic
Source
modeCopy
modeOr
modeXor
modeBic
Destination (Screen)

C H A P T E R 3
Views
About Views
3-23
Opening and Closing Animation Effects
3
Another attribute of a view that you can specify is an animation that occurs when
the view is opened or closed on the screen. If an effect is defined for a view, it occurs
whenever the view is sent an
Open
,
Close
,
Show
,
Hide
, or
Toggle
message.
Use the
viewEffect
slot to give the view an opening or closing animation.
Alternately, you can perform one-time effects on a view by sending it one of these
view messages:
Effect
,
SlideEffect
,
RevealEffect
, or
Delete
. These
methods are described in "Animating Views" (page 3-40).
The
viewEffect
slot specifies an animation that occurs when a view is shown or
hidden. If this slot is not present, the view will not animate at these times. There
are several predefined animation types. You can also create a custom effect using a
combination of
viewEffect
flags from Table 2-7 (page 2-86) in Newton
Programmer's Reference. To use one of the predefined animation types, specify the
number of animation steps, the time per step, and the animation type, with the
following values:
fxSteps(
x
)
In x specify the number of steps you want, from 1 to 15.
fxStepTime(
x
)
In x specify the number of ticks that you want each step to
take, from zero to 15 (there are 60 ticks per second).
Specify one of the following values to select the type of animation effect desired:
fxCheckerboardEffect
--reveals a view using a checkerboard effect, where
adjoining squares move in opposite (up and down) directions.
fxBarnDoorOpenEffect
--reveals a view from center towards left and right
edges, like a barn door opening where the view is the inside of the barn.
fxBarnDoorCloseEffect
--reveals a view from left and right edges towards
the center, like a barn door closing where the view is painted on the doors.
fxVenetianBlindsEffect
--reveals a view so that it appears behind
venetian blinds that open.
fxIrisOpenEffect
--changes the size of an invisible "aperture" covering the
view, revealing an ever-increasing portion of the full-size view as the aperture
opens.
fxIrisCloseEffect
--like
fxIrisOpenEffect
, except that it decreases
the size of an invisible "aperture" covering the view, as the aperture closes.
fxPopDownEffect
--reveals a view as it slides down from its top boundary.
fxDrawerEffect
--reveals a view as it slides up from its bottom boundary.
fxZoomOpenEffect
--expands the image of the view from a point in the
center until it fills the screen; that is, the entire view appears to grow from a
point in the center of the screen.

C H A P T E R 3
Views
3-24
About Views
fxZoomCloseEffect
--opposite of
fxZoomOpenEffect
. This value
shrinks the image of the view from a point in the center until it disappears or
closes on the screen.
fxZoomVerticalEffect
--the view expands out from a horizontal line in the
center of its bounds. The top half moves upward and lower half moves
downward.
A complete
viewEffect
specification might look like this:
fxVenetianBlindsEffect+fxSteps(6)+fxStepTime(8)
You can omit the
fxSteps
and
fxStepTime
constants and appropriate defaults
will be used, depending on the type of the effect.
Table 2-7 (page 2-86) in Newton Programmer's Reference lists the constants that
you can use in the
viewEffect
slot to create custom animation effects. You
combine these constants in different ways to create different effects. For example,
the predefined animation type
fxCheckerboardEffect
is defined as:
fxColumns(8)+fxRows(8)+fxColAltPhase+fxRowAltPhase+fxDown
It is difficult to envision what the different effects will look like in combination, so it
is best to experiment with various combinations until you achieve the effect you want.
Other Characteristics
3
Other view characteristics are controlled by the following slots:
viewFont
Specifies the font used in the view. This slot applies only to
views that hold text, that is, views of the class
clParagraphView
. For more information about how to
specify the font, see the section "Using Fonts for Text and
Ink Display" (page 8-17) in "Text and Ink Input and Display"
declareSelf
When the template is instantiated, a slot named with the
value of this slot is added to the view. Its value is a reference
to itself. For example, if you specify
declareSelf:'base
,
a slot named
base
is added to the view and its value is set to
a reference to itself. Note that this slot is not inherited by the
children of a view; it applies only to the view within which
it exists.
Inheritance Links
3
These slots describe the template's location in the inheritance chain, including
references to its proto, parent, and children. The following slots are not inherited
by children of the template.
_proto
Contains a reference to a proto template. This slot is created
when the view opens.

C H A P T E R 3
Views
About Views
3-25
_parent
Contains a reference to the parent template. This slot is
created when the view opens. Note that it's best to use the
Parent
function to access the parent view at run time, rather
than directly referencing the
_parent
slot.
stepChildren
Contains an array that holds references to each of the
template's child templates. This slot is created and set
automatically when you graphically create child views in
NTK. This slot is for children that you add to a template.
viewChildren
Contains an array that holds references to each of a system
proto's child templates. Because this slot is used by system
protos, you should never modify it or create a new one with
this name. If you do so, you may be inadvertently overriding
the children of a system proto. An exception to this rule
occurs for clEditView; you might want to edit the
viewChildren slot of a clEditView. See Table 2-1, "View
class constants," (page 2-2) in Newton Programmer's Guide
for details.
The reason for the dual child view slots is that the
viewChildren
slot is used by
the system protos to store their child templates. If you create a view derived from
one of the system protos and change the
viewChildren
slot (for example, to add
your own child templates programmatically), you would actually be creating a new
viewChildren
slot that would override the one in the proto, and the child
templates of the proto would be ignored.
The
stepChildren
slot has been provided instead as a place for you to put your
child templates, if you need to do so from within a method. By adding your
templates to this slot, the
viewChildren
slot of the proto is not overridden. Both
groups of child views are created when the parent view is instantiated.
If you are only creating views graphically using the Newton Toolkit palette, you don't
need to worry about these internal details. The Newton Toolkit always uses the
stepChildren
slot for you.
You may see either
viewChildren
,
stepChildren
, or both slots when you
examine a template at run time in the Newton Toolkit Inspector window. Child
templates can be listed in either slot, or both. When a view is instantiated, all the
child views from both of these two slots are also created. Note that the templates in
the
viewChildren
slot are instantiated first, followed by the templates in the
stepChildren
slot.
If you are adding child views in a method that will not be executed until run time,
you need to use the
stepChildren
slot to do this. If there isn't a
stepChildren
slot, create one and put your views there.

C H A P T E R 3
Views
3-26
About Views
IMPORTANT
Remember that the
viewChildren
and
stepChildren
arrays
contain templates, not views. If you try to send a message like
Hide
to one of the objects listed in this array, the system will
probably throw an exception because it is not a view.
During run time, if you want to obtain references to the child
views of a particular view, you must use the
ChildViewFrames
method. This method returns views from both the
viewChildren
and
stepChildren
slots. This method is
described in "Getting References to Views" (page 3-32).
Application-Defined Methods
3
As your application executes, it receives messages from the system that you can
choose to handle by providing methods that are named after the messages. These
messages give you a chance to perform your own processing as particular events
are occurring.
For example, with views, the system performs default initialization operations
when a view is instantiated. It also sends a view a
ViewSetupFormScript
message. If you provide a method to handle this message, you can perform your
own initialization operations in the method. However, handling system messages in
your application is optional.
The system usually performs its own actions to handle each event for which it
sends your view messages. Your system message-handling methods do not override
these system actions. You cannot change, delete, or substitute for the default system
event-handling actions. Your system message-handling methods augment the
system actions.
For example, when the view system receives a Show command for a view, it
displays the view. It also sends the view the
ViewShowScript
message. If you
have provided a
ViewShowScript
method, you can perform any special
processing that you need to do when the view is displayed.
The system sends messages to your application at specific times during its handling
of an event. Some messages are sent before the system does anything to respond to
the event, and some are sent after the system has already performed its actions. The
timing is explained in each of the message descriptions in "ApplicationDefined
Methods" (page 2-65) in the Newton Programmer's Reference.
View Instantiation
3
View instantiation refers to the act of creating a view from its template. The process
of view instantiation includes several steps and it is important to understand when
and in what order the steps occur.

C H A P T E R 3
Views
About Views
3-27
Declaring a View
3
Before diving into the discussion of view instantiation, it is important to understand
the term declaring. Declaring a view is something you do during the application
development process using the Newton Toolkit (NTK). Declaring a view allows it
to be accessed symbolically from another view.
In NTK, you declare a view using the Template Info command. (Although the
phrase "declaring a view" is being used here, at development time, you're really
just dealing with the view template.) In the Template Info dialog, you declare a
view by checking the box entitled "Declare To," and then choosing another view in
which to declare the selected view. The name you give your view must be a valid
symbol, and not a reserved word or the name of a system method.
You always declare a view in its parent or in some other view farther up the parent
chain. It's best, for efficiency and speed, to declare a view in the lowest level
possible in the view hierarchy; that is, in its parent view or as close to it as possible.
If you declare a view in a view other than the parent view, it may get the wrong
parent view. Because the view's parent is wrong, its coordinates will be wrong as
well, so it will show up at the wrong position on screen.
Declaring a view simply puts the declared view in the named slot. See Appendix A,
"The Inside Story on Declare," for a complete description. The slot name is the
name of the view you are declaring. The slot value, at run time, will hold a
reference to the declared view.
The base view of your application is always declared in the system root view. Note
that the application base view is declared in a slot named with its application symbol,
specified in the Application Symbol field of the Project Settings slip in NTK.
Why would you want to declare a view? When a view is declared in another view,
it can be accessed symbolically from that other view. The NewtonScript inheritance
rules already allow access from a view to its parent view, but there is no direct
access from a parent view to its child views, or between child views of a common
parent. Declaring a view provides this access.
For example, if you have two child views of a common parent, and they need to
send messages to each other, you need to declare each of them in the common
parent view. Or, if a parent view needs to send messages to one of its child views,
the child view must be declared in the parent view.
One key situation requiring a declared view is when you want to send the
Open
message to show a nonvisible view. The
Open
message can only be sent to a
declared view.
Declaring a view has a small amount of system overhead associated with it. This is
why the system doesn't just automatically declare every view you create. You
should only declare views that you need to access from other views.

C H A P T E R 3
Views
3-28
About Views
For a more detailed technical description of the inner workings of declaring a view,
see Appendix A, "The Inside Story on Declare."
Creating a View
3
A view is created in two stages. First, a view memory object (a frame) is created in
RAM. This view memory object contains a reference to its template, along with
other transient run-time information. In the following discussion, the phrase,
"creating the view" is used to describe just this part of the process. Second, the
graphic representation of the view is created and shown on the screen. In the
following discussion, the phrase, "showing the view" is used to describe just this
part of the process.
A view is created and shown at different times, depending on whether or not it is a
declared view.
If the view is declared in another open (shown) view, it is created when the view
in which it is declared is sent the
Open
message. For example, a child view
declared in the parent of its parent view is created when that "grandparent" view
is opened. Note, however, that the child view is not necessarily shown at the
same time it is created.
If the view is not declared in any view, it is created and also shown when its
immediate parent view is sent the
Open
message. (Note that if a nondeclared
view's
vVisible
flag is not set, that view can never be created.)
Here is the view creation sequence for a typical application installed in the Newton
Extras Drawer and declared in the system root view:
1. When your application is installed on the Newton device, its base view is
automatically created, but not shown.
2. When the user taps on the icon representing your application in the Extras
Drawer, the system sends the
ButtonToggleScript
message to the
application's base view.
3. When the application is launched from the Extras Drawer, a view is created (but
not shown yet) for each template declared in the base view. Slots with the names
of these views are created in the base view. These slots contain references to
their corresponding views.
4. The
ViewSetupFormScript
message is sent to the base view,
viewFlags
,
viewFormat
,
viewBounds
,
viewJustify
, and
declareSelf
slots, and so
on, are read from the view template. The global bounds of the view are adjusted
to reflect the effects of the
viewJustifyflags
, but the
viewBounds
values
are not changed, and the
ViewSetupChildrenScript
message is sent to
the base view.

C H A P T E R 3
Views
About Views
3-29
5. The
viewChildren
and
stepChildren
slots are read and the child views
are instantiated using this same process. As part of the process, the following
messages are sent to each child view, in this order:
ViewSetupFormScript
,
ViewSetupChildrenScript
, and
ViewSetupDoneScript
.
6. The
ViewSetupDoneScript
message is sent to the view.
7. The view is displayed if its
vVisible viewFlags
bit is set.
8. The
ViewShowScript
message is sent to the view and then the
ViewDrawScript
message is sent to the view. (Note that the
ViewShowScript
message is not sent to any child views, however.)
9. Each of the child views is drawn, in hierarchical order, and the
ViewDrawScript
message is sent to each of these views, immediately
after it is drawn.
As you can see from step 5, when a view is opened, all child views in the hierarchy
under it are also shown (as long as they are flagged as visible). A nonvisible child
view can be subsequently shown by sending it the
Open
message--as long as it
has been declared.
Closing a View
3
When you send a view the
Close
message, the graphic representation of the view
(and of all of its child views) is destroyed, but the view memory object is not
necessarily destroyed. There are two possibilities:
If the view was declared, and the view in which it was declared is still open, the
frame is preserved. You can send the view another
Open
or
Toggle
message to
reopen it at a later time.
A view memory object is finally destroyed when the view in which it was
declared is closed. That is, when a view is closed, all views declared in it are
made available for garbage collection.
If the view being closed was not declared, both its graphic representation and its
view memory object are made available for garbage collection when it is closed.
When a view is closed, the following steps occur:
1. If the view is closing because it was directly sent the
Close
or
Toggle
message, the system sends it the
ViewHideScript
message. (If the view
is closing because it is a child of a view being closed directly, the
ViewHideScript
message is not sent to it.)
2. The graphic representation of the view is removed from the screen.
3. The view is sent the
ViewQuitScript
message.
The view itself may or may not be marked for garbage collection, depending on
whether or not it was declared.

C H A P T E R 3
Views
3-30
About Views
View Compatibility
3
The following new functionality has been added for the 2.0 release of Newton
System Software. See the Newton Programmer's Reference for complete
descriptions on each new function and method.
New Drag and Drop API
3
A drag and drop API has been added. This API now lets users drag a view, or part
of a view, and drop it into another view. See "Dragging and Dropping with Views"
(page 3-40) for details.
New Functions and Methods
3
The following functions and methods have been added.
AsyncConfirm
creates and displays a slip that the user must dismiss before
continuing.
ButtonToggleScript
lets the application perform special handling when its
icon is tapped in the Extras Drawer.
DirtyBox
marks a portion of a view (or views) as needing redrawing.
GetDrawBox
returns the bounds of the area on the screen that needs redrawing.
GlobalOuterBox
returns the rectangle, in global coordinates, of the specified
view, including any frame that is drawn around the view.
ModalConfirm
creates and displays a slip.
MoveBehind
moves a view behind another view, redrawing the screen as
appropriate.
StdButtonWidth
returns the size that a button needs to be in order to fit some
specified text.
New Messages
3
The following messages have been added.
ReorientToScreen
is sent to each child of the root view when the screen
orientation is changed.
ViewPostQuitScript
is sent to a view following the
ViewQuitScript
message and after all of the view's child views have been destroyed.

C H A P T E R 3
Views
About Views
3-31
New Alignment Flags
3
The
viewJustify
slot contains new constants that allow you to specify that a
view is sized proportionally to its sibling or parent view, both horizontally and/or
vertically.
A change to the way existing
viewJustify
constants work is that when you are
using sibling-relative alignment, the first sibling uses the parent alignment settings
(since it has no sibling to which to justify itself).
Changes to Existing Functions and Methods
3
The following changes have been made to existing functions and methods for 2.0.
RemoveStepView
. This function now removes the view template from the
stepChildren
array of the parent view. You do not need to remove the
template yourself.
SetValue
. You can now use this global function to change the recognition
behavior of a view at run time by setting new recognition flags in the
viewFlags
slot. The new recognition behavior takes effect immediately
following the
SetValue
call.
GlobalBox
. This method now works properly when called from the
ViewSetupFormScript
method of a view. If called from the
ViewSetupFormScript
method,
GlobalBox
gets the
viewBounds
and
ViewJustify
slots from the view, calculates the effects of the sibling and
parent alignment on the view bounds, and then returns the resulting bounds
frame in global coordinates.
LocalBox
. This method now works properly when called from
the
ViewSetupFormScript
method of a view. If called from the
ViewSetupFormScript
method,
LocalBox
gets the
viewBounds
and
ViewJustify
slots from the view, calculates the effects of the sibling and
parent alignment on the view bounds, and then returns the resulting bounds
frame in local coordinates.
ViewQuitScript
. When this message is sent to a view, it propagates down to
child views of that view. In system software version 1.0, the order in which child
views received this message and were closed was undefined.
In system software version 2.0, the order in which this message is sent to
child views is top-down. Also, each view has the option of having
ViewPostQuitScript
called in child-first order. The return value of
the
ViewQuitScript
method determines whether or not the
ViewPostQuitScript
message is sent.

C H A P T E R 3
Views
3-32
Using Views
New Warning Messages
3
Warning messages are now printed to the inspector when a NewtonScript
application calls a view method in situations where the requested operation is
unwise, unnecessary, ambiguous, invalid, or just a bad idea.
Obsolete Functions and Methods
3
The following functions and methods are obsolete with version 2.0 of the Newton
System Software:
Confirm
, which created and displayed an OK/Cancel slip. Use
AsyncConfirm
instead.
DeferredConfirmedCall
and
DeferredConfirmedSend
have both been
replaced by
AsyncConfirm
.
Using Views
3
This section describes how to use the view functions and methods to perform
specific tasks. See "Summary of Views" (page 3-47) for descriptions of the
functions and methods discussed in this section.
Getting References to Views
3
Frequently, when performing view operations, you need access to the child or
parent views of a view, or to the root view in the system. You need to use the
ChildViewFrames
and
Parent
methods as well as the
GetRoot
and
GetView
functions to return references to these "related" views.
To test whether an application is open or not, for example, you can use the
GetRoot
function and the application's signature, together with the global
function
kViewIsOpenFunc
:
call kViewIsOpenFunc with (GetRoot().appsignature)
The
ChildViewFrames
method is an important method you must use if you need
access to the child views of a view. It returns the views in the same order in which
they appear in the view hierarchy, from back to front. The most recently opened
views (which appear on top of the hierarchy) will appear later in the list. Views
with the
vFloating
flag (which always appear above nonfloating views) will be
at the end of the array.

C H A P T E R 3
Views
Using Views
3-33
Displaying, Hiding, and Redrawing Views
3
To display a view (and its visible child views), send it one of the following
view messages:
Open
--to open the view
Toggle
--to open or close the view
Show
--to show the view if it had previously been opened, then hidden
To hide a view (and its child views), send it one of the following view messages:
Close
--to hide and possibly delete it from memory
Toggle
--to close or open the view
Hide
--to hide it temporarily
You can cause a view (and its child views) to be redrawn by using one of the
following view messages or global functions:
Dirty
--flags the view as "dirty" so it is redrawn during the next system
idle loop
RefreshViews
--redraws all dirty views immediately
SetValue
--sets the value of a slot and possibly dirties the view
SyncView
--redraws the view if its bounds have changed
Dynamically Adding Views
3
Creating a view dynamically (that is, at run time) is a complex issue that has
multiple solutions. Depending on what you really need to do, you can use one of
the following solutions:
Don't create the view dynamically because it's easier to accomplish what you
want by creating an invisible view and opening it later.
Create the view by adding a new template to its parent view's
stepChildren
array in the
ViewSetupChildrenScript
method.
Create the template and the view at run time by using the
AddStepView
function.
Create the template and the view at run time by using the
BuildContext
function.
If you want a pop-up list view, called a picker, use the
PopupMenu
function to
create and manage the view.
These techniques are discussed in the following sections. The first four techniques
are listed in order from easiest to most complex (and error prone). You should use
the easiest solution that accomplishes what you want. The last technique, for
creating a picker view, should be used if you want that kind of view.

C H A P T E R 3
Views
3-34
Using Views
Showing a Hidden View
3
In many cases, you might think that you need to create a view dynamically. However,
if the template can be defined at compile time, it's easier to do that and flag the
view as not visible. At the appropriate time, send it the
Open
message to show it.
The typical example of this is a slip, which you can usually define at compile time.
Using the Newton Toolkit (NTK), simply do not check the
vVisible
flag in the
viewFlags
slot of the view template. This will keep the view hidden when the
application is opened.
Also, it is important to declare this view in your application base view. For
information on declaring a view, see the section "View Instantiation" (page 3-26).
When you need to display the view, send it the
Open
message using the name
under which you have declared it (for example,
myView:Open()
).
This solution even works in cases where some template slots cannot be set until run
time. You can dynamically set slot values during view instantiation in any of the
following view methods:
ViewSetupFormScript
,
ViewSetupChildrenScript
, and
ViewSetupDoneScript
. You can also set
values in a declared view before sending it the
Open
message.
Adding to the stepChildren Array
3
If it is not possible to define the template for a view at compile time, the next best
solution is to create the template (either at compile time or run time) and add it to
the
stepChildren
array of the parent view using the
ViewSetupChildrenScript
method. This way, the view system takes care of
creating the view at the appropriate time (when the child views are shown).
For example, if you want to dynamically create a child view, you first define the
view template as a frame. Then, in the
ViewSetupChildrenScript
method of
its parent view, you add this frame to the
stepChildren
array of the parent view.
To ensure that the
stepChildren
array is in RAM, use this code:
if not HasSlot(self, 'stepChildren) then
self.stepChildren := Clone(self.stepChildren);
AddArraySlot(self.stepChildren,
myDynamicTemplate
);
The
if
statement checks whether the
stepChildren
slot already exists in the
current view (in RAM). If it does not, it is copied out of the template (in ROM)
into RAM. Then the new template is appended to the array.
All of this takes place in the
ViewSetupChildrenScript
method of the parent
view, which is before the
stepChildren
array is read and the child views are
created.
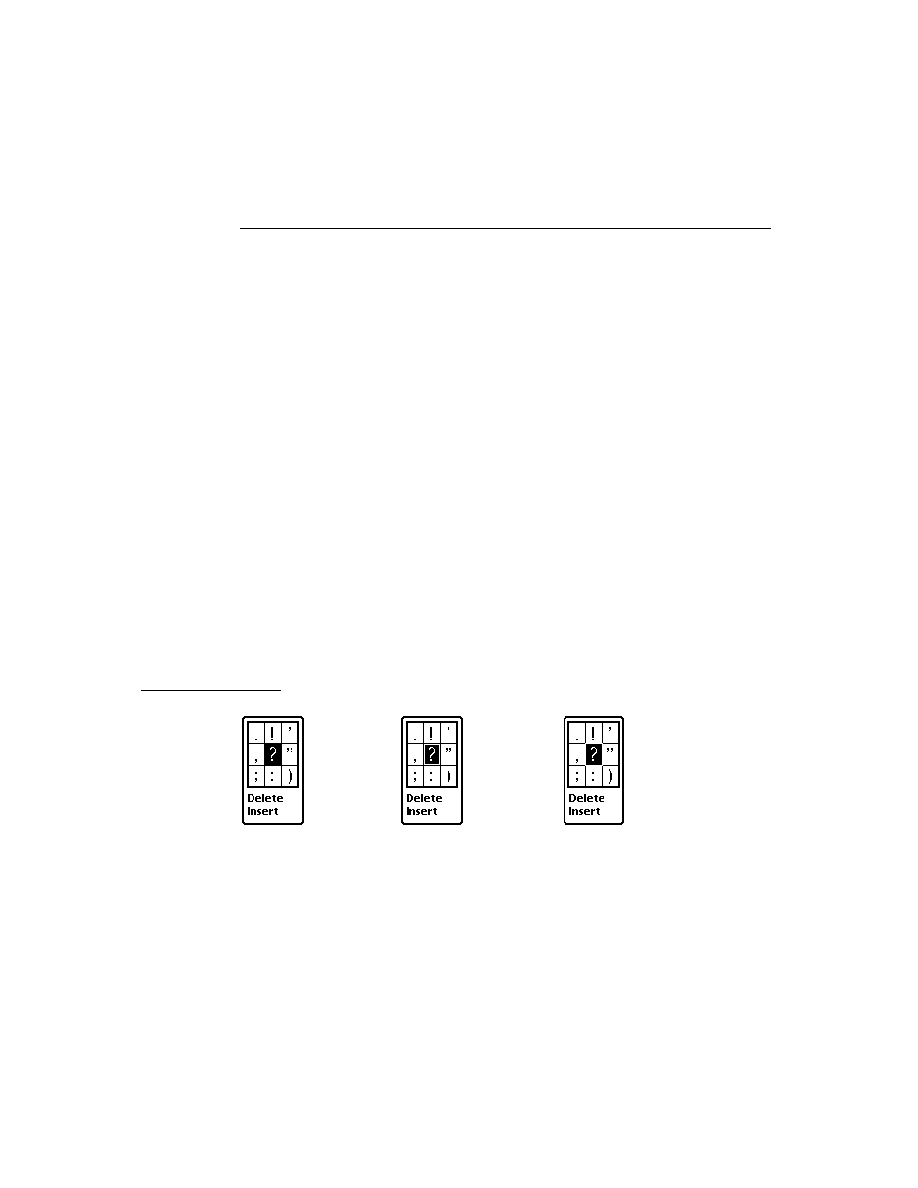
C H A P T E R 3
Views
Using Views
3-35
If at some point after the child views have been created you want to modify the
contents of the
stepChildren
array and build new child views from it, you can
use the
RedoChildren
view method. First, make any changes you desire to the
stepChildren
array, then send your view the
RedoChildren
message. All of
the view's current children will be closed and removed. A new set of child views
will then be recreated from the
stepChildren
array.
Also, note that reordering the
stepChildren
array and then calling
RedoChildren
or
MoveBehind
is the way to reorder the child views of a
view dynamically.
For details on an easy way to create a template dynamically, see "Creating
Templates" (page 3-36).
Using the AddStepView Function
3
If you need to create a template and add a view yourself at run time, use the
function
AddStepView
. This function takes two parameters: the parent view to
which you want to add a view, and the template for the view you want to create.
The function returns a reference to the view it creates. Be sure to save this return
value so you can access the view later.
The
AddStepView
function also adds the template to the parent's
stepChildren
array. This means that the
stepChildren
array needs to be
modifiable, or
AddStepView
will fail. See the code in the previous section for an
example of how to ensure that the
stepChildren
array is modifiable.
The
AddStepView
function doesn't force a redraw when the view is created, so
you must take one of the following actions yourself:
Send the new view a
Dirty
message.
Send the new view's parent view a
Dirty
message. This is useful if you're
using
AddStepView
to create several views and you want to show them all at
the same time.
If you created the view template with the
vVisible
bit cleared, the new view
will remain hidden and you must send it the
Show
message to make it visible.
This technique is useful if you want the view to appear with an animation effect
(specified in the
viewEffect
slot in the template).
Do not use the
AddStepView
function in a
ViewSetupFormScript
method or
a
ViewSetupChildrenScript
method--it won't work because that's too early
in the view creation process of the parent for child views to be created. If you are
tempted to do this, you should instead use the second method of dynamic view
creation, in which you add your template to the
stepChildren
array and let the
view system create the view for you.

C H A P T E R 3
Views
3-36
Using Views
To remove a view created by
AddStepView
, use the
RemoveStepView
function.
This function takes two parameters: the parent view from which you want to
remove the child view, and the view (not its template) that you want to remove.
For details on an easy way to create a template dynamically, see "Creating
Templates" (page 3-36).
Using the BuildContext Function
3
Another function that is occasionally useful is
BuildContext
. It takes one
parameter, a template. It makes a view from the template and returns it. The view's
parent is the root view. The template is not added to any
viewChildren
or
stepChildren
array. Basically, you get a free-agent view.
Normally, you won't need to use
BuildContext
. It's useful when you need to
create a view from code that isn't part of an application (that is, there's no base
view to use as a parent). For instance, if your
InstallScript
or
RemoveScript
needs to prompt the user with a slip, you use
BuildContext
to
create the slip.
BuildContext
is also useful for creating a view, such as a slip, that is larger than
your application base view.
For details on an easy way to create a template dynamically, see the next section,
"Creating Templates"
Creating Templates
3
The three immediately preceding techniques require you to create templates. You
can do this using NewtonScript to define a frame, but then you have to remember
which slots to include and what kinds of values they can have. It's easy to make
a mistake.
A simple way of creating a template is to make a user proto in NTK and then use it
as a template. That allows you to take advantage of the slot editors in NTK.
If there are slots whose values you can't compute ahead of time, it doesn't matter.
Leave them out of the user proto, and then at run time, create a frame with those
slots set properly and include a
_proto
slot pointing to the user proto. A typical
example might be needing to compute the bounds of a view at run time. If you
defined all the static slots in a user proto in the file called
dynoTemplate
, you
could create the template you need using code like this:
template := {viewBounds: RelBounds(x, y, width, height),
_proto: GetLayout("DynoTemplate"),
}
This really shows off the advantage of a prototype-based object system. You create
a small object "on the fly" and the system uses inheritance to get the rest of the

C H A P T E R 3
Views
Using Views
3-37
needed values. Your template is only a two-slot object in RAM. The user proto
resides in the package with the rest of your application. The conventional, RAM-
wasting alternative would have been:
template := Clone(PT_dynoTemplate);
template.viewBounds := RelBounds(x, y, width, height);
Note that for creating views arranged in a table, there is a function called
LayoutTable
that calculates all the bounds. It returns an array of templates.
Making a Picker View
3
To create a transient pop-up list view, or picker, you can use the function
PopupMenu
. This kind of view pops up on the screen and is a list from which the
user can make a choice by tapping it. As soon as the user chooses an item, the
picker view is closed.
You can also create a picker view by defining a template using the
protoPicker
view proto. See "Pickers, Pop-up Views, and Overviews" (page 6-1) for
information on
protoPicker
and
PopupMenu
.
Changing the Values in viewFormat
3
You can change the values in the
viewFormat
slot of a view without closing and
reopening a view. Use the
SetValue
function to update the view with new
settings. For example:
SetValue(myView, `viewFormat, 337)
// 337 = vfFillWhite + vfFrameBlack+vfPen(1)
SetValue
, among other things, calls
Dirty
if necessary, so you don't need to
call it to do a task that the view system already knows about, such as changing
viewBounds
or text slots in a view.
Determining Which View Item Is Selected
3
To determine which view item is selected in a view call
GetHiliteOffsets
.
You must call this function in combination with the
HiliteOwner
function.
When you call
GetHiliteOffsets
, it returns an array of arrays. Each item in
the outer array represents selected subviews, as in the following example:
x:= gethiliteoffsets()
#440CA69 [[{#4414991}, 0, 2],
[{#4417B01}, 0, 5],
[{#4418029}, 1, 3]}

C H A P T E R 3
Views
3-38
Using Views
Each of the three return values contains three elements:
Element 0: the subview that is highlighted. This subview is usually
a
clParagraphView
, but you need to check to make sure. A
clPolygonView
is not returned here even if
HiliteOwner
returns a
clEditView
when a
clPolygonView
child is highlighted.
Element 1: the start position of the text found in the text slot of a
clParagraphView
.
Element 2: the end position of the text found in the text slot of a
clParagraphView
.
To verify that your view is a
clParagraphView
, check the
viewClass
slot of
the view. The value returned (dynamically) sometimes has a high bit set so you
need to take it into consideration using a mask constant,
vcClassMask
:
theviews.viewClass=clParagraphView OR
theView.viewClass - vcClassMask=clParagraphView
BAnd(thViews.viewClass, BNot(vcClassMask))=clParagraphView
If a graphic is highlighted and
HiliteOwner
returns a
clEditView
, check its
view children for non-
nil
values of the '
hilites
slot (the '
hilites
slot is for
use in any view but its contents are private).
Complex View Effects
3
If you have an application that uses
ViewQuitScript
in numerous places, your
view may close immediately, but to the user the Newton may appear to be hung
during the long calculations. A way to avoid this is to have the view appear open
until the close completes.
You can accomplish this effect in one of two ways. First, put your code in
ViewHideScript
instead of
ViewCloseScript
. Second, remove the view's
ViewEffect
and manually force the effect at the end of
ViewQuitScript
using the
Effect
method.
Making Modal Views
3
A modal view is one that primarily restricts the user to interacting with that view.
All taps outside the modal view are ignored while the modal view is open.
In the interest of good user interface design, you should avoid using modal views
unless they are absolutely necessary. However, there are occasions when you may
need one.

C H A P T E R 3
Views
Using Views
3-39
Typically, modal views are used for slips. For example, if the user was going to
delete some data in your application, you might want to display a slip asking them
to confirm or cancel the operation. The slip would prevent them from going to
another operation until they provide an answer.
Use
AsyncConfirm
to create and display a slip that the user must dismiss before
continuing. The slip is created at a deferred time, so the call to
AsyncConfirm
returns immediately, allowing the currently executing NewtonScript code to finish.
You can also use
ModalConfirm
but this method causes a separate OS task to be
created and doesn't return until after the slip is closed. It is less efficient and takes
more system overhead.
Once you've created a modal view, you can use the
FilterDialog
or
ModalDialog
to open it. Using
FilterDialog
is the preferred method as it
returns immediately. As with
ModalConfirm
,
ModalDialog
causes a separate
OS task to be created.
Finding the Bounds of Views
3
The following functions and view methods calculate and return a
viewBounds
frame.
Run-time functions:
RelBounds
-- calculates the right and bottom values of a view and returns a
bounds frame.
SetBounds
--returns a frame when the left, top, right, and bottom coordinates
are given.
GlobalBox
--returns the rectangle, in coordinates, of a specified view.
GlobalOuterBox
--returns the rectangle, in coordinates, of a specified view
including any frame that is drawn around a view.
LocalBox
--returns a frame containing the view bounds relative to the view itself.
MoveBehind
-- moves a view behind another view.
DirtyBox
-- marks a portion of a view as needing redrawing.
GetDrawBox
-- returns the bounds of an area on the screen that needs redrawing.
Compile-time functions:
ButtonBounds
--returns a frame when supplied with the width of a button to
be placed in the status bar.
PictBounds
-- finds the width and height of a picture and returns the proper
bounds frame.

C H A P T E R 3
Views
3-40
Using Views
Animating Views
3
There are four view methods that perform special animation effects on views. They
are summarized here:
Effect
--performs any animation that can be specified in the
viewEffect
slot.
SlideEffect
--slides a whole view or its contents up or down.
RevealEffect
--slides part of a view up or down.
Delete
--crumples a view and tosses it into a trash can.
Note that these animation methods only move bits around on the screen. They do
not change the actual bounds of a view, or do anything to a view that would change
its contents. When you use any of these methods, you are responsible for supplying
another method that actually changes the view bounds or contents. Your method is
called just before the animation occurs.
Dragging a View
3
Dragging a view means allowing the user to move the view by tapping on it,
holding the pen down, and dragging it to a new location on the screen. To drag a
view, send the view a
Drag
message.
Dragging and Dropping with Views
3
Dragging and dropping a view means allowing a user to drag an item and drop it
into another view.
To enable dragging and dropping capability, you must first create a frame that
contains slots that specify how the drop will behave. For example, you specify the
types of objects that can be dropped into a view, if any. Examples include
'text
or
'picture
. See the dragInfo parameter to the
DragAndDrop
method
(page 2-46) in the Newton Programmer's Reference for a complete description
of the slots.
You must set up code to handle a drag and drop in one of two ways: either add
code to create a frame and code to call
DragAndDrop
's view method in each
source and destination view that accepts a drag and drop message, or you can
create a proto and use it as a template for each view.
Each view must also have the following methods. The system calls these methods
in the order listed.
ViewGetDropTypesScript
-- is sent to the destination view. It is called
repeatedly while the pen is down.
ViewGetDropTypesScript
is passed the
current location as the dragged item is moved from its source location to its
destination location. An array of object types is also returned. In this method,
you must return an array of object types that can be accepted by that location.

C H A P T E R 3
Views
Using Views
3-41
GetDropDataScript
-- is sent to the source view when the destination view
is found.
ViewDropScript
-- is sent to the destination view. You must add the object to
the destination view.
ViewDropMoveScript
-- is sent to the source view. It is used when dragging
an object within the same view.
ViewDropRemoveScript
and
ViewDropScript
are not called in this case.
ViewDropRemoveScript
-- is sent to the source view. It is used when
dragging an object from one view to another. You must delete the original from
the source view when the drag completes.
Additional optional methods can also be added. If you do not include these, the
default behavior occurs.
ViewDrawDragDataScript
-- is sent to the source view. It draws the image
that will be dragged. If you don't specify an image, the area inside the rectangle
specified by the
DragAndDrop
bounds parameter is used.
ViewDrawDragBackgroundScript
-- is sent to the source view. It draws
the image that will appear behind the dragged image.
ViewFindTargetScript
-- is sent to the destination view. It lets the
destination view change the drop point to a different view.
ViewDragFeedbackScript
-- is sent to the destination view. It provides
visual feedback while items are dragged.
ViewDropDoneScript
-- is sent to the destination view to tell it that the
object has been dropped.
Scrolling View Contents
3
There are different methods of scrolling a view, supported by view methods you
call to do the work. Both methods described here operate on the child views of the
view to which you send a scroll message.
One method is used to scroll all the children of a view any incremental amount in
any direction, within the parent view. Use the
SetOrigin
method to perform this
kind of scrolling. This method changes the view origin by setting the values of the
viewOriginX
and
viewOriginY
slots in the view.
Another kind of scrolling is used for a situation in which there is a parent view
containing a number of child views positioned vertically, one below the other. The
SyncScroll
method provides the ability to scroll the child views up or down the
height of one of the views. This is the kind of scrolling you see on the built-in
Notepad application.

C H A P T E R 3
Views
3-42
Using Views
In the latter kind of scrolling, the child views are moved within the parent view by
changing their view bounds. Newly visible views will be opened for the first time,
and views which have scrolled completely out-of-view will be closed. The
viewOriginX and viewOriginY slots are not used.
For information about techniques you can use to optimize scrolling so that it
happens as fast as possible, see "Scrolling" (page 3-46), and "Optimizing View
Performance" (page 3-44).
Redirecting Scrolling Messages
3
You can redirect scrolling messages from the base view to another view. Scrolling
and overview messages are sent to the frontmost view; this is the same view that is
returned if you call
GetView('viewFrontMost)
.
The
viewFrontMost
view is found by looking recursively at views that have
both the
vVisible
and
vApplication
bits set in their
viewFlags
. This
means that you can set the
vApplication
bit in a descendant of your base view,
and as long as
vApplication
is set in all of the views in the parent chain for that
view, the scrolling messages will go directly to that view. The
vApplication
bit
is not just for base views, despite what the name might suggest.
If your situation is more complex, where the view that needs to be scrolled cannot
have
vApplication
set or is not a descendant of your base view, you can have the
base view's scrolling scripts call the appropriate scripts in the view you wish scrolled.
Working With View Highlighting
3
A highlighted view is identified visually by being inverted. That is, black and white
are reversed.
To highlight or unhighlight a view, send the view the
Hilite
message.
To highlight or unhighlight a single view from a group, send the view the
HiliteUnique
message. (The group is defined as all of the child views of one
parent view.)
To highlight a view when the current pen position is within it, send the view the
TrackHilite
message. The view is unhighlighted when the pen moves outside
the view bounds. If the view is a button, you can send the view the
TrackButton
message to accomplish the same task.
To get the view containing highlighted data, you can call the global function
HiliteOwner
; to get the highlighted text use
GetHiliteOffsets
.
To highlight some or all of the text in a paragraph, you can use the
SetHilite
method.

C H A P T E R 3
Views
Using Views
3-43
To determine if a given view is highlighted, check the
vSelected
bit in the
viewFlags
.
vSelected
should not be set by your application, but you can test it
to see if a view is currently selected (that is, highlighted.) If
BAND(viewflags,vSelected) <> 0
is non-
nil
, the view is selected.
Creating View Dependencies
3
You can make one view dependent upon another by using the global function
TieViews
. The dependent view is notified whenever the view it is dependent
on changes.
This dependency relationship is set up outside the normal inheritance hierarchy.
That is, the views don't have to be related to each other in any particular way in the
hierarchy. The views must be able to access each other, and so need references to
each other. Declaring them to a common parent view is one way to accomplish this.
View Synchronization
3
View synchronization refers to the process of synchronizing the graphic representa-
tion of the view with its internal data description. You need to do this when you
add, delete, or modify the children of a view, in order to update the screen.
Typically you would add or remove elements from the
stepChildren
array of a
parent view, and then call one of the view synchronization functions to cause the
child views to be redrawn, created, or closed, as appropriate. Remember that if you
need to modify the
stepChildren
array of a view, the array must be copied into
RAM; you can't modify the array in the view template, since that is usually stored
in ROM or in a package. To ensure that the
stepChildren
array is in RAM, use
this code:
if not HasSlot(self, 'stepChildren) then
self.stepChildren := Clone(self.stepChildren);
To redraw all the child views of a view, you can send two different messages to a
view:
RedoChildren
or
SyncChildren
. These work similarly, except that
RedoChildren
closes and reopens all child views, while
SyncChildren
only
closes obsolete child views and opens new child views.
Laying Out Multiple Child Views
3
Two different methods are provided to help lay out a view that is a table or consists
of some other group of child views.
To lay out a view containing a table in which each cell is a child view, send the
view the message
LayoutTable
.

C H A P T E R 3
Views
3-44
Using Views
To lay out a view containing a vertical column of child views, send the view the
message
LayoutColumn
.
Optimizing View Performance
3
Drawing, updating, scrolling, and performing other view operations can account
for a significant amount of time used during the execution of your application.
Here are some techniques that can help speed up the view performance of your
application.
Using Drawing Functions
3
Use the drawing functions to draw lines, rectangles, polygons, and even text in a
single view, rather than creating these objects as several separate specialized views.
This technique increases drawing performance and reduces the system overhead
used for each view you create. The drawing functions are described in "Drawing
and Graphics" (page 13-1)
View Fill
3
Many views need no fill color, so you may be inclined to set the fill color to "none"
when you create such a view. However, it's best to fill the view with white, if it
may be individually dirtied and you don't need a transparent view. This increases
the performance of your application because when the system is redrawing the
screen, it doesn't have to update views behind those filled with a solid color such as
white. However, don't fill all views with white, since there is some small overhead
associated with fills; use this technique only if the view is one that is usually dirtied.
Redrawing Views
3
A view is flagged as dirty (needing redrawing) if you send it the
Dirty
message,
or as a result of some other operation, such as calling the
SetValue
function for a
view. All dirty views are redrawn the next time the system event loop executes.
Often this redrawing speed is sufficient since the system event loop usually
executes several times a second (unless a lengthy or slow method is executing).
However, sometimes you want to be able to redraw a view immediately. The fastest
way to update a single view immediately is to send it the
Dirty
message and then
call the global function
RefreshViews
. In most cases, only the view you dirtied
will be redrawn.
If you call
RefreshViews
and there are multiple dirty views, performance can be
significantly slower, depending on where the dirty views are on the screen and how
many other views are between them. In this case, what is redrawn is the rectangle
that is the union of all the dirty views (which might include many other nondirty

C H A P T E R 3
Views
Using Views
3-45
views). Also, if there are multiple dirty views that are in different view hierarchies,
their closest common ancestor view is redrawn, potentially causing many other
views to be redrawn needlessly.
If you want to dirty and redraw more than one view at a time, it may be faster to
send the
Dirty
message to the first view, then call
RefreshViews
, send the
Dirty
message to the second view, then call
RefreshViews
, and so on, rather
than just calling
RefreshViews
once after all views are dirtied. The performance
is highly dependent on the number of views visible on the screen, the location of
the dirty views, and their positions in the view hierarchy, so it's best to experiment
to find the solution that gives you the best performance.
Memory Usage
3
Each view that you create has a certain amount of system overhead associated with
it. This overhead exists in the form of frame objects allocated in a reserved area of
system memory called the NewtonScript heap. The amount of space that a frame
occupies is entirely dependent on the complexity and content of the view to which
it corresponds. As more and more views are created, more of the NewtonScript
heap is used, and overall system performance may begin to suffer as a result.
This is not usually an issue with relatively simple applications. However, complex
applications that have dozens of views open simultaneously may cause the system
to slow down. If your application fits this description, try to combine and eliminate
views wherever possible. Try to design your application so that it has as few views
as possible open at once. This can increase system performance.
You should also be aware of some important information regarding hidden and
closed views and the use of memory. This information applies to any view that is
hidden, it has been sent the
Hide
message, or to any declared view that is closed
but where the view it is declared in is still open. In these cases, the view memory
object for the view still exists, even though the view is not visible on the screen. If
the hidden or closed view contains large data objects, these objects continue to
occupy space in the NewtonScript heap.
You can reduce memory usage in the NewtonScript heap by setting to
nil
those
slots that contain large objects and that you don't need when the view is hidden or
closed. You can do this in the
ViewHideScript
or
ViewQuitScript
methods,
and then reload these slots with data when the view is shown or opened again,
using the
ViewShowScript
or
ViewSetupFormScript
methods. Again, the
performance impact of these techniques is highly application-dependent and you
should experiment to see what works best.
Note that this information applies to the base view of your application, since it is
automatically declared in the system root view. As long as it is installed in the
Newton, slots that you set in the base view of your application will continue to
exist, even after the application is closed. If you store large data objects in the base

C H A P T E R 3
Views
3-46
Using Views
view of your application, you should set to
nil
those slots that aren't needed when
the application is closed, since they are wasting space in the NewtonScript heap. It
is especially important to set to
nil
slots that reference soups and cursors, if they
are not needed, since they use relatively much space.
If your application is gathering data from the user that needs to be stored, store the
data in a soup, rather than in slots in one of the application views. Data stored in
soups is protected, while slots in views are transient and will be lost during a
system restart.
For information on declaring views, see "View Instantiation" (page 3-26). For
information on storing data in soups, see Chapter 11, "Data Storage and Retrieval."
Scrolling
3
Scrolling the contents of a view can sometimes seem slow. Here are some techniques
you can use to improve the speed:
Scroll multiple lines at a time, rather than just a single line at a time, when the
user taps a scroll arrow.
In general, reduce the number of child views that need to be redrawn, if
possible. For example, make a list that is implemented as several paragraphs
(separate views) into a single paragraph.
Set the view fill to white. For more information, see "View Fill" (page 3-44).

C H A P T E R 3
Views
Summary of Views
3-47
Summary of Views
3
Constants
3
Class Constants
viewFlags Constants
Constant
Value
clView
74
clPictureView
76
clEditView
77
clKeyboardView
79
clMonthView
80
clParagraphView
81
clPolygonView
82
clRemoteView
88
clPickView
91
clGaugeView
92
clOutline
105
Constant
Value
vNoFlags
0
vVisible
1
vReadOnly
2
vApplication
4
vCalculateBounds
8
vClipping
32
vFloating
64
vWriteProtected
128
vClickable
512
vNoScripts
134217728
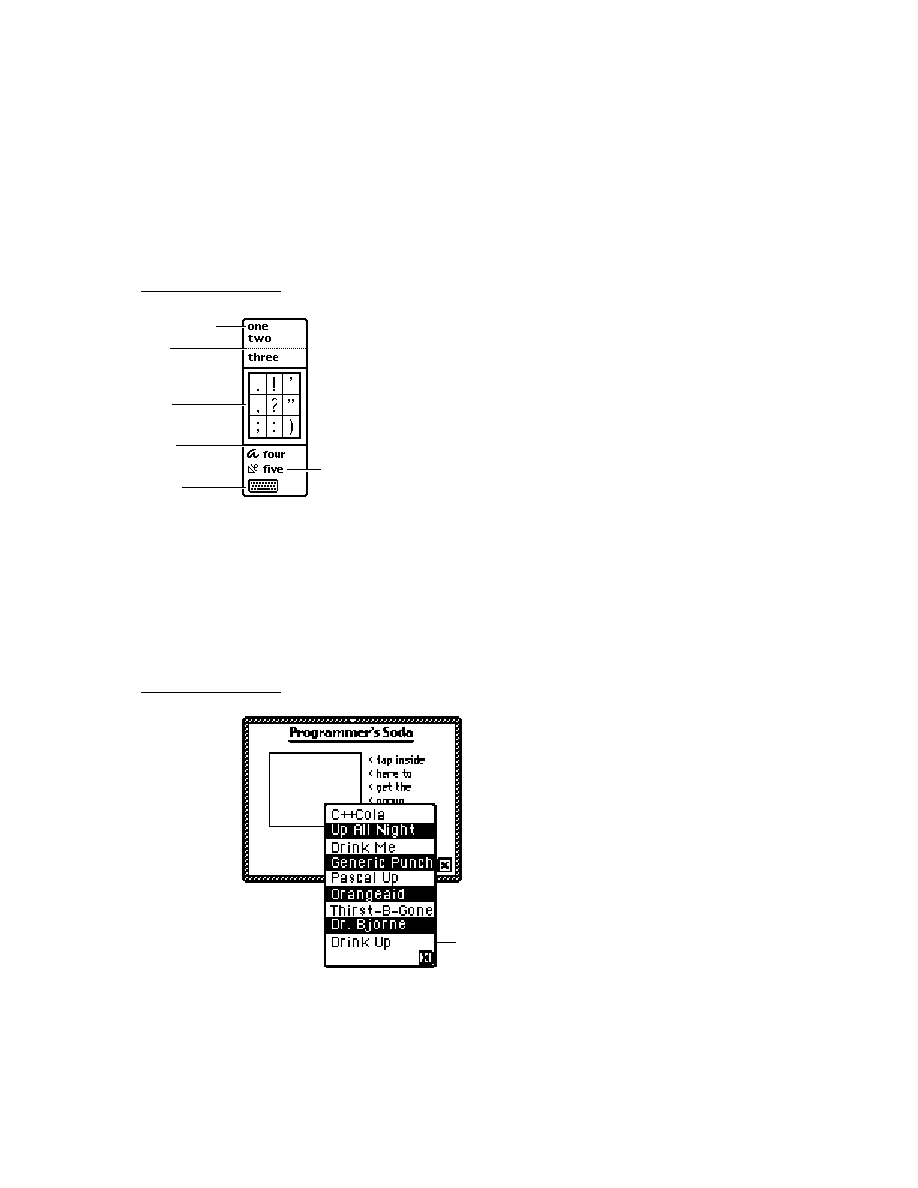
C H A P T E R 3
Views
3-48
Summary of Views
viewFormat Constants
Constant
Value
vfNone
0
vfFillWhite
1
vfFillLtGray
2
vfFillGray
3
vfFillDkGray
4
vfFillBlack
5
vfFillCustom
14
vfFrameWhite
16
vfFrameLtGray
32
vfFrameGray
48
vfFrameDkGray
64
vfFrameBlack
80
vfFrameDragger
208
vfFrameCustom
224
vfFrameMatte
240
vfPen(
pixels
)
pixels
256
vfLinesWhite
4096
vfLinesLtGray
8192
vfLinesGray
12288
vfLinesDkGray
16384
vfLinesBlack
20480
vfInset(
pixels
)
pixels
65536
vfLinesCustom
57344
vfShadow(
pixels
)
pixels
262144
vfRound(
pixels
)
pixels
16777216

C H A P T E R 3
Views
Summary of Views
3-49
viewTransferMode Constants
viewEffect Constants
Constant
Value
modeCopy
0
modeOr
1
modeXor
2
modeBic
3
modeNotCopy
4
modeNotOr
5
modeNotXor
6
modeNotBic
7
modeMask
8
Constant
Bit Flag
Integer Value
fxColumns(
x
)
((x-1) << fxColumnsShift)
x
-1
fxRows(
x
)
((x-1) << fxRowsShift)
(x-1)*32
fxHStartPhase
(1 << fxHStartPhaseShift)
1024
fxVStartPhase
(1 << fxVStartPhaseShift)
2048
fxColAltHPhase
(1 << fxColAltHPhaseShift)
4096
fxColAltVPhase
(1 << fxColAltVPhaseShift)
8192
fxRowAltHPhase
(1 << fxRowAltHPhaseShift)
16384
fxRowAltVPhase
(1 << fxRowAltVPhaseShift)
32768
fxMoveH
(1 << fxMoveHShift)
65536
fxRight
fxMoveH
65536
fxLeft
fxHStartPhase+fxMoveH
66560
fxUp
fxVStartPhase+fxMoveV
133120
fxDown
fxMoveV
131072
fxMoveV
(1 << fxMoveVShift)
131072
fxVenetianBlindsEffect
fxRows(8)+fxDown
131296
fxDrawerEffect
fxUp
133120
continued

C H A P T E R 3
Views
3-50
Summary of Views
fxCheckerboardEffect
fxColumns(8)+fxRows(8)+fxColAltVPhase+
fxRowAltHPhase+fxDown
155879
fxZoomVerticalEffect
fxColumns(1)+fxRows(2)+fxUp+
fxRowAltVPhase
165920
fxZoomCloseEffect
fxColumns(2)+fxRows(2)+fxUp+fxLeft
199713
fxZoomOpenEffect
fxColumns(2)+fxRows(2)+fxUp+fxLeft+
fxColAltHPhase+fxRowAltVPhase
236577
fxRevealLine
(1 << fxRevealLineShift)
262144
fxPopDownEffect
fxDown+fxRevealLine
393216
fxWipe
1 << fxWipeShift)
524288
fxBarnDoorCloseEffect
fxColumns(2)+fxColAltHPhase+
fxRowAltVPhase+fxRight+fxWipe
626689
fxBarnDoorOpenEffect
fxColumns(2)+fxColAltHPhase+
fxRowAltVPhase+fxLeft+fxWipe
627713
fxIrisCloseEffect
fxColumns(2)+fxRows(2)+fxUp+fxLeft+
fxRevealLine+fxWipe
986145
fxIrisOpenEffect
fxColumns(2)+fxRows(2)+fxUp+fxLeft+
fxColAltHPhase+fxRowAltVPhase+
fxRevealLine+fxWipe
1023009
fxFromEdge
(1 << fxFromEdgeShift)
1048576
fxSteps(
x
)
((num-1) << fxStepsShift)
(x-1)*
2097152
fxStepTime(
x
)
((num) << fxStepTimeShift)
x
*33554432
Constant
Bit Flag
Integer Value

C H A P T E R 3
Views
Summary of Views
3-51
Functions and Methods
3
Getting References to Views
view
:ChildViewFrames()
view
:Parent()
GetRoot()
GetView(
symbol
)
Displaying, Hiding, and Redrawing Views
view
:Open()
view
:Close()
view
:Toggle()
view
:Show()
view
:Hide()
view
:Dirty()
RefreshViews()
SetValue(
view
,
slotSymbol
,
value
)
view
:SyncView()
viewToMove
:MoveBehind(
view
)
Dynamically Adding Views
AddStepView(
parentView
,
childTemplate
)
RemoveStepView(
parentView
,
childView
)
AddView(
parentView
,
childTemplate
)
BuildContext(
template
)
Making Modal Views
AsyncConfirm(
confirmMessage
, buttonList, fn
)
ModalConfirm(
confirmMessage
,
buttonList
)
view
:
ModalDialog()
view
:FilterDialog()
Setting the Bounds of Views
RelBounds(
left
,
top
,
width
,
height
)
SetBounds(
left
,
top
,
right
,
bottom
)
view
:GlobalBox()
view
:
GlobalOuterBox()
view
:LocalBox()
viewToMove
:MoveBehind
(view)
view
:DirtyBox(
boundsFrame
)
view
:GetDrawBox()
ButtonBounds(
width
)
PictBounds(
name
,
left
,
top
)
Animating Views
view
:Effect(
effect
,
offScreen
,
sound
,
methodName
,
methodParameters
)
view
:SlideEffect(
contentOffset
,
viewOffset
,
sound
,
methodName
,
methodParameters
)

C H A P T E R 3
Views
3-52
Summary of Views
view
:RevealEffect(
distance
,
bounds
,
sound
,
methodName
,
methodParameters
)
view
:Delete(
methodName
,
methodParameters
)
Dragging a View
view
:Drag(
unit
,
dragBounds
)
Dragging and Dropping an Item
view
:DragAndDrop(
unit
,
bounds
,
limitBounds, copy
,
dragInfo
)
Scrolling View Contents
view
:SetOrigin(
originX
,
originY
)
view
:SyncScroll(
What
,
index
,
upDown
)
Working With View Highlighting
view
:Hilite(
on
)
view
:HiliteUnique(
on
)
view
:TrackHilite(
unit
)
view
:TrackButton(
unit
)
HiliteOwner()
GetHiliteOffsets()
view
:
SetHilite
(start, end, unique)
Creating View Dependencies
TieViews(
mainView
,
dependentView
,
methodName
)
Synchronizing Views
view
:RedoChildren()
view
:SyncChildren()
Laying Out Multiple Child Views
view
:LayoutTable(
tableDefinition
,
columnStart
,
rowStart
)
view
:LayoutColumn(
childViews
,
index
)
Miscellaneous View Operations
view
:SetPopup()
GetViewFlags(
template
)
Visible(
view
)
ViewIsOpen(
view
) //platform file function
Application-Defined Methods
ViewSetupFormScript()
ViewSetupChildrenScript()
ViewSetupDoneScript()
ViewQuitScript()
ViewPostQuitScript()
ViewShowScript()
ViewHideScript()
ViewDrawScript()
ViewHiliteScript(
on
)
ViewScrollDownScript()

C H A P T E R 3
Views
Summary of Views
3-53
ViewScrollUpScript()
ViewOverviewScript()
ViewAddChildScript(
child
)
ViewChangedScript(
slot, view
)
ViewDropChildScript(
child
)
ViewIdleScript()
sourceView
:ViewDrawDragDataScript(
bounds
)
sourceView
:ViewDrawDragBackgroundScript(
bounds
,
copy
)
destView
:ViewGetDropTypesScript(
currentPoint)
src:
ViewGetDropDataScript(
dragType
,
dragRef
)
destView
:ViewDragFeedbackScript(
dragInfo
,
currentPoint
,
show
)
sourceView:
ViewDropApproveScript(
destView
)
sourceView
:ViewGetDropDataScript(
dragType
,
dragRef
)
destView
:ViewDropScript(
dropType
,
dropData
,
dropPt
)
sourceView
:ViewDropMoveScript(
dragRef
,
offset
,
lastDragPt
,
copy
)
destView:
ViewFindTargetScript(
dragInfo
)
sourceView
:ViewDropRemoveScript(
dragRef
)
destView:
ViewDropDoneScript()


About the NewtApp Framework
4-1
C H A P T E R 4
NewtApp Applications
4
Figure 4-0
Table 4-0
NewtApp is a collection of prototypes that work together in an application frame-
work. Using these protos you can quickly construct a full-featured application that
includes functionality like finding and filing.
Whether or not you have written an application for the Newton platform before,
you should read this chapter. If you're new at writing Newton applications, you'll
find that using NewtApp is the best way to start programming for the Newton
platform. If you've created Newton applications before, the process of putting
together a NewtApp application will be familiar, though you'll find the time
required is significantly less.
Newton applications can be created with the NewtApp framework protos, which
are described in this chapter, or by constructing them from protos described in
almost every other chapter of this book. Chapter 2, "Getting Started," gives you an
overview of the process.
Before reading this chapter you should be familiar with the concepts of views,
templates, protos, soups, and stores. However, you don't need to know the details
of the interfaces to these objects before proceeding with NewtApp. Simply read the
first part of the appropriate chapters to get a good overview of the information. These
subjects are covered in Chapter 3, "Views," Chapter 11, "Data Storage and Retrieval,"
Chapter 16, "Find," Chapter 15, "Filing," and Chapter 21, "Routing Interface."
To work with the examples in this chapter, you should also be familiar with
Newton Toolkit (NTK) which is described in the Newton Toolkit User's Guide.
About the NewtApp Framework
4
You can construct an entire application by using the protos in the NewtApp frame-
work, without recreating a lot of support code; that is, the code necessary for
providing date and text searching, filing, setting up and registering soups, flushing
entries, notifying the system of soup changes, formatting data for display, displaying
views, and handling write-protected cards. You set the values of a prescribed set of
slots, and the framework does the rest.

C H A P T E R 4
NewtApp Applications
4-2
About the NewtApp Framework
You can create most kinds of applications with the NewtApp framework. If your
application is similar to a data browser or editor, or if it implements an automated
form, you can save yourself a significant amount of time by using the NewtApp
framework.
If you're creating a specialized application (for example, a calculator) or if you
need to display more than one soup at a time, you shouldn't construct it with
NewtApp, but should use the protos described in other chapters of this book. These
chapters include Chapter 3, "Views," Chapter 6, "Pickers, Pop-up Views, and
Overviews," Chapter 7, "Controls and Other Protos," Chapter 8, "Text and Ink
Input and Display," Chapter 13, "Drawing and Graphics," Chapter 16, "Find," and
Chapter 15, "Filing."
Some NewtApp protos work in nonframework applications. For example, you may
want to update an existing application to take advantage of the functionality
provided by the NewtApp slot view protos. Updating requires a bit of retrofitting,
but it can be done. See "Using Slot Views in Non-NewtApp Applications"
(page 4-22) for an example.
When you use the NewtApp framework protos, your user interface is updated as
the protos change with new system software releases, thereby staying consistent
with the latest system changes. In addition, the built-in code that manages system
services for these protos is also automatically updated and maintained as the
system software advances.
A NewtApp-based application can present many different views of your data. For
example, the Show button displays different views of information; the New button
creates new formats for data input.
NewtApp applications use a programming device known as stationery--a
collective term for data definitions (known as dataDefs) and view definitions
(known as viewDefs)--to enable this feature. You should use viewDefs to add
different views of your data and dataDefs to create different data formats. Stationery
is documented in Chapter 5; its use in a NewtApp application is demonstrated in
this chapter.
The NewtApp Protos
4
When you put the application protos together in a programming environment like
Newton Toolkit and set the values of slots, the framework takes care of the rest.
Your applications automatically take advantage of extensive system management
functionality with little additional work on your part. For example, to include your
application in system-wide date searches, just set a slot in the base view of your
application called
dateFindSlot
. (See "newtApplication" (page 3-8) in Newton
Programmer's Reference.)

C H A P T E R 4
NewtApp Applications
About the NewtApp Framework
4-3
The parts of the NewtApp framework are designed to fit together using the
two-part NewtonScript inheritance scheme. Generally speaking, the framework is
constructed so the user interface components of your application (such as views
and buttons) use proto inheritance to make methods and application-state variables,
which are provided by NewtApp (and transparent to you), available to your
application. Parent inheritance implements slots that keep track of system details.
Because the NewtApp framework structure is dependent on both the parent and
proto structure of your application, it requires applications to be constructed in a
fairly predictable way. Children of certain NewtApp framework protos are required
to be particular protos; for example, the application base view must be a
newtApplication
proto.
W A R N I N G
When you override system service methods and functions be
careful to use the conditional message send operator (
:?
) to avoid
inadvertently overriding built-in functionality; otherwise, your
code will break.
There may also be alternate ways to construct a NewtApp
application, other than those recommended in this chapter and in
Chapter 5, "Stationery." Be forewarned that applications using
alternate construction methods are not guaranteed to work in
the future.
Figure 4-1 shows the four conceptual layers of NewtApp protos that you use to
construct an application: the application base view, the layout view, the entry view,
and the slot views.
Figure 4-1
The main protos in a NewtApp-based application
_proto: newtStatusBar
_proto: newtApplication
title: "MyApp",
_proto: newtLayout
_proto: newtEntryView
_proto: newtLabelInputLine
path: 'name.first,
label: "First",
_proto: newtLabelInputLine
path: 'name.last,
label: "Last",
Layout View
Base View
Entry View
Slot View
_proto: newtClockShowBar

C H A P T E R 4
NewtApp Applications
4-4
About the NewtApp Framework
Note
This drawing does not depict the protos as they would appear in a
Newton Toolkit layout window.
The basic NewtApp protos are defined here in very general terms. Note that unlike
Figure 4-1, this list includes the proto for storing data, which does not have a visual
representation in a layout file.
The
newtApplication
proto is the application's base view. As in
nonframework applications, the base view proto either contains or has
references to all the other application parts.
The
newtSoup
proto is used to create and manage the data storage soup for
your application; it is not displayed.
The
newtLayout
protos govern the overall look of your data.
The
newtEntryView
protos is the view associated with current soup entry and
is contained in the default layout view. A
newtEntryView
proto does not
display on the screen, but instead manages operations on a soup.
The slot views are a category of protos used to edit and/or display data from the
slots in your application's soup entry frames.
About newtApplication
4
The
newtApplication
proto serves as the base view for your application; it
contains all other application protos. The
allSoups
slot of this proto is where you
set up the application soup (based on the
newtSoup
proto).
The functionality defined in this proto layer manages application-wide functions,
events, and globals. For example, the functionality for opening and registering
soups, dispatching events, and maintaining state information and application
globals is implemented in this proto layer.
Also managed by this proto layer are the application-wide user interface elements.
Application-wide Controls
4
Several control protos affect the entire application. Because of this, the protos are
generally placed in the
newtApplication
base view layer. The buttons include
the standard Information and Action buttons, as well as the New and Show
stationery buttons. Stationery buttons, which you can use to tie viewDefs and
dataDefs into your application, are defined in Chapter 5, "Stationery." The
NewtApp controls that should be in the
newtApplication
base view include the
standard status bar, the folder tab, and the A-Z alphabet tabs.

C H A P T E R 4
NewtApp Applications
About the NewtApp Framework
4-5
About newtSoup
4
Application data is stored in persistent structures known as soups in any Newton
application. In a NewtApp application, soup definitions, written in the
newtApplication.allSoups
slot, must be based on the
newtSoup
proto.
Within a soup, data is stored in frames known as entries. In turn, entries contain the
individual slots in which you store your application's data. The data in these slots is
accessed by using a programming construct known as a cursor.
The
newtSoup
proto defines its own version of a set of the data storage objects
and methods. If you are not already familiar with these concepts and objects, you
should read the introductory parts of Chapter 11, "Data Storage and Retrieval,"
before trying to use the
newtSoup
proto.
The Layout Protos
4
Each NewtApp application must have two basic views of the application data,
known as layouts, which are:
an overview--seen when the Overview button is tapped
a default view--seen when the application is first opened
Three kinds of layouts correspond to three basic application styles:
the card (see
newtLayout
)
the continuous roll (see
newtRollLayout
)
the page (see
newtPageLayout
)
Card-based and roll-based applications differ in the number of entries each may
have visible at one time. The built-in Names application is a card-based application.
For this type of application, only one entry is displayed at a time. In contrast, the
built-in Notes application, which is a roll-based application, can have multiple
entries visible at once. They must be separated by a header, that incorporates Action
and Filing buttons to make it obvious to which entry a button action should apply.
Examples of card-based and a roll-based applications are shown in Figure 4-2.

C H A P T E R 4
NewtApp Applications
4-6
About the NewtApp Framework
Figure 4-2
A roll-based application (left) versus a card-based application
The page-based application is a hybrid of the card-based and roll-based applications.
Like the card-based application, the page-based application shows only one entry
at a time. However, unlike the card-based application but like the roll-based
application, an entry may be longer than a screen's length. The built-in Calls
application, shown in Figure 4-3, is an example of a page-based application.

C H A P T E R 4
NewtApp Applications
About the NewtApp Framework
4-7
Figure 4-3
Calls is an example of a page-based application
The overview protos are also layouts; they include the
newtOverLayout
and
newtRollOverLayout
protos.
The NewtApp framework code that governs soups, scrolling, and all the standard
view functionality, is implemented in the layout protos. A main (default) view
layout and an overview layout must be declared in the
allLayouts
slot of the
newtApplication
base view. See "newtApplication" (page 3-8) in Newton
Programmer's Reference for details.
Your layout can also control which buttons show on the status bar; you can set the
menuLeftButtons
and
menuRightButtons
slots of the layout proto, along
with the
statusBarSlot
of the base view (
newtApplication
proto). This
control becomes important when more than one entry is shown on the screen, as in
a roll-style application. For example, when multiple entries are showing on one
screen, the Action and Filing buttons would not be on the status bar. Instead, they
would be on the header of each entry, so the entry on which to perform an action is
unambiguous.

C H A P T E R 4
NewtApp Applications
4-8
About the NewtApp Framework
The Entry View Protos
4
The entry view is the focal point for operations that happen on one soup entry
frame at a time. These include functions such as displaying and updating data
stored in the entry's slots.
The NewtApp framework has three entry view protos:
newtEntryView
,
newtRollEntryView
, and
newtFalseEntryView
. The
newtEntryView
and
newtRollEntryView
protos are used within a NewtApp application, while
the
newtFalseEntryView
and
newtRollEntryView
protos allows you to use
the framework's slot views in an application that is not based on the NewtApp
framework.
The entry view also contains the user interface components that perform operations
on one entry at a time. These components include the header bars, which are used
as divider bars to separate multiple entries displayed simultaneously. This behavior
happens in the Notes application. An example of the Notes application with multiple
entries and header bars is shown in Figure 4-4.
Figure 4-4
Multiple entries visible simultaneously

C H A P T E R 4
NewtApp Applications
About the NewtApp Framework
4-9
Note that the header bar contains the Action and Filing buttons on its right side.
These buttons appear on the header bar to prevent any ambiguity regarding the
entry to be acted upon by those buttons.
In addition, the header bar contains a Title and icon on the left. When the icon is
tapped, the Information slip appears, as shown in Figure 4-5. This slip is created
from a
newtInfoBox
proto and displays an informational string, which it obtains
from the
description
slot of the dataDef. See Chapter 5, "Stationery," for more
information about dataDefs.
Figure 4-5
An Information slip
It is at the entry view level of your application that the specific slots for accessing
and displaying data in your application soup are set up. The target entry, which is
the entry to be acted on, is set in the entry view. The target view is then created by
the entry view; the view in which the data in that entry appears. Finally, the data
cursor is created by the entry view and is used to access the entries.
The entry view protos also contain important methods that act on individual
entries. These methods include functionality for managing and changing existing
data in the soup, such as the
FlushData
method.
About the Slot View Protos
4
The slot view protos retrieve, display, edit, and save changes to any type of data
stored in the slots of your application soup's entry frame.
Unless they are contained by either a
newtEntryView
or a
newtFalseEntryView
, the slot views do not work. This is because the
entry views are responsible for setting references to a specific entry. These
references are used by the slot view to display data.
Slot views exist in two varieties: simple slot views and labelled input-line slot
views. Both kinds of slot views are tailored to display and edit a particular kind of

C H A P T E R 4
NewtApp Applications
4-10
About the NewtApp Framework
data which they format appropriately. For example, the number views
(
newtNumberView
and
newtRONumberView
) format number data (according to
the value of a
format
slot you set).
The labelled input-line slot view protos provide you with a label, which you may
specify, for the input line. Additionally, the label may include a picker (pop-up menu).
These views also format a particular kind of data. To do this they use a special
NewtApp object known as a filter to specify a value for the
flavor
slot of the
labelled input-line slot views.
The filter object essentially acts as a translator between the target data frame (or
more typically, a slot in that frame) and the text field visible to the user. For
example, in the
newtDateInputLine
proto, a filter translates the time from a
time-in-minutes value to a string, which is displayed. The filter then translates the
string back to a time-in-minutes value, which is saved in the soup.
You can create custom filters by basing them on the proto
newtFilter
or on the
other filters documented in Table 3-1 (page 3-60) in the Newton Programmer's
Reference. You can also create custom labelled input-line slot views. See the example
in "Creating a Custom Labelled Input-Line Slot View," beginning on page 4-24.
You can have your label input-line protos remember a list of recent items. To do so,
all you need do is assign a symbol to the
'memory
slot of your template. This
symbol must incorporate your developer signature. The system automatically
maintains the list of recent items for your input line. To use the list, you need to
use the same symbol with the
AddMemoryItem
,
AddMemoryItemUnique
,
GetMemoryItems
, and
GetMemorySlot
functions, which are described in
Chapter 26, "Utility Functions."
In addition, one special slot view, called the
newtSmartNameView
proto, allows
the user to choose a name from the soup belonging to the built-in Names application.
It adds the pop-up menu item, Other, to the picker; when the user chooses Other
from the
newtSmartNameView
proto, it displays the names in the Names
application soup in a system-provided people picker.
After you choose a name and close the view displaying the Names soup, that
name is displayed on the input line. The name is also put into the Picker menu.
A
newtSmartNameView
proto is shown in Figure 4-6.

C H A P T E R 4
NewtApp Applications
About the NewtApp Framework
4-11
Figure 4-6
The smart name view and system-provided people picker
Stationery
4
Stationery, an extension you can add to any NewtApp application, is tightly
integrated with the NewtApp framework.
Stationery consists of two components that work together: a data definition (dataDef)
and a view definition (viewDef). The dataDef provides a definition of the data to be
used in the stationery. It is registered in conjunction with its display component,
which is a viewDef.
These extensions are available to the user through the New and Show stationery
buttons in the NewtApp application. The names of the viewDefs are displayed in
the Show menu. The New button is used either to propagate the new entry defined
in the dataDef or to display the names of the dataDefs. For more detailed
information, see Chapter 5, "Stationery."
NewtApp Compatibility
4
The NewtApp framework did not exist prior to version 2.0 of Newton system
software. Applications created with NewtApp protos will not run on previous
versions of the Newton system.

C H A P T E R 4
NewtApp Applications
4-12
Using NewtApp
Some NewtApp protos are usable in your non-NewtApp applications. For example,
there is a
newtStatusBarNoClose
proto, see page 3-29 in the Newton
Programmer's Reference
, that is unique to NewtApp, which may be used, without
special provision, in a non-NewtApp application.
Other NewtApp protos--specifically the slot views--can function only within a
simulated NewtApp environment. The mechanism for creating this setup is the
newtFalseEntryView
proto, described on page 3-44 in the Newton
Programmer's Reference
.
The slot views, documented in "Slot View Protos" (page 3-49) in Newton
Programmer's Reference, provide convenient display and data manipulation
functionality that you can use to your advantage in an existing application.
Using NewtApp
4
The protos in the NewtApp application framework can be used to
create an application that has one data soup and can be built as a data viewer
or editor
add functionality to non-NewtApp applications
create and incorporate stationery extensions
When you use the set of protos that make up the NewtApp application framework,
you can quickly create an application that takes full advantage of the Newton
system services.
In addition, many of the protos may be used in applications built without the
framework. In particular, the slot views, used to display data, have built-in
functionality you may wish to use.
The framework works best when used with stationery to present different views of
and formats for the application's data. The sample application, described in the
following sections uses a single piece of stationery, which consists of a dataDef
with two viewDefs. Stationery is documented fully in Chapter 5, "Stationery."
The sample application is built using the Newton Toolkit (NTK) development envi-
ronment. See Newton Toolkit User's Guide for more information about using NTK.
Constructing a NewtApp Application
4
The sample "starter" application presented here shows how to get a NewtApp
application underway quickly. You may incorporate this sample code into your
applications without restriction. Although every reasonable effort has been made to
make sure the application is operable, the code is provided "as is." The

C H A P T E R 4
NewtApp Applications
Using NewtApp
4-13
responsibility for its operation is 100% yours. If you are going to redistribute it,
you must make it clear in your source files that the code descended from
Apple-provided sample code and you have made changes.
The sample is an application for gathering data that supports the system services
routing, filing, and finding. It presents two views of the data to be collected: a
required default view; "IOU Info" (and an alternate "IOU Notes" view); and a
required overview. IOU Info and IOU Notes are stationery and appear as items in
the Show button's picker. In addition, it shows how to implement the application in
the three styles of NewtApp applications: card, page, and roll. See the DTS sample
code for details.
The application starts with three basic NTK layout files:
The application base view--a
newtApplication
proto.
A default layout--one of the layout protos.
An overview layout--either the
newtOverLayout
or
newtRollOverLayout
proto.
The application also contains the NTK layout files for the stationery, a dataDef,
and its two corresponding viewDefs:
iouDataDef
iouDefaultViewDef
iouNotesViewDef
The creation of these files is shown in Chapter 5, "Stationery."
A NewtApp application must include standard
InstallScript
and
RemoveScript
functions. Any icons must be included with a resource file; the
example uses
CardStarter.rsrc
. In the example, there is also a text file,
Definitions.f
, in which application globals are defined. Neither the resource
file nor the text file is required.
The basic view slots,
viewBounds
,
viewFlags
, and
viewJustify
,
are discussed in Chapter 3, "Views," and are called out in the samples only
when there is something unusual about them.
Using Application Globals
4
These samples use several application globals. When you use NTK as your
development system, they are defined in a definitions file, which we named
Definitions.f
.
The values of the constants
kSuperSymbol
and
kDataSymbol
are set to the
application symbol. They are used to set slots that must have unique identifying
symbols. You are not required to use the application symbol for this purpose, but it
is a good idea, because the application symbol is known to be unique.

C H A P T E R 4
NewtApp Applications
4-14
Using NewtApp
One other global, unique to this application, is set. It is the constant
kAppTitle
,
set to the string
"Card Starter"
.
Using newtApplication
4
This proto serves as the template for the application base view. This section shows
you how to use it to set up the
application base view
application soup
status bar; for layout-level control of the appearance and disappearance of
its buttons.
layout slots
stationery slots
Setting Up the Application Base View
4
The application base view template,
newtApplication
, should contain the basic
application element protos. When you use NTK to create the layout for the
newtApplication
proto, you add to it a
newtStatusBar
proto (the status bar
at the bottom of the application) and a
newtClockShowBar
(the folder tab across
the top of the application).
Follow these steps to create the application base view:
1. Create a new layout and draw a
newtApplication
proto in it.
2. Place a
newtStatusBar
across the bottom of the layout.
3. Name the
newtStatusBar
proto
status.
4. Place a
newtClockShowBar
proto across the top of the layout.
5. Save the layout file as
baseView.t
.
6. Name the layout frame
baseView
.
There are more than a dozen slots that need to be set in a
newtApplication
proto. Several of the
newtApplication
slots can be set quickly. Set these slots
as follows:
Set the
title
slot to
kAppTitle
. Note that you must define this constant.
Set the
appSymbol
slot to
kAppSymbol
. This constant is automatically
defined by NTK.
Set the
appObject
slot to
["Item", "Items"]
.
Set the
appAll
slot to
"All Items"
. Note that you'll see this displayed on a
folder tab.

C H A P T E R 4
NewtApp Applications
Using NewtApp
4-15
Optional. Set the
statusBarSlot
to contain the declared name of the status
bar so layouts can use it to control the buttons displayed on it. Use the symbol
'status
to set it.
If you wish to override a system message like
ViewSetupFormScript
, which is
called before a view is displayed on the screen, make sure to call the inherited
method at the end of your own
ViewSetupFormScript
method. Also, you may
wish to add a
ReOrientToScreen
method to the
newtApplication
base
view so your application can rotate to a landscape display. This message is sent to
each child of the root view when the screen orientation is changed. See
ReOrientToScreen
(page 2-73) in Newton Programmer's Reference for details.
Finally, be sure to add the layout file
baseView.t
to your project and mark it as
the application base view.
Tying Layouts Into the Main Application
4
The
allLayouts
slot in the
newtApplication
proto is a frame that contains
symbols for the application's layout files. It must contain two slots, named
default
and
overview,
that refer to the two layout files used for those
respective views.
The section "Using the Layout Protos," beginning on page 4-16, shows how to use
the NewtApp layout protos to construct these files. Assume they are named Default
Layout and Overview Layout for the purpose of setting the references to them in
the
allLayouts
slot. The following code segment sets the
allLayouts
slot
appropriately:
allLayouts:= {
default: GetLayout("Default Layout"),
overview: GetLayout("Overview Layout"),
}
Setting Up the Application Soup
4
The
newtApplication
proto uses the values in its
allSoups
slot to set up and
register your soup with the system.
The framework also looks in the
allSoups
slot to get the appropriate
soup information for each layout. It does this by matching the value of
the layout's
masterSoupSlot
to the name of a frame contained in the
newtApplication.allSoups
slot. See the section "Using the Layout Protos,"
following this one.
This application contains only one soup, though a NewtApp application can
contain more than one. Each soup defined for a NewtApp application must be
based on the
newtSoup
proto. The slots
soupName
,
soupIndices
, and
soupQuery
must be defined within the
allSoups
soup definition frame.

C H A P T E R 4
NewtApp Applications
4-16
Using NewtApp
Use code similar to the following example to set the
allSoups
slot:
allSoups:=
{ IOUSoup: {_proto: newtSoup,
soupName: "IOU:PIEDTS",
soupIndices: [
{structure: 'slot,
path: 'title,
type: 'string},
{structure: 'slot,
path: 'timeStamp,
type: 'int},
{ structure: 'slot,
path: 'labels,
type: 'tags }
],
soupQuery: {type: 'index, indexPath:
'timeStamp},
soupDescr: "The IOU soup.",
defaultDataType: '|BasicCard:sig|,}
}
Using the Layout Protos
4
Each NewtApp Application requires exactly two layouts: a default layout,
displayed when the application is opened, and an overview layout, displayed when
the Overview button is tapped.
The NewtApp framework layout proto you choose for your default view, sets up
your application as either a card-, roll-, or page-style application.
Unique slots in the layout protos include:
masterSoupSlot
forceNewEntry
The
masterSoupSlot
is the most important. It contains a reference to the
application soup in the
newtApplication.allSoups
slot, from which the
layout gets its data.
The
forceNewEntry
slot allows your application to deal gracefully with
the situation created when someone opens a folder that is empty. If the
forceNewEntry
slot is set to
true
in that situation, an entry is automatically
created. Otherwise, an alert slip announces that there are no items in this list,

C H A P T E R 4
NewtApp Applications
Using NewtApp
4-17
where items is replaced by the value of the
appObject
slot set in the
newtApplication
base view. An example of this message from the Names
application is shown in Figure 4-7.
Figure 4-7
The message resulting from a
nil
value for
forceNewEntry
Using newtOverLayout
4
The slots you must set for an overview are shown in the Overview Layout browser
in Figure 4-8.
Figure 4-8
The overview slots
Follow these steps to create the required overview layout:
1. Open a new layout window and drag out a
newtOverLayout
proto.
2. Name it
Overview Layout
.

C H A P T E R 4
NewtApp Applications
4-18
Using NewtApp
3. Set the
masterSoupSlot
to the symbol
'IOUSoup
. This correlates to the
name of the soup as it is set up in the
newtApplication.allSoups
slot.
See "Setting Up the Application Soup," beginning on page 4-15.
4. Add the
forceNewEntry
slot. Leave it with the default value
true
.
This causes a new entry to be created if a user tries to open an empty folder.
5. Add a
viewFormat
slot and set the
Fill
value to
White
. This makes the data
it displays look better and keeps anything from inadvertently showing through.
In addition, the white fill improves the speed of the display and enhances view
performance.
6. Set the name slot to a string like
"Overview"
.
7. Add a
centerTarget
slot and set it to
true
. This assures that the entries are
centered for display in the Overview.
Controlling Menu Buttons From Layouts
4
Once the name of the status bar is declared to the application base view (in the
newtApplication.statusBarSlot
), you may control the appearance and
disappearance of buttons on the status bar, from the layout view, as needed.
To do this, you must specify which buttons should appear on the status bar by
using the slots
menuLeftButtons
and
menuRightButtons
. Each of these is
an array that must contain the name of the button proto(s) that you wish to appear
on the menu bar's left and right sides. When you use these arrays, the button protos
listed in them are automatically placed correctly on the status bar, according to the
current human interface guidelines.
To appropriately set up the appearance of the status bar for display in the Overview,
first add the optional slots
menuLeftButtons
and
menuRightButtons
. The
buttons you name in these slots replace the menu bar buttons from the main layout,
since the
statusBarSlot
is set there.
Set the
menuLeftButtons
slot to an array that includes the protos for the
Information and New buttons. These buttons are automatically laid out on the
status bar, going from left to right.
menuLeftButtons:=[
newtInfoButton,
newtNewStationeryButton,
]
Set the
menuRightButtons
slot to an array that includes the protos for the
Action and Filing buttons. These buttons are automatically laid out on the status
bar from right to left.

C H A P T E R 4
NewtApp Applications
Using NewtApp
4-19
menuRightButtons:=[
newtActionButton,
newtFilingButton,
]
Be sure to add the Overview Layout template file to your NTK Project window.
Creating the Default Layout
4
This is the view you see upon opening the application. Since it will eventually
contain views that display the data, it needs to know about the application soup.
The
masterSoupSlot
identifies the application soup to the layout proto. The
symbol in this slot must match the name of a soup declared in the
allSoups
slot
of the
newtApplication
base view, which was
IOUSoup
. In the layout it is
used as a symbol to set the value of the
masterSoupSlot
.
Follow these steps to create the required default layout:
1. Open a new layout window in NTK and drag out a
newtLayout
proto.
2. Name it
default
.
3. Set the
masterSoupSlot
to the symbol
'IOUSoup
. This correlates to the
name of the soup as it is set up in the
newtApplication.allSoups
slot.
See "Setting Up the Application Soup," beginning on page 4-15.
4. Add a
forceNewEntry
slot
.
Leave the default value
true
. This causes a new
entry to be created when a user tries to open an empty folder.
5. Set the
viewFormat
slot's Fill value to White. This makes the data it displays
look better and keeps anything from inadvertently showing through. In addition,
the white fill improves the speed of the display and enhances view performance.
Be sure to add the default template file to your NTK Project window.
Using Entry Views
4
Entry views are used as containers for the slot views that display data from the
slots in the target entry of the application soup. They are also the containers for the
different header bars. Note that entry views are not necessary in the overview
layout, since the overview layout displays items as shapes.
The entry view sets values needed to locate the data to be displayed in the slot
views it will contain. These values include references to the data cursor (the
dataCursor
slot), the soup entry that contains the stored data (the
target
slot),
and the view to display data (the
targetView
slot).

C H A P T E R 4
NewtApp Applications
4-20
Using NewtApp
Follow these steps to ready your application for the slot views:
1. Drag out a
newtEntryView
proto on top of the
newtLayout
proto.
2. Optional. Name it
theEntry
.
There are no unusual slots to set in an entry view. Therefore, you are ready to add
the header and slot view protos.
3. Drag out a
newtEntryPageHeader
across the top of the
newtEntryView
.
4. Under the header, drag out a
newtStationeryView
proto that covers the rest
of the entry view. This special view is not be visible; its function is to provide a
bounding box for the viewDef that will eventually be displayed.
The layout should look like the screen shot shown in Figure 4-9.
Figure 4-9
The information button and picker.
Registering DataDefs and ViewDefs
4
Several slots in the
newtApplication
base view enable you to identify the
stationery in your application. These slots include the
allViewDefs
,
allDataDefs
, and
superSymbol
slots.
Note
To see how to create the stationery used as part of this application,
consult Chapter 5, "Stationery." The
allDataDefs
and
allViewDefs
slots, which are discussed here, contain
references to those dataDefs and viewDefs.
The
allDataDefs
and
allViewDefs
slots are assigned references to the NTK
layout files containing your dataDefs and viewDefs. Once this is done, the
NewtApp framework automatically registers your stationery with the Newton
system registry when your application is installed on a Newton device.
Each
allDataDefs
and
allViewDefs
slot contains frames that are required to
contain slots with identical names, to indicate the dataDefs and viewDefs that work
together. (A dataDef must be registered with its set of viewDefs because dataDefs
use viewDefs to display their data.)
In the
allDataDefs
slot is a frame containing a reference to the NTK layout
template for a single dataDef. In the frame within the
allViewDefs
slot is the

C H A P T E R 4
NewtApp Applications
Using NewtApp
4-21
frame containing slots with references to all the viewDef layout templates that
work with that dataDef.
The recommended way to name the corresponding
allDataDefs
and
allViewDefs
slots is to set the slot names to the data symbol constant,
as shown in the following code examples.
Set the
allDataDefs
slot to return a frame with references to all the application's
dataDefs, as follows:
result := {};
result.(kDataSymbol) := GetLayout("IOUDataDef");
// result.(kData2Symbol) := ... to add a 2nd DataDef
result;
Set the
allViewDefs
slot to return a frame with references to all the application's
viewDefs, in a parallel manner, as shown in the following code:
result := {};
result.(kDataSymbol) := {
default: GetLayout("IOUDefaultViewDef"),
notes:
GetLayout("IOUNotesViewDef"),
iouPrintFormat: GetLayout("IOUPrintFormat"),
// Use for routing (beaming, mailing, transports):
frameFormat: {_proto: protoFrameFormat},
};
// Use to add a 2nd DataDef:
// result.(kData2Symbol) := {...}
result;
A NewtApp application only accepts stationery when a dataDef has a
superSymbol
with a value matching the value of the
newtApplication
base view's
superSymbol
slot. For this reason you want the value of the
superSymbol
slot to be a unique symbol. This sample application uses
the constant
kSuperSymbol
, which is set to the application symbol
'|IOU:PIEDTS|
, to set the
superSymbol
slot.
Using the Required NewtApp Install and Remove Scripts
4
An
InstallScript
function and
RemoveScript
function are required to
register your NewtApp application with the system for the various system services.
These scripts are boilerplate functions you should copy unaltered.

C H A P T E R 4
NewtApp Applications
4-22
Using NewtApp
You should create a text file, which you save as
Install&Remove.f
, into which
to copy the functions:
InstallScript := func(partFrame)
begin
partFrame.removeFrame :=
(partFrame.theForm):NewtInstallScript(partFrame.theForm);
end;
RemoveScript := func(partFrame)
begin
(partFrame.removeFrame):NewtRemoveScript(removeFrame);
end;
This file should be the last one processed when your application is built. (In NTK
this means that it should appear at the bottom of the Project file list.)
If you have included the stationery files built in Chapter 5, "Stationery," you may
now build, download, and run your NewtApp application.
Using Slot Views in Non-NewtApp Applications
4
The NewtApp slot view protos have a lot of functionality built into them which you
may want to use in a non-NewtApp application. You can do this by keeping your
existing application base view, removing the existing entry view layer and its
contents, replacing it with a
newtFalseEntryView
proto, and placing the slot
views in the
newtFalseEntryView
.
The following requirements must be satisfied for slot views to work outside a
NewtApp application:
The parent of the
newtFalseEntryView
must have the following slots:
target
targetView
The slot views must be contained in a
newtFalseEntryView
proto.
The
newtFalseEntryView
must receive a
Retarget
message whenever
entries are changed.
Modifying the Base View
4
This discussion assumes that you already have a base view set up as part of your
NTK project and that a
newtFalseEntryView
will be added to it later. If that is
the case, you already have slots set with specifications for a soup name, soup
indices, a soup query, and a soup cursor (among numerous others.)
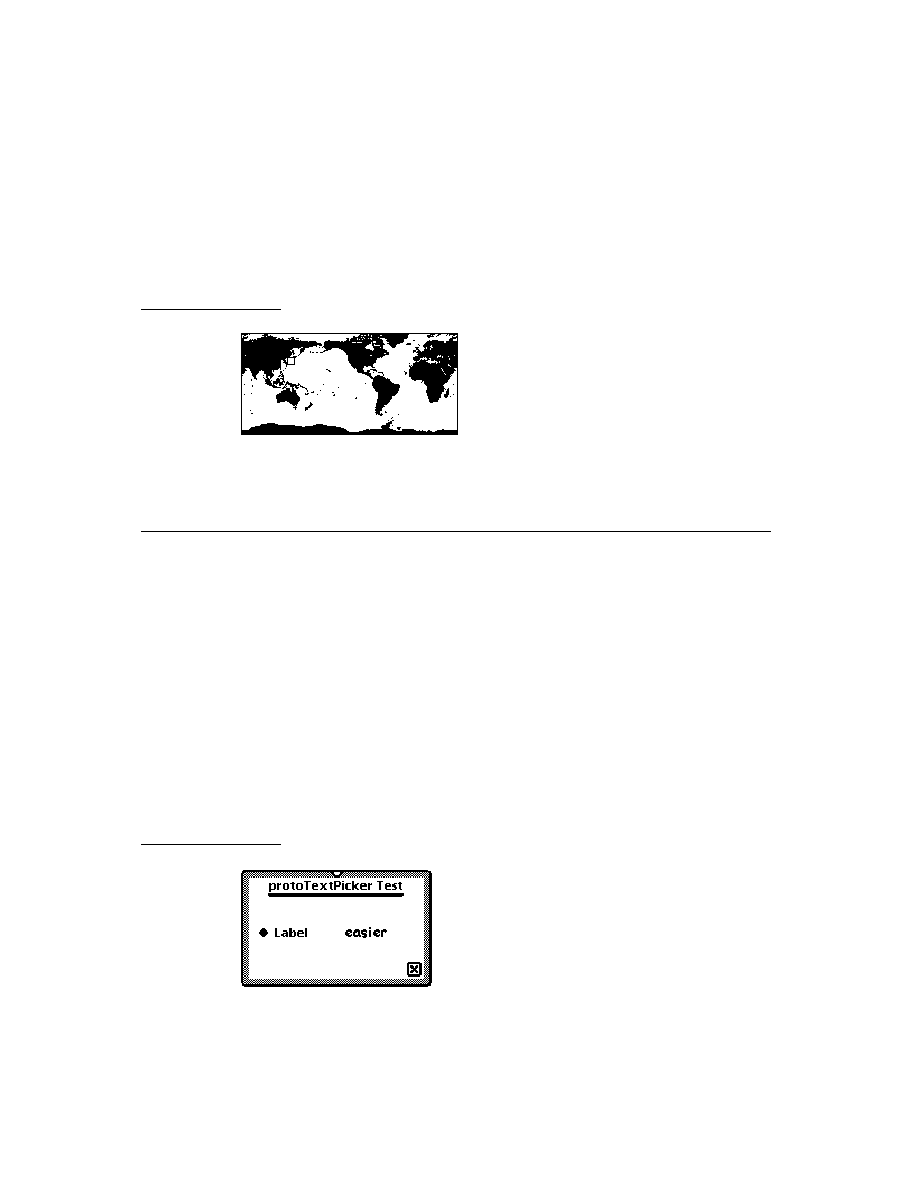
C H A P T E R 4
NewtApp Applications
Using NewtApp
4-23
Certain slots must be added to these base view slots for your application to be able
to utilize the false entry view and the slot views. First, you must be sure to add a
target
slot and
targetView
slot, so that the false entry view can set them when
an entry is changed. Second, you should include a method that sends the
Retarget
message to the false entry view when an entry is changed. As an
example, you may wish to implement the following method, or one like it:
baseView.DoReTargeting := func()
theFalseEntryView:Retarget()
There are several places in your code where this message could be sent. For
instance, if your application scrolls through entries, you should send the
DoReTargeting
message, defined above, to
ViewScrollUpScript
and
ViewScrollDownScript
. Following is an example of a
ViewScrollUpScript
method that scrolls through soup entries:
func()
begin
EntryChange(target);
cardSoupCursor:Prev();
:ResetTarget();
:DoRetargeting();
end
Other places where you may want to send the
Retarget
message include a
delete action method, a
ViewSetupDoneScript
method (which executes
immediately before a view is displayed or redisplayed), or even the
ButtonClickScript
method of a button that generates new entries and
thus changes the soup and its display.
Using a False Entry View
4
The example used here, in which the
newtFalseEntryView
is implemented, is
a non-NewtApp application that supports the use of slot views. If you want to adopt
slot views into an existing application, you must use
newtFalseEntryView
.
Once you have an application base view set up, you may add the following slots to
your
newtFalseEntryView
:
Add a
dataCursorSlot
and set it to the symbol
'cardSoupCursor
. This
symbol should match a slot defined in your application base view. The slot may
be omitted if your base application view's cursor slot is set to the default name
dataCursor
.
Add a
dataSoupSlot
and set it to the symbol
'cardSoup
. This symbol
should match a slot defined in your application base view. The slot may be

C H A P T E R 4
NewtApp Applications
4-24
Using NewtApp
omitted if your base application view's soup slot is set to the default name
dataSoup
.
Add a
soupQuerySlot
and set it to the symbol
'cardSoupQuerySpec
.
This symbol should match a slot defined in your application base view. The slot
may be omitted if your base application view's soup query slot is set to the
default name
soupQuery
.
Finally, you should make sure to declare the
newtFalseEntryView
to the
application base view so the base view can send
Retarget
messages to the false
entry view when data is changed.
For more information about the
newtFalseEntryView
see the Newton
Programmer's Reference
.
Creating a Custom Labelled Input-Line Slot View
4
You may find situations in which you need to create a custom slot view to get one
that does exactly what your application requires. For example, the NewtApp
framework does not yet contain a slot view that can display a picture. This is
possible after you know more about how the slot views work.
In general, a slot view performs the following functions:
Target data; that is, updates a soup entry from its contents and vice versa.
Format data by using a filter.
Allow you to place ("jam") the data from another soup entry in this slot view. Of
the built-in slot views, the
newtSmartName
proto does this.
All slot views assume a soup entry has been set by the parent view as the value of
the
target
slot. The
target
slot contains a reference to the soup entry. The soup
entry contains the slot with the data to be displayed in a given slot view and stores
the new data.
Slot views also require a
path
slot which refers to the specific slot within the
target
entry. The path expression must lead to a slot that holds the correct
kind of data for a given slot view. For instance, the
path
slot of a
newtROTextDateView
proto must refer to a slot in an entry that contain a
integer date.
In the label input-line slot view protos, formatting is accomplished by selecting the
correct NewtApp data filter as the value of the slot view's
flavor
slot. Note that
some of the NewtApp data filters also specify a particular system picker which will
be available when you use the
popup
option for your slot view. See the DTS
sample code to see how to create a new newt proto.
C H A P T E R 4
NewtApp Applications
Summary of the NewtApp Framework
4-25
Summary of the NewtApp Framework
4
Required Code
4
Required InstallScript
4
InstallScript := func(partFrame)
begin
partFrame.removeFrame := (partFrame.theForm):
NewtInstallScript(partFrame.theForm);
end;
Required RemoveScript
4
RemoveScript := func(partFrame)
begin
(partFrame.removeFrame):NewtRemoveScript(removeFrame);
end;
Protos
4
newtSoup
4
myNewtSoup := {
_proto: newtSoup, // NewtApp soup proto
soupName:
"MyApp:SIG"
, // a string unique to your app.
soupIndices: [
//soup particulars, may vary
{structure: '
slot
, //describing a slot
path: '
title
, // named "title" which
type: 'string}, //contains a string
...], // more descriptions may follow
soupQuery: {
// a soup query
type: 'index,
indexPath:'
timeStamp
}, // slot to use as index
soupDescr:"The
Widget
soup."//string describing the soup
defaultDataType:'
soupType
,
//type for your soup entry

C H A P T E R 4
NewtApp Applications
4-26
Summary of the NewtApp Framework
AddEntry: //Adds the entry to the specified store
func(
entry, store
) ...
AdoptEntry: // Adds entry to the application soup while
func(
entry, type
)... // preserving dataDef entry slots
CreateBlankEntry: // Returns a blank entry
func() ...
DeleteEntry: // Removes an entry from its soup
func(
entry
) ...
DuplicateEntry: // Clones and returns entry
func(
entry
) ...
DoneWithSoup: // Unregisters soup changes and soup
func(
appSymbol
) ...
FillNewSoup:
// Called by MakeSoup to add soup
func()
...// values to a new soup
MakeSoup:
// Used by the newtApplication proto
func(
appSymbol
)... // to return and register a new soup
GetCursor: // Returns the cursor
func() ...
SetupCursor:
// Sets the cursor to an entry in the
func(
querySpec
) ... // master soup
Query: // Performs a query on a newtSoup
func(
querySpec
) ...
GetAlias: // Returns an entry alias.
func(
entry
)...
GetCursorPosition: // Returns an entry alias.
func() ...
GoToAlias: // Returns entry referenced by the alias.
func(
alias
)...
}
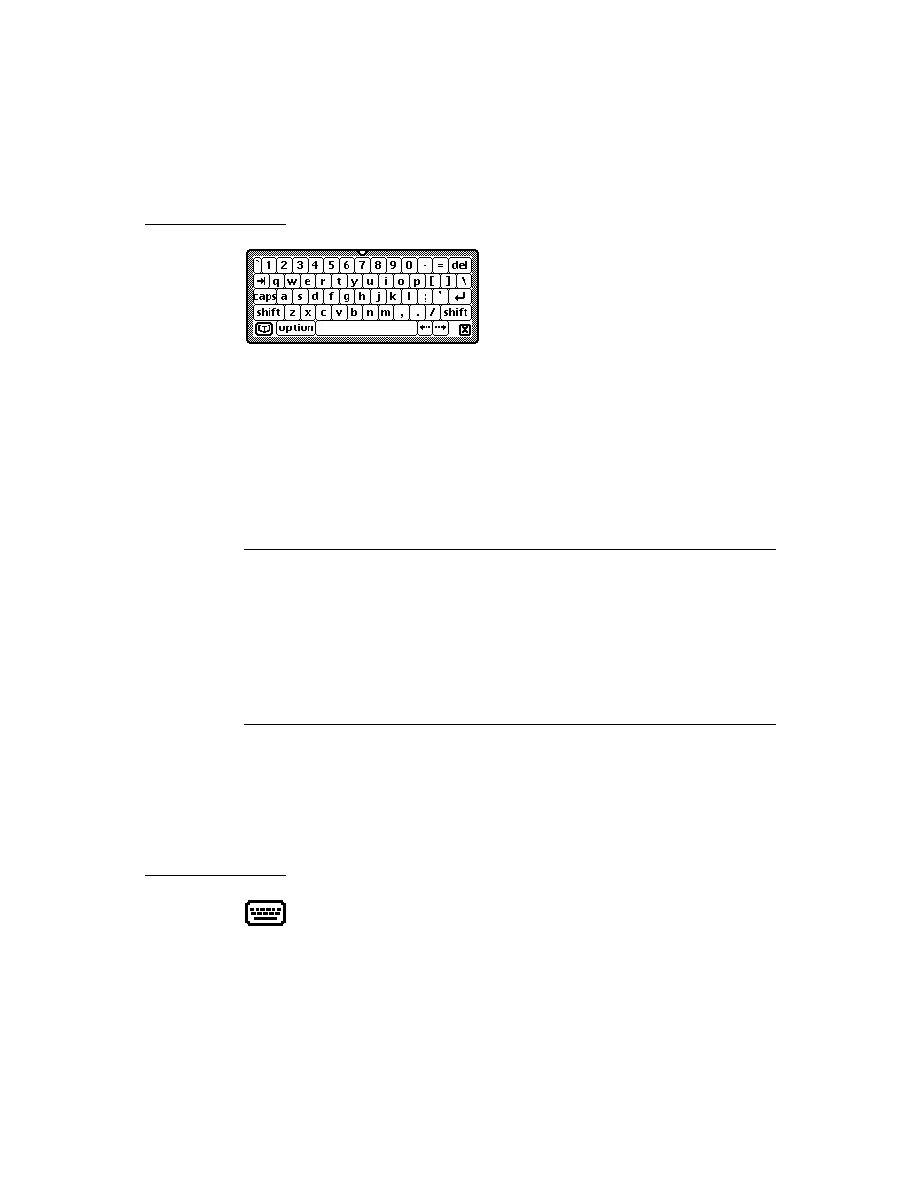
C H A P T E R 4
NewtApp Applications
Summary of the NewtApp Framework
4-27
newtApplication
4
myNewtAppBaseView := {
_proto: newtapplication, // Application base view proto
appSymbol: '|
IOU
:
DTS
| //Unique application symbol
title: "Roll Starter" // A string naming the app
appObject:
[
"
Ox
"
,
"
Oxen
"
]
// Array with singular and
// plural strings describing application's data
appAll: "
All Notes
" // Displayed in folder tab picker
allSoups: { //Frame defining all known soups for app
mySoup
: {
_proto: newtSoup,
...
}
}
allLayouts: {
// Frame with references to layout files;
// both default and overview required.
default:GetLayout("
DefaultLayoutFile
"),
overview:GetLayout("
OverviewLayoutFile
"),
}
scrollingEndBehavior:'beepAndWrap // How scrolling is
// handled at end of view; can also be 'wrap
,
'stop
, or
// 'beepAndStop
.
scrollingUpBehavior: 'bottom //Either 'top or 'bottom
statusBarSlot: '
myStatusBar
//Declare name to base so
//layouts may send messages
allDataDefs: {'|
appName
:
SIG
|:GetLayout("
yourDataDef
")}
//Frame with dataDef symbols as slot names. Slot
// values are references to dataDef layout files.
allViewDefs:
{'|
appName
:
SIG
|: {default:GetLayout("
yourViewDef
")}}
// Frame with dataDef symbols as slot names. Slot
// values are references to frames of viewDef
// layout files.
superSymbol: '|
appName
:
SIG
| //Unique symbol identifying
//superSet of application's soups
doCardRouting:true or 'onlyCardRouting //Enables
// filing and routing

C H A P T E R 4
NewtApp Applications
4-28
Summary of the NewtApp Framework
dateFindSlot:
pathExpression
// Enables dateFind for your
// app. Path must lead to a slot containing a date.
routeScripts: //Contains default Delete and Duplicate
//route scripts.
labelsFilter: //Set dynamically for filing settings
layout:
// Set to the current layout
newtAppBase: //Set dynamically to identify, for
//instance, view to be closed when close box tapped
retargetChain: // Dynamically set array of views
// to update.
targetView: // Dynamically set to the view where
// target soup entry is displayed
target: // Set to the soup entry to be displayed
AddEntryFromStationery: //Returns blank entry with class
func(
stationerySymbol
)....// slot set to
stationerySymbol
AdoptEntryFromStationery: // Returns entry with all slots
func(
adoptee, stationerySymbol, store
)...// from adopted frame
//and class slot set to
stationerySymbol
AdoptSoupEntryFromStationery: //Same as above plus
func(
adoptee, stationerySymbol, store, soup
)... // you specify
//soup & store
FolderChanged: //Changes folder tab to new value
func(
soupName, oldFolder, newFolder
)....
FilterChanged: //Updates folder labels for each soup
func()
.... //in the allSoups frame.
ChainIn: //Adds views needing to be notified for
func(
chainSymbol
) .... //retargeting to
chainSymbol
array.
ChainOut:
//Removes views from
func(
chainSymbol
) .... //
chainSymbol
array.
GetTarget:
//Returns current soup entry.
func()
....
GetTargetView:
//Returns view in which the
func()
.... // target entry is displayed.
DateFind: // Default DateFind method defined in framework.
// Set dateFindSlot in base view to enable it.
func(
date, findType, results, scope, findContext
)....

C H A P T E R 4
NewtApp Applications
Summary of the NewtApp Framework
4-29
Find:
// Default Find method as defined in framework.
func(
text, results, scope, findContext
)...
ShowLayout:// Switches display to specified layout.
func(
layout
)...
NewtDeleteScript:// Deletes entry.
func(
entry, view
)... // Referenced in routeScripts array
NewtDuplicateScript:// Duplicates entry.
func(
entry, view
)... // Referenced in routeScripts array
GetAppState:// Gets app preferences, sets app, & returns
func()... // prefs. Override to add own app prefs.
GetDefaultState:// Sets default app preferences.
func()... // Override to add own app prefs.
SaveAppState:// Sets default app preferences.
func()... // Override to add own app prefs.
newtInfoButton
4
infoButton
:= {
// The standard "i" info button
_proto: newtInfoButton,// Place proto in menuLeftButtons
DoInfoHelp:
//Opens online help book
func()...,
DoInfoAbout:
//Either opens or closes an
func()...,
// About view
DoInfoPrefs:
//Either opens or closes a
func()...,}
// Preferences view
newtActionButton
4
actionButton
:= {
// the standard action button
_proto: newtActionButton } // place in menuRightButtons
newtFilingButton
4
filingButton
:= {
// the standard filing button
_proto: newtFilingButton } // place in menuRightButtons

C H A P T E R 4
NewtApp Applications
4-30
Summary of the NewtApp Framework
newtAZTabs
4
myAZTab
:= {
// the standard A-Z tabs
_proto: newtAZTabs,
PickActionScript:
//Default definition keys to
func(
letter
)...}
// 'indexPath of allSoups soup query
newtFolderTab
4
myFolderTab
:= {
// the plain folder tab
_proto: newtFolderTab }
newtClockFolderTab
4
myClockFolderTab
:= {
// digital clock and folder tabs
_proto: newtClockFolderTab }
newtStatusBarNoClose
4
aStatusBarNoClose
:= {
// status bar with no close box
_proto: newtStatusBarNoClose,
menuLeftButtons: [], //array of button protos
// laid out left to right
menuRightButtons: [], // array of button protos laid out
// right to left
newtStatusBar
4
aStatusBar
:= {
// status bar with close box
_proto: newtStatusBar
menuLeftButtons: [], //array of button protos
// laid out left to right
menuRightButtons: [], // array of button protos laid out
// right to left }
newtFloatingBar
4
aFloatingBar
:= {
// status bar with close box
_proto: newtFloatingBar,
menuButtons: [], // array of button protos }
newtAboutView
4
anAboutView
:= {
// The about view
_proto: newtAboutView }

C H A P T E R 4
NewtApp Applications
Summary of the NewtApp Framework
4-31
newtPrefsView
4
aPrefsView
:= {
// The preferences view
_proto: newtPrefsView }
newtLayout
4
aBasicLayout
:= {
// The basic layout view
_proto: newtLayout,
name: "",
// Optional.
masterSoupSlot: '
mainSoup
, // Required.
// Symbol referring to soup from allSoups slot
forceNewEntry: true, //Forces new entry when empty
//folder opened.
menuRightButtons:[], //Replaces slot in status bar
menuLeftButtons:[], //Replaces slot in status bar
dataSoup: '
soupSymbol
,//Set to soup for this layout
dataCursor: ,// Set to top visible entry; main cursor
FlushData:
//Flushes all children's entries
func(),
NewTarget:
//Utility resets origin and
func(),
// resets screen
ReTarget:
//Sets the dataCursor slot and resets
func(
setViews
),// screen if
setViews
is true
ScrollCursor: //Moves
cursor
delta
entries and resets it.
func(
delta
),
SetUpCursor:
//Sets cursor and returns entry.
func(),
Scroller: //Moves
numAndDirection
entries. Scrolls
func(
numAndDirection
)...,//up if
numAndDirection
<0.
ViewScrollDownScript: // Calls scroller with the
func()...,
//value of 1.
ViewScrollUpScript:
// Calls scroller with the
func()...,
//value of -1.
DoRetarget():
// Calls the "right" retarget
func()...,
}

C H A P T E R 4
NewtApp Applications
4-32
Summary of the NewtApp Framework
newtRollLayout
4
myRollLayout
:= { // Dynamically lays out child views
_proto: newtRollLayout, // using protoChild as default
protoChild: GetLayout("
DefaultEntryView
"), // Default view
name: "",
// Optional.
masterSoupSlot: '
mainSoup
, // Required.
// Symbol referring to soup from allSoups slot
forceNewEntry: true, //Forces new entry when empty
//folder opened.
menuRightButtons:[], //Replaces slot in status bar
menuLeftButtons:[], //Replaces slot in status bar
dataSoup: '
soupSymbol
,//Set to soup for this layout
dataCursor: ,// Set to top visible entry; main cursor
// All newtLayout methods are inherited.
}
newtPageLayout
4
myPageLayout
:= { // Dynamically lays out child views
_proto: newtPageLayout, // using protoChild as default
protoChild: GetLayout("
DefaultEntryView
"), // Default view
name: "",
// Optional.
masterSoupSlot: '
mainSoup
, // Required.
// Symbol referring to soup from allSoups slot
forceNewEntry: true, //Forces new entry when empty
//folder opened.
menuRightButtons:[], //Replaces slot in status bar
menuLeftButtons:[], //Replaces slot in status bar
dataSoup: '
soupSymbol
,//Set to soup for this layout
dataCursor: ,// Set to top visible entry; main cursor
// All newtLayout methods are inherited.
}
newtOverLayout
4
myOverLayout
:= { // Overview for page and card type layout
_proto: newtOverLayout
centerTarget: nil, // True centers entry in overview
masterSoupSlot: '
mainSoup
, // Required.
// Symbol referring to soup from allSoups slot
name: "",
// Required but not used.

C H A P T E R 4
NewtApp Applications
Summary of the NewtApp Framework
4-33
forceNewEntry: true, //Creates blank entry for layout
menuRightButtons:[], //Replaces slot in status bar
menuLeftButtons:[], //Replaces slot in status bar
nothingCheckable: nil, //True suppresses checkboxes
Abstract: //Returns shapes for items in overviews
func(
targetEntry, bbox
)..., //Override to extract text
GetTargetInfo: //Returns frame with target information
func(
targetType
)...,
HitItem: //Called when overview item is tapped.
func(
index, x, y
)...,
// All newtLayout methods are inherited.
}
newtRollOverLayout
4
myOverLayout
:= { // Overview for roll-type application
_proto: newtRollOverLayout //Same as newtOverLayout
centerTarget: nil, // True centers entry in overview
masterSoupSlot: '
mainSoup
, // Required.
// Symbol referring to soup from allSoups slot
name: "",
// Required but not used.
menuRightButtons:[], //Replaces slot in status bar
menuLeftButtons:[], //Replaces slot in status bar
forceNewEntry: true, //Creates blank entry for layout
nothingCheckable: nil, //True suppresses checkboxes
Abstract: //Returns shapes for items in overviews
func(
targetEntry, bbox
)..., //Override to extract text
GetTargetInfo: //Returns frame with target information
func(
targetType
)...,
HitItem: //Called when overview item is tapped.
func(
index, x, y
)...,
// All newtLayout methods are inherited.
}
newtEntryView
4
anEntryView
:= {
// Invisible container for slot views
_proto: newtEntryView
entryChanged: //Set to true for flushing
entryDirtied: //Set to true if flush occurred
target: //Set to entry for display
currentDataDef: //Set to current dataDef

C H A P T E R 4
NewtApp Applications
4-34
Summary of the NewtApp Framework
currentViewDef: //Set to current viewDef
currentStatView: //Set to current context of viewDef
StartFlush: // Starts timer that flushes entry
func()...,
EndFlush: // Called when flush timer fires
func()...,
EntryCool: // Is target read-only? True
report
func(
report
)..., //displays write-protected message
JamFromEntry: // Finds children's jamFromEntry and sends
func(
otherEntry
)..., // message if found, then retargets
Retarget: // Changes stationery's display then sends
func()...,//message on to child views
DoRetarget: // Calls the "right" retarget
func()...,//
}
newtFalseEntryView
4
aFalseEntryView
:= {// Use as container for slot views in
_proto: newtFalseEntryView, // non-NewtApp applications.
targetSlot: 'target, //Parent needs to have slots
dataCursorSlot: 'dataCursor, //with names
targetSlot: 'dataSoup, //that match each of
dataSoup: 'soupQuery // these symbols.
// newtFalseEntryView inherits all newtEntryView methods.
}
newtRollEntryView
4
aRollEntryView
:= { // Entry view for paper roll-style apps
_proto: newtRollEntryView, //stationery required.
bottomlessHeight: kEntryViewHeight, //Optional
// Inherits slots and methods from newtEntryView.
}
newtEntryPageHeader
4
aPageHeader
:= {
// Header bar for card or page-style apps
_proto: newtEntryPageHeader,
// contains no additional slots or methods
}

C H A P T E R 4
NewtApp Applications
Summary of the NewtApp Framework
4-35
newtEntryRollHeader
4
aRollHeader
:= {
// Header/divider bar for page or
// roll-style apps
_proto: newtEntryRollHeader,
hasFiling: true // Nil is no filing or action buttons
isResizable: true // Nil is no drag resizing
}
newtEntryViewActionButton
4
anEntryActionButton
:= {// Action button to use on headers
// and within entry views
_proto: newtEntryViewActionButton
}
newtEntryViewFilingButton
4
anEntryFilingButton
:= {// Filing button to use on headers
// and within entry views
_proto: newtEntryViewFilingButton
}
newtInfoBox
4
anInfoBox
:= {
// Floating view displayed when header
_proto: newtInfoBox, //icon tapped
icon: ,// Optional, default provided.
description: "",// Displayed in view next to icon.
}
newtROTextView
4
readOnlyTextView
:= {// All simple slot views based on this
_proto: newtROTextView,
path: 'pathExpr,// Text stored and retrieved from here
styles: nil,// Plain text.
tabs: nil,// Tabs not enabled.
jamSlot: 'jamPathExpr,// New path for JamFromEntry.
TextScript: // Returns a text representation of data
func()..., //
JamFromEntry: // Retargets to
jamPathExpr
if not nil
func(
jamPathExpr
)..., //
}

C H A P T E R 4
NewtApp Applications
4-36
Summary of the NewtApp Framework
newtTextView
4
editableTextView
:= {// This is the editable text view
_proto: newtTextView,
path: 'pathExpr,// Text stored/retrieved from here
styles: nil,// Plain text.
tabs: nil,// Tabs not enabled.
jamSlot: 'jamPathExpr,// New path for JamFromEntry.
TextScript: // Returns a text representation of data
func()..., //
JamFromEntry: // Retargets to
jamPathExpr
if not nil
func(
jamPathExpr
)..., //
}
newtRONumView
4
readOnlyNumberView
:= {// Read-only number view
_proto: newtRONumView,
path: 'pathExpr,// Numbers stored/retrieved from here
format: %.10g,// For 10-place decimal; you may change
integerOnly: true,// Text to num conversion is int
TextScript: // Returns a text representation of data
func()..., //
JamFromEntry: // Retargets to
jamPathExpr
if not nil
func(
jamPathExpr
)..., //
}
newtNumView
4
editableNumberView
:= {// Editable number view
_proto: newtNumView,
path: 'pathExpr,// Numbers stored/retrieved from here
format: %.10g,// For 10-place decimal; you may change
integerOnly: true,// Text to num conversion is int
TextScript: // Returns a text representation of data
func()..., //
JamFromEntry: // Retargets to
jamPathExpr
if not nil
func(
jamPathExpr
)..., //
}
newtROTextDateView
4
readOnlyTextDateView
:= {// Read-only text and date view. One
_proto: newtROTextDateView, //format slot must be non-nil
path: 'pathExpr,// Data stored/retrieved from here

C H A P T E R 4
NewtApp Applications
Summary of the NewtApp Framework
4-37
longFormat: yearMonthDayStrSpec,// for LongDateStr
shortFormat: nil,
// for ShortDateStr function
TextScript: // Returns a text representation of data
func()..., //
JamFromEntry: // Retargets to
jamPathExpr
if not nil
func(
jamPathExpr
)..., //
}
newtTextDateView
4
editableTextDateView
:= {// Editable text and date view. One
_proto: newtTextDateView, //format slot must be non-nil
path: 'pathExpr,// Data stored/retrieved from here
longFormat: yearMonthDayStrSpec,// for LongDateStr
shortFormat: nil,
// for ShortDateStr function
TextScript: // Returns a text representation of data
func()..., //
JamFromEntry: // Retargets to
jamPathExpr
if not nil
func(
jamPathExpr
)..., //
}
newtROTextTimeView
4
readOnlyTextTimeView
:= {// Displays and formats time text
_proto: newtROTextTimeView,
path: 'pathExpr,// Data stored/retrieved from here
format: ShortTimeStrSpec,// for TimeStr function
TextScript: // Returns a text representation of data
func()..., //
JamFromEntry: // Retargets to
jamPathExpr
if not nil
func(
jamPathExpr
)..., //
}
newtTextTimeView
4
editableTextTimeView
:= {// Editable time text
_proto: newtTextTimeView,
path: 'pathExpr,// Data stored/retrieved from here
format: ShortTimeStrSpec,// for TimeStr function
TextScript: // Returns a text representation of data
func()..., //
JamFromEntry: // Retargets to
jamPathExpr
if not nil
func(
jamPathExpr
)..., //
}

C H A P T E R 4
NewtApp Applications
4-38
Summary of the NewtApp Framework
newtROTextPhoneView
4
readOnlyTextPhoneView
:= {// Displays phone numbers
_proto: newtROTextPhoneView,
path: 'pathExpr,// Data stored/retrieved from here
TextScript: // Returns a text representation of data
func()..., //
JamFromEntry: // Retargets to
jamPathExpr
if not nil
func(
jamPathExpr
)..., //
}
newtTextPhoneView
4
EditableTextPhoneView
:= {// Displays editable phone numbers
_proto: newtTextPhoneView,
path: 'pathExpr,// Data stored/retrieved from here
TextScript: // Returns a text representation of data
func()..., //
JamFromEntry: // Retargets to
jamPathExpr
if not nil
func(
jamPathExpr
)..., //
}
newtAreaCodeLine
4
protonewtAreaCodeLine : = {
_proto: protonewtAreaCodeLine,
flavor: newtPhoneFilter
access: 'query
label: string
//text to display in the highlight window
path: 'pathExpr,// Data stored/retrieved from here
}
newtAreaCodePhoneLine
4
protonewtAreaCodeLine : = {
_proto: protonewtAreaCodeLine,
flavor: newtPhoneFilter
access: 'query
label: string
//text to display in the highlight window
path: 'pathExpr,// Data stored/retrieved from here
}

C H A P T E R 4
NewtApp Applications
Summary of the NewtApp Framework
4-39
newtROEditView
4
readOnlyEditView
:= { // A text display view, which
// may have scrollers
_proto: newtROEditView,
optionFlags: kNoOptions,
// disables scroller
//kHasScrollersOption enables scroller
doCaret: true, //caret is autoset
viewLineSpacing: 28,
path: 'pathExpr,// Data stored/retrieved from here
ScrolltoWord: // Finds
words
, scrolls to it, and high-
func(
words, hilite
)..., // lights it (if
hilite
is true)
}
newteditView
4
editView
:= {
// A text edit view, which
// may have scrollers
_proto: newtEditView,
optionFlags: kNoOptions,
// disables scroller
//kHasScrollersOption enables scroller
doCaret: true, //caret is autoset
viewLineSpacing: 28,
path: 'pathExpr,// Data stored/retrieved from here
ScrolltoWord: // Finds
words
, scrolls to it, and high-
func(
words, hilite
)..., // lights it (if
hilite
is true)
}
newtCheckBox
4
checkBoxView
:= {
// A checkbox
_proto: newtCheckBox
assert: true,// Data stored/retrieved from here
negate: nil,// Data stored/retrieved from here
path: 'pathExpr,// Data stored/retrieved from here
ViewSetupForm: // Is target.(path)= assert?
func()..., //
ValueChanged: // Changes target.(path) value to its
func()..., // opposite either true or false
}

C H A P T E R 4
NewtApp Applications
4-40
Summary of the NewtApp Framework
newtStationeryView
4
stationeryView
:= {
// Used as bounding box and container
// view for viewDef
_proto: newtStationeryView
}
newtEntryLockedIcon
4
entryLockedIcon
:= { //
Shows lock if slot is on locked media
_proto: newtEntryLockedIcon
icon: nil,// Can also be: lockedIcon
Retarget : // displays either lock or unlocked icon
func()...,
SetIcon: // Changes target.(path) value to its
func()..., // opposite either true or false
}
newtProtoLine
4
basicInputLine
:= {
// Base for input line protos
_proto: newtProtoLine,
label: "",// Text for input line label
labelCommands: ["", "",],// Picker options
curLabelCommand: 1,// Integer for current command
usePopup: true,// When true with labelCommands array
// picker is enabled
path: 'pathExpr,// Data stored/retrieved from here
access: 'readWrite,// Could be 'readOnly or 'pickOnly
flavor: newtFilter,// Don't change
memory: nil,
// most recent picker choices
ChangePopup: // change picker items before they display
func(
item, entry
)..., //
UpdateText: // Used with Undo to update text to new text
func(
newText
)..., //
}
newtLabelInputLine
4
aLabelInputLine
:= {
// Labelled input line for text
_proto: newtLabelInputLine,
label: "",// Text for input line label
labelCommands: ["", "",],// Picker options
curLabelCommand:
integer
,// Integer for current command

C H A P T E R 4
NewtApp Applications
Summary of the NewtApp Framework
4-41
usePopup: true,// When true with labelCommands array
// picker is enabled
access: 'readWrite,// Could be 'readOnly or 'pickOnly
flavor: newtTextFilter,//
memory: nil,
// most recent picker choices
path: 'pathExpr,// Data stored/retrieved from here
ChangePopup: // change picker items before they display
func(
item, entry
)..., //
UpdateText: // Used with Undo to update text to new text
func(
newText
)..., //
}
newtROLabelInputLine
4
aLabelInputLine
:= {
// Labelled display line for text
_proto: newtROLabelInputLine,
label: "",// Text for input line label
flavor: newtTextFilter,//
memory: nil,
// most recent picker choices
path: 'pathExpr,// Data stored/retrieved from here
ChangePopup: // change picker items before they display
func(
item, entry
)..., //
UpdateText: // Used with Undo to update text to new text
func(
newText
)..., //
}
newtLabelNumInputLine
4
aLabelNumberInputLine
:= {
// Labelled number input line
_proto: newtLabelNumInputLine,
label: "",// Text for input line label
labelCommands: ["", "",],// Picker options
curLabelCommand:
integer
,// Integer for current command
usePopup: true,// When true with labelCommands array
// picker is enabled
access: 'readWrite,// Could be 'readOnly or 'pickOnly
flavor: newtNumberFilter,//
memory: nil,
// most recent picker choices
path: 'pathExpr,// Data stored/retrieved from here
ChangePopup: // change picker items before they display
func(
item, entry
)..., //
UpdateText: // Used with Undo to update text to new text
func(
newText
)..., //
}

C H A P T E R 4
NewtApp Applications
4-42
Summary of the NewtApp Framework
newtROLabelNumInputLine
4
aDisplayLabelNumberInputLine
:= {// Labelled number display line
_proto: newtROLabelNumInputLine,
label: "",// Text for input line label
flavor: newtNumberFilter,//
path: 'pathExpr,// Data stored/retrieved from here
UpdateText: // Used with Undo to update text to new text
func(
newText
)..., //
}
newtLabelDateInputLine
4
editableLabelNumberInputLine
:= {// Labelled date input line
_proto: newtLabelDateInputLine,
label: "",// Text for input line label
labelCommands: ["", "",],// Picker options
curLabelCommand:
integer
,// Integer for current command
memory: nil,
// most recent picker choices
usePopup: true,// When true with labelCommands array
// picker is enabled
access: 'readWrite,// Could be 'readOnly or 'pickOnly
flavor: newtDateFilter,//
path: 'pathExpr,// Data stored/retrieved from here
ChangePopup: // change picker items before they display
func(
item, entry
)..., //
UpdateText: // Used with Undo to update text to new text
func(
newText
)..., //
}
newtROLabelDateInputLine
4
displayLabelDateLine
:= {
// Labelled number display line
_proto: newtROLabelDateInputLine,
label: "",// Text for input line label
flavor: newtDateFilter,// Don't change
path: 'pathExpr,// Data stored/retrieved from here
UpdateText: // Used with Undo to update text to new text
func(
newText
)..., //
}
newtLabelSimpleDateInputLine
4
editableLabelSimpleDateLine
:= {// Labelled date display line
// accepts dates like 9/15 or 9/15/95

C H A P T E R 4
NewtApp Applications
Summary of the NewtApp Framework
4-43
_proto: newtLabelSimpleDateInputLine,
label: "",// Text for input line label
access: 'readWrite,// Could be 'readOnly or 'pickOnly
flavor: newtSimpleDateFilter,//
path: 'pathExpr,// Data stored/retrieved from here
UpdateText: // Used with Undo to update text to new text
func(
newText
)..., //
}
newtNRLabelDateInputLine
4
pickerLabelDateInputLine
:= {
// Input through DatePopup picker
_proto: newtNRLabelDateInputLine,
label: "",// Text for input line label
access: 'pickOnly,// Could be 'readOnly
flavor: newtDateFilter,//
path: 'pathExpr,// Data stored/retrieved from here
UpdateText: // Used with Undo to update text to new text
func(
newText
)..., //
}
newtROLabelTimeInputLine
4
displayLabelTimeLine
:= {
// Labelled time display line
_proto: newtROLabelTimeInputLine,
label: "",// Text for input line label
flavor: newtTimeFilter,// Don't change
path: 'pathExpr,// Data stored/retrieved from here
}
newtLabelTimeInputLine
4
aLabelTimeInputLine
:= {
// Labelled time input line
_proto: newtLabelTimeInputLine,
label: "",// Text for input line label
labelCommands: ["", "",],// Picker options
curLabelCommand:
integer
,// Integer for current command
usePopup: true,// When true with labelCommands array
// picker is enabled
access: 'readWrite,// Could be 'readOnly or 'pickOnly
flavor: newtTimeFilter,// Don't change
memory: nil,
// most recent picker choices
path: 'pathExpr,// Data stored/retrieved from here
ChangePopup: // change picker items before they display
func(
item, entry
)..., //

C H A P T E R 4
NewtApp Applications
4-44
Summary of the NewtApp Framework
UpdateText: // Used with Undo to update text to new text
func(
newText
)..., //
}
newtNRLabelTimeInputLine
4
pickerLabelTimeInputLine
:= {
// Input through TimePopup picker
_proto: newtNRLabelTimeInputLine,
label: "",// Text for input line label
access: 'pickOnly,// Could be 'readOnly
flavor: newtTimeFilter,// Don't change
path: 'pathExpr,// Data stored/retrieved from here
UpdateText: // Used with Undo to update text to new text
func(
newText
)..., //
}
newtLabelPhoneInputLine
4
aLabelPhoneInputLine
:= {
// Labelled phone input line
_proto: newtLabelPhoneInputLine,
label: "",// Text for input line label
usePopup: true,// When true with labelCommands array
// picker is enabled
access: 'readWrite,// Could be 'readOnly or 'pickOnly
flavor: newtPhoneFilter,// Don't change
memory: nil,
// most recent picker choices
path: 'pathExpr,// Data stored/retrieved from here
ChangePopup: // change picker items before they display
func(
item, entry
)..., //
UpdateText: // Used with Undo to update text to new text
func(
newText
)..., //
}
newtSmartNameView
4
smartNameLine
:= {
// protoPeoplePicker Input
_proto: newtSmartNameView, // from Names soup
label: "",// Text for input line label
access: 'readWrite,// Could be 'readOnly or 'pickOnly
flavor: newtSmartNameFilter,// Don't change
path: 'pathExpr,// Data stored/retrieved from here
UpdateText: // Used with Undo to update text to new text
func(
newText
)...,
}

About Stationery
5-1
C H A P T E R 5
Stationery
5
Figure 5-0
Table 5-0
Stationery, which consists of new data formats and different views of your data,
may be built into an application or added as an extension. Once incorporated, these
data formats and views are available through the pickers (pop-up menus) of the
New and Show buttons.
Stationery works best when incorporated into a NewtApp application. It is part of the
NewtApp framework and is tightly integrated into its structures. If you are building
applications using the NewtApp framework, you'll probably want to read this chapter.
Before you begin you should already be familiar with the concepts documented in
Chapter 4, "NewtApp Applications," as well as the concepts of views and templates,
soups and stores, and system services like finding, filing, and routing. These subjects
are covered in Chapter 3, "Views," Chapter 11, "Data Storage and Retrieval,"
Chapter 16, "Find," Chapter 15, "Filing," and Chapter 21, "Routing Interface."
The examples in this chapter use the Newton Toolkit (NTK) development
environment. Therefore, you should also be familiar with NTK before you try the
examples. Consult Newton Toolkit User's Guide for information about NTK.
This chapter describes:
how to create stationery and tie it into an application
how to create, register, and install an extension
the stationery protos, methods, and global functions
About Stationery
5
Stationery application extensions provide different ways of structuring data and
various ways to view that data. To add stationery to your application, you must
create a data definition, also called a dataDef, and an adjunct view definition, also
called a viewDef. Both of the stationery components are created as view templates,
though only the viewDef displays as a view at run time. Stationery always consists
of at least one dataDef which has one or more viewDefs associated with it.

C H A P T E R 5
Stationery
5-2
About Stationery
A dataDef is based on the
newtStationery
proto and is used to create
alternative data structures. The dataDef contains slots that define, describe, and
identify its data structures. It also contains a slot, called
superSymbol
, that
identifies the application into which its data entries are to be subsumed. It also
contains a
name
slot where the string that names the dataDef is placed. This is the
name that appears in the New picker. Note that each of the items shown in the New
menu of the Notes application in Figure 5-1 is a dataDef name.
The viewDef is based on any general view proto, depending upon the
characteristics you wish to impart, but must have a specified set of slots added to it.
(For more information about the slots required in viewDefs and dataDefs, see the
"Stationery Reference" chapter in Newton Programmer's Reference.) The viewDef
is the view template you design as the input and display device for your data. It is
the component of stationery that imparts the "look and feel" for that part of the
application. Each dataDef must have at least one viewDef defined to display it,
though it can have several.
You may include or add stationery to any NewtApp application or any application
that already uses stationery. The stationery components you create appear as items
in the pickers (pop-up menus) of the New and Show buttons.
The Stationery Buttons
5
The stationery buttons are necessary to integrate stationery definitions with
an application. They must be in the application which is to display your
stationery components. They are defined as part of the NewtApp framework
and work only when included in a NewtApp application. (You can use the
newtStationeryPopupButton
proto to create your own non-
NewtApp buttons.)
The New button offers new data formats generated from dataDefs. For example,
the New button in the built-in Calls application creates one new data entry form by
default; if it contained more dataDefs there would be a New picker available. The
New button of the built-in Notes application offers a picker whose choices create a
new Note, Checklist, or Outline format for entering notes. The example used in this
chapter extends the built-in Notes application by adding the dataDef item IOU to
the New menu, as shown in Figure 5-1.

C H A P T E R 5
Stationery
About Stationery
5-3
Figure 5-1
The IOU extension in the New picker
When you choose IOU from the New picker, an IOU entry is displayed, as shown
in Figure 5-2.
Figure 5-2
The IOU extension to the Notes application
The Show button offers different views for the display of application data. These
are generated by the viewDefs defined for an application. For example, the choices
in the Show button of the built-in Names application include a Card and All Info
view of the data. These views appear as shown in Figure 5-3.

C H A P T E R 5
Stationery
5-4
About Stationery
Figure 5-3
The Show menu presents different views of application data
Stationery Registration
5
Your stationery, which may be built as part of an application or outside of an
application (as an NTK auto part), must be registered with the system when an
application is installed and unregistered when an application is uninstalled.
DataDef and viewDef registry functions coordinate those stationery parts by
registering the viewDef with its dataDef symbol, as well as its view template. The
dataDef registry function adds its view templates to the system registry.
When it is part of a NewtApp application, stationery registration is done
automaticallyafter you set slots with the necessary symbols. If you create your
stationery outside of a NewtApp application, you must register (and unregister)
your stationery manually by using the global functions provided for that
purpose (
RegDataDef
,
UnRegDataDef
,
RegisterViewDef
, and
UnRegisterViewDef
) in the
InstallScript
and
RemoveScript
functions
in your application part.
Once stationery is registered, applications can make use of those dataDefs whose
superSymbol
slot matches the application's
superSymbol
slot.

C H A P T E R 5
Stationery
Using Stationery
5-5
Getting Information about Stationery
5
By using the appropriate global function, you can get information about all the
dataDefs and viewDefs that have been registered and thus are part of the system
registry. These functions include
GetDefs
,
GetDataDefs
,
GetAppDataDefs
,
GetViewDefs
, and so on. For details on these functions, see Newton
Programmer's Reference.
You can also obtain application-specific stationery information. This enables
applications that are registered for stationery to be extended by other developers.
Compatibility Information
5
The stationery feature and programming interface is new in Newton OS version
2.0. It is not supported on earlier system versions.
Using Stationery
5
Stationery allows you to:
Create discrete data definitions and view definitions.
Extend your own and other applications.
Create print formats.
Designing Stationery
5
Whether you use stationery in an application or an auto part, it is important to keep
the data and view definitions as discrete as possible. Encapsulating them, by
keeping all references confined to the code in the data or view definition, will make
them maximally reusable.
You should keep in mind that these extensions may be used in any number of
future programming situations that you cannot foresee. If your stationery was
created for an application (which you may have written at the same time), resist
any and all urges to make references to structures contained in that application,
thereby "hard-wiring" it to depend on that application. In addition, you should
provide public interfaces to any values you want to share outside the dataDef.
If your stationery is designed for a NewtApp, the stationery soup entries, which are
defined in the dataDef component of stationery, are adopted into the soup of a
NewtApp application (via the
AdoptEntry
method) so that your stationery's slots
are added to those already defined in the main application. This allows the
stationery and the host application to have discrete soup structures. See the
description of
AdoptEntry
(page 3-5) in Newton Programmer's Reference.

C H A P T E R 5
Stationery
5-6
Using Stationery
The dataDef component of your stationery should use a
FillNewEntry
method
to define its own discrete soup entry structure. Note that it is your responsibility to
set a
class
slot within each entry. The value of the
class
slot must match the
dataDef symbol and is used by the system when routing the entry (via faxing,
mailing, beaming, printing, and so on). An example of how to use
FillNewEntry
follows.
Using FillNewEntry
5
You use the
FillNewEntry
method in your dataDef to create an entry structure
that is tailored to your data. This approach is recommended when your stationery is
implemented as part of a NewtApp application.
The
FillNewEntry
method works in conjunction with the NewtApp
framework's
newtSoup.CreateBlankEntry
method. The
FillNewEntry
method takes a new entry, as returned by the
CreateBlankEntry
method, as a
parameter. This is done with a
CreateBlankEntry
implementation put in the
newtApplication.allSoups
slot of your NewtApp application, as shown in
the following example:
CreateBlankEntry: func()
begin
local newEntry := Clone({class:nil,
viewStationery: nil,
title: nil,
timeStamp: nil,
height: 176});
newEntry.title := ShortDate(time());
newEntry.timeStamp := time();
newEntry;
end;
This new entry contains an entry template. In the following code example, that
new entry is passed as a parameter to the
FillNewEntry
method, which is
implemented in the stationery's dataDef.
FillNewEntry
adds a slot named
kDataSymbol
, which contains an entry template for the stationery's data
definition. It then adds a
class
slot to the new entry, which is set to the same
constant (
kDataSymbol
). A
viewStationery
slot is then added and set to the
same constant (only needed for vestigial compatibility with the Notes application).
Finally, it adds a value to the
dueDate
slot of the
kDataSymbol
entry.
FillNewEntry: func(newEntry)
begin
newEntry.(kDataSymbol) :=
Clone({who: "A Name",
howMuch: 42,
dueDate: nil});

C H A P T E R 5
Stationery
Using Stationery
5-7
newEntry.class := kDataSymbol;
newEntry.viewStationery := kDataSymbol;
newEntry.(kDataSymbol).dueDate:=time();
newEntry;
end;
Extending the Notes Application
5
You may extend an existing application, such as the built-in Notes application, by
adding your own stationery. This is done by building and downloading an NTK
auto part that defines your stationery extensions.
The sample project used to illustrate many of the following sections consists of
these files, in the processing order shown:
ExtendNotes.rsrc
ExtendNotes Definitions.f
iouDataDef
iouDefaultViewDef
iouPrintFormat
ExtendNotes Install & Remove.f
Of these, the
iouDataDef
,
iouDefaultViewDef
, and
ExtendNotes
Install & Remove.f
files are used in the examples in this chapter. The
resource file (
ExtendNotes.rsrc
) contains the icon that is displayed next to the
dataDef name in the New menu (as shown in Figure 5-1). The definitions file
(
ExtendNotes Definitions.f
) is the file in which the constants, some of
which are used in examples, are defined. Finally, the
iouPrintFormat
file
defines a print format for the stationery.
Determining the SuperSymbol of the Host
5
Using stationery requires the presence of a matching
superSymbol
slot in both
the host application and the dataDef component of your stationery. The value in the
superSymbol
slot is used to link a dataDef to an application.
If you do not know the value of the
superSymbol
slot for an application that is
installed on your Newton device, you may use the global function
GetDefs
to see
all the dataDefs that are registered by the system.

C H A P T E R 5
Stationery
5-8
Using Stationery
A call to the global function
GetDefs
in the NTK Inspector window returns a
series of frames describing dataDefs that have been registered with the system. An
excerpt of the output from a call made in the Inspector window follows.
GetDefs('dataDef,nil,nil)
#44150A9 [{_proto: {@451},
symbol: paperroll,
name: "Note",
superSymbol: notes,
description: "Note",
icon: {@717},
version: 1,
metadata: NIL,
MakeNewEntry: <function, 0 arg(s) #46938D>,
StringExtract: <function, 2 arg(s) #4693AD>,
textScript: <function, 2 arg(s) #4693CD>},
{_proto: {@451},
symbol: calllog,
name: "Calls",
superSymbol: callapp,
description: "Phone Message",
icon: {@718},
version: 1,
metadata: NIL,
taskSlip: |PhoneHome:Newton|,
MakeNewEntry: <function, 0 arg(s) #47F9A9>,
StringExtract: <function, 2 arg(s) #47F969>,
textScript: <function, 2 arg(s) #47F989>},
...]
GetDefs
and other stationery functions are documented in Newton Programmer's
Reference.
Creating a DataDef
5
You create a dataDef by basing it on a
newtStationery
proto. In NTK it is
created as a layout file, even though it is never displayed. The following steps lead
you through the creation of the dataDef that is used to extend the built-in Notes
application.
Note again that the data definition is adopted into an application's soup only when
the application and dataDef have matching values in their
superSymbol
slots.
For instance, when you are building a dataDef as an extension to the Notes
application, as we are in this example, your dataDef must have
'notes
as the
value of its
superSymbol
slot.

C H A P T E R 5
Stationery
Using Stationery
5-9
The following example uses the constant
kSuperSymbol
as the value of the
superSymbol
slot. It is defined as follows in the
Extend Notes
Definition.f
file:
constant kSuperSymbol := 'notes;// Note's SuperSymbol
Once you have created an NTK layout, named the template
iouDataDef
, and
saved the file under the name
iouDataDef
, you may set the slots of the
iouDataDef
as follows:
Set
name
to
"IOU"
. This shows up in the New button's picker.
Set
superSymbol
to the constant
kSuperSymbol
. This stationery can
only be used by an application that has a matching value in the
newtApplication
base view's
superSymbol
slot.
Set
description
to
"An IOU entry"
. This string shows up in the
information box that appears when the user taps the icon on the left side of
the header, as shown in Figure 4-5 (page 4-9).
Set
symbol
to
kDataSymbol
.
Set
version
to
1
. This is an arbitrary stationery version number set at your
discretion.
Remove the
viewBounds
slot; it's not needed since this object is not a view.
There are a number of methods defined within the
newtStationery
proto that
you should override for your data type.
Defining DataDef Methods
5
The three methods
MakeNewEntry
,
StringExtract
, and
TextScript
are
illustrated in this section. You use the method
MakeNewEntry
to define the soup
entries for your dataDef; the method
StringExtract
is required by NewtApp
overview scripts to return text for display in the overview; and
TextScript
is
called by the routing interface to return a text description of your data.
The
MakeNewEntry
method returns a complete entry frame which will be added
to some (possibly unknown) application soup. You should use
MakeNewEntry
,
instead of the
FillNewEntry
method (which works in conjunction with the
NewtApp framework's
newtSoup.CreateBlankEntry
), when your stationery
is being defined as an auto part.
The example of
MakeNewEntry
used here defines the constant
kEntryTemplate
as a frame in which to define all the generic parts of the entry.
All the specific parts of the data definition are kept in a nested frame that has the
name of the data class symbol,
kDataSymbol
. By keeping the specific definitions
of your data grouped in a single nested frame and accessible by the class of the
data, you are assuring that your code will be reusable in other applications.

C H A P T E R 5
Stationery
5-10
Using Stationery
// Generic entry definition:
DefConst('kEntryTemplate, {
class: kDataSymbol,
viewStationery: kDataSymbol,// vestigial; for Notes
// compatibility
title: nil,
timeStamp: nil,
height: 176,
// For page and paper roll-type apps
// this should be the same as height
// slot in dataDef and viewDefHeight
// slot in viewDef (if present)
});
// This facilitates writing viewDefs that can be reused
kEntryTemplate.(kDataSymbol) := {
who: nil,
howMuch: 0,
dueDate: nil,
};
MakeNewEntry: func()
begin
local theNewEntry := DeepClone(kEntryTemplate);
theNewEntry.title := ShortDate(time());
theNewEntry.timeStamp := time();
theNewEntry.(kDataSymbol).dueDate := time();
theNewEntry;
end;
The
StringExtract
method is called when an overview is generated and is
expected to return a one or two-line description of the data. Here is an example of a
StringExtract
implementation:
StringExtract: func(item,numLines)
begin
if numLines = 1 then
return item.title
else
return item.title&&item.(kDataSymbol).who;
end;
The
TextScript
method is called by the routing interface to get a text version of
an entire entry. It differs from
StringExtract
in that it returns the text of the
item, rather than a description.

C H A P T E R 5
Stationery
Using Stationery
5-11
Here is an example:
TextScript: func(item,target)
begin
item.text := "IOU\n" & target.(kDataSymbol).who
&& "owes me" &&
NumberStr(target.(kDataSymbol).howMuch);
item.text;
end;
Creating ViewDefs
5
ViewDefs may be based on any of the generic view protos. You could use, for
instance, a
clView
, which has very little functionality. Or, if you wanted a picture
to display behind your data, you could base your viewDef on a
clPictureView
.
Routing and printing formats are also implemented as viewDefs. You can learn
more about using special protos to create routing and printing formats in Chapter 21,
"Routing Interface."
Note that these are just a few examples of views you may use as a base view in
your viewDef. Your viewDef will function as expected, so long as the required slots
are set and the resulting view template is registered, either in the
allviewDefs
slot of the
newtApplication
base view or through the
InstallScript
function of an auto part.
You may create the viewDef for the auto part that extends the Notes application by
using a
clView
as the base view. Create an NTK view template, named
iouDefaultViewDef
, in which a
clView
fills the entire drawing area. Then
save the view template file (using the Save As menu item) as
iouDefaultViewDef
.
You can now set the slots as follows:
Set the
name
slot to
"IOU Info"
. This string appears in the Show button, if
there is one.
Set the
symbol
slot to
'default
. At least one of the viewDefs associated with
a dataDef must have
'default
as the value of its
symbol
slot.
Set the
type
slot to
'viewer
. The three system-defined types for viewDefs are
'editor
,
'viewer
, and
'routeFormat
. You may define others as you wish.
Set the
viewDefHeight
slot to 176 (of the four slot views that will be added
to this viewDef, each is 34 pixels high plus an 8-pixel separation between them
and an 8-pixel border at the bottom).
Set the
viewBounds
slot to 0, 0, 0, 0.
Set the
viewJustify
slot to horizontal parent full relative and vertical parent
full relative.
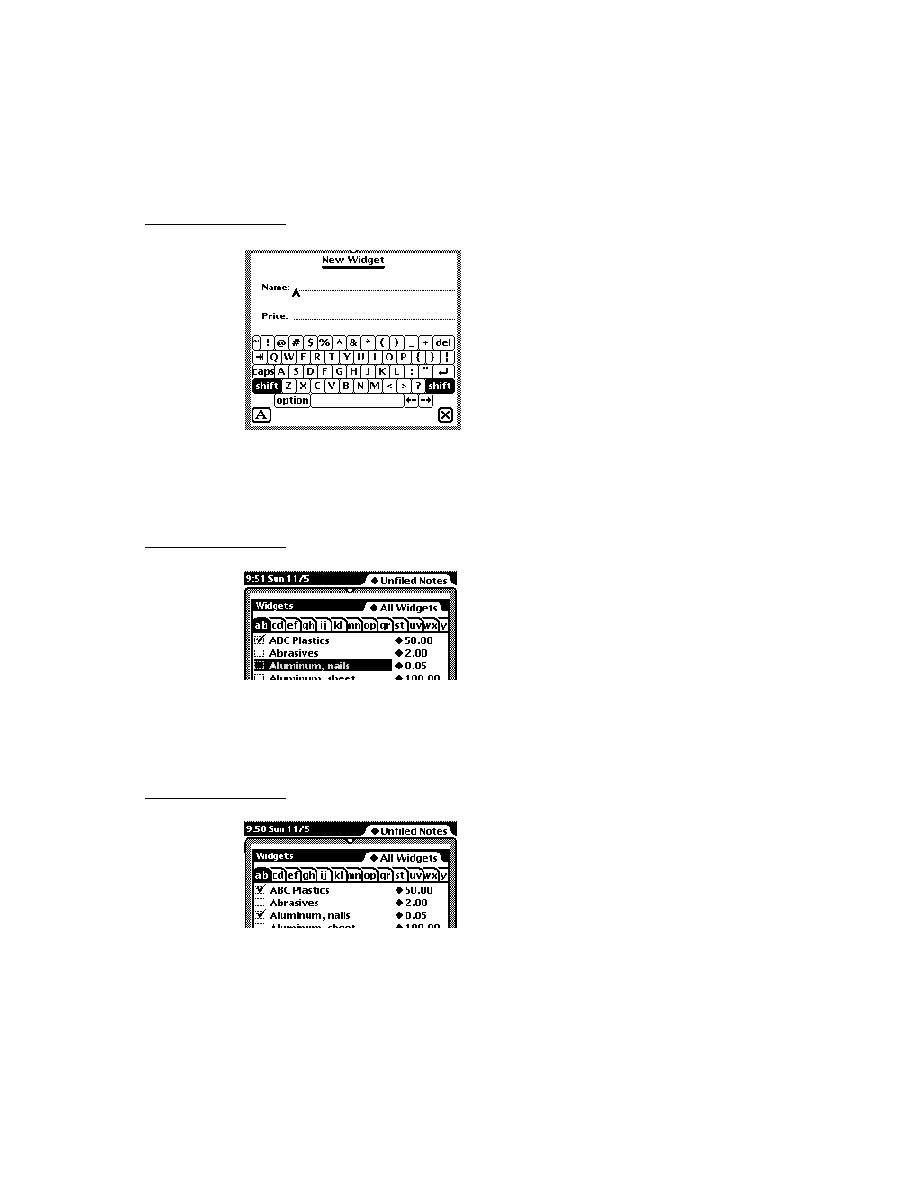
C H A P T E R 5
Stationery
5-12
Using Stationery
Add the protos that will display the data and labels to the working application. The
protos used here include:
newtSmartNameView
newtLabelNumInputLine
newtLabelDateInputLine
newtLabelTimeInputLine
You can read more about these protos in Chapter 4, "NewtApp Applications." They
should be aligned as shown in Figure 5-4.
Figure 5-4
The default viewDef view template
Set the slots of the
newtSmartNameView
as follows:
Set the
label
slot to
"Who"
.
Set the
path
slot to
[pathExpr: kDataSymbol, 'who]
. The path slot
must evaluate to a slot in your data entry frame that contains a name (or a place
to store one).
Set the
usePopup
slot to
true
.

C H A P T E R 5
Stationery
Using Stationery
5-13
Set the slots of the
newtLabelNumInputLine
as follows:
Set the
label
slot to
"How Much"
.
Set the
path
slot to
[pathExpr: kDataSymbol, 'howMuch]
. This
path
slot must evaluate to a slot in your data entry frame that contains a number (or a
place to store one).
Add a
newtLabelDateInputLine
at the top of the
default
template so that it
is aligned as shown. Then set the slots as follows:
Set the
label
slot to
"Date Due"
.
Set the
path
slot to
[pathExpr: kDataSymbol, 'dueDate]
. This
path
slot must evaluate to a slot in your data entry frame that contains a date (or a
place to store one).
Add a
newtLabelTimeInputLine
at the top of the
default
template so that it
is aligned as shown. Then set the slots as follows:
Set the
label
slot to
"Due Time"
.
Set the
path
slot to
[pathExpr: kDataSymbol, 'dueDate]
. This
path
must evaluate to a slot in your data entry frame that contains a time (or a place
to store one).
Registering Stationery for an Auto Part
5
When your stationery is implemented in an auto part, you are responsible for
registering and removing it. The following code samples show
InstallScript
and
RemoveScript
functions that use the appropriate global functions to register
and unregister the viewDef and dataDef files in your auto part as it is installed and
removed, respectively. Note that the print format file is also registered as a viewDef
with the system.
InstallScript: func(partFrame,removeFrame)
begin
RegDataDef(kDataSymbol, GetLayout("iouDataDef"));
RegisterViewDef(GetLayout("iouDefaultViewDef"),
kDataSymbol);
RegisterViewDef(GetLayout("iouPrintFormat"),
kDataSymbol);
end;
RemoveScript: func(removeFrame)
begin
UnRegisterViewDef('default, kDataSymbol);
UnRegisterViewDef('iouPrintFormat, kDataSymbol);
UnRegDataDef(kDataSymbol);
end;
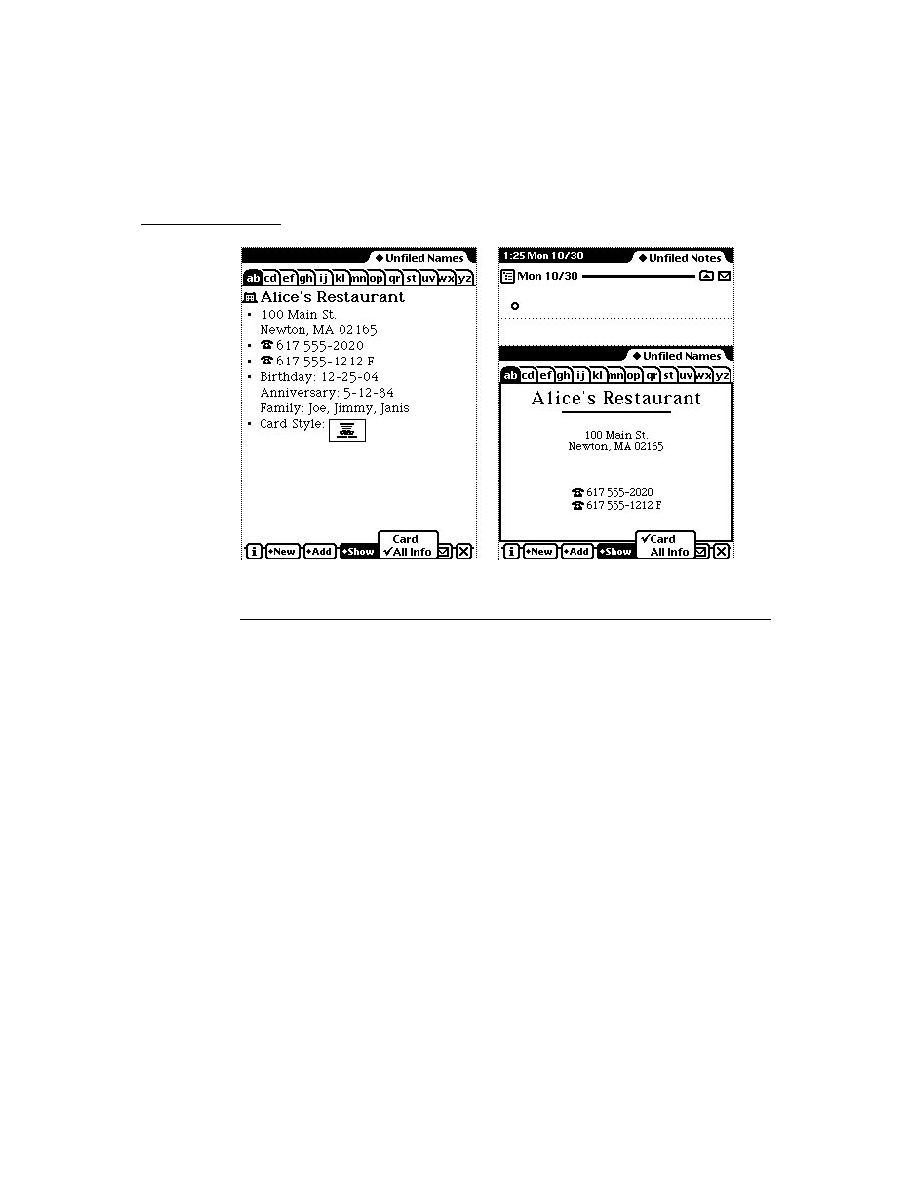
C H A P T E R 5
Stationery
5-14
Using Stationery
Using the MinimalBounds ViewDef Method
5
The
MinimalBounds
method must be used in a viewDef when the size of the
entry is dynamic, as it is in a paper-roll-style or page-style application. It's not
necessary for a card-style application, which has a fixed height; in that case you
should set a static height for your viewDef in the
viewDefHeight
slot.
The
MinimalBounds
method is used to compute the minimal size for the
enclosing bounding box for the viewDef at run time. The following is an
example of a
MinimalBounds
implementation where the viewDef contains
a
newtEditView
whose
path
slot is set to
[pathExpr:kDataSymbol,'notes]
:
MinimalBounds: func(entry)
begin
local result := {left: 0, top: 0, right: 0,
bottom: viewDefHeight};
// For an editView, make the bounds big enough to
// contain all the child views.
if entry.(kDataSymbol).notes then
foreach item in entry.(kDataSymbol).notes do
result := UnionRect( result, item.viewBounds );
result;
end;
C H A P T E R 5
Stationery
Stationery Summary
5-15
Stationery Summary
5
Data Structures
5
ViewDef Frame
5
myViewDef := {
_proto:
anyGenericView
,
type: 'editor, // could also be 'viewer or a custom type
symbol: 'default, // required; identifies the view
name:
string
, // required; name of viewDef
version:
integer
, // required; should match dataDef
viewDefHeight:
integer,
// required, except in card-style
MinimalBounds:
// returns the minimal enclosing
func(
entry
)..., // bounding box for data
SetupForm:
// called by ViewSetupFormScript;
func(
entry, entryView
)..., //
use to massage data
}
Protos
5
newtStationery
5
myDataDef := { // use to build a dataDef
_proto: newtStationery,
description:
string
,
,
// describes dataDef entries
height:
integer,
// required, except in card-style; should
// match viewDefHeight
icon:
resource
,
// optional; used in header & New menu
name:
string,
// required; appears in New button picker
symbol: kAppSymbol, // required unique symbol
superSymbol: aSymbol, // identifies "owning" application
version:
integer,
// required; should match viewDef's version
FillNewEntry:
// returns a modified entry
func(
newEntry
)...,
MakeNewEntry:
// used if FillNewEntry does not exist
func()...,
StringExtract:
// creates string description
func(
entry
,
nLines
)...,
TextScript:
// extracts data as text for routing
func(
fields
,
target
)...,
}

C H A P T E R 5
Stationery
5-16
Stationery Summary
newtStationeryPopupButton
5
aStatPopup := { // used to construct New and Show buttons
_proto: newtStationeryPopupButton,
form:
symbol
,
// 'viewDef or 'dataDef
symbols: nil,
// gathers all or specify:[
uniqueSym
,
...
]
text:
string
,
// text displayed in picker
types: [
typeSym,...
],// type slots of viewDefs
sorter: '|str<|,// sorted alphabetically by Sort function
shortCircuit:
Boolean
, // controls picker behavior
StatScript:
// called when picker item chosen
func(
stationeryItem
)..., // define actions in this method
SetUpStatArray:// override to intercept picker items to
func()...,
// be displayed
}
newtNewStationeryButton
5
aNewButton := { // the New button collects dataDefs
_proto: newtNewStationeryButton,
sorter: '|str<|,// sorted alphabetically by Sort function
shortCircuit:
Boolean
,// controls picker behavior
StatScript:
// called when picker item chosen
func(
stationeryItem
)..., // define actions in this method
SetUpStatArray:// override to intercept picker items to
func()..., // be displayed
}
newtShowStationeryButton
5
aShowButton := { // the Show button collects viewDefs
_proto: newtShowStationeryButton,
types: [
typeSym,...
],// can specify type slots of viewDefs
sorter: '|str<|,// sorted alphabetically by Sort function
shortCircuit:
Boolean
,// controls picker behavior
StatScript:
// called when picker item chosen
func(
stationeryItem
)..., // define actions in this method
SetUpStatArray:// override to intercept picker items to
func()..., // be displayed
}

C H A P T E R 5
Stationery
Stationery Summary
5-17
newtRollShowStationeryButton
5
aRollShowButton := { // the Show button in paper roll apps
_proto: newtRollShowStationeryButton,
types: [
typeSym,...
],// can specify type slots of viewDefs
sorter: '|str<|,// sorted alphabetically by Sort function
shortCircuit:
Boolean
,// controls picker behavior
StatScript:
// called when picker item chosen
func(
stationeryItem
)..., // define actions in this method
SetUpStatArray:// override to intercept picker items to
func()..., // be displayed
}
newtRollShowStationeryButton
5
anEntryShowButton := { // Show button in paperroll apps
_proto: newtEntryShowStationeryButton,
types: [
typeSym,...
],// can specify type slots of viewDefs
sorter: '|str<|,// sorted alphabetically by Sort function
shortCircuit:
Boolean
,// controls picker behavior
StatScript:
// called when picker item chosen
func(
stationeryItem
)..., // define actions in this method
SetUpStatArray:// override to change entry displayed
func()..., // can display different view for each
}
Functions
5
RegDataDef(
dataDefSym, newDefTemplate
) // register dataDef
UnRegDataDef(
dataDefSym
) // unregister dataDef
RegisterViewDef(
viewDef, dataDefSym
)// register viewDef
UnRegisterViewDef(
viewDefSym, dataDefSym
)//unregister viewDef
GetDefs(
form, symbols, types
)// returns view or data defs array
GetDataDefs(
dataDefSym
)// returns dataDef
GetAppDataDefs(
superSymbol
)// returns an app's dataDefs
GetEntryDataDef(
soupEntry
) // returns the entry's dataDef
GetEntryDataView(
soupEntry, viewDefSym
)// returns the entry's
// viewDef
GetViewDefs (
dataDefSym
)
// returns viewDefs registered
// with the dataDef
GetDataView (
dataDefSym, viewDefSym
) // returns a specific
// viewDef of the dataDef


About Pickers and Pop-up Views
6-1
C H A P T E R 6
Pickers, Pop-up Views, and
Overviews
6
Figure 6-0
Table 6-0
This chapter describes how to use pickers and pop-up views to present information
and choices to the user. You should read this chapter if you are
creating your own pickers and pop-up views
taking advantage of built-in picker and pop-up protos
presenting outlines and overviews of data
Before reading this chapter, you should be familiar with the information in
Chapter 3, "Views."
This chapter contains:
an overview of pickers and pop-up views
descriptions of the pickers and pop-up views used to perform specific tasks
a summary of picker and pop-up view reference information
About Pickers and Pop-up Views
6
A picker or pop-up view is a view that pops up and presents a list of items from
which the user can make selections. The view pops up in response to a user action
such as a pen tap.
The distinction between a picker and a pop-up view is not important and has not
been maintained in naming the protos, so the terms are used somewhat
interchangeably. In the discussion that follows, picker is used for both terms.
The simplest picker protos handle the triggering and closing of the picker; for these
protos, all you need to do is provide the items in the list. When the user taps a
button, a label, or a hot spot in a picture, the picker view opens automatically.
When the user makes a selection, the view closes automatically and sends a
message with the index of the chosen item. If the user taps outside the picker, the
view closes, with no selection having been made.

C H A P T E R 6
Pickers, Pop-up Views, and Overviews
6-2
About Pickers and Pop-up Views
More sophisticated picker protos allow multiple selections and use a close box to
dispatch the view.
With some picker protos, you must determine when and how the picker is displayed.
You open a picker view by sending the
Open
message to the view, or by calling the
PopupMenu
function.
Your picker views can display
simple text
bitmaps
icons with strings
separator lines
two-dimensional grids
The most sophisticated picker protos let you access built-in system soups as well as
your own soups. Much of the behavior of these protos is provided by data
definitions that iterate through soup entries, display a list, allow the user to see and
modify the data, and add new entries to the soup.
Pickers and Pop-up View Compatibility
6
The 2.0 release of Newton system software contains a number of new picker protos
and a replacement for the
DoPopup
global function.
New Pickers and Pop-up Views
6
Two new picker protos,
protoPopupButton
and
protoPopInPlace
, define
text buttons that display pickers.
A new set of map pickers allows you to display various maps from which a user
can select a location and receive information about it. The map pickers include
the following:
protoCountryPicker
protoProvincePicker
protoStatePicker
protoWorldPicker
A set of new text pickers lets you display pop-up views that show text that the
user can change by tapping the string and entering a new string. The
protoDateTextPicker
, for example, lets the user change a date. The text-
picker protos include the following:
protoTextPicker
protoDateTextPicker

C H A P T E R 6
Pickers, Pop-up Views, and Overviews
About Pickers and Pop-up Views
6-3
protoDateDurationTextPicker
protoRepeatDateDurationTextPicker
protoDateNTimeTextPicker
protoTimeTextPicker
protoDurationTextPicker
protoTimeDeltaTimePicker
protoMapTextPicker
protoCountryTextPicker
protoUSstatesTextPicker
protoCitiesTextPicker
protoLongLatTextPicker
New date, time, and location pop-up views let the user specify new information in
a graphical view--changing the date on a calendar, for example. These protos
include the following:
protoDatePopup
protoDatePicker
protoDateNTimePopup
protoDateIntervalPopup
protoMultiDatePopup
protoYearPopup
protoTimePopup
protoAnalogTimePopup
protoTimeDeltaPopup
protoTimeIntervalPopup
A new number picker displays pickers from which a user can select a number. The
new number picker is
protoNumberPicker
A set of new overview protos allows you to create overviews of data; some of the
protos are designed to display data from the Names soup. The data picker protos
include the following:
protoOverview
protoSoupOverview
protoListPicker
protoPeoplePicker

C H A P T E R 6
Pickers, Pop-up Views, and Overviews
6-4
General-Purpose Pickers
protoPeoplePopup
The following two protos are data types that support the
protoListPicker
:
protoNameRefDataDef
protoPeopleDataDef
Obsolete Function
6
The
DoPopup
global function used in system software version 1.x is obsolete; it is
supported in version 2.0, but support is not guaranteed in future releases. Use the
new
PopupMenu
function instead.
Picker Categories
6
The remainder of this chapter divides the pickers into a number of categories. The
protos within each category operate in a related manner. General-purpose protos
are used to create simple, general-purpose pickers and pop-up views. The remaining
protos in the list are triggered by specific user actions or by events that you define:
general-purpose pickers
map pickers
text pickers
date, time, and location pickers
number pickers
picture picker
overview protos
roll protos
There is also a section discussing the view classes used with pickers.
General-Purpose Pickers
6
You use the protos described in this section to create simple, general-purpose
pickers and pop-up views. Some of the following protos are triggered by specific
user actions, while others are triggered by events that you define:
The
protoPopupButton
picker is a text button that displays a picker when
tapped. The button is highlighted while the picker is open. For information
about the slots and methods for this picker, see "protoPopupButton" (page 5-4)
in Newton Programmer's Reference. Figure 6-1 shows an example of a
protoPopupButton
.

C H A P T E R 6
Pickers, Pop-up Views, and Overviews
General-Purpose Pickers
6-5
Figure 6-1
A
protoPopupButton
example
The
protoPopInPlace
picker is a text button that displays a picker when
tapped. When the user chooses an item from the picker, the text of the chosen
item appears in the button. For information about the slots and methods for this
picker, see "protoPopInPlace" (page 5-6) in Newton Programmer's Reference.
Figure 6-2 shows an example of a
protoPopInPlace
.
Figure 6-2
A
protoPopInPlace
example
The
protoLabelPicker
is a label that displays a picker when tapped. The
currently selected item in the list is displayed next to the label. For information
about the slots and methods for this picker, see "protoLabelPicker" (page 5-8) in
Newton Programmer's Reference. Figure 6-3 shows an example of a
protoLabelPicker
.
Figure 6-3
A
protoLabelPicker
example
The
protoPicker
is a picker that displays anything from a simple text list to a
two-dimensional grid containing shapes and text. For information about the slots
and methods for this picker, see "protoPicker" (page 5-13) in Newton
Button
After button is tapped, it is highlighted
and picker is shown to the right of it.
Button
After item is chosen from
picker, it is shown in button
After button is tapped,
picker is shown on top of it.
Current choice
shown next to
label (optionally
includes icon, if
used in picker list)
Menu of choices
pops up

C H A P T E R 6
Pickers, Pop-up Views, and Overviews
6-6
General-Purpose Pickers
Programmer's Reference. Figure 6-4 shows the types of objects you can display
in a
protoPicker
.
Figure 6-4
A
protoPicker
example
The
protoGeneralPopup
is a pop-up view that has a close box. The view
cancels if the user taps outside it. This can use this proto to construct more
complex pickers. It is used, for example, as the basis for the duration
pickers. For information about the slots and methods for this proto, see
"protoGeneralPopup" (page 5-19) in Newton Programmer's Reference.
Figure 6-5 shows an example of a
protoGeneralPopup
.
Figure 6-5
A
protoGeneralPopup
example
Simple string
Thin
separator line
Thick
separator line
Two-
dimensional grid
Bitmap
Icon with string
protoGeneralPopup view
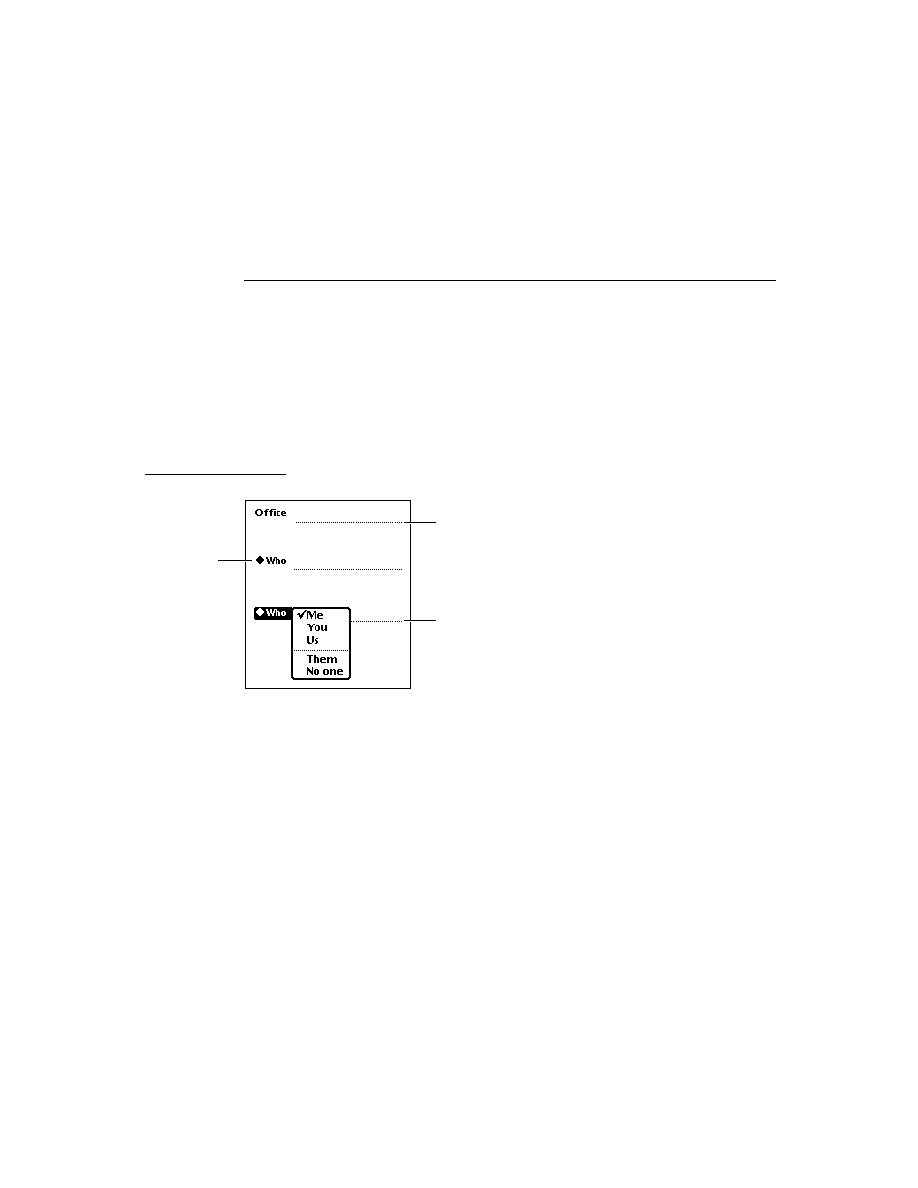
C H A P T E R 6
Pickers, Pop-up Views, and Overviews
General-Purpose Pickers
6-7
The
protoTextList
picker is a scrollable list of items. The user can scroll the
list by dragging or scrolling with the optional scroll arrows and can choose one
or more items in the list by tapping them. The scrollable list can include shapes
or text. For information about the slots and methods for this picker, see
"protoTextList" (page 5-20) in Newton Programmer's Reference. Figure 6-6
shows an example of a
proto
TextList
.
Figure 6-6
A
protoTextList
example
The
protoTable
picker is a simple one-column table of text. The user can tap
any item in the list to select it. For information about the slots and methods for
this picker, see "protoTable" (page 5-24) in Newton Programmer's Reference.
Figure 6-7 shows an example of a
proto
TableList
picker.
Figure 6-7
A
protoTable
example
You define the format of the table using a
protoTableDef
object; see
"protoTableDef" (page 5-27) in Newton Programmer's Reference for
information. You define the format of each row using a
protoTableEntry
object; see "protoTableEntry" (page 5-29) in Newton Programmer's Reference
for information.
Using protoGeneralPopup
6
As with most protos, you create a
protoGeneralPopup
object by using the
NTK palette to draw one in your layout. After creating the object, you should
remove the
context
and
cancelled
slots. The
viewBounds
should be
(0,
0, width, height)
for the box. The
New
method tries to set the bounds
correctly, based on the recommended bounds passed to the call.

C H A P T E R 6
Pickers, Pop-up Views, and Overviews
6-8
Map Pickers
The protoGeneralPopup
sends a
pickCancelledScript
to the
callbackContext
specified in the
New
method. However, it does not send a
pickActionScript
back; instead, it sends an
Affirmative
message to itself.
You supply the method and decide what call to make to the context and what
information to send back.
To put other objects in the
protoGeneralPopup
, just drag them out in NTK. For
example, if you want a checkbox in your pop-up view, drag out a
protoCheckbox
. You can put anything in the pop-up view, including your
own protos.
Since you have to assemble the information to send on an affirmative, you will
likely end up declaring your content to the general pop-up.
The only slots you really need to set are
Affirmative
and
viewBounds
.
Affirmative
is a function. Here's an example:
func()
begin
// Notify the context that the user has accepted the
// changes made in the popup
if context then
context:?pickActionScript(changeData) ;
end
Map Pickers
6
You can use the pickers described in this section to display maps and allow the user
to select countries, U.S. states, Canadian provinces, and cities. The Newton system
software provides the following map picker protos:
The
protoCountryPicker
displays a map of the world. When the user taps a
country, the
PickWorld
message is sent to your view. For information about
the slots and methods for this picker, see "protoCountryPicker" (page 5-30) in
Newton Programmer's Reference. Figure 6-8 shows an example of a
protoCountryPicker
.
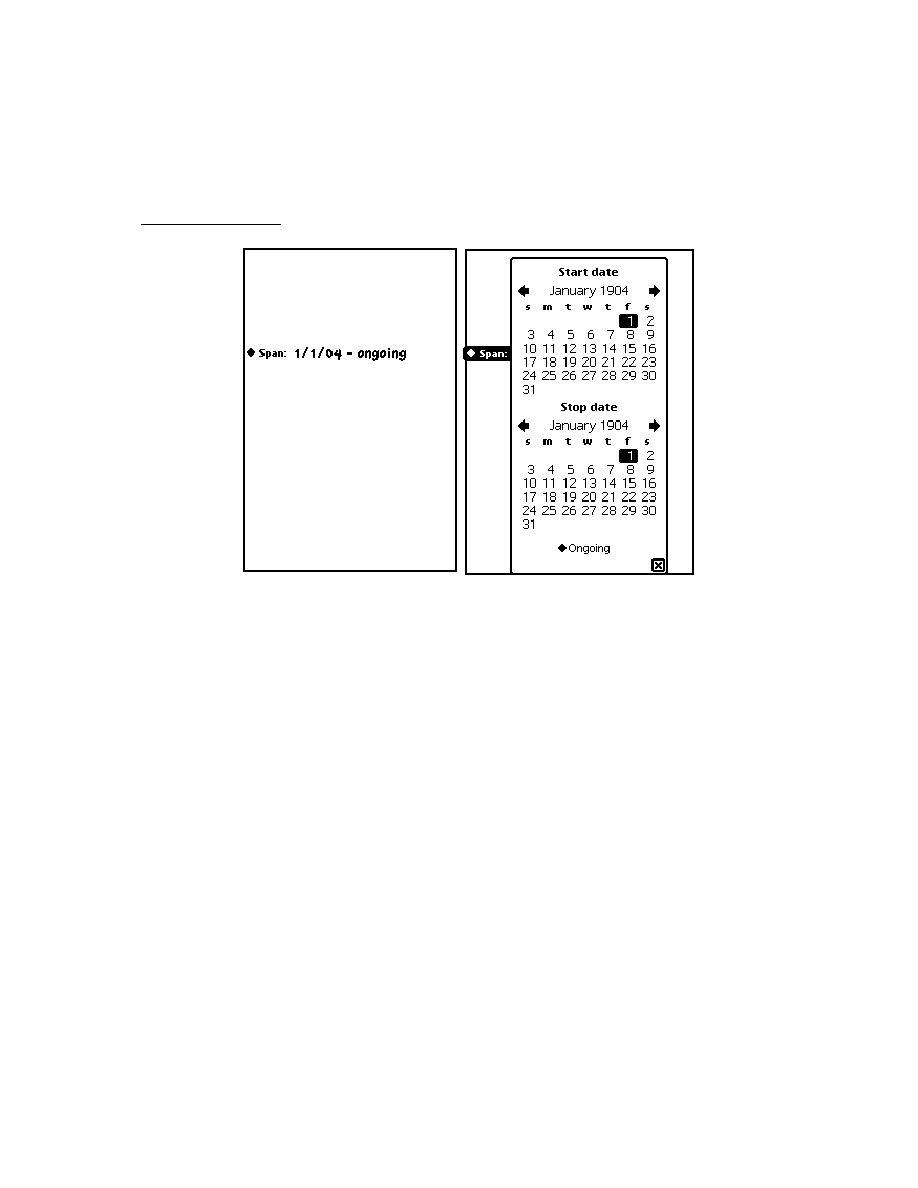
C H A P T E R 6
Pickers, Pop-up Views, and Overviews
Map Pickers
6-9
Figure 6-8
A
protoCountryPicker
example
The
protoProvincePicker
displays a map of North America. When
the user taps a province, the
PickWorld
message is sent to your view.
For information about the slots and methods for this picker, see
"protoProvincePicker" (page 5-31) in Newton Programmer's Reference.
Figure 6-9 shows an example of a
protoProvincePicker
.
Figure 6-9
A
protoProvincePicker
example
The
protoStatePicker
displays a map of North America. When the user
taps a state, the
PickWorld
message is sent to your view. For information
about the slots and methods for this picker, see "protoStatePicker" (page 5-32)
in Newton Programmer's Reference. Figure 6-10 shows an example of a
protoStatePicker
.
Figure 6-10
A
protoStatePicker
example
The
protoWorldPicker
displays a map of the world. When the user taps a
continent, the
PickWorld
message is sent to your view. For information about

C H A P T E R 6
Pickers, Pop-up Views, and Overviews
6-10
Text Pickers
the slots and methods for this picker, see "protoWorldPicker" (page 5-34) in
Newton Programmer's Reference. Figure 6-11 shows an example of a
protoWorldPicker
.
Figure 6-11
A
protoWorldPicker
example
Text Pickers
6
Text picker protos allow the user to specify various kinds of information by
picking text representations. Each of these protos displays a label picker with
a string that shows the currently selected data value. For example,
protoDurationTextPicker
, which lets the user set a duration, might have a
label of "When" followed by a duration in the form "8:26
A
.
M
. 10:36
P
.
M
."
When the user taps a text picker, the picker displays a pop-up view in which the
user can enter new information. The Newton system software provides the
following text picker protos:
The
protoTextPicker
is a label picker with a text representation of an entry.
When the user taps the picker, a customized picker is displayed. For information
about the slots and methods for this picker, see "protoTextPicker" (page 5-35) in
Newton Programmer's Reference. Figure 6-12 shows an example of a
protoTextPicker
.
Figure 6-12
A
protoTextPicker
example

C H A P T E R 6
Pickers, Pop-up Views, and Overviews
Text Pickers
6-11
The
protoDateTextPicker
is a label picker with a text representation of a
date. When the user taps the picker, a
protoDatePopup
is displayed, which
allows the user to specify a different date. For information about the slots and
methods for this picker, see "protoDateTextPicker" (page 5-37) in Newton
Programmer's Reference. Figure 6-13 shows an example of a
protoDateTextPicker
.
Figure 6-13
A
protoDateTextPicker
example
The
protoDateDurationTextPicker
is a label picker with a text
representation of a range of dates. When the user taps the picker, a
protoDateIntervalPopup
is displayed, which allows the user to
specify a different range. For information about the slots and methods for
this picker, see "protoDateDurationTextPicker" (page 5-40) in Newton
Programmer's Reference. Figure 6-14 shows an example of a
protoDateDurationTextPicker
.

C H A P T E R 6
Pickers, Pop-up Views, and Overviews
6-12
Text Pickers
Figure 6-14
A
protoDateDurationTextPicker
example
The
protoRepeatDateDurationTextPicker
is a label picker
with a text representation of a range of dates. When the user taps the
picker, a
protoDateIntervalPopup
is displayed, which allows the
user to specify a different range. This proto differs from the
protoDateDurationTextPicker
in that the
protoRepeatDateDurationDatePicker
presents choices that are
appropriate for the
repeatType
slot, and the duration displayed when the user
taps a duration or stop date is given in units of the
repeatType
. Otherwise, it
looks like the protoDateDurationTextPicker and popup shown in Appendix
Figure 6-14. For information about the slots and methods for this picker,
see "protoRepeatDateDurationTextPicker" (page 5-43) in Newton Programmer's
Reference.
The
protoDateNTimeTextPicker
is a label picker with a text
representation of a date and time. When the user taps the picker, a
protoDateNTimePopup
is displayed, which allows the user to specify a
different date and time. For information about the slots and methods for this
picker, see "protoDateNTimeTextPicker" (page 5-46) in Newton Programmer's
Reference. Figure 6-15 shows an example of a
protoDateNTimeTextPicker
.
Before tap
After tap

C H A P T E R 6
Pickers, Pop-up Views, and Overviews
Text Pickers
6-13
Figure 6-15
A
protoDateNTimeTextPicker
example
The
protoTimeTextPicker
is a label picker with a text representation of a
time. When the user taps the picker, a
protoTimePopup
is displayed, which
allows the user to specify a different time. For information about the slots and
methods for this picker, see "A
protoTimeTextPicker
example"
(page 6-13) in Newton Programmer's Reference. Figure 6-16 shows an example
of a
protoTimeTextPicker
.
Figure 6-16
A
protoTimeTextPicker
example
The
protoDurationTextPicker
is a label picker with a text representation
of a time range. When the user taps the picker, a
protoTimeIntervalPopup
is displayed, which allows the user to specify a different time range. For
information about the slots and methods for this picker, see
"protoDurationTextPicker" (page 5-51) in Newton Programmer's Reference.
Figure 6-17 shows an example of a
protoDurationTextPicker
.
Before tap
After tap
Before tap
After tap

C H A P T E R 6
Pickers, Pop-up Views, and Overviews
6-14
Text Pickers
Figure 6-17
A
protoDurationTextPicker
example
The
protoTimeDeltaTextPicker
is a label picker with a text
representation of a time delta. When the user taps the picker, a
protoTimeDeltaPopup
is displayed, which allows the user to specify a
different time delta. For information about the slots and methods for this picker,
see "protoTimeDeltaTextPicker" (page 5-53) in Newton Programmer's
Reference. Figure 6-18 shows an example of a
protoTimeDeltaTextPicker
.
Figure 6-18
A
protoTimeDeltaTextPicker
example
The
protoMapTextPicker
is a label picker with a text representation of a
country. When the user taps the picker, a popup displays that allows the user to
select a new country from an alphabetical list. For information about the slots
and methods for this picker, see "protoMapTextPicker" (page 5-54) in Newton
Programmer's Reference. Figure 6-19 shows an example of a
protoMapTextPicker
.
Before tap
After tap
Before tap
After tap

C H A P T E R 6
Pickers, Pop-up Views, and Overviews
Text Pickers
6-15
Figure 6-19
A
protoMapTextPicker
example
The
protoCountryTextPicker
is the same as
protoMapTextPicker
.
The
protoUSstatesTextPicker
is a label picker with a text representa-
tion of a U.S. state. When the user taps the picker, a popup displays that allows
the user to select a new state from an alphabetical list. For information about the
slots and methods for this picker, see "protoUSstatesTextPicker" (page 5-56) in
Newton Programmer's Reference. Figure 6-20 shows an example of a
protoUSstatesTextPicker
.
Figure 6-20
A
protoUSstatesTextPicker
example
Before tap
After tap
Before tap
After tap
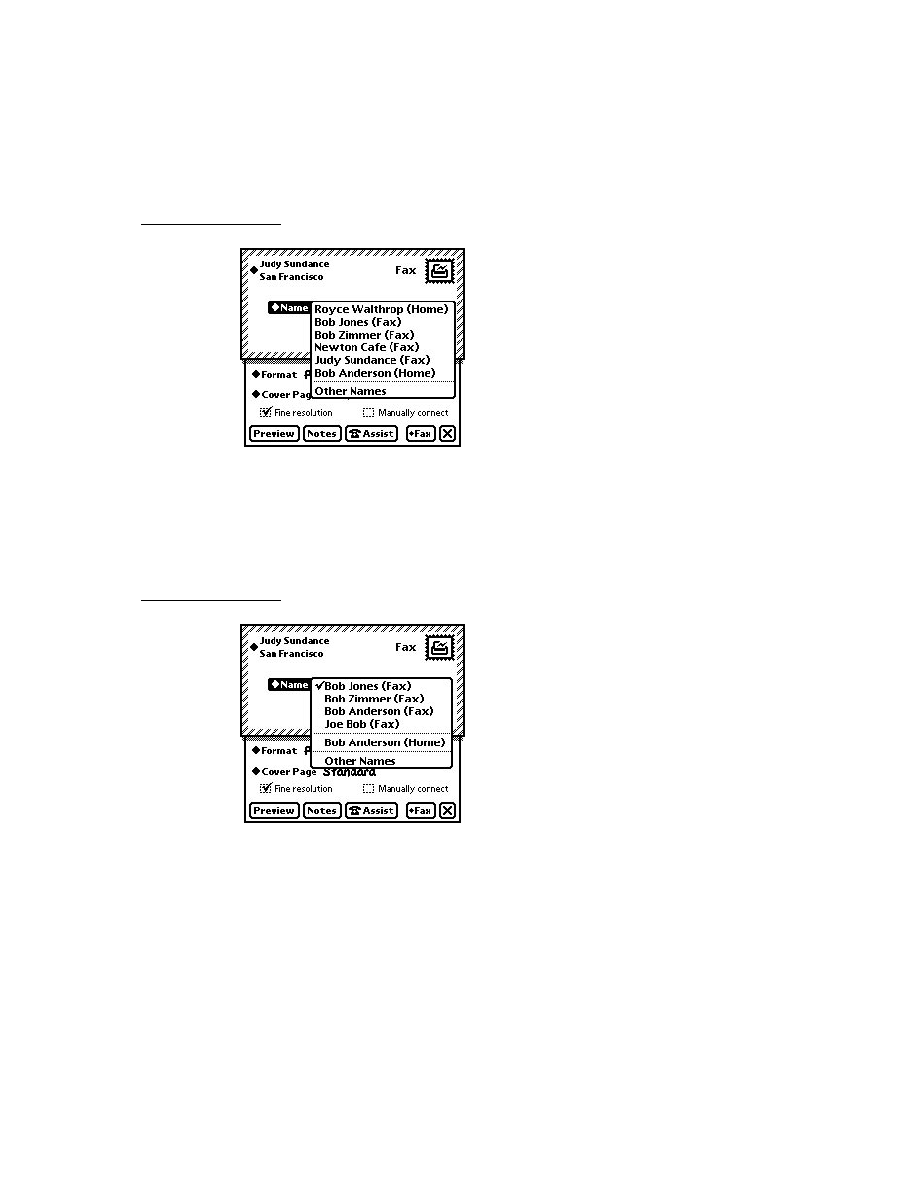
C H A P T E R 6
Pickers, Pop-up Views, and Overviews
6-16
Text Pickers
The
protoCitiesTextPicker
is a label picker with a text representation of
a city. When the user taps the picker, a popup displays that allows the user to
select a new city from an alphabetical list. For information about the slots and
methods for this picker, see "protoCitiesTextPicker" (page 5-58) in Newton
Programmer's Reference. Figure 6-21 shows an example of a
protoCitiesTextPicker
.
Figure 6-21
A
protoCitiesTextPicker
example
The
protoLongLatTextPicker
is a label picker with a text representation
of longitude and latitude values. When the user taps the picker, a
longLatPicker
is displayed, which allows the user to select new longitude
and latitude values. For information about the slots and methods for this picker,
see "protoLongLatTextPicker" (page 5-61) in Newton Programmer's Reference.
Figure 6-22 shows an example of a
protoLongLatTextPicker
.
Figure 6-22
A
protoLongLatTextPicker
example
Before tap
After tap
Before tap
After tap

C H A P T E R 6
Pickers, Pop-up Views, and Overviews
Date, Time, and Location Pop-up Views
6-17
Date, Time, and Location Pop-up Views
6
You can use the protos described in this section to present pop-up views to the user
for setting or choosing specific types of values. The Newton System Software
provides the following pop-up protos for date, time, and location values:
The
protoDatePopup
allows the user to choose a single date. For information
about the slots and methods for this proto, see "protoDatePopup" (page 5-63) in
Newton Programmer's Reference. Figure 6-23 shows an example of a
protoDatePopup
.
Figure 6-23
A
protoDatePopup
example
The
protoDatePicker
allows the user to choose a single date when the date
is likely to be relatively close to the current date. Changing the year is not easily
done with this proto. For information about the slots and methods for this proto,
see "protoDatePicker" (page 5-64) in Newton Programmer's Reference.
Figure 6-24 shows an example of a
protoDatePicker
.
Figure 6-24
A
protoDatePicker
example

C H A P T E R 6
Pickers, Pop-up Views, and Overviews
6-18
Date, Time, and Location Pop-up Views
The
protoDateNTimePopup
allows the user to choose a single date and time.
For information about the slots and methods for this proto, see
"protoDateNTimePopup" (page 5-67) in Newton Programmer's Reference.
Figure 6-25 shows an example of a
protoDateNTimePopup
.
Figure 6-25
A
protoDateNTimePopup
example
The
protoDateIntervalPopup
allows the user to choose an interval of
dates by specifying the start and stop dates. For information about the slots and
methods for this proto, see "protoDateIntervalPopup" (page 5-69) in Newton
Programmer's Reference. Figure 6-26 shows an example of a
protoDateIntervalPopup
.
Figure 6-26
A
protoDateIntervalPopup
example

C H A P T E R 6
Pickers, Pop-up Views, and Overviews
Date, Time, and Location Pop-up Views
6-19
The
protoMultiDatePopup
allows the user to specify a range of dates. For
information about the slots and methods for this proto, see "protoMultiDatePopup"
(page 5-72) in Newton Programmer's Reference. Figure 6-27 shows an example
of a
protoMultiDatePopup
.
Figure 6-27
A
protoMultiDatePopup
example
The
protoYearPopup
allows the user to choose a year. For information about
the slots and methods for this proto, see "protoYearPopup" (page 5-73) in
Newton Programmer's Reference. Figure 6-28 shows an example of a
protoYearPopup
.
Figure 6-28
A
protoYearPopup
example
The
protoTimePopup
allows the user to choose a time with a digital clock.
For information about the slots and methods for this proto, see
"protoTimePopup" (page 5-74) in Newton Programmer's Reference.
Figure 6-29 shows an example of a
protoTimePopup
.
Figure 6-29
A
protoTimePopup
example

C H A P T E R 6
Pickers, Pop-up Views, and Overviews
6-20
Date, Time, and Location Pop-up Views
The
protoAnalogTimePopup
allows the user to choose a time with an
analog clock. For information about the slots and methods for this proto, see
"protoAnalogTimePopup" (page 5-76) in Newton Programmer's Reference.
Figure 6-30 shows an example of a
protoAnalogTimePopup
.
Figure 6-30
A
protoAnalogTimePopup
example
The
protoTimeDeltaPopup
allows the user to choose a time period (a delta).
For information about the slots and methods for this proto, see
"protoTimeDeltaPopup" (page 5-78) in Newton Programmer's Reference.
Figure 6-31 shows an example of a
protoTimeDeltaPopup
.
Figure 6-31
A
protoTimeDeltaPopup
example
The
protoTimeIntervalPopup
allows the user to choose a time interval by
specifying the start and stop times. For information about the slots and methods
for this proto, see "protoTimeIntervalPopup" (page 5-79) in Newton
Programmer's Reference. Figure 6-32 shows an example of a
protoTimeIntervalPopup
.
Figure 6-32
A
protoTimeIntervalPopup
example

C H A P T E R 6
Pickers, Pop-up Views, and Overviews
Number Pickers
6-21
Number Pickers
6
This section describes the protos available to allow users to pick numbers. The
Newton system software provides the following protos for picking numbers:
The
protoNumberPicker
displays a picker from which the user can select a
number. For information about the slots and methods for this picker, see
"protoNumberPicker" (page 5-81) in Newton Programmer's Reference.
Figure 6-33 shows an example of a
protoNumberPicker
.
Figure 6-33
A
protoNumberPicker
example
Picture Picker
6
This section describes the proto you can use to create a picture as a picker.
The
protoPictIndexer
picker displays a horizontal array of pictures, from
which the user can choose. For information about the slots and methods for this
picker, see "protoPictIndexer" (page 5-82) in Newton Programmer's Reference.
Figure 6-34 shows an example of a
protoPictIndexer
.
Figure 6-34
A
protoPictIndexer
example
protoPictIndexer
view

C H A P T E R 6
Pickers, Pop-up Views, and Overviews
6-22
Overview Protos
Overview Protos
6
You can use the protos described in this section to create overviews of data. An over-
view allows the user to see all of data in a soup or an array scrolling list. The user
can select individual items and open them to see the detail. Overview protos include:
The
protoOverview
provides a framework for displaying an overview of the
data in your application. Each overview item occupies one line, and the user can
scroll the list and pick individual or multiple items. "Using protoOverview"
(page 6-24) has information on using this proto. For further information about
the slots and methods of
protoOverview
, see "protoOverview" (page 5-85) in
Newton Programmer's Reference. Figure 6-35 shows an example of a
protoOverview
.
Figure 6-35
A
protoOverview
example
The
protoSoupOverview
provides a framework for displaying an overview
of soup entries in your application. For information about the slots and methods
for this proto, see "protoSoupOverview" (page 5-90) in Newton Programmer's
Reference. Figure 6-36 shows an example of a
protoSoupOverview
.
C H A P T E R 6
Pickers, Pop-up Views, and Overviews
Overview Protos
6-23
Figure 6-36
A
protoSoupOverview
example
The
protoListPicker
provides a scrollable list of items. Items can be from a
soup, an array, or both. The user can select any number of items in the list. For
information about the slots and methods for this proto, see "protoListPicker"
(page 5-93) in Newton Programmer's Reference. "Using protoListPicker"
(page 6-26) has a more extensive example and discusses how to use this proto.
Figure 6-37 shows an example of a
protoListPicker
.

C H A P T E R 6
Pickers, Pop-up Views, and Overviews
6-24
Overview Protos
Figure 6-37
A
protoListPicker
example
The
protoPeoplePicker
displays a list of names and associated information
from the Names application. For information about the slots and methods for
this proto, see "protoPeoplePicker" (page 5-110) in Newton Programmer's
Reference.
The
protoPeoplePopup
is similar to the
protoPeoplePicker
, except that
protoPeoplePopup
displays the picker in a pop-up view. For information
about the slots and methods for this proto, see "protoPeoplePopup" (page 5-111)
in Newton Programmer's Reference.
Using protoOverview
6
The protoOverview
was set up primarily to be the basis
for
protoSoupOverview
. Because of that, you need to do some extra
work to use just the
protoOverview
.
You need to define
Abstract
,
HitItem
,
IsSelected
,
SelectItem
, and
viewSetupChildrenScript
methods in your
protoOverview
. See
"protoOverview" (page 5-85) in Newton Programmer's Reference for details.

C H A P T E R 6
Pickers, Pop-up Views, and Overviews
Overview Protos
6-25
You also need to define the following slot in your
protoOverview
:
cursor
This should be a cursor-like object.
You use the object stored in this slot to encapsulate your data. The cursor-like
object must support the methods
Entry
,
Next
,
Move
, and
Clone
. An example is
given below.
In addition, you must provide a mechanism to find an actual data item given an
index of a displayed item. In general, you need some sort of saved index that
corresponds to the first displayed item. See the example code in "HitItem"
(page 5-88) in Newton Programmer's Reference for an example of how this is used.
You also should provide a mechanism to track the currently highlighted item,
which is distinct from a selected item.
Since your data is probably in an array, you can use a "cursor" object like this:
{
items: nil,
index: 0,
Entry:func()
begin
if index < Length(items) then
items[index];
end,
Next: func()
if index < Length(items)-1 then
begin
index := index + 1;
items[index];
end,
Move: func(delta)
begin
index := Min(Max(index + delta, 0),
kNumItems-1) ;
items[index];
end,
Clone:func()
Clone(self)}
The methods that you need to have in the cursor-like object are:
Entry
, which returns the item pointed to by the "cursor."
Next
, which moves the "cursor" to the next item and returns that item or, if
there is no next item,
nil
.

C H A P T E R 6
Pickers, Pop-up Views, and Overviews
6-26
Overview Protos
Move
, which moves the "cursor" a given number of entries and returns that
entry or, if there is no item in that place,
nil.
Clone
, which returns a copy of the "cursor" that is modifiable independent of
the original "cursor."
Using protoListPicker
6
The
protoListPicker
proto--documented in Newton Programmer's Reference
(page 5-93)--provides a number of controls for finding specific entries, including
folder tabs, alphabet tabs (azTabs), and scrolling arrows; any of these controls can
be suppressed.
Like
protoOverview
, this proto manages an array of selected items. Any soup
that can be queried by a cursor can be displayed, or elements from an array can
be displayed.
Figure 6-38 shows a full-featured example of
protoListPicker
that displays a
two-column list. The first column is used to select or deselect members, and the
second column provides additional information that can be edited in place.
Figure 6-38
A
ProtoListPicker
example
The checkbox at the bottom-left of the slip is used to either show every eligible
item or to trim all unselected elements from the list. The New button at the bottom
allows the immediate creation of another entry to be displayed. See Figure 6-39.

C H A P T E R 6
Pickers, Pop-up Views, and Overviews
Overview Protos
6-27
Figure 6-39
Creating a new name entry
When the pen comes down in any column, the row/column cell inverts as shown in
Figure 6-40.
Figure 6-40
Highlighted row
When the pen is released, if it is within the first column, the item is either checked
to show that it is selected or unchecked to show that it is not. See Figure 6-41.
Figure 6-41
Selected row
When the pen tap is released within the second column, what happens next
depends on the underlying data. If there are many options already available, a

C H A P T E R 6
Pickers, Pop-up Views, and Overviews
6-28
Overview Protos
pop-up view is displayed to allow the user to select any option or enter a new one.
See Figure 6-42.
Figure 6-42
Pop-up view displayed over list
If the user selects "Add new price" (or if there were one or no options already
available to them), the user can enter a new price as shown in Figure 6-43.
Figure 6-43
Slip displayed for gathering input
The proto is driven by a frame contained in the
pickerDef
slot. This picker
definition frame may or may not come from the data definition registry. The
functionality it provides, however, is similar to that of any data definition: it offers
all the hooks the proto needs to interpret and display the data without the proto
itself knowing what the data is.
The chosen items are collected into an array, as described in "Name References"
(page 5-1) in Newton Programmer's Reference, which can be stored separately
from the original entries. Each selection is represented in the array by a name
reference that contains all information needed to display or operate on the entries.
The name reference is stored as part of the selection, along with an entry alias that
refers to the original entry, if there is an original entry. (See "Entry Aliases"
beginning on page 12-1 for basic information on these objects.)

C H A P T E R 6
Pickers, Pop-up Views, and Overviews
Overview Protos
6-29
The picker definition (described in the next section) is a data definition frame that
is provides the routines to create a name reference from an entry, an entry alias,
another name reference, a straight frame, or just to create a canonical empty name
reference (if no data is provided). It also retrieves the data from a name reference.
Finally, it provides some information about the name reference to support actions
like tapping and highlighting.
You also need to define the soup to query. Both this and the query specification can
be defined either in the data definition or in the list picker.
Using the Data Definitions Frame in a List Picker
6
The
pickerDef
slot of the list picker holds a data definition frame that determines
the overall behavior of the list picker. This frame should be based on
protoNameRefDataDef
or
protoPeopleDataDef
, or at should least support
the required slots.
Here is an example:
pickerDef:= {
_proto:
protoNameRefDataDef,
name:
"Widgets",
class:
'|nameRef.widget|,
entryType:
'widget,
soupToQuery:"Widgets",
querySpec:
{indexPath: 'name},
columns:
kColumns,
};
Specifying Columns
6
The
columns
slot hold an array that determines how the columns in the list picker
are displayed. Here's an example of column specification array:
columns:= [{
fieldPath:'name,// path for field to display in column
optional:true,// not required -- unnamed widget
tapWidth:155},// width for checkbox & name combined
{
fieldPath:'price,// path for field to display
in column
optional:nil,// price is required
tapWidth:0}];// width -- to right end of view

C H A P T E R 6
Pickers, Pop-up Views, and Overviews
6-30
Overview Protos
See "Column Specifications" (page 5-3) in Newton Programmer's Reference for
details of the slots.
Having a Single Selection in a List Picker
6
The key to getting single selection is that single selection is part of the picker
definition and not an option of
protoListPicker
. That means the particular
class of
nameRef
you use must include single selection. In general, this requires
creating your own subclass of the particular name reference class.
The basic solution is to create a data definition that is a subclass of the particular
class your
protoListPicker
variant will view. That data definition will include
the
singleSelect
slot. As an example, suppose you want to use a
protoPeoplePopup
that just picks individual people. You could use the
following code to bring up a
protoPeoplePopup
that allows selecting only one
individual at a time:
// register the modified data definition
RegDataDef('|nameref.people.single:SIG|,
{_proto: GetDataDefs('|nameRef.people|), singleSelect:
true});
// then pop the thing
protoPeoplePopup:New('|nameref.people.single:SIG|,[],self,[
]);
// sometime later
UnRegDataDef('|nameref.people.single:SIG|);
For other types of
protoListPickers
and classes, create the appropriate
subclass. For example, a transport that uses
protoAddressPicker
for e-mail
messages might create a subclass of
'|nameRef.email|
and put that subclass
symbol in the class slot of the
protoAddressPicker
.
Since many applications are likely to do this, you may cut down on code in your
installScript
and
removeScript
by registering your
dataDef
only for the
duration of the picker. That would mean registering the class just before you pop
the picker and unregistering after the picker has closed. You can use the
pickActionScript
and
pickCanceledScript
methods to be notified when
to unregister the
dataDef
.
Having Preselected Items in a List Picker
6
If you want to have items that are initially selected in a list picker, use the
viewSetupDoneScript
to set up the selected array, rather than setting up
the selected array in your
viewSetupFormScript
or
viewSetupChildrenScript
, then send the
Update
message to
protoListPicker
to tell it to update the display.

C H A P T E R 6
Pickers, Pop-up Views, and Overviews
Overview Protos
6-31
Validation and Editing in protoListPicker
6
The built-in validation mechanism is not designed to deal with nested soup
information. In general, you gain more flexibility by not using a
validationFrame
in your
pickerDef
, even if you have no nested entries.
Instead, you can provide your own validation mechanism and editors:
define a
Validate
method in your picker definition
define an
OpenEditor
method in your picker definition
draw a layout for each editor you require
Here is how your
Validate
method should work. The following example
assumes that pickerDef.ValidateName and pickerDef.ValidatePager have
been implemented:
pickerDef.Validate := func(nameRef, pathArray)
begin
// keep track of any paths that fail
local failedPaths := [];
for each index, path in pathArray do
begin
if path = 'name then
begin
// check if name validation fails
if NOT :ValidateName(nameRef) then
// if so, add it to array of failures
AddArraySlot(failedPaths, path);
end;
else begin
if NOT :ValidatePager(nameRef) then
AddArraySlot(failedPaths, path);
end;
end;
// return failed paths or empty array
failedPaths;
end;
Here is how your
OpenEditor
method should work:
pickerDef.OpenEditor := func(tapInfo, context, why)
begin
local valid = :Validate(tapInfo.nameRef,
tapInfo.editPaths) ;
if (Length(valid) > 0) then
// if not valid, open the editor

C H A P T E R 6
Pickers, Pop-up Views, and Overviews
6-32
Overview Protos
// NOTE: returns the edit slip that is opened
GetLayout("editor.t"):new(tapInfo.nameRef,
tapInfo.editPaths, why, self, 'EditDone, context);
else
begin
// the item is valid, so just toggle the selection
context:Tapped('toggle);
nil;
// Return <nil>.
end;..
end;
The example above assumes that the base view of the layout
editor.t
has a
New
method that opens the editor and returns the associated view.
The editor can be designed to fit your data. However, we suggest that you use a
protoFloatNGo
that is attached to the root view using
BuildContext
. You are
also likely to need a callback to the
pickderDef
so it can appropriately update
the edited or new item. Finally, your editor needs to update your data soup using an
Xmit
soup method so that the list picker updates.
In the
OpenEditor
example above, the last three arguments are used by the editor
to send a callback to the
pickerDef
from the
viewQuitScript
. The design of
the callback function is up to you. Here is an example:
pickerDef.EditDone := func(nameRef, context)
begin
local valid = :Validate(tapInfo.nameRef, tapInfo.editPaths) ;
if (Length(valid) > 0) then
begin
// Something failed. Try and revert back to original
if NOT :ValidatePager(nameRef) AND
self.('[pathExpr: savedPagerValue, nameRef]) = nameRef then
nameRef.pager := savedPagerValue.pager;
context:Tapped(nil);// Remove the checkmark
end;
else
// The nameRef is valid, so select it.
context:Tapped('select);
// Clear the saved value for next time.
savedPagerValue := nil;
end;

C H A P T E R 6
Pickers, Pop-up Views, and Overviews
Overview Protos
6-33
Changing the Font of protoListPicker
6
The mechanism described here will probably change in the future. Eventually you
may be able to set a
viewFont
slot in the list picker itself, just as you can set
viewLineSpacing
now. In the meantime, you need a piece of workaround code.
You must set the
viewFont
of the list picker and also include this workaround
code.
Give the list picker the following
viewSetupDoneScript
:
func()
begin
if listBase then
SetValue(listBase, 'viewFont, viewFont) ;
inherited:?viewSetupDoneScript();
end;
This sets the
viewFont
of the
listbase
view to the view font of the list picker.
You cannot rely on the
listbase
view always being there (hence the test).
Using protoSoupOverview
6
For the most part, you use this proto like
protoOverview
, except that it is set up
to use a soup cursor, and, so, is easier to use. See "Using protoOverview" (page 6-24)
for information.
Determining Which protoSoupOverview Item Is Hit
6
There is a method of
protoSoupOverview
called
HitItem
that is called
whenever an item is tapped. The method is defined by the overview and you should
call the inherited method. Also note that
HitItem
gets called regardless of where
in the line a tap occurs. If the tap occurs in the checkbox (that is, if
x
is less than
selectIndent
), you should do nothing other than calling the inherited functions,
because the inherited function will handle the tap, otherwise you should do
something appropriate.
The method is passed the index of the item that is hit. The index is relative to the
item displayed at the top of the displayed list. This item is always the current entry
of the cursor used by
protoSoupOverview
, so you can find the actual soup entry
by cloning the cursor and moving it.
func(itemIndex, x, y)
begin
// MUST call the inherited method for bookkeeping
inherited:HitItem(itemIndex, x, y);

C H A P T E R 6
Pickers, Pop-up Views, and Overviews
6-34
Overview Protos
if x > selectIndent then
begin
// get a temporary cursor based on the cursor used
// by soup overview
local tCursor := cursor:Clone();
// move it to the selected item
tCursor:Move(itemIndex) ;
// move the application's detail cursor to the
// selected entry
myBaseApp.detailCursor:Goto(tCursor:Entry());
// usually you will close the overview and switch to
// some other view
self:Close();
end;
// otherwise, just let them check/uncheck
// which is the default behavior
end
Displaying the protoSoupOverview Vertical Divider
6
The mechanism for bringing up the vertical divider line was not correctly
implemented in
protoSoupOverview
. You can draw one in as follows:
// set up a cached shape for efficiency
mySoupOverview.cachedLine := nil;
mySoupOverview.viewSetupDoneScript := func()
begin
inherited:?viewSetupDoneScript();
local bounds := :LocalBox();
cachedLine := MakeRect(selectIndent - 2, 0,
selectIndent - 1, bounds.bottom);
end;
mySoupOverview.viewDrawScript := func()
begin
// MUST call inherited script
inherited:?viewDrawScript();
:DrawShape(cachedLine,
{penPattern: vfNone, fillPattern: vfGray});
end;

C H A P T E R 6
Pickers, Pop-up Views, and Overviews
Roll Protos
6-35
Roll Protos
6
You can use the protos described in this section to present roll views in your
applications. A roll view is one that contains several discrete subviews that are
arranged vertically. The roll can be viewed in overview mode, in which each
subview is represented by a one-line description. Any or all of the subviews can be
expanded to full size. The individual subviews are contained in objects based on
protoRollItem
.
The Newton system software provides the following roll protos:
The
protoRoll
provides a roll-like view that includes a series of individual
items. The user can see the items either as a collapsed list of one-line overviews
or as full-size views. When the user taps an overview line, all the full-size views
are displayed, with the tapped view shown at the top of the roll. For information
about the slots and methods for this proto, see "protoRoll" (page 5-112) in
Newton Programmer's Reference. Figure 6-44 shows an example of a
protoRoll
.
Figure 6-44
A
protoRoll
example
The
protoRollBrowser
is similar to
protoRoll
, except that
protoRollBrowser
creates a self-contained application based on the
protoApp
, described in "protoApp" (page 1-2) in Newton Programmer's
Reference. See "protoRollBrowser" (page 5-116) in Newton Programmer's
Reference for information about the slots and methods for this proto.
Figure 6-45 shows an example of a
protoRollBrowser
:

C H A P T E R 6
Pickers, Pop-up Views, and Overviews
6-36
View Classes
Figure 6-45
A
protoRollBrowser
example
View Classes
6
There are two view classes that you use for pickers:
The
clOutline
view class displays an expandable text outline. Figure 6-46
shows an example.
Figure 6-46
Example of an expandable text outline
Collapsed View
Expanded View

C H A P T E R 6
Pickers, Pop-up Views, and Overviews
Specifying the List of Items for a Popup
6-37
The
clMonthView
view class displays a monthly calendar. Figure 6-47 shows
an example.
Figure 6-47
Example of a month view
Specifying the List of Items for a Popup
6
You specify the item list for
protoPicker
,
protoTextList
,
protoPopUpButton
,
proptoPopupInPlace
, and
PopUpMenu
in
an array. In the simplest case, this is an array of strings, but it can contain
different kinds of items:
simple string
A string. You can control the pickability of a text item or add
a mark to the display by specifying the text in a frame, as
described in Table 6-1 (page 6-38).
bitmap
A bitmap frame or a NewtonScript frame, as returned from
the
GetPictAsBits
compile-time function. You can
control the pickability of the item or add a mark to the
display by placing the bitmap in a frame, as described in
Table 6-1 (page 6-38).
icon with string
A frame that specifies both a string and an icon, as described
in Table 6-2 (page 6-38).
separator line
An instruction to display a line that runs the width of the
picker. To display a dashed gray line, specify the symbol
'pickSeparator
. For a solid black line, specify the
symbol
'pickSolidSeparator
.
two-dimensional grid
A frame describing the grid item, as described in Table 6-3
(page 6-39).
If all the items in the picker list cannot fit into the view, the user can scroll the list
to see more items.
Table 6-1 describes the frame used to specify simple string and bitmap items in the
picker list.
Current day
Selected day

C H A P T E R 6
Pickers, Pop-up Views, and Overviews
6-38
Specifying the List of Items for a Popup
Table 6-2 describes the frame used to specify a string with an icon in the picker list.
Table 6-1
Item frame for strings and bitmaps
Slot name
Description
item
The item string or bitmap reference.
pickable
A flag that determines whether the item is pickable.
Specify non-
nil
if you want the item to be pickable, or
nil
if you don't want the item pickable. Not-pickable
items appear in the list but are not highlighted and can't be
selected.
mark
A character displayed next to an item when it's chosen.
Specify a dollar sign followed by the character you want to
use to mark this item if it is chosen. For example,
$\uFC0B
specifies the check mark symbol. (You can use the constant
kCheckMarkChar
to specify the check mark character.)
fixedHeight
When you give a bitmap, you can give this slot for the first
item in order to force all items to be the same size. If you
use bitmaps in a list that can become large enough to
scroll, you should specify the
fixedHeight
slot for
every item. You can also use slot this for any item to
specify a height different from other items.
Table 6-2
Item frame for string with icon
Slot name
Description
item
The item string.
icon
A bitmap frame, as returned from the compile-time function
GetPictAsBits
. The bitmap is displayed to the left of the
text, and the text is drawn flush against it, unless the
indent
slot is specified.
continued

C H A P T E R 6
Pickers, Pop-up Views, and Overviews
Specifying the List of Items for a Popup
6-39
Table 6-3 describes the frame required to specify a two-dimensional grid item in
the picker list.
indent
An integer that defines a text indent to use for this item and
subsequent icon/string items. This integer specifies the
number of pixels to indent the text from the left side of the
picker view. You can use it to line up a number of text items
that may have icons of varying width. Specify 1 to cancel
the indent effect for the current and subsequent text items.
The icon is always centered within the indent width.
fixedHeight
You can give this slot for the first item in order to force all
items to be the same size. If you use icons in a list that can
become large enough to scroll, you should specify the
fixedHeight
slot for every item. You can also use this
slot for any item to specify a height different from other
items. (When you use P
opupMenu
, you must specify a
fixedHeight
slot for the first item, because P
opupMenu
ignores the height of the icon.)
Table 6-3
Item frame for two-dimensional grid
Slot Name
Description
bits
A binary object representing the bitmap of the grid item. A
bitmap is returned in the
bits
slot in the frame returned by
the compile-time function
GetPictAsBits
.
The bitmap is a complete picture of the grid item, including
the lines between cells and the border around the outside of the
cells. There must be no extra white space outside the border.
Each cell must be the same size and must be symmetrical.
bounds
The bitmap bounds frame, from the
bounds
slot in the frame
returned by
GetPictAsBits
.
width
The number of columns in the grid (must be non-zero).
height
The number of rows in the grid (must be non-zero).
continued
Table 6-2
Item frame for string with icon (continued)
Slot name
Description

C H A P T E R 6
Pickers, Pop-up Views, and Overviews
6-40
Specifying the List of Items for a Popup
Note
Picker items can include 1.x bitmaps but not 2.0 shapes.
When a cell is highlighted in a two-dimensional picker item, only the part of the
cell inside the cell frame lines is inverted. You can vary the highlighting effect by
changing the values of the
cellFrame
and
outerFrame
slots, which control
how much unhighlighted space to leave for the cell frame lines. An example of how
these values affect cell highlighting is shown in Figure 6-48.
Figure 6-48
Cell highlighting example for
protoPicke
r
cellFrame
Optional. The width of the separator line between cells, used
for highlighting purposes. If you don't specify this slot, the
default is 1 pixel.
outerFrame
Optional. The width of the border line around the cells, used
for highlighting purposes. If you don't specify this slot, the
default is 2 pixels.
mask
Optional. A binary object representing the bits for a bitmap
mask. This mask is used to restrict highlighting, or for special
hit-testing. The mask must be exactly the same size as the
bitmap. Cells in the grid are highlighted only if the position
tapped is "black" in the mask.
Table 6-3
Item frame for two-dimensional grid (continued)
Slot Name
Description
cellFrame=1
outerFrame=2
cellFrame=3
outerFrame=3
cellFrame=0
outerFrame=0

C H A P T E R 6
Pickers, Pop-up Views, and Overviews
Summary
6-41
Summary
6
The following sections summarize the reference information in this chapter.
General Picker Protos
6
protoPopupButton
6
aProtoPopupButton := {
_proto:
protoPopupButton,
viewFlags:
flags
,
viewBounds:
boundsFrame
,
viewJustify:
justificationFlags
,
text:
string
,
// text inside button
popup:
array
,
// items in list
ButtonClickScript:
function
,
// called on button tap
PickActionScript:
function
,
// returns item selected
PickCancelledScript:
function
,
// user cancelled
...
}
protoPopInPlace
6
aProtoPopInPlace := {
_proto:
protoPopInPlace,
viewBounds:
boundsFrame
,
viewFlags:
constant
,
viewJustify:
justificationFlags
,
text:
string
,
// text inside button
popup:
array
,
// items in list
PickActionScript:
function
,
// returns selected item
PickCancelledScript:
function
,
// user cancelled
...
}
protoLabelPicker
6
aProtoLabelPicker := {
_proto:
protoLabelPicker,
viewBounds:
boundsFrame
,
viewFont:
fontSpec
,

C H A P T E R 6
Pickers, Pop-up Views, and Overviews
6-42
Summary
iconSetup:
icon frame,
labelCommands:
array
,
// items in list
iconBounds:
boundsFrame
,
// bounds of largest icon
iconIndent:
integer
,
// indent of text from icon
checkCurrentItem:
Boolean
,
// true to check selected item
indent:
integer
,
// indent of picker from label
textIndent:
integer
,
// indent of text
LabelActionScript:
function
,
// returns selected item
TextSetup:
function
,
// gets initial item
TextChanged:
function
,
// called upon item value change
UpdateText:
function
,
// call to change selected item
PickerSetup:
function
,
// called when user taps label
Popit:
function
,
// call to programmatically
// pop up picker
...
}
protoPicker
6
aProtoPicker := {
_proto:
protoPicker,
bounds:
boundsFrame
,
viewBounds:
boundsFrame
, // ignored
viewFlags:
constant
,
viewFormat:
formatFlags
,
viewJustify:
justificationFlags
,
viewFont:
fontSpec
,
viewEffect:
effectFlag
,
pickItems:
array
, // items in list
pickTextItemHeight:
integer
, // height reserved for items
pickLeftMargin:
integer
, // margin from left of view
pickRightMargin:
integer
, // margin from right of view
pickTopMargin:
integer
, // margin above each item in
// list
pickAutoClose:
Boolean
, // true to close list after pick
pickItemsMarkable:
Boolean
, // true to reserve space for
// check mark before item
pickMarkWidth:
integer
, // space to reserve for marks
callbackContext:
view
,
// view with pick scripts
PickActionScript:
function
, // returns selected item
PickCancelledScript:
function
,
// user cancelled
SetItemMark:
function
, // sets char for check marks
GetItemMark:
function
, // gets char for check marks
...
}

C H A P T E R 6
Pickers, Pop-up Views, and Overviews
Summary
6-43
protoGeneralPopup
6
aProtoGeneralPopup := {
_proto:
protoGeneralPopup,
viewBounds:
boundsFrame
,
viewFlags:
constant
,
cancelled:
Boolean
,
// true if user cancelled
// pop-up view
context:
view
,
// view with pick scripts
New:
// open pop-up view
Affirmative:
function
,
// user taps pop-up view
PickCancelledScript:
function
,
// called in pop-up view
// cancelled
...
}
protoTextList
6
aProtoTextList := {
_proto:
protoTextList,
viewBounds:
boundsFrame
,
viewFont:
fontSpec
,
viewFormat:
formatFlags
,
viewLines:
integer
,
// number of lines to show
selection:
integer
,
// index of selected item
selectedItems:
arrary
,
// items in list
listItems:
array
,
// strings or shapes in list
lineHeight:
array
,
// height of lines in list
isShapeList:
Boolean
,
// true if picts instead of text
useMultipleSelections:
Boolean
,
// true for multiple select
useScroller:
Boolean
,
// true to include scrollers
scrollAmounts:
array
,
// units to scroll
DoScrollScript:
function
,
// scrolls list by offset
ViewSetupFormScript:
function
,
// set up list
ButtonClickScript:
function
,
// returns selected item
...
}
protoTable
6
aProtoTable := {
_proto:
protoTable,
viewBounds:
boundsFrame
,

C H A P T E R 6
Pickers, Pop-up Views, and Overviews
6-44
Summary
viewFormat:
formatFlags
,
def:
frame
,
// protoTableDef table
// definition frame
scrollAmount:
integer
,
// number of rows to scroll
currentSelection:
string
,
// text of selected item
selectedCells:
array
,
// selected cell indexes
declareSelf:
symbol
,
// 'tabbase; do not change
ViewSetupFormScript:
function
,
// set up table
SelectThisCell:
function
,
// called when cell is
selected
...
}
protoTableDef
6
aProtoTableDef := {
_proto: protoTableDef,
tabAcross:
integer
,
// number of columns - must be 1
tabDown:
integer
,
// number of rows in table
tabWidths:
integer
,
// width of table
tabHeight:
integer
,
// height of rows
tabProtos:
frame
,
// references to row templates
tabValues:
integer/array
,
// value/array of values for
// rows
tabValueSlot:
symbol
,
// slot to store tabValues in
tabUniqueSelection:
Boolean
, // true for single selection
indentX:
integer
,
// do not change: used internally
TabSetUp:
function
,
// called before each row set up
...
}
protoTableEntry
6
aProtoTableEntry := {
_proto:
protoTableEntry,
viewClass:
clTextView,
viewFlags:
flags
,
viewJustify:
justificationFlags
,
viewTransferMode:
modeOr,
text:
string
,
// text inside table
ViewClickScript:
function
,
// sets current selection
ViewHiliteScript:
function
,
// highlights selection
...
}

C H A P T E R 6
Pickers, Pop-up Views, and Overviews
Summary
6-45
Map Pickers
6
protoCountryPicker
6
aProtoCountryPicker := {
_proto:
protoCountryPicker,
viewBounds:
boundsFrame
,
autoClose:
Boolean
, // true to close picker on selection
listLimit:
integer
,
// maximum items listed
PickWorld:
function
,
// called when selection is made
...
}
protoProvincePicker
6
aProtoProvincePicker := {
_proto:
protoProvincePicker,
viewFlags:
constant
,
autoClose:
Boolean
,
// true to close picker on selection
listLimit:
integer
,
// maximum items listed
PickWorld:
function
,
// called when selection is made
...
}
protoStatePicker
6
aProtoStatePicker := {
_proto:
protoStatePicker,
viewFlags:
constant
,
autoClose:
Boolean
,
// true to close picker on selection
PickWorld:
function
,
// called when selection is made
listLimit:
integer
,
// maximum items listed
...
}
protoWorldPicker
6
aProtoWorldPicker := {
_proto:
protoWorldPicker,
viewBounds:
boundsFrame
,
autoClose:
Boolean
, // true to close picker on selection
listLimit:
integer
,
// maximum items listed
PickWorld:
function
, // called when selection is made
...
}

C H A P T E R 6
Pickers, Pop-up Views, and Overviews
6-46
Summary
Text Picker Protos
6
protoTextPicker
6
aProtoTextPicker := {
_proto:
protoTextPicker,
label:
string
,
// picker label
indent:
integer
,
// indent
labelFont:
fontSpec
,
// font for label
entryFont:
fontSpec
,
// font for picker line
Popit:
function
,
// user tapped picker
PickActionScript:
function
,
// returns selected item
PickCancelledScript:
function
,
// user cancelled picker
TextSetup:
function
,
// returns text string
...
}
protoDateTextPicker
6
aProtoDateTextPicker := {
_proto:
protoDateTextPicker,
label:
string
,
// picker label
date:
integer
,
// initial and currently
// selected date
longFormat:
symbol
,
// format to display date
shortFormat:
symbol
,
// format to display date
PickActionScript:
function
,
// returns selected item
PickCancelledScript:
function
,
// user cancelled picker
...
}
protoDateDurationTextPicker
6
aProtoDateDurationTextPicker := {
_proto:
protoDateDurationTextPicker,
label:
string
,
// picker label
labelFont:
fontSpec
,
// display font
entryFont:
fontSpec
,
// picked entry font
startTime:
integer
,
// initial start date
stopTime:
integer
,
// initial end date
longFormat:
symbol
,
// format to display date
shortFormat:
symbol
,
// format to display date

C H A P T E R 6
Pickers, Pop-up Views, and Overviews
Summary
6-47
PickActionScript:
function
,
// returns selected item
PickCancelledScript:
function
,
// user cancelled picker
...
}
protoRepeatDateDurationTextPicker
6
aProtoRepeatDateDurationTextPicker := {
_proto:
protoRepeatDateDurationTextPicker,
label:
string
,
// picker label
startTime:
integer
,
// initial start date
stopTime:
integer
,
// initial end date
longFormat:
symbol
,
// format to display date
shortFormat:
symbol
,
// format to display date
repeatType:
constant
,
// how often meeting meets
mtgInfo:
constant
,
// repeating meetings
PickActionScript:
function
,
// returns selected item
PickCancelledScript:
function
, // user cancelled picker
...
}
protoDateNTimeTextPicker
6
aProtoDateNTimeTextPicker := {
_proto:
protoDateNTimeTextPicker,
label:
string
,
// picker label
date:
integer
,
// initial date/time
format:
symbol
,
// format to display time
longFormat:
symbol
,
// format to display date
shortFormat:
symbol
,
// format to display date
increment:
integer
// amount to change time
PickActionScript:
function
,
// returns selected item
PickCancelledScript:
function
,
// user cancelled picker
...
}
protoTimeTextPicker
6
aProtoTimeTextPicker := {
_proto:
protoTimeTextPicker,
label:
string
,
// picker label
labelFont:
fontSpec
,
// label display font
entryFont:
fontSpec
,
// picked entry font
indent:
integer
,
// amount to indent text
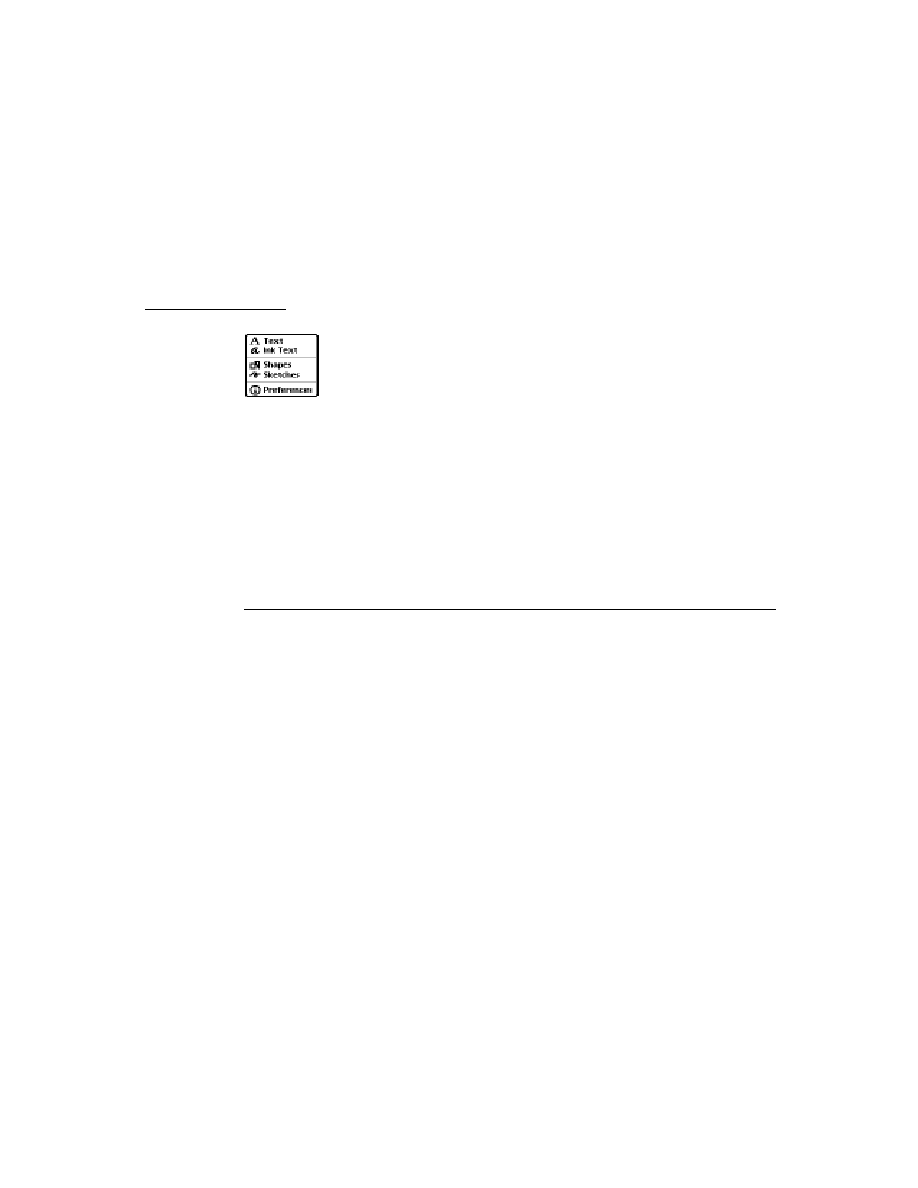
C H A P T E R 6
Pickers, Pop-up Views, and Overviews
6-48
Summary
time:
integer
,
// initial start time
format:
symbol
,
// format to display time
increment:
integer
,
// increment to change
// time for taps
PickActionScript:
function
,
// returns selected item
PickCancelledScript:
function
,
// user cancelled picker
...
}
protoDurationTextPicker
6
aProtoDurationTextPicker := {
_proto:
protoDurationTextPicker,
label:
string
,
// picker label
startTime:
integer
,
// initial start time
stopTime:
integer
,
// initial end time
format:
symbol
,
// format to display time
increment:
integer
,
// increment to change
// time for taps
PickActionScript:
function
,
// returns selected item
PickCancelledScript:
function
,
// user cancelled picker
...
}
protoTimeDeltaTextPicker
6
aProtoTimeDeltaTextPicker := {
_proto:
protoTimeDeltaTextPicker,
label:
string
,
// picker label
time:
integer
,
// initial time
labelFont:
fontSpec
,
// label display font
entryFont:
fontSpec
,
// picked entry font
indent:
integer
,
//amount to indent text
increment:
integer
,
// increment to change
// time for taps
minValue:
integer
,
// minimum delta value
PickActionScript:
function
,
// returns selected item
PickCancelledScript:
function
,
// user cancelled picker
...
}

C H A P T E R 6
Pickers, Pop-up Views, and Overviews
Summary
6-49
protoMapTextPicker
6
aProtoMapTextPicker := {
_proto:
protoMapTextPicker,
label:
string
,
// picker label
labelFont:
fontSpec
,
// label display font
entryFont:
fontSpec
,
// picked entry font
indent:
integer
,
// amount to indent text
params:
frame
,
PickActionScript:
function
,
// returns selected item
PickCancelledScript:
function
,
// user cancelled picker
...
}
protoCountryTextPicker
6
aProtoCountryTextPicker := {
_proto:
protoCountryTextPicker,
label:
string
,
// picker label
labelFont:
fontSpec
,
// label display font
entryFont:
fontSpec
,
// picked entry font
indent:
integer
,
// amount to indent text
params:
frame
,
PickActionScript:
function
,
// returns selected item
PickCancelledScript:
function
,
// user cancelled picker
...
}
protoUSstatesTextPicker
6
aProtoUSstatesTextPicker := {
_proto:
protoUSstatesTextPicker,
label:
string
,
// picker label
labelFont:
fontSpec
,
// label display font
entryFont:
fontSpec
,
// picked entry font
indent:
integer
,
// amount to indent text
params:
frame
,
PickActionScript:
function
,
// returns selected item
PickCancelledScript:
function
,
// user cancelled picker
...
}

C H A P T E R 6
Pickers, Pop-up Views, and Overviews
6-50
Summary
protoCitiesTextPicker
6
aProtoCitiesTextPicker := {
_proto:
protoCitiesTextPicker,
label:
string
,
// picker label
labelFont:
fontSpec
,
// label display font
entryFont:
fontSpec
,
// picked entry font
indent:
integer
,
// amount to indent text
params:
frame
,
PickActionScript:
function
,
// returns selected item
PickCancelledScript:
function
,
// user cancelled picker
...
}
protoLongLatTextPicker
6
aProtoLongLatTextPicker := {
_proto:
protoLongLatTextPicker,
label:
string
,
// picker label
latitude:
integer
,
// initial latitude
longitude:
integer
,
// initial longitude
labelFont:
fontSpec
,
// label display font
entryFont:
fontSpec
,
// picked entry font
indent:
integer
,
// amount to indent text
PickActionScript:
function
,
// returns selected item
PickCancelledScript:
function
,
// user cancelled picker
worldClock:
boolean
// do not change
...
}
Date, Time, and Location Pop-up Views
6
protoDatePopup
6
aProtoDatePopup := {
_proto:
protoDatePopup,
New:
function
,
// creates pop-up view
PickActionScript:
function
,
// returns selected item
PickCancelledScript:
function
,
// user cancelled picker
...
}

C H A P T E R 6
Pickers, Pop-up Views, and Overviews
Summary
6-51
protoDatePicker
6
aProtoDatePicker := {
_proto:
protoDatePicker,
selectedDates:
array
,
// selected date
DateChanged:
function
,
// called when date is selected
Refresh:
function
,
// update view with new dates
...
}
protoDateNTimePopup
6
protoDateNTimePopup := {
_proto:
protoDateNTimePopup,
New:
function
,
// creates pop-up view
NewTime:
function
,
// called when time changes
PickActionScript:
function
,
// returns selected item
PickCancelledScript:
function
,
// user cancelled picker
...
}
protoDateIntervalPopup
6
protoDateIntervalPopup := {
_proto:
protoDateIntervalPopup,
New:
function
,
// creates pop-up view
NewTime:
function
,
// called when time changes
PickActionScript:
function
,
// returns selected item
PickCancelledScript:
function
,
// user cancelled picker
...
}
protoMultiDatePopup
6
protoMultiDatePopup := {
_proto:
protoMultiDatePopup,
New:
function
,
// creates pop-up view
PickActionScript:
function
,
// returns selected item
PickCancelledScript:
function
,
// user cancelled picker
...
}

C H A P T E R 6
Pickers, Pop-up Views, and Overviews
6-52
Summary
protoYearPopup
6
protoYearPopup := {
_proto:
protoYearPopup,
New:
function
,
// creates pop-up view
NewYear:
function
,
// called when year changes
DoneYear:
function,
// called on close box tap
PickCancelledScript:
function
,
// user cancelled picker
...
}
protoTimePopup
6
protoTimePopup := {
_proto:
protoTimePopup,
New:
function
,
// creates pop-up view
NewTime:
function
,
// called when time changes
PickActionScript:
function
,
// returns selected item
PickCancelledScript:
function
,
// user cancelled picker
...
}
protoAnalogTimePopup
6
protoAnalogTimePopup := {
_proto:
protoAnalogTimePopup,
New:
function
,
// creates pop-up view
NewTime:
function
,
// called when time changes
PickActionScript:
function
,
// returns selected item
PickCancelledScript:
function
,
// user cancelled picker
...
}
protoTimeDeltaPopup
6
protoTimeDeltaPopup := {
_proto:
protoTimeDeltaPopup,
New:
function
,
// creates pop-up view
PickActionScript:
function
,
// returns selected item
PickCancelledScript:
function
,
// user cancelled picker
...
}

C H A P T E R 6
Pickers, Pop-up Views, and Overviews
Summary
6-53
protoTimeIntervalPopup
6
protoTimeIntervalPopup := {
_proto:
protoTimeIntervalPopup,
New:
function
,
// creates pop-up view
PickActionScript:
function
,
// returns selected item
PickCancelledScript:
function
,
// user cancelled picker
...
}
Number Pickers
6
protoNumberPicker
6
aProtoNumberPicker := {
_proto:
protoNumberPicker,
minValue:
integer
,
// minimum value in list
maxValue:
integer
,
// maximum value in list
value:
integer
,
// currently selected value
showLeadingZeros:
Boolean
,
// true to show leading zeros
prepareForClick:
function,
// called after click is
// processed
ClickDone:
function,
// called after click is
// processed
...
}
Picture Picker
6
protoPictIndexer
6
aProtoPictIndexer := {
_proto:
protoPictIndexer,
viewBounds :
boundsFrame
,
viewJustify:
justificationFlags
,
viewFormat :
formatFlags
,
icon:
bitmap
,
// bitmap with objects
// arranged vertically
iconBBox:
boundsFrame
, // bitmap bounds within view
numIndices:
integer
,
// # of objects in bitmap
curIndex:
integer
,
// index of current item
IndexClickScript:
function
,
// user taps bitmap
...
}

C H A P T E R 6
Pickers, Pop-up Views, and Overviews
6-54
Summary
Overview Protos
6
protoOverview
6
aProtoOverview := {
_proto:
protoOverview,
viewBounds :
boundsFrame
,
viewFlags :
constant
,
viewFont :
fontSpec
,
lineHeight:
integer
,
// height of items in pixels
selectIndent:
integer
,
// specifies left margin
nothingCheckable:
Boolean
,
// true for no checkboxes
SelectItem:
function
,
// to record selected items
SetupAbstracts:
function
,
// set up entry
Abstract:
function
,
// return shape given entry
HitItem:
function
,
// called when item is tapped
IsSelected:
function
// Return true if the item is
// selected
cursor:
cursor
,
// cursor for the items
CheckState:
function
,
// determines if selectable
Scroller:
function
,
// implement scrolling here
SelectItem:
function
,
// records selected items
viewSetupChildrenScript:
function
,
// Calls SetupAbstracts
...
}
protoSoupOverview
6
aProtoSoupOverview := {
_proto:
protoSoupOverview,
autoDeselect:
Boolean
,
// whether to deselect when
// the pen leaves an item
cursor:
cursor
,
// cursor for the entries
Scroller:
function
,
// implement scrolling here
SelectItem:
function
,
// records selected items
Abstract:
function
,
// return shape given entry
IsSelected:
function
,
// returns true if selected
ForEachSelected:
function
,
// called for each selected
// item
...
}

C H A P T E R 6
Pickers, Pop-up Views, and Overviews
Summary
6-55
protoListPicker
6
aProtoListPicker := {
_proto:
protoListPicker,
declareSelf :
symbol
,
// Set to 'pickBase
defaultJustification :
constant
,
viewFlags :
constant
,
viewBounds :
boundsFrame
,
lineHeight:
integer
,
// height of items in pixels
listFormat:
formatFlags
,
pickerDef:
frame
,
// defines list behavior
selected:
array
,
// references to selected items
soupToQuery:
string
,
// union soup to query
querySpec:
frame
,
// query to use
selected:
array,
// modified as user selects
// and deselects item
singleSelect:
Boolean
,
// single selection if non-nil
suppressNew:
Boolean
,
// suppress New button if non-nil
suppressScrollers:
Boolean
,
// suppress scroller if
// non-nil
suppressAZTabs:
Boolean
,
// suppress tabs if non-nil
suppressFolderTabs:
Boolean
, // suppress if non-nil
suppressSelOnlyCheckbox:
Boolean
,// suppress if non-nil
suppressCloseBox:
Boolean
,
// suppress if non-nil
suppressCounter:
Boolean
,
// suppress if non-nil
reviewSelections:
Boolean
,
// Selected Only if non-nil
readOnly:
Boolean
,
// items are read-only if
// non-nil
dontPurge:
Boolean
,
// keep unselected refs if
// non-nil
soupChangeSymbol:
symbol
,
// for RegSoupChange method
SoupEnters:
function
,
// syncs up changed soup
SoupLeaves:
function
,
// syncs up changed soup
SetNowShowing:
function
,
// set Selected Only
AddFakeItem:
function
,
// add item to array; update
// screen
GetSelected:
function
,
// returns clone of selected
// array
...
}

C H A P T E R 6
Pickers, Pop-up Views, and Overviews
6-56
Summary
protoNameRefDataDef
6
aProtoNameRefDataDef := {
_proto:
protoNameRefDataDef,
name:
string
,
// name to identify picker in
// top left corner
class:
symbol
,
// specify class for new name
// references
entryType:
symbol
,
// class for new soup entries
columns:
array
,
// column specifications
singleSelect:
Boolean
,
// single selection if non-nil
soupToQuery:
string
,
// union soup to query
querySpec:
frame
,
// query to use
validationFrame:
frame,
// checks validity of entry
MakeCanonicalNameRef:
function
,// make blank name ref
MakeNameRef:
function
,
// make name reference
Get:
function
,
// returns data from specified
// object
GetPrimaryValue:
function
, // retrieves data from object
HitItem:
function
,
// called when item tapped
MakePopup:
function
,
// called before making pop-up
// view
Tapped:
function
,
// called when tap has been
// handled
New:
function
,
// called when tap on New button
DefaultOpenEditor:
function
,// open an edit view
OpenEditor:
function
,
// open an custom edit view
NewEntry:
function
,
// returns a new soup entry
ModifyEntry:
function
,
// returns a modified soup entry
Validate:
function
,
// validates paths
...
}
protoPeopleDataDef
6
aProtoPeopleDataDef := {
_proto:
protoPeopleDataDef,
entryType:
symbol
,
// class for new soup entries
soupToQuery:
string
,
// union soup to query
primaryPath:
symbol
,
// the primary path column
primaryPathMapper:
frame
,
// maps entry class to data
Equivalent:
function
,
// compares two name refs

C H A P T E R 6
Pickers, Pop-up Views, and Overviews
Summary
6-57
Validate:
function
,
// returns array of invalid
// refs
ModifyEntryPath:
function
,
// entry modification of Names
GetRoutingInfo:
function
,
// retrieves routing info
GetItemRoutingFrame:
function
, // converts routing info
GetRoutingTitle:
function
,
// creates target string
PrepareForRouting:
function
,
// strips extra info
...
}
protoPeoplePicker
6
aProtoPeoplePicker := {
_proto:
protoPeoplePicker,
class:
symbol
,
// type of data to display
selected:
array
,
// references to selected items
...
}
protoPeoplePopup
6
aProtoPeoplePicker := {
_proto:
protoPeoplePicker,
class:
symbol
,
// type of data to display
selected:
array
,
// references to selected items
context:
symbol
,
// view with PickActionScript
// method
options:
array
,
// options for protoListPicker
PickActionScript:
function
,
// called when pop-up is closed
...
}
Roll Protos
6
protoRoll
6
aProtoRoll := {
_proto:
protoRoll,
viewFlags:
constant
,
viewBounds:
boundsFrame
,
items:
array
,
// templates for roll items

C H A P T E R 6
Pickers, Pop-up Views, and Overviews
6-58
Summary
allCollapsed:
Boolean
,
// roll collapsed if non-nil
index:
integer
,
// index of item to start
// display at
declareSelf:
symbol
,
// 'roll -- do not change
...
}
protoRollBrowser
6
aProtoRollBrowser := {
_proto:
protoRollBrowser,
viewBounds:
boundsFrame
,
viewJustify:
justificationFlags
,
viewFormat:
formatFlags
,
title:
string
,
// text for title at top of roll
rollItems:
array
,
// templates for roll items
rollCollapsed:
Boolean
,
// roll collapsed if non-nil
rollIndex:
integer
,
// index of item to start
// display at
declareSelf:
symbol
,
// 'base -- do not change
...
}
protoRollItem
6
aProtoRollItem := {
_proto:
protoRollItem,
viewBounds:
boundsFrame
,
viewJustify:
justificationFlags
,
viewFormat:
formatFlags
,
overview:
string
,
// text for one-line overview
height:
integer
,
// height of the view in pixels
stepChildren:
Boolean
,
// child views for this roll item
...
}
View Classes
6
clOutlineView
6
myOutline:= {...
viewClass:
clOutline,
viewBounds:
boundsFrame
,

C H A P T E R 6
Pickers, Pop-up Views, and Overviews
Summary
6-59
browsers:
array
,
// frame with array of outline
// items
viewFont:
fontSpec,
viewFlags :
constant
,
viewFormat:
formatFlags
,
clickSound:
frame
,
// sound frame for taps
OutlineClickScript:
function
, //called when user taps item
...
}
clMonthView
6
theMonth := {...
viewclass: clMonthView,
viewBounds:
boundsFrame
,
viewflags:
constant
,
labelFont:
fontSpec
,
dateFont:
fontSpec
,
selectedDates:
array
,
viewSetupFormScript:
function
,
...
}
Functions
6
PopupMenu(
list
,
options
)
IsNameRef(
item
)
AliasFromObj(
item
)
EntryFromObj(
item
)
ObjEntryClass(
item
)


7-1
C H A P T E R 7
Controls and Other Protos
7
Figure 7-0
Table 7-0
Controls are software objects that provide various user interface capabilities,
including scrolling, selection buttons, and sliders. You use the controls and other
protos described in this chapter to add these features to your NewtonScript
applications.
This chapter gives a general description of the controls and related protos provided
in Newton System Software. For a detailed description of these protos, including
the slots that you use to set to implement each, see "Controls Reference"
(page 6-1) in Newton Programmer's Reference.
This chapter provides information about the following controls and protos:
horizontal and vertical scrollers
boxes and buttons
alphabetical selection tabs
gauges and sliders
time-setting displays
special views
view appearance enhancements
status bars
Controls Compatibility
7
The 2.0 release of Newton System Software includes a number of new protos,
including:
four new scroller protos:
protoHorizontal2DScroller
,
protoLeftRightScroller
,
protoUpDownScroller
, and
protoHorizontalUpDownScroller
two new buttons:
protoInfoButton
and
protoOrientation
two selection tab protos:
protoAZTabs
and
protoAZVertTabs

C H A P T E R 7
Controls and Other Protos
7-2
Scroller Protos
four new date and time protos:
protoDigitalClock
,
protoSetClock,
protoNewSetClock
, and
protoAMPMCluster
two special view protos:
protoDragger
and
protoDragNGo
Scroller Protos
7
Scrollers allow the user to move vertically or horizontally through a display that is
bigger than the view. The Newton System Software provides a number of scrollers
to allow users to scroll their views.
All scroller protos are implemented in the same way; that is, they use the same
methods and slots. These scrollers are not linked or related to the scroll arrows on
the built-in button bar. For individual descriptions of the scroller protos, see
"Scroller Protos" (page 7-2) in Newton Programmer's Reference. This section
describes how to implement scrollers in your applications.
The scroller protos do not perform the actual scrolling of data in a view; they
simply display and maintain the arrows as the user taps them. To scroll data in a
view, you can use the following protos in your applications:
The
protoHorizontal2DScroller
is centered at the bottom of a view and
provides both horizontal and vertical scroll arrows. For more information about
the slots and methods for this scroller, see "protoHorizontal2DScroller"
(page 6-2) in Newton Programmer's Reference. Figure 7-1 shows an example
of a
protoHorizontal2DScroller
view.
Figure 7-1
A
protoHorizontal2DScroller
view
The
protoLeftRightScroller
is centered at the bottom of a view and
provides horizontal scroll arrows. For more information about the slots and
methods for this scroller, see "protoLeftRightScroller" (page 6-5) in Newton
Programmer's Reference. Figure 7-2 shows an example of a
protoLeftRightScroller
view.
Figure 7-2
A
protoLeftRightScroller
view

C H A P T E R 7
Controls and Other Protos
Scroller Protos
7-3
The
protoUpDownScroller
is centered on the right side of a view and
provides vertical scroll arrows. For more information about the slots and
methods for this scroller, see "protoUpDownScroller" (page 6-5) in Newton
Programmer's Reference. Figure 7-3 shows an example of a
protoHorizontal2DScroller
view.
Figure 7-3
A
protoUpDownScroller
view
The
protoHorizontalUpDownScroller
is centered at the bottom of a
view and provides vertical scroll arrows. For more information about the slots
and methods for this scroller, see "protoHorizontalUpDownScroller" (page 6-6)
in Newton Programmer's Reference. Figure 7-4 shows an example of a
protoHorizontalUpDownScroller
view.
Figure 7-4
A
protoHorizontalUpDownScroller
view
Implementing a Minimal Scroller
7
To implement a minimal scroller, all that you have to define is a
ViewScroll2DScript
method in your scroller template. This method is
called whenever the user taps one of the scroll arrows in the scroller view. Your
ViewScroll2DScript
method must perform the actual scrolling of the contents
of some other view, which you usually do by calling the
SetOrigin
method.
For more information on the
ViewScroll2DScript
method, see
"ViewScroll2DScript" (page 6-3) in Newton Programmer's Reference. For
more information on the
SetOrigin
method, see "SetOrigin" (page 2-48) in
Newton Programmer's Reference.
Automatic Arrow Feedback
7
All of the scroller protos can provide visual feedback to the user indicating that
there is more information to see. This feedback is handled automatically for your if
you provide three additional slots in your scroller template:
scrollRect
,

C H A P T E R 7
Controls and Other Protos
7-4
Scroller Protos
viewRect
, and
dataRect
. Each of these slots is a bounds frame with the
following form:
{left: 0, top: 0, right: 10, bottom: 10}
You usually create these bounds frame slots with the utility function
SetBounds
,
which is described in "SetBounds" (page 2-34) in Newton Programmer's Reference.
When you use these slots, the scroller protos highlight the scrolling arrows
automatically to indicate to the user that more data can be viewed by tapping on the
highlighted arrows.
Each of the bounds frame slots serves a specific purpose in the scroller, as shown in
Table 7-1. The next section provides several examples of setting the values of these
slots for different scrolling effects.
Scrolling Examples
7
This section presents several simple examples of setting the bounds frame slots in
your scroller to allow scrolling.
Scrolling Lines of Text
7
To scroll lines of text, you set the values of the three scroller bounds frames as
required for your application. For example, if you have 20 text items in a vertical
list and you want to show 6 of the items at a time, you need to set the slot values
as follows:
scrollRect: SetBounds(0, 0, 0, 20)
// 20 possible lines
viewRect:
SetBounds(0, 0, 0, 6)
// show 6 at a time
dataRect:
SetBounds(0, 0, 0, 20)
Table 7-1
Scroller bounds frame slots
Slot name
Description
scrollRect
Specifies the scrollable area, which is the total area that the
user can see, or scroll over, with the scroller.
viewRect
Specifies the part of the scrollable area that the user can
see at any one time. This is usually smaller than the area
specified by
scrollRect
.
dataRect
Specifies the portion of the
scrollRect
that contains
data. In simple cases, this is the same as
scrollRect
.

C H A P T E R 7
Controls and Other Protos
Scroller Protos
7-5
Scrolling in the Dates Application
7
Scrolling in the Dates application allows the user to see the 24 hours in a day, 7
hours at a time. When there is only interesting data in a certain range of the day,
the application sets the
dataRect
for that time frame. This tells the scroller to
blacken a scroll arrow when the data time frame is not displayed in the
viewRect
,
providing additional visual feedback to the user.
scrollRect: SetBounds(0, 0, 0, 24)
// 24 hours per day
viewRect:
SetBounds(0, 0, 0, 7)
// show 7 at a time
dataRect:
SetBounds(0, 0, 0, 10)
// meeting from 9-10
Scrolling In a Graphics Application
7
A final example shows scrolling in a graphics application. This example shows a
total scrollable area of 200 pixels by 200 pixels, of which a 50 pixel by 50 pixel
area is shown at any one time. In this example, an object of interest (data) is
located at (100,100).
// total area is 200 by 200
scrollRect: SetBounds( 0, 0, 200, 200)
// show a 50 by 50 area at a time
viewRect:
SetBounds( 0, 0, 50, 50)
// there's something at location (100,100)
dataRect:
SetBounds(100, 100, 110, 110)
Scroll Amounts
7
Whenever the
ViewScroll2DScript
method is called, the scroller proto
increments the
viewRect
by 1. For example, in the Dates application example,
each time the user taps an arrow, the
viewRect
is moved up or down by 1 hour.
In the graphics application example, each time the user taps an arrow, the
viewRect
is moved up or down by 1 pixel. Since scrolling by 1 pixel at a time is too slow,
you need to be able to adjust the scrolling amount for certain applications. To do
so, you change the value of the
scrollAmounts
slot, which is an array of three
values. The default value of this slot is:
[1, 1, 1]
The first value in the
scrollAmounts
array specifies the amount to scroll for a
single tap. The second value specifies the amount to scroll when the user holds
down on the arrow (accelerated scrolling), and the third value specifies the amount
to scroll for a double tap. For a typical graphics application, you can use values like
the following:
[10, 50, 50]

C H A P T E R 7
Controls and Other Protos
7-6
Button and Box Protos
Keep in mind that if you set
scrollAmounts
to values other than the default,
your method must check the value passed to it and scroll that amount.
Note
In general, you should discourage double-tapping, since
inadvertently tapping twice can cause a double-tap action
to occur.
Advanced Usage
7
If you want more control over the arrow feedback, don't use the
scrollRect
,
viewRect
, or
dataRect
slots at all; instead, use the
SetArrow
and
GetArrow
methods.
For more information about the
SetArrow
method, see "SetArrow" (page 6-4) in
Newton Programmer's Reference; for more on the
GetArrow
method, see
"GetArrow" (page 6-4) in Newton Programmer's Reference.
Button and Box Protos
7
You use the protos described in this section to display text and picture buttons,
checkboxes, and radio buttons. The Newton System Software provides a variety of
button and box types for use in your applications.
Each of these protos uses specific methods to control its behavior. For many of the
protos, the Newton System Software calls the
ButtonClickScript
when the
button is tapped. You can define or redefine this method to generate the actions that
you want associated with the button.
The Newton System Software calls certain methods for each of the protos described
here. For information about which methods you need to define for each proto, see
"Button and Box Protos" (page 6-6) in Newton Programmer's Reference.
For information about sizing and placement recommendations for your button and
box protos, see Newton 2.0 User Interface Guidelines.
The following are the button and box protos that you can use in your applications:
The
protoTextButton
creates a rounded text button with text centered
vertically and horizontally inside it. For more information about the slots and
methods for this button, see "protoTextButton" (page 6-7) in Newton Programmer's
Reference. Figure 7-5 shows an example of a
protoTextButton
view.
Figure 7-5
A
protoTextButton
view

C H A P T E R 7
Controls and Other Protos
Button and Box Protos
7-7
The
protoPictureButton
creates a picture that is a button. For more
information about the slots and methods for this button, see "protoPictureButton"
(page 6-9) in Newton Programmer's Reference. Figure 7-6 shows an example of
a
protoPictureButton
view.
Figure 7-6
A
protoPictureButton
view
The
protoInfoButton
includes an information button in a view. When the
user taps this button, a picker containing information items appears. The picker
includes the About, Help, and Prefs items. For more information about the slots
and methods for this button, see "protoInfoButton" (page 6-10) in Newton
Programmer's Reference. Figure 7-7 shows an example of a
protoInfoButton
view.
Figure 7-7
A
protoInfoButton
view
The
protoOrientation
is a text button that changes the screen orientation so
that data on the screen can be displayed facing different directions. This proto is
available only on Newton platforms that support changing the screen
orientation. For more information about the slots and methods for this button,
see "protoOrientation" (page 6-13) in Newton Programmer's Reference.
Figure 7-8 shows an example of a protoOrientation view.
Figure 7-8
A
protoOrientation
view
The
protoRadioCluster
groups a series of radio buttons into a cluster in
which only one can be "on" at a time. For more information about the slots and
methods for this proto, see "protoRadioCluster" (page 6-14) in Newton
Programmer's Reference. This proto has no visual representation.
Picture Buttons
Information
Button
Picker displayed when
button is tapped

C H A P T E R 7
Controls and Other Protos
7-8
Button and Box Protos
The
protoRadioButton
creates a radio button child view of a radio button
cluster (based on
protoRadioCluster
). Each radio button is a small oval
bitmap that is labeled with text. For more information about the slots and
methods for this button, see "protoPictRadioButton" (page 6-18) in Newton
Programmer's Reference. Figure 7-9 shows an example of several radio buttons
in a cluster.
Figure 7-9
A cluster of
protoRadioButtons
The
protoPictRadioButton
creates a child view of a radio button cluster
(based on
protoRadioCluster
). For more information about the slots
and methods for this button, see "protoPictureButton" (page 6-9) in Newton
Programmer's Reference. Figure 7-10 shows a cluster of
protoPictRadioButtons
.
Figure 7-10
A cluster of
protoPictRadioButtons
The
protoCloseBox
allows the user to close the view. For more information
about the slots and methods for this box, see "protoCloseBox" (page 6-20) in
Newton Programmer's Reference. Figure 7-11 shows an example of a
protoCloseBox
view.
Figure 7-11
A
protoCloseBox
view

C H A P T E R 7
Controls and Other Protos
Button and Box Protos
7-9
The
protoLargeCloseBox
creates a picture button with an "X" icon that is
used to close the view. For more information about the slots and methods for
this box, see "protoLargeCloseBox" (page 6-22) in Newton Programmer's
Reference. Figure 7-12 shows an example of a
protoLargeCloseBox
view.
Figure 7-12
A
protoLargeCloseBox
view
Note
See Newton 2.0 User Interface Guidelines for information about
when to use
protoCloseBox
and when to use
protoLargeCloseBox
.
The
protoCheckBox
creates a labeled checkbox with the label text to the right
of the box. When the user taps the checkbox, a checkmark is drawn in it. For
more information about the slots and methods for this box, see
"protoCheckbox" (page 6-24) in Newton Programmer's Reference. Figure 7-13
shows an example of a
protoCheckBox
view.
Figure 7-13
A
protoCheckBox
view
The
protoRCheckBox
creates a labeled checkbox with the text to the left of
the checkbox. When the user taps the checkbox, a checkmark is drawn in it. For
more information about the slots and methods for this box, see "protoRCheckbox"
(page 6-26) in Newton Programmer's Reference. Figure 7-14 shows an example
of a
protoRCheckBox
view.
Figure 7-14
A
protoRCheckBox
view
Large Close Box

C H A P T E R 7
Controls and Other Protos
7-10
Button and Box Protos
Implementing a Simple Button
7
To provide a simple button in your application, pick a button proto to use, set the
appropriate slots in the button object, and (in most cases) define one or more
scripts for the button.
The following is an example of a template that includes
protoTextButton
:
aButton := {...
_proto: protoTextButton,
viewFont: ROM_fontSystem12Bold,
text: "My Button",
ButtonClickScript: func()
Print("ouch!");
// a handy way to fit a button around a string
ViewSetupFormScript: func()
viewbounds := RelBounds(10, 60,
StdButtonWidth(self.text), 13);
...}
The above example creates the following button on the Newton screen:
When the user taps this button in the Inspector, "ouch" is printed to the Inspector.
You implement a picture button with a similar template, as shown in the
following example:
pictButton := {...
_proto: protoPictureButton,
icon: namesBitmap,
viewBounds: SetBounds( 2, 8, 34, 40 ),
ButtonClickScript: func()
cardfile:Toggle()
...}
For more information on implementing specific button and box protos, see "Button
and Box Protos" (page 7-6) in Newton Programmer's Reference.
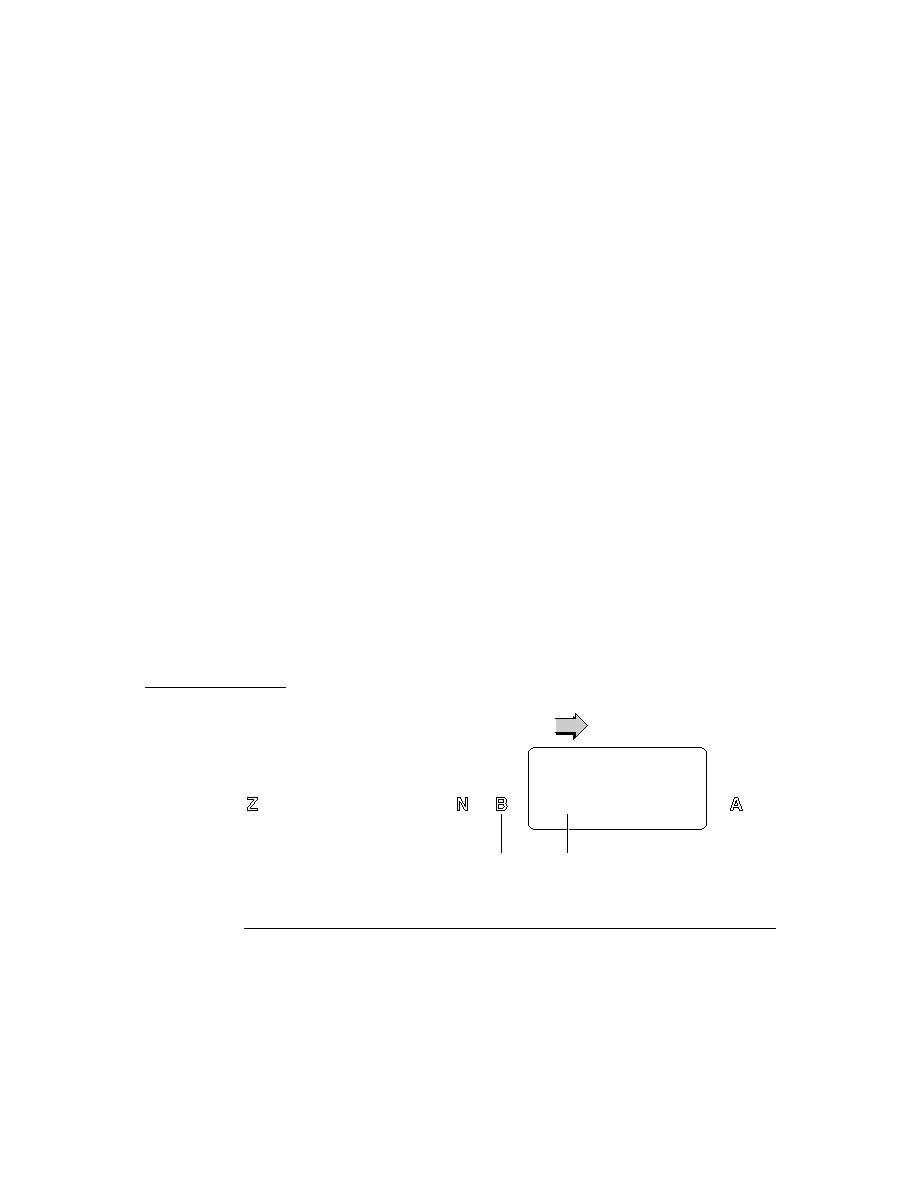
C H A P T E R 7
Controls and Other Protos
Selection Tab Protos
7-11
Selection Tab Protos
7
You can use the protos described in this section to display alphabetic selection tabs
on the screen. There are two tab protos that you can use:
The
protoAZTabs
displays alphabetical tabs arranged horizontally in a view.
For more information about the slots and methods for this proto, see
"protoAZTabs" (page 6-28) in Newton Programmer's Reference. Figure 7-15
shows an example of a
protoAZTabs
view.
Figure 7-15
A
protoAZTabs
view
The
protoAZVertTabs
displays alphabetical tabs arranged vertically in a
view. For more information about the slots and methods for this proto, see
"protoAZVertTabs" (page 6-29) in Newton Programmer's Reference.
Figure 7-16 shows an example of a
protoAZVertTabs
view.
Figure 7-16
A
protoAZVertTabs
view
When the user taps in either of the tab protos, the proto calls the
PickLetterScript
method, passing in the letter that was tapped. The tabs
protos and the
PickLetterScript
method are described in "Selection Tab
Protos" (page 6-28) in Newton Programmer's Reference.

C H A P T E R 7
Controls and Other Protos
7-12
Gauge and Slider Protos
Gauge and Slider Protos
7
You can use the gauge and slider protos described in this section to display gauges.
Each slider presents a gauge view that indicates the current progress in relation to
the entire operation. There are three protos and one view class available for
defining sliders:
The
protoSlider
creates a user-settable gauge view, which looks like an
analog bar gauge with a draggable diamond-shaped knob. For more information
about the slots and methods for this proto, see "protoSlider" (page 6-33) in
Newton Programmer's Reference. Figure 7-17 shows an example of a
protoSlider
view.
Figure 7-17
A
protoSlider
view
The
protoGauge
creates a read-only gauge view. For more information about
the slots and methods for this proto, see "protoGauge" (page 6-35) in Newton
Programmer's Reference. Figure 7-18 shows an example of a
protoGauge
view.
Figure 7-18
A
protoGauge
view
The
protoLabeledBatteryGauge
creates a read-only gauge view that
periodically samples the system battery and graphically shows the amount of
power left. For more information about the slots and methods for this proto, see
"protoLabeledBatteryGauge" (page 6-37) in Newton Programmer's Reference.
Figure 7-19 shows an example of a
protoLabeledBatteryGauge
view.
Figure 7-19
A
protoLabeledBatteryGauge
view
Large Close Box
Battery gauge
Battery charging
C H A P T E R 7
Controls and Other Protos
Gauge and Slider Protos
7-13
The
clGaugeView
class is used to display objects that look like analog bar
gauges. Although the
clGaugeView
class is available, you should use the
protoGauge
to display bar gauges. purpose as is the
protoGauge
proto. For
more information about the slots and methods for the
protoGauge
proto, see
"protoGauge" (page 6-35) in Newton Programmer's Reference.
Figure 7-20
A
clGaugeView
view
Implementing a Simple Slider
7
The
clGaugeView
class and the slider protos all have several slots to define the
appearance and range of the slider:
The
viewBounds
slot specifies the size and location of the slider.
The
viewValue
slot specifies the current value of the slider.
The
minValue
slot specifies the minimum value of the slider, with a default
value of
0
.
The
maxValue
slot specifies the maximum value of the slider, with a default
value of
100
.
You can specify the initial value of a slider in the
viewValue
slot. However, you
often need to look up the initial value; when this is the case, set the initial value of
the slider in the ViewSetupFormScript method.
To implement a slider, define your template with the proto that you want to use,
specify the appearance and range slots, and (optionally) assign an initial value in
the
ViewSetupFormScript
method of the proto. For some protos, you need to
define additional methods that respond to the user modifying the slider.
The following example is a template that uses
protoSlider
to allow adjustment
of the current system volume:
SoundSetter := {...
_proto: protoSlider,
viewBounds: RelBounds( 12, -21, 65, 9),
viewJustify: vjParentBottomV,
maxValue: 4,
ViewSetupFormScript: func()
self.viewValue := GetUserConfig('soundVolume);
Knob

C H A P T E R 7
Controls and Other Protos
7-14
Time Protos
ChangedSlider: func()
begin
SetVolume(viewValue);
:SysBeep();
end,
...}
The example above initializes the slider gauge to indicate the current system
volume, which it retrieves from the user configuration that is maintained by the
Newton System Software. The range of allowable volume values is from
0
(the default for
minValue
) to
4
.
Whenever the user moves the slider and lifts the pen, the
viewValue
slot is
updated and the
ChangedSlider
method is called. In the example, the
ChangedSlider
method resets the system volume to the new value chosen by
the user and sounds a beep to provide the user with audible feedback.
For more information on the
protoSlider
and the
ChangedSlider
method,
see "protoSlider" (page 6-33) in Newton Programmer's Reference.
Time Protos
7
You can use the time protos to allow the user to set time and date values. There are
four time protos:
The
protoDigitalClock
time proto displays a digital clock with which the
user can set a time value. For more information about the slots and methods for
this proto, see "protoDigitalClock" (page 6-38) in Newton Programmer's
Reference. Figure 7-21 shows an example of a
protoDigitalClock
view.
Figure 7-21
A
protoDigitalClock
view
The
protoNewSetClock
time proto displays an analog clock with which the
user can set a time value. For more information about the slots and methods for
this proto, see "protoNewSetClock" (page 6-40) in Newton Programmer's
Reference. Figure 7-22 shows an example of a
protoNewSetClock
view.

C H A P T E R 7
Controls and Other Protos
Time Protos
7-15
Figure 7-22
A
protoNewSetClock
view
The
protoSetClock
time proto also displays an analog clock with which the
user can set a time value. Although this proto is still available for use, it has
been updated to the
protoNewSetClock
, which you should use instead.
The
protoAMPMCluster
time proto displays
A
.
M
. and
P
.
M
. radio buttons in a
protoNewSetClock
view. For more information about the slots and methods
for this proto, see "protoAMPMCluster" (page 6-44) in Newton Programmer's
Reference. Figure 7-23 shows an example of a
protoAMPMCluster
view.
Figure 7-23
A
protoAMPMCluster
view
Implementing a Simple Time Setter
7
To implement a time setter, define your template with the proto that you want
to use, specify the initial time value to show in the clock, and define the
TimeChanged
method. You might also need to define additional slots or messages,
as described in "Time Protos" (page 6-38) in Newton Programmer's Reference.
The following example is a template that uses
protoDigitalClock
to allow the
user to specify a time:
clock := {...
_proto: protoDigitalClock,
time: 0,
TimeChanged: func()
begin
// add your code to respond to time change
print(time);
end,

C H A P T E R 7
Controls and Other Protos
7-16
Special View Protos
// initialize with current time
ViewSetupFormScript: func()
begin
time := time();
end,
...};
Special View Protos
7
You can use the protos described in this section to provide special-purpose views in
your applications. There are seven special view protos:
The
protoDragger
creates a view that can be dragged around the screen with
the pen. For more information about the slots and methods for this proto, see
"protoDragger" (page 6-45) in Newton Programmer's Reference. Figure 7-22
shows an example of a
protoDragger
view.
Figure 7-24
A
protoDragger
view
The
protoDragNGo
creates a view that can be dragged around the screen with
the pen. This is identical to
protoDragger
, except that
protoDragNGo
includes a close box in the lower-right corner of the view. For more information
about the slots and methods for this proto, see "protoDragNGo" (page 6-47) in
Newton Programmer's Reference. Figure 7-25 shows an example of a
protoDragNGo
view.
Figure 7-25
A
protoDragNGo
view

C H A P T E R 7
Controls and Other Protos
Special View Protos
7-17
The
protoDrawer
creates a view that looks and acts like the base view of the
Extras Drawer. For more information about the slots and methods for this proto,
see "protoDrawer" (page 6-49) in Newton Programmer's Reference.
The
protoFloater
creates a draggable view that is horizontally centered
within its parent view and floats above all other nonfloating sibling views within
an application. For more information about the slots and methods for this proto,
see "protoFloater" (page 6-49) in Newton Programmer's Reference.
The
protoFloatNGo
creates a draggable view that is horizontally centered
within its parent view and floats above all other nonfloating sibling views
within an application. This is identical to
protoFloater
, except that
protoFloatNGo
includes a close box in the lower-right corner of the view. For
more information about the slots and methods for this proto, see
"protoFloatNGo" (page 6-51) in Newton Programmer's Reference.
The
protoGlance
creates a text view that automatically closes itself after
displaying for a brief period. For more information about the slots and methods
for this proto, see "protoGlance" (page 6-52) in Newton Programmer's
Reference. Figure 7-26 shows an example of a
protoGlance
view.
Figure 7-26
A
protoGlance
view
The
protoStaticText
creates a one-line paragraph view that is read-only
and left-justified. For more information about the slots and methods for this, see
"protoStaticText" (page 6-54) in Newton Programmer's Reference. Figure 7-22
shows an example of a
protoStaticText
view.
Figure 7-27
A
protoStaticText
view
Static text

C H A P T E R 7
Controls and Other Protos
7-18
View Appearance Protos
View Appearance Protos
7
You can use the protos described in this section to add to the appearance of your
views in certain ways. There are three view appearance protos:
The
protoBorder
is a view filled with black. You can use this proto as a
border, a line, or a black rectangle. For more information about the slots and
methods for this proto, see "protoBorder" (page 6-56) in Newton Programmer's
Reference. Figure 7-28 shows an example of a
protoBorder
view.
Figure 7-28
A
protoBorder
view
The
protoDivider
creates a divider bar that extends the whole width of
its parent view. This proto also includes a text label. For more information
about the slots and methods for this proto, see "protoDivider" (page 6-56) in
Newton Programmer's Reference. Figure 7-29 shows an example of a
protoDivider
view.
Figure 7-29
A
protoDivider
view
The
protoTitle
creates a title centered above a heavy black line at the top of
a view. You can optionally include an icon that appears to the left of the title
text. For more information about the slots and methods for this proto, see
"protoTitle" (page 6-58) in Newton Programmer's Reference. Figure 7-30
shows an example of a
protoTitle
view.
Figure 7-30
A
protoTitle
view
Icon
Title
C H A P T E R 7
Controls and Other Protos
Status Bar Protos
7-19
Status Bar Protos
7
You can use the protos described in this section to display a status bar at the bottom
of a view. There are two status bar protos:
The
protoStatus
creates a status bar, which includes a close button and an
analog clock, at the bottom of a view. For more information about the slots and
methods for this proto, see "protoStatus" (page 6-59) in Newton Programmer's
Reference. Figure 7-31 shows an example of a
protoStatus
view.
Figure 7-31
A
protoStatus
view
The
protoStatusBar
creates a status bar, which includes an analog clock,
at the bottom of a view. This is identical to
protoStatus
, except that
protoStatusBar
does not include a close button. For more information about
the slots and methods for this proto, see "protoStatusBar" (page 6-60) in Newton
Programmer's Reference. Figure 7-32 shows an example of a
protoStatusBar
view.
Figure 7-32
A
protoStatusBar
view
Note
The new status bar protos
newtStatusBarNoClose
and
newtStatusBar
, are the preferred way to add a status bar to
your applications. These protos, which are described in
"NewtApp Applications" (page 4-1), simplify adding buttons and
automate hiding the close box when your application is moved
into the background.

C H A P T E R 7
Controls and Other Protos
7-20
Summary
Summary
7
Scroller Protos
7
protoLeftRightScroller
7
aProtoLeftRightScroller := {
_proto: protoLeftRightScroller,
scrollView:
viewTemplate
,
scrollRect:
boundsFrame
,
// extent of scrollable area
dataRect:
boundsFrame
,
// extent of data in the view
viewRect:
boundsFrame
,
// extent of visible area
xPos:
integer
,
// initial x-coord in scrollRect
yPos:
integer
,
// initial y-coord in scrollRect
scrollAmounts:
array
,
// line, page, dbl-click values
pageThreshhold:
integer
,
// lines before page scrolling
ViewScroll2DScript:
function
, // called when arrows tapped
ViewScrollDoneScript:
function
, // called when scroll done
SetArrow:
function
, // set scroll direction
GetArrow:
function
, // returns scroll direction
...
}
protoUpDownScroller
7
aProtoUpDownScroller := {
_proto: protoUpDownScroller,
scrollView:
viewTemplate
,
scrollRect:
boundsFrame
,// extent of scrollable area
dataRect:
boundsFrame
,// extent of data in the view
viewRect:
boundsFrame
,// extent of visible area
xPos:
integer
,
// initial x-coord in scrollRect
yPos:
integer
,
// initial y-coord in scrollRect
scrollAmounts:
array
,
// line, page, dbl-click values
pageThreshhold:
integer
,
// lines before page scrolling
ViewScroll2DScript:
function
, // called when arrows tapped
ViewScrollDoneScript:
function
, // called when scroll done
SetArrow:
function
, // set scroll direction
GetArrow:
function
, // returns scroll direction
...
}
C H A P T E R 7
Controls and Other Protos
Summary
7-21
protoHorizontal2DScroller
7
aProtoHorizontal2DScroller := {
_proto: protoHorizontal2DScroller,
scrollView:
viewTemplate
,
scrollRect:
boundsFrame
,// extent of scrollable area
dataRect:
boundsFrame
,// extent of data in the view
viewRect:
boundsFrame
,// extent of visible area
xPos:
integer
,
// initial x-coord in scrollRect
yPos:
integer
,
// initial y-coord in scrollRect
scrollAmounts:
array
,
// line, page, dbl-click values
pageThreshhold:
integer
,
// lines before page scrolling
ViewScroll2DScript:
function
, // called when arrows tapped
ViewScrollDoneScript:
function
, // called when scroll done
SetArrow:
function
, // set scroll direction
GetArrow:
function
, // returns scroll direction
...
}
protoHorizontalUpDownScroller
7
aProtoHorizontalUpDownScroller := {
_proto: protoHorizontalUpDownScroller,
scrollView:
viewTemplate
,
scrollRect:
boundsFrame
,// extent of scrollable area
dataRect:
boundsFrame
,// extent of data in the view
viewRect:
boundsFrame
,// extent of visible area
xPos:
integer
,
// initial x-coord in scrollRect
yPos:
integer
,
// initial y-coord in scrollRect
scrollAmounts:
array
,
// line, page, dbl-click values
pageThreshhold:
integer
,
// lines before page scrolling
ViewScroll2DScript:
function
, // called when arrows tapped
ViewScrollDoneScript:
function
, // called when scroll done
SetArrow:
function
, // set scroll direction
GetArrow:
function
, // returns scroll direction
...
}

C H A P T E R 7
Controls and Other Protos
7-22
Summary
Button and Box Protos
7
protoTextButton
7
aProtoTextButton := {
_proto: protoTextButton,
viewBounds:
boundsFrame
,
viewFlags:
integer
,
// viewFlags constants
text:
string,
// text inside the button
viewFont:
fontFlags
,
viewFormat:
formatFlags
,
viewJustify:
justificationFlags
,
viewTransferMode:
integer
,
// view transfer constants
ButtonClickScript:
function
,
// when button is tapped
ButtonPressedScript:
function
,
// while button is pressed
...
}
protoPictureButton
7
aProtoTextButton := {
_proto: protoPictureButton,
viewBounds:
boundsFrame
,
viewFlags:
integer
,
// viewFlags constants
icon:
bitmap
,
// bitmap to use for button
viewFormat:
formatFlags
,
viewJustify:
justificationFlags
,
ButtonClickScript:
function
,
// when button is tapped
ButtonPressedScript:
function
,
// while button is pressed
...
}
protoInfoButton
7
aProtoInfoButton := {
_proto: protoInfoButton,
viewFlags:
integer
,
// viewFlags constants
viewBounds:
boundsFrame
,
viewJustify:
justificationFlags
,
...
}

C H A P T E R 7
Controls and Other Protos
Summary
7-23
protoOrientation
7
aProtoOrientation := {
_proto: protoOrientation,
viewFlags:
integer
,
// viewFlags constants
viewBounds:
boundsFrame
,
viewJustify:
justificationFlags
,
...
}
protoRadioCluster
7
aProtoRadioCluster := {
_proto: protoRadioCluster,
viewBounds:
boundsFrame
,
clusterValue:
integer
,
// value of selected button
InitClusterValue:
function
,
// initialize cluster
ViewSetupFormScript:
function
,
// set initial button
ClusterChanged:
function
,
// called upon value change
SetClusterValue:
function
,
// change selected button
...
}
protoRadioButton
7
aProtoRadioButton := {
_proto: protoRadioButton,
viewBounds:
boundsFrame
,
viewFormat:
formatFlags
,
text:
string
,
// radio button text label
buttonValue:
integer
,
// identifies button
viewValue:
integer
,
// current value of radio button
...
}
protoPictRadioButton
7
aProtoPictRadioButton := {
_proto: protoPictRadioButton,
viewBounds:
boundsFrame
,
viewFormat:
formatFlags
,
viewJustify:
justificationFlags
,
icon:
bitmap
,
// bitmap for picture button
buttonValue:
integer
,
// identifies button

C H A P T E R 7
Controls and Other Protos
7-24
Summary
viewValue:
integer
,
// current value of radio button
ViewDrawScript:
function
,
// to highlight button
...
}
protoCloseBox
7
aProtoCloseBox := {
_proto: protoCloseBox,
viewFlags:
integer
,
// viewFlags constants
viewBounds:
boundsFrame
,
viewJustify:
justificationFlags
,
viewFormat:
formatFlags
,
ButtonClickScript:
function
,
// called before closing
...
}
protoLargeCloseBox
7
aProtoLargeCloseBox := {
_proto: protoLargeCloseBox,
viewFlags:
integer
,
// viewFlags constants
viewBounds:
boundsFrame
,
viewJustify:
justificationFlags
,
viewFormat:
formatFlags
,
ButtonClickScript:
function
,
// called before closing
...
}
protoCheckbox
7
aProtoCheckbox := {
_proto: protoCheckbox,
viewBounds:
boundsFrame
,
viewFormat:
formatFlags
,
viewFont:
fontFlags
, // font for text label
text:
string
,
// the checkbox label
buttonValue:
value,
// value when box is checked
viewValue:
value
,
// current value (nil=unchecked)
ValueChanged:
function
,
// checkbox value changed
ToggleCheck:
function
,
// toggles checkbox state
...
}

C H A P T E R 7
Controls and Other Protos
Summary
7-25
protoRCheckbox
7
aProtoRCheckbox := {
_proto: protoRCheckbox,
viewBounds:
boundsFrame
,
viewFormat:
formatFlags
,
viewFont:
fontFlags
, // font for text label
text:
string
,
// the checkbox label
indent:
integer
,
// pixels to indent box
buttonValue:
value
,
// value when box is checked
viewValue:
value
,
// current value (nil=unchecked)
ValueChanged:
function
,
// checkbox value changed
ToggleCheck:
function
,
// toggles checkbox state
...
}
Selection Tab Protos
7
protoAZTabs
7
aProtoAZTabs := {
_proto: protoAZTabs,
PickLetterScript:
function
,
// tab is tapped
SetLetter:
function
,
// sets tab letter
...
}
protoAZVertTabs
7
aProtoAZVertTabs := {
_proto: protoAZVertTabs,
PickLetterScript:
function
,
// tab is tapped
SetLetter:
function
,
// sets tab letter
...
}
Gauges and Slider Protos
7
protoSlider
7
aProtoSlider := {
_proto: protoSlider,
viewBounds:
boundsFrame
,
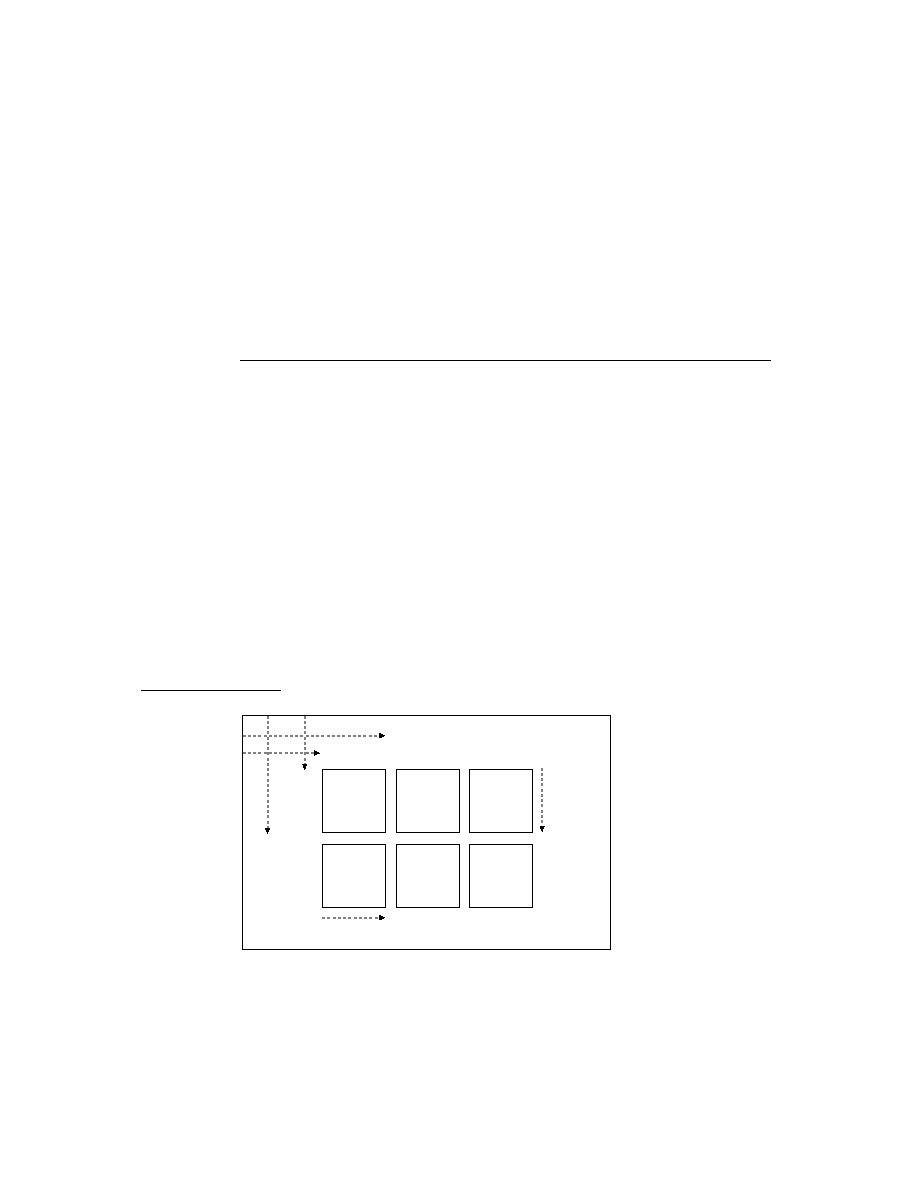
C H A P T E R 7
Controls and Other Protos
7-26
Summary
viewValue:
integer
,
// gauge value
minValue:
integer
,
// minimum gauge value
maxValue:
integer
,
// maximum gauge value
ViewSetupFormScript:
function
,
// set initial gauge value
ChangedSlider:
function
,
// slider moved
TrackSlider:
function
,
// viewValue changed
...
}
protoGauge
7
aProtoGauge := {
_proto: protoGauge,
viewBounds:
boundsFrame
,
viewValue:
integer
,
// gauge value
minValue:
integer
,
// minimum gauge value
maxValue:
integer
,
// maximum gauge value
gaugeDrawLimits:
Boolean
,
// non-nil for gray bg
ViewSetupFormScript:
function
,
// set initial gauge value
...
}
protoLabeledBatteryGauge
7
aProtoLabeledBatteryGauge:= {
_proto: protoLabeledBatteryGauge,
viewBounds:
boundsFrame
,
...
}
clGaugeView
7
aClGaugeView:= {
viewBounds:
boundsFrame
,
viewClass:
clGaugeView,
viewValue:
integer
,
// value of gauge
viewFlags:
integer
,
// viewFlags constants
viewFormat:
formatFlags
,
minValue:
integer
,
// min value of gauge
maxValue:
integer
,
// max value of gauge
gaugeDrawLimits:
Boolean
,
// non-nil for gray bg
ViewChangedScript:
function
,
// gauge dragged
ViewFinalChangeScript:
function
,
// gauge changed
...
}

C H A P T E R 7
Controls and Other Protos
Summary
7-27
Time Protos
7
protoDigitalClock
7
aProtoDigitalClock := {
_proto: protoDigitalClock,
viewFlags:
integer
,
// viewFlags constants
viewBounds:
boundsFrame
,
viewJustify:
justificationFlags
,
increment:
integer
,
// minutes to change on tap
time:
integer
,
// initial or current time
wrapping:
Boolean
,
// non-nil to wrap around day
// boundaries
midnite:
Boolean
,
// non-nil if 0 means midnight
// tomorrow
Refresh:
function
,
// update clock
TimeChanged:
function
,
// called when time is changed
...
}
protoSetClock
7
aProtoSetClock := {
_proto: protoSetClock,
viewBounds:
boundsFrame
,
viewFlags:
integer
,
// viewFlags constants
viewFormat:
formatFlags
,
hours:
integer
,
// value set by hour hand
minutes:
integer
,
// value set by minute hand
TimeChanged:
function
,
// called when time is changed
...
}
protoNewSetClock
7
aProtoNewSetClock := {
_proto: protoNewSetClock,
viewBounds:
boundsFrame
,
viewJustify:
justificationFlags
,
time:
integer
,
// initial or current time
annotations:
array
,
// four strings to annotate
// the clock face
supressAnnotations:
Boolean
, // if slot exists, suppress
exactHour:
Boolean
,
// adjust hour markers

C H A P T E R 7
Controls and Other Protos
7-28
Summary
Refresh:
function
,
// update clock
TimeChanged:
function
,
// called when time is changed
...
}
protoAMPMCluster
7
aProtoAMPMCluster := {
_proto: protoAMPMCluster,
viewBounds:
boundsFrame
,
viewJustify:
justificationFlags
,
time:
integer
,
// specify time--required
...
}
Special View Protos
7
protoDragger
7
aProtoDragger := {
_proto: protoDragger,
viewBounds :
boundsFrame
,
viewFlags:
integer
,
// viewFlags constants
viewFormat:
formatFlags
,
noScroll:
string
,
// msg to display if no scrolling
noOverview:
string
,
// msg to display if no overview
...
}
protoDragNGo
7
aProtoDragNGo := {
_proto: protoDragNGo,
viewBounds:
boundsFrame
,
viewFlags:
integer
,
// viewFlags constants
viewJustify:
justificationFlags
,
viewFormat:
formatFlags
,
noScroll:
string
,
// msg to display if no scrolling
noOverview:
string
,
// msg to display if no overview
...
}

C H A P T E R 7
Controls and Other Protos
Summary
7-29
protoDrawer
7
aProtoDrawer := {
_proto: protoDrawer,
viewFlags:
integer
,
// viewFlags constants
viewBounds:
boundsFrame
,
viewFormat:
formatFlags
,
viewEffect:
effectFlags
,
showSound:
soundFrame
,// sound when drawer opens
hideSound:
soundFrame
,// sound when drawer closes
...
}
protoFloater
7
aProtoFloater := {
_proto: protoFloater,
viewBounds:
boundsFrame
,
viewFlags:
integer
,
// viewFlags constants
viewJustify:
justificationFlags
,
viewFormat:
formatFlags
,
viewEffect:
effectFlags
,
noScroll:
string
,
// msg to display if no scrolling
noOverview:
string
,
// msg to display if no overview
...
}
protoFloatNGo
7
aProtoFloatNGo := {
_proto: protoFloatNGo,
viewFlags:
integer
,
// viewFlags constants
viewBounds:
boundsFrame
,
viewJustify:
justificationFlags
,
viewFormat:
formatFlags
,
viewEffect:
effectFlags
,
noScroll:
string
,
// msg to display if no scrolling
noOverview:
string
,
// msg to display if no overview
...
}

C H A P T E R 7
Controls and Other Protos
7-30
Summary
protoGlance
7
aProtoGlance := {
_proto: protoGlance,
viewBounds:
boundsFrame
,
viewJustify:
justificationFlags
,
viewFormat:
formatFlags
,
viewFont:
fontFlags
, // font for text
viewEffect:
effectFlags
,
viewIdleFrequency:
integer
,
// time view to remain open
text:
string
,
// text to appear in view
...
}
protoStaticText
7
aProtoStaticText:= {
_proto: protoStaticText,
viewBounds:
boundsFrame
,
viewFlags:
integer
,
// viewFlags constants
text:
string
,
// text to display
viewFont:
fontFlags
,
viewJustify:
justificationFlags
,
viewFormat:
formatFlags
,
viewTransferMode:
integer
,
// view transfer constants
tabs:
array
, // up to eight tab-stop positions
styles:
array
, // font information
...
}
View Appearance Protos
7
protoBorder
7
aProtoBorder := {
_proto: protoBorder,
viewBounds:
boundsFrame
,
viewFlags:
integer
,
// viewFlags constants
viewFormat:
formatFlags
,
...
}

C H A P T E R 7
Controls and Other Protos
Summary
7-31
protoDivider
7
aProtoDivider:= {
_proto: protoDivider,
viewBounds:
boundsFrame
,
viewFlags:
integer
,
// viewFlags constants
viewFont:
fontFlags
, // font for text
viewJustify:
justificationFlags
,
viewFormat:
formatFlags
,
title:
string
,
// text on divider bar
titleHeight:
integer
,
// height of divider
...
}
protoTitle
7
aProtoTitle := {
_proto: protoTitle,
viewJustify:
justificationFlags
,
viewFormat:
formatFlags
,
viewFont:
fontFlags
,
title:
string
,
// text of title
titleIcon:
bitMapFrame
,
titleHeight:
integer
,
// height of title
viewTransferMode:
integer
,
// view transfer constants
...
}
Status Bar Protos
7
protoStatus
7
aProtoStatus := {
_proto: protoStatus,
...
}
protoStatusBar
7
aProtoStatusBar := {
_proto: protoStatusBar,
...
}
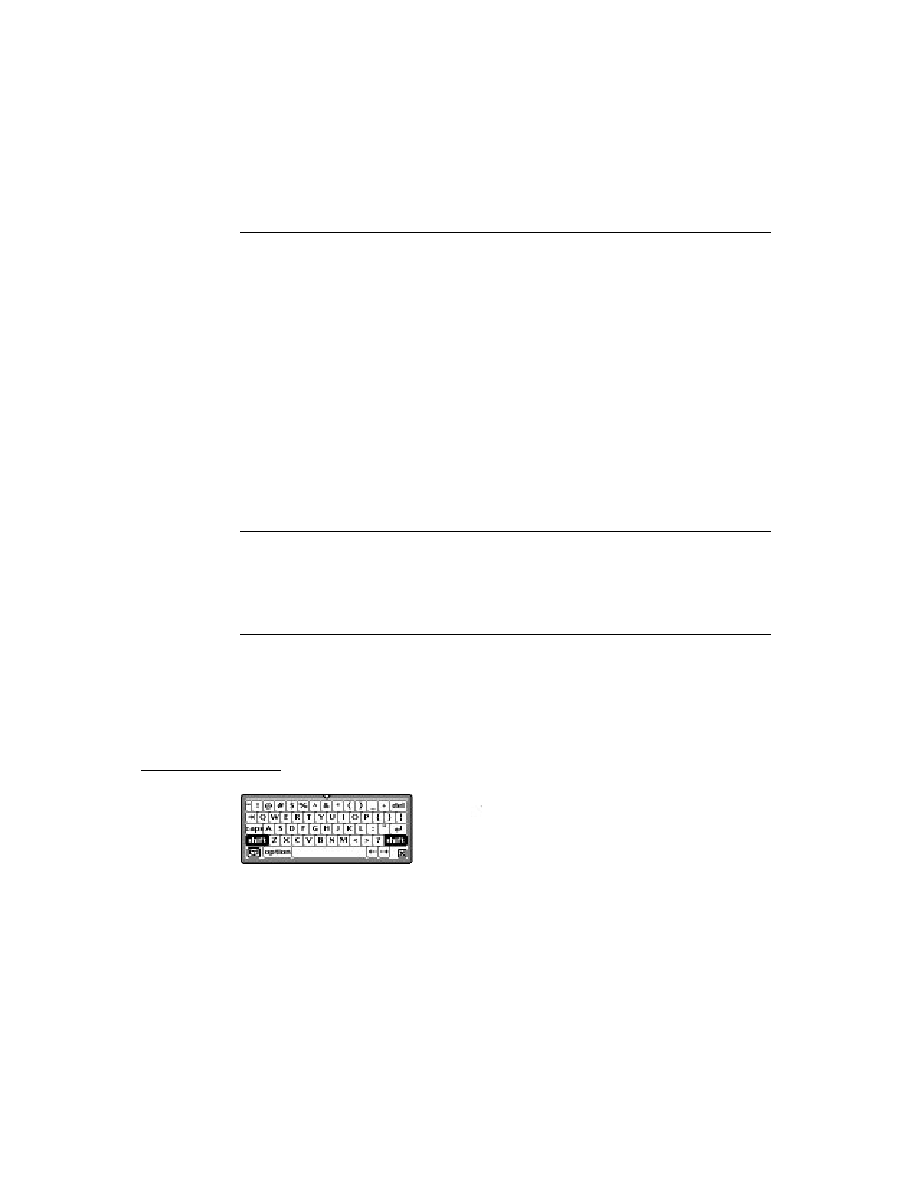

About Text
8-1
C H A P T E R 8
Text and Ink Input and Display
8
Figure 8-0
Table 8-0
This chapter describes how the Newton system handles text and presents interfaces
you can use to work with text in NewtonScript applications.
The material covers the following components of Newton text handling:
handwritten text input
keyboard text input
views for text display
fonts for text display
The first section of this chapter, "About Text," describes the basic terms and
concepts needed to understand text processing on the Newton.
The second section, "Using Text," describes how to use the various input and
display components to handle text in your applications.
For comprehensive reference information about the text-related constants, data
structures, views, methods, and functions, see "Text and Ink Input and Display
Reference" (page 7-1) in Newton Programmer's Reference.
About Text
8
This section describes the basic concepts, terms, and processes you need to
understand to work with text in your applications.
About Text and Ink
8
The Newton allows you to process two forms of text input: ink text and
recognized text
.
This section describes both forms of text input.

C H A P T E R 8
Text and Ink Input and Display
8-2
About Text
When the user writes a line of text on the Newton screen, the Newton system
software performs a series of operations, as follows:
The raw data for the input is captured as ink, which is also known as sketch ink
or raw ink.
Raw ink is stored as a sequence of strokes or stroke data.
If the view in which the ink was drawn is configured for ink text, the recognition
system groups the stroke data into a series of ink words, based on the timing
and spacing of the user's handwriting. A user can insert, delete, and move ink
words in the same way as recognized text. Ink words can be scaled to various
sizes for display and printing. They can also be recognized at a later time, by a
process known as deferred recognition.
If the view in which the ink was drawn supports or is configured for text
recognition, the ink words are processed by the recognition system into
recognized text and displayed in a typeface.
The data describing the handwriting strokes of the ink word are stored as compressed
data in a binary object. This stroke data can be accessed programmatically, using
the stroke bundle methods described in "Recognition" (page 9-1) in Newton
Programmer's Guide.
The recognition system and deferred recognition are described in "Recognition"
(page 9-1).
Note
To provide maximum user flexibility for your applications, you
are encouraged to allow ink text in all of your input views.
Written Input Formats
8
Ink words can be intermixed with recognized text. This data, normally represented
as rich strings, can be used anywhere that you might expect a standard string.
Each ink word is encoded as a single character in a rich string, as described in
"Rich Strings" (page 8-22).
You should use the rich string format to store data in a soup, because of its
compact representation. You can safely use rich strings with all functions, including
the string functions, which are documented in "Utility Functions" (page 26-1).
Another data format, described in "Text and Styles" (page 8-25), pairs text strings
with style data for viewing in text views.
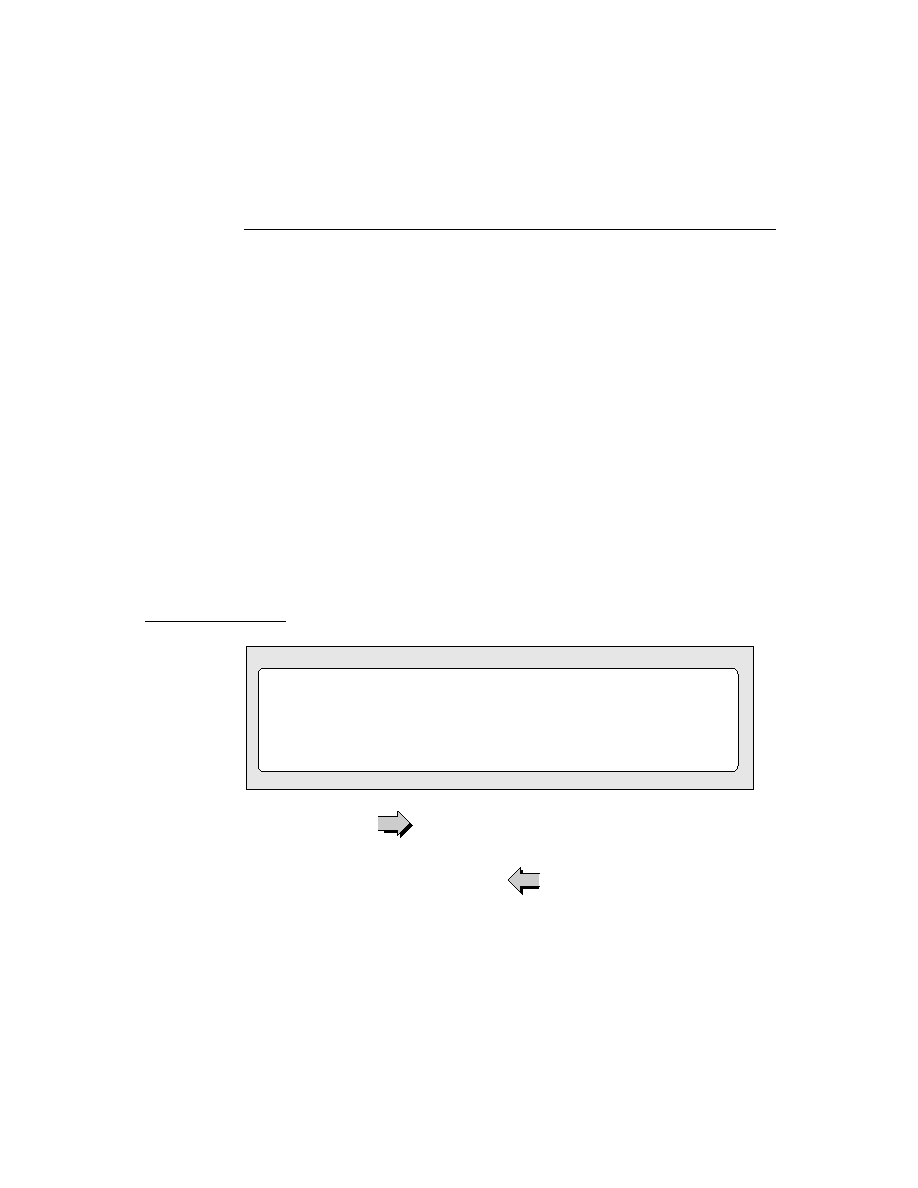
C H A P T E R 8
Text and Ink Input and Display
About Text
8-3
Caret Insertion Writing Mode
8
Caret insertion writing mode is a text input mode that the user can enable or
disable. When caret insertion mode is disabled, handwritten text is inserted into the
view at the location where it is written. When caret insertion writing mode is
enabled, handwritten text is inserted at the location indicated by the insertion caret,
regardless of where on the screen it is drawn. Caret insertion writing mode is used
automatically for keyboard text entry.
To enable or disable caret insertion writing mode, the user selects or deselects the
"Insert new words at caret" option from the Text Editing Settings slip. You can
display this slip by tapping the Options button in the Recognition Preferences slip.
Applications do not normally need to be aware of whether caret insertion writing
mode is enabled or disabled. The one exception to this is at application startup
time, when you might want to set the initial location of the insertion point. This is
described in "Setting the Caret Insertion Point" (page 8-26).
There are a few caret insertion writing mode routines you can use to implement
your own version of this mode. They are described in "Caret Insertion Writing
Mode Functions and Methods" (page 7-47) in Newton Programmer's Reference.
Fonts for Text and Ink Display
8
The Newton system software allows you to specify the font characteristics for
displaying text and ink in a paragraph view on the screen. The font information is
stored in a font specification structure known as a font spec. The font specification
for built-in ROM fonts can also be represented in a frame as a packed integer. Both
of these representations are described in "Using Fonts for Text and Ink Display"
(page 8-17).
The system provides a number of functions you can use to access and modify font
attributes. These are described in "Text and Styles" (page 8-25).
About Text Views and Protos
8
There are a number of views and protos to use for displaying text and for receiving
text input. For basic information about views, see "Views" (page 3-1).

C H A P T E R 8
Text and Ink Input and Display
8-4
About Text
The views and protos that you use for text are listed in Table 8-1.
About Keyboard Text Input
8
Your application can provide keyboards and keypads for user text input by creating
an object from one of the keyboard view classes or protos:
The
clKeyboardView
class provides a keyboard-like array of buttons that the
user can tap with the pen to perform an action. This class is described in
"Keyboard Views" (page 8-26).
Table 8-1
Views and protos for text input and display
View or Proto
Description
edit view
Use the
clEditView
class for basic text input and display.
Objects of this class can display and/or accept text and
graphic data. The
clEditView
automatically creates child
clParagraphView
views for text input and display and
clPolygonView
views for graphic input and display. You
can also include
clPictureView
views in your
clEditViews
.
For more information about this class, see "General Input
Views" (page 8-6).
paragraph views
Use the
clParagraphView
class to display text or to accept
text input.
For more information about this class, see "Paragraph Views"
(page 8-10).
lightweight
paragraph views
If your paragraph view template meets certain criteria, the
Newton system automatically creates a lightweight paragraph
view for you. Lightweight paragraph views are read-only
and use only one font, although they can contain ink. These
views require significantly less memory than do standard
paragraph views.
For more information about lightweight paragraph views, see
"Lightweight Paragraph Views" (page 8-11).
input line protos
You can use one of the input line protos to allow the user to
enter a single line of text, as described in "Using Input Line
Protos" (page 8-12).

C H A P T E R 8
Text and Ink Input and Display
About Text
8-5
Use one of the keyboard protos to create keyboard views in your applications.
These protos include the
protoKeyboard
, which creates a keyboard view that
floats above all other views. The keyboard protos are also described in
"Keyboard Views."
The Keyboard Registry
8
You need to register any custom keyboards or keypads that you create with the
Newton system's keyboard registry. Caret insertion writing mode is used whenever
the user enters text from a keyboard or keypad. When a registered keyboard or keypad
is opened, the system knows to display the insertion caret at the proper location.
The Newton system also allows you to customize the behavior of the insertion
caret and key presses by calling your application-defined methods whenever an
action occurs in a registered keyboard or keypad.
For more information about the keyboard registry, see "Using the Keyboard
Registry" (page 8-36).
The Punctuation Pop-up Menu
8
The user can tap the insertion caret to display a Punctuation pop-up menu. This
menu, shown in Figure 8-1, provides an easy way to add punctuation when writing
with the stylus.
Figure 8-1
The Punctuation pop-up menu
Choosing any item on the Punctuation pop-up menu inserts the appropriate
character into the text, at the insertion caret. The bent arrow, at the top left, is a
carriage return, and the blank box at the bottom indicates a space.
You can override this menu with your own caret pop-up menu, as described in
"The Caret Pop-up Menu" (page 8-38).

C H A P T E R 8
Text and Ink Input and Display
8-6
Using Text
Compatibility
8
One of the significant advances in software functionality in the Newton 2.0 system
is the capacity to process ink in most views, which includes deferred recognition
and the ability to mix text and ink together in rich string. This expands the behavior
provided by Newton 1.x machines, which generally process written input
immediately for recognition and display the resulting word in a typeface.
These additional capabilities made it necessary to extend the Recognition menu.
The Newton 2.0 Recognition menu adds more input options and replaces the
toggling Recognizer buttons of the Newton 1.x status bar.
The Newton 2.0 system also behaves slightly differently when merging text into
paragraph views. When caret insertion writing mode is disabled, paragraphs no
longer automatically insert carriage returns or tabs. This is true regardless of
whether the user is entering text or ink words.
With Newton System 2.0, you can include images in your edit views. Edit views
(clEditView) can now contain picture views (
clPictureView
) as child views
Any ink written on a 1.x machine can be dragged into a Newton System 2.0
paragraph and automatically converted into an ink word.
Notes, text, or ink moved from a Newton 1.x to a Newton with the 2.0 system
works correctly without any intervention. However, the reverse is not true: you
cannot insert a a card with 2.0 or later data into a 1.x machine.
The expando protos have become obsolete. These are
protoExpandoShell
,
protoDateExpando
,
protoPhoneExpando
, and
protoTextExpando
.
These protos are still supported for 1.x application compatibility, but should not be
used in new applications.
Using Text
8
This section describes how to use various features of text input and display on the
Newton and provides examples of some of these features.
Using Views and Protos for Text Input and Display
8
This section describes the different views and protos to use in your applications for
text input and display.
General Input Views
8
The
clEditView
view class is used for a view that can display and/or accept text
and graphic data. Views of the
clEditView
class contain no data directly;

C H A P T E R 8
Text and Ink Input and Display
Using Text
8-7
instead, they have child views that contain the individual data items. Text items
are contained in child views of the class
clParagraphView
and graphics are
contained in child views of the class
clPolygonView
.
A view of the
clEditView
class includes the following features:
Automatic creation of
clParagraphView
or
clPolygonView
children as
the user writes or draws in the view. These child views hold the data the user writes.
Support for inclusion of
clPictureView
views, which are used for images.
Text and shape recognition, selection, and gestures such as scrubbing, copying
to clipboard, pasting from clipboard, duplicating, and others, as controlled by
the setting of the
viewFlags
slot. The initial recognition is handled by the
clEditView
. A child
clParagraphView
or
clPolygonView
is created
and that child view handles subsequent editing of the data.
Drag and drop handling. A child view can be dragged (moved or copied) out of
the
clEditView
and dropped into another
clEditView
, whose child it then
becomes. Other views can be configured to handle data dragged from a
clEditView
, as described in "Views" (page 3-1).
Clipboard support. A
clParagraphView
or
clPolygonView
child view can
be dragged (moved or copied) to the clipboard, from which it can be pasted into
another
clEditView
or
clView
, whose child it becomes.
Automatic resizing of
clParagraphView
child views to accommodate added
input. This feature is controlled by the
vCalculateBounds
flag in the
viewFlags
slot of those child views.
Automatic addition of new words to existing paragraphs when caret insertion
writing mode is disabled.
Views of the class
clEditView
are intended for user input of text, shape, image,
and ink data. Consequently, views of this class expect that any child views have
been defined and created at run time, not predefined by templates created in NTK.
If you need to include predefined child views in a
clEditView
, use the
ViewSetupChildrenScript
method of the
clEditView
to define the child
views and set up the
stepChildren
array. You might need to do this, for
example, if you store the data for child views in a soup, and you need to retrieve
the data and rebuild the child views at run time. For more information, see
"Including Editable Child Views in an Input View" (page 8-9).
The default font for a
clParagraphView
created by a
clEditView
is the font
selected by the user on the Styles palette in the system.
The default pen width for a
clPolygonView
created by a
clEditView
is the
width set by the user on the Styles palette.
The slots of
clEditView
are described in "General Input View (clEditView)"
(page 7-12) in Newton Programmer's Reference.

C H A P T E R 8
Text and Ink Input and Display
8-8
Using Text
Here is an example of a template defining a view of the
clEditView
class:
editor := {...
viewClass: clEditView,
viewBounds: {left:0, top:0, right:200, bottom:200},
viewFlags: vVisible+vAnythingAllowed,
viewFormat: vfFillWhite+vfFrameBlack+vfPen(1)+
vfLinesLtGray,
viewLineSpacing: 20,
// methods and other view-specific slots
viewSetupFormScript: func()...
...}
System Messages in Automatically Created Views
8
When a child view is automatically created by a
clEditView
, the
vNoScripts
flag is set in the
viewFlags
slot of the child view. This flag prevents system
messages from being sent to a view.
This behavior is normally desirable for automatically created views, because they
have no system message-handling methods and the system saves time by not
sending the messages to them.
If you want to use one of these views in a manner that requires it to receive system
messages, you need to remove the
vNoScripts
flag from the
viewFlags
slot of
the view.
Creating the Lined Paper Effect in a Text View
8
A view of the
clEditView
class can appear simply as a blank area in which the
user writes information. However, this type of view usually contains a series of
horizontal dotted lines, like lined writing paper. The lines indicate to the user that
the view accepts input. To create the lined paper effect, you must set the following
slots appropriately:
viewFormat
Must include one of the
vfLines...
flags. This activates the
line display.
viewLineSpacing
Sets the spacing between the lines, in pixels.
viewLinePattern
Optional. Sets a custom pattern that is used to draw the lines
in the view. In the
viewFormat
slot editor in NTK, you
must also set the Lines item to Custom to signal that
you are using a custom pattern. (This sets the
vfCustom<<vfLinesShift
flag in the
viewFormat
slot.)
Patterns are binary data structures, which are described in the
next section.
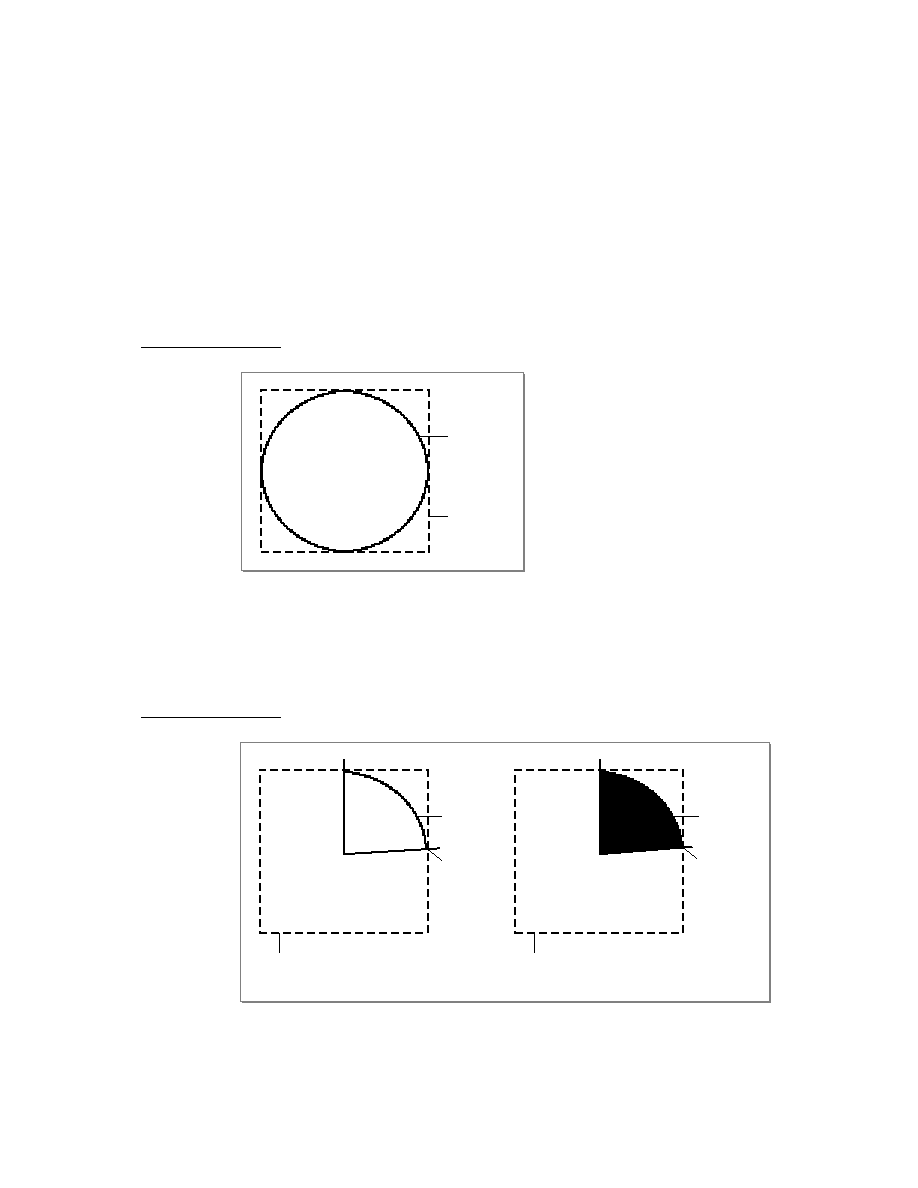
C H A P T E R 8
Text and Ink Input and Display
Using Text
8-9
Defining a Line Pattern
8
You can define a custom line pattern for drawing the horizontal lines in a paragraph
view. A line pattern is an eight-byte binary data structure with the class
'pattern
.
To create a binary pattern data structure on the fly, use the following
NewtonScript trick:
myPattern := SetClass( Clone("\uAAAAAAAAAAAAAAAA"),
'pattern );
This code clones a string, which is already a binary object, and changes its class to
'pattern
. The string is specified with hex character codes whose binary represen-
tation creates the pattern. Each two-digit hex code creates one byte of the pattern.
Including Editable Child Views in an Input View
8
For a child view of a clEditView to be editable, you need to follow certain rules:
The child view must reside in the
viewChildren
slot of the
clEditView
.
You cannot store a child view's template in the
stepChildren
slot, as NTK
normally does.
The child view must contain a
viewStationery
slot with an appropriate
value, depending on the view class and data type. The acceptable values are
shown in Table 8-2:
Add the child view templates to the
viewChildren
array of the edit view and
open the view or send it the
RedoChildren
message. Alternatively, you can
add the child view with the
AddView
method and then send the
Dirty
message
to the edit view.
Table 8-2
viewStationery
slot value for
clEditView
children
View class
View data type
Value of
viewStationery
slot
clParagraphView
text
'para
clPolygonView
recognized
graphics
'poly
clPolygonView
ink
'ink
clPictureView
bitmap or
picture object
'pict

C H A P T E R 8
Text and Ink Input and Display
8-10
Using Text
IMPORTANT
You store view templates (not view objects) in the
viewChildren
array of an edit view.
Paragraph Views
8
The
clParagraphView
class displays text or accepts text input. It includes the
following features:
Text recognition
Text correction
Text editing, including scrubbing, selection, copying to the clipboard, pasting
from the clipboard, and other gestures, including duplicating, as controlled by
the setting of the
viewFlags
slot.
Automatic word-wrapping.
Support for the caret gesture, which adds a space or splits a word.
Clipping of text that won't fit in the view. (An ellipsis is shown to indicate text
beyond what is visible.)
Use of ink and different text fonts (styles) within the same paragraph.
Tab-stop alignment of text.
Automatic resizing to accommodate added text (when this view is enclosed in a
clEditView
). This feature is controlled by the
vCalculateBounds
flag in
the
viewFlags
slot.
Automatic addition of new words written near the view when this view is
enclosed in a
clEditView
and caret insertion writing mode is disabled.
The slots of
clParagraphView
are described in "Paragraph View
(clParagraphView)" (page 7-15) in Newton Programmer's Reference.
Note that you don't need to create paragraph views yourself if you are accepting
user input inside a
clEditView
. Just provide a
clEditView
and when the user
writes in it, the view automatically creates paragraph views to hold text.
The following is an example of a template defining a view of the
clParagraphView
class:
dateSample := {...
viewClass: clParagraphView,
viewBounds: {left:50, top:50, right:200, bottom:70},
viewFlags: vVisible+vReadOnly,
viewFormat: vfFillWhite,
viewJustify: oneLineOnly,
text: "January 24, 1994",

C H A P T E R 8
Text and Ink Input and Display
Using Text
8-11
// 8 chars of one font, 3 chars of another, 5 chars
// of another
styles: [8, 18434, 3, 12290, 5, 1060865],
...}
Paragraph views are normally lined to convey to the user that the view accepts text
input. To add the lined paper effect to paragraph views, see "Creating the Lined
Paper Effect in a Text View" (page 8-8).
Lightweight Paragraph Views
8
When you create a template using the
clParagraphView
class, and that
template is instantiated into a view at run time, the system may create a specialized
kind of paragraph view object, called a lightweight paragraph view. Lightweight
paragraph views have the advantage of requiring much less memory than do
standard paragraph views.
The system automatically creates a lightweight paragraph view instead of a
standard paragraph view if your template meets the following conditions:
The view must be read-only, which means that its
viewFlags
slot contains the
vReadOnly
flag.
The view must not include any tabs, which means that the template does not
contain the
tabs
slot.
The view must not include multiple font styles, which means that the template
does not contain the
styles
slot; however, the view can contain a rich string in
its
text
slot. For information about rich strings, see "Rich Strings" (page 8-22).
The
viewFlags
slot of the view must not contain the following flags:
vGesturesAllowed
,
vCalculateBounds.
Note
Lightweight paragraph views can contain ink.
Most paragraph views look the same after they are instantiated; that is, there is
not normally a way to tell whether a particular paragraph view is a standard or a
lightweight view. However, ink displayed in a lightweight paragraph view is
displayed in a fixed font size.
Note
When laying out text in a lightweight paragraph view, the
viewLineSpacing value is ignored. This is not generally a
problem, since the line spacing dotted lines are normally used to
indicate that the text can be edited, and text in a lightweight
paragraph cannot be edited.

C H A P T E R 8
Text and Ink Input and Display
8-12
Using Text
Once a lightweight paragraph view has been instantiated, you cannot dynamically
change the view flags to make it an editable view, or add multistyled text by
providing a
styles
slot, since this type of view object doesn't support these
features. If you need this functionality for an existing lightweight paragraph view,
you'll have to copy the text out of it into an editable paragraph view.
Using Input Line Protos
8
Input line protos provide the user with single lines in which to enter data. There are
four input line protos available:
protoInputLine
is a one-line input field that defines a simple paragraph
view in which the text input is left-justified.
protoRichInputLine
is the text and ink equivalent of
protoInputLine
.
protoLabelInputLine
is a one-line input field that includes a text label and
can optionally include a pop-up menu known as a picker.
protoRichLabelInputLine
is the text and ink equivalent of
protoLabelInputLine.
protoInputLine
8
This proto defines a view that accepts any kind of text input and is left-justified.
Below is an example of a what a
protoInputLine
looks like on the
Newton screen:
The
protoInputLine
is based on a view of the
clParagraphView
class. It
has no child views.
The following is an example of a template using
protoInputLine
:
myInput := {...
_proto: protoInputLine,
viewJustify: vjParentRightH+vjParentBottomV,
viewLineSpacing: 24,
viewBounds: SetBounds( -55, -33, -3, -3),
...}
The slots of the
protoInputLine
are described in "protoInputLine" (page 7-17)
in Newton Programmer's Reference.
protoRichInputLine
8
This proto works exactly like
protoInputLine
. The only difference is that
protoRichInputLine
allows mixed ink and text input, as determined by the
current user recognition preferences.
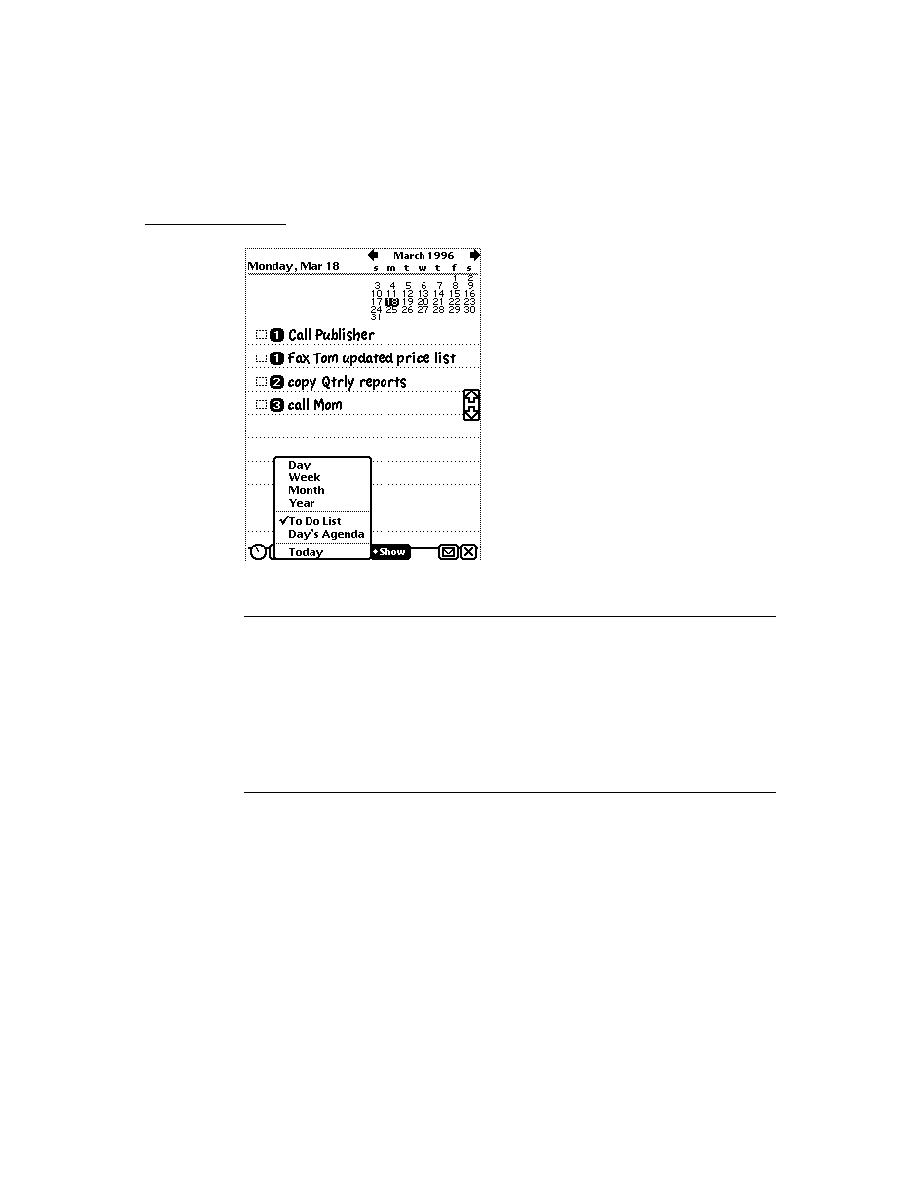
C H A P T E R 8
Text and Ink Input and Display
Using Text
8-13
The slots of
protoRichInputLine
are described in "protoRichInputLine"
(page 7-19) in Newton Programmer's Reference.
protoLabelInputLine
8
This proto defines a view that features a label, accepts any kind of input, and is
left-justified. The
protoLabelInputLine
can optionally include a picker.
When the
protoLabelInputLine
does include a picker, the user selects a
choice from the picker. That choice is entered as the text in the input line, and is
marked with a check mark in the picker.
Figure 8-2 shows an example of a
protoLabelInputLine
with and without the
picker option:
Figure 8-2
An example of a
protoLabelInputLine
The
protoLabelInputLine
is based on a view of the
clParagraphView
class. It has two child views:
The
labelLine
child view uses the
protoStaticText
proto to create the
static text label and to activate the picker if the proto includes one.
The
entryLine
child view uses the
protoInputLine
proto to create the
input field into which the user writes text. The text value entered into this field is
stored in the
text
slot of this view.
You can have your label input line protos remember a list of recent items. To do
this, assign a symbol that incorporates your developer signature to the
'memory
slot of your prototype. The system automatically maintains the list of recent
items for your input line. To access the list, use the same symbol with the
AddMemoryItem
,
AddMemoryItemUnique
,
GetMemoryItems
, and
GetMemorySlot
functions, which are described in "Utility Functions" (page 26-1).
Picker option
indicated by
diamond
Example of a picker displayed after lable is tapped.
Check mark indicates the currently selected choice.
Simple
protLableInputLine
(no picker option)
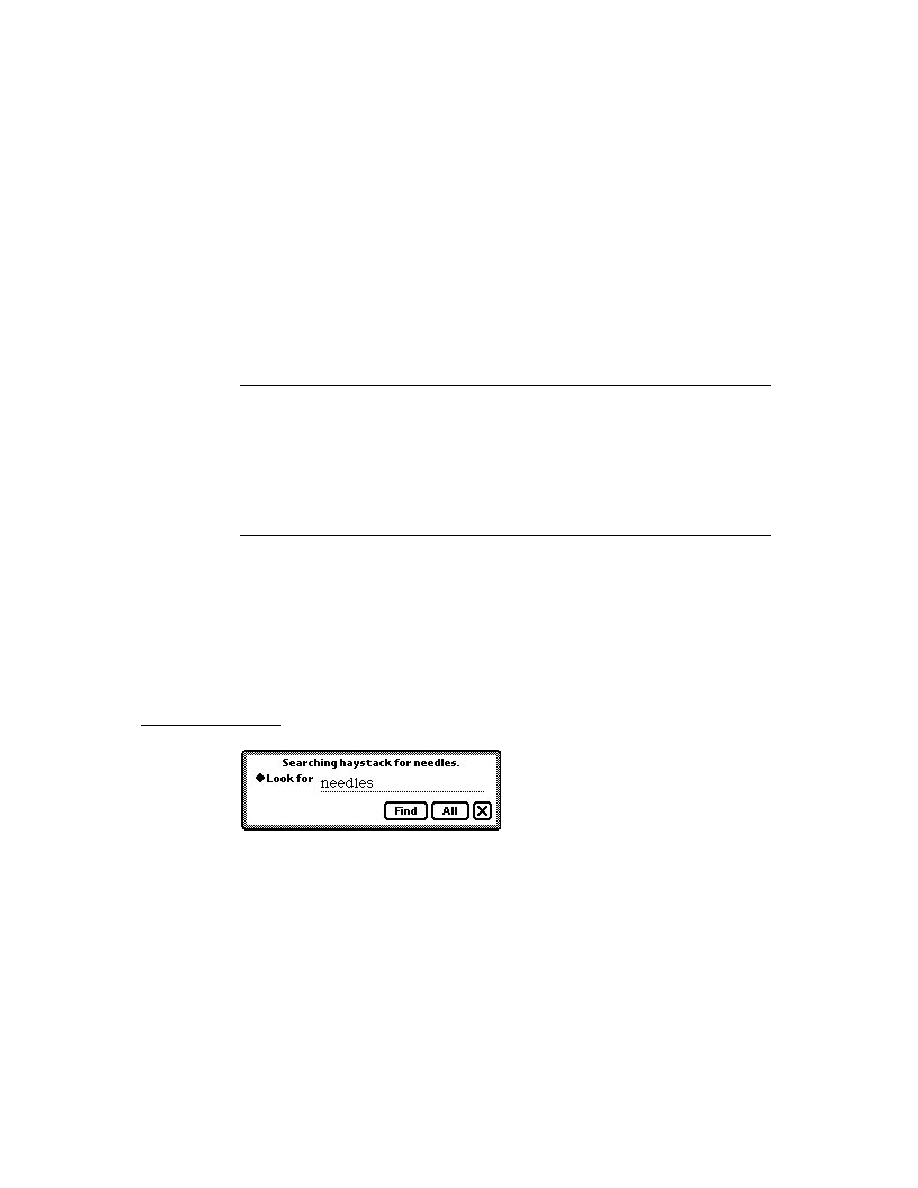
C H A P T E R 8
Text and Ink Input and Display
8-14
Using Text
IMPORTANT
You can programmatically access the value of the
text
slot for
the
protoLabelInputLine
with the expression
entryLine.text
. If you update the text slot programmati-
cally, you need to call the
SetValue
function to ensure that the
view is updated. Below is an example:
SetValue(entryLine, 'text, "new text")]
The following is an example of a template using
protoLabelInputLine
:
labelLine := {...
_proto: protoLabelInputLine,
viewBounds: {top: 90, left: 42, right: 194, bottom: 114},
label: "Who",
labelCommands: ["Me", "You", "Us", 'pickseparator,
"Them", "No one"],
curLabelCommand: 0,
...}
The slots of the
protoLabelInputLine
are described in "protoLabelInputLine"
(page 7-19) in Newton Programmer's Reference.
protoRichLabelInputLine
8
This proto works exactly like
protoLabelInputLine.
The only difference is
that
protoRichLabelInputLine
allows mixed ink and text input, as
determined by the current user recognition preferences.
The slots of the
protoRichLabelInputLine
are described in
"protoRichLabelInputLine" (page 7-22) in Newton Programmer's Reference.
Displaying Text and Ink
8
In addition to knowing about the views and protos that you can use for displaying
text and ink, you should understand how text and ink are displayed. This involves
the use of fonts, text styles, and rich strings. This section describes these objects
and how you can use them in your applications to control the display of text and ink.
Text and Ink in Views
8
When the user draws with the pen on the Newton screen, pen input data is captured
as ink, which is also known as sketch ink or raw ink.
What happens with the raw ink depends upon the configuration of the view in
which the input action was performed and the choices that the user made in the

C H A P T E R 8
Text and Ink Input and Display
Using Text
8-15
Recognition menu. The view configuration is defined by the view flags and the
(optional) recognition configuration (
recConfig
) frame of the view. The
Recognition menu is shown in Figure 8-3.
Figure 8-3
The Recognition menu
When the
viewFlags
input flags and the
recConfig
frame of the view are set to
accept both text and ink, the Recognition menu choices control what kind of data is
inserted into the paragraph view.
Note that you can limit the choices that are available in the Recognition menu of
your application, though this is rarely necessary or advisable.
The Recognition menu, recognition view flags, and the recognition configuration
frame are described in "Recognition" (page 9-1).
Mixing Text and Ink in Views
8
Some views require textual input and cannot accept ink words. The recognition
controls are not used by these text-only views, in which writing is always
recognized and inserted as text. If the user drops an ink word into a text-only field,
the ink word is automatically recognized before control returns to the user.
Edit views can handle both ink words and sketch ink. If an edit view receives an
ink word, it either merges that word into an existing paragraph view or creates a
new view for the ink word. If an edit view receives sketch ink, it creates a polygon
view for the ink drawing.
You can also create fields that accepts only ink words. However, if the user types or
drops recognized text into such a field, the recognized text remains recognized text.
You can set a paragraph view to accept either text or ink input with the
following settings:
viewClass: clParagraphView,
viewFlags: vVisible + vClipping + vClickable +
vGesturesAllowed + vCharsAllowed +
vNumbersAllowed,
recConfig: rcInkOrText
C H A P T E R 8
Text and Ink Input and Display
8-16
Using Text
Note
The view flags are described in "Views" (page 3-1). The
recognition view flags are described in "Recognition"
(page 9-1).
Although raw ink is intended mostly for drawing, the user can still write with raw
ink by choosing "Sketches" from the Recognition menu. The recognizer
automatically segments raw ink into ink words. The raw ink can subsequently be
recognized, using deferred recognition. Unlike ink text, raw ink is not moved or
resized after it is written.
When raw ink from a 1.x system is dragged into a paragraph view, each piece of
ink is automatically converted into an ink word. This conversion is not reversible.
Note
You can use one of two representations for text and ink that are
mixed together. The first and more common representation is as a
rich string, as described in "Rich Strings" (page 8-22). The second
representation, used in paragraph views, is as a text string with a
corresponding series of matching style runs. This representation,
which is used for editing operations in paragraph views, is
described in "Text and Styles" (page 8-25).
Ink Word Scaling and Styling
8
Ink words are drawn using the pen thickness that the user specifies in the Styles
menu. After the ink words are drawn, they are scaled by the system software. The
scaling value is specified in the Text Editing Settings menu, which the user can
access by choosing Preferences from the Recognition menu.
The standard values for scaling ink words are 50 percent, 75 percent, and 100 percent.
After the system performs scaling, it assigns a font style and size to the ink word.
The initial style is plain. The initial size is proportional to the x-height of the ink
word, as estimated by the recognizer. This size is defined so that an ink word of a
certain size will be roughly the same size as a text word displayed in a font of that
size. For example, an ink word of size 12 is drawn at roughly the same size as a
text word in a typical 12-point font, as shown in Figure 8-4. The ink words in
Figure 8-4 were first scaled to 50 percent of their written size.
Figure 8-4
Resized and recognized ink

C H A P T E R 8
Text and Ink Input and Display
Using Text
8-17
You can modify the size at which ink words are displayed in two ways: by
changing the scaling percentage or the font size. For example, suppose that you
draw an ink word and the system calculates its font size, as written, at 36 point. If
your ink text scaling is set to 50 percent, the ink word is displayed at half of the
written size, which makes its font size 18 point. If you subsequently change the
scaling of that ink word to 100 percent, its font size changes to 36 point.
If the user applies deferred recognition to the ink words, the recognized text is
displayed in the current font family, size, and style, as specified in the Styles menu.
Note
There is a maximum ink word size. Ink words are scaled to the
smaller of what would be produced by the selected scaling
percentage or the maximum size.
Constraining Font Style in Views
8
You can override the use of styles in a paragraph view so that all of the text in the
paragraph is displayed with a certain font specification. To do this, use the
viewFont
slot of the paragraph view along with two of the text view flags.
If you include
vFixedTextStyle
in the text flags for a paragraph view, all
recognized text in the view is displayed using the font family, point size, and
character style specified for
viewFont
. This is the normal behavior for input fields.
If you include
vFixedInkTextStyle
in the text flags for a paragraph view, all
ink words in the view are displayed using the point size and character style
specified for
viewFont
. Note that the font family does not affect the display of
ink words.
Note
Using the
vFixedTextStyle
or
vFixedInkTextStyle
flags
does not modify the
'styles
slot of the view. However, if you
use either of these flags, the system does not allow the user to
change the text style for your paragraph view.
The text view flags are described in "Text Flags" (page 7-2) in Newton
Programmer's Reference.
Using Fonts for Text and Ink Display
8
Whenever recognized text is drawn on the Newton screen, the system software
examines the font specification associated with the text to determine how to draw
the text. The font specification includes the font family name, the font style, and
the point size for the text. You can specify a font with a font frame or with a packed
integer; both of these formats are described in this section.

C H A P T E R 8
Text and Ink Input and Display
8-18
Using Text
The constants you can use in font specifications are shown in "Font Constants for
Packed Font Integer Specifications" (page 7-4) in Newton Programmer's Reference.
The Font Frame
8
A font frame has the following format:
{family:
familyName
, face:
faceNumber
, size:
pointSize
}
For familyName, you can specify a symbol corresponding to one of the available
built-in fonts, which are shown in Table 8-3.
For faceNumber, you can specify a combination of the values shown in Table 8-4:
Table 8-3
Font family symbols
Symbol
Font Family
'espy
Espy (system) font
'geneva
Geneva font
'newYork
New York font
'handwriting
Casual (handwriting) font
Table 8-4
Font style (face) values
Constant
Value
Font face
kFaceNormal
0x000
Normal font
kFaceBold
0x001
Bold font
kFaceItalic
0x002
Italic font
kFaceUnderline
0x004
Underline font
kFaceOutline
0x008
Outline font
kFaceSuperScript
0x080
Superscript font
kFaceSubscript
0x100
Subscript font

C H A P T E R 8
Text and Ink Input and Display
Using Text
8-19
Note
Apple recommending using the normal, bold, and underline font
styles. The other styles do not necessarily display well on
Newton screens.
For pointSize, use an integer that specifies the point size value.
The Packed Integer Font Specification
8
You can specify a font in one 30-bit integer. A packed integer font specification
uses the lower 10 bits for the font family, the middle 10 bits for the font size, and
the upper 10 bits for the font style. Since only the ROM fonts have predefined font
family number constants, you can only specify ROM fonts in a packed value.
Using the Built-in Fonts
8
The system provides several constants you can use to specify one of the built-in fonts.
These constants are listed in Table 8-5. The fonts shown in the table can be specified
by the constant (usable at compile time only), by their font frame, or by an integer
value that packs all of the font information into an integer (sometimes this is what
you see at run time if you examine a
viewFont
slot in the NTK Inspector).
Table 8-5
Built-in font constants
Constant
Font frame
Integer value
ROM_fontsystem9
{family:'espy,
face:0, size:9}
9216
ROM_fontsystem9bold
{family:'espy,
face:1, size:9}
1057792
ROM_fontsystem9underline
{family:'espy,
face:4, size:9}
4203520
ROM_fontsystem10
{family:'espy,
face:0, size:10}
10240
ROM_fontsystem10bold
{family:'espy,
face:1, size:10}
1058816
ROM_fontsystem10underline
{family:'espy,
face:4, size:10}
4204544
ROM_fontsystem12
{family:'espy,
face:0, size:12}
12288
ROM_fontsystem12bold
{family:'espy,
face:1, size:12}
1060864
continued
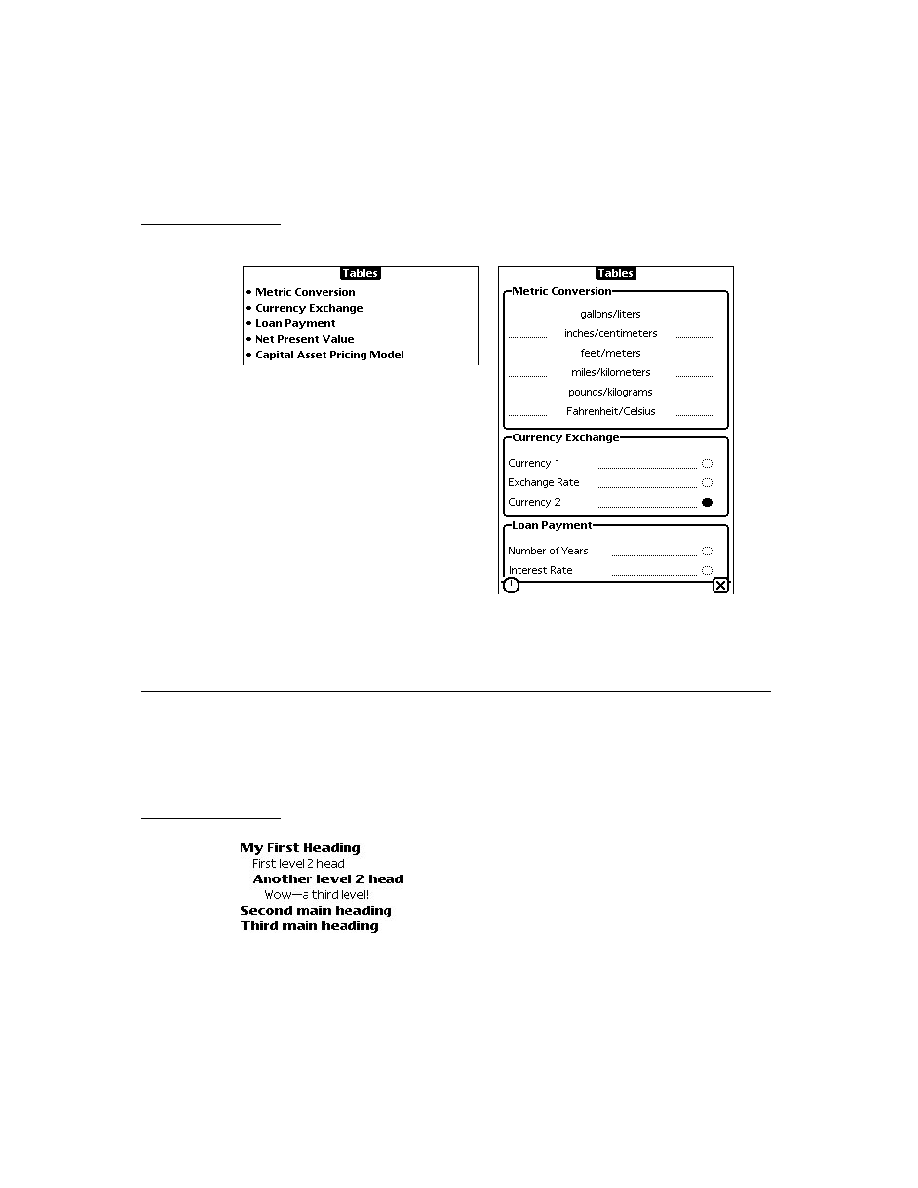
C H A P T E R 8
Text and Ink Input and Display
8-20
Using Text
ROM_fontsystem12underline
{family:'espy,
face:4, size:12}
4206592
ROM_fontsystem14
{family:'espy,
face:0, size:14}
14336
ROM_fontsystem14bold
{family:'espy,
face:1, size:14}
1062912
ROM_fontsystem14underline
{family:'espy,
face:4, size:14}
4208640
ROM_fontsystem18
{family:'espy,
face:0, size:18}
18432
ROM_fontsystem18bold
{family:'espy,
face:1, size:18}
1067008
ROM_fontsystem18underline
{family:'espy,
face:4, size:18}
4212736
simpleFont9
{family:'geneva,
face:0, size:9}
9218
simpleFont10
{family:'geneva,
face:0, size:10}
10242
simpleFont12
{family:'geneva,
face:0, size:12}
12290
simpleFont18
{family:'geneva,
face:0, size:18}
18434
fancyFont9
or
userFont9
{family:'newYork,
face:0, size:9}
9217
fancyFont10
or
userFont10
{family:'newYork,
face:0, size:10}
10241
fancyFont12
or
userFont12
{family:'newYork,
face:0, size:12}
12289
fancyFont18
or
userFont18
{family:'newYork,
face:0, size:18}
18433
continued
Table 8-5
Built-in font constants (continued)
Constant
Font frame
Integer value

C H A P T E R 8
Text and Ink Input and Display
Using Text
8-21
The integers in Table 8-5 are derived by packing font family, face, and size
information into a single integer value. Each NewtonScript integer is 30 bits in
length. In packed font specifications, the lower 10 bits hold the font family, the
middle 10 bits hold the font size, and the upper 10 bits hold the font style.
These three parts added together specify a single font in one integer value. You can
use the constants listed in Table 8-6 at compile time to specify all of the needed infor-
mation. To do this, add one constant from each category together to yield a complete
font specification. At run time, of course, you'll need to use the integer values.
editFont10
{family:'handwriting,
face:0, size:10}
10243
editFont12
{family:'handwriting,
face:0, size:12}
12291
editFont18
{family:'handwriting,
face:0, size:18}
18435
Table 8-6
Font packing constants
Constant
Value
Description
Font Family
(none defined)
0
Identifies the System font (Espy)
tsFancy
1
Identifies the New York font
tsSimple
2
Identifies the Geneva font
tsHWFont
3
Identifies the Casual (Handwriting)
font
Font Size
tsSize(
pointSize
)
pointSize
<< 10
Specify the point size of the font in
pointSize
Font Face
tsPlain
0
Normal font
tsBold
1048576
Bold font
continued
Table 8-5
Built-in font constants (continued)
Constant
Font frame
Integer value

C H A P T E R 8
Text and Ink Input and Display
8-22
Using Text
Note that the "Casual" font uses the symbol
'handwriting
for its font family.
You can use the
MakeCompactFont
function at runtime to create a packed
integer value from a specification of the font family, font size, and font face. You
can only specify ROM fonts with the packed integer format. Here is an example:
fontValue := MakeCompactFont('tsSimple, 12, tsItalic)
If the font specified by the three parameters does not belong to a ROM font family,
MakeCompactFont
returns a font frame instead.
The
MakeCompactFont
function is described in "MakeCompactFont"
(page 7-28) in Newton Programmer's Reference.
Rich Strings
8
Rich strings store text strings and ink in a single string. If you application supports
user-input text or ink, you can use rich strings to represent all user data. You can
convert between the text and styles pairs in paragraph views and rich strings. Text
and styles pair are described in "Text and Styles" (page 8-25).
Rich strings are especially useful for storing text with embedded ink in a soup. You
can use the rich string functions, described in "Rich String Functions" (page 8-24),
to work with rich strings.
The system software automatically handles rich strings properly, including their
use in performing the following operations:
screen display
sorting and indexing
concatenation with standard functions such as
StrConcat
and
ParamStr
,
described in "Utility Functions" (page 26-1)
measuring
tsItalic
2097152
Italic font
tsUnderline
4194304
Underlined normal font
tsOutline
8388608
Outline font
tsSuperScript
134217728
Superscript font
tsSubScript
268435456
Subscript font
Table 8-6
Font packing constants (continued)
Constant
Value
Description
C H A P T E R 8
Text and Ink Input and Display
Using Text
8-23
Important Rich String Considerations
8
Although the Newton system software allows you to use rich strings anywhere that
plain strings are used, there are certain considerations to be aware of when using
rich strings. These include:
Do not use functions that are not rich-string-aware. These include the
Length
,
SetLength
,
BinaryMunger
, and
StuffXXX
functions.
Use the
StrLen
function to find the length of a string.
Use the
StrMunger
function to perform operations that modify the length of a
string, such as appending or deleting characters.
Do not assume that the rich string terminator character is the last character in a
rich string object.
Do not truncate a rich string by inserting a string terminator character into
the string.
Do not assign characters into a rich string, due to the presence of ink place-
holder characters. Use the
SetChar
function instead of direct assignment.
Do not use undocumented string functions, which are not guaranteed to work
with rich strings.
Using the Rich String Storage Format
8
Ink data is embedded in rich strings by inserting a placeholder character in the
string for each ink word. Data for each ink word is stored following the string
terminator character.
Each ink word is represented in the text portion of the rich string by the special
character
kInkChar
(
0xF700
), which is a reserved Unicode character value.
The ink data for all ink words in the string follows the string terminator character.
The final 32 bits in a rich string encode information about the rich string.
Note
The string in the
'text
slot of a paragraph view uses the
kParaInkChar
(
0xF701
) character as a placeholder character
instead of the
kInkChar
code. The
'text
slot string is not a
rich string but might contain ink word placeholders. See "Text and
Styles" (page 8-25) for more information.
Automatic Conversion of Rich Strings
8
Text is automatically converted from the rich string format to a text/styles pair when-
ever a paragraph is opened and the
SetValue
function is called with a rich string.
When a paragraph view is opened, the
'text
slot is first examined to determine
whether or not the text contains any embedded ink. If so, new versions of the
C H A P T E R 8
Text and Ink Input and Display
8-24
Using Text
view's
'text
and
'styles
slots are generated and placed in the context frame of
the view.
When
SetValue
is called with a string parameter that is a rich string, it is
automatically decoded into a text and style pair. The result is stored in the view
frame of the paragraph view.
Rich String Functions
8
You can use the rich string functions to convert and work with rich strings. Each of
these functions, shown in Table 8-7, is described in "Rich String Functions and
Methods" (page 7-31) in Newton Programmer's Reference.
Table 8-7
Rich string functions
Function or method name
Description
MakeRichString
Converts the data from two slots into a rich
string.
MakeRichString
uses the text
from the '
text
slot of the view and the
styles
array from the '
styles
slot of the
view.
DecodeRichString
Converts a rich string into a frame containing
a
'text
slot and a
'styles
slot. These
slots can be placed in a paragraph view for
editing or viewing.
ExtractRangeAsRichString
Returns a rich string for a range of text
from a paragraph view.
IsRichString
Determines if a string is a rich string
(i.e., contains ink).
view:GetRichString
Returns the text from a paragraph view as a
rich string or plain string, depending on
whether the paragraph view contains
any ink.
StripInk
Strips any ink from a rich string. Either
removes the ink words or replaces each
with a specified replacement character
or string.

C H A P T E R 8
Text and Ink Input and Display
Using Text
8-25
Text and Styles
8
Within a paragraph view, text is represented in two slots: the
'text
slot and the
'styles
slot. The
'text
slot contains the sequence of text characters in the
paragraph, including an instance of the
kParaInkChar
placeholder character
(
0xF701
) for each ink word.
The
'styles
slot specifies how each text run is displayed in the paragraph. A
text run is a sequence of characters that are all displayed with the same font
specification. The
'styles
slot consists of an array of alternating length and style
information: one length value and one style specification for each text run. For ink
words, the length value is always
1
, and the style specification is a binary object
that contains the ink data.
For example, consider the paragraph text shown in Figure 8-5.
Figure 8-5
A paragraph view containing an ink word and text
In the paragraph view shown in Figure 8-5, the
'text
slot contains the following
sequence of Unicode characters:
'T' 'r' 'y' ' ' 0xF701 'o' 'n' 'e'
The
'styles
slot for this paragraph consists of the following array:
styles: [4, 12289, 1, <inkData, length 42>, 4, 12289]
The first pair of values in the array, (
4, 12289
), covers the word "Try" and the
space that follows it. The length value,
4
, specifies that the text run consists of four
characters. The packed integer font specification value
12289
specifies plain,
12-point, New York.
The second pair of values in the array, (
1, inkData
), covers the ink word. The
length value is
1
, which is always the case for ink words. The value
inkData
is a
binary object that contains the compressed data for the handwritten "this" that is
part of the text in the paragraph view. The data is automatically extracted from the
tablet data as part of a preliminary recognition process that precedes word recognition.
The third and final pair of values in the
'styles
slot array,
(4, 12289)
, covers
the word "one" and the space that precedes it. This text run is 4 characters long and
is displayed 12 points high in the plain version of the New York font family.
Note
The packed integer font specification values
are shown in Table 8-6 (page 8-21).

C H A P T E R 8
Text and Ink Input and Display
8-26
Using Text
Setting the Caret Insertion Point
8
When you application starts up, you might want to establish the insertion point for
keyboard entry in caret insertion writing mode. There are three functions that you
can use for this purpose:
to establish the insertion point in an input field, use the
SetKeyView
function,
which is described in "SetKeyView" (page 7-43) in Newton Programmer's
Reference.
to establish the insertion point in an edit view, use the
PositionCaret
function, which is described in "PositionCaret" (page 7-49) in Newton
Programmer's Reference.
to establish the insertion point in an edit view or paragraph, you can use the
SetCaretInfo
function, which is described in "SetCaretInfo" (page 7-50) in
Newton Programmer's Reference.
Using Keyboards
8
You can provide the user with on-screen keyboard input in your applications using
the built-in keyboard views. You can also define new keyboard views and register
them with the system, which will activate caret input when these views are opened.
Keyboard Views
8
There are four different floating keyboards built into the system root view. Each of
the built-in keyboards can be accessed as a child of the root with a symbol.
To use the full alphanumeric keyboard, which is shown in Figure 8-6, use the
symbol
'alphaKeyboard
.
Figure 8-6
The built-in alphanumeric keyboard

C H A P T E R 8
Text and Ink Input and Display
Using Text
8-27
To use the numeric keyboard, which is shown in Figure 8-7, use the symbol
'numericKeyboard
.
Figure 8-7
The built-in numeric keyboard
To use the phone keyboard, which is shown in Figure 8-8, use the symbol
'phoneKeyboard
.
Figure 8-8
The built-in phone keyboard
To use the time and date keyboard, which is shown in Figure 8-9, use the symbol
'dateKeyboard
.
Figure 8-9
The built-in time and date keyboard
An on-screen keyboard can be opened by the user with a double tap on an input
field. The kind of keyboard displayed is determined by what type of input field is
recognized. For example, a field in which only numbers are recognized would use
the numeric keyboard. The user can also open a keyboard from the corrector
pop-up list, which appears when you correct a recognized word.

C H A P T E R 8
Text and Ink Input and Display
8-28
Using Text
If you want to open one of these keyboards programmatically, use code like the
following to send it the
Open
message:
Getroot().alphaKeyboard:Open()
The keystrokes entered by the user are sent to the current key receiver view.
There can be only one key receiver at a time, and only views of the classes
clParagraphView
and
clEditView
can be key receiver views. When a
keyboard is open, a caret is shown in the key receiver view at the location where
characters will be inserted.
The keyboard views are based on
clKeyboardView
, which is described in
"Keyboard View (clKeyboardView)" (page 7-35) in Newton Programmer's
Reference.
Using Keyboard Protos
8
The keyboard protos to provide users of your applications with on-screen
keyboards with which to enter text. The following keyboard protos are available:
protoKeyboard
provides a standard keyboard view that floats above all
other views.
protoKeypad
allows you to define a customized floating keyboard.
protoKeyboardButton
includes a keyboard button in a view.
protoSmallKeyboardButton
includes a small keyboard button
in a view.
protoAlphaKeyboard
provides an alphanumeric keyboard that you can
include in a view.
protoNumericKeyboard
provides a numeric keyboard that you can include
in a view.
protoPhoneKeyboard
provides a phone keyboard that you can include in
a view.
protoDateKeyboardButton
provides a time and date keyboard that you can
include in a view.
protoKeyboard
8
This proto creates a keyboard view that floats above all other views. It is centered
within its parent view and appears in a location that won't obscure the
key-receiving view (normally, the view to which the keystrokes from the keyboard
are to be sent). The user can drag the keyboard view by its drag-dot to a different
location, if desired. Figure 8-10 shows an example of what a
protoKeyboard
looks like on the screen.
C H A P T E R 8
Text and Ink Input and Display
Using Text
8-29
Figure 8-10
An example of a
protoKeyboard
This proto enables the caret (if it is not already visible) in the key-receiving view
while the keyboard is displayed. Characters corresponding to tapped keys are
inserted in the key-receiving view at the insertion bar location. The caret is disabled
when the keyboard view is closed.
This proto is used in conjunction with
protoKeypad
to implement a floating
keyboard. The
protoKeyboard
proto defines the parent view, and
protoKeypad
is a child view that defines the key characteristics.
protoKeypad
8
This proto defines key characteristics for a keyboard view (
clKeyboardView
class). It also contains functionality that automatically registers an open keyboard
view with the system. If you want to get this behavior in your custom keyboard,
use
protoKeypad
.
You use this proto along with
protoKeyboard
to implement a floating keyboard.
The view using the
protoKeypad
proto should be a child of the view using the
protoKeyboard
proto.
protoKeyboardButton
8
This proto is used to include the keyboard button in a view. This is the same keyboard
button shown on the status bar in the notepad. Tapping the button causes the on-
screen keyboard to appear. If the keyboard is already displayed, a picker listing
available keyboard types is displayed. The user can tap one to open that keyboard.
Figure 8-11 shows an example of the keyboard button.
Figure 8-11
The keyboard button

C H A P T E R 8
Text and Ink Input and Display
8-30
Using Text
protoSmallKeyboardButton
8
This proto is used to include a small keyboard button in a view. Tapping the button
causes the on-screen keyboard to appear. If the keyboard is already displayed, a
picker listing available keyboard types is displayed. The user can tap one to open
that keyboard.
Figure 8-12 shows an example of the small keyboard button.
Figure 8-12
The small keyboard button
protoAlphaKeyboard
8
This proto is used to include an alphanumeric keyboard in a view. This is the same
as the
'alphaKeyboard
keyboard view provided in the root view, as described in
"Keyboard Views" (page 8-26). An example of
protoAlphaKeyboard
is shown
in Figure 8-6 (page 8-26).
protoNumericKeyboard
8
This proto is used to include a numeric keyboard in a view. This is the same as the
'numericKeyboard
keyboard view provided in the root view, as described in
"Keyboard Views" (page 8-26). An example of
protoNumericKeyboard
is
shown in Figure 8-7 (page 8-27).
protoPhoneKeyboard
8
This proto is used to include a phone keyboard in a view. This is the same as the
'phoneKeyboard
keyboard view provided in the root view, as described in
"Keyboard Views" (page 8-26). An example of
protoPhoneKeyboard
is shown
in Figure 8-8 (page 8-27).
protoDateKeyboard
8
This proto is used to include a time and date keyboard in a view. This is the same
as the
'dateKeyboard
keyboard view provided in the root view, as described in
"Keyboard Views" (page 8-26). An example of
protoDateKeyboard
is shown
in Figure 8-9 (page 8-27).
Defining Keys in a Keyboard View
8
When you define a keyboard view, you need to specify the appearance and behavior
of each key in the keyboard. This section presents the definition of an example
keyboard view, which is shown in Figure 8-13 (page 8-31).

C H A P T E R 8
Text and Ink Input and Display
Using Text
8-31
The Key Definitions Array
8
Each keyboard view contains a key definitions array, which determines the layout
of the individual keys in the keyboard. The key definitions array is an array of rows.
Each row is an array of values that looks like this:
row0 := [
rowHeight
,
rowMaxKeyHeight
,
key0Legend
,
key0result
,
key0Descriptor
,
key1Legend
,
key1result
,
key1Descriptor
,
key2Legend
,
key2result
,
key2Descriptor
,
...
]
The first two elements describe the height to allot for the row (rowHeight) and the
height of the tallest key in the row (rowMaxKeyHeight), in key units. These two
measurements are often the same, but they may differ. Key units are described in
"Key Dimensions" (page 8-35).
Next in the row array is a series of three elements for each key in the row:
keyLegend
keyResult
keyDescriptor
These values are described in the following sections.
Figure 8-13 shows the example keyboard view that is used to explain key definition
in this section.
Figure 8-13
A generic keyboard view
The following is the view definition of the keyboard shown in Figure 8-13. The
values in the row arrays are explained in the remainder of this section.
row0 := [ keyVUnit, keyVUnit,
"1",1, keyHUnit+keyVUnit+keyFramed+2*keyInsetUnit+keyAutoHilite,
"2",2, keyHUnit+keyVUnit+keyFramed+2*keyInsetUnit+keyAutoHilite
"3",3, keyHUnit+keyVUnit+keyFramed+2*keyInsetUnit+keyAutoHilite ];

C H A P T E R 8
Text and Ink Input and Display
8-32
Using Text
row1 := [ keyVUnit, keyVUnit,
"4",4, keyHUnit+keyVUnit+keyFramed+2*keyInsetUnit+keyAutoHilite,
"5",5, keyHUnit+keyVUnit+keyFramed+2*keyInsetUnit+keyAutoHilite,
"6",6, keyHUnit+keyVUnit+keyFramed+2*keyInsetUnit+keyAutoHilite ];
row2 := [ keyVUnit, keyVUnit,
"7",7, keyHUnit+keyVUnit+keyFramed+2*keyInsetUnit+keyAutoHilite,
"8",8, keyHUnit+keyVUnit+keyFramed+2*keyInsetUnit+keyAutoHilite,
"9",9, keyHUnit+keyVUnit+keyFramed+2*keyInsetUnit+keyAutoHilite ];
row3 := [ keyVUnit, keyVUnit,
"*",$*, keyHUnit+keyVUnit+keyFramed+2*keyInsetUnit+keyAutoHilite,
"0",0, keyHUnit+keyVUnit+keyFramed+2*keyInsetUnit+keyAutoHilite,
"#",$#, keyHUnit+keyVUnit+keyFramed+2*keyInsetUnit+keyAutoHilite ];
keypad := {...
viewClass: clKeyboardView,
viewBounds: {left:65, top:65, right:153, bottom:145},
viewFlags: vVisible+vClickable+vFloating,
viewFormat: vfFrameBlack+vfFillWhite+vfPen(1),
keyDefinitions: [ row0, row1, row2, row3 ], // defined above
keyPressScript: func (key)
begin
Print("You pressed " & key);
end,
...}
The Key Legend
8
The key legend specifies what appears on the keycap. It can be one of the following
types of data:
nil
, in which case the key result is used as the legend.
A string, which is displayed centered in the keycap.
A character constant, which is displayed centered in the keycap.
A bitmap object, which is displayed centered in the keycap.
An integer. The number is displayed centered in the keycap and is used directly
as the key result, unless the
keyResultsAreKeycodes
slot is set to
true
, as
described in the next section.
A method. The method is evaluated and its result is treated as if it had been
specified as the legend.

C H A P T E R 8
Text and Ink Input and Display
Using Text
8-33
An array. An element of the array is selected and treated as one of the above
data types. The index of the array element is determined by the value of the
keyArrayIndex
slot (which can be changed dynamically). Note that arrays of
arrays are not allowed here, but an array can include any combination of other
data types.
The Key Result
8
The key result is the value returned when the key is pressed. This value is passed as
a parameter to the
keyPressScript
method. If this method doesn't exist, the
result is converted (if possible) into a sequence of characters that are posted as key
events to the key receiver view.
The key result element can be one of the following types of data:
A string, character constant, or bitmap object, which is simply returned.
An integer, which is returned. Alternately, if the
keyResultsAreKeycodes
slot is set to
true
, the integer is treated as a key code. In this case, the character
corresponding to the specified key code is returned. If you are using keycodes,
make sure to register your keyboard by including the
kKbdUsesKeycodes
view flag.
See Figure 8-14 (page 8-34) for the numeric key codes returned by each of the
keys on a keyboard.
A method. The method is evaluated and its result is treated as if it had been
specified as the result.
An array. An element of the array is selected and treated as one of the above
data types. The index of the array element is determined by the value of the
keyArrayIndex
slot (which can be changed dynamically). Note that arrays of
arrays are not allowed, but an array can include any combination of other
data types.

C H A P T E R 8
Text and Ink Input and Display
8-34
Using Text
Figure 8-14
Keyboard codes
The Key Descriptor
8
The appearance of each key in a keyboard is determined by its key descriptor. The
key descriptor is a 30-bit value that determines the key size, framing, and other
characteristics. The descriptor is specified by combining any of the constants
shown in Table 8-8.
Table 8-8
Key descriptor constants
keySpacer
Nothing is drawn in this space; it is a spacer, not a key.
keyAutoHilite
Highlight this key when it is pressed.
keyInsetUnit
Inset this key's frame a certain number of pixels within its
space. Multiply this constant by the number of pixels you
want to inset, from 07 (for example,
keyInsetUnit*3
).
continued
F13
F14
F15
num
lock
caps
lock
scroll
lock
=
/
7
8
9
4
5
6
1
2
3
0
.
_
+
num
lock
del
help
ins
home
page
up
end
page
down
enter
esc
F6
F7
F8
F5
F1
F2
F3
F4
F9
F10
F11
F12
alt
alt
2
3
4
5
6
7
8 9
0
+
@
#
%
^
&
(
)
Q
W
E
R
T
Y
U
I
O
P
A
S
D
F
G
H
J
K
L
Z
X
C
V
B
N
M
$
control
{
[
]
}
?
/
.
,
=
:
"
;
'
control
shift
caps
lock
tab
option
option
shift
delete
return
clear
1
`
35
7A 78
63 76
72 73 74
75 77
79
7B
7D 7C
7E
51 4B 43
47
5B 5C 4E
59
57 58 45
56
54
41
4C
52
53
55
37
37
12 13 14 15 17
16
1A 1C
19 1D
0C 0D 0E 0F 11 10
20 22 1F 23
00
01 02 03 05 04
26 28 25
07 08 09 0B 2D 2E 2B
21
1E
38
2C
2F
29
1B
33
18
32
30
39
27
24
06
38
31
3A
2A
3B
3A
7F7F
60 61
62 64
65 6D 67 6F
69
6B 71
3B
!
~

C H A P T E R 8
Text and Ink Input and Display
Using Text
8-35
Key Dimensions
8
The width and height of keys are specified in units, not pixels. A key unit is not a
fixed size, but is used to specify the size of a key relative to other keys. The width
of a unit depends on the total width of all keys in the view and on the width of the
view itself. Key widths and heights can be specified in whole units, half units,
quarter units, and eighth units.
When it is displayed, the whole keyboard is scaled to fit entirely within whatever
size view bounds you specify for it.
To fit the whole keyboard within the width of a view, the total unit widths are
summed for each row, and the scaling is determined based on the widest row. This
row is scaled to fit within the view width, giving an equal pixel width to each
whole key unit. A similar process is used to scale keys vertically to fit within the
height of a view.
Fractional key units (half, quarter, eighth), when scaled, must be rounded to an
integer number of pixels, and thus may not be exactly the indicated fraction of a
whole key unit. For example, if the keys are scaled to fit in the view bounds,
a whole key unit ends up to be 13 pixels wide. This means that a key specified to
have a width of 1 3/8 units (
keyHUnit+keyHEighth*3
) is rounded to 13 + 5, or
18 pixels, which is not exactly 1 3/8 *13.
keyFramed
Specify the thickness of the frame around the key. Multiply
this constant by the number of pixels that you want to use
for the frame thickness, from 0-3.
keyRoundingUnit
Specify the roundedness of the frame corners. Multiply this
constant by the number of pixels that you want to use for
the corner radius, from 0-15, zero being square.
keyLeftOpen
No frame line is drawn along the left side of this key.
keyTopOpen
No frame line is drawn along the top side of this key.
keyRightOpen
No frame line is drawn along the right side of this key.
keyBottomOpen
No frame line is drawn along the bottom side of this key.
keyHUnit
keyHHalf
keyHQuarter
keyHEighth
A combination of these four constants specifies the
horizontal dimension of the key in units. For details,
see the next section.
keyVUnit
keyVHalf
keyVQuarter
keyVEighth
A combination of these four constants specifies the
vertical dimension of the key in units. For details, see
the next section.
Table 8-8
Key descriptor constants (continued)

C H A P T E R 8
Text and Ink Input and Display
8-36
Using Text
Key dimensions are specified by summing a combination of horizontal and vertical
key unit constants within the
keyDescriptor
. For example, to specify a key that
is 2 3/4 units wide by 1 1/2 units high, specify these constants for
keyDescriptor
:
keyHUnit*2 + keyHQuarter*3 + keyVUnit + keyVHalf
Using the Keyboard Registry
8
If your application includes its own keyboard, you need to register it with the system
keyboard registry. This makes it possible for the system to call any keyboard-related
functions that you have defined and to handle the insertion caret properly.
The
RegisterOpenKeyboard
method of a view is for registering a keyboard for
use with that view.
Use the
UnregisterOpenKeyboard
method of a view to remove the keyboard
view from the registry. If the insertion caret is visible, calling this method hides it.
Note
The system automatically unregisters the keyboard when the
registered view is hidden or closed. The protokeypad proto
also automatically handles registration for you in its
viewSetupDoneScript
. You do not need to call the
UnregisterOpenKeyboard
method in these cases.
You can use the
OpenKeypadFor
function to open a context-sensitive keyboard
for a view. This function first attempts to open the keyboard defined in the view's
_keyboard
slot. If the view does not define a keyboard in that slot,
OpenKeypadFor
determines if the view allows only a single type of input, such
as date, time, phone number, or numbers. If so,
OpenKeypadFor
opens the
appropriate built-in keyboard for that input type. If none of these other conditions
is met,
OpenKeypadFor
opens the
alphaKeyboard
keyboard for the view.
Note
The Newton System Software uses the
OpenKeypadFor
function to open a context-sensitive keyboard when the user
double-taps on a view in which a
_keyboard
slot is defined.
Theses methods and functions, as well as several others you can use with the
keyboard registry in your applications, are described in "Keyboard Registry
Functions and Methods" (page 7-44) in Newton Programmer's Reference.
Defining Tabbing Orders
8
You can define the tabbing order for an input view with the
_tabChildren
slot,
which contains an array of view paths.

C H A P T E R 8
Text and Ink Input and Display
Using Text
8-37
Each view path must specify the actual view that accepts the input. An example of
a suitable path is shown here:
'myInputLine, 'myLabelInputLine.entryLine
When the user tabs through this list, it loops from end to beginning and, with
reverse-tabbing, from beginning to end.
You can use the
_tabParent
slot to inform the system that you want tabbing in a
view restricted to that view. Each view in which
_tabPare
nt is non-
nil
defines a
tabbing context. This makes it possible to have several views on the screen at once
with independent tabbing within each view. In this case, the user must tap in
another view to access the tabbing order in that view.
For example, in Figure 8-15, there are two independent tabbing orders. The first
consists of the input lines that contain the text "One," "Two," "Three," and "Four".
The second tabbing order consists of the input lines that contain the text "Five"
and "Six."
Figure 8-15
Independent tabbing orders within a parent view
The user taps in any of the top four slots; thereafter, pressing the tab key on a keypad
or external keyboard moves among the four slots in that tabbing order. If the user
taps one of the bottom two slots, the tab key jumps between those two slots.
The slots
_tabParent
and
_tabChildren
can coexist in a view, but the
_tabChildren
slot takes precedence in specifying the next key view. If the
current view does not define the
_tabParent
slot, the search moves upward from
the current view until one of the following conditions is met:
a view descended from
protoInputLine
with a
_tabParent
slot is found.
a
protofloater
view is found

C H A P T E R 8
Text and Ink Input and Display
8-38
Using Text
a view descended from
protoInputLine
with the
vApplication
flag set in
the
viewFlags
slot
The Caret Pop-up Menu
8
Normally, when the user taps the insertion caret, the system-provided Punctuation
pop-up Menu opens. However, you can override this with a pop-up menu of your
own creation.
When the user taps the insertion caret, the system starts searching for a slot named
_caretPopup
. The search begins in the view owning the caret, and follows both
the proto and parent inheritance paths. The default Punctuation pop-up is stored in
the root view.
The
_caretPopup
slot must hold a frame containing two slots. The first slot,
pop
, defines a list of pop-up items suitable for passing to
DoPopup
. The second
slot must contain a
pickActionScript
. If not, control passes to the punctuation
pop-up, which has its own version of the
pickActionScript
. This routine then
inserts a string, corresponding to the selected character at the caret, by using the
function
PostKeyString
.
Handling Input Events
8
You sometimes need to respond to input events that occur in text views. This
section describes how to test for a selection hit and respond to keystrokes and
insertion events.
Testing for a Selection Hit
8
After the user taps the screen, you can determine if the point "hits" a specific
character or word in a paragraph view.
The
view:PointToCharOffset
method returns the offset within the paragraph
that is closest to the point (x, y). This method is described in "PointToCharOffset"
(page 7-51) in Newton Programmer's Reference.
The
view:PointToWord
method returns a frame that indicates the position of
the word within the paragraph that is closest to the point (x, y). This method is
described in "PointToWord" (page 7-52) in Newton Programmer's Reference.
Note
Both of these functions return
nil
if the view is not a paragraph
view. Also, the point you are testing must correspond to a visible
position within the paragraph view; you cannot hit-test on
off-screen portions of a view.

C H A P T E R 8
Text and Ink Input and Display
Summary of Text
8-39
Summary of Text
8
Text Constants and Data Structures
8
Text Flags
8
vWidthIsParentWidth
(1 << 0)
vNoSpaces
(1 << 1)
vWidthGrowsWithText
(1 << 2)
vFixedTextStyle
(1 << 3)
vFixedInkTextSTyle
(1 << 4)
vExpectingNumbers
(1 << 9)
Font Family Constants for Use in Frames
8
'espy
'geneva
'newYork
'handwriting
Font Face Constants for Use in Frames
8
kFaceNormal
0x000
kFaceBold
0x001
kFaceItalic
0x002
kFaceUnderline
0x004
kFaceOutline
0x008
kFaceSuperScript
0x0080
kFaceSubScript
0x100
Built-in Font Constants
8
ROM_fontsystem9
9216
ROM_fontsystem9bold
1057792
ROM_fontsystem9underline
4203520
ROM_fontsystem10
10240
ROM_fontsystem10bold
1058816

C H A P T E R 8
Text and Ink Input and Display
8-40
Summary of Text
ROM_fontsystem10underline
4204544
ROM_fontsystem12
12288
ROM_fontsystem12bold
1060864
ROM_fontsystem12underline
4206592
ROM_fontsystem14
14336
ROM_fontsystem14bold
1062912
ROM_fontsystem14underline
4208640
ROM_fontsystem18
18432
ROM_fontsystem18bold
1067008
ROM_fontsystem18underline
4212736
simpleFont9
9218
simpleFont10
10242
simpleFont12
12290
simpleFont18
18434
fancyFont9 or
userFont9
9217
fancyFont10 or
userFont10
10241
fancyFont12 or
userFont12
12289
fancyFont18 or
userFont18
18433
editFont10
10243
editFont12
12291
editFont18
18435
Font Family Constants for Packed Integer Font Specifications
8
tsFancy
1
tsSimple
2
tsHWFont
3

C H A P T E R 8
Text and Ink Input and Display
Summary of Text
8-41
Font Face Constants for Packed Integer Font Specifications
8
tsPlain
0
tsBold
1048576
tsItalic
2097152
tsUnderline
4194304
tsOutline
8388608
tsSuperScript
134217728
tsSubScript
268435456
Keyboard Registration Constants
8
kKbdUsesKeyCodes
1
kKbdTracksCaret
2
kKbdforInput
4
Key Descriptor Constants
8
keySpacer
(1 << 29)
keyAutoHilite
(1 << 28)
keyInsetUnit
(1 << 25)
keyFramed
(1 << 23)
keyRoundingUnit
(1 << 20)
keyLeftOpen
(1 << 19)
keyTopOpen
(1 << 18)
keyRightOpen
(1 << 17)
keyBottomOpen
(1 << 16)
keyHUnit
(1 << 11)
keyHHalf
(1 << 10)
keyHQuarter
(1 << 9)
keyHEighth
(1 << 8)
keyVUnit
(1 << 3)
keyVHalf
(1 << 2)
keyVQuarter
(1 << 1)
keyVEighth
(1 << 0)

C H A P T E R 8
Text and Ink Input and Display
8-42
Summary of Text
Keyboard Modifier Keys
8
kIsSoftKeyboard
(1 << 24)
kCommandModifier
(1 << 25)
kShiftModifier
(1 << 26)
kCapsLockModifier
(1 << 27)
kOptionsModifier
(1 << 28)
kControlModifier
(1 << 29)
Views
8
clEditView
8
aClEditView:= {
viewBounds:
boundsFrame
,
viewFlags:
constant
,
viewFormat:
formatFlags
,
viewLineSpacing:
integer
,
viewLinePattern:
integer
,
view:
EditAddWordScript(
form, bounds
)
NotesText(
childArray
)
...
}
clParagraphView
8
aClEditView:= {
viewBounds:
boundsFrame
,
viewFont:
fontFrame
,
text:
string
,
viewFlags:
constant
,
viewFormat:
formatFlags
,
viewJustify:
constant
,
tabs:
array
,
// tab stops
styles:
array
,
// style runs
textFlags:
constant
,
copyProtection:
constant
,
...
}
C H A P T E R 8
Text and Ink Input and Display
Summary of Text
8-43
clKeyboardView
8
aClEditView:= {
_noRepeat:
constant
,
viewBounds:
boundsFrame
,
keyDefinitions:
array
,
// defines key layout
viewFlags:
constant
,
viewFormat:
constant
,
keyArrayIndex:
array
,
// key legends
keyHighlightKeys:
array
,
// keys to highlight
keyResultsAreKeycodes:
Boolean
,
keyReceiverView:
view
,
// view for keystrokes
keySound:
soundFrame
,
keyPressScript:
function
...
}
Protos
8
protoInputLine
8
aprotoInputLine:= {
_proto : protoInputLine,
viewBounds:
boundsFrame
,
viewFlags:
constant
,
text:
string
,
viewFont:
constant
,
viewJustify:
constant
,
viewFormat:
constant
,
viewTransferMode:
constant
,
viewLineSpacing:
integer
,
viewLinePattern:
binary
,
// 8-byte pattern
memory:
symbol
,
viewChangedScript:
function
.
...
}
protoRichInputLine
8
aprotoRichInputLine:= {
_proto : protoRichInputLine,
viewBounds:
boundsFrame
,
viewFlags:
constant
,

C H A P T E R 8
Text and Ink Input and Display
8-44
Summary of Text
text:
string
,
viewFont:
constant
,
viewJustify:
constant
,
viewFormat:
constant
,
viewTransferMode:
constant
,
viewLineSpacing:
integer
,
viewLinePattern:
binary
,
// 8-byte pattern
memory:
symbol
,
viewChangedScript:
function
,
...
}
protoLabelInputLine
8
aprotoLabelInputLine:= {
_proto : protoLabelInputLine,
viewBounds:
boundsFrame
,
entryFlags:
constant
,
label:
string
,
labelFont:
constant
,
labelCommands:
array
,
// strings for list
curLabelCommand:
integer
,
indent:
integer
,
viewLineSpacing:
integer
,
viewLinePattern:
binary
,
// 8-byte pattern
textSetup:
function
,
updateText:
function
,
textChanged:
function
,
setLabelText:
function
,
setLabelCommands:
function
,
labelClick:
function
,
labelActionScript:
function
,
...
}
protoRichLabelInputLine
8
aprotoRichLabelInputLine:= {
_proto : protoRichLabelInputLine,
viewBounds:
boundsFrame
,
entryFlags:
constant
,
label:
string
,

C H A P T E R 8
Text and Ink Input and Display
Summary of Text
8-45
labelFont:
constant
,
labelCommands:
array
,
// strings for list
curLabelCommand:
integer
,
indent:
integer
,
viewLineSpacing:
integer
,
viewLinePattern:
binary
,
// 8-byte pattern
textSetup:
function
,
updateText:
function
,
textChanged:
function
,
setLabelText:
function
,
setLabelCommands:
function
,
labelClick:
function
,
labelActionScript:
function
,
...
}
protoKeyboard
8
aprotoKeyboard:= {
_proto : protoKeyboard,
saveBounds:
boundsFrame
,
freeze:
Boolean
,
...
}
protoKeypad
8
aprotoKeypad:= {
_proto : protoKeypad,
keyDefinitions:
array
,
// defines key layout
viewFont:
constant
,
viewFormat:
constant
,
keyArrayIndex:
integer
,
keyHighlightKeys:
Boolean
,
keyResultsAreKeycodes:
Boolean
,
keyReceiverView:
constant
,
keySound:
constant
,
keyPressScript:
function,
...
}

C H A P T E R 8
Text and Ink Input and Display
8-46
Summary of Text
protoKeyboardButton
8
aprotoKeyboardButton:= {
_proto : protoKeyboardButton,
viewFlags:
constant
,
viewBounds:
boundsFrame
,
viewJustify:
constant
,
defaultKeyboard
symbol
,
...
}
protoSmallKeyboardButton
8
aprotoSmallKeyboardButton:= {
_proto : protoSmallKeyboardButton,
viewFlags:
constant
,
viewBounds:
boundsFrame
,
viewJustify:
constant
,
current:
symbol
,
...
}
protoAlphaKeyboard
8
aprotoAlphaKeyboard:= {
_proto : protoAlphaKeyboard,
viewBounds:
boundsFrame
,
viewJustify:
constant
,
...
}
protoNumericKeyboard
8
aprotoNumericKeyboard:= {
_proto : protoNumericKeyboard,
viewBounds:
boundsFrame
,
viewJustify:
constant
,
...
}

C H A P T E R 8
Text and Ink Input and Display
Summary of Text
8-47
protoPhoneKeyboard
8
aprotoPhoneKeyboard:= {
_proto : protoPhoneKeyboard,
viewBounds:
boundsFrame
,
viewJustify:
constant
,
...
}
protoDateKeyboard
8
aprotoDateKeyboard:= {
_proto : protoDateKeyboard,
viewBounds:
boundsFrame
,
viewJustify:
constant
,
...
}
Text and Ink Display Functions and Methods
8
This section summarizes the functions and methods you can use to work with text
and ink in your applications.
Functions and Methods for Edit Views
8
view:
EditAddWordScript(
form, bounds
)
NotesText(
childArray
)
Functions and Methods for Measuring Text Views
8
TextBounds(
rStr, fontSpec, viewBounds
)
TotalTextBounds(
paraSpec
,
editSpec
)
Functions and Methods for Determining View Ink Types
8
AddInk(
edit
,
poly
)
ViewAllowsInk(
view
)
ViewAllowsInkWords(
view
)

C H A P T E R 8
Text and Ink Input and Display
8-48
Summary of Text
Font Attribute Functions and Methods
8
FontAscent(
fontSpec
)
FontDescent(
fontSpec
)
FontHeight(
fontSpec
)
FontLeading(
fontSpec
)
GetFontFace
(fontSpec)
GetFontFamilyNum
(fontSpec)
GetFontFamilySym
(fontSpec)
GetFontSize
(fontSpec)
MakeCompactFont
(family, size, face)
SetFontFace
(fontSpec, newFace)
SetFontFamily
(fontSpec, newFamily)
SetFontParms
(fontSpec, whichParms)
SetFontSize
(fontSpec, newSize)
Rich String Functions and Methods
8
DecodeRichString
(richString, defaultFontSpec)
view:
ExtractRangeAsRichString
(offset, length)
view:
GetRichString()
IsRichString
(testString)
MakeRichString
(text, styleArray)
StripInk
(richString, replaceString)
Functions and Methods for Accessing Ink in Views
8
GetInkAt
(para, index)
NextInkIndex
(para, index)
ParaContainsInk
(para)
PolyContainsInk
(poly)

C H A P T E R 8
Text and Ink Input and Display
Summary of Text
8-49
Keyboard Functions and Methods
8
This section summarizes the functions and methods that you can use to work with
keyboards in your applications.
General Keyboard Functions and Methods
8
GetCaretBox()
view
:KeyboardInput()
KeyIn(
keyCode
,
down
)
PostKeyString(
view
,
keyString
)
SetKeyView(
view, offset
)
Keyboard Registry Functions and Methods
8
KeyboardConnected()
OpenKeyPadFor
(view)
RegGlobalKeyboard(
kbdSymbol, kbdTemplate
)
view
:RegisterOpenKeyboard(
flags
)
UnRegGlobalKeyboard(
kbdSymbol
)
view
:UnregisterOpenKeyboard()
Caret Insertion Writing Mode Functions and Methods
8
GetRemoteWriting()
SetRemoteWriting
(newSetting)
Insertion Caret Functions and Methods
8
GetCaretInfo()
GetKeyView()
view:
PositionCaret
(x, y, playSound)
SetCaretInfo(
view, info
)
Application-Defined Methods for Keyboards
8
ViewCaretChangedScript
(view, offset, length)

C H A P T E R 8
Text and Ink Input and Display
8-50
Summary of Text
Input Event Functions and Methods
8
This section summarizes the functions and methods that you can use to work with
input events in your applications.
Functions and Methods for Hit-Testing
8
view:
PointToCharOffset
(x,y)
view:
PointToWord
(x,y)
Functions and Methods for Handling Insertions
8
view:
HandleInsertItems
(insertSpec)
InsertItemsAtCaret
(insertSpec)
Functions and Methods for Handling Ink Words
8
GetInkWordInfo(
inkWord
)
view:
HandleInkWord
(strokeBundle)
view:
HandleRawInk
(strokeBundle)
Application-Defined Methods for Handling Ink in a View
8
view:
ViewInkWordScript
(strokeBundle)
view:
ViewRawInkScript
(strokeBundle)
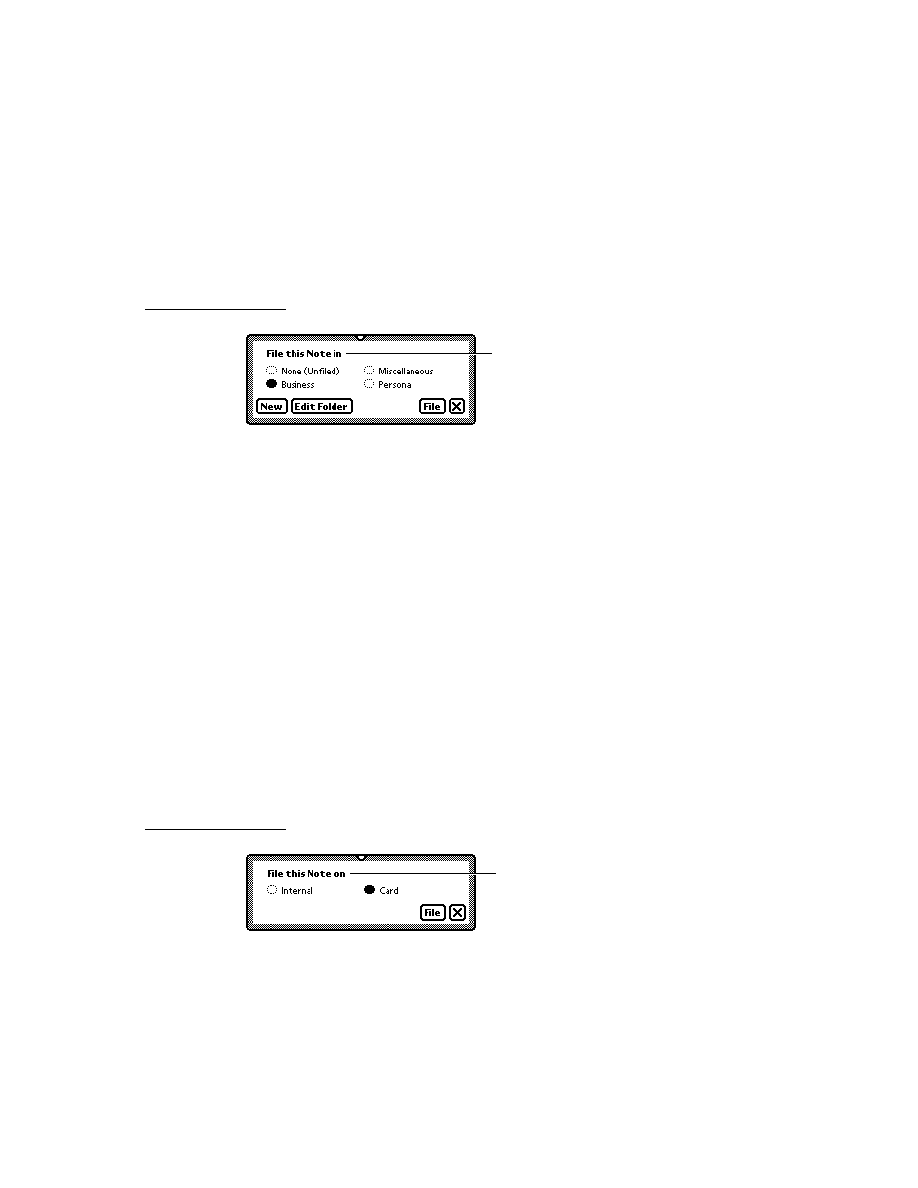
About the Recognition System
9-1
C H A P T E R 9
Recognition
9
Figure 9-0
Listing 1-0
Table 9-0
This chapter and Chapter 10, "Recognition: Advanced Topics," describe the use of
the Newton recognition system. The recognition system accepts written input from
views and returns text, ink text, graphical objects, or sketch ink to them.
This chapter describes how to use view flags to enable the recognition of text,
shapes and gestures in views. If you are developing an application that must derive
text or graphical data from pen input, you should become familiar with the contents
of this chapter. Before reading this chapter, you should be familiar with NewtonScript
message passing among views and the use of view flags to specify the characteristics
of views, as described in Chapter 3, "Views."
You need not read Chapter 10, "Recognition: Advanced Topics," unless you need to
provide unusual input views or specialized recognition behavior. (See that chapter's
first page for a complete list of its topics.)
About the Recognition System
9
The Newton recognition system enables views to convert handwritten input into
text or graphical shapes, and to take action in response to system-defined gestures
such as taps and scrubs.
Any type of view can accept pen input, and different types of views provide
different amounts of system-supplied behavior. Views based on the system-supplied
clEditView
and
clParagraphView
classes handle most forms of pen input
automatically. Applications need not handle recognition events in these types of
views explicitly unless they need to do something unusual. The
clView
class, on
the other hand, provides no built-in recognition behavior. Views of this type must
provide all recognition behavior themselves.
The system provides recognizer engines (also called recognizers) that classify
pen input as clicks, strokes, gestures, shapes, or words. Each view can specify
independently which recognizers it uses and how the recognition system is to process
pen input that occurs within its boundaries. For example, you could configure a view
to recognize text and shapes, or you might enable only text recognition in a view
not intended to accept graphical input.
C H A P T E R 9
Recognition
9-2
About the Recognition System
Although no recognizers are associated with clicks and strokes, they do pass
through the recognition system, allowing your view to respond to them by means
of optional
ViewClickScript
and
ViewStrokeScript
methods that you
supply as necessary. The
ViewClickScript
method of a view that accepts pen
input takes application-specific action when the pen contacts or leaves the surface
of the screen within the view's boundaries. The
ViewStrokeScript
method
performs application-specific processing of input strokes before they are passed on
to the gesture, shape, or text recognizers.
The gesture recognizer identifies system-defined gestures such as scrubbing items
on the screen, adding spaces to words, selecting items on the screen, and so on.
Views based on the
clEditView
and
clParagraphView
classes (edit views
and paragraph views, respectively) respond automatically to standard system-
defined gestures; other kinds of views do not. Your view can provide an optional
ViewGestureScript
method to perform application-specific processing of
system-defined gestures. You cannot define new gestures to the system.
Only views based on the
clEditView
class can recognize shapes. The shape
recognizer uses symmetry found in input strokes to classify them as shapes. The
shape recognizer may make the original shape more symmetrical, straighten its
curves, or close the shape. There is no developer interface to shape recognition.
The system provides two text recognizers--one optimized for a printed handwriting
style and another optimized for a cursive handwriting style. The printed text
recognizer (also called the printed recognizer) requires that the user lift the pen
from the screen between letters. The cursive text recognizer (also called the cursive
recognizer) accepts cursive input (letters connected within a single word), printed
input (disconnected letters within a single word), or any combination of these two
kinds of input.
In views that recognize text, the system enables the printed recognizer by default
unless the cursive recognizer is enabled explicitly. The user can specify the use of a
particular text recognizer from within the Handwriting Recognition preferences
slip. This user preference slip and others that affect recognition behavior are
discussed in "User Preferences for Recognition" beginning on page 9-14.
Only one text recognizer can be active at a time--all views on the screen share the
same text recognizer--but individual views can specify options that customize its
behavior for a particular view. Individual views can also use any combination of
other recognizers in addition to the specified text recognizer. Regardless of which
text recognizer is in use, the recognition system limits the size of individual input
strings to 32 characters--longer words may not be recognized correctly.
Although the Newton platform currently supports only its built-in recognizers,
future versions of the system may permit the use of third-party recognizer engines.
The next section describes how the recognition system classifies input as text,
shapes, or gestures.
C H A P T E R 9
Recognition
About the Recognition System
9-3
Classifying Strokes
9
Recognition is an iterative process that compares raw input strokes with various
system-defined models to identify the best matches for further processing. When
the user writes or draws in an edit view or paragraph view that accepts user input,
the system
notifies the view that a pen event occurred within its boundaries.
provides user feedback, in the form of electronic ink drawn on the screen as the
pen moves across its surface.
attempts to group strokes meaningfully according to temporal and spatial data.
A view that accepts pen input is notified of pen events within its boundaries by
ViewClickScript
messages that are sent when the pen contacts the screen
and when it is lifted from the screen. Views based on the
clEditView
and
clParagraphView
classes handle these events automatically; other views may
not, depending on the type of view in which the pen event occurred. Your view can
supply an optional
ViewClickScript
method to take application-specific action
in response to these events as necessary.
The electronic ink displayed as the pen moves across the screen is called raw ink.
Raw ink is drawn in the same place on the screen as the original input strokes.
Views based on the
clParagraphView
view class can be configured to replace
the raw ink with another representation of the input strokes called ink text. Ink text
is a version of the original strokes that has been scaled for display and formatted
into paragraphs: spaces between groups of strokes are made uniform and groups of
strokes are wrapped to the margins of the screen. The size to which ink text is
scaled is specified by the user from the Text Editing Settings user preference slip.
This user preference slip and others that affect recognition behavior are discussed
in "User Preferences for Recognition" beginning on page 9-14.
The recognition system encapsulates raw input strokes in an object called a stroke
unit. Stroke units cannot be examined directly from NewtonScript; however, you
can pass them to functions that construct useful objects from them or perform
recognition using the stroke data they contain.
Views configured to image input as ink text display a scaled representation of the
original input strokes without performing any further processing; that is, they
circumvent the remainder of the recognition process described here.
When stroke units are made available to a view that performs recognition, all of
the recognizers enabled for the view compete equally to classify the input. Each
recognizer compares the input to a system-defined model; if there is a match,
the recognizer involved claims the stroke unit as its own.
Once a stroke unit is claimed by one of the recognizers, it is not returned to the
other recognizers for additional classification; however, recognizers may combine

C H A P T E R 9
Recognition
9-4
About the Recognition System
multiple stroke units into meaningful groups. For example, certain letters (such as
an uppercase E) might be composed of multiple strokes. The process of grouping
input strokes is influenced by the user preference settings for handwriting style and
letter styles.
The recognizer that claimed one or more stroke units returns to the view one or
more interpretations of the strokes. The gesture and shape recognizers return
only one interpretation to the view. The text recognizer usually returns multiple
interpretations to the view.
Associated with each interpretation is a value, called the score, which indicates
how well the input matched the system-defined model used by the recognizer that
interpreted it. When multiple recognizers are enabled, the system selects the best
interpretations based on their scores and the application of appropriate heuristics.
For example, the text recognizer might choose between interpreting a stroke as a
zero or as the letter O based on whether you have specified that the view accepts
numeric or alphabetic input.
The recognizer that claimed the strokes places its best interpretations in another
kind of unit that is returned to the view. The text recognizer returns word units, the
shape recognizer returns shape units, and the gesture recognizer returns gesture
units
. Each of these units contains data representing one or more strokes. A word
unit represents a single recognized word, a shape unit represents a single
recognized shape, and a gesture unit represents a single recognized gesture, as
shown in Figure 9-1. The next several sections describe how the system handles
each of these units.
Gestures
9
When the recognition system returns a gesture unit to the view, the view performs
the action associated with that gesture automatically. The action taken is dependent
on the kind of view that received the gesture unit.
Edit views and paragraph views respond automatically to system-defined gestures
such as scrubbing items on the screen, adding spaces to words, selecting items on
the screen, and so on. Other kinds of views may do nothing in response to a
particular gesture.
You can provide an optional
ViewGestureScript
method to take action in
response to any standard gesture. For example, you can use this method to respond
to gestures in views that are not paragraph views or edit views. You can also use
this method to override or augment the standard behavior of a particular view in
response to system-defined gestures. At present, you cannot define custom gestures
to the system.

C H A P T E R 9
Recognition
About the Recognition System
9-5
Figure 9-1
Recognizers create units from input strokes
Shapes
9
When the recognition system returns a shape unit to the view, the shape is displayed
as the
clPolygonView
child view of a
clEditView
view. The shape unit contains
a single, cleaned-up version of the original strokes. The shape recognizer may
make the original shape more symmetrical, straighten its curves, or close the shape.
There is no developer interface to shape recognition. To manipulate shapes
returned by the recognition system, you must extract polygon view children from
edit views yourself. You can do so from within an optional
ViewAddChildScript
method that you supply. The system invokes this method
for each
clPolygonView
or
clParagraphView
child added to an edit view.
Pen on tablet
Stroke units
Shape
unit
Word
unit
Gesture
unit
Ink text
Text
Ink
Recognizers
ABC
C H A P T E R 9
Recognition
9-6
About the Recognition System
Text
9
When the recognition system returns a word unit to a view based on the
clParagraphView
or
clEditView
classes, the view displays or uses the best
interpretation of the original input strokes. Paragraph views display words directly;
edit views create a
clParagraphView
child automatically to display text that the
recognition system returns. Additionally, the recognition system constructs a
correction information frame from the word unit and saves learning data as
appropriate. For more information, see "Correction and Learning" (page 9-13)
and "Accessing Correction Information"(page 10-23). Your view can provide an
optional
ViewWordScript
method to perform application-specific processing of
the word unit.
The set of possible interpretations that the text recognizer returns to a view is
affected by
the text recognizer that the view uses to interpret the input strokes
options you have specified for the text recognizer in use
the dictionaries that are available to the view for recognition use
A dictionary is a system construct against which the user's input strings are
matched, as a means of ensuring the validity of the text recognizer's output. The
system supplies dictionaries that define names, places, dates, times, phone numbers,
and commonly used words to the text recognizers. The user can expand the
system's built-in vocabulary by adding new words to a RAM-based user dictionary
accessed from the Personal Word List slip. In addition, you can provide custom
dictionaries for the recognition system's use. For example, you might create a
custom dictionary to supply specialized vocabulary, such as medical or legal
terminology. The section "System Dictionaries" beginning on page 9-11 describes
the system-supplied dictionaries in more detail. The use of custom dictionaries for
recognition is described in "Using Custom Dictionaries" beginning on page 10-24.
Although the interpretations returned by the printed recognizer are never limited to
dictionary words, its output is influenced strongly by the set of dictionaries
available for its use. The interpretations returned by the cursive recognizer can be
restricted to those words appearing in the set of dictionaries available for its use;
however its default behavior is to return non-dictionary words in addition to words
appearing in available dictionaries.
Options specified for the currently enabled recognizer may also influence the
interpretations it returns to the view. For example, the cursive recognizer's default
settings enable its letter-by-letter recognition option, to increase the likelihood of
its returning strings not in the currently available set of dictionaries. The user can
control this option and others from within the Handwriting Settings preferences slip.
Note that even when the cursive and printed recognizers are configured similarly,
the results they return for the same input may differ. For example, using the cursive

C H A P T E R 9
Recognition
About the Recognition System
9-7
recognizer's letter-by-letter option may produce different results than using the
printed recognizer (which always provides letter-by-letter recognition.) Options
for both recognizers are described throughout this chapter and in Chapter 10,
"Recognition: Advanced Topics."
Unrecognized Strokes
9
If the input strokes are not recognized, the system encapsulates them in an object
known as a stroke bundle. A stroke bundle is a NewtonScript object that
encapsulates stroke data for multiple strokes. The strokes in the bundle have been
grouped by the system according to temporal and spatial data gathered when the
user first entered them on the screen. You can access the information in stroke
bundles to provide your own form of deferred recognition, or to examine or modify
stroke data before it is recognized. For information on using stroke bundles, see
Chapter 10, "Recognition: Advanced Topics."
Stroke bundles may be returned to the view under any of the following circumstances:
No recognizers are enabled for the view.
Recognizers are enabled for the view but recognition fails.
The view is configured to image input as ink text.
The view's
vStrokesAllowed
flag is set and a
ViewStrokeScript
method
is provided.
When the system passes a stroke bundle to a
clEditView
view, the view images
the strokes in the bundle as ink text or sketch ink. Other kinds of views may require
you to provide code that displays the strokes.
When no recognizers are enabled for a
clEditView
view, it displays input as
sketch ink. Input views for which no recognizers are enabled are not as unusual as
they might seem at first; for example, you might provide a view that accepts stroke
input without performing recognition as a means of capturing the user's handwritten
signature. And some views, such as those used in the built-in Notepad application,
allow the user to enable and disable recognizers at will.
When recognizers are enabled for the view but recognition fails, the view may
return ink text or sketch ink. Recognition may fail if input strokes are too sloppy to
classify or if the view is not configured correctly for the intended input. For more
information, see "Recognition Failure" beginning on page 9-11.
When the view is configured to display input as ink text, the system skips the
remainder of the recognition process--it does not attempt to further classify the input
strokes as letters or words. Instead, the view simply images the strokes as ink text.
The most important difference between ink text and sketch ink has to do with how
these two forms of ink are represented. Ink text is inserted into existing text in
paragraph views in the same way as recognized words are: as the contents of a

C H A P T E R 9
Recognition
9-8
About the Recognition System
clParagraphView
view child. Ink text automatically wraps to the paragraph
boundaries, just as recognized text does. Ink text is also usually reduced in size
when it is drawn, according to the user preference specified by the Ink Text Scaling
item in the Text Editing preferences slip. Sketch ink, on the other hand, is treated as
a graphic: it is inserted into the view as a
clPolygonView
view child. Sketch ink
is always drawn at full size, and in the position at which it was written on the screen.
Thus, stroke bundles are normally returned only to views that do not perform
recognition. To cause the system to always return stroke bundles to the view (in
addition to any word units, gesture units or shape units that may be passed to the
view), set the view's
vStrokesAllowed
flag and provide a
ViewStrokeScript
method, as described in "Customized Processing of Input Strokes" beginning on
page 10-40.
The recognition system's classification of user input is essentially a process of
elimination. Enabling and configuring only the recognizers and dictionaries
appropriate to a particular context is the primary means by which you optimize the
recognition system's performance within your application.
Enabling Recognizers
9
Each view has a
viewFlags
slot that contains a bit field. The bits in this field
specify characteristics that the view does not inherit from its view class, such as its
recognition behavior. When you set a view flag, it sets bits in this field to enable
combinations of recognizers and dictionaries suited to the input you anticipate the
view to receive.
Not all of the bits in this field affect recognition; some are used to set other
characteristics, such as the view's placement on the screen. The bits in this field
that affect the recognition system are referred to as the view's input mask. When
the view is constructed at run time, the system copies the input mask bits and other
view flags' bits into the view's
viewFlags
slot. shows the relationship of
recognition-related view flags to bits in the
viewFlags
slot.
You can set bits in the
viewFlags
slot from within the graphical view editor in
Newton Toolkit or you can set them programmatically from within your own
NewtonScript code. Either approach allows you to set combinations of bits to
produce a variety of behaviors.
This book uses the NewtonScript approach for all examples. For information on
using the graphical view editor in Newton Toolkit, see Newton Toolkit User's Guide.
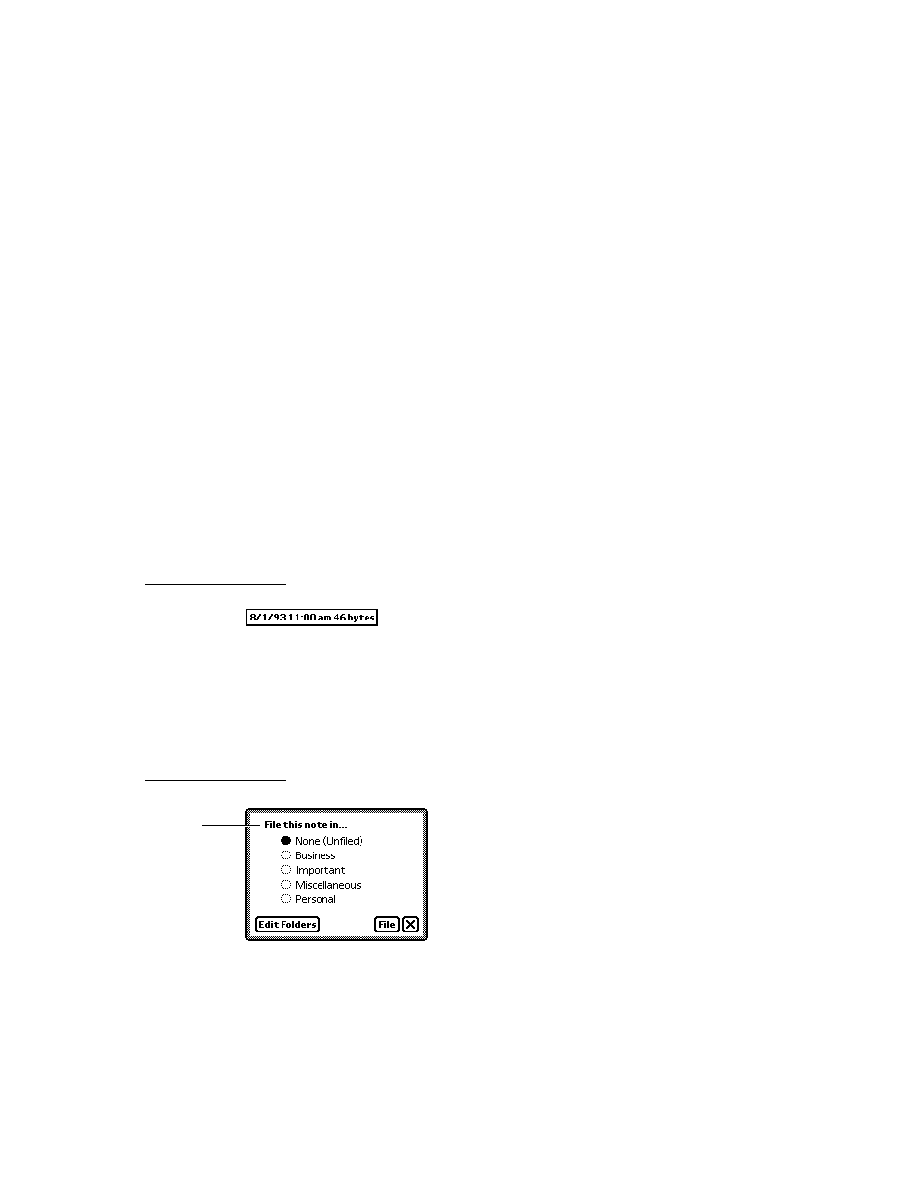
C H A P T E R 9
Recognition
About the Recognition System
9-9
Figure 9-2
Recognition-related view flags
View Flags
9
The system supplies a number of constants, called view flags, which are used to set
bits in a view's
viewFlags
slot programmatically. In general, each of these flags
activates a combination of recognizers and dictionaries suited to recognizing a
particular kind of input. Thus, a view's view flags specify the kinds of data it is
likely to recognize successfully. For a summary of the view flags that affect
recognition, see "Constants" (page 9-31).
There are two ways to set view flags from NewtonScript: you can place view flag
constants in your view template's
viewFlags
slot or you can supply a recognition
configuration (
recConfig
) frame for the view. Occasionally, the use of both
techniques is appropriate, but in most cases you'll use only one or the other.
Recognition Configuration Frames
9
Recognition configuration frames (
recConfig
frames) provide an alternate
programmatic interface to the recognition system. They can be used to provide any
behavior that view flags provide, and can also be used to provide specialized
recognition behaviors that view flags cannot. For example, view flags generally set
vTimeField
vDateField
vPhoneField
Reserved for system use
vShapesAllowed
5
0
10
15
20
24
1
1
1
1
1
1
1
1
1
1
1
1
1
1
1
1
0
0
0
0
0
0
0
0
0
0
0
0
0
0
0
0
vAnythingAllowed
vSingleUnit
vCustomDictionaries
vCharsAllowed
vNumbersAllowed
vLettersAllowed
vPunctuationAllowed
vClickable
vStrokesAllowed
vGesturesAllowed
vAddressField
vNameField
vCapsRequired
vNothingAllowed

C H A P T E R 9
Recognition
9-10
About the Recognition System
multiple bits in the input mask to produce a particular behavior. You can use a
recConfig
frame to set individual bits in the input mask, allowing you to control
aspects of recognition behavior that view flags do not.
Some features of the recognition system require the use of a
recConfig
frame.
For example, to create a view that provides single-letter input areas suitable for
accepting pen input in a crossword puzzle application, you must supply a
recConfig
frame that provides an
rcGridInfo
frame. The system-supplied
rcGridInfo
frame is used to specify the location of one or more single-letter
input views.
This chapter focuses on the use of view flags to configure recognition. The use of
recConfig
frames is described in Chapter 10, "Recognition: Advanced Topics."
System-supplied
recConfig
frames are described in "System-Supplied recConfig
Frames" (page 8-18) in Newton Programmer's Reference.
View Flags vs. RecConfig Frames
9
In most cases, view flags provide the easiest and most efficient way to configure
the recognition system. Although
recConfig
frames provide more flexible and
precise control over the configuration of recognition behavior, they require more
effort to use correctly.
It is recommended that you use view flags to configure recognition unless you need
some special recognition behavior that they cannot provide. Examples of such
behavior include constraining recognition on a character-by-character basis,
implementing customized forms of deferred recognition, and defining baseline or
grid information.
The rest of this chapter discusses configuration of the recognition system only in
terms of the view flag model. You need to read this material even if you plan to use
recConfig
frames in your application, because the description of
recConfig
frames in Chapter 10, "Recognition: Advanced Topics," assumes an understanding
of the view flag model upon which these frames are based.
Where to Go From Here
9
If you're anxious to begin experimenting with view flags, you can skip ahead to
"Using the Recognition System" beginning on page 9-21 and test the effects of
various flags using the viewFlags sample application provided with Newton
Toolkit. However, it is recommended that you read the rest of this section before
attempting to work with the recognition system.

C H A P T E R 9
Recognition
About the Recognition System
9-11
Recognition Failure
9
Recognition may fail when the handwritten input is too sloppy for the system to
make a good match against its internal handwriting model, when the view is not con-
figured correctly for the intended input, or (in the case of dictionary-based recognition
only) when none of the interpretations of the input strokes match a dictionary entry.
In such cases, the recognition system may return sketch ink or ink text.
Ink text looks similar to sketch ink; however, ink text is scaled and placed in a
clParagraphView
view as text. Sketch ink is not placed in a paragraph but
drawn in a
clPolygonView
view on top of anything else that appears in the
polygon view's
clEditView
parent. Both ink text and sketch ink hold stroke data
that can be used to recognize the strokes at another time. Deferred recognition--
the process of recognizing saved ink at a later time--is described in more detail in
"Deferred Recognition" (page 10-5), in Chapter 10, "Recognition: Advanced
Topics."
System Dictionaries
9
The system supplies a variety of dictionaries against which names, places, dates,
times, phone numbers, and commonly used words are matched. There are two
kinds of dictionaries used for text recognition: enumerated and lexical. An
enumerated dictionary is simply a list of strings that can be matched. A lexical
dictionary specifies a grammar or syntax that is used to classify user input. The
kind of dictionary used for a particular task is dependent upon task-specific
requirements. For example, it would be impractical to create an enumerated
dictionary of phone numbers; however, the clearly defined format imposed on these
numbers makes them ideal candidates for definition in a lexical dictionary.
The specific set of dictionaries that the system provides for a particular purpose
generally varies according to the user's locale. For example, because currency
formats vary from country to country, the particular lexical dictionary that the
system uses for matching monetary values may change according to the current
locale. However, you usually need not be concerned with the specific set of
dictionaries used by a particular locale. For more information, see Chapter 20,
"Localizing Newton Applications."
Dictionaries can be in ROM or in RAM (internal or card-based). Most of the system-
supplied dictionaries are in ROM; however, the user dictionary resides in RAM.
Applications must never add items to the user dictionary without the user's
consent. The user dictionary is intended to be solely in the user's control--adding
items to it is akin to changing the user's handwriting preferences or Names entries.
It's also important to leave room for users to store their own items.

C H A P T E R 9
Recognition
9-12
About the Recognition System
IMPORTANT
An excessively large user dictionary can slow the system when
performing searches that are not related to your application. It is
therefore recommended that applications do not add items to the
user dictionary at all.
The system supports a total of about 1,000 items in the RAM-based user dictionary
(also known as the review dictionary). Note that this number may change in future
Newton devices. A persistent copy of the user word list is kept on the internal store
in the system soup. The user dictionary is loaded into system memory (not the
NewtonScript heap or store memory) when the system restarts and saved when the
user closes the Personal Word List slip. For more information, see "Working With
the Review Dictionary" (page 10-30).
A separate dictionary called the expand dictionary allows you or the user to
define word expansions that are substituted for abbreviations automatically. The
substitution takes place after the abbreviation has been recognized, but before it has
been displayed. For example, you could specify that the string w/ be expanded to
the string with, or the string appt expand to appointment. In addition to permitting
the substitution of an entirely different string for the one recognized, the expand
dictionary can be used to correct recurring recognition mistakes or misspellings
automatically.
The expand dictionary is not used directly by the recognition system. Instead, each
word to be expanded is added to both the user dictionary and the expand dictionary.
Then the user dictionary and any appropriate additional dictionaries are used to
perform stroke recognition. Before the recognizer returns the list of recognized
words to the view, it determines whether any of the items in the list are present in
the expand dictionary. If so, the expanded version of the word is inserted into the
list of recognized words before the original version of the word. The original version
is also included in the list, just in case the user doesn't want to expand the word.
As words not present in any of the currently enabled dictionaries are recognized, the
auto-add mechanism may add them to the user dictionary automatically. This
feature is enabled when the cursive recognizer is active, but not when the printed
recognizer is active. (Although both recognizers use dictionaries to improve
accuracy, the use of dictionaries does not benefit the printed recognizer enough to
justify default use of the auto-add mechanism.) You can improve the printed
recognizer's treatment of problematic words by making them available from a
dictionary, but it is recommended that you create a custom dictionary that provides
those words; the user dictionary is intended to be under the user's control.
The auto-add dictionary is a list of words that have been added to the user
dictionary automatically. If the auto-add dictionary is not empty, the Recently
Written Words slip displays its contents when the user opens the Personal Word
List slip. The Recently Written Words slip prompts the user to indicate whether
each of the words it displays should remain in the user dictionary. To encourage the

C H A P T E R 9
Recognition
About the Recognition System
9-13
user to make individual decisions about each word in the list, this slip does not
permit selection.
Although the Recently Written Words slip asks the user whether to add words to
the Personal Word List, the words have already been added to both the user
dictionary and the auto-add dictionary by the time they are displayed in this slip if
the cursive recognizer is in use. Rather than actually adding words to any
dictionaries, this slip actually removes those words that the user does not confirm
as candidates for addition to the user and auto-add dictionaries.
Note
When the printed text recognizer is in use, the automatic
addition of words to the user dictionary and the auto-add
dictionary is disabled.
The size of the auto-add dictionary is limited to 100 words. A persistent copy of the
auto-add dictionary is kept on the internal store in the system soup. The auto-add
dictionary is loaded in system memory (not the NewtonScript heap or store
memory) when the system restarts and saved when the user opens or edits the
Recently Written Words slip. For more information, see "Working With the Review
Dictionary" beginning on page 10-30.
Another dictionary, the symbols dictionary, is always enabled for any view that
performs text recognition. This dictionary includes alphabetic characters, numerals,
and some punctuation marks. Use of this dictionary permits the user to correct
single characters by writing over them on the screen.
Correction and Learning
9
When the recognition system returns a word unit to the view, it constructs a
correction information frame from the word unit and may save learning data as
well. The correction information frame holds information used to correct
misrecognized words. Learning data is used by the system to improve the cursive
recognizer's accuracy.
The system provides a developer interface to the information in the correction
information frame, as well as a user interface to a subset of this data. For complete
descriptions of the
protoCorrectInfo
,
protoWordInfo
and
protoWordInterp
system prototypes that provide access to correction
information, see "Recognition System Prototypes" (page 8-31) in Newton
Programmer's Reference
The picker (popup menu) shown in Figure 9-3 provides the user interface to
correction information. This picker is displayed automatically when the user
double-taps a previously recognized word. This picker's items include
the five best interpretations returned by the recognizer.
the alternative capitalization of the most highly scored interpretation.

C H A P T E R 9
Recognition
9-14
About the Recognition System
the expansions of words that match entries in the expansion dictionary.
a graphical representation of the original input strokes as ink.
buttons for the soft keyboard and text-corrector views.
a Try Letters button when the cursive recognizer is active.
Figure 9-3
Text-corrector picker
The words in this list are one example of correction information stored by the
system as it recognizes words. In addition to word lists, correction information
includes the original stroke data and information known as learning data.
Learning data
is information gathered as the user corrects misrecognized words. It
is used to modify the system's internal handwriting model to more closely match
the way the user actually writes. This information is called learning data because
the system can be said to learn various characteristics of the user's handwriting
style, with a resulting increase in recognition accuracy. Not all recognizers return
learning data.
User Preferences for Recognition
9
The user can specify several preferences that affect the overall configuration of the
recognition system. This information is provided for reference purposes only;
generally, you should not change the user's recognition preferences settings.

C H A P T E R 9
Recognition
About the Recognition System
9-15
This section describes only those user preferences for which the system provides a
NewtonScript interface. It does not provide a comprehensive summary of the user
interface to recognition, which may vary on different Newton devices. For a
description of the user interface to a particular Newton device, see the user manual
for that device.
The user preference settings for recognition that this section describes are stored as
the values of slots in a system-maintained frame that holds user configuration data.
These slots are described in "System-Wide Settings" (page 8-2) in Newton
Programmer's Reference.
The user preference settings described here may be affected by the setting of a
protoRecToggle
view associated with the view performing recognition. For a
description of this view, see "RecToggle Views" beginning on page 9-18.
Recognition-oriented user preference settings may also be overridden by a
recConfig
frame associated with the view performing recognition. For complete
information on
recConfig
frames, see Chapter 10, "Recognition: Advanced
Topics."
Handwriting Recognition Preferences
9
The Handwriting Recognition preferences slip shown in Figure 9-4 specifies the
overall characteristics of the user's handwriting. In general, you should not override
the user settings specified in this slip.
The Printing and Cursive radio buttons specify whether a printed or cursive style
of lettering is used. This system-wide setting enables either the printed or cursive
recognizer by setting the value of the
letterSetSelection
slot in the system's
user configuration data. It is strongly recommended that you do not change
this setting.
The user can also specify the amount of blank space the recognizer may find
between words; this setting influences the recognition system's initial grouping of
stroke data. The value returned by the slider control in this slip is kept in the
letterSpaceCursiveOption
slot in the system's user configuration data. This
value may be overridden by views that perform recognition.
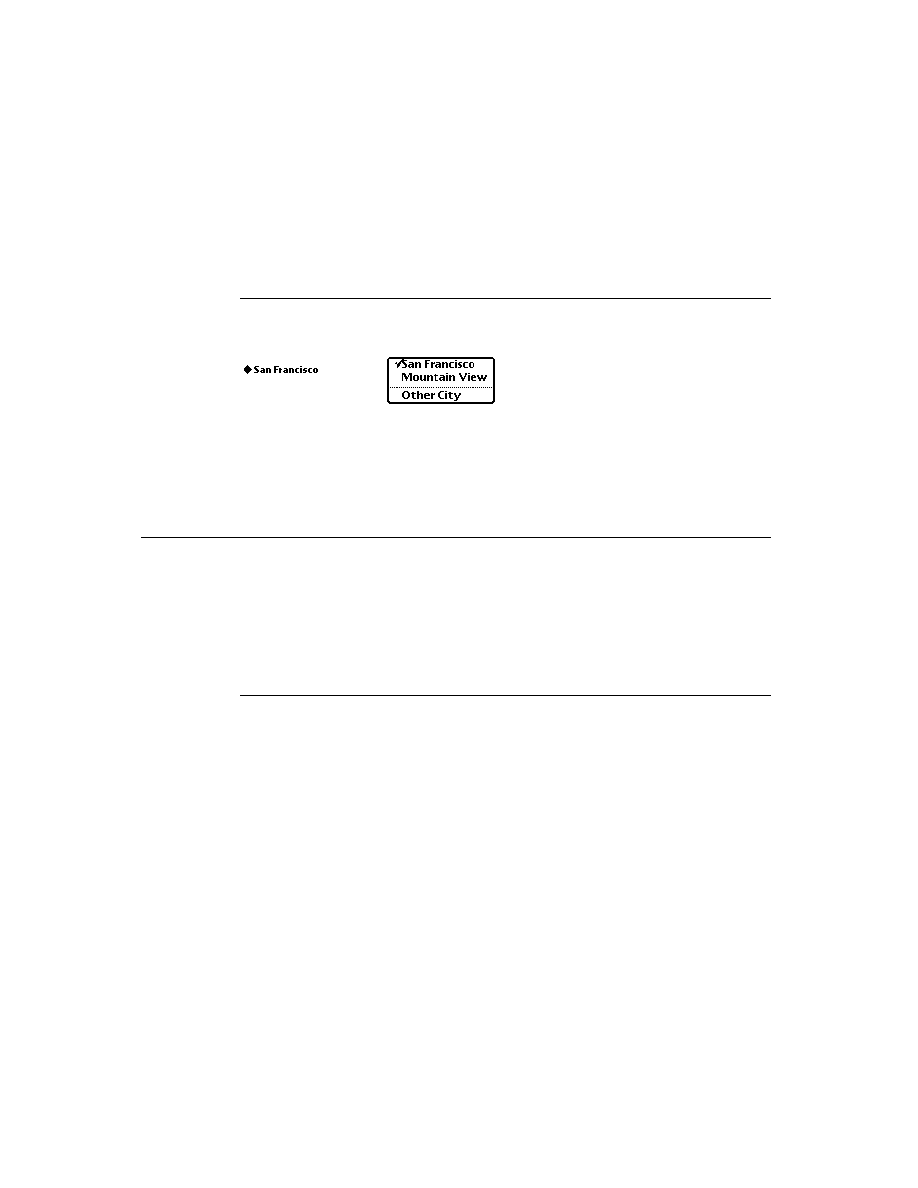
C H A P T E R 9
Recognition
9-16
About the Recognition System
Figure 9-4
Handwriting Recognition preferences
Checking the "Configure for guest user" checkbox causes the system to
save all current recognition system settings.
save the owner's learning data.
temporarily reset all recognition system preferences to their default values.
learn the guest user's writing style as misrecognized words are corrected if the
cursive recognizer is in use. (The printed recognizer does not use learning data.)
When the user deselects the "Configure for guest user" checkbox, the guest user's
learning data is discarded and the original user's learning data, preferences, and
other settings are restored. Note that the system's use of the auto-add mechanism is
not affected by the setting of this checkbox--when the cursive recognizer is
enabled, the system always adds new words to the auto-add dictionary.
The Options button displays a picker from which the user can access options for
various preferences. The items included in this picker vary according to whether
the printed or cursive recognizer is enabled. When the cursive recognizer is enabled,
this picker provides the Text Editing Settings, Handwriting Settings, Letter Shapes,
and Fine Tuning items. When the printed recognizer is enabled, this picker provides
only the Text Editing Settings and Fine Tuning items. Because the system provides
no developer interface to the Letter Shapes slip, it is not discussed here.
Figure 9-5 shows the Text Editing Settings slip that is displayed for both the
printed and cursive recognizers. Of the adjustments available from the Text Editing
Settings slip, the "Add new words to Personal Word List" checkbox is of interest to
developers. The cursive recognizer adds new words to the RAM-based user
dictionary automatically when this checkbox is selected. The printed recognizer
never adds new words automatically, regardless of the setting of this checkbox. You
Options
Button
letterSpaceCursiveOption
letterSetSelection

C H A P T E R 9
Recognition
About the Recognition System
9-17
can always add new words to the user dictionary programmatically, regardless of
which recognizer is enabled. To display or edit the personal word list, the user taps
the book icon on the soft keyboard.
Figure 9-5
Text Editing Settings slip
The system provides two versions of the Fine Tuning slip, one for each of the
cursive and printed text recognizers, as shown in Figure 9-6. Both slips provide a
"Transform my handwriting" slider control that allows the user to fine-tune the
system's use of temporal cues to determine when a group of strokes is complete.
This slider sets the value of the
timeoutCursiveOption
slot in the system's
user configuration data.
Figure 9-6
Fine Tuning handwriting preferences slips
The Fine Tuning slip used by the cursive recognizer includes an additional slider
that allows the user to trade some measure of accuracy for a faster response from
the recognizer. The "Recognize my handwriting" slider sets the value of the
speedCursiveOption
slot in the system's user configuration data.
When the cursive recognizer is enabled, the Options button in the Handwriting
Recognition preferences slip provides access to the Handwriting Settings slip
shown in Figure 9-7.
timeoutCursiveOption
speedCursiveOption
For cursive recognizer
For printed recognizer

C H A P T E R 9
Recognition
9-18
About the Recognition System
Figure 9-7
Handwriting Settings slip
When the "Learn my handwriting" checkbox is selected, the system sets the value
of the
learningEnabledOption
slot in its user configuration data to
true
.
When this slot holds the value
true
, the system modifies its internal handwriting
model as the user corrects misrecognized words when the cursive recognizer is
enabled. The printed recognizer does not provide or use learning data.
The user can cause the cursive recognizer to perform character-based recognition
(rather than dictionary-based recognition) in certain kinds of views by selecting the
"Letter-by-letter in fields" or "Letter-by-letter in notes" checkboxes in the
Handwriting Settings slip. (The printed recognizer can always return character
combinations that do not appear in dictionaries.)
The "Letter-by-letter in fields" checkbox enables the cursive recognizer's letter-by-
letter option in
protoLabelInputLine
views that use this recognizer. The
intended use of this flag is to permit the user to enable letter-by-letter recognition
automatically for views that are unlikely to find user input in dictionaries. For
example, an application that restricts the cursive recognizer to returning dictionary
words might enable this recognizer's letter-by-letter option selectively for views
intended to accept surnames. When the "Letter-by-letter in fields" box is selected,
the value of the
letterInFieldsOption
slot in the system's user configuration
data is set to
true
. For more information, see the description of this slot in
"System-Wide Settings" (page 8-2) in Newton Programmer's Reference.
The "Letter-by-letter in notes" checkbox enables letter-by-letter recognition for
views based on the
clEditView
class that use the cursive recognizer. When the
"Letter-by-letter in notes" box is selected, the
lettersCursiveOption
slot in
the system's user configuration data is set to
true
. The built-in Notes application
and notes associated with items in the Names and Dates applications demonstrate
this behavior. For more information, see the
lettersCursiveOption
description
in "System-Wide Settings" (page 8-2) in Newton Programmer's Reference.
RecToggle Views
9
The
protoRecToggle
view is a button that allows the user to control the
recognition behavior of one or more views easily. This button is usually provided
as a child of your application's status bar. When the user taps this button, it
letterInFieldsOption
lettersCursiveOption
learningEnabledOption
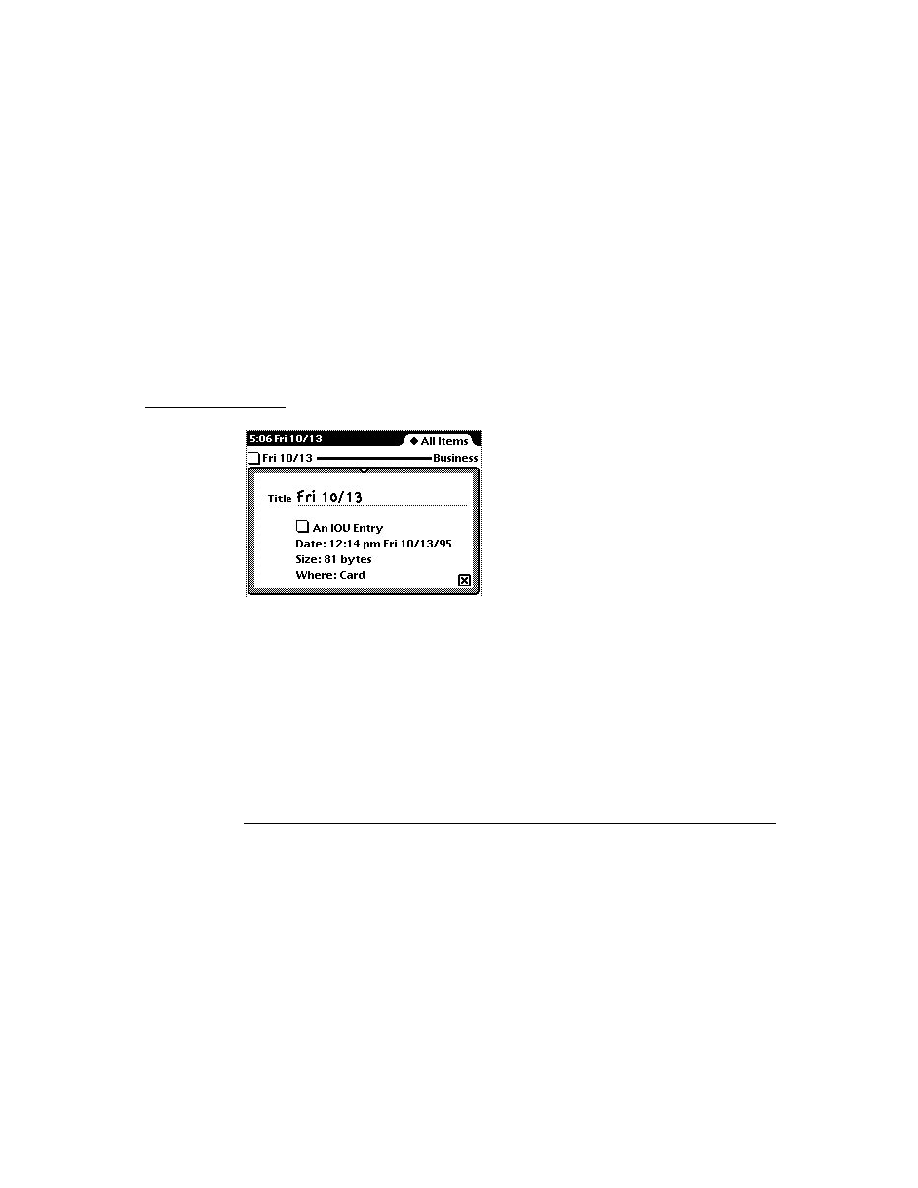
C H A P T E R 9
Recognition
About the Recognition System
9-19
displays a picker from which the user can choose recognition behaviors that you
specify. When this picker is collapsed, the appearance of the button indicates the
current recognition settings for the view or views that it controls. Figure 9-8 shows
the appearance of typical
protoRecToggle
view when it is collapsed and when
it is expanded to display the pick list of recognizers it can enable.
Figure 9-8
Use of
protoRecToggle
view in the Notes application
The default picker provides all of the items shown in Figure 9-8 in the order
illustrated. You can specify that this picker display a subset of these items in the
order you specify.
The topmost item in the picker indicates the recognizer that the
recToggle
view
enables by default; unless you specify otherwise, the
recToggle
view enables the
text recognizer by default, as shown in the figure.
You can also provide code that restores the user's most recent
recToggle
setting
or initializes the
recToggle
to a predetermined setting each time your
application opens.
The picker's Preferences item opens the Handwriting Recognition user preferences
slip by default.
For more information on
protoRecToggle
views, see Chapter 10, "Recognition:
Advanced Topics," as well as the description of this prototype in Newton
Programmer's Reference
.
Flag-Naming Conventions
9
This section describes conventions used to name recognition-related view flags, as
well as the significance of the use of the words
Field
and
Allowed
in flag names.
The Entry Flags area of the Newton Toolkit (NTK) view editor actually sets view
flags. The distinction that Newton Toolkit makes between "view flags" and "entry
flags" is an artifact of the way certain views create child views dynamically at
run time.
For example, when the user taps a
protoLabelInputLine
view, it creates and
opens a
clParagraphView
child that is the input line view in which text
Collapsed
Expanded
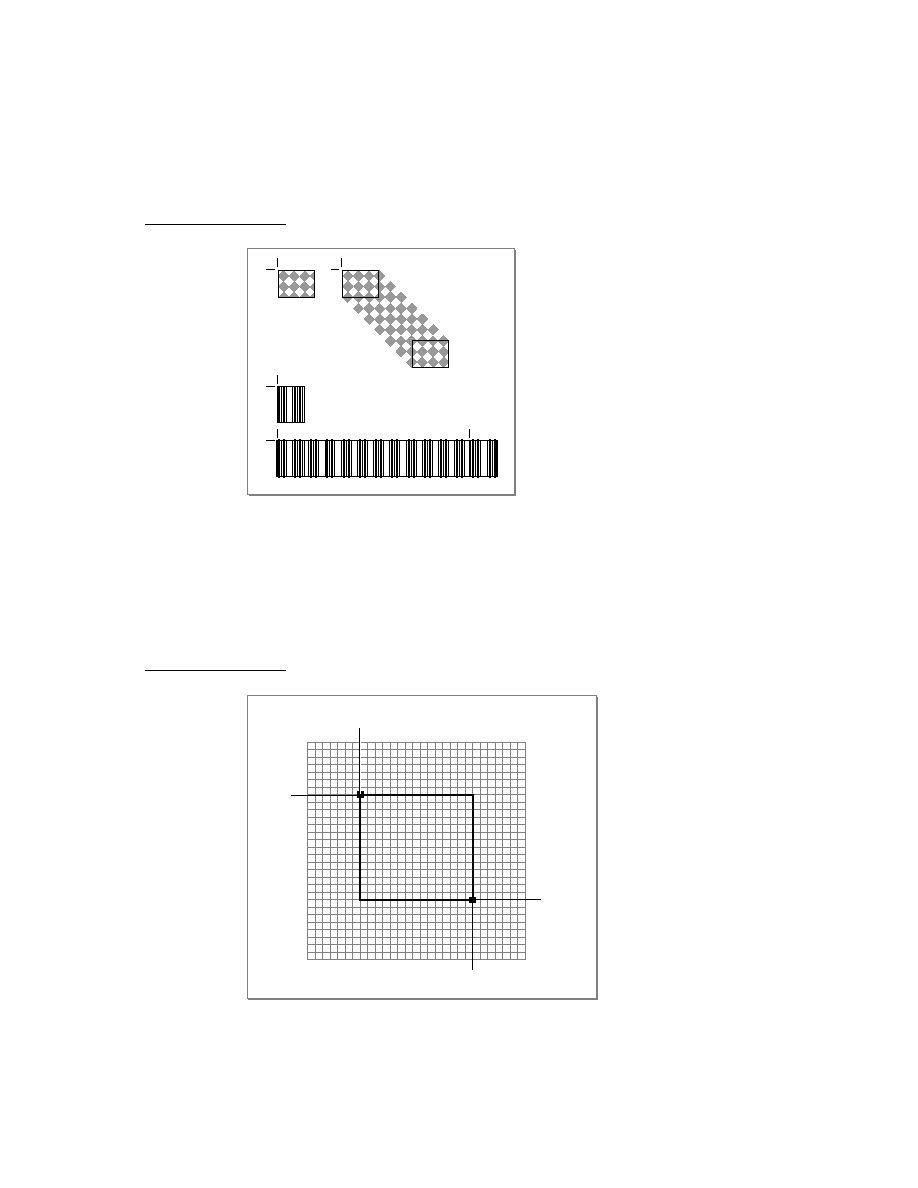
C H A P T E R 9
Recognition
9-20
About the Recognition System
recognition takes place. The Entry Flags area of the NTK screen specifies the view
flags for this dynamically created child view separately from the view flags for the
container view in which it appears. When the system creates the child view, it
copies the Entry Flags bits into the child view's
viewFlags
slot.
For simplicity's sake, this chapter refers to all recognition-oriented flags as "view
flags." This chapter and its corresponding section of the Newton Programmer's
Reference
document all such flags as view flags.
Although the NTK view editor describes
vAnythingAllowed
as a "flag" it is
actually a mask that sets all bits in a
clEditView
view's input mask. This chapter
refers to this construct as the "
vAnythingAllowed
mask." See (page 9-8) for a
graphical depiction of the relationships between bits in the input mask and
recognition-related view flags.
The use of
Field
in the names of some flags and
Allowed
in others is meant to
reflect these flags' intended use, rather than a functional difference.
The "field" flags are intended for setting up input views that accept a single kind of
input, such as dates. For example, setting the
vDateField
flag specifies that the
view accepts numeric input in a format commonly used for dates in the current
locale. Setting this flag enables the set of dictionaries appropriate for recognizing
such input.
On the other hand, the more inclusive "allowed" flags are intended for use with
views that must recognize several kinds of input; for example, setting the
vNumbersAllowed
flag specifies that the view accepts a wide range of numeric
input, such as currency values, times, and dates. Setting the
vNumbersAllowed
flag alone, then, enables a more inclusive set of dictionaries than obtained by
setting the
vDateField
flag alone.
Despite differences in naming conventions (and despite the fact that the Field Type
popup menu in the NTK view editor considers these flags mutually exclusive), the
"field" and "allowed" flags can be mixed in any combination. Keep in mind,
though, that the more choices the recognizer has, the more opportunity it has to
make the wrong choice.
Recognition Compatibility
9
In addition to the cursive recognizer available in previous systems, version 2.0 of
system software adds a recognizer optimized for printed characters. This recognizer,
represented by the Printed radio button in the Handwriting Recognition preferences
slip, is the default text recognizer used when you or the user do not specify otherwise.
Selecting the Cursive radio button in the Handwriting Recognition preferences slip
equates to selecting the Mixed Cursive and Printed radio button available in
previous versions of this slip: the cursive recognizer is enabled, all printed and

C H A P T E R 9
Recognition
Using the Recognition System
9-21
cursive letter styles in the system's handwriting model are enabled, and the system
disables unused letter styles over time as the user corrects misrecognized words.
The default settings of the cursive recognizer in version 2.0 enable this recognizer's
letter-by-letter recognition option. Previous versions of the system disabled this
option by default, causing the cursive recognizer to return only words appearing in
the set of dictionaries available to the view performing recognition.
The
protoLetterByLetter
prototype, which appears at the lower-left corner
of the screen in the Notepad application on the MessagePad 100 and MessagePad
110, is obsolete. It has been replaced by the
protoRecToggle
prototype. For
more information, see "RecToggle Views" (page 9-18).
Prior to version 2.0 of Newton system software, correction information was not
accessible from NewtonScript. Version 2.0 of Newton system software makes this
information available as frame data. For more information, see "Correction and
Learning" (page 9-13).
Combining the
vLettersAllowed
flag with flags used to specify recognition of
numeric values (such as
vPhoneField
,
vNumbersAllowed
,
vDateField
,
vTimeField
, and
vAddressField
) produced undesirable results in system
software prior to version 2.0. System software version 2.0 supports these kinds of
view flag combinations.
Deferred recognition--the ability to convert strokes to text at some time other than
when the strokes are first entered on the screen--was introduced in Newton system
software version 1.3 with no application programming interface. Version 2.0 of
Newton system software provides a NewtonScript interface to this feature.
Using the Recognition System
9
This section describes how to use view flags to enable recognition in views. This
chapter discusses only those view flags that interact with the recognition system.
For a summary of these view flags, see "Constants" (page 9-31). For information
on other kinds of view flags, see Chapter 3, "Views." For complete descriptions of
all view flags, see Newton Programmer's Reference.
For information on the use of
recToggle
views,
recConfig
frames and advanced
features of the recognition system, see Chapter 10, "Recognition: Advanced
Topics."
Types of Views
9
The kind of view that you use to recognize input affects the amount of work you'll
have to do to support recognition. Views based on the
clEditView
class handle
most recognition events automatically once you've specified their intended

C H A P T E R 9
Recognition
9-22
Using the Recognition System
recognition behavior by setting view flags or providing a
recConfig
frame.
Specifically,
clEditView
views create
clParagraphView
or
clPolygonView
child views automatically as required to display output from the
recognition system. To use other kinds of views for recognition, you may need to
provide
view
Xxx
Script
methods that create these child views and respond in
other ways to recognition system events.
Configuring the Recognition System
9
You can take the following approaches to configuring the recognition system:
Set view flags only. This approach works well for most applications and is
described in this chapter.
Set view flags and allow the user to configure recognition from a
protoRecToggle
view that you provide. The easiest way to do this is by
setting the
vAnythingAllowed
mask, which is described in this chapter.
This approach supports the use of ink text in
clEditView
views. Use of
the
protoRecToggle
view is described in Chapter 10, "Recognition:
Advanced Topics."
Set view flags and supply a recognition configuration frame based on
ROM_rcInkOrText
. This approach supports ink text in
clEditView
views.
You should provide a
protoRecToggle
view as well, to allow the user to
switch easily between text and ink text.
Supply a recognition configuration frame of some other kind. This approach
offers you the most control and flexibility, but also requires the most work to
implement. The difficulty of enabling ink text according to the value of a
protoRecToggle
view depends on the particular implementation of your
recConfig
frame. Recognition configuration frames are described in
Chapter 10, "Recognition: Advanced Topics."
Use the
RecogSettingsChanged
message sent by the
protoRecToggle
view to enable recognition behaviors dynamically. This technique is described in
Chapter 10, "Recognition: Advanced Topics."
Except where noted otherwise, all of the flags described in this chapter are set in
the view's
viewFlags
slot. When setting the values of
viewFlags
slots,
remember that in order to produce useful behavior you may need to set other bits in
addition to the recognition-oriented ones that this chapter describes. To preserve
settings that your view's
viewFlags
slot inherits from its view class, you should
logically
OR
changes to bits in this slot.
For information on non-recognition view flags provided by the system, see
Chapter 3, "Views."
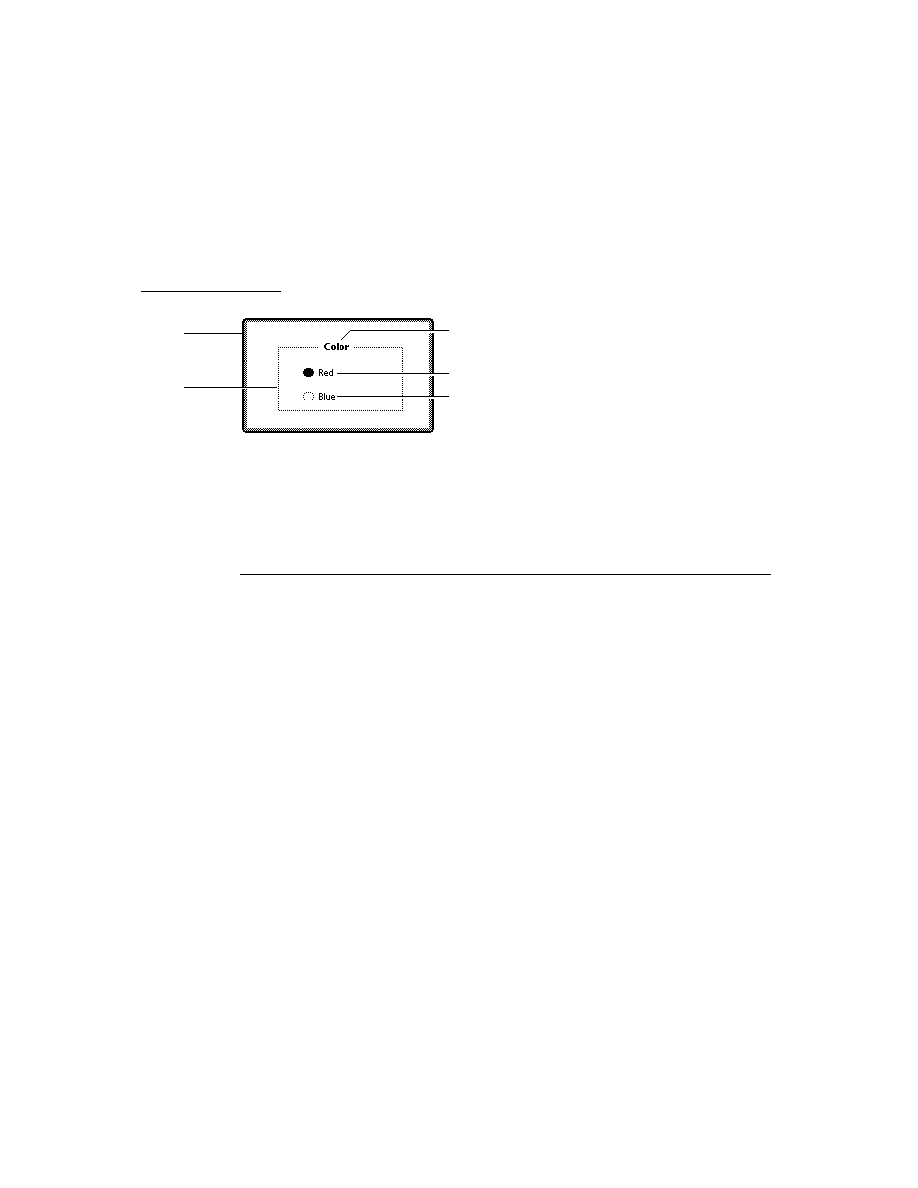
C H A P T E R 9
Recognition
Using the Recognition System
9-23
Obtaining Optimum Recognition Performance
9
To obtain the most accurate results from the recognition system, you must define as
precisely as possible the type of input that the view is to recognize. Aside from
potentially introducing errors, enabling superfluous recognizers may slow the
recognition system's performance.
The view flags that enable text recognition also enable dictionaries suited to
recognizing particular kinds of input, such as dates, phone numbers, and so on.
Some view flags activate multiple dictionaries, and the sets of dictionaries activated
by various flags may overlap. The system shows no preference towards any single
dictionary in a set except for a slight weighting of results in favor of words found
in the user dictionary, which most view flags enable.
The specific dictionaries that a particular flag enables varies according to the user's
locale and the ROM version of the Newton device. You usually need not be
concerned with this implementation detail, nor should you rely on the presence of a
particular dictionary when setting view flags.
When you need to control precisely which dictionaries a view uses for recognition,
you can set its
vCustomDictionaries
flag and use a
dictionaries
slot to
specify explicitly which dictionaries are to be used. For information about custom
dictionaries, see "Using Your RAM-Based Custom Dictionary" (page 10-28), in
Chapter 10, "Recognition: Advanced Topics." For information about locale and the
recognition system, see "How Locale Affects Recognition" (page 20-2), in
Chapter 20, "Localizing Newton Applications."
For best performance, you need to specify the minimum combination of recognizers
and dictionaries required to process the kind of input you expect the view to receive.
This equates to enabling the minimum set of view flags that allow the view to
recognize appropriate input correctly. By restricting the possible interpretations
returned by the recognition system to only those that are appropriate for a particular
view, you increase the system's chances of interpreting the input correctly. For
example, when configuring a view for the entry of numeric data, you would not
specify that the recognition system return alphabetic characters to that view.
The printed and cursive text recognizers appear nearly identical to NewtonScript
applications. The main difference between them is that while the cursive recognizer
can be made to use the value of the
viewFlags
slot as a strict definition of what it
can recognize, the printed recognizer uses this value as only a hint--that is, it can
always return values not specified by the input view's view flags. When configuring
views for text recognition, you should set view flags that describe the input you
anticipate the view to receive and then verify that you obtain acceptable results
from both text recognizers.
Because the printed recognizer lets you write anything in the input view, it may be
difficult to determine whether your
viewFlags
settings are appropriate when this
recognizer is enabled; the cursive recognizer usually provides better feedback in

C H A P T E R 9
Recognition
9-24
Using the Recognition System
this regard. If necessary, you can provide a
ViewWordScript
or
ViewChangedScript
method that validates the recognizer's output; this method
can be especially useful when working with the printed recognizer.
Accepting Pen Input
9
When setting up any view, you must specify whether it accepts pen input at all. If
you set the
vNothingAllowed
flag (or turn off all recognition-oriented flags), the
view does not accept pen input. If you want the view to accept pen input, you must
set the
vClickable
flag in its
viewFlags
slot. Setting this flag only causes the
view to accept pen taps and send
ViewClickScript
messages; it does not
enable ink handling or send messages to any of the unit-handling methods that
provide recognition behavior.
Setting the
vClickable
flag specifies that the view system is to send the
ViewClickScript
message to the view once for each pen tap that occurs within
the view. Note that this is the case only when
vClickable
is the only flag set for
the view--other flags, such as the
vCustomDictionaries
flag, set the
vClickable
bit in the view's input mask also.
When this flag is set, the system sends additional messages to the view to signal
taps, strokes, gestures, and words. All pen input is signaled by the
ViewClickScript
message, which indicates that the pen contacted the screen
or was lifted from it within the boundaries of the view. If you supply a
ViewClickScript
method, it should return
true
to indicate that the message
was handled, or
nil
to pass the message on to another view. If this message is not
handled by the view and additional recognition flags are set, other messages may
be sent to the view, depending on what was written. These other messages include
ViewStrokeScript
,
ViewGestureScript
, and
ViewWordScript
--in that
order, if all are sent.
Each of the corresponding input-related view methods accept as an argument a unit
object passed to it by the system. The unit contains information about the pen
input. You cannot examine the unit directly from NewtonScript, but you can pass it
to other system-supplied functions that extract information from it such as the
beginning and ending points of the stroke, an array of stroke points, the stroke
bounds, and so on.
Taps and Overlapping Views
9
When views overlap, taps can "fall through" from the top view to the one beneath,
causing unexpected results. For example, when the user taps in an area of the top
view that doesn't handle taps, and the view beneath provides a button in the
vicinity of the tap, the button may be activated unintentionally.

C H A P T E R 9
Recognition
Using the Recognition System
9-25
You can solve this problem by setting the top view's
vClickable
flag without
providing a
ViewClickScript
method. (The top view need not handle the taps,
only prevent them from being passed on to the other view.)
Recognizing Shapes
9
The
vShapesAllowed
flag enables the recognition of geometric shapes such as
circles, straight lines, polygons, and so on. Do not set this flag for views that
handle text input only. This flag is intended for use only in views based on the
clEditView
class. The
clEditView
class provides the built-in Notepad
application's note stationery with much of its recognition behavior.
The shapes displayed on the screen are
clPolygon
views returned as the children
of the
clEditView
that accepted the input strokes. There is no developer
interface to shape recognition; to manipulate shapes returned by the recognition
system, you must extract the polygon views from the edit view yourself. In some
cases, you may find the
ViewAddChildScript
method useful for this purpose.
The
ViewAddChildScript
message is sent when a child view is added to a view.
When multiple shapes are returned to an edit view, its
ViewAddChildScript
method is called once for each shape.
When multiple ink text words are returned to an edit view, the
ViewAddChildScript
method is invoked when the
clParagraphView
that
holds the ink text is added as the child of the edit view, but this method is not
invoked as ink text words are added to the paragraph view.
In views not based on the
clEditView
class, the arrival of each ink word is
signalled by a
ViewInkWordScript
message.
Recognizing Standard Gestures
9
Setting the
vGesturesAllowed
flag supplies system-defined behavior for the
gestures tap, double tap, highlight, scrub, line, caret, and caret-drag. Most input
views set the
vGesturesAllowed
flag, as they need to respond to standard
gestures such as scrubbing to delete text or ink. At present, you cannot define new
gestures to the system.
When the
vGesturesAllowed
flag is set, the gesture recognizer invokes the
view's
ViewGestureScript
method before handling the gesture. Normally,
you don't need to supply a
ViewGestureScript
method for
clEditView
or
clParagraphView
views. These views handle all system-defined gestures
automatically.
Your
ViewGestureScript
method is invoked only for gestures that the view
system does not handle automatically. For information on intercepting standard
gestures before the view system handles them, see "Customized Processing of

C H A P T E R 9
Recognition
9-26
Using the Recognition System
Double Taps" beginning on page 10-41. See also "ViewGestureScript" (page 8-71)
in Newton Programmer's Reference.
Combining View Flags
9
Generally, you must combine multiple view flags to produce useful recognition
behavior. For example, most views that accept user input set the
vClickable
flag
to enable pen input and the
vGesturesAllowed
flag to enable recognition of
standard gestures such scrubbing and inserting spaces.
Except where noted otherwise, the NewtonScript "plus" operator (+) is used to
combine view flags, as in the following code fragment.
myViewTemplate :=
{
// recognize taps, gestures, and shapes
viewFlags: vClickable+vGesturesAllowed+vShapesAllowed,
...}
Note
Most combinations of view flags include the
vClickable
flag.
If you do not set the
vClickable
flag, the view does not accept
pen input at all.
Sometimes a particular combination of view flags produces results that seem
incorrect. For example, you might be surprised to discover that a view setting only
the flags
vClickable+vLettersAllowed
can occasionally recognize numeric
values. (The
vLettersAllowed
flag enables the recognition of single text
characters by the cursive recognizer.) This behavior is caused by the presence of
the symbols dictionary in the set of dictionaries available to the view. The symbols
dictionary includes alphabetic characters, numerals and some punctuation marks.
Most view flags enable this dictionary to support the correction of single letters or
numerals by overwriting. As a side effect, it becomes possible to recognize
extraneous characters or numerals in fields that ostensibly should not support such
input. This behavior is rarely a problem, however, because the recognition system
is designed to show a strong preference for "appropriate" interpretations of input as
defined by the view flags set for the view.
Although you might expect that the presence of the symbols dictionary would
allow a view setting only the flags
vClickable+vNumbersAllowed
to return
alphabetic characters, this behavior is quite difficult to produce. Views that set the
vNumbersAllowed
flag show a much stronger preference for single-digit
numbers than single alphabetic characters. However, letters that do not look similar
to numeric values--for example, the letter W--may produce this particular form of
misrecognition.

C H A P T E R 9
Recognition
Using the Recognition System
9-27
When troubleshooting recognition errors, remember that view flags may enable
multiple dictionaries and that the sets of dictionaries enabled by various flags
may overlap.
As a general rule, the fastest and most accurate recognition occurs when the fewest
recognizers and dictionaries necessary to successfully analyze the input are
enabled. Enabling unnecessary recognizers and dictionaries may decrease the
speed and accuracy with which recognition is performed.
Recognizing Text
9
The
vCharsAllowed
and
vLettersAllowed
flags enable text recognition in
views that accept pen input. Either flag enables the text recognizer specified by the
Handwriting Recognition preferences slip.
Each of these flags specifies different recognition options and dictionary sets. The
unique behaviors associated with each flag are demonstrated most clearly by the
cursive recognizer. The cursive recognizer can be made to return only words
present in the set of dictionaries available to the view performing recognition. In
contrast, the printed recognizer can always return words or letter combinations that
are not present in dictionaries.
The
vCharsAllowed
flag enables a default set of dictionaries that provide
vocabulary used in common speech, names of days, names of months, proper
names, and words in the user dictionary. When the
vCharsAllowed
flag is set
and the
vLettersAllowed
flag is not, the cursive recognizer returns only words
that appear in the set of dictionaries available to the view performing recognition.
Note that the complete set of dictionaries available to the view may include those
enabled by other flags. For example, the NTK view editor provides a Field Type
popup menu that allows you to specify whether the view is to accept phone, date,
time, address or name data. The choices in this menu set the
vPhoneField
,
vDateField
,
vTimeField
,
vAddressField
and
vNameField
flags,
respectively. Each of these flags enables one or more dictionaries suited to
recognizing the specified input data. Custom dictionaries may also be made
available to the view performing recognition by setting the
vCustomDictionaries
flag and providing a valid
dictionaries
slot in the
view that performs recognition.
The
vLettersAllowed
flag enables the cursive recognizer's letter-by-letter
recognition option. When the
vLettersAllowed
flag is set, the cursive recognizer
may return words not appearing in dictionaries as well as nonword letter
combinations. Note that this configuration increases the cursive recognizer's chances
of misrecognizing words that appear in the set of dictionaries available to it.
Although both text recognizers provide a letter-based recognition feature, the two
recognition engines are completely distinct. Consequently, the results produced by

C H A P T E R 9
Recognition
9-28
Using the Recognition System
the cursive recognizer's letter-by-letter option may be different from those returned
by the printed recognizer for the same input data.
Although the printed recognizer can always return non-dictionary words, it does
make extensive use of the dictionaries available to the view for recognition. Users
may improve the printed recognizer's accuracy for problematic non-dictionary
words by adding them to the user dictionary. You can supply custom dictionaries to
improve the recognition of specialized vocabulary. It is recommended that
applications do not add words to the user dictionary.
Recognizing Punctuation
9
The
vPunctuationAllowed
flag permits the cursive recognizer to return
common punctuation marks such as the period (.); comma (,); question mark (?);
single quotation marks (` and '); double quotation marks (" and "); and so on. The
printed recognizer can always return these characters, regardless of whether this
flag is set.
Views restricted to the entry of phone numbers, dates, or times need not set the
vPunctuationAllowed
flag because the
vPhoneField
,
vDateField
, and
vTimeField
flags already allow the entry of appropriate punctuation.
The cursive recognizer can also apply some simple rules when deciphering
ambiguous input; for example, it can make use of the fact that most punctuation
marks follow rather than precede words.
Suppressing Spaces Between Words
9
Setting the
vSingleUnit
flag causes the recognition system to ignore spatial
information when grouping input strokes as words; instead, the system relies on
temporal cues to determine when the user has finished writing a word. When this
flag is set, the recognizer ignores short delays, such as those that occur between
writing the individual characters in a word. Longer delays cue the recognizer to group
the most recently completed set of strokes as a word. The amount of time considered
to be a longer delay is a function of the speed of the processor and the recognition
system, as well as the value of the
timeoutCursiveOption
user preference.
The
vSingleUnit
flag is useful for views in which the presence of gratuitous
spaces may confuse the recognizer; for example, phone number entry fields usually
suppress the recognition of spaces. If you want to suppress all spaces in the displayed
text, you can use the
vNoSpaces
flag in conjunction with the
vSingleUnit
flag.
Rather than suppressing the input of spatial cues, the
vNoSpaces
flag suppresses
the insertion of spaces between groups of strokes or recognized text in views based
on the
clParagraphView
class. This post-processing flag does not restrict the
interpretation of the input strokes or affect word segmentation, as the
vSingleUnit
flag does.

C H A P T E R 9
Recognition
Using the Recognition System
9-29
The
vNoSpaces
flag must appear in an evaluate slot named
textFlags
that you
create in the view. The
vSingleUnit
flag appears in the view's
viewFlags
slot,
as usual.
Forcing Capitalization
9
The
vCapsRequired
flag directs the system to capitalize the first letter of each
word returned by the recognizer before displaying the text in the view.
Setting the
vCapsRequired
flag does not affect the recognizer's behavior--it
affects post-processing performed on the recognizer's output before it is returned to
the view.
Justifying to Width of Parent View
9
Setting the
vWidthIsParentWidth
flag for a view based on the
clParagraphView
class causes the view to extend its right boundary to match
that of its parent automatically.
The
vWidthIsParentWidth
flag must appear in an evaluate slot named
textFlags
that you create in the view.
Like other flags set in the
textFlags
slot, the
vWidthIsParentWidth
flag
does not affect the recognizer's behavior--it affects post-processing performed on
the recognizer's output before it is returned to the view.
Restricting Input to Single Lines or Single Words
9
Including the
oneLineOnly
flag in your view's
viewJustify
slot causes the
view to accept only a single line of text input, with no word wrapping provided.
You can restrict input to a single word by including the
oneWordOnly
flag in the
view's
viewJustify
slot. If this flag is set, the view replaces the currently
displayed word with the new one when the user writes in the view. You can also
restrict input to single characters by using this flag in conjunction with a custom
dictionary of single letters.
For more information on these flags, see their descriptions in Chapter 3, "Views."
For information on the use of custom dictionaries, see "Using Custom
Dictionaries" beginning on page 10-24.
Validating Clipboard and Keyboard Input
9
It is possible for the user to enter invalid values in fields by dragging text from the
Clipboard or by using a keyboard to type in the field. For example, setting the
vPhoneField
flag normally restricts input to numeric values in phone number
formats; however, the user can still enter invalid values in such a field by dragging

C H A P T E R 9
Recognition
9-30
Using the Recognition System
or typing them. To prevent invalid input by these means, you can implement a
ViewChangedScript
method that validates its view's input.
Using the vAnythingAllowed Mask
9
The
vAnythingAllowed
mask can be used only with views based on the
clEditView
class. When used by itself, this mask sets all of the bits in the view's
input mask, potentially enabling all of the system-supplied recognizers and
dictionaries. However, the actual recognition behavior of views that use this mask
varies according to current user preference settings.
For a view that sets the
vAnythingAllowed
mask, the recognition system
replaces the set of view flags you've specified with a set of flags derived from the
current settings of user preferences that affect recognition.The actual set of
recognizers enabled for the view is controlled by
user preferences specified in the system's user configuration data.
the application's
protoRecToggle
view, if it has one.
the view's
recConfig
frame, if it has one.
Slots in the system's user configuration data specify recognition behaviors that all
views inherit. However, an optional
protoRecToggle
view can specify different
behaviors for individual views by overriding values inherited from user configuration
data. Similarly, each view can provide a
recConfig
frame that overrides settings
specified by the
protoRecToggle
view or the system's user configuration data.
Thus, in practice, the
vAnythingAllowed
mask usually is not what its name
implies: if any bit in this mask is turned off (by another flag, or by a
recToggle
view, for example), the input mask is no longer
vAnythingAllowed
.
The built-in Notepad application provides a good example of the behavior of views
that use the
vAnythingAllowed
mask, including the use of a
protoRecToggle
view to change recognition settings.

C H A P T E R 9
Recognition
Summary
9-31
Summary
9
Constants
9
Text Recognition View Flags
9
Constant
Value
Description
vCharsAllowed
1 << 12
or
0x01000
Enables default text recognizer and default
dictionary set.
vLettersAllowed
1 << 14
or
0x04000
Enables letter-by-letter text recognition.
vAddressField
1 << 21
or
0x0200000
Enables recognizers and dictionaries suitable for
the input of address data in the current locale.
vNumbersAllowed
1 << 13
or
0x02000
Enables the recognition of numeric characters,
monetary values (for example, $12.25), decimal
points, and signs (+ or ).
vNameField
1 << 22
or
0x0400000
Enables text recognition optimized for name
data; usually combined w/
vCapsRequired
.
vCustomDictionaries
1 << 24
or
0x01000000
Enables text recognition using dictionaries
specified by the view's
dictionaries
slot.
vPunctuationAllowed
1 << 15
or
0x08000
Enables recognition of punctuation marks by the
cursive recognizer. (Printed recognizer always
recognizes punctuation marks.)
vCapsRequired
1 << 23
or
0x0800000
Forces capitalization of the first character of
each recognized word.

C H A P T E R 9
Recognition
9-32
Summary
Non-Text Recognition View Flags
9
Constant
Value
Description
vNothingAllowed
0x00000000
or
0x0000
The view accepts no handwritten or keyboard input.
vAnythingAllowed
65535 << 9
or
0x01FFFE00
Recognize any input. Use only for views based on
the
clEditView
class.
vClickable
1 << 9
or
0x0200
Accept taps and send
ViewClickScript
message to the view once for each tap that
occurs within the view.
vStrokesAllowed
1 << 10
or
0x0400
Accept stroke input and send the
ViewStrokeScript
message at the end
of each stroke.
vGesturesAllowed
1 << 11
or
0x0800
Recognize gesture strokes such as scrub, highlight,
tap, double tap, caret, caret-drag, and line. Send
the
ViewGestureScript
message when the
view recognizes a gesture that it does not handle
automatically.
vShapesAllowed
1 << 16
or
0x010000
Enables shape recognition. Use only for views
based on the
clEditView
class.
vSingleUnit
1 << 8
or
0x0100
Disable the use of spatial cues (distance between
strokes). Meaningful for text recognizers only.
vNoSpaces
1 << 1
or
0x0002
Directs a view based on the
clParagraphView
class to not insert spaces between existing text and
new text.
vWidthIsParentWidth
1 << 0
or
0x0001
Extend right boundary of
clParagraphView
view to match that of its parent.

C H A P T E R 9
Recognition
Summary
9-33
View Flags Enabling Lexical Dictionaries
9
Data Structures
9
Recognition-Related User Configuration Slots
9
Use the
GetUserConfig
and
SetUserConfig
global functions to access
these slots.
Constant
Value
Description
vNumbersAllowed
1 << 13
or
0x02000
Enables recognition of numbers, monetary values (for
example, $12.25), decimal points, and mathematical
signs (+ and ).
vPhoneField
1 << 18
or
0x040000
Enables recognition of phone numbers. Note that the
set of lexical dictionaries enabled by this flag varies
with the text recognizer currently in use.
vDateField
1 << 19
or
0x080000
Enables recognition of date formats (such as March
3-95), names of months, and names of days.
vTimeField
1 << 20
or
0x0100000
Enables recognition of times.
Slot name
Notes
letterSetSelection
Text recognizer in use.
learningEnabledOption
true
enables cursive learning.
letterSpaceCursiveOption
Space between stroke groups.
timeoutCursiveOption
Time between individual strokes.
speedCursiveOption
Time spent analyzing input.
letterInFieldsOption
true
enables cursive recognizer's
letter-by-letter option in
protoLabelInputLine
views.
lettersCursiveOption
true
enables cursive recognizer's
letter-by-letter option in built-in Names
and Dates applications'
protoLabelInputLine
views.
doAutoAdd
true
adds new words to user dictionary and
auto-add dictionary automatically.
continued

C H A P T E R 9
Recognition
9-34
Summary
doTextRecognition
true
enables text recognition
unconditionally.
doShapeRecognition
true
enables shape recognition
unconditionally.
doInkWordRecognition
true
causes text recognizer to return ink
text rather than sketch ink.
Slot name
Notes

About Advanced Topics in Recognition
10-1
C H A P T E R 1 0
Recognition:
Advanced Topics
10
Figure 10-0
Listing 2-0
Table 10-0
This chapter describes advanced uses of the Newton recognition system. If you are
developing an application that supports ink text, implements specialized recognition
system behavior, or provides unusual input views, you'll need to understand one or
more topics presented here. This chapter describes
the use of
recConfig
frames. An individual view can use a
recConfig
frame
to specify its own recognition behavior, support ink text, specify baseline
information, support deferred recognition, and define input areas for single letters.
the use of text-corrector views and text-correction information.
the programmatic manipulation of system dictionaries and custom dictionaries.
Before reading this chapter, you should understand the contents of Chapter 9,
"Recognition," which provides an overview of the recognition system and
describes how to implement its most common behaviors. Depending on your
application development goals, you may also find it helpful to be familiar with
soups, as described in Chapter 11, "Data Storage and Retrieval."
About Advanced Topics in Recognition
10
This section provides conceptual information regarding
how views configure recognizers and dictionaries based on the interaction of
view flags,
recConfig
frames,
recToggle
views, and recognition-related
user preferences.
the use of
protoCharEdit
views.
deferred recognition.
How the System Uses Recognition Settings
10
A number of settings that control the behavior of the various recognizers are
specified by the system's user configuration data. All views that perform recognition
inherit behavior from these values, which is why it's rarely appropriate for individual
C H A P T E R 1 0
Recognition: Advanced Topics
10-2
About Advanced Topics in Recognition
applications to change these system-wide settings. Instead, individual views can
customize their own recognition behavior by using a
recConfig
frame or
recToggle
view to override these inherited values locally.
In practice, most views' recognition behavior is defined by a combination of
inherited and overridden values. For example, because most users tend not to
change the speed at which they write, it's common for views to use inherited values
for the
timeoutCursiveOption
slot, which specifies the relative delay required
to consider a group of input strokes complete. At the same time, individual views
may customize certain recognition settings by overriding values that would
otherwise be inherited from the system's user configuration data. For example, a
view can use a
recConfig
frame to disable the automatic addition of new words
to the user dictionary.
A view based on the
protoRecToggle
system prototype provides another way to
override inherited recognition settings. This view provides a picker that allows the
user to change recognition settings easily. Each view controlled by this picker must
provide a
_recogSettings
slot that the picker sets according to the user's
current choice of recognition settings. The value in the
_recogSettings
slot
overrides values inherited from the system's user configuration data.
Your application supplies only one
_recogSettings
slot for each
recToggle
view it provides. Because views use parent inheritance to find a
_recogSettings
slot, a single
recToggle
view and a single
_recogSettings
slot can control
the recognition behavior of one view or multiple views, depending on the
_recogSettings
slot's position in the view hierarchy. For more information, see
"Creating the _recogSettings Slot" beginning on page 10-20.
You can also provide an optional
RecogSettingsChanged
method in the
_parent
chain of any view controlled by the
recToggle
view. If a
RecogSettingsChanged
method is provided, the
recToggle
view sends this
message to
self
when the user chooses an item in the
recToggle
picker.Your
RecogSettingsChanged
method can perform any application-specific task that
is appropriate; typically, this method reconfigures recognition settings in response
to the change in the
recToggle
view's state.
Finally, any view can provide an optional
recConfig
frame that specifies the
view's recognition behavior at the local level.
Although
recConfig
frames have thus far been presented as simply an alternate
interface to the recognition system, they are actually used internally by the system
to represent the recognition behavior of each view. When the user writes, draws, or
gestures in a view, the system builds a
recConfig
frame that specifies the precise
settings of all the recognizers needed for the view. If you supply a
recConfig
frame for the view, the
recConfig
frame that the system builds is based on the
recConfig
frame you have supplied and any recognition-related user preferences
that may apply.

C H A P T E R 1 0
Recognition: Advanced Topics
About Advanced Topics in Recognition
10-3
On the other hand, if the view does not supply a
recConfig
frame, the recognition
system builds one based on the set of view flags enabled for that view, the contents
of its
dictionaries
slot (if present) and any recognition-related user preferences
that may apply. Thus, every view that performs recognition is eventually associated
with a
recConfig
frame that the system uses to perform setup tasks when the
view is opened.
Note that the
recConfig
frame actually used to configure recognition is the one
that the system builds, not the one that you supply. The
recConfig
frame that
you supply is referenced by the
_proto
slot of the
recConfig
frame that the
system builds.
The
recConfig
frame built by the system is passed to a recognition area, which is
an object used internally by the system to describe the recognition characteristics
of one or more views. Because similar views can share an area, the use of
recognition areas minimizes the reconfiguration of the recognition system required
to respond to changes in views on the screen.
A small number of recognition areas are kept in a cache. You can change the
recognition behavior of a view dynamically by specifying new recognition settings
and invalidating the area cache. The next time the view accepts input, the system
builds a new recognition area reflecting its currently-specified recognition behavior
and the dictionaries it is to use for recognition.
In addition to providing an efficient and flexible means of configuring the
recognition system programmatically,
recConfig
frames provide support for
future expansion of the recognition system. The
recConfig
frame allows
applications to specify recognition configurations in a uniform way that is not
dependent on the use of any particular recognizer engine. Although the Newton
platform currently supports only its built-in recognizers, future versions of the
system may permit the use of third-party recognizer engines.
The system provides several standard
recConfig
frames that can be placed in your
view's
recConfig
slot or used as a starting point for building your own
recConfig
frames. For descriptions of system-supplied
recConfig
frames, see
"System-Supplied recConfig Frames" (page 8-18) in Newton Programmer's
Reference.
In summary, the recognition behavior that a view exhibits is ultimately determined
by a combination of the following values:
values inherited from the system's user configuration data.
values in the view's
viewFlags
and
entryFlags
slots.
values in the view's
dictionaries
slot when the
vCustomDictionaries
flag is set.
values specified by an optional
recToggle
view, which may override values
inherited from user configuration data or supply additional values.

C H A P T E R 1 0
Recognition: Advanced Topics
10-4
About Advanced Topics in Recognition
values specified by an optional
recConfig
frame, which may override values
inherited from user configuration data, override values specified by a
recToggle
view, or supply additional values.
ProtoCharEdit Views
10
The
protoCharEdit
system prototype provides a comb-style entry view (or
comb view
) that allows the user to edit individual characters in words easily.
Figure 10-1
Example of
protoCharEdit
view
Individual character positions (or cells) in the comb view are delimited by vertical
dotted lines. Each cell that can be edited has a dotted line beneath it to indicate that
it can be changed. The user can edit a character by writing a new character over
one currently occupying a cell; the recognized value of the character is displayed in
the cell. When the user taps a cell, it displays a picker containing the best
interpretations of the input strokes. The user can correct the character in that
position by choosing an item from the picker.
The user can delete an individual character by tapping it and then selecting
"Delete" from the picker that is displayed. Alternatively, the user can delete one or
more characters by writing the scrub gesture over one or more cells.
The user can insert a space by tapping on the cell at the position that the new space
is to occupy and choosing Insert from the picker that is displayed.
Alternatively, the user can enter the caret gesture in a cell to perform the same
operation. When an insertion takes place in a cell already occupied by a character,
the comb view shifts that character and those comprising the rest of the word to
the right.
Tapping a blank cell before or after a word in the comb view displays a list of
punctuation characters that may be appropriate for that position.
The recognition behavior of a
protoCharEdit
view is controlled by values you
supply in an optional
template
slot. If this slot's value is
nil
, the comb view is
said to be unformatted because input is not restricted in any way. The recognition
behavior of an unformatted comb view is similar to that of the text-corrector view
provided by the built-in Notepad application: all characters are allowed, insertion
and deletion are supported fully, and spaces are added at the ends of words to allow
them to be extended.

C H A P T E R 1 0
Recognition: Advanced Topics
About Advanced Topics in Recognition
10-5
A formatted comb view utilizes a template you define which specifies characteristics
of the view's behavior or appearance. A comb view's template may specify an
initial value for the string that the view displays, the editing characteristics for each
position in the comb view, and filters that restrict the values recognized in each of
these positions. The template may also define methods for initializing and post-
processing the string displayed by the comb view. These methods may be useful
when the string displayed in the comb needs to be different from the input string or
when an externally-displayed string must differ from its internal representation.
When the user taps a character in a formatted comb view, it displays the list of
characters specified by its template, if that list contains ten or fewer items. (Note
that this value may change in future platforms.) Otherwise, it displays the list of
top-ranking alternate interpretations returned by the text recognizer.
Ambiguous Characters in protoCharEdit Views
10
Because there are several characters that are ambiguous in appearance--for
example, the value zero (
0
) and the letter O, or the value one (
1
) and the letter L--
the built-in system fonts provide enhanced versions of these characters that
improve their readability. However, continuous use of these characters can be
distracting to the user. Thus, these fonts contain character codes that map to
alternate versions of the ambiguous characters, and the system provides functions
for mapping between the codes for the normal and enhanced characters. For more
information, see the descriptions of the
MapAmbiguousCharacters
and
UnMapAmbiguousCharacters
functions under "protoCharEdit Functions and
Methods" (page 8-47) in Newton Programmer's Reference.
Deferred Recognition
10
Deferred recognition is the ability to convert strokes to text at some time other
than when the strokes are first entered on the screen. Views that are to perform
deferred recognition must be capable of capturing ink text or ink. For example, a
view that bases its
recConfig
frame on the system-supplied
ROM_InkOrText
frame and uses a
protoRecToggle
view to configure the recognition system
need not do anything more to provide the deferred recognition feature.
This section describes the user interface to deferred recognition and then provides a
programmer's overview of this feature.
User Interface to Deferred Recognition
10
A view that performs deferred recognition uses the same settings as it would for
real-time text recognition: a combination of settings specified by user preferences
and settings specified by the view flags or
recConfig
frame associated with the
view in which recognition takes place.

C H A P T E R 1 0
Recognition: Advanced Topics
10-6
About Advanced Topics in Recognition
The user can enter unrecognized ink by enabling ink text or sketch ink. In this
mode, strokes appear as ink. To convert the ink to text, the user double-taps the ink
word; the user can cause multiple words to be recognized by selecting them
beforehand and then double-tapping the selection. The recognition system responds
by inverting the ink word or selection, as shown in Figure 10-2, and returning the
recognized text, which replaces the selection.
Figure 10-2
User interface to deferred recognition, with inverted ink
Programmer's Overview of Deferred Recognition
10
Deferred recognition is available in views based on the
clEditView
class or
clParagraphView
views that support ink text. This feature works with any
amount of input, from a single letter to a full page of text.
To initiate deferred recognition, the user double-taps the child views that display
the ink to be recognized. The recognized text is added to an edit view as if the user
had just written it. That is, a new
clParagraphView
child is added, or the
recognized text is appended to a nearby
clParagraphView
. After the recognized
text has been added, the original view containing the sketch ink or the ink text is
removed from its edit view parent.
Deferred recognition also invokes the
ViewAddChildScript
and
ViewDropChildScript
methods of the recognized text and unrecognized ink
views. Words added to nearby paragraphs invoke
ViewChangedScript
methods for those paragraphs, updating the
text
slot in those views; for some
paragraph views, the
viewBounds
slot is updated as well.
You can pass
recConfig
frames to the global functions
Recognize
,
RecognizePara
, and
RecognizePoly
to implement your own form of
deferred recognition. For more information, see "Deferred Recognition Functions"
(page 8-89) in Newton Programmer's Reference.

C H A P T E R 1 0
Recognition: Advanced Topics
Using Advanced Topics in Recognition
10-7
Compatibility Information
10
The
ReadDomainOptions
function is obsolete. It has been replaced by the
ReadCursiveOptions
function.
The
AddToUserDictionary
function is obsolete. It has been replaced by the
AddWord
method of the review dictionary.
Two new dictionary constants,
kMoneyOnlyDictionary
and
kNumbersOnlyDictionary
, provide access to new lexical dictionaries used for
recognizing monetary and numeric values, respectively.
Most lexical dictionaries are no longer locale-specific--aside from a few exceptions,
each lexical dictionary is used for all locales. For detailed information, see
"System-Supplied Dictionaries" (page 8-16) in Newton Programmer's Reference.
All of the dictionary information provided by previous versions of system software
is still present in version 2.0; however, certain dictionary constants now provide a
superset of the information they previously referenced, as follows:
The
kLastNamesDictionary
is obsolete. This information is now included
in the
kSharedPropersDictionary
dictionary.
The
kLocalCompaniesDictionary
constant is obsolete.This information is
now included in the
kSharedPropersDictionary
dictionary.
The
kLocalStatesAbbrevsDictionary
constant is obsolete.This
information is now included in the
kSharedPropersDictionary
dictionary.
The
kDateLexDictionary
constant is obsolete. It has been replaced by the
kLocalDateDictionary
constant.
The
kTimeLexDictionary
constant is obsolete. It has been replaced by the
kLocalTimeDictionary
constant.
The
kMoneyLexDictionary
constant is obsolete. This information is now
included in the
kLocalNumberDictionary
dictionary.
The
kNumberLexDictionary
constant is obsolete. This information is now
included in the
kLocalNumberDictionary
dictionary.
Using Advanced Topics in Recognition
10
This section describes how to provide advanced recognition behaviors. It presumes
understanding of conceptual material provided in this and other chapters. Topics
discussed here include
using
recConfig
frames to specify recognition behavior
changing the recognition behavior of views dynamically
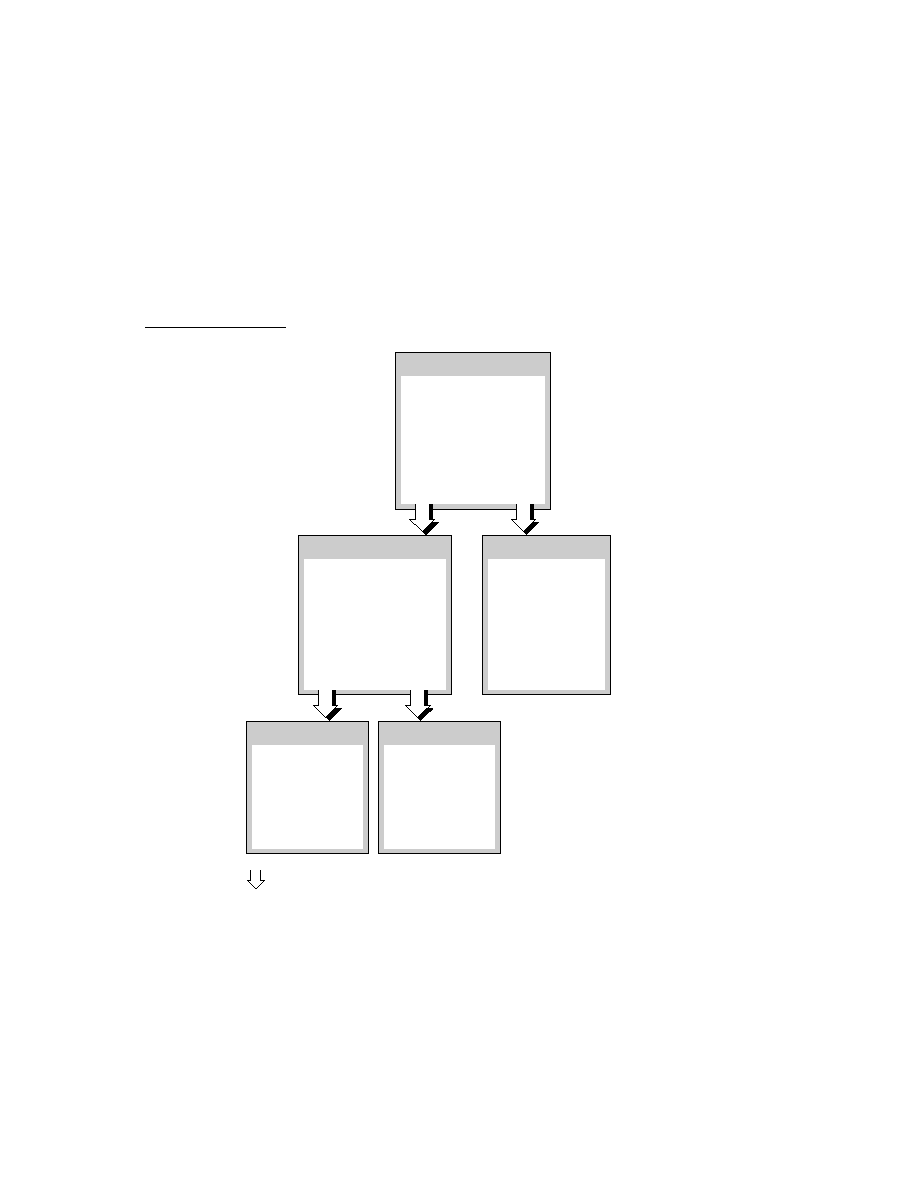
C H A P T E R 1 0
Recognition: Advanced Topics
10-8
Using Advanced Topics in Recognition
using
protoRecToggle
views to specify recognition behavior
defining single-letter input areas within a view
accessing text correction information
using custom dictionaries for recognition
manipulating the review dictionary (includes the user dictionary, expand
dictionary, and auto-add dictionary)
using
protoCharEdit
views for correcting text
using stroke bundles
Using recConfig Frames
10
This section describes how to use a
recConfig
frame to specify a view's
recognition behavior. Note that the use of view flags is generally the best (and
simplest) way to configure views to recognize common input such as words and
shapes. You need not use a
recConfig
frame unless you require some recognition
behavior that cannot be provided using the view's
viewFlags
and
dictionaries
slots. For example, the use of a
recConfig
frame is required for
views that restrict recognition of individual characters to a specified set, or
implement customized forms of deferred recognition.
This section describes the use of
recConfig
frames for
enabling recognizers
supporting ink text
fine-tuning recognition options
specifying the dictionaries used for recognition
A
recConfig
frame can be used to specify any set of recognizers and
dictionaries, including combinations not supported by the view flag model;
however, views controlled by
recConfig
frames are subject to the same
limitations as all views that perform recognition:
The text recognizer (printed or cursive) made available to all views is determined
by the value of the
letterSetSelection
slot in the system's user
configuration data. Individual views cannot override this system-wide setting.
The system's ability to save learning data is enabled by the value of the
learningEnabledOption
slot in the system's user configuration data.
Individual views cannot override this system-wide setting.
Do not include
letterSetSelection
or
learningEnabledOption
slots in
your
recConfig
frame.

C H A P T E R 1 0
Recognition: Advanced Topics
Using Advanced Topics in Recognition
10-9
Creating a recConfig Frame
10
For any view that is to use a
recConfig
frame, you must supply a
recConfig
slot, usually by defining it in your view's template. The frame in your view's
recConfig
slot must be modifiable; that is, it must be RAM-based. When your
view template supplies a
recConfig
frame, the view system builds a RAM-based
recConfig
frame along with the view--you need not do anything more to cause
the view to use the
recConfig
frame.
To create your own
recConfig
frame at run time, you need to call the
PrepRecConfig
function to create a RAM-based
recConfig
frame that the
system can use. Although you could obtain similar results by cloning a
recConfig
frame that your view template defines, using the
PrepRecConfig
function is more efficient:
The
PrepRecConfig
function creates a smaller frame than that obtained by
cloning your view template's
recConfig
frame.
The frame that the
PrepRecConfig
function returns can be used as it is by the
recognition system. Any other frame that you place in the view's
recConfig
slot is used by the system to create the
recConfig
frame actually used by the
view, with the result being the creation of two frames in RAM rather than just one.
Consistent use of this function to create
recConfig
frames saves RAM by
permitting similar
recConfig
frames to share the same frame map.
A function similar to the
PrepRecConfig
function, the
BuildRecConfig
function, is provided for debugging use. Do not use the
BuildRecConfig
function to create your RAM-based
recConfig
frame. The argument to the
BuildRecConfig
function is the view itself, rather than its
recConfig
frame.
This function builds an appropriate
recConfig
frame for the specified view,
regardless of whether the view defines one. The system does not use the
recConfig
frame that this function returns, however--as stated previously, this
frame is for debugging use only.
IMPORTANT
The contents of the
inputMask
slot in the view's
recConfig
frame must match the input mask (the recognition-related bits)
provided by the view's
viewFlags
slot. For more information on
this slot and others that the
recConfig
frame may contain, see
"protoRecConfig" (page 8-36) in Newton Programmer's
Reference.
You can base your
recConfig
frame on one of the system-supplied
recConfig
frames by simply placing the appropriate constant in your view template's
recConfig
slot. Alternatively, you can place in this slot a frame that uses its
_proto
slot to reference one of the system-supplied
recConfig
frames. A third
way to define a
recConfig
frame is to supply all necessary values yourself. The

C H A P T E R 1 0
Recognition: Advanced Topics
10-10
Using Advanced Topics in Recognition
exact complement of slots and values required is determined by the recognition
features your
recConfig
frame is intended to supply; for more information,
including complete descriptions of the system-supplied
recConfig
frames, see
"System-Supplied recConfig Frames" (page 8-18) in Newton Programmer's
Reference.
Once you've created a RAM-based
recConfig
frame, you must cause the
recognition system to use it. This process is described in "Changing Recognition
Behavior Dynamically" beginning on page 10-17. For a code example showing
how to create a
recConfig
frame based on one of the system-supplied
prototypes, see "Creating Single-Letter Input Views" beginning on page 10-15.
Using RecConfig Frames to Enable Recognizers
10
To enable or disable recognizers unconditionally, supply appropriate values
for the
doTextRecognition
,
doShapeRecognition
, or
doInkWordRecognition
slots your view's
recConfig
frame provides. For
descriptions of these slots, see "protoRecConfig" (page 8-36) in Newton
Programmer's Reference.
For some operations, you may wish to restrict the recognizers that the user can
enable in a view while still respecting the rest of the preferences indicated in the
system's user configuration data. The optional slots
allowTextRecognition
and
allowShapeRecognition
in the view's
recConfig
frame are intended
for use with views having an input mask that is
vAnythingAllowed
. For
complete descriptions of these slots, see "protoRecConfig" (page 8-36) in Newton
Programmer's Reference. Note that you can also allow the user to set the values of
these slots from a
protoRecToggle
view instead of setting them yourself in the
recConfig
frame.
Views that use the
allow
Something
Recognition
slots allow the user to turn on
only the recognizers that you specify while respecting all other user preferences.
Any subset of
allow
Something
Recognition
slots can be specified to allow
the user to enable any appropriate combination of recognizers from the
protoRecToggle
view or user preferences.
For example, setting the value of the
allowTextRecognition
slot to
true
allows the user to enable the text recognizer in the view controlled by the
recConfig
frame while the
doTextRecognition
slot in the system's user
configuration data holds a non-
nil
value.
Returning Text, Ink Text or Sketch Ink
10
This section discusses the use of
recToggle
views with system-supplied view
classes and
recConfig
frames to provide views that can display text, ink text, or
sketch ink.

C H A P T E R 1 0
Recognition: Advanced Topics
Using Advanced Topics in Recognition
10-11
Sketch ink, like shapes, is displayed only in views based on the
clEditView
class. As a rule of thumb, consider sketch ink and ink text to be mutually exclusive
when configuring recognition in views; for best results, configure your input view
to recognize only one of these two data types.
Views based on the
clEditView
class handle sketch ink and ink text automatically.
For other views, the system invokes the view's
ViewInkWordScript
or
ViewRawInkScript
method when ink arrives. For more details, see the
descriptions of these methods in Newton Programmer's Reference.
The system-supplied
ROM_rcInkOrText
constant provides a ready-to-use
recConfig
frame that allows views based on the
clParagraphView
class to
contain ink text in addition to normal text. To use this
recConfig
frame to create
a view that supports ink text, you'll need to take the following steps:
Create a view template that protos from the
clParagraphView
class.
In your view template, create a
recConfig
slot that holds the
ROM_rcInkOrText
constant. For more information, see "Creating a recConfig
Frame" beginning on page 10-9.
Provide a
protoRecToggle
view that allows the user to choose text or ink
text settings; if your application provides a status bar, you need to provide the
recToggle
view as one of its children. For more information, see "Creating
the recToggle View" beginning on page 10-19.
Provide a
_recogSettings
slot at an appropriate position in the
recToggle
view's
_parent
chain. For more information see "Creating the _recogSettings
Slot" beginning on page 10-20.
Normally, the input view tries to recognize input using all currently enabled
recognizers. If no recognizers are enabled or if recognition fails for some reason--
for example, due to messy input or some sort of error--then the view system
converts the input strokes into ink. The
doInkWordRecognition
slot in the
input view's
recConfig
frame specifies the kind of ink that the system creates
from the input strokes.
When the
doInkWordRecognition
slot holds a non-
nil
value, the system
returns ink text; when this slot holds the
nil
value, the system returns sketch ink.
This slot is described fully in "protoRecConfig" (page 8-36) in Newton
Programmer's Reference. Table 10-1 on page 10-12 summarizes the kinds of data
returned by the recognition system when recognition fails in an edit view or
paragraph view that is controlled by a
recToggle
view.
Note that when the input view is set to recognize shapes, the smoothed and cleaned
up ink that is returned may be ink text but is more likely to be a curve shape. Aside
from the failure of shape recognition, the only time raw ink is returned to the view
is when its associated
recToggle
is set to "Sketches".

C H A P T E R 1 0
Recognition: Advanced Topics
10-12
Using Advanced Topics in Recognition
As an alternative to using a
recConfig
frame to provide support for ink text, you
can set your
clParagraphView
view's
vAnythingAllowed
mask. Although
this is truly the easiest way to support ink text, it is less-preferred because it
provides you the least control over the view's recognition behavior. A variation on
this approach that may provide better performance is to enable an appropriate set
of view flags rather than setting the
vAnythingAllowed
mask. The best way to
support ink text, however, is through the use of a
recConfig
frame that provides
appropriate values.
Regardless of the approach you take to provide ink text support, you should test
your view's recognition behavior under both text recognizers, and under any other
configurations your
recToggle
view provides.
To support both ink text and sketch ink in a single view, or to take other application-
specific action in response to changes in the state of a
recToggle
view, your view
can provide a
RecogSettingsChanged
method that reconfigures the its
recognition behavior dynamically. For more information, see "Changing
Recognition Behavior Dynamically" beginning on page 10-17.
For more information on
protoRecToggle
views, see "Using protoRecToggle
Views" beginning on page 10-19. For detailed descriptions of
recConfig
frames,
see "protoRecConfig" (page 8-36) and "System-Supplied recConfig Frames"
(page 8-18) in Newton Programmer's Reference.
Fine-Tuning Text Recognition
10
To fine-tune either text recognizer's interpretation of input strokes, you can add the
optional
speedCursiveOption
,
timeoutCursiveOption
, and
letterSpaceCursiveOption
slots to the
recConfig
frame. These
mechanisms for controlling recognizer behavior may affect various recognizers
differently. For more information, see "protoRecConfig" (page 8-36) in Newton
Programmer's Reference. For a discussion of the
dictionaries
slot, see "Using
Your RAM-Based Custom Dictionary" beginning on page 10-28.
Table 10-1
Recognition failure in paragraph or edit view controlled by
recToggle
Recognizer enabled
by
recToggle
view
Returns on failure
Text Ink
text
Ink text
Ink text (does not fail)
Shapes
Sketch ink, smoothed
Sketch ink
Nothing (occurs rarely)

C H A P T E R 1 0
Recognition: Advanced Topics
Using Advanced Topics in Recognition
10-13
Manipulating Dictionaries
10
You can control the view's use of dictionaries by including in your
recConfig
frame the
dictionaries
,
rcSingleLetters
, or
inhibitSymbolsDictionary
slots as appropriate. These slots are described in
"protoRecConfig" (page 8-36) in Newton Programmer's Reference.
Single-Character Input Views
10
When recognizing single characters, the recognizer sometimes has difficulty
determining individual characters' baseline or size; for example, it can be difficult
to distinguish between an upper case P and a lower case p when relying strictly on
user input. If you know where the user will be writing with respect to a
well-defined baseline, you can provide an
rcBaseInfo
or
rcGridInfo
frame to
specify to the recognition system precisely where characters are written.
The rcBaseInfo Frame
10
The
rcBaseInfo
frame is especially valuable in improving the recognition of
single characters, for which it is sometimes difficult to derive baseline or letter-size
values from user input.
Figure 10-3 depicts the editing box that an
rcBaseInfo
frame defines.
Figure 10-3
Single-character editing box specified by
rcBaseInfo
frame
The NewtonScript code used to create the baseline information for the editing box
shown in Figure 10-3 looks like the following example.
rcBaseInfo := {
base:
140,// global y-coordinate of baseline
smallHeight:15,// height of a lower case x
bigHeight:30,// height of an upper case X
descent:15,// size of descender below baseline
};
base
descent
smallHeight
bigHeight
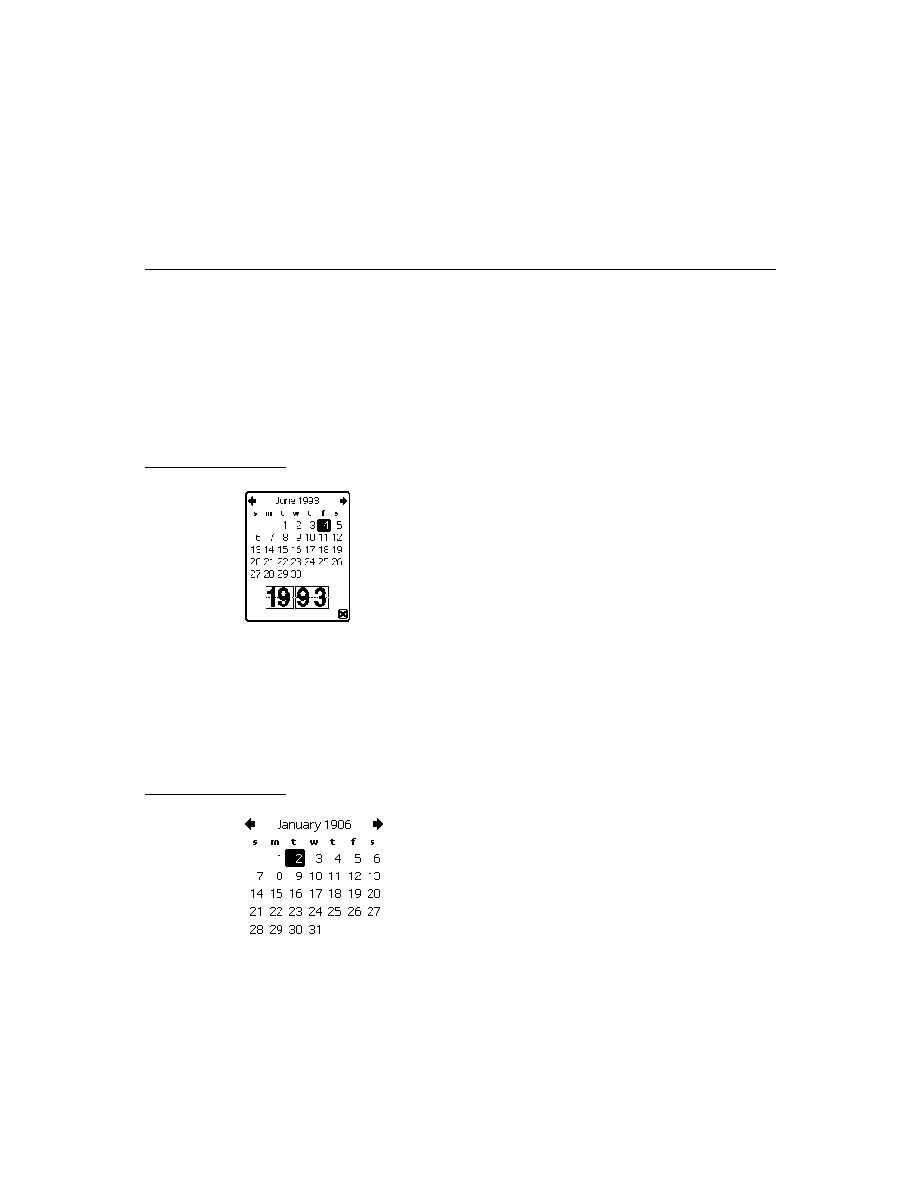
C H A P T E R 1 0
Recognition: Advanced Topics
10-14
Using Advanced Topics in Recognition
To obtain the best performance and to conserve available memory, create your
rcBaseInfo
frame by cloning the frame provided by the
ROM_canonicalBaseInfo
constant. Store your frame in a slot named
rcBaseInfo
in your input view's
recConfig
frame.
For a detailed description of the
rcBaseInfo
frame, see "Data Structures Used in
recConfig Frames" (page 8-24) in Newton Programmer's Reference.
The rcGridInfo Frame
10
The
rcGridInfo
frame allows you to define the position of one or more single-
letter input areas within a single input view. Its purpose is to facilitate the creation
of views having multiple single-letter input areas, such as might be used by a
crossword puzzle application. Providing a separate view for each single letter input
area would be extremely inefficient; the use of an
rcGridInfo
frame allows you
to draw one view that provides the illusion of many input views, by defining to the
recognizer the size of an individual input area and the spacing between input areas.
Figure 10-4 depicts an example of the grid that an
rcGridInfo
frame defines.
The boxes shown in this figure are not views themselves, just lines on the screen
that indicate the location of the input areas to the user. The recognition behavior is
provided by the view that draws these boxes; the
rcGridInfo
frame helps the
recognizer determine the precise location of user input, and, consequently, where to
display its output. By providing the proper slots, you can use an
rcGridInfo
frame to define a row, column, or matrix (as shown in the figure) of single-letter
input areas within a view.
Figure 10-4
Two-dimensional array of input boxes specified by
rcGridInfo
frame
boxRight
boxBottom
boxTop
xSpace
ySpace
boxLeft

C H A P T E R 1 0
Recognition: Advanced Topics
Using Advanced Topics in Recognition
10-15
If you provide a grid in which the user is to write characters or words, you need to
use an
rcGridInfo
frame to define the grid to the text recognizer. For example,
the
protoCharEdit
system prototype uses an
rcGridInfo
frame internally to
define the input areas (cells) in the comb view it provides.
The recognizer uses the information in an
rcGridInfo
frame to make character-
segmentation decisions. You can use the
rcGridInfo
frame in conjunction with
an
rcBaseInfo
frame to provide more accurate recognition within boxes in a
single view. Recognition in the most recently used grid box begins as soon as the
user writes in a new box in the grid.
The NewtonScript code used to create the grid shown in Figure 10-4 looks like the
following example.
rcGridInfo := {
boxLeft: 100,// x coordinate of left of top-left box
boxRight:145,// x coordinate of right of top-left box
xSpace:55,// x distance from boxLeft to boxLeft
boxTop: 50,// y coordinate of top of top-left box
boxBottom:95,// y coordinate of bottom of top-left box
ySpace:55// y distance from boxTop to boxTop
};
To obtain the best performance and to conserve available memory, create your
rcGridInfo
frame by cloning the frame provided by the
ROM_canonicalCharGrid
constant. Store your frame in a slot named
rcGridInfo
in your view's
recConfig
frame.
For a detailed description of the
rcGridInfo
frame, see "Data Structures Used in
recConfig Frames" (page 8-24) in Newton Programmer's Reference
Creating Single-Letter Input Views
10
The following code fragment creates a single-letter input view's
recConfig
frame. This frame, which includes
rcBaseInfo
and
rcGridInfo
frames, is
based on the
ROM_rcSingleCharacterConfig
frame supplied by the system.
// specify box (or horizontal array of boxes)
// into which character(s) are written.
myView := {
recConfig: ROM_rcsinglecharacterconfig,
...}
// height of a lowercase letter
constant kSmallHeight := 11;

C H A P T E R 1 0
Recognition: Advanced Topics
10-16
Using Advanced Topics in Recognition
// indent from left of view to first letter
constant kBoxIndent := 4;
// width of a single box in the grid
constant kCellWidth := 24;
// create editable recConfig frame and set initial values
myView.ViewSetupDoneScript := func()
begin
// prebuild RAM copy that we can change
recConfig := PrepRecConfig(recConfig);
// set these same flags in myView.viewFlags
recConfig.inputMask :=
vClickable+vGesturesAllowed+vCustomDictionaries;
// get global bounds of enclosing view
local box := :GlobalBox();
// calc left edge of boxes in grid
local leftX := box.left + kBoxIndent;
// specify baseline and expected letter height
recConfig.rcBaseInfo :=
{
// baseline for writing
base: box.top + viewLineSpacing,
// height of a small letter
smallHeight: kSmallHeight,
};
// specify horizontal info for an array of boxes
recConfig.rcGridInfo :=
{
// left edge of first box
boxLeft: leftX,
// right edge of first box
boxRight: leftX + kCellWidth,
// width to left edge of next box
xSpace: kCellWidth,
};
// use new settings
PurgeAreaCache();
end;

C H A P T E R 1 0
Recognition: Advanced Topics
Using Advanced Topics in Recognition
10-17
The
PurgeAreaCache
function causes the recognition system to adopt the
settings that the
recConfig
frame specifies. This function is explained in more
detail in the next section, "Changing Recognition Behavior Dynamically."
Normally, you need not call the
PurgeAreaCache
function when specifying a
recConfig
frame as part of a view's template. However, you must call this
function to change a
recConfig
frame at run time. For example, the previous
code fragment calculates values determining the size and location of the grid view
according to the size of the enclosing parent view; thus, the parent view must
already exist before the grid view's
recConfig
frame can be constructed.
Therefore, the grid view's
recConfig
frame is constructed from within the
ViewSetupDoneScript
method of the parent view that encloses the grid view.
At the time the
viewSetupDoneScript
method is executed, the system has
already used the
recConfig
frame supplied by the enclosing view's template. In
order to cause the system to use the new
recConfig
frame--the one that defines
the grid view--the
ViewSetupDoneScript
method must call the
PurgeAreaCache
function.
Changing Recognition Behavior Dynamically
10
To change a view's recognition behavior dynamically, you must indicate the view's
new configuration (by setting view flags, changing the view's
dictionaries
slot, or defining a
recConfig
frame) and make the recognition system use the
new settings. The system supplies three functions that you can use to make the
system adopt new recognition settings; each is appropriate for a particular situation.
The function you use to adopt new settings depends on whether you are changing
the recognition behavior of all views or just changing the behavior of individual
views. Changes to user preferences for recognition affect the recognition behavior
of all views. On the other hand, changing the value of a single view's
viewFlags
or
recConfig
slot affects that view only.
Note
It is recommended that you do not change any user settings
without confirmation from the user.
To change the recognition behavior of a single view dynamically, use the global
function
SetValue
to change the value of the view's
viewFlags
slot or
recConfig
slot. In addition to setting the new value, the
SetValue
function
invalidates the area cache, which is a buffer that stores a small number of
recognition areas. Your changes to recognition behavior are incorporated when the
recognition area for your view is rebuilt.

C H A P T E R 1 0
Recognition: Advanced Topics
10-18
Using Advanced Topics in Recognition
W A R N I N G
The
SetValue
function may not be appropriate for
setting the
entryFlags
slot in views that do not
have a
viewFlags
slot. In these kinds of views, set the
value of the
entryFlags
slot directly and then call the
PurgeAreaCache
function to invalidate the area cache. If you
have changed values in the system's user configuration data, call
the
ReadCursiveOptions
function instead of the
PurgeAreaCache
function.
You can also use the
PurgeAreaCache
function to invalidate the area cache. This
function provides an efficient way to force the reconstruction of recognition areas
after you've changed the values of slots in multiple views. Note, however, that this
function does not resynchronize the recognition system with changes in the
system's user configuration data. Do not call
PurgeAreaCache
to effect changes
in user preferences for recognition.
User preferences that affect recognition behavior are saved as slot values in the
system's user configuration data. Some of these values, such as that of the
timeoutCursiveOption
slot, affect all views; others affect only views that set
the
vAnythingAllowed
mask. For detailed information about the slot you need
to set, see its description in "System-Wide Settings" (page 8-2) in Newton
Programmer's Reference.
When setting user preferences for recognition, do not modify the system's user
configuration data directly. Instead, use the
GetUserConfig
and
SetUserConfig
global functions to manipulate user configuration values.
After calling the
SetUserConfig
function to set one or more new values, you
must call the
ReadCursiveOptions
function to cause the recognition system to
use the new values. Do not call the
PurgeAreaCache
function after changing
values in the system's user configuration data--this function does not even test for
changes to user preferences. Because the
ReadCursiveOptions
function
invalidates the area cache, you need not call the
PurgeAreaCache
function after
calling the
ReadCursiveOptions
function.
IMPORTANT
The view's
viewFlags
slot must contain the same recognition
flags as the
inputMask
slot in its
recConfig
frame. Certain
view system operations depend on the
viewFlags
slot being set
up properly.

C H A P T E R 1 0
Recognition: Advanced Topics
Using Advanced Topics in Recognition
10-19
Using protoRecToggle Views
10
A
protoRecToggle
view changes the recognition behavior of views by overriding
values inherited from the system's user configuration data. Note that values in the
view's
recConfig
frame override settings specified by the
protoRecToggle
view.
The
protoRecToggle
view is usually used with
clEditView
views that set the
vAnythingAllowed
mask or
clParagraphView
views that support ink text.
Take the following steps to use a
protoRecToggle
view.
Create the
recToggle
view in NTK. If your application has a status bar, you
need to provide the
recToggle
view as a child of the status bar.
Configure input views appropriately to support the choices your
recToggle
view provides. To do so, you need to provide an appropriate
recConfig
frame
or set the
vAnythingAllowed
mask for each view that is to be controlled by
the
recToggle
view.
Provide a
_recogSettings
slot at a place in the
_parent
chain that allows
each view controlled by the
recToggle
view to inherit this slot.
You can take the following optional steps to customize your
recToggle
view's
appearance or behavior:
Provide a
_recogPopup
slot specifying the items to be included in the
protoRecToggle
picker.
Implement a
RecogSettingsChanged
method in the
_parent
chain of any
view controlled by the
recToggle
view.
The next several sections describes these steps in detail.
Creating the recToggle View
10
To create a
recToggle
view, you'll first need to sketch it out in the NTK layout
editor. When you do so, you'll notice that regardless of where you draw it, the view
will appear in the upper-left corner of the layout. This is because the
recToggle
view is intended to be displayed as a child of the status bar in applications that
have one.
When a recToggle view is a child of your application's status bar, the view system
positions the
recToggle
view on the status bar automatically, ignoring the value
of the
recToggle
view template's
viewBounds
slot in the process. When the
recToggle
view is not a child of the status bar, you must create a
viewBounds
slot for it and set appropriate values for this slot.

C H A P T E R 1 0
Recognition: Advanced Topics
10-20
Using Advanced Topics in Recognition
Configuring Recognizers and Dictionaries for recToggle Views
10
Regardless of whether you use a
recConfig
frame or view flags to specify your
view's recognition behavior, the view must be capable of enabling recognizers and
dictionaries appropriate for each choice in the
recToggle
picker. If your view
does not support all of the recognition settings provided by the default
recToggle
view, you need to provide a
_recogPopup
slot that restricts the choices appearing
in the picker that the
recToggle
view displays. For more information, see
"Providing the _recogPopup Slot" beginning on page 10-22.
If you are using a
recConfig
frame to specify your view's recognition behavior,
you can place the
ROM_rcPrefsConfig
constant in your
recConfig
frame's
_proto
slot to provide a general-purpose
recConfig
frame that allows
recognition of all forms of pen input. Note that you must also enable recognition
behavior and dictionaries as appropriate in order to produce useful behavior.
Creating the _recogSettings Slot
10
Applications that use a
recToggle
view must provide a
_recogSettings
slot
in a view that is a parent to both the
recToggle
view and the input view it
controls. Your view template should specify an initial value of
nil
for this slot.
Each time the user chooses an item from the
recToggle
picker, it saves a value
representing its current setting in this slot. You can preserve the user's recognition
settings by saving the contents of this slot when your application closes and
restoring this slot's value when your application reopens.
When a single
recToggle
view controls recognition for all of your application's
views, the
_recogSettings
slot can reside in the application's base view, as
shown in Figure 10-5.
This approach can be used to synchronize the recognition behavior of multiple
views; for example, the built-in Notes application uses a single
recToggle
view
to control the recognition behavior of all currently visible notes. All of the views
controlled by a single
recToggle
view must provide the same set of recognizers
and dictionaries.
When each of several
recToggle
views must control individual input views, you
must provide a
_recogSettings
slot for each
recToggle
view at an
appropriate place in the
_parent
chain of each view that performs recognition, as
shown in Figure 10-6.

C H A P T E R 1 0
Recognition: Advanced Topics
Using Advanced Topics in Recognition
10-21
Figure 10-5
One
recToggle
controls all views
Figure 10-6
Each
recToggle
view controls a single input view
Input Strokes
recognized as
recognized as
recognized as
appBase
myRecToggle
Input Strokes
recognized as
recognized as
recognized as
appBase
recToggle3
recToggle2
recToggle1

C H A P T E R 1 0
Recognition: Advanced Topics
10-22
Using Advanced Topics in Recognition
When the view receives input, it uses parent inheritance to find configuration
information. If a
_recogSettings
slot exists in the view's
_parent
chain, the
view uses the value of this slot, along with values supplied by an optional
recConfig
frame and values inherited from the system's user configuration data.
The
recToggle
view's
ViewSetupFormScript
method uses the value of the
_recogSettings
slot to set the state of the
recToggle
view. To restore the
recognition settings that were in effect the last time your application was used, you
can save the value of the
_recogSettings
slot when the application closes and
restore the value of this slot when the application reopens. If you prefer that the
recToggle
view always open to a default setting, rather than a saved one, you
can place the value
nil
in the
_recogSettings
slot when your application opens.
Providing the _recogPopup Slot
10
You can customize the appearance and behavior of your
recToggle
view by
providing a
_recogPopup
slot in its view template. This slot contains an array of
symbols corresponding to items included in the picker that the
recToggle
view
displays. The first item in the array appears at the top of the picker and specifies the
default recognizer enabled by the
recToggle
view. The picker includes subsequent
items in the order in which they appear in the array.
Table 10-2 summarizes the symbols that may appear in the
_recogPopup
slot,
along with the corresponding item each produces in the
recToggle
picker.
To specify that the
recToggle
view enable a default recognizer other than the one
specified by the first symbol in the
_recogPopup
array, your
recToggle
view's
template can provide a
defaultItem
slot. This slot holds an integer value
specifying the array element to be used as the default.
Table 10-2
Symbols appearing in the
_recogPopup
slot
Symbol
Represents
Picker item
'recogText
Text recognizer
Text
'recogInkText
Ink text
Ink Text
'recogShapes
Shape recognizer
Shapes
'recogSketches
Raw ink
Sketches
'recToggleSettings
Handwriting Recognition
preferences slip
Preferences
'pickSeparator
No selection
Dashed line

C H A P T E R 1 0
Recognition: Advanced Topics
Using Advanced Topics in Recognition
10-23
Avoid including inappropriate items in the
recToggle
popup, such as an ink text
item for a view that does not support ink text. It is your responsibility to ensure that
the
_recogPopup
array includes only symbols representing valid choices for the
view that the
recToggle
configures.
Accessing Correction Information
10
As words are recognized, the system saves correction information that includes
the stroke bundle. (See "Unrecognized Strokes" on page 9-7.)
alternate interpretations returned by the recognizer. (See "Classifying Strokes"
on page 9-3.)
learning data. (See "Correction and Learning" on page 9-13.)
You can call the
GetCorrectInfo
global function at any time to obtain
correction information for recently-recognized words. This function returns a
correctInfo
frame based on the
protoCorrectInfo
system prototype.
The
info
slot in the
correctInfo
frame holds an array of
wordInfo
frames
based on the
protoWordInfo
system prototype. Each
wordInfo
frame
represents a single written word.
The
max
slot in the
correctInfo
frame specifies the maximum number of words
for which it holds correction information. When adding a new element to the
info
array will cause this array to exceed the size specified by the
max
slot, the system
removes the first element of the
info
array, uses its learning data if necessary, and
adds the new
wordInfo
frame to the
info
array.
The
correctInfo
frame provides a number of methods that you can use to
manipulate its contents; for more information, see "CorrectInfo Functions and
Methods" (page 8-54) in Newton Programmer's Reference.
Each
wordInfo
frame specifies the following information:
the view that contains the word.
the position of the word within the
clParagraphView
view that displays it.
the list of alternate interpretations of the input strokes.
an identifier specifying the recognizer that interpreted the input.
a stroke bundle (optional).
learning data (optional).
As an alternative to obtaining
wordInfo
frames from the
correctInfo
frame,
you can extract these frames from the word unit passed to an optional
ViewWordScript
method that your view provides. For a description of this
method, see "Application-Defined Recognition Methods" (page 8-66) in Newton
Programmer's Reference.

C H A P T E R 1 0
Recognition: Advanced Topics
10-24
Using Advanced Topics in Recognition
The
wordInfo
frame provides methods that you can use to manipulate its
contents; for more information, see "WordInfo Methods" (page 8-62) in Newton
Programmer's Reference.
The alternate interpretations of a recognized word are provided as
wordInterp
frames based on the
protoWordInterp
system prototype. An array of
wordInterp
frames resides in the
wordInfo
frame's
words
slot.
Each
wordInterp
frame contains the following information:
a string that is one interpretation of the original input strokes.
a score indicating the recognizer's confidence in the accuracy of the interpretation.
the dictionary identifier of the recognized word (for internal use only).
the position occupied by this word in the original list of interpretations returned
by the recognizer.
For more information, see the descriptions of the
protoCorrectInfo
,
protoWordInterp
, and
protoWordInfo
prototypes in Newton Programmer's
Reference
.
You can provide an optional
ViewCorrectionPopupScript
method that
modifies or replaces the picker that displays correction information when a word is
double-tapped. For a description of this method, see "Application-Defined
Recognition Methods" (page 8-66) in Newton Programmer's Reference.
Using Custom Dictionaries
10
In addition to the system-supplied dictionaries, your application can use custom
dictionaries to facilitate the recognition of specialized vocabulary such as medical
or legal terms. It's relatively easy to create a RAM-based enumerated dictionary at
run time; however, this approach is not recommended for dictionaries containing
more than a few words.
Note that you cannot cause the built-in applications (Names, Dates and so on) to
use custom dictionaries. The only way to enable these applications to recognize
specialized terminology is to add words to the user dictionary. However, you are
strongly discouraged from doing so, because each entry added to the user dictionary
reduces the amount of system RAM available to the user. For more information,
see "System Dictionaries" beginning on page 9-11.
Creating a Custom Enumerated Dictionary
10
To create a custom enumerated dictionary, you must populate a blank RAM-based
dictionary with your dictionary items. Dictionary items can come from a number of
places: they might be elements of your own array of strings stored in the application's
NTK project data; they might be represented as binary resource data in your

C H A P T E R 1 0
Recognition: Advanced Topics
Using Advanced Topics in Recognition
10-25
application's NTK project; they might be supplied by the user in an input line
view; they might even arrive as serial data. Because dictionary items can originate
from a number of sources, the example here presumes that you know how to store
your word strings and pass them, one at a time, to the
AddWordToDictionary
function. This function adds its argument to the specified custom dictionary.
The
AddWordToDictionary
function does not place any restrictions on the
strings to be entered in the dictionary; however, your intended use of the dictionary
entry may influence its content. For nonrecognition purposes, such as validating
input to a field, any string is a valid dictionary entry. For use in stroke recognition,
strings in enumerated dictionaries must not include spaces. The printed recognizer
accepts the full set of ASCII characters; the cursive recognizer does not. Digits
or non-alphabetic characters in dictionary entries used by the cursive recognizer
must appear in the input string in order to be recognized. Do not use the
AddWordToDictionary
function to add items to the review dictionary; use the
appropriate
reviewDict
methods instead.
You can take the following steps to create a RAM-based enumerated dictionary at
run time:
1. Use the global function
NewDictionary
to create a new empty dictionary.
2. Use the global function
AddWordToDictionary
to add dictionary items to
the new dictionary.
3. Use the global function
GetDictionaryData
to create a binary
representation of the completed dictionary, which can then be stored in a soup.
Another way to do this is to create a new dictionary and restore its data from a soup.
The next several sections describe the numbered steps in greater detail. Following
this discussion, the section "Restoring Dictionary Data From a Soup" (page 10-28),
describes how to restore an existing dictionary from soup data.
Creating the Blank Dictionary
10
You can create a blank RAM-based dictionary anywhere in your application that
makes sense; a common approach is to take care of this in the
ViewSetupFormScript
method of the application's base view. You must also
create a slot in which to store the RAM-based dictionary. The following code
fragment creates a dictionary in the
mySpecialDictionary
slot.
ViewSetupFormScript := func()
begin
mySpecialDictionary := NewDictionary('custom);
end
This code example uses the
NewDictionary
function to create a blank dictionary
in the
mySpecialDictionary
slot. The
NewDictionary
function accepts the

C H A P T E R 1 0
Recognition: Advanced Topics
10-26
Using Advanced Topics in Recognition
symbol
'custom
as its argument, which specifies that the new dictionary is for
this application's use only.
Note
Although the token returned by the
NewDictionary
function
currently evaluates to an integer in the NTK Inspector, the type of
value returned by this function may change on future Newton
devices. Do not rely on the
NewDictionary
function returning
an integer.
Adding Words to RAM-Based Dictionaries
10
Once you have created a blank dictionary, you need to populate it with your
dictionary items. You can use the
AddWordToDictionary
function to add a
specified string to a specified RAM-based dictionary.
The first argument to this function is the identifier of the dictionary to which the
string is to be added; this identifier is returned by the
NewDictionary
function. The
previous code example stored this identifier in the
mySpecialDictionary
slot.
The second argument to this function is the string to be added to the dictionary. If
this argument is not a string, the
AddWordToDictionary
function throws an
exception. If the word is added successfully, this function returns
true
. If the
specified word cannot be added, this function returns
nil
.
The
AddWordToDictionary
function may return
nil
when the word to be
added is already present in the specified dictionary, or it may return
nil
because of
resource limitations. It is possible to run out of system memory for dictionaries,
with potentially serious consequences. Do not rely on a specific number of
dictionary entries as the maximum amount that may be added safely. It is strongly
recommended that you use custom dictionaries sparingly and keep them as small as
possible, taking into account the possibility that other applications may require
system memory for their own dictionaries or for other uses.
To populate the dictionary, you need to call the
AddWordToDictionary
function once for each item to be added. There are many ways to call a function
iteratively; the best approach for your needs is an application-specific detail that
cannot be anticipated here. The following code example shows one way to populate
a blank dictionary.
myAdder:= func()
begin
local element;
// items slot contains an array of dictionary strings
foreach element in items do
AddWordToDictionary(mySpecialDictionary, element);
end

C H A P T E R 1 0
Recognition: Advanced Topics
Using Advanced Topics in Recognition
10-27
This approach works well for small dictionaries; for most large dictionaries,
however, it is far more efficient to populate the dictionary from saved soup data.
You should store custom dictionary data in a soup so that it is safely stored and
persistent across soft resets.
IMPORTANT
Do not use the
AddWordToDictionary
global function to add
words to the review dictionary; instead, use the appropriate review
dictionary methods.
Removing Words From RAM-Based Dictionaries
10
You can use the
DeleteWordFromDictionary
function to remove a specified
word from a specified RAM-based dictionary. Note that this function does not
make permanent changes to soups. After calling this function you must write your
changes to the appropriate soup.
IMPORTANT
Do not use the
DeleteWordFromDictionary
function to
remove words from the review dictionary; instead, use the
appropriate review dictionary methods.
Saving Dictionary Data to a Soup
10
Once you have added all of your dictionary entries, your RAM-based custom
dictionary is ready for use. However, it would be inefficient to build it from scratch
each time you need it, especially if it is large. Instead, you can store a binary
representation of the dictionary data in a soup and use this soup data to restore the
custom dictionary.
The
NewDictionary
function returns an identifier used to reference the
dictionary; in the previous example, this identifier was stored in the
mySpecialDictionary
slot defined in the base view of the application. You can
pass this identifier as the
GetDictionaryData
function's argument. This
function returns a binary representation of the dictionary data (the words or items).
You can then place this binary object in a slot in a frame and add the frame to a
soup. The following code fragment assumes that the soup
kSoupName
is a valid
soup created according to the Newton DTS soup-creation guidelines.
// get a soup in which to save the data
mySoup := GetUnionSoupAlways (kSoupName);
// create binary representation of dictionary data
local dict := GetRoot().
appSym
.mySpecialDictionary;
local theObj:= GetDictionaryData(dict);

C H A P T E R 1 0
Recognition: Advanced Topics
10-28
Using Advanced Topics in Recognition
// store the dictionary data
dictData := {data:theObj};
mySoup:AddXmit(dictData, nil);
Restoring Dictionary Data From a Soup
10
To use the dictionary, your application needs to retrieve the dictionary data object
from the soup and use the global function
SetDictionaryData
to install the
data in an empty dictionary. This is typically done in the application part's
InstallScript
function or in the
ViewSetupFormScript
method of the
view that uses the custom dictionary, as shown in the following code example:
// make new blank dictionary
mySpecialDictionary := NewDictionary('custom);
// get the dictionary data from the soup
// structure of query depends on how you store data
dataCursor:=
dictDataSoup
:Query(
querySpec
);
// how you get entry depends on how you store data
myBinaryData := dataCursor:entry();
// put data in dictionary
SetDictionaryData(mySpecialDictionary, myBinaryData);
Note that RAM-based dictionaries are lost when the system resets. However, the
system calls your application part's
InstallScript
function after a reset. This
function can determine whether the dictionary exists and recreate it if necessary.
Because this function is also called when a card with your application on it is
inserted, as well as when the application is installed initially, it provides an ideal
place from which to install your custom dictionary.
Using Your RAM-Based Custom Dictionary
10
Take the following steps to make your RAM-based dictionary available to each
view that is to use it for recognition:
1. Set the view's
vCustomDictionaries
flag.
2. Create a
dictionaries
slot. You can create this slot in the view itself or in its
recConfig
frame.
3. Place your dictionary's identifier in the
dictionaries
slot.
To enable the use of custom dictionaries, you must set the
vCustomDictionaries
flag for the view that is to use the custom dictionary. This flag indicates that the
view has access to a slot named
dictionaries
that specifies dictionaries to be
used for recognition. The dictionaries specified in this slot are used in conjunction
with any other dictionaries that may be specified for this view's use.

C H A P T E R 1 0
Recognition: Advanced Topics
Using Advanced Topics in Recognition
10-29
In addition to setting the view's
vCustomDictionaries
flag, you need to create
a
dictionaries
slot in either the view or its
recConfig
frame. The
dictionaries
slot stores a single dictionary identifier or an array of dictionary
identifiers. You need to install the custom dictionary in this slot using code similar
to the following example.
// vCustomDictionaries flag already set
dictionaries := mySpecialDictionary;
To use system-supplied dictionaries in addition to your custom dictionary, you can
enable additional view flags in the Entry Flags editor in NTK or set these
additional flags procedurally. If you prefer to set view flags procedurally, you must
use the
Bor
function to bitwise OR the
vCustomDictionaries
flag with any
bits already set in the
viewFlags
slot. In either case, your custom dictionary must
still be specified in the
dictionaries
slot.
Note that some view flags enable combinations of system dictionaries. If you want
to specify explicitly which system dictionaries the view can use, set no dictionary-
enabling flags other than the
vCustomDictionaries
flag and use system-
supplied dictionary ID constants to add specific dictionaries to the
dictionaries
slot. For descriptions of the system-supplied dictionary ID constants, see
"System-Supplied Dictionaries" (page 8-16) in Newton Programmer's Reference.
The following code fragment shows how you can specify dictionaries explicitly
by including the appropriate constants as elements of the array in the
dictionaries
slot.
dictionaries :=[mySpecialDictionary, kUserDictionary,
kCommonDictionary]
Regardless of the order of elements in the
dictionaries
array, the system
always searches the user dictionary first. The system then searches all of the
specified dictionaries in the order that they appear in the
dictionaries
array. In
general, the order in which this array's items appear is not critical, except in the
case of conflicting capitalization information for representations of the same word
in multiple dictionaries. When multiple dictionary entries match the input, the
system uses the first dictionary entry that was matched.
Note that the printed recognizer can always return words not present in
dictionaries. Only the cursive recognizer may be restricted to returning only words
present in dictionaries (and then only when letter-by-letter recognition is not
enabled). To test your dictionary settings, use the cursive recognizer while its
letter-by-letter option is disabled.

C H A P T E R 1 0
Recognition: Advanced Topics
10-30
Using Advanced Topics in Recognition
Removing Your RAM-Based Custom Dictionary
10
It is recommended that you remove your custom dictionary when it is no longer
needed, such as when your application is removed. The
DisposeDictionary
function removes a specified RAM-based dictionary.
The
DisposeDictionary
function accepts one argument, the dictionary identifier
returned by
NewDictionary
. If this identifier was stored in a slot named
mySpecialDictionary
, a line of code similar to the following example would
be used to remove the custom dictionary.
DisposeDictionary(mySpecialDictionary);
Using System Dictionaries Individually
10
The system provides several constants that you can use to refer to system
dictionaries conveniently; see "System-Supplied Dictionaries" (page 8-16) in
Newton Programmer's Reference. You can set the
vCustomDictionaries
flag
and place one or more of these constants in your view's
dictionaries
slot to
specify explicitly the vocabulary it can recognize, such as first names only or
names of days and months only. Note that a single constant may represent multiple
dictionaries; for example, when the
kCommonDictionary
constant is specified,
the system may actually add several dictionaries to the set that the view uses for
recognition. The rest of this section describes the use of individual system dictionaries.
The
vNumbersAllowed
flag enables both the numeric lexical dictionary and the
monetary lexical dictionary. To create a view that recognizes numeric values but
not monetary values, set the
vCustomDictionaries
flag and place the
kNumbersOnlyDictionary
constant in the view's
dictionaries
slot.
Note that both the
vCustomDictionaries
and
vCharsAllowed
flags enable
text recognition. The difference between these flags is in the set of dictionaries they
enable. The
vCustomDictionaries
flag enables only those dictionaries specified
by the
dictionaries
slot of the view performing recognition. The
vCharsAllowed
flag, on the other hand, enables several system-supplied
dictionaries. To avoid unexpected results when working with custom dictionaries,
be aware that setting other flags may enable additional dictionaries. Remember,
also, that the printed recognizer can always return words not appearing in dictionaries.
Working With the Review Dictionary
10
The review dictionary object provides methods for manipulating the contents of the
user dictionary (personal word list), and the expand dictionary. Although the
auto-add dictionary is also part of the review dictionary, the auto-add dictionary
has its own interface.

C H A P T E R 1 0
Recognition: Advanced Topics
Using Advanced Topics in Recognition
10-31
Do not use the global functions
AddWordToDictionary
and
RemoveWordFromDictionary
to make changes to the review dictionary;
instead, use the appropriate review dictionary methods.
The dictionaries themselves are stored as entries in the system soup. This section
describes how to manipulate these dictionaries programmatically. All of the
functions and methods named in this section are described completely in "User
Dictionary Functions and Methods" beginning on page 10-54.
Retrieving the Review Dictionary
10
To manipulate the contents of the user dictionary or expand dictionary, you send
messages to the
reviewDict
object, which resides in the root view.
To obtain a reference to the
reviewDict
object, you can use code similar to the
following example.
local reviewDict := GetRoot().reviewDict;
Note
Future versions of the system are not guaranteed to have the
ReviewDict
slot. You must verify that the returned value is
non-
nil
before using it.
You usually do not need to load the review dictionary into RAM yourself--the
system does so automatically when it is reset and most flags that enable text
recognition include the user dictionary automatically in the set of dictionaries they
enable. You usually do not need to load the auto-add or expand dictionaries explicitly,
either--the user dictionary consults these additional dictionaries automatically.
However, the
LoadUserDictionary
,
LoadExpandDictionary
, and
LoadAutoAddDictionary
functions are provided for your convenience.
For general information about the user dictionary, expand dictionary and auto-add
dictionary, see "System Dictionaries" beginning on page 9-11.
Displaying Review Dictionary Browsers
10
You can send the
Open
message to the
reviewDict
object to display the Personal
Word List slip. If words have been added to the auto-add dictionary, this function
displays the Recently Written Words slip automatically as well.
To display the Recently Written Words slip alone, send the
Open
message to
the
autoAdd
object residing in the system's root view, as shown in the
following example.
local auto := GetRoot().autoAdd:Open();
if auto then auto:Open();

C H A P T E R 1 0
Recognition: Advanced Topics
10-32
Using Advanced Topics in Recognition
Note
Future versions of the system are not guaranteed to have the
autoAdd
slot. You must verify that the returned value is non-
nil
before using it.
Adding Words to the User Dictionary
10
The following code fragment uses the
AddWord
method of the
reviewDict
object to add words to the user dictionary. After adding one or more words, you
must call the
SaveUserDictionary
function to make your changes to the user
dictionary's system soup entry persistent.
local reviewDict := GetRoot().reviewDict;
if reviewDict then
begin
reviewDict:AddWord("myWord");
reviewDict:AddWord("myOtherWord");
SaveUserDictionary();
end;
The
AddWord
method returns
true
if the word was added successfully and
returns
nil
if the word was not added; however, this function may also return
nil
due to resource limitations.
It is possible to run out of system memory for dictionaries, with potentially serious
consequences. Do not rely on a specific number as the maximum amount of
dictionary entries that may be added safely.
If the Personal Word List slip is open when you add words to the user dictionary,
its display is updated automatically. An undo action is posted for this update.
IMPORTANT
Do not use the
AddWordToDictionary
global function to add
words to the review dictionary.
Removing Words From the User Dictionary
10
The following code fragment uses the
RemoveWord
method of the
reviewDict
object to remove a word from the user dictionary. After deleting the word, you
must call the
SaveUserDictionary
function to write the changes to the user
dictionary's system soup entry.
local reviewDict := GetRoot().ReviewDict;
if reviewDict then
begin
reviewDict:RemoveWord("myWord");
reviewDict:RemoveWord("myOtherWord");
SaveUserDictionary();
end;
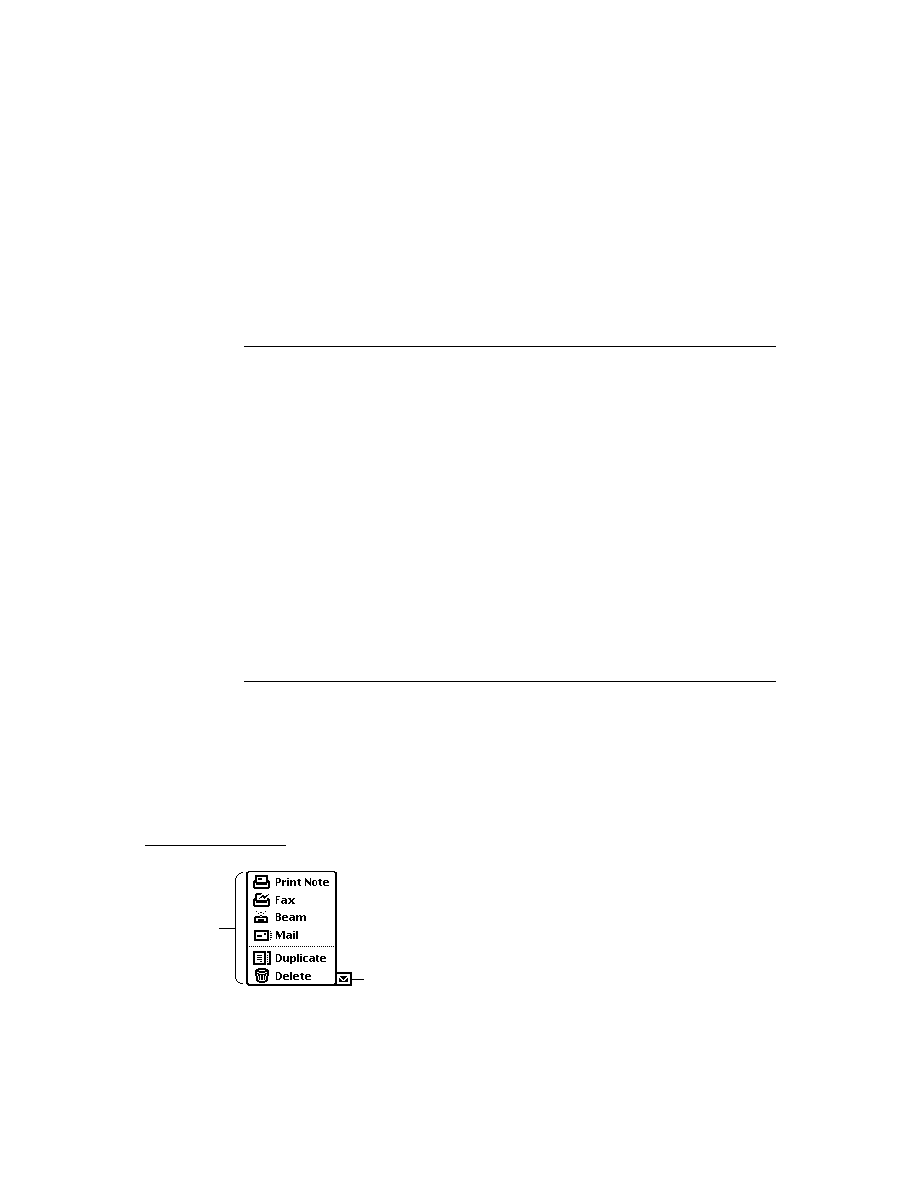
C H A P T E R 1 0
Recognition: Advanced Topics
Using Advanced Topics in Recognition
10-33
The
RemoveWord
method returns
true
if the word was removed successfully and
returns
nil
if the word was not removed. This method returns
nil
and does not
remove the specified word if there are differences in case between the word in the
dictionary and the word passed as the argument to the
RemoveWord
method. This
method also returns
nil
when the word to be removed is not present in the
review dictionary.
IMPORTANT
Do not use the
RemoveWordFromDictionary
global function
to make changes to the review dictionary; instead, use the
appropriate review dictionary methods.
Adding Words to the Expand Dictionary
10
The expand dictionary (the dictionary that defines word expansions) is kept in RAM,
and its size is limited to 256 words. To manipulate the expand dictionary, you send
messages to the
reviewDict
object residing in the root view. The system provides
methods for adding words and their associated expansions to this dictionary;
retrieving the expansions associated with words; removing words and expansions
from this dictionary; and saving expansion dictionary changes to the system soup.
To add a word and its expansion to the expand dictionary, you must send the
AddExpandWord
message to the
reviewDict
object. Words added to the
expand dictionary must first be recognized and present in the user dictionary. If
necessary, you can use the
AddWord
method of the
reviewDict
object to add
the word to the user dictionary before adding it to the expand dictionary. After
adding one or more words to the expand dictionary, you must call the
SaveExpandDictionary
function to write your changes to the system soup, as
the following code fragment illustrates.
local reviewDict := GetRoot().ReviewDict;
// word must be present in user dict before adding to expand dict
if reviewDict then
begin
if not LookupWordInDictionary(reviewDict, "BTW") then
begin
reviewDict:AddWord("BTW");
SaveUserDictionary();
end;
reviewDict:AddExpandWord("BTW", "by the way");
// write changes to system soup
SaveExpandDictionary();
end;

C H A P T E R 1 0
Recognition: Advanced Topics
10-34
Using Advanced Topics in Recognition
Removing Words From the Expand Dictionary
10
Normally, words are added to both the expand dictionary and the user dictionary
simultaneously. As a result, words removed from the expand dictionary generally
must also be removed from the user dictionary. The following code fragment uses
the
RemoveWord
method to remove a word from both the expand and the user
dictionaries. After deleting the word, you must call the
SaveUserDictionary
function to write the changes to the system soup.
local reviewDict := GetRoot().ReviewDict;
if reviewDict then
begin
// remove word & expansion from dictionaries
reviewDict:RemoveWord("BTW");
SaveUserDictionary();
end;
Retrieving Word Expansions
10
The following code fragment uses the
GetExpandedWord
method of the
reviewDict
object to retrieve the expansion associated with a specified word.
This method returns
nil
if the specified word is not found in the expand dictionary.
local reviewDict := GetRoot().ReviewDict;
if reviewDict then
local theExpansion := reviewDict:GetExpandedWord("BTW");
Retrieving the Auto-Add Dictionary
10
The auto-add dictionary (the list of new words to add to the user dictionary
automatically) resides in RAM and its size is limited to 100 words. The system
adds new words to this dictionary automatically when the cursive recognizer is
enabled and the Add New Words to Personal Word List checkbox in the Text
Editing Settings preferences slip is selected.
The Recently Added Words slip provides the NewtonScript interface to the
auto-add dictionary. You can use code similar to the following example to obtain a
reference to the RecentlyAdded Words slip.
local autoAddDict := GetRoot().AutoAdd;
Note
Future versions of the system are not guaranteed to have this
slot. You must verify that the returned value is non-
nil
before
using it.
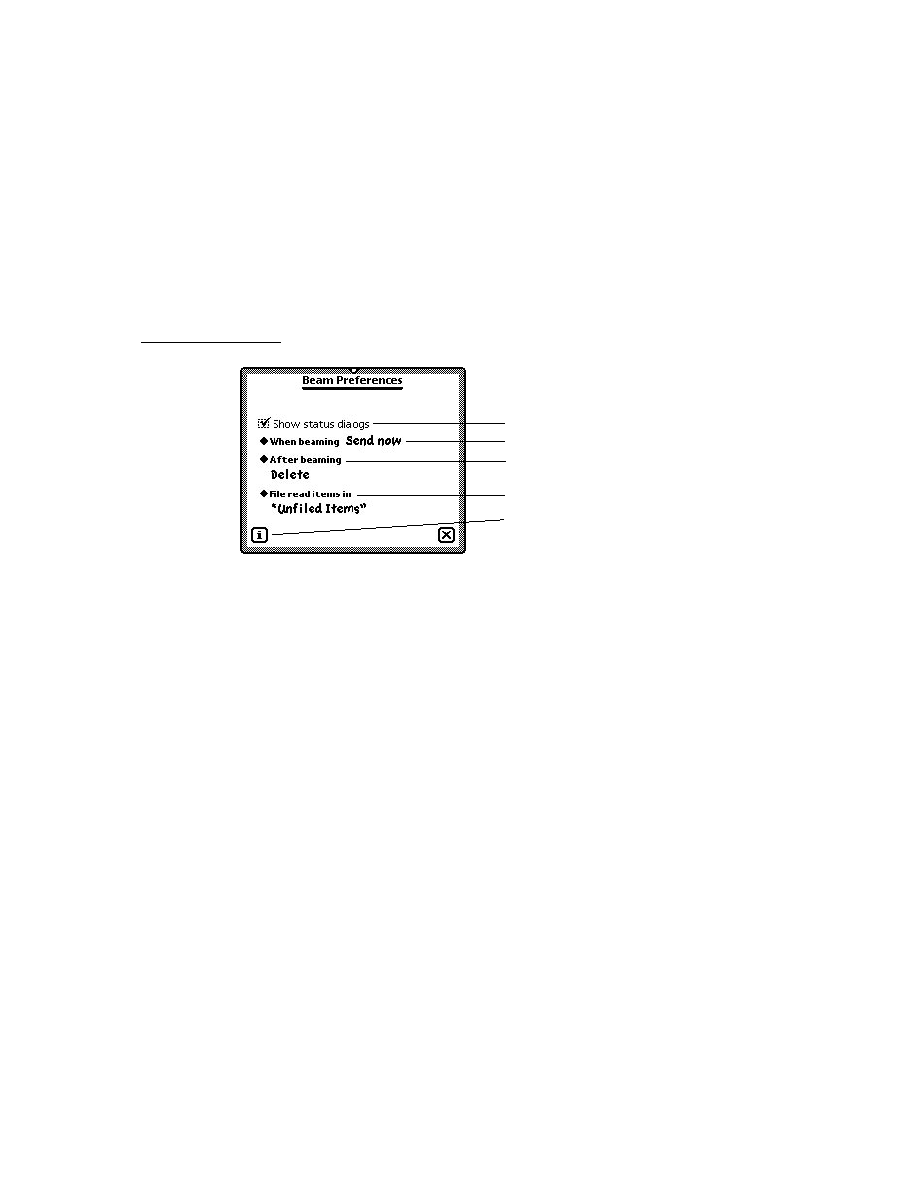
C H A P T E R 1 0
Recognition: Advanced Topics
Using Advanced Topics in Recognition
10-35
Usually, you do not need to load the auto-add dictionary into RAM yourself--the
system does so automatically whenever the Personal Word List slip is opened or
the system is reset. However, the system provides the
LoadAutoAddDictionary
function for your convenience.
Disabling the Auto-Add Mechanism
10
When the cursive recognizer is enabled, words not appearing in any of the
currently enabled dictionaries are added to the auto-add and user dictionaries
automatically as they are recognized or corrected. The value of the
doAutoAdd
slot in the system's user configuration data controls this default behavior.
However, not all input to a view is appropriate to add to dictionaries; for example,
consider a spreadsheet that allows the user to select cells by entering row and
column numbers--you wouldn't want to add these strings to the dictionaries as
they are recognized. To disable the automatic addition of new words to the user and
auto-add dictionaries, you can use either of the following techniques:
Set the
_noautoadd
slot in the view or its
recConfig
frame to a
non-
nil
value.
Set the
_noautoadd
slot in the word's
wordInfo
frame to a non-
nil
value. You can get a word's
wordInfo
frame by calling the
GetCorrectionWordInfo
function from within the view's
ViewWordScript
method.
Alternatively, you can set the value of the
doAutoAdd
slot in the system's user
configuration data to
nil
and call the
ReadCursiveOptions
function; however,
it is not recommended that you change user configuration settings without first
obtaining confirmation from the user.
Adding Words to the Auto-Add Dictionary
10
The
AddAutoAdd
function adds a specified word to both the user and auto-add
dictionaries. This function returns the value
true
after adding the word
successfully. The word is not added if its unpunctuated form is present in the
standard set of dictionaries enabled by the
vCharsAllowed
flag.
If the auto-add dictionary already contains its maximum of 100 words, this
function does not add the new word but displays the notify icon instead. When the
user taps the notify icon, it posts a notify action that displays the Recently Written
Words slip. The user can then edit the Recently Written Words slip before
attempting to add more words; if the user responds immediately, no new words are
lost. For more information on the notify icon and notify actions, see Chapter 17,
"Additional System Services."

C H A P T E R 1 0
Recognition: Advanced Topics
10-36
Using Advanced Topics in Recognition
Removing Words From the Auto-Add Dictionary
10
The
RemoveAutoAdd
function deletes a specified word from both the user and
auto-add dictionaries. This function returns
true
if the word was removed and
returns
nil
if the word was not removed. This method does not remove the word if
it is not present in the auto-add dictionary or if there are case inconsistencies
between the argument to this function and the word actually found in the dictionary.
Using protoCharEdit Views
10
The
protoCharEdit
proto provides a comb-style view that facilitates the
correction of individual characters in misrecognized words. The view provided by
this proto uses an
rcGridInfo
frame internally to provide a horizontal row of
single-character input areas. The system-supplied corrector available from the
picker displayed when the user taps a recognized word makes use of this view.
Figure 10-7 illustrates a typical
protoCharEdit
view.
Figure 10-7
Example of a
protoCharEdit
view
This section describes how to position a
protoCharEdit
view, how to manipulate
the text string it displays, and how to restrict its input to a specified set of characters.
Positioning protoCharEdit Views
10
There are two ways to position a
protoCharEdit
view within its parent view.
You can set the values of its
top
and
left
slots to values that position it at the top
left corner of the view, or you can provide a similar value for its
viewBounds
slot.
If you specify the values of the
top
and
left
slots, then the
ViewSetupFormScript
method of the
protoCharEdit
view supplies an
appropriate value for the
viewBounds
slot based on the values of the
cellHeight
,
cellWidth
, and
maxChars
slots. On the other hand, if you
provide the values of the
viewBounds
and
cellWidth
slots, then this view
supplies appropriate values for the
maxChars
and
cellHeight
slots for you.
This proto provides useful default values for the
cellWidth
and
cellHeight
slots; it is recommended that you do not change these values.
The technique you use depends on how you want to set the slots that this proto
provides. For detailed information, see "protoCharEdit" (page 8-41) in Newton
Programmer's Reference.

C H A P T E R 1 0
Recognition: Advanced Topics
Using Advanced Topics in Recognition
10-37
Manipulating Text in protoCharEdit Views
10
The default view provided by the
protoCharEdit
proto is an unformatted comb
view (see page 10-4). You can provide an optional template that customizes this
view's appearance and behavior. The template itself is a frame residing in the view's
template
slot. This frame may provide the following slots and methods:
The template's
filter
slot defines a set of permissible input values. For
example, a view for correcting phone numbers might restrict the set of
permissible characters to numerals.
The template's
format
slot can specify the length of the comb view and the
editing characteristics of its entry fields. For example, the phone number
correction view might use a format template to restrict input to a fixed number
of characters and make certain entry fields non-editable. When the comb view
erases invalid characters it displays the animated cloud and plays the
ROM_poof
sound that normally accompanies the scrub gesture.
The template's
text
slot supplies a string to be displayed initially when the
comb view opens. The comb view retrieves this value when its
ViewSetupFormScript
is executed.
You can also supply optional
SetupString
and
CleanupString
functions
that manipulate the string in the
text
slot.
For complete descriptions of these slots, see "Template Used by ProtoCharEdit
Views"(page 8-45) and "Application-Defined protoCharEdit Template Methods"
(page 8-52) in Newton Programmer's Reference.
The system also provides several global functions that are useful for manipulating
protoCharEdit
views and the strings they display.
To change the comb view's text string or template dynamically, call the
UseTextAndTemplate
function after setting appropriate values for the
text
or
template
slots. Alternatively, you can use the
SetNewWord
or
SetNewTemplate
and
UseNewWord
or
UseNewTemplate
functions to perform
the same operations; in fact, calling these functions yourself is faster than calling
the
UseTextAndTemplate
function.
To get the current value of the text in the comb view, you can send the
CurrentWord
message to the view. You must not use the value of the
text
slot
directly, because unformatted comb views may add extra spaces to the string in this
slot. To get a special version of the text that is formatted for display in a view other
than the comb view, use the
GetWordForDisplay
function. If you are using a
template, this function may return the string in a more standardized format,
because it calls the template's optional
CleanupString
function before returning
the string.

C H A P T E R 1 0
Recognition: Advanced Topics
10-38
Using Advanced Topics in Recognition
You may also need to know the boundaries of the word in the
text
slot when
working with certain
protoCharEdit
methods and functions. The
protoCharEdit
view's
wordLeft
and
wordRight
slots provide indexes into
the
text
string that you can use to determine the boundaries of a substring suitable
for external display or for use as an argument to these routines. The
wordLeft
slot contains the index of the first externally-displayed character in the
text
slot.
The
wordRight
slot contains the index of the position immediately following the
last externally-displayed character in the
text
slot. For example, when the
text
slot holds the
"one "
string, 1 is the value of the
wordLeft
slot and 4 is the value
of the
wordRight
slot. The
dispLeft
slot contains the index of the first
character in the
text
slot that is displayed--this character occupies the leftmost
position in the comb view. The
dispLeft
slot normally has the value 0, but after
scrolling it may have values greater than 0. The
dispIndent
slot is the offset
from the leftmost edge of the view to the leftmost edge of the first character displayed.
For more information, see "protoCharEdit Functions and Methods" (page 8-47) in
Newton Programmer's Reference.
Restricting Characters Returned by protoCharEdit Views
10
This section provides code examples illustrating the use of templates to restrict the
set of characters that may appear in a comb view. Note that templates post-process
the characters returned by the recognition system before the view displays them,
rather than limiting the set of characters that the view can recognize.
The templates defined by the following code fragments are intended to serve as
examples only. The system provides templates that handle formatting conventions
for dates, times, phone numbers, and numeric values properly according to the
user's locale. For complete descriptions of these templates, see "System-Supplied
protoCharEdit Templates" (page 8-46) in Newton Programmer's Reference.
The following code example defines a template for a date field:
digits :=
"0123456789";// filters[0]
digits1 := "01";
// filters[1]
digits3 := "0123";
// filters[2]
dateTemplate := {
string:" / / ",// slashes locked by "_" in format
format:"10_20_00",// indexes into filters array
filters:[digits, digits1, digits3],
};
This example template is used in a
protoCharEdit
view that specifies a value of
8
or more for its
maxChars
slot; hence, the eight-character strings in the
format
and
string
slots.

C H A P T E R 1 0
Recognition: Advanced Topics
Using Advanced Topics in Recognition
10-39
The cells in this example template use filters defined by the
format
and
filters
slots to restrict input to valid values.
The
format
slot specifies the valid input for each position in the comb view. Each
character in the
format
string is an index into the
filters
array. In this example,
the first position in the comb view is filtered by the element 1 of the
filters
array, which is the
digits1
template; the second position is filtered by element 0
of the filters array, which is the
digits
template.
You can write-protect any position in the comb view by placing an underscore (
_
)
in the appropriate position in the
format
string. In this example, the string positions
that display slashes between the digits of the date field do not allow input. These
are indicated by the underscores at corresponding positions in the
format
string.
The
text
slot is not used by
protoCharEdit
views, but may be used as a
default value by optional
SetupString
and
CleanupString
methods that your
template supplies.
Note that the template itself does not restrict any values unnecessarily. For example,
it is not wise to restrict date values according to the value of the month, because the
user might enter the date before the month or the month value might not be
recognized correctly. Instead, you can define a
CleanupString
function that
examines the input string and indicates an error condition or modifies the string.
The following code fragment provides examples of typical
SetupString
and
CleanupString
functions.
myTemplate := {
format:"0000001",
string:" 0",
filters: [kMyDigitsOrSpace, kMyDigits],
SetupString: func(str) begin
// pad string to 5 digits
if StrLen(str) < 7 then
StrMunger(str,0,0,string,0,7-StrLen(str));
str;
end,
CleanupString: func(str) begin
// replace spaces with zeros
StrReplace(str, " ", "0", nil);
// trim leading zeros
str := NumberStr(StringToNumber(str));
str;
end,
};

C H A P T E R 1 0
Recognition: Advanced Topics
10-40
Using Advanced Topics in Recognition
Customized Processing of Input Strokes
10
Setting the
vStrokesAllowed
flag provides the view with a means of intercepting
raw input data for application-specific processing. If this flag is set, strokes are
passed one at a time as the argument to the view's
ViewStrokeScript
method.
Your
ViewStrokeScript
method can then process the strokes in any manner
that is appropriate. The view's
ViewStrokeScript
method is invoked when the
user lifts the pen from the screen at the end of each input stroke.
Both the
vGesturesAllowed
and
vStrokesAllowed
flags invoke methods
that can be used to provide application-specific handling of gestures. However, the
vGesturesAllowed
flag supplies system-defined behavior for the gestures tap,
double-tap, highlight, and scrub in
clEditView
and
clParagraphView
views,
while the
vStrokesAllowed
flag does not provide any behavior that you don't
implement yourself, regardless of the kind of view performing recognition.
For example,
clEditView
and
clParagraphView
views handle system-
defined gestures automatically. Thus, scrubbing in a
clParagraphView
view that
sets the
vGesturesAllowed
flag does not invoke the
ViewGestureScript
method because the view handles this gesture automatically. On the other hand, a
clView
view would need to supply a
ViewGestureScript
method to process
the scrub gesture because this kind of view does not provide any gesture-handling
behavior of its own. Finally, remember that any view setting the
vStrokesAllowed
flag must also supply a
ViewStrokeScript
method.
Setting these flags causes the recognition system to send messages such as
ViewClickScript
or
ViewStrokeScript
, passing a unit (an object that
describes the interaction of the pen with the tablet) as the argument to the
corresponding methods. Units are only valid when accessed from within the
methods invoked during the recognition process--you cannot save them for later
use. However, you can distribute the processing of unit data as appropriate; for
example, you might call the
GetPointsArray
function from within your
ViewClickScript
method and use the result later in your
ViewIdleScript
method.
IMPORTANT
Do not save units for later use--they are valid only during the
recognition process. After the user interaction is complete and the
various scripts utilizing a particular unit have returned, the
memory allocated for that unit is freed explicitly. Subsequent use
of the unit may produce bus errors or loss of significant data.

C H A P T E R 1 0
Recognition: Advanced Topics
Using Advanced Topics in Recognition
10-41
Customized Processing of Double Taps
10
To process double taps reliably, your view's
ViewGestureScript
method can
test for the presence of the
aeDoubleTap
gesture. The gesture recognizer
measures time between pen events reliably even when the main NewtonScript
thread is busy.
The recognition system considers a second tap to be part of a double tap when it
occurs within a specified amount of time and distance relative to the first tap.
The second tap must be within 6 pixels of the first to be considered part of a double
tap. Any stroke longer than 6 pixels is not recognized as a tap (or as the second
tap). Measurement of the distance between taps is based on the midpoint of the
start and end points of the stroke.
The amount of time that determines whether a second tap is considered part of a
double tap is specified by the value of the
timeoutCursiveOption
slot in the
system's user configuration data. This value ranges between 15 and 60 ticks, with a
default value of 45 ticks. The user sets the value of this slot by moving the
"Transform my handwriting" slider in the Fine Tuning slip. The Fine Tuning slip is
available from the picker displayed by the Options button in the Handwriting
Recognition preferences slip.
Your
ViewGestureScript
method is called only if the view does not handle the
gesture automatically. Your
ViewGestureScript
method should return the
value
true
to avoid passing the gesture unit to other
ViewGestureScript
methods, such as those supplied by views in the
_parent
chain. If you do want to
pass the gesture unit to other views, your method should return the value
nil
.
Changing User Preferences for Recognition
10
When you must make system-wide changes in recognition behavior, you can set
the values of slots in the system's user configuration data to do so. However, in
most cases it is more appropriate to change the behavior of individual views, rather
than system-wide settings. For information on using
recConfig
frames to specify
the recognition behavior of individual views, see "Using recConfig Frames"
beginning on page 10-8.
Take the following steps to change recognition settings used by all views:
1. Call the
SetUserConfig
function to set the values of one or more slots in the
system's user configuration data. For a complete listing of the recognition-
related slots, see "System-Wide Settings" (page 8-2) in Newton Programmer's
Reference.
2. Call the
ReadCursiveOptions
function to cause the system to use the
new settings.

C H A P T E R 1 0
Recognition: Advanced Topics
10-42
Using Advanced Topics in Recognition
Note
Normally, slot values in the system's user configuration
data are set by the user from various preference slips.
It is strongly recommended that you do not change any
user preferences without first obtaining confirmation from
the user.
Modifying or Replacing the Correction Picker
10
Views that recognize text can provide an optional
ViewCorrectionPopupScript
method that modifies or replaces the picker displayed when a recognized word is
double-tapped. For more information, see "ViewCorrectionPopupScript" (page 8-75)
in Newton Programmer's Reference.
Using Stroke Bundles
10
The system provides functions that allow you to retrieve or manipulate stroke data,
such as the tablet points from each stroke. You can access these points in one of
two resolutions: screen resolution or tablet resolution. In screen resolution, each
coordinate value is rounded to the nearest screen pixel. In tablet resolution, each
coordinate has an additional three bits of data.
To access the ink in a view, use one of the functions documented in "Text and Ink
Input and Display Reference" (page 7-1) in Newton Programmer's Reference.
Functions that allow you to manipulate ink include the
ParaContainsInk
,
PolyContainsInk
, and
GetInkAt
functions.
To perform deferred recognition on the strokes in a stroke bundle, pass the stroke
bundle to one of the
Recognize
,
RecognizePara
or
RecognizePoly
functions. For more information, see "Deferred Recognition" on page 10-5.
The system software provides a number of functions for working with stroke
bundles. These functions allow you to extract information from a stroke bundle and
convert the information in stroke bundles into other forms. The stroke bundle
functions are documented in "Stroke Bundle Functions and Methods" (page 8-83)
in Newton Programmer's Reference.
Stroke Bundles Example
10
This section shows an example of working with stroke bundles before they are
passed to the view performing recognition. One way to do this, as shown in the
following code fragment, is to implement the
ViewInkWordScript
method
of an input view. The
ViewInkWordScript
method is described in
"ViewInkWordScript" (page 7-56) in Newton Programmer's Reference.

C H A P T E R 1 0
Recognition: Advanced Topics
Using Advanced Topics in Recognition
10-43
GetKeyView().viewInkWordScript := func(strokeBundle) begin
// convert the stroke bundle into an ink word
local inkPoly := CompressStrokes(strokeBundle);
local inkWord := inkPoly.ink;
local textSlot := "\uF701";
local stylesSlot := [1, inkWord];
local root := GetRoot();
// create a rich string with the ink word in it
local appendString := MakeRichString(textSlot,
stylesSlot);
// append the rich string to myRichString
if root.myRichString then
root.myRichString := root.myRichString && appendString;
else
root.myRichString := appendString;
// return nil so default handling still happens
nil;
end;
This implementation converts the stroke bundle into an ink word, creates a rich
string that includes the ink word, and appends that rich string to a rich string that is
stored in the root (
myRichString
). The method then returns
nil
, which allows
the built-in handling of the stroke bundle to occur.

C H A P T E R 1 0
Recognition: Advanced Topics
10-44
Summary of Advanced Topics in Recognition
Summary of Advanced Topics in Recognition
10
See also "Summary" beginning on page 9-31 in Chapter 9, "Recognition."
Constants
10
See also
Chapter 9, "Recognition," which includes the following summaries: "Text
Recognition View Flags" on page 9-31; "Non-Text Recognition View Flags" on
page 9-32; and "View Flags Enabling Lexical Dictionaries" on page 9-33.
kStandardCharSetInfo // cursive recognizer
kUCBlockCharSetInfo // printed recognizer
ROM_canonicalBaseInfo // System-supplied rcBaseInfo frame
ROM_canonicalCharGrid // System-supplied rcGridInfo frame
Enumerated Dictionaries
10
1
Locale-specific dictionary
Dictionary ID Constant
Value
Contents
kUserDictionary
31
Words added by the user.
kCommonDictionary
0
Commonly-used words.
kCountriesDictionary
8
Names of countries.
kDaysMonthsDictionary
34
Names of days and months.
kFirstNamesDictionary
48
First names.
kLocalCitiesDictionary
41
Names of cities.
kLocalPropersDictionary
1
2
Proper names.
kLocalStatesDictionary
43
Names of states, provinces, etc.
kSharedPropersDictionary
1
Proper names, company names, state or
province names and abbreviations.

C H A P T E R 1 0
Recognition: Advanced Topics
Summary of Advanced Topics in Recognition
10-45
Lexical Dictionaries
10
System-Supplied RecConfig Frames
10
Data Structures
10
See also
Chapter 9, "Recognition," which includes the following summaries:
"Recognition-Related User Configuration Slots" on page 9-33;
RecConfig Frame
10
See
protoRecConfig
in "Recognition System Prototypes" beginning on
page 10-49.
1
Locale-specific dictionary
Dictionary ID Constant
Value
Contents
kLocalDateDictionary
110
Date formats.
kLocalNumberDictionary
1
113
Currency and numeric formats.
kLocalPhoneDictionary
112
Phone number formats.
kLocalTimeDictionary
111
Time formats.
kMoneyOnlyDictionary
1
118
Currency values and formats.
kNumbersOnlyDictionary
1
117
Numeric values and formats.
kPostalCodeDictionary
116
Postal code formats.
RecConfig Constant
Behavior of recConfig frame
ROM_rcInkOrText
Recognize ink text or text.
ROM_rcPrefsConfig
Recognize according to user settings.
ROM_rcDefaultConfig
None; you supply slot values.
ROM_rcSingleCharacterConfig
Recognize single characters.
ROM_rcTryLettersConfig
Recognize letter-by-letter.
ROM_rcRerecognizeConfig
Deferred recognition.
rcBaseInfo
Defines baseline.
rcGridInfo
Defines single-letter input view.

C H A P T E R 1 0
Recognition: Advanced Topics
10-46
Summary of Advanced Topics in Recognition
System-Supplied RecConfig Frames
10
// recognize ink or text
ROM_rcInkOrText :=
{
// allow user to enable text recog from recToggle
allowTextRecognition: true, // default
// return ink text when text recognizer disabled
doInkWordRecognition: true, // default
...}
// recognize according to user prefs
ROM_rcPrefsConfig :=
{
// allow user to enable text recog from recToggle
allowTextRecognition: true, // default
// allow user to enable shape recog from recToggle
allowShapeRecognition: true, // default
...}
// generic recConfig frame - you supply useful values
ROM_rcDefaultConfig :=
{
// true enables recognition of punctuation marks
punctuationCursiveOption: nil, // default
// list of dictionaries used for recognition
dictionaries: nil, // default
// true enables letter-by-letter option
rcSingleLetters: nil, // default
// Holds an rcBaseInfo frame
rcBaseInfo: nil, // default
// bitfield specifying recognition configuration
inputMask: 0x0000, // default
...}
// use as-is to configure single-character input views
ROM_rcSingleCharacterConfig :=
{
// do not change value of this slot
_proto: ROM_rcDefaultConfig, // default
//interpret all input strokes as a single word
letterSpaceCursiveOption: nil, // default
// enable letter-by-letter option
rcSingleLetters: true, // default

C H A P T E R 1 0
Recognition: Advanced Topics
Summary of Advanced Topics in Recognition
10-47
// use custom dictionaries only
inputMask: vCustomDictionaries, // default
// dictionaries to use for recognition
dictionaries: kSymbolsDictionary, // default
// don't enable symbols dictionary twice
inhibitSymbolsDictionary: true // default
...}
// recognize letter-by-letter instead of w/ dictionaries
ROM_rcTryLettersConfig :=
{
// do not change value of this slot
_proto: ROM_rcDefaultConfig, // default
//interpret all input strokes as a single word
letterSpaceCursiveOption: nil, // default
// recognize non-dictionary words and numbers
inputMask: vLettersAllowed+vNumbersAllowed, // default
...}
// use as-is to implement your own form of deferred recog
ROM_rcRerecognizeConfig :=
{
// use value of doTextRecognition slot
allowTextRecognition: true, // default
// text recognition enabled
doTextRecognition: true, // default
// amount of time to spend analyzing input
speedCursiveOption: 2, // default
// do not segment strokes
letterSpaceCursiveOption: nil, // default
...}
Supporting Frames Used In RecConfig Frames
10
// specifies baseline info to recognizer
rcBaseInfo :=
{
// y-coordinate of the view's baseline
// in screen coords (global coords).
base:
int
,
// Positive offset (in pixels) from base
// to the top of a lowercase "x"
smallHeight:
int
,

C H A P T E R 1 0
Recognition: Advanced Topics
10-48
Summary of Advanced Topics in Recognition
// Positive offset (in pixels) from base
// to the top of an uppercase "X"
bigHeight:
int
,
// Positive offset (in pixels) from base
// to the bottom of a lowercase "g"
descent:
int
,
...}
// use w/ rcBaseInfo to define grids of input cells
rcGridInfo :=
{// all coordinates are global (screen) coordinates
// coord of left edge of upper-left box in grid
boxLeft:
int
,
// coord of right edge of upper-left box in grid
boxRight:
int
,
// distance in pixels from one boxLeft to next boxLeft
xSpace:
int
,
// coord of topmost edge of upper-left box in grid
boxTop:
int
,
// coord of bottom edge of upper-left box in grid
boxBottom:
int
,
// distance in pixels from one boxTop to next boxTop
ySpace:
int
}
ProtoCharEdit Template
10
aCharEditTemplate :=
{
format:
string
, // string array indexes or underscores
filters: [
str1
,
str2
, ...
strN
], // valid input values
string:
string
// initial string to display
// optional method you supply
// sets value of
charEditView
.text slot
SetupString: func (
str
) begin ... end,
// optional method you supply
// formats
charEditView
.text string for ext display
CleanupString: func (
str
)begin ... end
}

C H A P T E R 1 0
Recognition: Advanced Topics
Summary of Advanced Topics in Recognition
10-49
System-Supplied ProtoCharEdit Templates
10
GetLocale().phoneFilter // phone number template
GetLocale().dateFilter // date template
GetLocale().timeFilter // time template
ROM_numberFilter // general-purpose integer template
Stroke Bundle Frame
10
aStrokeBundle :=
{
//bounding rectangle of ink strokes
bounds: {
top
,
left
,
right
,
bottom
},
// strokes in the bundle
strokes: [
binaryObj1
,
binaryObj2
, ...
binaryObjN
]
}
Recognition System Prototypes
10
protoRecConfig
10
aRecConfigFrame := {
// enabled recognizers and dicts
inputMask:
bitField
,
// true enables text recog if doTextRecognition
// is also true
allowTextRecognition:
Boolean
,
// true enables shape recog if doShapeRecognition
// is also true
allowShapeRecognition:
Boolean
,
// true enables text recognition unconditionally
doTextRecognition:
Boolean
,
// true enables shape recognition unconditionally
doShapeRecognition:
Boolean
,
// true enables ink text unconditionally
doInkWordRecognition:
Boolean
,
// amount of time to spend recognizing input
speedCursiveOption:
int
,
// relative amount of time between distinct strokes
timeoutCursiveOption:
int
,
// true enables letter-by-letter option
letterSpaceCursiveOption:
Boolean
,

C H A P T E R 1 0
Recognition: Advanced Topics
10-50
Summary of Advanced Topics in Recognition
// dictionaries to use when vCustomDictionaries is set
// single values need not reside in an array
dictionaries: [
dictId1
,
dictID2
, ...
dictIdN
],
// optional baseline info
rcGridInfo:
frame
,
// optional single-letter input view info
rcSingleLetters:
frame
,
// true disables symbols dictionary
inhibitSymbolsDictionary:
Boolean
,
...}
protoRecToggle
10
aRecToggleView :=
{
// current setting of recToggle view
// this slot may be provided by _parent chain
_recogSettings:
systemSuppliedValue
,
// order of items in recToggle picker
_recogPopup: [
sym1
,
sym2
...
symN
],
// optional index into _recogPopup array
defaultItem:
int
,
...}
protoCharEdit
10
aCharEditView :=
{
// screen coordinates of top edge of comb view
top:
int
, // Required when viewBounds not provided
// screen coordinates of left edge of comb view
left:
int
, // Required when viewBounds not provided
// dimensions & placement of comb view
viewBounds:
frame
, // Required when top & left not provided
// maximum number of cells in comb view; default value is 8
maxChars:
int
, // Required; sys provides if you provide viewBounds
// true causes comb view to display divider lines between cells
frameCells:
Boolean
,// Optional; default value is nil
// width of a cell in pixels; must be even number; default is 12
cellWidth:
int
, // system calculates from your top & left values
// pixels of blank space between cells in comb view
cellGap:
int
, // system-provided default value is 6
// pixels from top of viewBounds to dotted line at bottom of comb
viewLineSpacing:
int
, // system-provided default is 30
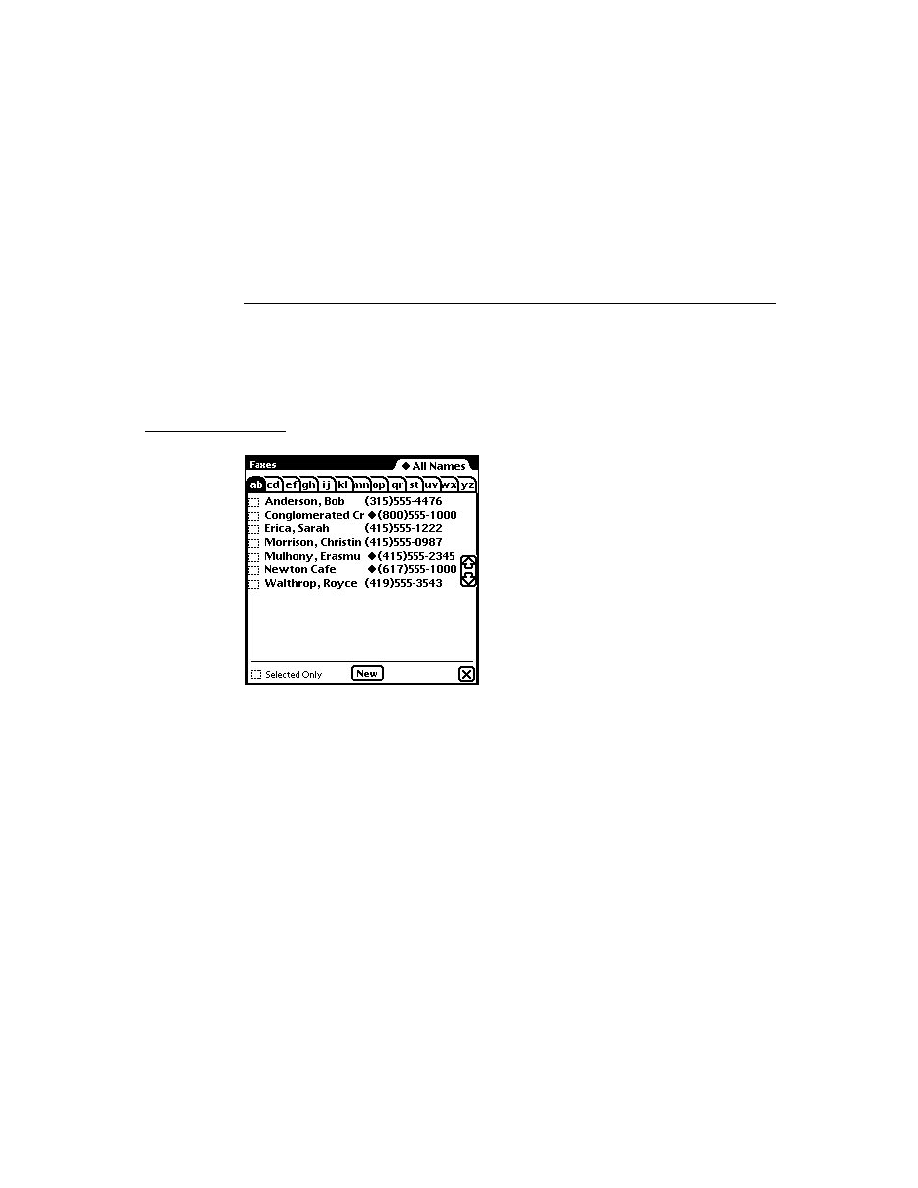
C H A P T E R 1 0
Recognition: Advanced Topics
Summary of Advanced Topics in Recognition
10-51
// height of cells in pixels
cellHeight:
int
, // system-provided default is 50
// recConfig frame specifying this view's recog behavior
recConfig:
frame
, // system provides default
// specifies appearance & behavior of formatted comb view
template:
frame
, // optional protoCharEdit template
// string displayed when view opens; arg to SetupString method
text:
string
, // optional
// index of leftmost non-space character in comb view
wordLeft:
int
, // system-provided value
// index of cell to the right of rightmost non-space character
wordRight:
int
, // system-provided value
// index into text slot of character occupying leftmost cell
dispLeft:
int
, // system-provided value; changes after scrolling
// offset in pixels from leftmost edge of comb view
// to leftmost edge of first cell displayed
dispIndent:
int
,
// return word from comb view w/out leading/trailing spaces
CurrentWord:
function
,
// return cleaned-up version of word suitable for ext display
GetWordForDisplay:
function
, // calls CleanupString if provided
// deletes specified text from comb view
DeleteText:
function
,
// scrolls contents of comb view left or right as specified
Scroll:
function
,
// makes comb view use current values of text & template slots
UseTextAndTemplate:
function
,
// Sets the string displayed by the comb view
SetNewWord:
function
,
// performs internal initialization using current values of
// text and template slot; call after calling SetNewWord
UseNewWord:
function
,
// Returns true when template's format slot is non-nil
FixedWord:
function
,
// Returns number of chars residing in templates format slot
FixedWordLength:
function
,
// optional app-defined methods
// you supply optional fn to update external display
DisplayExternal:
function
, // message sent when comb view changes
// you supply optional fn to save your undo info
SaveUndoState:
function
, // message sent when comb view changes
// you supply optional fn to do app-specific tasks for undo
RestoreUndoState:
function
, // msg sent to undo comb view changes
...}

C H A P T E R 1 0
Recognition: Advanced Topics
10-52
Summary of Advanced Topics in Recognition
protoCharEdit Templates
10
ROM_numberFilter // general-purpose numeric template
GetLocale().timeFilter // time template
GetLocale().dateFilter// date template
GetLocale().phoneFilter // phone numnber template
ProtoCharEdit Functions
10
MapAmbiguousCharacters(
str
)
UnmapAmbiguousCharacters(
str
)
ProtoCorrectInfo
10
aCorrectInfoFrame :=
{
info: [
frame1
,
frame2
...
frameMax
] // wordInfo frames
// maximum number of frames in info array
max: 10, // default value
// system-supplied methods
Offset:
function
, // move, merge or delete wordInfo
// remove view's wordInfo from correctInfo
RemoveView:
function
,
// return wordInfo frame at specified offset
Find:
function
,
// return wordInfo frame at specified offset,
// creating one if none found
FindNew:
function
,
// extract wordInfo from unit & add to correctInfo
AddUnit:
function
,
// add specified wordInfo to correctInfo
AddWord:
function
,
// delete range of wordInfo frames from correctInfo
Clear:
function
,
// copy range of wordInfo frames from view
// into a new correctInfo frame
Extract:
function
,
// copy range of wordInfo frames from source
// correctInfo frame into dest correctInfo frame
Insert:
function
,
...}

C H A P T E R 1 0
Recognition: Advanced Topics
Summary of Advanced Topics in Recognition
10-53
ProtoWordInfo
10
aWordInfoFrame :=
{
// ID of view that owns this data; returned by GetViewID
id:
int
,
// first char's offset into clParagraphView view
Start:
int
,
// last char's offset into clParagraphView view
Stop:
int
,
flags:
forSystemUseOnly
, // do not use this slot
unitID:
forSystemUseOnly
, // do not use this slot
// array of wordInterp frames; see page 10-53
words: [
wordInterp1
,
wordInterp2
, ...
wordInterpN
]
// stroke data from original input
strokes:
strokeBundleFrame
, // see page 10-49
unitData:
forSystemUseOnly
, // do not use this slot
// sets list of words held by this wordInfo frame
SetWords:
function
,
// returns array of strings held by wordInterp frames
GetWords:
function
,
// Adds first word in this word list to auto-add and user dicts
AutoAdd:
function
,
// Removes first word in this list from auto-add and user dicts
AutoRemove:
function
,
}
protoWordInterp
10
aWordInterpFrame :=
{
// one interpretation of input strokes
word:
string
,
// recognizer's confidence in this interpretation
score:
int
, // 0 is good score, 1000 is bad score
// dictionary id of recognized word
label:
int
, // internal use only
// this word's rank in orig list of interpretations
index:
int
, // internal use only
}

C H A P T E R 1 0
Recognition: Advanced Topics
10-54
Summary of Advanced Topics in Recognition
Additional Recognition Functions and Methods
10
Dictionary Functions
10
AddWordToDictionary(
dictionary, wordString
)
DeleteWordFromDictionary(
dictID,word
)
DisposeDictionary(
dictionary
)
GetDictionaryData(
dictionary
)
GetRandomWord(
minLength, maxLength
)
LookupWordInDictionary(
dictID,word
)
NewDictionary(
dictionaryKind
)
SaveUserDictionary()
SetDictionaryData(
dictionary, binaryObject
)
User Dictionary Functions and Methods
10
AddAutoAdd(
word
)
RemoveAutoAdd(
word
)
reviewDict
:AddWord(
word
)
reviewDict
:RemoveWord(
word
)
LoadUserDictionary()
SaveUserDictionary()
reviewDict
:AddExpandWord(
word
,
expandedWord
)
reviewDict
:GetExpandedWord(
word
)
reviewDict
:RemoveExpandedWord(
word
)
LoadExpandDictionary()
SaveExpandDictionary()
Recognition Functions
10
BuildRecConfig(
viewRef
)
GetPoint(
selector
,
unit
)
GetPointsArray(
unit
)
GetScoreArray(
unit
)
GetViewID(
viewRef
)
GetWordArray(
unit
)
StrokeBounds(
unit
)
StrokeDone(
unit
)
PurgeAreaCache()

C H A P T E R 1 0
Recognition: Advanced Topics
Summary of Advanced Topics in Recognition
10-55
Deferred Recognition Functions
10
Recognize(
strokes
,
config
,
doGroup
)
RecognizePara(
para
,
start
,
end
,
hilite
,
config
)
RecognizePoly(
poly
,
hilite
,
config
)
Application-Defined Methods
10
view
:ViewClickScript(
stroke
)
view
:ViewStrokeScript(
stroke
)
view
:ViewGestureScript(
stroke
,
gesture
)
view
:ViewWordScript(
stroke
)
CorrectInfo Functions
10
GetCorrectInfo() // return correctInfo frame
// return view identifier for use w/ correctInfo methods
GetViewID(
view
)
// extract wordInfo from word unit
GetCorrectionWordInfo(
wordUnit
) // call in ViewWordScript
Inker Functions
10
InkOff(
unit
)
InkOffUnHobbled(
unit
)
SetInkerPenSize(
size
)
Stroke Bundle Functions and Methods
10
CompressStrokes
(strokeBundle)
CountPoints
(stroke)
CountStrokes
(strokeBundle)
ExpandInk
(poly, format)
ExpandUnit
(unit)
GetStroke
(strokeBundle, index)
GetStrokeBounds
(stroke)
GetStrokePoint
(stroke, index, point, format)
GetStrokePointsArray
(stroke, format)
InkConvert
(ink, outputFormat)
MakeStrokeBundle
(strokes, format)
MergeInk
(poly1, poly2)
PointsArrayToStroke
(pointsArray, format)
SplitInkAt
(poly, x, slop)
StrokeBundleToInkWord
(strokeBundle)


About Data Storage on Newton Devices
11-1
C H A P T E R 1 1
Data Storage and Retrieval
11
Figure 11-0
Table 11-0
The Newton operating system supplies a suite of objects that interact with each
other to provide data storage and retrieval services. This chapter describes the use
of these objects--stores, soups, cursors, and entries--to save and retrieve data. If
you are developing an application that saves data, retrieves data, or provides
preexisting data, you should familiarize yourself with the contents of this chapter.
Before reading this chapter, you should understand the following sections in
Chapter 1, "Overview."
"Memory" on page 1-3 describes the use of random access memory (RAM) by
the operating system and applications.
"Packages" on page 1-4 describes the object that encapsulates code, scripts, and
resources as a Newton application.
"Object Storage System" on page 1-5 provides a brief introduction to the most
important data storage objects provided by the Newton operating system.
About Data Storage on Newton Devices
11
This section introduces Newton data storage objects and describes their interaction
and use. Additional special-purpose data storage objects are described in Chapter 12,
"Special-Purpose Objects for Data Storage and Retrieval."

C H A P T E R 1 1
Data Storage and Retrieval
11-2
About Data Storage on Newton Devices
Introduction to Data Storage Objects
11
Newton devices represent data as objects. The NewtonScript programming
language provides four basic object types that applications can use to
represent data:
Because immediates, binaries, and arrays are object representations of data types
common to many programming languages, they are not discussed further here. For
complete descriptions of these objects, see The NewtonScript Programming
Language
.
The frame is of particular interest, however, as it can contain any of the other
objects and is the only NewtonScript object to which you can send messages. In
addition, the following characteristics of frames make them a particularly flexible
and efficient way to store data:
Frames are sized dynamically--they grow and shrink as necessary.
All frames support a common set of predefined NewtonScript data types that
allows them to share most data virtually transparently.
Dissimilar data types can be stored in a single frame.
Like a database record, a frame stores data items. An individual data item in the
frame is held in a slot, which may be thought of as a field in the database record.
Unlike database records, however, frames need not contain the same complement
of slots.
Any slot can hold any NewtonScript data type, including strings, numeric formats,
arrays, and binary objects. Note that NewtonScript does not require that slots
declare a datatype. Slots are untyped because every NewtonScript object stores
datatype information as part of the object itself. (NewtonScript variables need not
declare a type, either, for the same reason.)
Slots can also hold other frames, as well as references to frames, slots, and
NewtonScript objects. A frame's ability to reference other frames from its slots
allows it to inherit attributes and behaviors from ROM-based objects known as
system prototypes or "protos." This feature of the object system also provides
dynamic slot lookup and message-passing between frames. For detailed
descriptions of NewtonScript syntax, system-supplied data types, dynamic slot
Immediate
A small, immutable object such as a character, integer or
Boolean value.
Binary
Raw binary data.
Array
A collection of object references accessed from a
numerical index.
Frame
A collection of object references accessed by name.

C H A P T E R 1 1
Data Storage and Retrieval
About Data Storage on Newton Devices
11-3
lookup, message-passing, and inheritance in NewtonScript, see The NewtonScript
Programming Language
.
Other than the requirement that data must reside in a slot, frames don't impose any
structure on their data. In practical use, though, the slots in a frame tend to be
related in some way, usually holding related data and methods which operate on
that data. In this way, the frame exemplifies the classic object-oriented
programming definition of an "object." Frames do not implement data-hiding,
however, nor do they necessarily encapsulate their data.
RAM-based frames are not persistent until they are saved in a data structure called
a soup, which is an opaque object that provides a persistent, dynamic repository
for data. Unless removed intentionally, soups remain resident on the Newton device
even when the application that owns them is removed.
The only NewtonScript object you can save in a soup is a frame; recall, however,
that any slot in the frame can hold any NewtonScript data type and multiple data
types can reside in a single frame. The object system does not impose any
limitations on the number of frames or the kinds of data that may reside in a soup.
In practical use, though, the items in a soup generally have some relationship to
one another.
Soups are made available to the system in a variety of ways. Applications may
create them on demand, they may be installed along with an application, or the user
may introduce them by inserting a storage card in the Newton device.
The soup resides on a store, which is a logical data repository on a physical storage
device. A store may be likened to a disk partition or volume on a conventional
computer system; just as a disk can be divided logically into multiple partitions, a
physical storage device can house multiple stores. The Newton platform supports a
single internal store and one or more external stores on PCMCIA devices.
Applications can use as many soups as they need, subject to the availability of
memory space on stores and in the NewtonScript heap.
Each store is identified by a name, which is not necessarily unique, though each
store has a nearly unique random number identifier called a signature. The store's
signature is assigned by the system when the store is created.
Soups can reside on internal or external stores; a special kind of object, the union
soup, represents multiple soups as a single entity, regardless of their locations on
various physical stores. For example, when a PCMCIA card is installed, application
data may be distributed between the internal and card-based soups. The union soup
object provides a way to address multiple soups having the same name as a single
"virtual" soup. Figure 11-1 illustrates the concept of a union soup graphically.
It's important to understand that there is only one kind of soup object in the
system; a union soup object simply represents the logical association of multiple
soup objects. In other words, aside from their logical association with other soups
in the union, a union soup's constituent soups (also called member soups) are no

C H A P T E R 1 1
Data Storage and Retrieval
11-4
About Data Storage on Newton Devices
different from soups that are not part of a union. Unless specifically noted
otherwise, anything said about soups in this text applies equally to union soups.
Figure 11-1
Stores, soups and union soups
In general, you'll want to use union soups for most purposes, especially for saving
most data the user creates with your application. Applications must allow the user
to choose whether to save new data on the internal or external store; using union
soups makes this easy to do.
An application creates a union soup by registering a soup definition frame with the
system; registering the soup definition causes the system to return a union soup
object to which the application can send messages that save and retrieve data. This
object may represent a new soup, one created previously, or no soups (if, for some
reason, all of the union's member soups are unavailable). For a detailed discussion
of soup creation, see "Soups" beginning on page 11-7.
All soups save frame data as objects called entries. An entry is a frame that has
been added to a soup by means of any of several system-supplied methods
provided for this purpose. Note that you cannot create a valid entry by simply
adding certain slots and values to a frame--the system must create the entry for
you from a frame presented as an argument to one of the entry-creation methods.
Returning to the database analogy, you can think of entries as individual records in
the database, and you can think of the soup as the database itself. Like a database, a
soup is opaque--you retrieve data by requesting it, rather than by examining its
records directly.
Your request for soup data takes the form of a
Query
message sent to the soup or
union soup object. The
Query
method accepts as its argument a frame known as
Internal Store
Entries
External Store
aSoup
aSoup
Union Soup
{theNum:121088
, ...
}
{myFn:<code block>
, ...
}
{aSlot:"some string data"
, ...
}
{data:
, ...
}
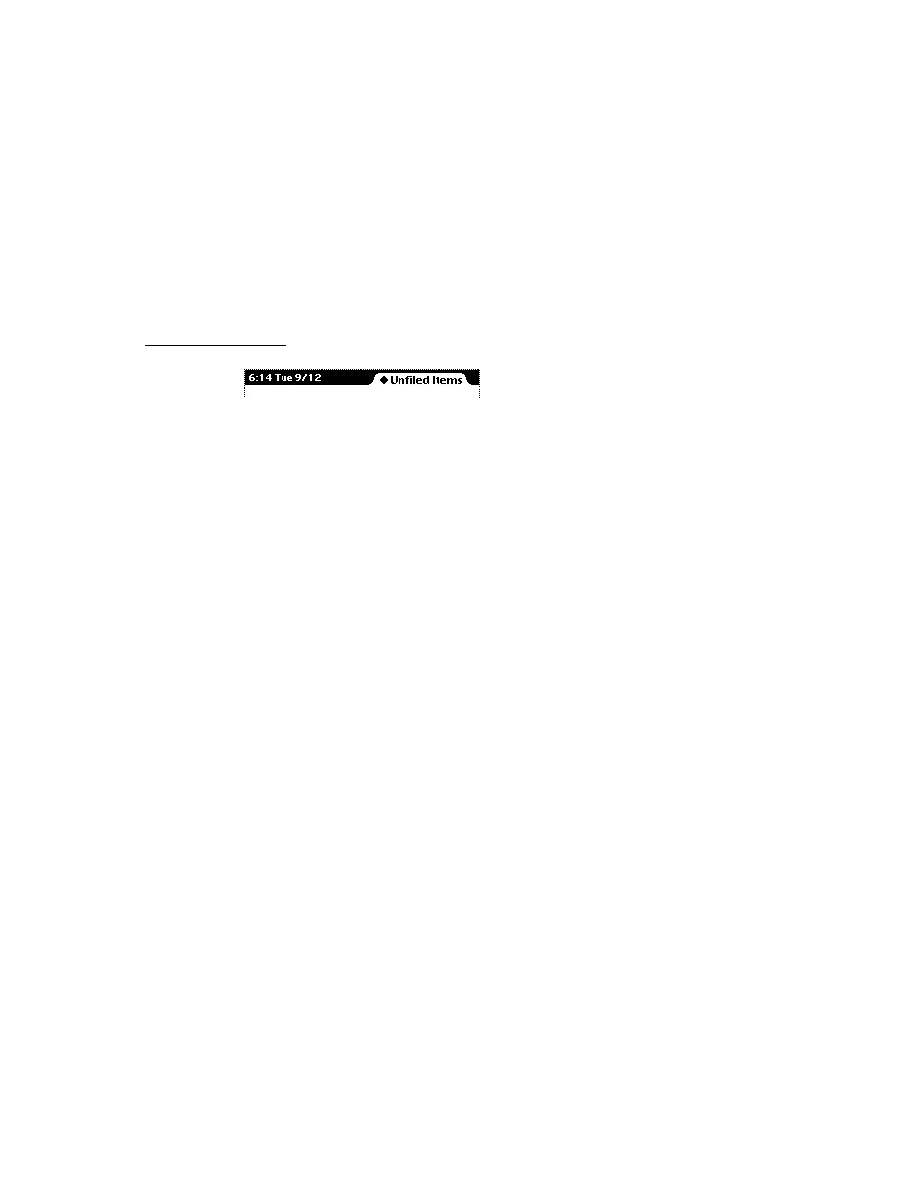
C H A P T E R 1 1
Data Storage and Retrieval
About Data Storage on Newton Devices
11-5
the query specification or query spec. The query spec describes the kind of
information the query returns. The order in which soups return data items is
imposed by an index you define for a specified soup.
If you've ever used an array, you are already familiar with the concept of an index.
Each element of the array is associated with a unique numeric value called a key.
These key values can be sorted, thus imposing order on their associated data items
(the elements of the array). In the case of a common array, a single numeric index
sorts the array elements in ascending key order.
Key values can also be used to reference or retrieve an indexed item. For example,
arrays allow you to reference or retrieve the data at a particular position in the array
without regard to the actual content stored at that position. Soup indexes provide
similar capabilities for soup data: they allow you to find and sort soup entries
associated with specified key values without specific knowledge of the data associated
with a particular key value.
You can index soup entries on any slot value you need to use as a key for extracting
them from the soup. For example, you could retrieve entries having a certain
creation date, or entries in which a particular string is present, and so on. Soups can
be created with a set of default indexes you specify and you can also add new
indexes to existing soups. Indexes are discussed in more detail in "Indexes"
beginning on page 11-8.
A soup responds to a query by returning a cursor object that iterates over the set of
entries meeting the criteria defined by the query spec. Cursors are updated
dynamically: if soup entries meeting the search criteria are added or deleted after
the original query is made, these changes are reflected automatically in the set of
entries that the cursor returns.
The cursor responds to messages that position it within the set of entries it
references and extract individual entries from this set. Until an entry is extracted
from the cursor, its data resides in the soup that was queried to generate the cursor.
The first time a slot in the entry is referenced--whether to read its value, set its
value, or to print its value in the Inspector--the system creates a normal frame
from it that is referenced by a special area of the NewtonScript heap known as the
entry cache. Changes to the entry's soup data are actually made in the cached
frame, not the permanent store; hence, changes to a soup entry are not persistent
until the cached frame is written back to a soup. This scheme makes it simple to
undo the changes to a soup entry--the system simply throws away the cached
frame and restores references to the original, unmodified soup entry.
Because the frame-based storage model facilitates the sharing of data, the system
provides a soup change notification mechanism that you can use to advise other
objects of changes to soups or soup data. All the methods that add, modify, or
delete soups or soup entries provide the option to execute registered callback
functions in response to changes in specified soups. Soup changes for which
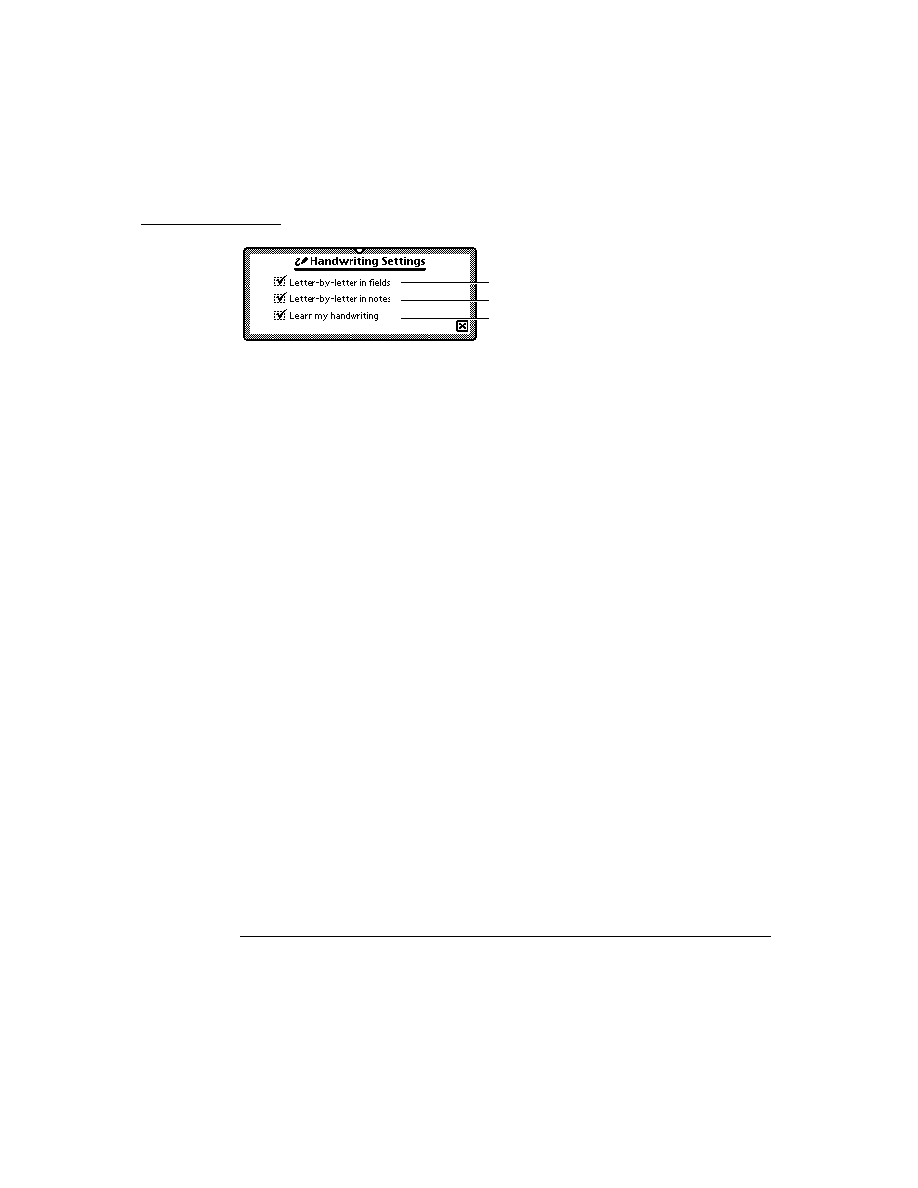
C H A P T E R 1 1
Data Storage and Retrieval
11-6
About Data Storage on Newton Devices
applications might require notification include creating soups; deleting soups; and
adding, removing, or changing individual soup entries. The soup change
notification mechanism is discussed in more detail in "Using Soup Change
Notification" beginning on page 11-63.
In summary, most applications that work with dynamic data perform the following
operations, which are described in this chapter:
creating and using frames
storing frames as soup entries
querying soups to retrieve sets of entries
using cursor objects to work with sets of soup entries
extracting individual entries from cursor objects
manipulating individual soup entries as frame objects
returning modified entries to the soup from which they came
notifying other applications of changes to soups
Where to Go From Here
11
You should now have a general understanding of how stores, soups, queries,
cursors, and entries interact. It is strongly recommended that you read the remainder
of this section now--it provides important details you'll need to know in order to
work with the Newton data storage system. However, if you are anxious to begin
experimenting with Newton data storage objects, you can skip ahead to
"Programmer's Overview" on page 11-25 and read the remainder of this section at
another time.
Stores
11
Although soups and packages reside on stores, the occasions on which you'll need
to interact with stores directly are rare--the system manages hardware interaction
for you, creates union soups automatically as needed, and provides a programming
interface that allows you to perform most union soup operations without
manipulating the stores on which individual member soups reside. Occasionally,
you may need to message a store directly in order to create or retrieve a soup that is
not part of a union, or you may need to pass a store object as an argument to certain
methods; otherwise, most applications' direct interaction with stores is limited.
In general, only specialized applications that back up and restore soup data need to
manipulate stores directly. However, the system provides a complete developer
interface to stores, as documented in "Data Storage and Retrieval Reference"
(page 9-1) in Newton Programmer's Reference.
C H A P T E R 1 1
Data Storage and Retrieval
About Data Storage on Newton Devices
11-7
For information on using store objects, see "Using Stores" beginning on page 11-29.
Packages
11
A package is the basic unit of downloadable Newton software: it provides a means
of loading code, resources, objects, and scripts into a Newton device. Most Newton
applications are shipped as packages that can be installed on a Newton device by
applications such as Newton Package Installer or Newton Backup Utility.
Packages can be read from a data stream or directly from memory. For example,
Newton Connection Utility uses a data stream protocol to load a package into the
Newton system from a MacOS or Windows computer. However, it is much more
common to use packages directly from memory, as the user does after the package
has been installed on the Newton device.
For a more detailed discussion of packages, see "Parts" on page 12-3 in
Chapter 12, "Special-Purpose Objects for Data Storage and Retrieval."
Soups
11
This section provides important background information about soup objects. Topics
discussed here include
soups vs. union soups
related data structures such as soup definitions, indexes, index specification
frames, and tags
automatic creation of soups
saving user preferences in the system soup
Applications using soup-based data storage must respect the user's default store
preferences for writing soup entries and create soups only as necessary. The use of
union soups makes it easy to observe these requirements. Union soups provide
methods that respect the user's default store preferences automatically when adding
new entries. These ROM-based methods are also much faster than equivalent
NewtonScript code. Union soups also provide methods you can use on those
occasions when you must specify the store on which to save soup entries.
Another good reason to use union soups is that applications almost never need to
create them explicitly. Once a soup definition is registered with the system, individual
members of the union soup it defines are created automatically as needed.
A soup definition is a frame that provides information about a particular union
soup. The soup definition supplies descriptive information about the union soup
and information required to create its member soups.

C H A P T E R 1 1
Data Storage and Retrieval
11-8
About Data Storage on Newton Devices
The soup definition frame specifies a name that identifies the soup to the system, a
user-visible name for the soup, a symbol identifying the application that "owns"
the soup, a user-visible string that describes the soup, and an array of index
specification frames defining the default set of indexes with which the soup is
created. For a complete description of the slots in the soup definition frame, see the
section "Soup Definition Frame" (page 9-2) in Newton Programmer's Reference.
Methods that add an entry to a union soup use the information in its soup definition
to create a member soup to hold the new entry if the member soup is not present on
the appropriate store at the time the entry is added. If a member of the union is
present on the specified store, the new entry is added to the existing member soup
and a new soup is not created. In most cases, the store in question is specified by
the user's preferences for the default storage of new data items; if necessary,
however, you can specify by store the member soup in which the new entry is to
reside. Note also that you can create union soup members explicitly, if necessary.
If no frames have ever been added to a particular union soup, the union's member
soups may not exist at all. You can add entries to a union soup in this state
(member soups are created automatically), but you cannot query a union soup that
has no members.
Member soups may be unavailable for other reasons, as well. For example, the
user might have removed a member soup temporarily by ejecting the card on
which it resides or might have removed the soup permanently by scrubbing it in
the Extras Drawer.
The descriptive information in a soup definition frame can be used to supply
information about a soup for use by the system, applications, or the user. For
example, this information can be used to make the user aware of a particular soup's
owner and function before allowing the user to delete the soup.
To make a soup definition available for use, you must first register it with the
system. For information on registering and unregistering soup definitions, see the
section "Registering and Unregistering Soup Definitions" beginning on page 11-33.
NewtApp applications also make use of soup definitions; for more information, see
Chapter 4, "NewtApp Applications."
Indexes
11
An index is a data structure that provides random access to the entries in a soup as
well as a means of ordering those entries. A designated value extracted from each
soup entry is stored separately in the soup's index as the index key for that entry.
Because the system can retrieve and sort index key values without reading their
associated soup entries into memory, indexes provide a fast and efficient means of
finding soup entries.
The system maintains all indexes automatically as soup entries are added, deleted,
or changed. Thus, index data is always up-to-date and readily available.

C H A P T E R 1 1
Data Storage and Retrieval
About Data Storage on Newton Devices
11-9
You can create your own specialized indexes for any soup. You need to create an
index for each slot or set of slots on which the soup will be searched frequently. It
is preferable to define your indexes in the appropriate soup definition, but you can
add indexes to an existing soup if necessary.
An index generated against a single key value is called a single-slot index. A
single-slot index selects and sorts soup entries according to the value of a single
slot specified when the index is created. An index generated against multiple key
values is called a multiple-slot index. A multiple-slot index can select and sort
soup entries according to the values of multiple slots. A multiple-slot index can
associate up to a total of six key values with each entry it indexes. You can create
multiple indexes for any soup.
The characteristics of an index are specified by an index specification frame or
index spec. The values in the index spec frame indicate the kind of index to build,
which slot values to use as index data, and the kind of data stored in the indexed
slots. The precise format of the index spec frame varies according to whether it
defines a single-slot index or a multiple-slot index. For complete descriptions of
index specs, see "Single-Slot Index Specification Frame" on page 9-5 and
"Multiple-Slot Index Specification Frame" (page 9-6) in Newton Programmer's
Reference.
A tag is an optional developer-defined symbol used to mark one or more soup
entries. Tags reside in a developer-specified slot that can be indexed, with the
results stored in a special index called the tags index.
The tags index is used to select soup entries according to their associated symbolic
values without reading the entries into memory; for example, one could select the
subset of entries tagged
'business
from the
ROM_CardFileSoupName
soup
used by the built-in Names application. In fact, "filing" Newton data items in
"folders" is a user-interface illusion--the data really resides in soup entries and its
display is filtered for the user according to the tags associated with each soup entry.
Note that the system allows only one tags index per soup. Each soup can contain a
maximum of 624 tags. The system treats missing tags as
nil
values. For more
information, see "Tag-based Queries" on page 11-14.
A tags index specification frame, or tags index spec, defines the characteristics of
a soup's tags index. Like an index spec, a tags index spec can be used to create a
default tags index on a new soup or add a tags index to an existing soup. For a
complete description of the slots in a tags index spec frame, see the section "Tags
Index Specification Frame" (page 9-8) in Newton Programmer's Reference.
To better support the use of languages other than English, soup indexes and queries
can be made sensitive to case and diacritical marks in string values. (Normally,
string comparison in NewtonScript is insensitive to case and diacritics.) This
behavior is intended to allow applications to support the introduction of non-
English data easily; for example, the user might insert a PCMCIA card containing

C H A P T E R 1 1
Data Storage and Retrieval
11-10
About Data Storage on Newton Devices
data from a different locale. To take advantage of this behavior, the application
must create an internationalized index for the soup and the query must request the
alternate sorting behavior explicitly in its query spec. For more information, see
"Internationalized Sorting Order for Text Queries" on page 11-45.
Saving User Preference Data in the System Soup
11
Most of the time you'll want to store data in union soups, but one task for which
union soups are not suitable is the storage of your application's user preferences
data. There are several good reasons for always saving user preferences data on the
internal store:
If your application is on a card that is moved from one Newton device to another,
it acts the way the users of the respective Newton devices think it should.
It rarely makes sense to distribute preferences data among several storage cards.
It's difficult to guarantee that your application will always have access to any
particular card.
If your application is on the internal store and it simply adds preference data to
the default store, the preference data could be saved on an external store that
becomes unavailable to the application when a card is ejected.
Hence, the built-in
ROM_SystemSoupName
soup on the internal store is usually
the ideal place to keep your application's preference data. The
GetAppPrefs
function allows you to get and set your application's preferences frame in this
soup. For more information, see the description of this function in Chapter 26,
"Utility Functions." For more information about the
ROM_SystemSoupName
soup
itself, see Chapter 19, "Built-in Applications and System Data."
Queries
11
To retrieve entries from a soup or union soup, you perform a query by sending the
Query
message to the soup or union soup. The
Query
method accepts as its
argument a frame known as a query specification or query spec. The query spec
defines criteria for the inclusion of entries in the query result. You can think of the
query spec as a filter that the
Query
method uses to select a subset of the soup's
data. Queries can test index key values or string values and perform customized
tests that you define.
A single query spec can specify multiple criteria that entries must meet in order to
be included in the result of the query. For example, you can specify that your query
return all entries created after a certain date that are tagged
'business
but do not
contain the
"paid"
string. For instructional purposes, this chapter discusses
separately each test that a query spec may include.
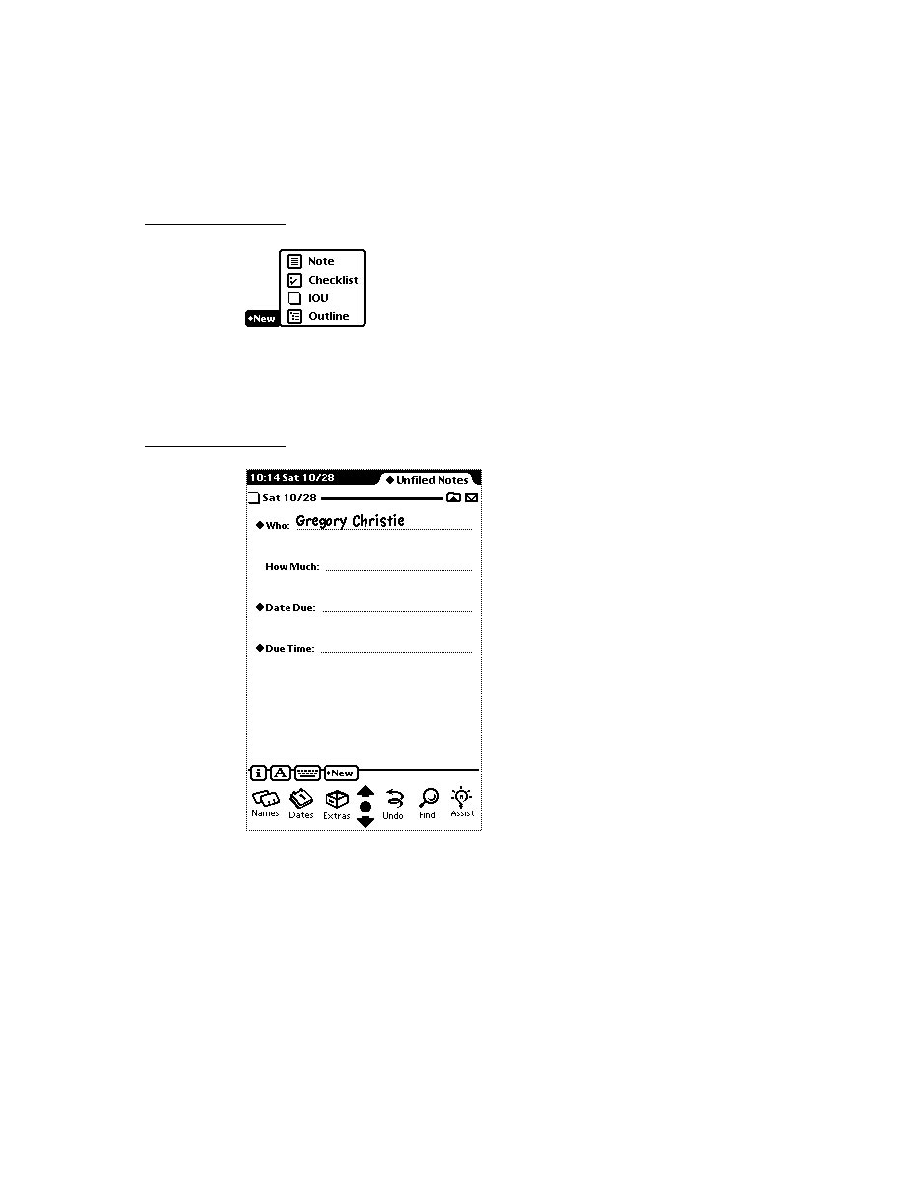
C H A P T E R 1 1
Data Storage and Retrieval
About Data Storage on Newton Devices
11-11
Querying for Indexed Values
11
Queries can retrieve items according to the presence of one or more index keys and
can test key values as well. A query that tests for the presence or value of an index
key is called an index query.
Soups that have single-slot indexes allow queries to use a single index key to select
soup entries. Detailed information is provided in "Querying on Single-Slot
Indexes" beginning on page 11-39.
Soups that have multiple-slot indexes allow queries to use multiple index keys to
select soup entries. Detailed information is provided in "Querying on Multiple-Slot
Indexes" beginning on page 11-47.
Index queries can be based only on slot names for which an index has been generated.
For example, to select entries according to the presence of the
foo
slot, the soup
that receives the
Query
message must be indexed on the
foo
slot. Entries not
having a
foo
slot are not included in the set of entries referenced by the
foo
index.
Although the entries in the soup are not actually in any particular order themselves,
the index keys associated with them can be sorted in a specific order that is defined
for each NewtonScript data type. Thus, you can envision the contents of an index
as a sequence of entries arranged in key order, as shown in Figure 11-2.
Figure 11-2
An index provides random access and imposes order
The
aSoup
soup shown in Figure 11-2 is indexed on the
foo
slot, which means
that the value of each entry's
foo
slot is used as its index key. Only those entries
containing a
foo
slot are included in this index. By sorting key values, the index
imposes order on their corresponding soup entries, which are otherwise unordered.
2 3 4 5
Ascending key order
Descending key order
Index on
foo
slot
Store
Soup
1
4
2
3
5
6
{foo:
, ...
}
{foo:
, ...
}
{foo:
, ...
}
{foo:
, ...
}
{bar:
, ...
}
{bar:
, ...
}

C H A P T E R 1 1
Data Storage and Retrieval
11-12
About Data Storage on Newton Devices
Indexes sort key values in ascending order unless the index spec frame used to
create a particular index specifies descending order.
Begin Keys and End Keys
11
Because index keys are sorted by value, you can improve the speed of an index
query significantly by limiting the range of index key values it tests. One way to do
this is to eliminate from the search any index key values that fall outside specified
minimum or maximum values. For example, you can specify a minimum index key
value used to select the first entry to be tested, causing the query to "skip over" all
lesser-valued index keys. A minimum value used in this way is defined in the query
spec as a
beginKey
value.
Similarly, you can specify a maximum index key value to be used in selecting the
last entry to be tested, causing the query to ignore entries having index keys of
greater value. A maximum value used in this way is defined in the query spec as an
endKey
value.
You can use these optional
beginKey
and
endKey
values together to specify a
subrange of index key values, as shown in Figure 11-3. Note that if an endrange
value is not specified, it is unbounded; for example, if you don't specify an
endKey
value the query result potentially includes all entries through the end of the index.
Figure 11-3
Using
beginKey
and
endKey
values to specify an index subrange
You can also define a special kind of key that is itself excluded from the valid
subrange of index values. These keys are defined as
beginExclKey
and
endExclKey
values in the query spec. Figure 11-4 depicts the use of
beginExclKey
and
endExclKey
values to define the same index subrange
shown in Figure 11-3. Note that you cannot specify both the inclusive and
Ascending key order
Descending key order
beginKey
endKey
subrange of index key values
3 4 5

C H A P T E R 1 1
Data Storage and Retrieval
About Data Storage on Newton Devices
11-13
exclusive forms of the same endrange selector; for example, a single query spec
cannot specify both a
beginKey
value and a
beginExclKey
value.
Another important point to understand is that there is only one
beginKey
or
beginExclKey
value, and only one
endKey
or
endExclKey
value associated
with any query and the cursor it returns.
Figure 11-4
Using
beginExclKey
and
endExclKey
values to specify
a subrange
Each
beginKey
,
beginExclKey
,
endKey
, or
endExclKey
specification
evaluates to a single value that has a unique position in the sorted index key data.
This position marks one end of the range over which the cursor iterates. The cursor
never moves to a position outside the range specified by these keys.
If any endrange selectors are defined for a query, the relationship of the cursor's
entries to the endrange selectors may be summarized as follows:
entry
> beginExclKey
entry
beginKey
entry
endKey
entry
< endExclKey
You can think of these values as being used by the system in an inequality
expression to specify the range of the cursor; for example,
beginKey
entry
< endExclKey
Note that if a valid entry is not found at the key value specified for an endrange
selector, the cursor is positioned on the nearest entry in index key order that falls
within the range specified by the endrange selectors. For example, if a valid entry is
not found at the key value specified for a
beginKey
or
beginExclKey
value, the
Ascending key order
Descending key order
subrange of index key values
3 4 5
beginExclKey
endExclKey

C H A P T E R 1 1
Data Storage and Retrieval
11-14
About Data Storage on Newton Devices
cursor is positioned on the next valid entry in index key order. Similarly, if a valid
entry is not found at the key value specified for an
endKey
or
endExclKey
value,
the cursor is positioned on the previous valid entry in index key order. (The cursor
is never positioned beyond the
endKey
value or before the
beginKey
value.)
For information on using index queries, see "Querying on Single-Slot Indexes"
beginning on page 11-39 and "Querying on Multiple-Slot Indexes" beginning on
page 11-47.
Tag-based Queries
11
Index queries can also include or exclude entries according to the presence of one
or more tags. A tag is an optional developer-defined symbol that resides in a
specified slot in the soup entry.
The symbols used as tags are stored as the key values in the soup's tags index. As
with any other index, the system maintains the tags index automatically and queries
can test values in this index without reading soup entries into memory. Thus, tag-
based queries are quick and efficient.
Unlike other indexes, the tags index alone cannot be used as the basis of an index
query--it does not sort entries (as other indexes do), it only selects or eliminates
entries according to their associated tag values. However, you need not specify an
additional index in order to query on tag values; when a separate index is not
specified, queries on tags test all entries in the soup.
The tags for which the query tests are specified by a tags query specification
frame or tags query spec supplied as part of the query spec. The tags query spec
can specify set operators such as
not
,
any
,
equal
, and
all
to create complex
filters based on tag values. For example, you could use these operators to query for
entries having the
'USA
or
'west
tags that do not have the
'California
tag.
The set operators used by tags query specs are described in greater detail in "Tag-
based Queries" beginning on page 11-14 of this book and "Tags Query
Specification Frame" (page 9-13) in Newton Programmer's Reference.
Customized Tests
11
The use of indexes, begin keys, end keys, and tags provides sufficient control over
query results for most uses; however, you can specify additional customized tests
when necessary. These tests take the form of an
indexValidTest
or
validTest
function that you define in the query spec.
The
indexValidTest
function tests the index key values associated with each
entry in the range of values over which the cursor iterates. This function returns
nil
for an entry that is to be rejected, and returns any non-
nil
value for an entry
that is to be included in the results of the query. Like all tests that manipulate index

C H A P T E R 1 1
Data Storage and Retrieval
About Data Storage on Newton Devices
11-15
key values,
indexValidTest
functions are fast and efficient because index key
values are always kept in memory.
Another kind of customized test, the
validTest
function, works like the
indexValidTest
function but tests the soup entry itself rather than its associated
index key value. To perform this test, the query must actually read the soup entry
into the NewtonScript heap, which takes more time and uses more memory than
tests which operate on index key values only. Thus, for performance reasons,
validTest
functions should be used only when absolutely necessary. It is
strongly suggested that you use index-based approaches to limit the range of
entries passed to the
validTest
function.
For information on using
indexValidTest
and
validTest
functions, see
"Querying on Single-Slot Indexes" beginning on page 11-39.
Text Queries
11
Queries can also select entries according to the presence of one or more specified
strings. For instructional purposes, this section describes separately each of the text
searches that queries can perform--remember, though, that a single query spec can
specify multiple tests for the query to perform on each soup entry it examines.
A words query tests all strings in each soup entry for a word beginning or for an
entire word. A text query is similar to a words query but its test is not limited to
word boundaries.
The default behavior for a words query is to test for word beginnings. For example,
a words query on the string
"smith"
would find the words
"smithe"
and
"smithereens"
. The word
"blacksmith"
would not be included in the results
of the search because the string
"smith"
is not at a word beginning. Because
words queries are not case sensitive, the word
"Smithsonian"
would also be
found by this query.
If you specify that the words query match only entire words, it returns only entries
containing the entire word
"smith"
or
"Smith"
and does not return any other
variations. You can also specify explicitly that the query be sensitive to case and
diacritics, causing it to return only the
"smith"
entry.
A words query is slower than a similar index query because it takes some time to
test all the string values in a soup entry. For information about performing words
queries, see "Querying for Text" beginning on page 11-43.
A text query is similar to a words query but its test is not limited to word
boundaries; that is, it tests all strings in each soup entry for one or more specified
strings, regardless of where they appear in the word. For example, a words query
on the string
"smith"
would find the words
"smithe"
and
"smithereens"
as
well as the word
"blacksmith"
. Because text queries are not case sensitive

C H A P T E R 1 1
Data Storage and Retrieval
11-16
About Data Storage on Newton Devices
unless this behavior is requested explicitly, the words
"blackSmith"
and
"Smithsonian"
would also be found by this query.
A text query is slower than its words query counterpart. Text queries do not require
significantly more heap space than other kinds of queries.
For more information about performing text queries, see "Querying for Text"
beginning on page 11-43.
Cursors
11
The
Query
method returns a cursor, which is an object that iterates over the set of
entries satisfying the query spec and returns entries in response to the messages it
receives. Cursors return entries in index key order. As entries in the soup are added,
deleted, and changed, the set of entries the cursor references is updated
dynamically, even after the original query has been performed.
Recall that after selecting a subrange of all entries in the soup, a query can use
various tests to eliminate certain entries within that range. If viewed within the
context of the entire soup index, the final set of valid entries is discontiguous--that
is, it includes gaps occupied by entries that did not meet the criteria established by
the query spec. However, the cursor presents this subset as a continuous range of
entries, as depicted in Figure 11-5.
Initially, the cursor points to the first entry in index order that satisfies the query.
The cursor supplies methods that allow you to determine its current position, retrieve
the entry referenced by its current position, or specify a new position. The cursor
may be moved incrementally, moved to the position occupied by a specified entry
or key, or reset to an initial position that is not necessarily the first entry in the valid
set. Note that it is possible to move the cursor incrementally to a position outside
the valid range of entries, in which case the cursor returns
nil
instead of an entry.
For information about using cursors, see "Using Cursors" beginning on page 11-53.

C H A P T E R 1 1
Data Storage and Retrieval
About Data Storage on Newton Devices
11-17
Figure 11-5
Cursor presents discontiguous index key values contiguously
Entries
11
An entry is a special kind of frame that resides in a soup. Valid entries can be
created only by system-supplied methods provided for this purpose--you cannot
create an entry by creating a frame having certain slots and values. The entry that
these methods create consists of the frame presented to the entry-creation method,
along with copies of any data structures the frame references, as well as copies of
any data structures those structures reference, and so on. An exception to this rule
is that
_proto
slots are not saved in soup entries. Circular references within an
entry are allowed.
1 2 3 4 5
6 7 8 9
2
4
6
2 4
6
beginKey
Indexed entries
Eliminate more
entries
Valid entries
in black
Valid entries as
presented by
cursor
Select subrange
of valid entries
endExclKey
indexValidTest: func (key)
begin
(key MOD 2 = 0)
end
subrange of index key values
2 3 4 5
6 7

C H A P T E R 1 1
Data Storage and Retrieval
11-18
About Data Storage on Newton Devices
All frames are compressed automatically when they are stored as soup entries and
all soup entries are decompressed when they are referenced. The automatic
compression and decompression of soup data reduces the amount of storage space
and run-time memory required by Newton applications.
If you add a frame that references another entry, the referenced entry is copied as a
frame into the new soup entry that is created. Similarly, if you move that entry to
another store, any data it references is moved to the new store as well.
The only way to retrieve an entry is to send the
Query
message to the soup or
union soup in which the entry resides. This method returns a cursor, which is an
object that returns entries in response to messages it receives.
As first returned by the cursor, the entry is a frame that holds references to the
entry's data. Soup data referenced by this frame is not decompressed until it is
referenced--for example, to get or set the value of one of the entry's slots. When a
slot in the entry is referenced, the system constructs the entire entry frame in the
NewtonScript heap.
Decompressed entries are cached in RAM until they are written back to the soup.
Applications can modify these cached entry frames directly. The system supplies
functions for modifying entries, writing them back to the soup, and manipulating
them in other ways.
For information about using entries, see the section "Using Entries" beginning on
page 11-57.
Alternatives to Soup-Based Storage
11
Although soup-based data storage offers many advantages, you may improve
your application's performance or reduce its RAM requirements by storing data
in other formats.
There are a wide variety of trade-offs to consider when choosing a structure to
represent your application data. You are strongly advised to conduct realistic tests
with the actual data set your application uses before committing to the use of a
particular data structure. It's also recommended that you design your application in
a way that allows you to experiment with the use of various data structures at any
point in its development.
When choosing schemes for storing your application's data, you need to consider
factors such as:
the kind of data to be saved
the quantity of data to be saved
how the application accesses the data

C H A P T E R 1 1
Data Storage and Retrieval
About Data Storage on Newton Devices
11-19
The most important factor to consider with respect to the kind of data is whether
the data is static or dynamic. You must use soups to store dynamic data, but a
number of options are available for storing static data. You will probably find that
certain structures lend themselves more naturally than others to working with your
particular data set.
Especially for large data sets, space-efficiency may influence your choice of one
data structure over another. In some cases, you may need to consider trade-offs
between space requirements and speed or ease of access.
Data access issues include questions such as whether the data structure under
consideration facilitates searching or sorting the data. For example, soups provide
powerful and flexible mechanisms for searching and sorting soup entry data.
Dynamic Data
11
Data your application gathers from the user must be stored in soups. Within
individual soup entries, you are free to store data in whatever manner best suits
your application's needs.
Because each entry in a soup is a frame, the price you pay for using soup-based
storage can be measured in terms of
the time required to find slots at run time
the memory space required to expand soup entries
the memory space required to store the expanded entry frames on the
NewtonScript heap
For many uses, the benefits offered by soups outweigh these costs; however, other
approaches may be more suitable for certain data sets, especially large sets of read-
only data.
For example, a large, read-only list of provinces and postal codes is saved most
compactly as a single array, frame, or binary object residing in a slot in the
application base view's template or in the application package itself. Information
stored in this way is compressed along with your application package and is not
brought into the NewtonScript heap when it is accessed. The primary disadvantages
of this scheme are that the data set is read-only and the conveniences provided by
soup queries are not available.
Static Data
11
Read-only or static data can be stored in packages held in protected memory on the
Newton. There are a variety of reasons you might store data in a package rather
than in a soup:
Storing static data in a compressed package rather than in a soup helps to
conserve store space and NewtonScript heap space.

C H A P T E R 1 1
Data Storage and Retrieval
11-20
About Data Storage on Newton Devices
Although the user might enter data dynamically, there might be a large initial set
of data your application needs to provide. Again, it's more efficient to supply
this as package data rather than as soup data.
You can supply multiple static data sets as separate packages to allow the user to
load some subset of that data. For example, a travel guide application might
keep data for individual countries in separate packages.
If your application makes use of a large initial data set to which the user can make
additions, you might consider a hybrid approach: keep the initial data set in your
base view's template and use a soup only for the user's additions.
A special-purpose object called a store part allows you to provide read-only soups
as package data; however, a soup residing on a store part cannot participate in a
union. For information about store parts, see Chapter 12, "Special-Purpose Objects
for Data Storage and Retrieval."
If you decide not to store your data in a soup, consider the following points:
Don't be too quick to discount frames as your data structure of choice--slot
lookup is very fast.
Storing data as a binary object can help you avoid some of the overhead associated
with array and frame data structures. In general, binary objects may let you store
your data more compactly, but make it more difficult to access: you'll need to
use the various
Extract
DataType functions to retrieve items. Note that the
ExtractCString
and
ExtractPString
functions create a string object in
the NewtonScript heap for each string extracted from a binary object.
Consider storing symbols for repeated strings rather than storing the strings
themselves. When you define a symbol for an object (such as a string or frame),
only one instance of the object is stored in the application package, and all the
symbols reference that instance. Remember that symbols are limited to 7-bit
ASCII values. Symbols (slot names) can include nonalphanumeric ASCII
characters if the name is enclosed by vertical bars; for example, the space in the
symbol
'|Chicken Little|
would normally be illegal syntax, but the
vertical bars suppress the usual evaluation of all characters they enclose.
Compatibility Information
11
This section provides version 2.0 compatibility information for applications that
use earlier versions of the data storage and retrieval interface.
Obsolete Store Functions and Methods
11
The following store methods and functions are obsolete:
store
:CreateSoup (
soupName
,
indexArray
) // use CreateSoupFromSoupDef
RemovePackage(
pkgFrmOrID
) // use SafeRemovePackage instead
store
:RestorePackage(
packageObject
) // use SuckPackageFromBinary instead

C H A P T E R 1 1
Data Storage and Retrieval
About Data Storage on Newton Devices
11-21
Soup Compatibility Information
11
This section contains compatibility information regarding
the new soup format introduced with version 2.0 of the Newton operating system
obsolete soup functions and methods
the new soup change notification mechanism introduced in version 2.0 of the
Newton operating system
soup information frame changes
null union soups on Newton 1.x devices
New Soup Format
11
Because 2.0 soup formats are incompatible with earlier versions of the Newton
data storage model, the system implements the following soup-conversion strategy:
When a 1.x data set is introduced to a Newton 2.0 system, the system allows the
user to choose read-only access or permanent conversion of the 1.x soup data to
the Newton 2.0 format.
Older systems display a slip that says "This card is too new. Do you want to
erase it?" when a Newton 2.0 soup is introduced to the system.
Obsolete Soup Methods and Functions
11
The system's approach to creating soups automatically has changed with version
2.0 of Newton system software. In previous versions of the system, any soup
registered by the
RegCardSoups
method was created automatically on any
PCMCIA card lacking that soup, even when the user specified that new items be
written by default to the internal store. The result was a proliferation of unused,
"empty" soups on any PCMCIA card introduced to the system.
Version 2.0 of Newton system software creates the members of union soups
automatically only when they are actually needed to store data. Thus, the
RegCardSoups
,
SetupCardSoups
,
RegisterCardSoup
, and
UnRegisterCardSoup
functions have been made obsolete by the
RegUnionSoup
and
UnRegUnionSoup
functions. Similarly, the
CreateSoup
store method has been made obsolete by the
RegUnionSoup
function. For more
information, see "Soups" beginning on page 11-7.

C H A P T E R 1 1
Data Storage and Retrieval
11-22
About Data Storage on Newton Devices
The following soup methods and functions are obsolete:
SetupCardSoups() // use RegUnionSoup instead
RegisterCardSoup(
soupName
,
indexArray
,
appSymbol
,
appObject
) // useRegUnionSoup instead
UnRegisterCardSoup(
soupName
)// use UnRegUnionSoup instead
BroadcastSoupChange(
soupNameString
) // use -xmit methods or
// XmitSoupChange fn instead
UnionSoupIsNull(
unionSoup
)// no null uSoups from GetUnionSoupAlways
GetUnionSoup(
soupNameString
)// use GetUnionSoupAlways instead
soup
:Add(
frame
) // use -xmit version instead
soup
:AddIndex(
indexSpec
) // use -xmit version instead
soupOrUSoup
:AddTags(
tagsToAdd
)// use -xmit version instead
unionSoup
:AddToDefaultStore(
frame
)// use -xmit version instead
soup
:AddWithUniqueId(
frame
)// use -xmit version instead
sourceSoup
:CopyEntries(
destSoup
)// use -xmit version instead
soup
:RemoveAllEntries() // use -xmit version instead
soup
:RemoveFromStore() // use -xmit version instead
soup
:RemoveIndex(
indexPath
) // use -xmit version instead
soupOrUSoup
:RemoveTags(
tagsToRemove
)// use -xmit version instead
soup
:SetInfo(
slotSymbol
) // use -xmit version instead
New Soup Change Notification Mechanism
11
Applications no longer modify system data structures directly to register and
unregister with the soup change notification mechanism. Instead, they use the
RegSoupChange
and
UnRegSoupChange
global functions provided for
this purpose.
In addition to the new registration and unregistration functions, the soup change
mechanism provides additional information about the nature of the change and
allows applications to register callback functions to be executed whenever a particular
soup changes. Consequently, the global function
BroadcastSoupChange
is obsolete.
For more details, see the section "Using Soup Change Notification" beginning on
page 11-63.
Soup Information Frame
11
Soups created from a soup definition frame carry a default soup information frame
that holds a copy of the soup definition frame. Soups created by the obsolete global
function
RegisterCardSoup
have a default soup information frame that
contains only the slots
applications
and
itemNames
.
Soups created by the obsolete store method
CreateSoup
do not contain a default
soup information frame.
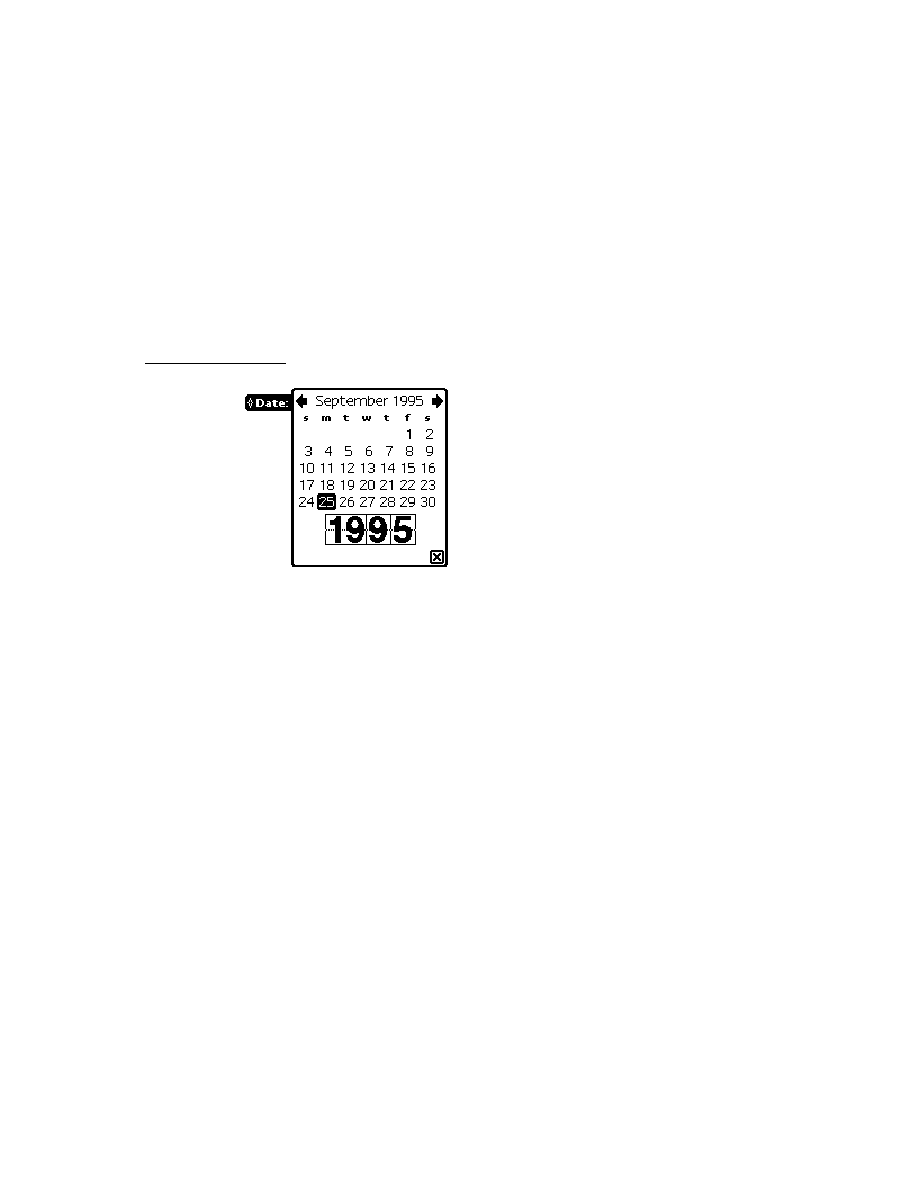
C H A P T E R 1 1
Data Storage and Retrieval
About Data Storage on Newton Devices
11-23
Null Union Soups
11
Under unusual circumstances a 1.x application may encounter a union soup that
doesn't contain any member soups. A soup in this state is referred to as a null
union soup. Queries on a null union soup fail. Attempts to add entries to a missing
member soup also fail if a soup definition for that soup has not been registered.
Null union soups should not normally occur with 1.x applications and cannot occur
with applications that use the 2.0 union soup interface correctly.
Null union soups are most often found in the aftermath of a debugging session--
for example, if in the NTK Inspector you have deleted various soups (to test the
cases in which your application needs to create its own soups) and neglected to
restore things to their normal state.
Null union soups can also occur as a result of the application soup not being
created properly. Normally, when a card is ejected, the internal store member of a
union soup is left behind or a soup definition for creating that soup is available.
When this is not the case, the union soup reference to the internal store member is
null when the card is ejected. If you follow the guidelines outlined in "Registering
and Unregistering Soup Definitions" on page 11-33 this problem does not occur.
Null union soups can also occur when another application deletes one or more
soups that your application uses. Any application that deletes soups should at least
transmit a soup change notification, thereby allowing your application to deal with
the change appropriately.
When your application is running on a 1.x unit or when no soup definition exists
for a union soup, it is appropriate to test for a constituent soup's validity before
trying to add an entry to it. Simply loop through the array of stores returned by the
GetStores
function, sending the
IsValid
message to each of the constituent
soups in the union.
Query Compatibility Information
11
Version 2.0 of Newton system software provides a more powerful query mechanism
while at the same time simplifying the syntax of queries. Although old-style query
syntax is still supported, you'll probably want to revise your application code to
take advantage of the features new-style queries provide. The following list
summarizes changes to queries. The remainder of this section explores query
compatibility issues in more detail.
Query (
soupOrUSoup
,
querySpec
) // use
soupOrUSoup
:Query(
querySpec
) instead
querySpec
:= {type :
symbol
, // obsolete, do not use
startKey:
keyValue
, // use beginKey or beginExclKey
endTest:
keyValue
, // endKey or endExclKey instead
... }

C H A P T E R 1 1
Data Storage and Retrieval
11-24
About Data Storage on Newton Devices
Query Global Function Is Obsolete
11
Queries are now performed by the
Query
method of soups or union soups;
however, the
Query
global function still exists for compatibility with applications
using version 1.x of the Newton application programming interface. The
Query
method accepts the same query specification frame argument that the
Query
global function did; however, version 2.0 query specs provide additional features
that 1.x queries do not. For examples of the use of the
Query
method, see "Using
Queries" beginning on page 11-38. For a complete description of the query spec
frame and its slots, see "Query Specification Frame" (page 9-9) in Newton
Programmer's Reference.
Query Types Obsolete
11
Query specs no longer require a
type
slot; if this slot is present, it is ignored.
StartKey and EndTest Obsolete
11
Because the order in which the cursor returns entries is determined entirely by
index values, specifying key values is sufficient to determine a range. Hence, the
use of an
endTest
function in a query spec is always unnecessary. Instead, your
query spec should specify an
endKey
or
endExclKey
value.
The
endTest
function was sometimes used for other purposes, such as stopping
the cursor after the visible portion of a list had been filled; however, this sort of test
is best performed outside the cursor to optimize performance. The caller of the
cursor's
Next
method should be able to determine when to stop retrieving soup
entries without resorting to the use of an
endTest
function.
When a cursor is generated initially and when it is reset, it references the entry
having the lowest index value in the set of entries in the selected subset. Thus, it is
usually unnecessary to use a start key, although this operation still works as in
earlier versions of system software. For those occasions when it is necessary to
start the cursor somewhere in the middle of the range, the use of a start key can be
simulated easily by invoking the cursor's
GotoKey
method immediately after
generating or resetting the cursor.
Queries on Nil-Value Slots Unsupported
11
In Newton system software prior to version 1.05, storing a value of
nil
in the
indexed slot of an entry returns
nil
to the query for that entry; that is, the query
fails to find the entry. To work around this problem in older Newton systems, make
sure your indexed slots store appropriate values.
In Newton system software version 2.0, the behavior of queries on
nil
-value slots
is unspecified. For best performance, make sure your indexed slots store
appropriate values.

C H A P T E R 1 1
Data Storage and Retrieval
Using Newton Data Storage Objects
11-25
Heap Space Requirements of Words and Text Queries
11
On systems prior to version 2.0, words and text queries generally require more
memory than index queries, because each entry to be tested must first be read into
the NewtonScript heap. System software version 2.0 uses virtual binary objects to
reduce the memory requirements of words and text queries significantly; however,
you need not be familiar with these objects yourself in order to query on string
values. Virtual binary objects are described in Chapter 12, "Special-Purpose
Objects for Data Storage and Retrieval."
Obsolete Entry Functions
11
The following entry functions are obsolete:
EntryChange(
entry
) // use -xmit version instead
EntryCopy(
entry
,
newSoup
) // use -xmit version instead
EntryMove(
entry
,
newSoup
)// use -xmit version instead
EntryRemoveFromSoup(
entry
)// use -xmit version instead
EntryReplace(
oldEntry
,
newEntry
)// use -xmit version instead
EntryUndoChanges(
entry
)// use -xmit version instead
Obsolete Data Backup and Restore Functions
11
The utility functions and methods in the following list are obsolete. Note that these
functions and methods are intended for use only by utility programs that back up
and restore Newton data.
soup
:AddWithUniqueId (
entry
)// use -xmit version instead
soup
:SetAllInfo (
frame
)// use -xmit version instead
EntryChangeWithModTime(
entry
)// use -xmit version instead
EntryReplaceWithModTime(
original
,
replacement
)// use -xmit version
Using Newton Data Storage Objects
11
This section describes how to use the most common Newton data storage objects
and methods. It presumes knowledge of the material in preceding sections. This
section begins with a programmer's overview, which is followed by sections
providing detailed explanations of the use of stores, soups, queries, cursors,
and entries.
Programmer's Overview
11
This section provides a code-level overview of common objects, methods, and
functions that provide data storage and retrieval services to Newton applications.
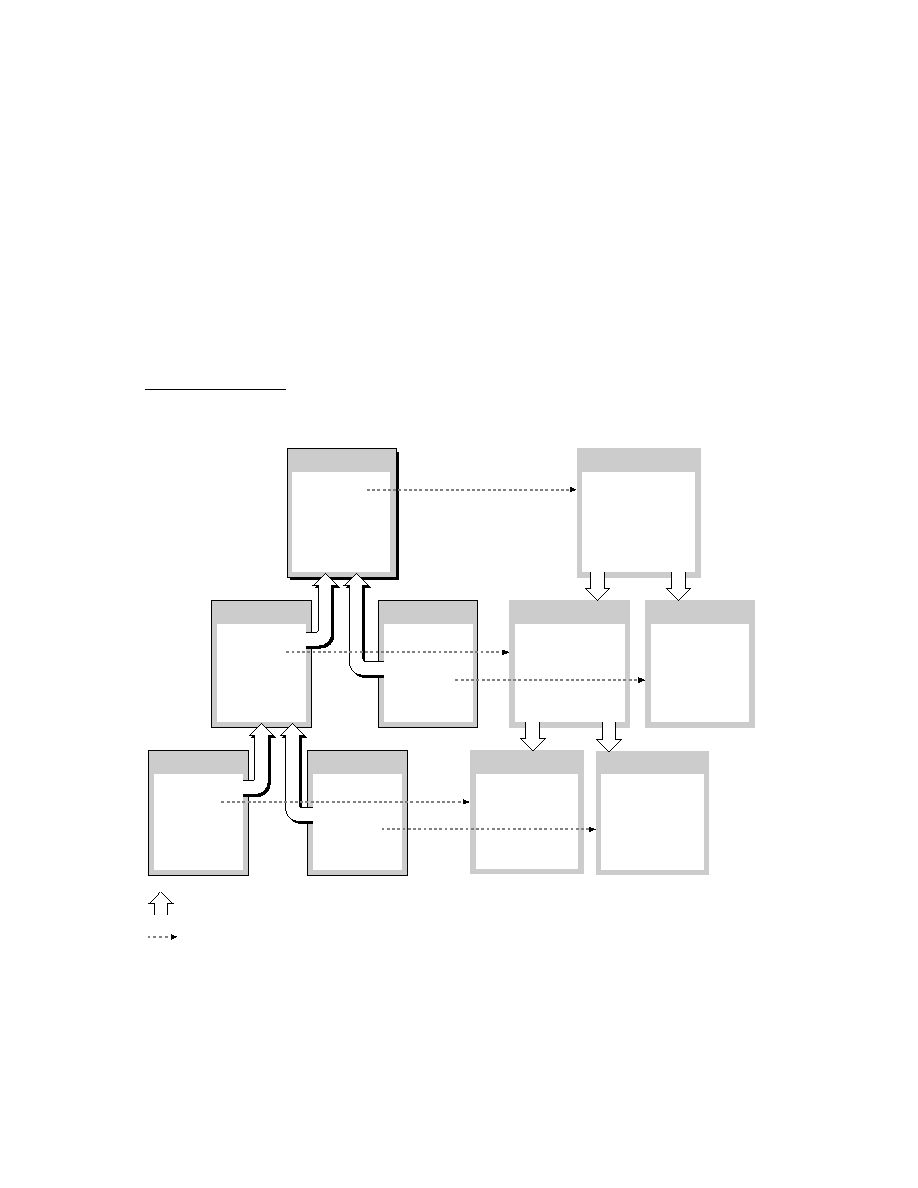
C H A P T E R 1 1
Data Storage and Retrieval
11-26
Using Newton Data Storage Objects
This section presumes understanding of the material in "About Data Storage on
Newton Devices" beginning on page 11-1.
Most applications store data as frames that reside in soup entries. You can create a
frame by simply defining it and saving it in a variable, a constant, or a slot in
another frame. For example, the following code fragment defines a frame
containing the
aSlot
and
otherSlot
slots. The frame itself is stored in the
myFrame
variable. For all practical purposes you can treat variables that hold
NewtonScript objects as the objects themselves; hence, the following discussion
refers to the frame saved in the
myFrame
variable as the
myFrame
frame.
myFrame := {aSlot: "some string data", otherSlot: 9258};
The
myFrame
frame contains two slots: the
aSlot
slot stores the
"some
string data"
string and the
otherSlot
slot stores the
9258
integer value.
Because every NewtonScript object encapsulates its own class data, you need not
declare types for NewtonScript data structures, including slots.
Frames are not persistent unless stored as soup entries. To add the
myFrame
frame
to a soup, you must send a message to the appropriate soup object. You can obtain
a soup or union soup object by creating a new one or by retrieving a reference to
one that is already present.
To create a new union soup, use the
RegUnionSoup
function to register its soup
definition with the system. The system uses this definition to create the union's
member soups as needed to store soup entries.
The following code fragment saves the union soup object
RegUnionSoup
returns
in the
myUSoup
local variable. You might place code like this example in your
application (
form
) part's
InstallScript
function or your application base
view's
ViewSetupFormScript
method:
local aSlotIndexSpec := {structure: 'slot, path: 'aSlot,
type: 'string};
local otherSlotIndexSpec := {structure: 'slot, path: 'otherSlot,
type: 'int};
local mySoupDef := {name: "mySoup:mySig",
userName: "My Soup",
ownerApp: '|MyApp:MySig|,
ownerAppName : "My Application",
userDescr: "This is the My Application soup.",
indexes: [aSlotIndexSpec,otherSlotIndexSpec]
};
local myUsoup := RegUnionSoup('|MyApp:MySig|,mySoupDef);
Note the use of the
mySig
developer signature as a suffix to ensure the uniqueness
of the values of the
name
and
ownerApp
slots. For more information regarding
developer signatures, see Chapter 2, "Getting Started."

C H A P T E R 1 1
Data Storage and Retrieval
Using Newton Data Storage Objects
11-27
When creating soups from within your application (
form
) part's
InstallScript
function, remember that this function calls the
EnsureInternal
function on
all values it uses. Thus, instead of passing references such as
partFrame.theForm.myMainSoupDef
to the
RegUnionSoup
function, paste
a local copy of your soup definition into your application part's
InstallScript
function for its use.
The
RegUnionSoup
function uses the value of your soup definition's
name
slot to
determine whether a particular soup definition has already been registered. You
need not be concerned with registering a soup definition twice as long as you don't
register different soup definitions that have the same name. An application that
registers a soup definition when it opens can always use the union soup object
returned by the
RegUnionSoup
function--if the union soup named by the soup
definition exists, this function returns it; otherwise, this function uses the specified
soup definition to create and return a new union soup.
The next code fragment uses the
AddToDefaultStoreXmit
function to add the
myFrame
frame to the
myUSoup
union soup. This function creates a new member
soup to hold the entry if necessary. The soup is created on the store indicated by the
user preference specifying where new items are kept.
myUSoup:AddToDefaultStoreXmit(myFrame, '|MyApp:MySig|);
At this point, we have created a soup on the store specified by the user and added
an entry to that soup without ever manipulating the store directly.
Because you'll often need to notify other applications--or even your own
application--when you make changes to soups, all the methods that modify
soups or soup entries are capable of broadcasting an appropriate soup change
notification message automatically. In the preceding example, the
AddToDefaultStoreXmit
method notifies applications registered for changes
to the
myUSoup
union soup that the
'|MyApp:MySig|
application added an
entry to this union soup. For more information, see "Callback Functions for Soup
Change Notification" (page 9-14) in Newton Programmer's Reference.
Most of the time, your application needs to work with existing soups rather than
create new ones. You can use the
GetUnionSoupAlways
function to retrieve an
existing soup by name.
Once you have a valid soup object, you can send the
Query
message to it to
retrieve soup entries. The
Query
method accepts a query specification frame as its
argument. This frame defines the criteria soup entries must meet in order to be
retrieved by this query. Although you can pass
nil
as the query spec in order to
retrieve all the entries in a soup, usually you'll want to retrieve some useful subset
of all entries. For example, the following code fragment retrieves from
myUsoup
all entries having an
aSlot
slot. For an overview of the use of query specifications,
see "Using Queries" beginning on page 11-38.

C H A P T E R 1 1
Data Storage and Retrieval
11-28
Using Newton Data Storage Objects
// get from myUSoup all entries having an aSlot slot
local myCursor := myUSoup:Query({indexPath: 'aSlot});
The
Query
method returns a cursor object that iterates over the set of soup entries
satisfying the query specification passed as its argument. You can send messages to
the cursor to change its position and to retrieve specified entries, as shown in the
following example. For an overview of cursor-manipulation functions, see
"Moving the Cursor" beginning on page 11-55.
// move the cursor two positions ahead in index order
myCursor:Move(2);
// retrieve the entry at the cursor's current position
local myEntry := myCursor:Entry();
For the purposes of discussion, assume that the cursor returned the entry holding
the
myFrame
frame. When accessing this frame, use the NewtonScript dot
operator (
.
) to dereference any of its slots. In the current example, the expression
myEntry.aSlot
evaluates to the
"some string data"
value and the
expression
myEntry.otherSlot
evaluates to the
9258
value.
As soon as any slot in the entry is referenced, the system reads entry data into a
cache in memory and sets the
myEntry
variable to reference the cache, rather than
the soup entry. This is important to understand for the following reasons:
Referencing a single slot in an entry costs you time and memory space, even if
you only examine or print the slot's value without modifying it.
Changing the value of a slot in the entry really changes the cached entry frame,
not the original soup entry; changes to the soup entry are not persistent until the
cached entry frame is written back to the soup, where it takes the place of the
original entry.
You can treat the cached entry frame as the
myFrame
frame and assign a new
value to the
aSlot
slot directly, as shown in the following code fragment:
myEntry.aSlot := "new and improved string data";
To make the changes permanent, you must use
EntryChangeXmit
or a similar
function to write the cached entry frame back to the soup, as in the following example:
EntryChangeXmit(myEntry, '|MyApp:MySig| );
Like the other functions and methods that make changes to soups, the
EntryChangeXmit
function transmits an appropriate soup change notification
message after writing the entry back to its soup; in this case, the notification
specifies that the
'|MyApp:MySig|
application made an
'entryChanged
change to the soup. (All entries store a reference to the soup in which they reside,
which is how the
EntryChangeXmit
method determines which soup changed.)

C H A P T E R 1 1
Data Storage and Retrieval
Using Newton Data Storage Objects
11-29
You can use the
EntryUndoChangesXmit
function to undo the changes to the
soup entry if you have not yet written the cached entry back to the soup. Because
this function throws away the contents of the entry cache, referencing a slot in the
entry after calling the
EntryUndoChangesXmit
function causes entry data to be
read into the cache again.
Most applications unregister their soup definitions when they are closed or
removed. To facilitate the automatic creation of soups when the user files or moves
soup entries in the Extras drawer, you may want your soup definition to remain
registered while your application is closed--to unregister only when your
application is removed, call the
UnRegUnionSoup
function from your application
(
form
) part's
DeletionScript
function.
The following code example uses the
UnRegUnionSoup
function to unregister a
soup definition. Because a single application can create multiple soups and soup
definitions, soup definitions are unregistered by name and application symbol:
// usually in your app part's DeletionScript fn
UnRegUnionSoup("mySoup:mySig",'|MyApp:MySig|);
Using Stores
11
Because the system manages stores automatically, most NewtonScript applications'
direct interaction with store objects is limited. This section describes the use of
system-supplied functions and methods for
getting store objects
retrieving packages from stores
testing stores for write protection
getting and setting store information
Procedures for manipulating other objects that reside on stores (such as soups,
store parts and virtual binary objects) are described in "Using" sections for each of
these objects; for detailed information, see "Using Soups" on page 11-32; "Using
Virtual Binary Objects" on page 12-8; and "Using Store Parts" on page 12-12.
Store Object Size Limits
11
The system imposes a hard upper limit of 64 KB on store object sizes for any kind
of store. SRAM-based stores impose a further limitation of 32 KB on block size.
Trying to create an entry larger than 32 KB causes the system to throw
|evt.ex.fr.store|
exceptions. These limits apply to the encoded form the
data takes when written to a soup, which varies from the object's size in the
NewtonScript heap.

C H A P T E R 1 1
Data Storage and Retrieval
11-30
Using Newton Data Storage Objects
Referencing Stores
11
The
GetStores
global function returns an array of references to all currently
available stores. You can send the messages described in this section to any of the
store objects in this array.
local allStores := GetStores();
W A R N I N G
Do not modify the array that the
GetStores
function returns.
You can reference individual stores in the array by appending an array index value
to the
GetStores
call, as in the following code example:
local internalStore := GetStores()[0];
The first element of the array returned by the
GetStores
function is always the
internal store; however, the ordering of subsequent elements in this array cannot be
relied upon, as it may vary on different Newton devices.
IMPORTANT
Don't call the
GetStores
function from your application's
RemoveScript
method, or you may find yourself looking at the
"Newton needs the card..." slip. You can avoid this situation by
using the
IsValid
store method to test the validity of a store
object before sending messages to it.
Retrieving Packages From Stores
11
The
GetPackages
global function returns an array of packages currently available
to the system; this array contains packages that reside on any currently available store.
To determine the store on which a specified package resides, test the value of the
store
slot in the package reference information frame associated with the
package. This frame is returned by the
GetPkgRefInfo
function.
To load a package procedurally, use either of the store methods
SuckPackageFromBinary
or
SuckPackageFromEndpoint
. For more
information, see the descriptions of these methods in "Data Storage and Retrieval
Reference" (page 9-1) in Newton Programmer's Reference.
Testing Stores for Write-Protection
11
The store methods
CheckWriteProtect
and
IsReadOnly
determine whether a
store is write-protected. The former throws an exception when it is passed a
reference to a write-protected store, while the latter simply returns the value
nil

C H A P T E R 1 1
Data Storage and Retrieval
Using Newton Data Storage Objects
11-31
for such stores. Do not use the global function
IsReadOnly
to test store objects;
use only the
IsReadOnly
store method for this purpose.
Getting or Setting the Default Store
11
The default store is that store designated by the user as the one on which new data
items are created. Normally, applications using union soups do not need to get or
set the default store. The system-supplied functions that accept union-soup
arguments handle the details of saving and retrieving soup data according to
preferences specified by the user.
If for some reason you need to get or set the default store yourself, you can utilize
the
GetDefaultStore
and
SetDefaultStore
global functions.
Note
Do not change the default store without
first notifying the user.
Getting and Setting the Store Name
11
Normal NewtonScript applications rarely need to get or set store names. A store's
name is the string that identifies the store in slips displayed to the user. The default
name for the internal store is "Internal" and a PCMCIA store is named "Card" by
default. The store methods
GetName
and
SetName
are used to get and set the
names of stores.
The following example uses the
GetName
method to obtain a string that is the
name of the internal store:
//returns the string "Internal"
GetStores()[0]:GetName();
Before attempting to set the store's name or write any other data to it, you can use
the store methods
IsReadOnly
or
CheckWriteProtect
to determine whether
the store can be written.
W A R N I N G
Renaming a store renders invalid all aliases to entries residing on
that store. See "Using Entry Aliases" on page 12-7.
Accessing the Store Information Frame
11
Each store may hold an optional information frame that applications can use to
save information associated with the store itself. Note that unless an application
stores data in this frame, it may not exist on every store.
The
GetInfo
and
SetInfo
store methods are intended for use by backup/restore
applications only; most applications need not use them at all. The
GetInfo
store

C H A P T E R 1 1
Data Storage and Retrieval
11-32
Using Newton Data Storage Objects
method retrieves the value of a specified slot in the store information frame. Its
corollary, the
SetInfo
store method, writes the value of a specified slot in this frame.
Using Soups
11
This section discusses the functions and methods used to work with soup objects.
Individual entries in soups and union soups are manipulated by means of queries,
cursors, and entry functions, as described in subsequent sections of this chapter.
This section describes procedures for
creating soups and indexes
retrieving existing soups
indexing existing soups
reading and writing soup data
accessing information about the soup itself and the store on which it resides
removing soups
Naming Soups
11
When creating soups, you need to follow certain naming conventions in order to
avoid name collisions with other applications' soups. Following these conventions
also makes your own soups more easily identifiable.
If your application creates only one soup, you can use your package name as the
name of its soup. Your package name is created by using a colon (
:
) to append
your package's Extras Drawer name to your unique developer signature. For
example, if your developer signature is
"myCompany"
and you are creating a
package that appears in the Extras Drawer with the name
"foo"
, concatenating
these two values produces the
"foo:myCompany"
package name.
If your application creates multiple soups, use another colon, followed by your
package name, as a suffix to a descriptive soup name. For example,
"soup1:foo:myCompany"
and
"soup2:foo:myCompany"
would be
acceptable soup names unlikely to duplicate those used by other applications.
Normally, each soup appears under its own icon in the Extras Drawer. If your
application creates multiple soups, it is recommended that you group them under a
single Extras Drawer icon. For more information, see "About Icons and the Extras
Drawer" on page 19-38 in Chapter 19, "Built-in Applications and System Data."
For additional information regarding naming conventions for your developer
signature and other items, see "Developer Signature Guidelines" on page 2-9 in
Chapter 2, "Getting Started."

C H A P T E R 1 1
Data Storage and Retrieval
Using Newton Data Storage Objects
11-33
Registering and Unregistering Soup Definitions
11
The
RegUnionSoup
global function registers a soup definition with the system
and returns a union soup object to which you can send messages. Once the soup
definition is registered, various union soup methods create the union's member
soups as needed to save entries. A corollary function,
UnRegUnionSoup
,
unregisters a specified soup definition.
You can register a soup definition with the system any time before your application
needs to access the soup it defines. If your application is the only one using your
soup, you need only ensure that its definition is registered while the application is
actually open. Normally, code that registers soup definitions is provided by your
application part's
InstallScript
function or your application base view's
ViewSetupFormScript
method. You need not be concerned with registering a
soup definition twice as long as you don't register different soup definitions that
have the same name.
Code to unregister soup definitions is usually provided either by your application
base view's
ViewQuitScript
method (to unregister when the application closes)
or your application part's
DeletionScript
function (to unregister only when the
application is removed.) An application that allows the user to file or move data
items from the Extras Drawer should allow its soup definitions to remain registered
while the application is closed, unregistering them only when the application is
removed. For more information on manipulating soup entries from the Extras
Drawer, see "About Icons and the Extras Drawer" on page 19-38 in Chapter 19,
"Built-in Applications and System Data."
Your application can also call the
RegUnionSoup
function to retrieve its own
union soups that already exist. If you call
RegUnionSoup
on a soup definition
that is already registered, this function replaces the currently registered soup
definition with the new one and returns the union soup named by the soup
definition passed as its argument; if that union soup does not exist, this method
uses the soup definition passed as its argument to create a new union soup that it
returns. Alternatively, you can call the
GetUnionSoupAlways
global function to
retrieve any extant union soup, not just those your application registers. For more
information, see "Retrieving Existing Soups" beginning on page 11-34.
To use the
RegUnionSoup
function, you might put code like the following
example in the
ViewSetupFormScript
method of your application's base view:
local mySoupDef := {name: "mySoup:mySig",
userName: "My Soup",
ownerApp: '|MyApp:MySig|,
ownerAppName : "My Application",
userDescr: "This is the My Application soup.",

C H A P T E R 1 1
Data Storage and Retrieval
11-34
Using Newton Data Storage Objects
indexes: [{structure: 'slot, path: 'aSlot,
type: 'string}]
};
// register soup or retrieve already-registered soup
local myUsoup := RegUnionSoup('|myApp:mySig|, mySoupDef);
You can unregister a soup definition whenever you no longer need to create the
soup it defines. If your application is the only one that uses your soup, you need
only ensure that its definition is registered while the application is actually open. If
other applications use your soup, you may wish to leave its definition registered
even after your application is closed or removed; however, most applications
unregister their soup definitions at one of these times, if only to make that much
more memory available to other applications.
The following code fragment illustrates the use of the
UnRegUnionSoup
function:
// unregister my soup def
UnRegUnionSoup (mySoupDef.Name, '|myApp:mySig|);
// don't forget to set all unused references to nil
myUsoup := nil;
Retrieving Existing Soups
11
To retrieve your own union soups, you can use the
RegUnionSoup
function as
described in "Registering and Unregistering Soup Definitions" beginning on
page 11-33. Alternatively, you can call the
GetUnionSoupAlways
global
function to retrieve any union soup by name.
Use of the
GetUnionSoupAlways
global function is straightforward, as the
following example shows. Note that you can pass system-supplied constants to this
function to retrieve soups used by the system and the built-in applications. For
more information, see Chapter 19, "Built-in Applications and System Data."
// retrieve "mySoup:mySig" union soup by name
local myUSoup := GetUnionSoupAlways("mySoup:mySig");
// retrieve soup used by built-in Names application
local names := GetUnionSoupAlways(ROM_CardFileSoupName);
Note that you can use the
IsInstance
utility function to determine whether a
specified soup is a union soup. Pass either of the symbols
'PlainSoup
or
'UnionSoup
as the value of the class parameter to this function, as shown in the
following code fragment.
IsInstance(mySoup, 'UnionSoup);

C H A P T E R 1 1
Data Storage and Retrieval
Using Newton Data Storage Objects
11-35
Adding Entries to Soups
11
This section describes how to add a frame to a union soup or a specified member
soup in a union. For information on creating union soups, see "Registering and
Unregistering Soup Definitions" on page 11-33. For information on retrieving
union soups, see "Retrieving Existing Soups" on page 11-34.
You can use either of the
AddToDefaultStoreXmit
or
AddToStoreXmit
methods to save frames as soup entries. Both of these methods create a single soup
in which to save the new entry when the appropriate member of the union is not
already present on the store. The
AddToDefaultStoreXmit
method adds its
entry to the member soup on the store specified by the user as the destination for
new entries. The
AddToStoreXmit
method allows you to specify according to
store the member soup to which it adds the new entry.
Methods that create soup entries--such as the
AddToDefaultStoreXmit
,
AddToStoreXmit
, and
AddXmit
methods--destructively modify the frame
presented as their argument to transform it into a soup entry. Thus, any frame
passed to these methods must allow write access. If the original frame must remain
unmodified, pass a copy of it to these methods.
The following code fragment saves a frame in the default store member of the
myUsoup
union by sending the
AddToDefaultStoreXmit
message to the
union soup object that the
RegUnionSoup
function returns:
// register soup def'n or get reference to already registered soup
local myUsoup := RegUnionSoup('|myApp:mySig|, mySoupDef);
// add the entry and transmit notification
local myEntry := myUSoup:AddToDefaultStoreXmit(
{aSlot:"my data"}, // frame to add to soup
'|myApp:mySig|); // app that changed soup
The following code fragment saves a frame in the internal store member of the
myUsoup
union by sending the
AddToStoreXmit
message to the union soup
object that the
GetUnionSoupAlways
function returns:
// get pre-existing uSoup by name
local myUSoup := GetUnionSoupAlways("mySoup:mySig");
// add entry to member on internal store and transmit notification
local myEntry := myUSoup:AddToStoreXmit(
{aSlot:"my data"}, // frame to add to soup
(GetStores()[0]), // add to member on internal store
'|myApp:mySig|); // app that changed soup

C H A P T E R 1 1
Data Storage and Retrieval
11-36
Using Newton Data Storage Objects
After creating the new soup entry, these methods transmit a soup change
notification message. To suppress the soup change notification message that -
Xmit
functions and methods transmit, pass
nil
as the value of their changeSym
argument. For more information, see "Using Soup Change Notification" beginning
on page 11-63; also see the descriptions of the
AddToDefaultStoreXmit
and
AddToStoreXmit
methods in "Soup Functions and Methods" (page 9-35) in
Newton Programmer's Reference.
Normally the member soups in a union are created automatically by the system as
needed to save frames as soup entries. If you need to force the creation of a union
soup member on a specified store without adding an entry to the new member soup,
use the
GetMember
union soup method to do so. For more information, see the
description of this method in "Soup Functions and Methods" (page 9-35) in
Newton Programmer's Reference.
Adding an Index to an Existing Soup
11
Normally, applications create an index for each slot or set of slots on which a soup
may be searched frequently. Although the soup's indexes are usually created along
with the soup itself, you may occasionally need to use the
AddIndexXmit
method
to add an index to an already existing soup and transmit a soup change notification
message. Indexes must be added individually--you can't pass arrays of index specs
to the
AddIndexXmit
method.
W A R N I N G
You cannot query a union soup on an index that is not present in
all its member soups. Sending the
AddIndexXmit
message to a
union soup adds the specified index to all soups currently
available to the union; however, any soup introduced to the union
subsequently has only its original complement of indexes, which
may not include the index this method added. Similarly, any
member soup created by the system has only the indexes specified
by its soup definition, which may not include the index this
method added.
The following code fragment adds an index to the
"mySoup:myApp"
union soup,
enabling queries to search for integer data in that soup's
mySlot
slot:
// get my union soup
local myUSoup := GetUnionSoupAlways("mySoup:mySig");
// add a new single-slot index on the'mySlot slot
local myISpec := {structure:'slot, path:'mySlot, type:'int};
local myUSoup:AddIndexXmit(myISpec,'|myApp:mySig|);

C H A P T E R 1 1
Data Storage and Retrieval
Using Newton Data Storage Objects
11-37
W A R N I N G
Each soup has only one tags index; if you add a tags index to a
soup that already has one, it replaces the original tags index. For
more information, see the description of the
AddIndexXmit
method (page 9-42) in Newton Programmer's Reference.
Removing Soups
11
When the user scrubs your application's icon in the Extras Drawer, the system
sends a
DeletionScript
message to your application. The
DeletionScript
function is an optional function that you supply in your application's
form
part.
This function accepts no arguments. You can remove your application's soups from
within this function by invoking the
RemoveFromStoreXmit
soup method. The
RemoveFromStoreXmit
method is defined only for single soups; in other words,
you must remove each member of a union soup separately.
For more information on the
DeletionScript
method, see the Newton Toolkit
User's Guide. See also "RemoveFromStoreXmit" (page 9-47) in Newton
Programmer's Reference.
Do not delete soups from within your application's
viewQuitScript
method--
user data needs to be preserved until the next time the application is run. For
similar reasons, do not remove soups from within your application's
RemoveScript
method. This method does not distinguish between removing
software permanently (scrubbing its icon in the Extras Drawer) and removing
software temporarily (ejecting the PCMCIA card.)
Using Built-in Soups
11
The soup-based data storage model makes it easy for applications to reuse existing
system-supplied soups for their own needs and to share their own soups with other
applications. Refer to Chapter 19, "Built-in Applications and System Data," to see
descriptions of the soups used by the applications built into the Newton ROM. You
can also use these descriptions as a model for documenting the structure of your
application's shared soups.
Making Changes to Other Applications' Soups
11
You should avoid changing other applications' soups if at all possible. If you must
make changes to another application's soup, be sure to respect the format of that
soup as documented by its creator. When possible, confine your changes to a single
slot that you create in any soup entry you modify.
When naming slots you add to other applications' soups, exercise the same caution
you would in naming soups themselves--use your application name and developer
signature in the slot name to avoid name-space conflicts.

C H A P T E R 1 1
Data Storage and Retrieval
11-38
Using Newton Data Storage Objects
This approach provides the following benefits:
It prevents your application from inadvertently damaging another
application's data.
It helps your application avoid name conflicts with other applications' slots.
It prevents soups from becoming cluttered with excessive numbers of entries.
It facilitates removal of your application's data.
Note that when you makes changes to other applications' soups you should
transmit notification of the changes by means of the mechanism described in
"Using Soup Change Notification" beginning on page 11-63.
Adding Tags to an Existing Soup
11
You can add tags only to a soup that has a tags index. To add new tags to a soup
that already has a tags index, simply add to the soup an entry that uses the new
tags--the tags index is updated automatically to include the new tags.
Adding a tags index to an existing soup is like adding any other kind of index:
simply pass the appropriate index spec to the soup's
AddIndexXmit
method.
Remember, however, that the system allows only one tags index per soup. If you try
to add another tags index to that soup, you'll replace the original tags index. It's
quite easy to add new tags to a soup that already has a tags index, so you'll rarely
need to replace a soup's tags index.
Using Queries
11
To retrieve soup entries, you need to query a soup or union soup object by sending
the
Query
message to it. The
Query
method accepts a query specification frame,
or query spec, as its argument. The query spec specifies the characteristics that
soup entries must have in order to be included in the query result.
Note
For instructional purposes, this section describes each item that
may appear in a query specification separately. Normally, a single
query spec defines multiple criteria that soup entries must meet to
be included in the results of the query; for example, you can
create a single query spec that specifies tests of index key values,
string values, and tags.
This section describes how to perform various queries to retrieve soup data. It
includes examples of
simple queries on index values, tags, or text
the use of ascending and descending indexes

C H A P T E R 1 1
Data Storage and Retrieval
Using Newton Data Storage Objects
11-39
the use of internationalized sorting order
queries on multiple-slot indexes
Querying Multiple Soups
11
Soups having the same name can be associated logically by a union soup object. To
retrieve entries from all the available soups in a union, just send the
Query
message to the union soup object.
You must query differently named soups separately, however. For example, before
scheduling a meeting, you might send the
Query
message to the
ROM_CardfileSoup
soup for information regarding its participants, and send
another
Query
message to the
ROM_CalendarSoupName
soup to determine
whether you have conflicting appointments at the proposed meeting time.
Entry aliases provide a handy way to save references to soup entries. You can use
entry aliases to reference entries from different soups more easily. For more
information, see "Using Entry Aliases" on page 12-7.
Querying on Single-Slot Indexes
11
This section provides code examples illustrating a variety of queries on single-slot
indexes. For more information on indexes, see "Introduction to Data Storage
Objects" on page 11-2 and "Indexes" on page 11-8.
The following code fragment presents an example of the simplest kind of index
query--it returns all entries in the soup:
local myUSoup := GetUnionSoupAlways("mySoup:mySig");
local allEntriesCursor := myUSoup:Query(nil);
When
nil
is passed as the query spec, as in the example above, the query result
potentially includes all entries in the soup. The cursor generated by such a query
returns entries in roughly the same order that they were added to the soup;
however, this sorting order is not guaranteed because the system recycles the values
it uses to identify entries internally. The only way to guarantee that entries are
sorted in the order they were added to a soup is to index them on your own time
stamp slot.
Most situations will require that you query for a subset of a soup's entries, rather
than for all of its entries. That is, you'll want to include or exclude entries
according to criteria you define. For example, you might want to find only entries
that have a certain slot, or entries in which the value of a specified slot falls within
a certain range. The next several examples illustrate the use of single-slot index
queries for these kinds of operations.
To find all entries that have a particular slot, specify a path to that slot as the query
spec's
indexPath
value. Note that in order to query on the presence of a

C H A P T E R 1 1
Data Storage and Retrieval
11-40
Using Newton Data Storage Objects
particular slot, the soup must be indexed on that slot. For example, the following
example of a query returns a cursor to all soup entries that have a
name
slot. The
cursor sorts the entries according to the value of this slot. As first returned by the
query, the cursor points to the first entry in index order.
// mySoup is a valid soup indexed on the 'name slot
nameCursor:= mySoup:Query({indexPath:'name});
You can also use the cursor method
GoToKey
to go directly to the first entry
holding a specified name or value in an indexed slot. For examples of the use of
this method, see "Moving the Cursor" beginning on page 11-55.
Using
beginKey
and
endKey
values to limit your search can improve query
performance significantly. The following example is an index query that uses
a
beginKey
value and an
endKey
value to return entries for which
(11
entry.number
27 )
.
// mySoup is indexed on the 'number slot
local numCursor := mySoup:Query({indexPath: 'number,
beginKey: 11,
endKey: 27});
The index on the
number
slot potentially includes all entries that have a
number
slot. The index sorts entries on their index key values; unless otherwise specified,
the default index order is ascending. Thus, the query can use a
beginKey
value of
11
to skip over entries holding a value less than
11
in the
number
slot. The test
can be concluded quickly by specifying a maximum value beyond which the cursor
generated by this query does not proceed. In this case, the
endKey
value specifies
that the query result does not include entries having values greater than
27
in the
number
slot. When multiple entries hold a specified endrange value, all of them
are included in the result of a query that specifies that endrange value; for example,
if multiple entries in the
mySoup
soup hold the value
27
in their
number
slot, the
previous example includes all of these entries in its result.
The
beginKey
specification evaluates to a value that occupies a unique position in
the sorted index data for the soup. If no entry is associated with this value, the
cursor is positioned at the next valid entry in index order. For example, if the
mySoup
soup in the previous code fragment does not contain an entry having a
number
slot
that holds the value
11
, the next valid entry in index order is the first entry in the
range over which the cursor iterates.
Similarly, the
endKey
specification evaluates to a value that occupies a unique
position in the sorted index data for the soup. If no entry is associated with this
value, the cursor stops on the first valid entry in index order before the
endKey
value. For example, if the
mySoup
soup in the previous code fragment does not
contain an entry having a
number
slot that holds the value
27
, the last valid entry

C H A P T E R 1 1
Data Storage and Retrieval
Using Newton Data Storage Objects
11-41
at or before the position that would be occupied by
27
in the index is the last entry
in the range over which the cursor iterates.
To conduct the same query while excluding the endrange values, specify a
beginExclKey
value instead of a
beginKey
value, and specify an
endExclKey
value instead of an
endKey
value, as shown in the following code fragment:
// mySoup is indexed on the 'number slot
// return entries for which (11 > entry.number < 27 )
local numCursor := mySoup:Query({indexPath: 'number,
beginExclKey: 11,
endExclKey: 27});
Note that a query spec cannot include both the inclusive and exclusive forms of the
same endrange selector; for example, you cannot specify
beginKey
and a
beginExclKey
values in the same query spec. However, you can specify, for
example, a
beginKey
value and an
endExclKey
value in the same query spec.
Because the index sorts entries according to key values, a
beginKey
on a soup
indexed in descending key order may appear to act like an
endKey
on a soup
indexed in ascending order, and vice versa. For more information, see "Queries on
Descending Indexes" beginning on page 11-46.
Another way to find all entries having a particular value in a specified slot is to use
an
indexValidTest
method, which can test any index key value without reading
its corresponding entry into the NewtonScript heap. The system passes index key
values to this function as the cursor moves. Your
indexValidTest
must return a
non-
nil
value if the entry associated with the key value should be included in the
query result. For example, you could use an
indexValidTest
method to select
entries that hold even-number values in a specified slot, as shown in the following
code fragment:
// mySoup indexed on 'number slot
// select entries having a 'number slot that holds
// an even value between 19 and 58
local myCursor :=
mySoup:Query({ beginKey: 19, endExclKey: 58,
indexValidTest: func (key)
(key MOD 2 = 0)});
A less-preferred way to test entries is to provide a
validTest
function to test
entries individually. The use of a
validTest
increases the memory requirements
of the search because the system must read soup entries into the NewtonScript heap
in order to pass them to the
validTest
function. Whenever possible, you should
avoid using
validTest
methods in favor of using
indexValidTest
methods.
Generally, you need not use a
validTest
method unless you must read the
entry's data to determine whether to include it in the query result.

C H A P T E R 1 1
Data Storage and Retrieval
11-42
Using Newton Data Storage Objects
The query passes the entire entry to the
validTest
method, rather than just the
value of the indexed slot. The next code example reads the entry's
aSlot
and
otherSlot
slots in order to compare their values:
// select entries for which aSlot > otherSlot
local myCursor :=
mySoup:Query({endKey:
aKeyValue
,
validTest: func (entry)
begin
entry.aSlot > entry.otherSlot
end});
Querying for Tags
11
In order to select soup entries according to their associated tag values, you need to
include a tags query spec frame in the
tagSpec
slot of the query specification
frame passed to the
Query
method. In addition to specifying one or more tags used
to select entries, the tags query spec can specify set operators such as
not
,
any
,
equal
, and
all
to create complex filters based on tag values. For a complete
description of the tags query spec frame, see "Tags Query Specification Frame"
(page 9-13) in Newton Programmer's Reference.
You cannot query for tags on a soup that does not have a tags index. This index is
usually specified by your soup definition and created along with the soup, but it can
be added to an existing soup if necessary. Note that each soup or union soup has
only one tags index; if you add a tags index to a soup that already has one, it
replaces the original tags index. For more information, see "Tags Index
Specification Frame" (page 9-8) in Newton Programmer's Reference.
The next several examples presume that the
mySoup
soup has a tags index on the
labels
slot. Note that queries need not specify the path to the slot from which tag
values are extracted--in this case, the
labels
slot--because each soup has only
one tags index and its index path is specified when the tags index is created.
However, because a soup or union soup is allowed to have multiple soup indexes,
queries must specify a path to the indexed slot; hence, these examples also presume
that the
mySoup
soup has a soup index on the
name
slot.
The presence of any tag specified by the
any
set operator is sufficient to include its
entry in the results of the query that uses this operator. For example, the following
query selects entries having either the symbol
'flower
or
'tall
in the
labels
slot. Entries not marked with at least one of these symbols are not included in the
query result.
local myCurs := mySoup:Query({indexPath:'name,
tagSpec: {any:['tall, 'flower]}});
The
equal
set operator specifies a set of tags an entry must match exactly to be
included in the query result. The query in the following example uses the
equal

C H A P T E R 1 1
Data Storage and Retrieval
Using Newton Data Storage Objects
11-43
set operator to select entries marked with only the
'flower
and
'tall
tags; this
query does not select entries missing either tag, nor does it select entries marked
with additional tags:
local myCurs := mySoup:Query({indexPath:'name,
tagSpec: {equal: ['tall, 'flower]}});
Like the
equal
set operator, the
all
set operator specifies a set of tags that entries
must have to be selected; however, the
all
set operator does not exclude entries
marked with additional tags. For example, the query in the following example uses
the
all
set operator to select entries marked with both the
'flower
and
'tall
tags. This query excludes entries missing either of these tags but includes entries
marked with a superset of the
'flower
and
'tall
tags:
local myCurs := mySoup:Query({indexPath:'name,
tagSpec: {all: ['tall, 'flower]}});
The presence of any tag specified by the
none
set operator is sufficient to exclude
that entry from the query result. For example, the following query matches entries
having both of the tags
'flower
and
'tall
but excludes any entry marked with
the
'thorns
tag:
local myCurs := mySoup:Query({indexPath:'name,
tagSpec: {all:['flower, 'tall],
none:['thorns]}});
The following exceptions may be thrown when attempting to query using a tag
spec. If the soup does not have a tags index, a "no tags" exception
|
evt.ex.fr.store| -48027
is thrown. If the tag spec passed as an argument to
the
Query
method has none of the slots
equal
,
any
,
all
, or
none
, an "invalid
tag spec" exception |
evt.ex.fr.store
|
-48028
is thrown.
Querying for Text
11
This section describes how to select entries according to the presence of one or
more strings in any slot. The current system allows you to search entries for string
beginnings, entire strings, or substrings of larger strings.
To select entries according to the presence of one or more specified string
beginnings, add to your query spec a
words
slot containing an array of string
beginnings to be matched. For example, the following code fragment illustrates a
query that returns entries having strings beginning with
"bob"
:
// find words beginning with "bob"
local myCurs := mySoup:Query({words: ["bob"]});

C H A P T E R 1 1
Data Storage and Retrieval
11-44
Using Newton Data Storage Objects
This query finds entries containing the words
"Bob"
,
"Bobby"
, and so forth, but
not words such as
"JoeBob"
. Text queries are not case sensitive--even though the
original query spec is all lower case, this query finds entries such as
"Bob"
or
"BOB"
.
Because the
words
slot contains an array, it can be used to search for multiple
string beginnings. For example, the following code fragment returns entries that
contain both of the string beginnings
"Bob"
and
"Apple"
. Thus, an entry
containing the strings
"Bobby"
and
"Applegate"
would be included in the
results of the search, but an entry missing either of the word beginnings
"Bob"
or
"Apple"
is not included.
// find entries holding "bob" and "apple" word beginnings
// won't find entries having only one of these beginnings
local myCurs := mySoup:Query({words: ["bob", "apple"]});
Because each element in the array is a string, each "word" to be matched can
actually contain multiple words and punctuation. For example, the following code
fragment returns entries that contain both of the string beginnings
"Bob"
and
"Apple Computer, Inc."
:
// find word beginnings "bob" and "Apple Computer, Inc."
local myCursor := mySoup:Query({words: ["bob",
"Apple Computer, Inc."]});
Note
The more unique the search string is, the more quickly a
words
search proceeds. Thus,
words
queries are slow for search words
that have only one or two characters in them.
To search for entire strings, rather than string beginnings, the query spec must
include an
entireWords
slot that holds the value
true
, as shown in the
following code fragment:
// return entries holding entire words "bob" and "Apple Computer"
local myCursor := mySoup:Query({words: ["bob", "Apple Computer"],
entireWords: true });
This query returns entries that contain both of the strings
"Bob"
and
"Apple
Computer"
. Because the
entireWords
slot holds the value
true
, this query
does not match strings such as
"Apple Computer, Inc."
or
"Bobby"
.
Entries containing only one of the specified words are not included in the results of
the search.
To conduct a text search that is not constrained by word boundaries, add to your
query spec a
text
slot containing a single string to be matched. For example, the

C H A P T E R 1 1
Data Storage and Retrieval
Using Newton Data Storage Objects
11-45
following code fragment illustrates a query that returns entries having strings that
contain the substring
"Bob"
:
// find strings containing the substring "Bob"
local myCursor := mySoup:Query({text: "bob"});
This query finds entries containing words such as
"JoeBob"
, as well as those
containing words such as
"bob"
and
"Bobby"
.
Internationalized Sorting Order for Text Queries
11
Indexes are not normally sensitive to case, diacritical marks, or ligatures in string
values; however, index and query specifications can request this behavior
specifically. When internationalized index ordering is used, uppercase letters sort
first, followed by lowercase letters, diacritical marks, and ligatures. Thus, the letter
A
sorts before the letter
a
, which sorts before the letter
å
, which sorts before the
letter
á
, which sorts before the ligature
æ
.
To index string values in internationalized order, include an optional
sortID
slot
holding the value
1
in the index specification frame used to build a soup's index. A
cursor subsequently generated against that soup returns entries holding the
following strings in the order listed here:
"AA", "aa", "åå", "EE", "ÉÉ", "ee"
This internationalized indexing order is available only for indexes on string values.
When the
sortID
slot is missing from the index spec or this slot's value is
nil
,
the index generated is not sensitive to case, diacritics, or ligatures; in other words,
the index may not necessarily sort
"AA"
before
"aa"
, and so on.
If an index has internationalized ordering, find operations performed by cursors
generated against that index can be made sensitive to case and diacritics. To request
this behavior, include a non-
nil secOrder
slot in the query spec passed to the
Query
method of an internationally-indexed soup.
The value of the
secOrder
slot affects the use of the
beginKey
,
beginExclKey
,
endKey
, and
endExclKey
slots, as well as the
GoToKey
cursor method. For
example, sending the
GoToKey("åå")
message to the cursor generated by this
query returns the first entry found at or after the
"åå"
index value but does not
return entries holding values that vary in case, diacritics, and so on.
When the
secOrder
slot is missing or holds the value
nil
, find operations
carried out by cursor methods such as
GoToKey
ignore case and diacritics; that is,
they may return entries holding case and diacritic variations on the requested value.
For example, sending the
myCursor:GoToKey("åå")
message returns the first
entry found that holds any of the
"AA"
,
"aa"
, or
"åå"
values. However, the
cursor generated by this query still uses the sorting order provided by the

C H A P T E R 1 1
Data Storage and Retrieval
11-46
Using Newton Data Storage Objects
internationalized index: cursor methods such as
Next
and
Prev
return entries in
the internationally-indexed order.
Queries on Descending Indexes
11
Even though queries and cursors based on descending order indexes work just like
normal queries and cursors, their behavior can seem confusing if you forget that it
is a function of index order. It is always helpful to remember the following points
when working with queries and cursors--especially when using descending indexes:
The "beginning" and "end" of a range of index values is a function of index
key order.
The cursor navigates entries in index key order.
This section provides examples of the behavior of cursors that use descending
indexes. These examples are based on a soup containing the entries shown in the
following code fragment; although this example uses string values, any kind of
index key value may be sorted in descending order.
{data: "able", ...};
{data: "axe", ...};
{data: "name", ...};
{data: "noun", ...};
Soup indexes normally sort string data in ascending alphabetical order; for example,
"able"
,
"axe"
,
"name"
,
"noun"
. A descending index sorts the same data in
reverse alphabetical order; for example,
"noun"
,
"name"
,
"axe"
,
"able"
.
Figure 11-6 depicts the reversed ordering that a descending index provides, with
examples of cursor behavior that is a function of index ordering.
Figure 11-6
Cursor operations on descending index
Descending key order
cursor:Reset();
cursor:GoToKey("az");
cursor:GoToKey("a");
Valid subrange
Z
"noun"
"name"
"az"
"axe"
"able"
A

C H A P T E R 1 1
Data Storage and Retrieval
Using Newton Data Storage Objects
11-47
Sending the
Reset
message to the cursor positions it at the first valid entry in
index order. In this case, the first entry is
"noun"
because the entries are sorted in
descending alphabetical order.
The
GoToKey
cursor method steps through the set of valid entries in index order
until it finds the first entry having a specified key value. If the specified key value is
not found, this method returns the next valid entry found after the specified index
position. Thus, sending the
GotoKey("az")
message to this cursor returns the
value
"axe"
because it's the first valid entry that appears in the index after the
unoccupied
"az"
position.
Sending the
GotoKey("a")
message to this cursor returns the value
nil
because
this message positions the cursor beyond the end of the range of valid entries
defined by the query that generated the cursor.
Figure 11-7 illustrates that specifying a
beginExclKey
value of
"b"
excludes
from consideration every entry beginning with a letter that comes after
"b"
in the
reverse alphabet; that is, this
beginExclKey
value causes the valid range of
entries to include only entries beginning with
"a"
. As a result, sending the
GotoKey("n")
message causes this cursor to return the value
"axe"
because it
is the first valid entry appearing in the index after the
"n"
position.
Note
The sort order for symbol-based indexes is the ASCII order of the
symbol's lexical form. This sorting behavior is made available in
NewtonScript by the
SymbolCompareLex
global function.
Figure 11-7
Specifying ends of a descending index
Querying on Multiple-Slot Indexes
11
Before reading this section, you should understand the contents of "Querying on
Single-Slot Indexes" beginning on page 11-39.
Descending key order
beginExclKey
cursor:GoToKey("n");
Valid subrange
Z
"noun"
"name"
B
N
"axe"
"able"
A

C H A P T E R 1 1
Data Storage and Retrieval
11-48
Using Newton Data Storage Objects
A multiple-slot query can be performed only on a soup that has a multiple-slot
index generated against the same set of keys in the same order as the query spec.
For information on creating an index, see "Registering and Unregistering Soup
Definitions" beginning on page 11-33 and "Adding an Index to an Existing Soup"
beginning on page 11-36. For a description of the data structure that defines a
multiple-slot index, see "Multiple-Slot Index Specification Frame" (page 9-6) in
Newton Programmer's Reference.
In a general sense, queries on multiple-slot indexes are specified like queries on
single-slot indexes and behave the same way. The "differences" you'll encounter
are usually the result of misunderstanding how multiple index keys are used to sort
and select indexed entries.
For purposes of discussion, assume that you have a soup containing the entries in
the following code fragment, and that you want to sort these entries alphabetically
by last name and then by first name:
// entries used for all examples in this section
{last: "Perry", first: "Bruce", num: 1}
{last: "Perry", first: "Ralph", num: 2}
{last: "Perry", first: "Barbara", num: 3}
{last: "Perry", first: "John", num: 4}
{last: "Bates", first: "Carol", num: 5}
{last: "Perry", first: "Daphne", num: 7}
A single-slot index sorts entries according to the value held in a single slot that you
specify when the index is created. In contrast, a multiple-slot index may consider
the values of multiple slots when sorting entries. It's important to understand that
either kind of index imposes only one sort order on the indexed data, regardless of
the number of slots examined to arrive at that order. A query on index values
evaluates its associated entries in this order, and the cursor generated by this query
iterates over its entries in this order, as well.
The first example illustrates how the entries in the example data could be sorted by
a single-slot index. For purposes of discussion, assume that these entries are
indexed on the value that each holds in its
last
slot, as specified by the single-slot
index spec in the following code fragment:
// single-slot index on string data from 'last slot
{structure:'slot, path: 'last, type:'string}
Sorting the entries according to the value each holds in its
last
slot isn't very
useful because all of the entries except one hold an identical value in this slot.
Unfortunately, sorting the entries on the value of another slot does not produce a
useful ordering, either: an index on any other single slot sorts the
"Bates"
entry
in the midst of all the
"Perry"
entries.

C H A P T E R 1 1
Data Storage and Retrieval
Using Newton Data Storage Objects
11-49
A multiple-slot index solves this problem by sorting entries according to multiple
key values. The key values are extracted from up to six index paths specified by the
path
array of the index specification frame. For example, the following code
fragment specifies a multiple-slot index that sorts entries according to the values
each holds in its
'last
,
'first
, and
'num
slots:
// multiple-slot index on data from three slots
myMultiSlotSpec :=
{structure:'multiSlot,
path: ['last,'first,'num],
type: ['string, 'string, 'int }
The first key in the
path
array is called the primary key; subsequent lower-order
keys, if they are present, are the secondary key, tertiary key, and so on, up to a total
of six keys per array.
The primary key specifies a minimum criterion for inclusion in the index and
provides a value used to sort the indexed entries initially. In the example, only
entries having a
last
slot are indexed, and the value of the
last
slot is used to
impose an initial ordering on the indexed entries. Thus, the multiple-slot index in
the previous example sorts the
"Bates"
entry before all of the
"Perry"
entries.
The secondary key, if it is present, is used to sort entries having identical primary
keys. In the previous example, the multiple-slot index imposes a secondary
ordering on all
"Perry"
entries, according to the value each holds in its
first
slot. Similarly, the tertiary key, if present, is used to sort further any entries having
identical secondary key values. Because none of the entries in the example have
identical secondary key values (none of the
first
slots hold identical values), the
value of each entry's
num
slot has no effect on how the index sorts the entries.
Thus, the multiple-slot index shown previously sorts the set of sample entries in the
following order:
{last: "Bates", first: "Carol", num: 5}
{last: "Perry", first: "Barbara", num: 3}
{last: "Perry", first: "Bruce", num: 1}
{last: "Perry", first: "Daphne", num: 7}
{last: "Perry", first: "John", num: 4}
{last: "Perry", first: "Ralph", num: 2}
Now that you're familiar with the manner in which multiple-slot indexes sort entries,
let's look at the way the
Query
method uses a multiple-slot index to select entries.
Missing slots in a multiple-slot query spec are treated as
nil
values, just as they
are when querying on single-slot indexes. For example, if the query spec is missing
an
endKey
slot, the upper end of the range of entries examined by the query is
unbounded, just as it would be for a query on a single-slot index.

C H A P T E R 1 1
Data Storage and Retrieval
11-50
Using Newton Data Storage Objects
Instead of using single values for the
indexPath
,
beginKey
,
beginExclKey
,
endKey
, and
endExclKey
slots in the query spec, the
Query
method accepts
arrays of keys or values as these arguments when it works with a soup having a
multiple-slot index. The first key in the array is the primary key; subsequent lower-
order keys, if they are present, are the secondary key, tertiary key, and so on, up to
a total of six keys per array.
To get a better idea of how queries evaluate multiple-slot key selectors, consider
how the
beginKey
value in the following code fragment would work with the
example data:
myQSpec := {indexPath: ['last,'first,'num],
beginKey:["Perry","Bruce",5]}
Querying the example data using this specification returns a cursor that initially
references the following entry:
{last: "Perry", first: "Daphne", num: 7}
First, the query finds the primary key value of
"Perry"
in the index, skipping
over the
"Bates"
entry in the process of doing so. Next, the query searches for an
index value identical to the secondary key
"Bruce"
, skipping over the
"Barbara"
entry in the process of doing so. Finally, the query searches for an
index value identical to the tertiary key value
5
. Because an entry having this value
is not found, the cursor is positioned on the next valid entry in index order, which
has the tertiary key value
7
.
When specifying strings as bounding values for queries, don't forget that the
beginKey
,
beginExclKey
,
endKey
, and
endExclKey
slots in a query spec
specify identical matches only. For example, the key value
"P"
is not identical to
the key value
"Perry"
.
When an identical index value cannot be found for a key specification, subordinate
key values have no effect. For example, if the primary key value is not matched, the
secondary and tertiary key values have no effect.
To demonstrate these points, imagine that you wrote the query spec in the previous
example a bit differently. Instead of specifying a value of
"Perry"
for the primary
element in the
beginKey
array, assume you specified a value of
"P"
. This change
would make the query spec look like the following code fragment:
myQSpec := {indexPath: ['last,'first,'num],
beginKey:["P","Bruce",5]}
Querying our example data using this specification returns a cursor that initially
references the following entry:
{last: "Perry", first: "Barbara", num: 3}
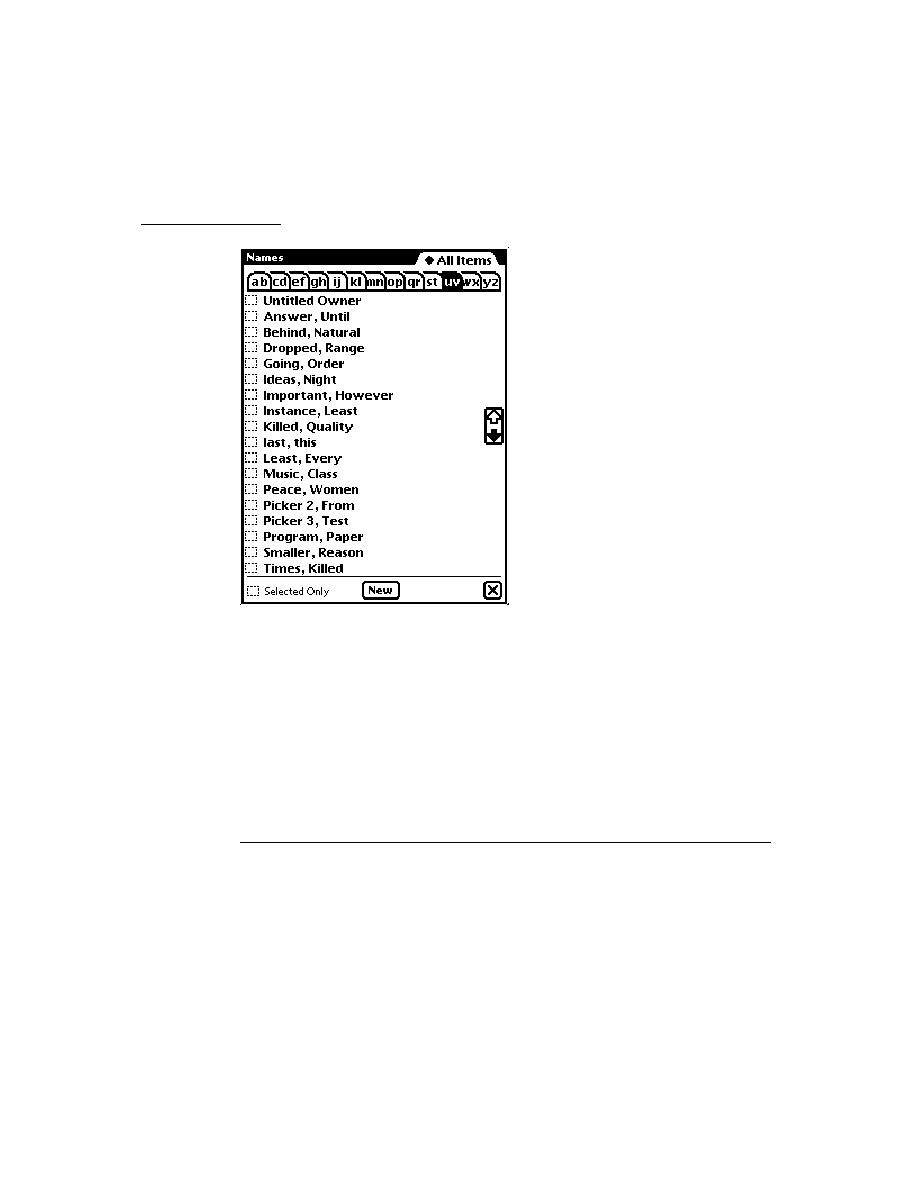
C H A P T E R 1 1
Data Storage and Retrieval
Using Newton Data Storage Objects
11-51
This time around, the query again skips over the
"Bates"
entry in the process of
positioning the cursor at index value
"P"
. However, because no entry holds a
primary index key value of
"P"
, the cursor stops at the next valid entry in index
order. Further, because an identical index value was not found for the primary key
specification, the secondary and tertiary key selectors have no effect at all. Thus
the cursor stops on the first index value found after the position that
["P","Bruce",5]
would occupy if it were present in the index data.
When an element of an array in a query spec is missing or
nil
, the
Query
method
does not test subordinate key values specified by the array. For example, the
presence of the
nil
value in the
endKey
specification
{endKey : ["bob",
nil, 55]}
makes it equivalent to the
{endKey : ["bob"]}
specification.
One result of this behavior is that it is impossible to make a query ignore higher-
order sort keys while still testing on lower-order keys. For example, it is meaningless
to specify a value such as
[nil,
validKey, ...
]
for the
beginKey
,
beginExclKey
,
endKey
, or
endExclKey
slot in a query spec--the
nil
-value primary element
specifies that the query is to ignore subsequent elements of the array.
If you want to be able to ignore key specifiers in a query spec selectively, you need
to define for your entries a default "
nil
-equivalent" value that does have a position
in index order. For example, you could use the empty string (
""
) for string key
values, either of the values
0
or
MININT
for integer key values, and the null
symbol (
'||
) for symbolic key values.
Further, the presence of a
nil
-value index key in an entry suppresses the
evaluation of lower-order keys in that entry for sorting in the multiple-slot index.
For example, the entries in the following code fragment sort to the same position in
the multiple-slot index because as soon as the system encounters the
nil
key value
in each entry's
secondary
slot, it does not attempt to sort that entry any further:
{primary: "foo", secondary: nil, tertiary: "bar"}
{primary: "foo", secondary: nil, tertiary: "qux"}
Querying explicitly for
nil
key values (
nil
-value slots) is not supported. Your
entries' indexed slots must hold non-
nil
values to participate in queries.
For cursors generated against multiple-slot indexes, the cursor method
GoToKey
accepts arrays of keys as its argument. You can use this method to experiment with
multiple-slot key specifications.
Similarly, for queries on multiple-slot indexes, the input passed to the
indexValidTest
function is an array of key values, with the first key in the
array being the primary key, followed by any subordinate key values held by the
entry being tested.

C H A P T E R 1 1
Data Storage and Retrieval
11-52
Using Newton Data Storage Objects
W A R N I N G
Index keys are limited to a total of 39 unicode characters (80
bytes, 2 of which are used internally) per soup entry. Keys that
exceed this limit may be truncated when passed to an
indexValidTest
function. This 80-byte limit applies to the
entire key space allocated for an entry, not for individual keys. As
a result, subordinate keys in multiple-slot indexes may be
truncated or missing when the total key size for the entry is
greater than 80 bytes. For more information, see the description of
the
indexValidTest
function in "Query Specification Frame"
(page 9-9) in Newton Programmer's Reference. See also the
description of the
MakeKey
method (page 9-45) in Newton
Programmer's Reference.
Limitations of Index Keys
11
Under the following conditions, a string may not match its index key exactly:
Keys of type '
string
are truncated after 39 unicode characters.
Ink data is stripped from '
string
keys.
Subkeys in multiple-slot indexes may be truncated or missing when the total key
size is greater than 80 bytes.
You can use the
MakeKey
function to determine precisely the index key that the
system generates for a particular string. The interface to this function looks like the
following code fragment:
soup
:MakeKey(
string
,
indexPath
)
The following examples presume that mySoup is a valid soup (not a union soup)
having the multiple-slot index specified by the following code fragment:
myMultiSlotIndexSpec := {structure: ' multislot,
path: ['name.first,
'cardType,
'name.last],
type : ['string, 'int, 'string]};
Each of the soup's entries has a
name
slot and a
cardType
slot. The
name
slot
holds a frame containing the slots
first
and
last
, which contain string data. The
cardType
slot holds integer data.
The first example illustrates the truncation of string keys longer than 39 characters.
Evaluating the following code fragment in the Inspector

C H A P T E R 1 1
Data Storage and Retrieval
Using Newton Data Storage Objects
11-53
mySoup
:MakeKey(["12345678901234567890", 3,
"ABCDEFGHIJKLMNOPQRSTUVWXYZ"],
['name.first, 'cardType, 'name.last] )
returns the key value
["12345678901234567890", 3, "ABCDEFGHIJKLMNO"]
The next example illustrates the truncation of subkeys when the total key size is
greater than 80 bytes. In this example, the first string in the string array is so long
that it uses up the entire 80 bytes allocated for the key, with the result that the first
string is truncated and the remaining key values are
nil
. Evaluating the following
code fragment in the Inspector
mySoup
:MakeKey(["12345678901234567890abcdefghijjlmnopqrstuvwxyz",
3, "ABCDEFGHIJKLMNOPQRSTUVWXYZ12345678901234567890"],
['name.first, 'cardType, 'name.last] )
returns the key value
["12345678901234567890abcdefghijjlmnopqr", NIL, NIL]
Missing elements in the string array are treated as
nil
values. For example, the
following code fragment is missing the second two elements of the string array:
mySoup
:MakeKey(["12345678901234567890],
['name.first, 'cardType, 'name.last] )
Evaluating this code fragment in the Inspector returns the key value
["12345678901234567890", NIL, NIL]
On the other hand, missing index paths cause this method to throw an exception. If
one of the index paths in a multiple-slot index is missing from the array passed as
the value of the indexPath parameter, the
MakeKey
method throws a "soup index
does not exist"
evt.ex.fr.store -48013
exception.
Using Cursors
11
This section discusses the functions and methods used to work with cursor objects
returned by the
Query
method of soups or union soups. Individual entries in soups
and union soups are manipulated by the entry functions described in the section
"Using Entries," later in this chapter. This section describes
getting the cursor
testing validity of the cursor
getting the currently referenced soup entry from the cursor
moving the cursor

C H A P T E R 1 1
Data Storage and Retrieval
11-54
Using Newton Data Storage Objects
getting the number of entries in cursor data
getting an index key from the cursor
copying the cursor
Getting a Cursor
11
Cursor objects are returned by the
Query
method. For more information, see
"Using Queries" beginning on page 11-38.
Testing Validity of the Cursor
11
When a storage card is inserted or a soup is created, union soups include new soups
in the union automatically as is appropriate. A cursor on a union soup may not be
able to include a new soup when the new soup's indexes do not match those present
for the other soups in the union. In particular, this situation can occur when
The new soup does not have the index specified in the
indexPath
of the query
spec used to generate the cursor.
The query spec used to generate the cursor included a
tagSpec
and the new
soup does not have the correct tags index.
In such cases, the cursor becomes invalid. An invalid cursor returns
nil
when sent
messages such as
Next
,
Prev
,
Entry
, and so on. Note that a valid cursor returns
nil
when it receives a message that positions it outside of the range of valid
entries. (For an example, see the text accompanying Figure 11-6 on page 11-46.)
You can test the cursor's validity by invoking the
Status
cursor method. This
method returns the
'valid
symbol for cursors that are valid and returns the
'missingIndex
symbol when a soup referenced by the cursor is missing an
index. Your application needs to call this method when it receives either of the
'soupEnters
or
'soupCreated
soup change notification messages. If the
Status
method does not return the
'valid
symbol, the application must correct
the situation and recreate the cursor.
For a detailed description of the
Status
cursor method, see the section "Query
and Cursor Methods" (page 9-60) in Newton Programmer's Reference. For a
discussion of soup change notification messages, see the section "Callback
Functions for Soup Change Notification" (page 9-14) in Newton Programmer's
Reference.
Getting the Entry Currently Referenced by the Cursor
11
To obtain the entry currently referenced by the cursor, send the
Entry
message to
the cursor, as shown in the following code fragment:
// assume myCursor is valid cursor returned from a query
local theEntry := myCursor:Entry();

C H A P T E R 1 1
Data Storage and Retrieval
Using Newton Data Storage Objects
11-55
Moving the Cursor
11
This section describes various ways to position the cursor within the range of
entries it references.
Sometimes the following discussion refers to the "first" entry in a cursor. As you
know, the order imposed on cursor data is defined by the soup index used by the
query that generated the cursor. When you see mentions of the "first" entry in a
cursor, be aware that this phrasing really means "the first entry as defined by index
order (ascending or descending order)."
When first returned by a query, the cursor points to the first entry in the data set
that satisfies the query. Thus, to obtain the first entry in the data set referenced by a
newly created cursor, just send the
Entry
message to the cursor.
You can also position the cursor on the first entry in its data set by sending the
Reset
message. The
Reset
method moves the cursor to the first valid entry in the
query result and returns that entry. For example:
local cursor := mySoup:Query(nil);
// move the cursor ahead a bit
local anEntry := cursor:Move(3);
// go back to first entry
local firstEntry := cursor:Reset();
Note that if the query spec includes a
beginKey
value, the
Reset
method returns
the first valid entry at or after the
beginKey
value in index order.
To obtain the last entry in the set of entries referenced by the cursor, send the
ResetToEnd
cursor message, as shown in the following example:
local cursor := mySoup: Query({indexPath: 'name,
endKey: "ZZ"});
local lastCursorEntry := cursor:ResetToEnd();
Note that if the query spec includes an
endKey
value, the
ResetToEnd
method
positions the cursor on the last valid entry in index order at or before the specified
endKey
value. For example, if you specify an
endKey
value of
"Z"
but the last
valid entry previous to that in index order has the key value
"gardenia"
, the
entry associated with the
"gardenia"
key value is returned.
The cursor can be advanced to the next entry in index order or moved back to the
previous entry by the
Next
and
Prev
methods, respectively. After these methods
move the cursor, they return the current entry. If sending either of these messages
positions the cursor outside of the range of valid entries, it returns
nil
.

C H A P T E R 1 1
Data Storage and Retrieval
11-56
Using Newton Data Storage Objects
You can use the
Move
method to move the cursor multiple positions. For example,
instead of coding incremental cursor movement as in the following example,
for i := 1 to 5 do myCursor:Next();
you can obtain faster results by using the
Move
method. The following code
fragment depicts a typical call to this method. After positioning the cursor, the
Move
method returns the current entry.
// skip next four entries and return the fifth one or nil
local theEntry := myCursor:Move(5);
To move the cursor in large increments, it's faster to use the
GoTo
and
GoToKey
methods to position the cursor directly. You can use the
GoToKey
method to go
directly to the first indexed slot that has a particular value and return the entry
containing that slot, as shown in the following example:
// index spec for soup that generated myCursor
indxSpec: {structure: 'slot, path: 'name, type: 'string};
// go to the first entry that has
// the value "Nige" in the name slot
local theEntry := myCursor:GotoKey("Nige");
If the argument to the
GoToKey
method is not of the type specified by the soup's
index spec, this method throws an exception. For example, the index spec in the
previous example specifies that the
name
slot holds string data. If you pass a
symbol to the
GoToKey
method, it signals an error because this soup's index holds
string data:
// throws exception - arg doesn't match index data type
myCursor:GotoKey('name);
Counting the Number of Entries in Cursor Data
11
Because the user can add or delete entries at any time, it's difficult to determine
with absolute certainty the number of entries referenced by a cursor. With that in
mind, you can use the
CountEntries
cursor method to discover the number of
entries present in the set referenced by the cursor at the time the
CountEntries
method executes.
To discover the number of entries in the entire soup, you can execute a very broad
query that includes all soup entries in the set referenced by the cursor and then
send a
CountEntries
message to that cursor. For example:
local allEntriesCursor := mySoup:Query(nil);
local numEntries := allEntriesCursor:CountEntries();

C H A P T E R 1 1
Data Storage and Retrieval
Using Newton Data Storage Objects
11-57
Note that if the query used to generate the cursor specifies a
beginKey
value, the
CountEntries
method starts counting at the first valid entry having an index key
value equal to or greater than the
beginKey
value. Similarly, if the query that
generated the cursor used an
endKey
value, the
CountEntries
method stops
counting at the last valid entry having an index key value equal to or less than the
endKey
value.
Note that the use of the
CountEntries
method is somewhat time-consuming and
may increase your application's heap space requirements; for performance reasons,
use this method only when necessary.
Getting the Current Entry's Index Key
11
The
EntryKey
cursor method returns the index key data associated with the
current cursor entry without reading the entry into the NewtonScript heap. Note,
however, that under certain circumstances the value returned by this method does
not match the entry's index key data exactly. For more information, see "Limitations
of Index Keys" on page 11-52.
Copying Cursors
11
You can clone a cursor to use for browsing soup entries without disturbing the
original cursor. Do not use the global functions
Clone
or
DeepClone
to clone
cursors. Instead, use the
Clone
method of the cursor to be copied, as shown in the
following code fragment:
local namesUSoup:= GetUnionSoupAlways(ROM_CardFileSoupName);
local namesCursor := namesUSoup:Query(nil);
local cursorCopy:= namesCursor:Clone();
Using Entries
11
This section discusses the functions and methods that work with soup entry objects
returned by cursors. This section describes
adding entries to soups
removing entries from soups
saving references to entries
modifying entries
replacing entries
sharing entry data
copying entry data
using the entry cache effectively

C H A P T E R 1 1
Data Storage and Retrieval
11-58
Using Newton Data Storage Objects
Saving Frames as Soup Entries
11
To save a frame as a soup entry, pass the frame to either of the union soup methods
AddToDefaultStoreXmit
or
AddToStoreXmit
, or pass it to the
AddXmit
soup method. Each of these methods transforms the frame presented as its
argument into a soup entry, returns the entry, and transmits a change notification
message. The following code example illustrates the use of the
AddToDefaultStoreXmit
method:
local myFrame := {text: "Some info", color: 'blue};
// assume mySoupDef is a valid soup definition
local myUSoup := RegUnionSoup(mySoupDef)
myUSoup:AddToDefaultStoreXmit(myFrame,'|MyApp:MySig|);
The new soup entry that these methods create consists of the frame presented to the
entry-creation method, along with copies of any data structures the frame
references, as well as copies of any data structures those structures reference, and
so on. Thus, you must be very cautious about making soup entries out of frames
that include references to other data structures. In general, this practice is to be
avoided--it can result in the creation of extremely large entries or entries missing
slots that were present in the original frame.
For example, the presence of a
_parent
slot in the frame presented as an
argument to these methods causes the whole
_parent
frame (and its parent, and
so on) to be stored in the resulting entry, potentially making it extremely large. An
alternative approach is to store a key symbol in the data and find the parent object
in a frame of templates at run time.
Do not include
_proto
slots in frames presented to methods that create soup
entries. These slots are not written to the soup entry and are missing when the entry
is read from the soup.
Do not save magic pointers in soup entries. Because the objects they reference are
always available in ROM, saving magic pointers is unnecessary and may cause the
entries to exceed the maximum permissible size.
Circular pointers within an entry are supported, and an entry can refer to another
by using an entry alias.
The size of an individual entry is not limited by the NewtonScript language; however,
due to various practical limitations, entries larger than about 16 KB can impact
application performance significantly. For best performance, it is recommended
that you limit the size of individual entries to 8 KB or less. Note that this total does
not include data held by virtual binary objects that the entry references; virtual
binary objects save their data separately on a store specified when the virtual binary
object is created. For more information, see "Virtual Binary Objects" on page 12-2
in Chapter 12, "Special-Purpose Objects for Data Storage and Retrieval."
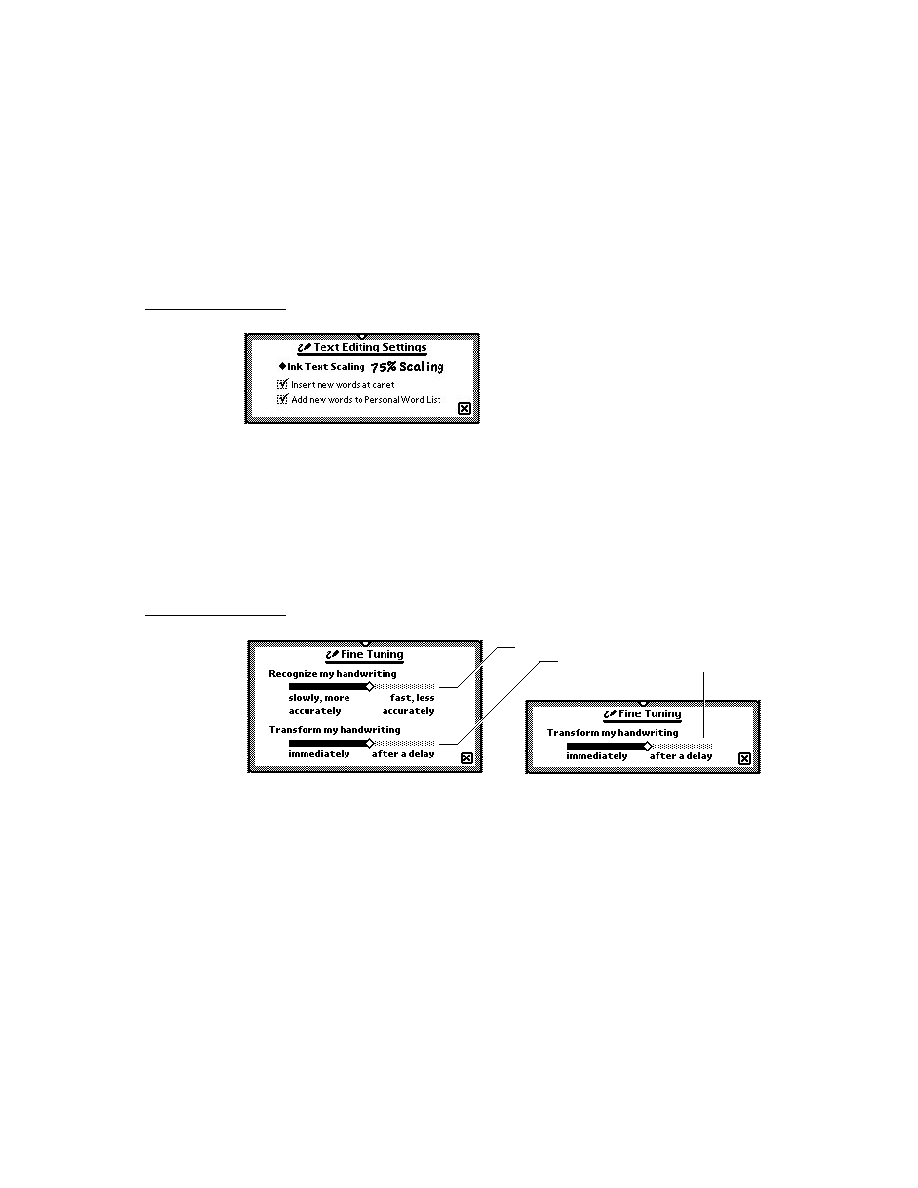
C H A P T E R 1 1
Data Storage and Retrieval
Using Newton Data Storage Objects
11-59
No more than 32 KB of text (total of all strings, keeping in mind that one character
is 2 bytes) can reside in any soup entry. Another practical limitation is that there
must be space in the NewtonScript heap to hold the entire soup entry. You should
also be aware that Newton Backup Utility and Newton Connection Kit do not
support entries larger than 32K.
Keeping these limitations in mind, you can put any slots you need into your soup
entries. Entries within the same soup need not have the same set of slots. The only
slots to which you must pay special attention are those that are indexed. When you
create a soup, you specify which of its entries' slots to index. Indexed slots must
contain data of the type specified by the index. For example, if you specify that an
index is to be built on slot
foo
and that
foo
contains a text string, it's important
that every
foo
slot in every entry in the indexed soup contains a text string or
nil
.
Entries that do not have a
foo
slot will not be found in queries on the
foo
index.
Entries having a
foo
slot that contains data of some type other than
text
cause
various exceptions. For example, if you should try to add this kind of frame to an
indexed soup, the method that attempts to add the frame throws an exception; if
you try to add a new index on a slot that varies in data type from entry to entry, the
AddIndex
method throws an exception, and so on. Soup entries can contain
nil
-
value slots, but querying for such slots is not supported; that is, you can query only
for slots that hold non-
nil
values.
Removing Entries From Soups
11
To remove an entry, pass it to the
EntryRemoveFromSoupXmit
function, as
shown in the following code fragment. If you try to remove an invalid entry, this
function throws an exception. An entry can become invalid when, for example, the
user ejects the storage card on which it resides.
local myCursor := Query(nil);
local theEntry := myCursor:Entry();
if theEntry then
EntryRemoveFromSoup(theEntry, '|MyApp:MySig|);
Modifying Entries
11
Only one instance of a particular entry exists at any time, regardless of how the
entry was obtained. That is, if two cursors from two different queries on a
particular soup happen to be pointing at identical entries, they are actually both
pointing at the same entry.
When first retrieved from a soup, an entry is just an identifier. When the entry is
accessed as a frame (by getting or setting one of its slots), the complete entry frame
is constructed in the NewtonScript heap. The frame is marked to identify it as a
member of the soup from which it came.

C H A P T E R 1 1
Data Storage and Retrieval
11-60
Using Newton Data Storage Objects
When the frame is constructed from the entry, it is cached in memory. At this point,
you can add, modify, and delete slots just as you would in any other frame;
however, the changes do not persist until the
EntryChangeXmit
function is
called for that particular entry. The
EntryChangeXmit
function writes the cached
entry frame back to the soup, replacing the original entry with the changed one.
If the
EntryUndoChangesXmit
function is called, the changes are thrown out
and the entry is restored to its original state. This function disposes of the cached
entry frame and restores the reference to the original uncached entry, just as if the
original entry was never referenced. Note that you can use the
FrameDirty
function to determine whether a cached entry has been modified since it was read
into the NewtonScript heap; however, this function does not detect changes to
individual characters in a string (a common operation for
clParagraphView
views). For more information, see "FrameDirty" (page 9-69) in Newton
Programmer's Reference.
The following code example gets an entry from the
namesUSoup
union soup,
changes it, and writes the changed entry back to the soup:
local namesUSoup := GetUnionSoupAlways(ROM_CardFileSoupName);
local namesCursor := namesUSoup:Query(nil);
local theEntry := namesCursor:Entry();
if theEntry then
begin
theEntry.cardType := 4;
EntryChangeXmit(theEntry, '|MyApp:MySig|);
end;
It's not always easy to determine the best time to write a cached entry back to its
soup. For example, it would be inappropriate to call a function like
EntryChangeXmit
from the
ViewChangedScript
method of a
protoLabelInputLine
view. When the user enters data on the input line with
the keyboard, the
ViewChangedScript
is called after every key press. Calling
the
EntryChangeXmit
function for every key press would be noticeably slow.
In some situations, the appropriate time to call
EntryChangeXmit
is more
obvious. For example, a natural time to call
EntryChangeXmit
would be when
the user dismisses an input slip.
Moving Entries
11
You can use the
MoveTarget
method of the root view to move (not copy) an
entry into the same-named soup on another store. For example, you would use
this method to move entries from one union soup member to another. For more
information, see "System-Supplied Filing Methods" (page 12-11) in Newton
Programmer's Reference.

C H A P T E R 1 1
Data Storage and Retrieval
Using Newton Data Storage Objects
11-61
Copying Entries
11
The
EntryCopyXmit
global function and the
CopyEntriesXmit
soup method
enable you to copy entries from one soup to another and transmit appropriate
change notifications.
The following code fragment uses the
CopyEntriesXmit
soup method to copy
all the entries from a specified source soup into a specified destination soup. Note
that this method is defined only for soups, not for union soups. The following code
fragment uses the
GetMember
union soup method to retrieve the plain soup
constituent of a union soup from a specified store. The
GetMember
method never
returns
nil
; instead, it creates an empty member soup on the specified store if one
does not already exist:
// myUsoup member on internal store is the source soup
local myUSoup := GetUnionSoupAlways("myUSoup:mySig");
local sourceSoup := myUSoup:GetMember(GetStores()[0])
// myUsoup member on another store is the destination soup
local destSoup := myUSoup:GetMember(GetStores()[1]);
// copy all entries from source soup to dest soup
local cursor := sourceSoup:Query(nil);
if (cursor:CountEntries() <> 0) then
sourceSoup:CopyEntriesXmit(destSoup, '|MyApp:MySig|);
You can use the
EntryCopyXmit
function to copy an entry from a specified
source soup to a specified destination soup and transmit a soup change notification
message. Note that this function is defined only for soups, not for union soups. The
following code fragment uses the
GetSoup
store method to retrieve a specified
soup from its store. Because the
GetSoup
method returns
nil
when the soup to
be retrieved is not available, you must at least ensure that this result is non-
nil
before using it. The following code fragment actually goes one step further and
uses the
IsValid
soup method to test the validity of the
destSoup
soup in
additional ways:
local myUSoup := GetUnionSoupAlways("myUSoup:mySig");
// get all entries having 'hot in 'temperature slot
local cursor := myUSoup:Query({indexPath: 'temperature,
beginKey: 'hot
endKey: 'hot});
local destSoup := GetStores()[0]:GetSoup("mySoup:mySig");
// make sure we actually got a valid soup
if destSoup:IsValid() then
begin
// xmit a single notification after all changes are made
while e := cursor:Entry() do EntryCopyXmit(e,destSoup,nil);
XmitSoupChange(destSoup, '|MyApp:MySig|, 'whatThe, nil);
end;

C H A P T E R 1 1
Data Storage and Retrieval
11-62
Using Newton Data Storage Objects
Note
The
EntryCopyXmit
method copies the cached entry--not the
original soup entry--into the destination soup.
Sharing Entry Data
11
Shared soups and shared entries need to be in a well-documented format to allow
other applications to use them. For an example of how to document the structure of
your soup entries, refer to Chapter 19, "Built-in Applications and System Data."
There you will see descriptions of the soups used by the built-in applications on
Newton devices produced by Apple Computer, Inc.
Using the Entry Cache Efficiently
11
Whenever you access a slot in a soup entry, the system reads the entire entry into
the NewtonScript heap if it is not already present. That is, simply testing or
printing the value of a single slot causes the entire soup entry in which it resides to
be read into the entry cache. For best performance, avoid creating cached entries
when you don't need them, and flush the entry cache as soon as is appropriate. This
section describes how you can avoid unnecessary caching and how you can reclaim
cache memory explicitly. Table 11-1 on page 11-63 summarizes the use of the
entry cache by the functions and methods described in this discussion.
Reading a soup entry into memory requires more heap space than testing tag or
index values does. Whenever possible, work with index keys and tags rather than
the contents of soup entries. Some suggested techniques for doing so include
the following:
Avoid using
validTest
functions in favor of using
indexValidTest
functions in your queries, as the latter can be performed without reading soup
entries into memory.
Query on index key values or tag values rather than on values that require
reading soup entries into the NewtonScript heap.
Use the cursor method
EntryKey
to retrieve an entry's key value without
reading the entry into the NewtonScript heap.
Normally, adding or changing a soup entry creates a cached entry. If you do not
plan on working further with an entry's data after you've added or modified it, you
can reclaim heap space by releasing the memory used by the entry cache. You can
use the
AddFlushedXmit
soup method to add a soup entry without creating a
cached entry at all; in addition to saving heap space, this method saves you the time
normally required to create the cached entry. When working with a cached entry,
you can use the
EntryFlushXmit
function to write it back to its soup and clear
the entry cache.

C H A P T E R 1 1
Data Storage and Retrieval
Using Newton Data Storage Objects
11-63
In contrast, the
EntryUndoChanges
function clears the entry cache without writing
the cached entry to the soup. This function makes references to the entry point to
the original, unmodified entry residing in the soup, instead of the cached entry.
Note that reading, printing, or modifying any slot in the entry after calling
EntryFlushXmit
,
EntryUndoChanges
, or
AddFlushedXmit
causes the
entire entry to be read back into the NewtonScript heap; thus, use these functions
only when you're sure you won't need to access the entry in the near future.
If you do need to work with the entry data after you've written it to the soup, you'll
want to use functions and methods that don't clear the entry cache after writing the
soup entry. The
AddToDefaultStoreXmit
and
AddToStoreXmit
union soup
methods save frames as soup entries without clearing the entry cache afterward.
When adding frames to single soups, you can use the
AddXmit
soup method for
the same purpose. The
EntryChangeXmit
function also writes the cached entry
back to its soup without flushing the cache afterward. Contrast this function with
the
EntryFlushXmit
function, which clears the entry cache after writing the
cached entry back to its soup. Table 11-1 summarizes the caching behavior of all
methods that write entries to soups or union soups.
Using Soup Change Notification
11
When your application changes an entry in a shared soup, the system executes
callback functions registered by applications using that soup, allowing them to take
action in response to the change. The system-supplied soup change notification
service allows applications to
notify each other when they make changes to soup entries
respond to notifications precisely
Table 11-1
Effect of functions and methods on entry cache
Function or method
Cached entry
uSoup
:AddToDefaultStoreXmit(
frame, changeSym
)
Creates and returns
uSoup
:AddToStoreXmit(
frame, changeSym
)
Creates and returns
soup
:AddXmit(
frame, changeSym
)
Creates and returns
soup
:AddFlushedXmit(
frame, changeSym
)
Does not create or return
EntryFlushXmit(
entry
)
Returns existing
EntryChangeXmit(
entry
)
Returns existing
EntryUndoChanges(
entry
)
Throws away existing
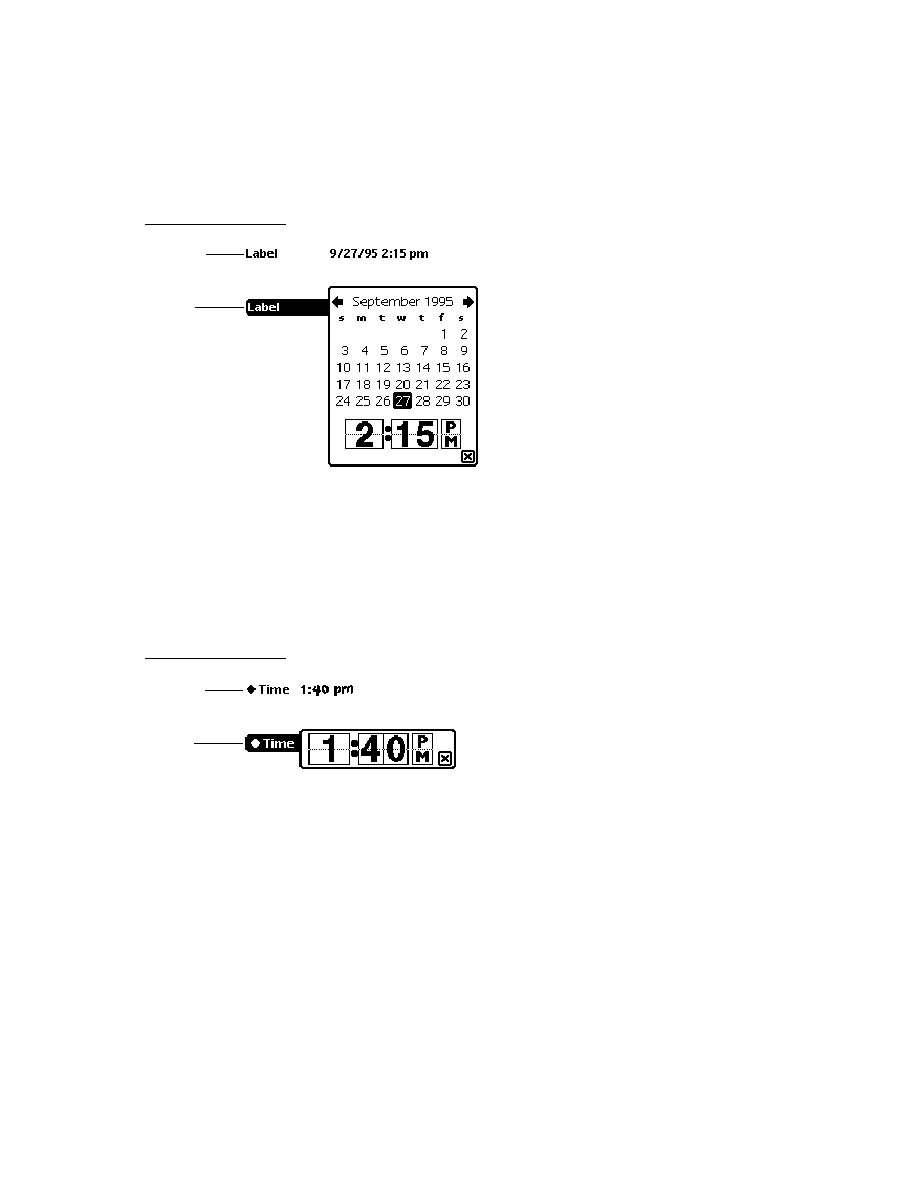
C H A P T E R 1 1
Data Storage and Retrieval
11-64
Using Newton Data Storage Objects
control how and when notifications are sent
The first part of this section describes how to register and unregister a callback
function for execution in response to changes in a particular soup. The next part
describes the various notifications that may be sent. The last part of this section
describes how applications send soup change notifications.
Registering Your Application for Change Notification
11
The
RegSoupChange
global function registers a callback function for execution
in response to changes in a particular soup. Note that this callback function must
not call either of the
RegSoupChange
or
UnRegSoupChange
functions.
If your application needs to respond to changes in more than one soup, you'll need
to call the
RegSoupChange
function once on each soup for which your
application requires change notification. This approach is valid for any system-
supplied soup except that used by the built-in Preferences application. For
notification of changes to user preferences, you must call the
RegUserConfigChange
function.
You can call the
RegSoupChange
function at any time that makes sense for your
application. For example, you might do so from within your base view's
viewSetupDoneScript
method; however, this is only a suggested guideline. In
order to conserve available memory, your application should minimize the amount
of time callback functions remain registered.
The following code example shows how to register your application for notification
of changes to the soup used by the built-in Names application:
local myFn := func (soupName, appSym, changeType, changeData)
begin
if (changeType) then
begin
if (changeType <> 'whatThe) then
print (changeType && "in the" && soupName &&
"soup by the" && GetAppName(appSym) &&
"application.");
else
print ("Unspecified changes occurred in the" &&
soupName && "soup.");
end;
end;
// register for changes to soup used by built-in "Names" app
RegSoupChange(ROM_CardFileSoupName, '|myFn1:MyApp:MySig|, myFn);

C H A P T E R 1 1
Data Storage and Retrieval
Using Newton Data Storage Objects
11-65
W A R N I N G
Any callback function registered by the
RegSoupChange
function must not call either of the
RegSoupChange
or
UnRegSoupChange
functions.
The second argument to the
RegSoupChange
function can be any unique symbol
that identifies the callback to be registered. If your application registers only one
callback function, you can just use your application symbol as the callback
identifier (ID). A callback ID need only be unique within the registry that uses it.
For example, no two power registry callback functions can share the same callback
ID; on the other hand, your application's power registry callback can use the same
ID as your application's login screen callback. Thus, if your application only
registers one callback function with each of the various registries, all of your
callback functions can use your application symbol (with developer signature) as
their callback ID.
To generate unique identifiers for multiple callbacks within the same registry, you
can prefix an additional identifier to your application symbol. For example, the
symbol
'|myFn1:MyApp:MySig|
could be used to identify one of several
callback functions registered by the
MyApp:MySig
application.
Unregistering Your Application for Change Notification
11
When your application no longer needs to be notified of changes to a particular
soup, it needs to call the
UnRegSoupChange
function to unregister its callback
function for that soup.
// unregister my app's Names soup callback
UnRegSoupChange(ROM_CardFileSoupName, '|myFn1:MyApp:MySig|);
Normally, you can unregister your soup change callbacks in the
viewQuitScript
method of your application's base view.
Responding to Notifications
11
When a soup changes in some way, the system executes the callback functions
registered for that soup. Note that the system does not consider the soup to have
changed until an entry is written to the soup. Thus, changing a cached entry is not
considered a change to the soup until the
EntryChangeXmit
function writes the
cached entry back to the soup.
Note
The system-supplied Preferences application sends
soup change notifications only if your application
uses the
RegUserConfigChange
function to register
for such notifications.

C H A P T E R 1 1
Data Storage and Retrieval
11-66
Using Newton Data Storage Objects
Your callback function must take any action that is appropriate to respond to the
change. Most applications have no need to respond to soup changes unless they are
open, which is why it is recommended that you register your callbacks when your
application opens and unregister them when it closes.
The arguments passed to your callback function include the name of the soup that
changed, the symbol identifying the callback function to execute, the kind of
change that occurred, and optional data such as changed soup entries. For a simple
code example, see "Registering Your Application for Change Notification"
beginning on page 11-64. For a complete description of the callback function and
its parameters, see the section "Callback Functions for Soup Change Notification"
(page 9-14) in Newton Programmer's Reference.
W A R N I N G
The
'soupEnters
and
'soupLeaves
messages are guaranteed
to be sent only when a reference to the changed soup exists. These
messages may not be sent for soups that are not in use. For
example, if no cursor object references the soup, this message
may not be sent.
Sending Notifications
11
When your application alters a soup, it may need to notify other applications that
the soup has changed. The best means of doing so depends on the exact nature
of the change.
The system provides functions and methods that transmit change notification
messages automatically after altering soups, union soups, or entries. The names of
these auto-transmit routines end with the
-Xmit
suffix. They are described
throughout this chapter in sections pertaining to the main behaviors they provide,
such as adding frames to soups as entries, changing entries, and so on.
The auto-transmit (fnOrMethodName
Xmit
) routines provide the easiest and best
way to send notifications when making a limited number of changes to a soup. For
example, to save a frame in a union soup and transmit an appropriate notification
message, use the
AddToDefaultStoreXmit
method as shown in the following
code fragment:
// get soup in which to save the new entry
local myUSoup := GetUnionSoupAlways("myUSoup:mySig");
// frame to add as new entry
local myFrame := {name: Daphne, color: tabby};
// add the entry and transmit change notification
local ent := myUSoup:AddToDefaultStoreXmit(myFrame,'|MyApp:MySig|);
The auto-transmit methods and functions accept a changeSym parameter identifying
the application that changed the soup. If you pass
nil
for the value of the
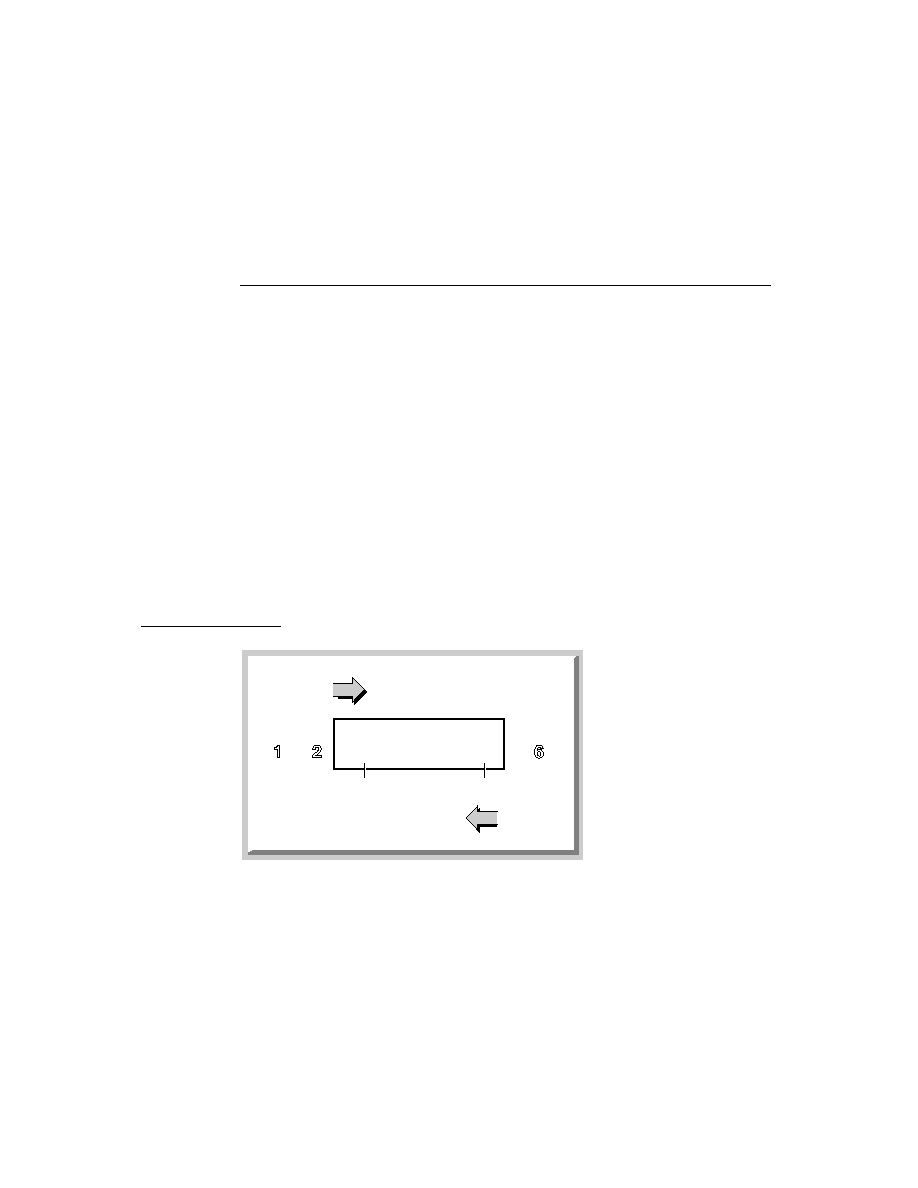
C H A P T E R 1 1
Data Storage and Retrieval
Using Newton Data Storage Objects
11-67
changeSym
parameter, the change notification is not sent, but the function or
method does everything else its description specifies.
Sometimes it may not be not desirable to send notifications immediately after
making each change to a soup; for example, when changing a large number of soup
entries, you might want to wait until after you've finished making all the changes to
transmit notification messages. You can use the
XmitSoupChange
global function
to send soup change notifications explicitly, as shown in the following code example:
// assume cursor and destSoup are valid
// xmit a single notification after all changes are made
while e := cursor:Entry() do EntryCopyXmit(e,destSoup,nil);
XmitSoupChange("mySoup:mySig", '|MyApp:MySig|, 'whatThe, nil);
The first argument to the
XmitSoupChange
function specifies the name of the
soup that has changed and the second argument specifies the application making
the change. The third argument is a predefined symbol specifying the kind of
change that was made, such as whether an entry was added, deleted, or changed.
Where appropriate, the final argument is change data, such as the new version of
the entry that was changed. Because this particular example makes multiple
changes to the
destSoup
soup, it passes the
'whatThe
symbol to indicate
unspecified changes, and passes
nil
as the change data. For a more detailed
discussion of change type and change data, see the section "Callback Functions for
Soup Change Notification" (page 9-14) in Newton Programmer's Reference.
Soup change notification messages are sent on a deferred basis. In most situations,
this implementation detail has no practical impact; however, you should be aware
that soup change messages are not sent until after the method that sends them
returns. For example, if your
ButtonClickScript
method causes a soup
change, the change notification message is not sent until after the
ButtonClickScript
method returns.

C H A P T E R 1 1
Data Storage and Retrieval
11-68
Summary of Data Storage
Summary of Data Storage
11
This section summarizes data structures, functions, objects and methods used for
data storage on Newton devices.
Data Structures
11
Soup Definition Frame
11
mySoupDef :=
{
// string that identifies this soup to the system
name: "
appName
:
appSym
",
// string that is user visible name
userName: "My Application soup",
// application symbol
ownerApp: '|myApp:mySig|,
// user-visible name of app that owns this soup
ownerAppName: "My Application",
// user-visible string describing soup
userDescr: "This soup is used by
My Application.",
// array of indexSpecs - default indexes
indexes: [
anIndexSpec
,
anotherIndexSpec
]
// optional function used to initialize the soup
initHook:
symbolOrCallBackFn
}
Single-Slot Index Specification Frame
11
{
// must use this value - index keys are slot values
structure:'slot,
// entries indexed on this slot
path:
pathExpr
,
// data type found in the indexed slot
type:
symbol
,
// optional. 'ascending or 'descending
order:
symbol
,
// optional. pass 1 to use alternate sort table
sortID: nil
}

C H A P T E R 1 1
Data Storage and Retrieval
Summary of Data Storage
11-69
Multiple-Slot Index Specification Frame
11
{
// index keys may be multiple slot values
structure: 'multiSlot, // must use this value
// up to six path expressions specifying indexed slots
path:[
pathExpr1
,
pathExpr2
, ... ,
pathExpr6
],
// data type found in each indexed slot
type:[
sym1
,
sym2
, ...
sym6
]
// optional. 'ascending or 'descending
order: [
sym1
,
sym2
, ...
sym6
]
// optional. pass 1 to use alternate sort table
sortID: nil
}
Tags Index Specification Frame
11
{
// must use this value - tags are slot values
structure:'slot,
// index values (tags) extracted from this slot
path:'
slotName
,
// must use this value
type:'tags,
}
Query Specification Frame
11
// pass nil instead of a query spec frame
// to retrieve all entries in the soup
// this frame used for queries on single-slot indexes
// see next example for multiple-slot query spec frame
{
// use the specified single-slot index for this query
// required when querying for index values
indexPath : '
pathExpr
,
// minimum index key value examined by this query
// for all entries, (beginKey
entry.indexPath)
beginKey :
keyValue
, // optional
// excluded lower boundary of key range examined by query
// for all entries, (beginExclKey < entry.indexPath)
beginExclKey :
keyValue
, // optional

C H A P T E R 1 1
Data Storage and Retrieval
11-70
Summary of Data Storage
// maximum index key value examined by this query
// for all entries, (entry.indexPath
endKey)
endKey:
keyValue
, // optional
// excluded upper boundary of key range examined by query
// for all entries, (beginExclKey < entry.indexPath)
endExclKey :
keyValue
, // optional
// returns non-nil to include entry in result
indexValidTest: func (
keyValue
) begin ... end;, // optional
// returns non-nil to include entry in result
validTest: func (
entry
) begin ... end; // optional
// optional tags query spec frame; see page 11-71
tagSpec: {equal:[
t1, t2, ...tN
], all:[
t1, t2, ...tN
],
any:[
t1, t2, ...tN
],none:[
t1, t2, ...tN
]},
// when non-nil, match entire string in 'words slot
entireWords:
Boolean
, // optional
// string(s) to match w/ word beginnings in entries
words:
string
|[
str1
,
str2
, ... ,
strN
], // optional
// string to match w/ any substring in entries
text:
string
, // optional
}
// this frame used for queries on multiple-slot indexes
// see previous example for single-slot query spec frame
{
// use the specified multiple-slot index for this query
indexPath : ['
pathExpr1,
'
pathExpr2,
...'
pathExpr6
], // required
// minimum index key value examined by this query
// for all entries, (beginKey
entry.indexPath)
beginKey : [
keyValue1
,
keyValue2
...
keyValue6
], // optional
// excluded lower boundary of key range examined by query
// for all entries, (beginExclKey < entry.indexPath)
beginExclKey : [
keyValue1
,
keyValue2
...
keyValue6
], // optional
// maximum index key value examined by this query
// for all entries, (entry.indexPath
endKey)
endKey: [
keyValue1
,
keyValue2
...
keyValue6
], // optional
// excluded upper boundary of key range examined by query
// for all entries, (beginExclKey < entry.indexPath)
endExclKey : [
keyValue1
,
keyValue2
...
keyValue6
], // optional
// optional; returns non-nil to include entry in result
indexValidTest: func ([
keyValue1
,
keyValue2
...
keyValue6
])
begin ... end;,
// optional; returns non-nil to include entry in result
validTest: func (
entry
) begin ... end;
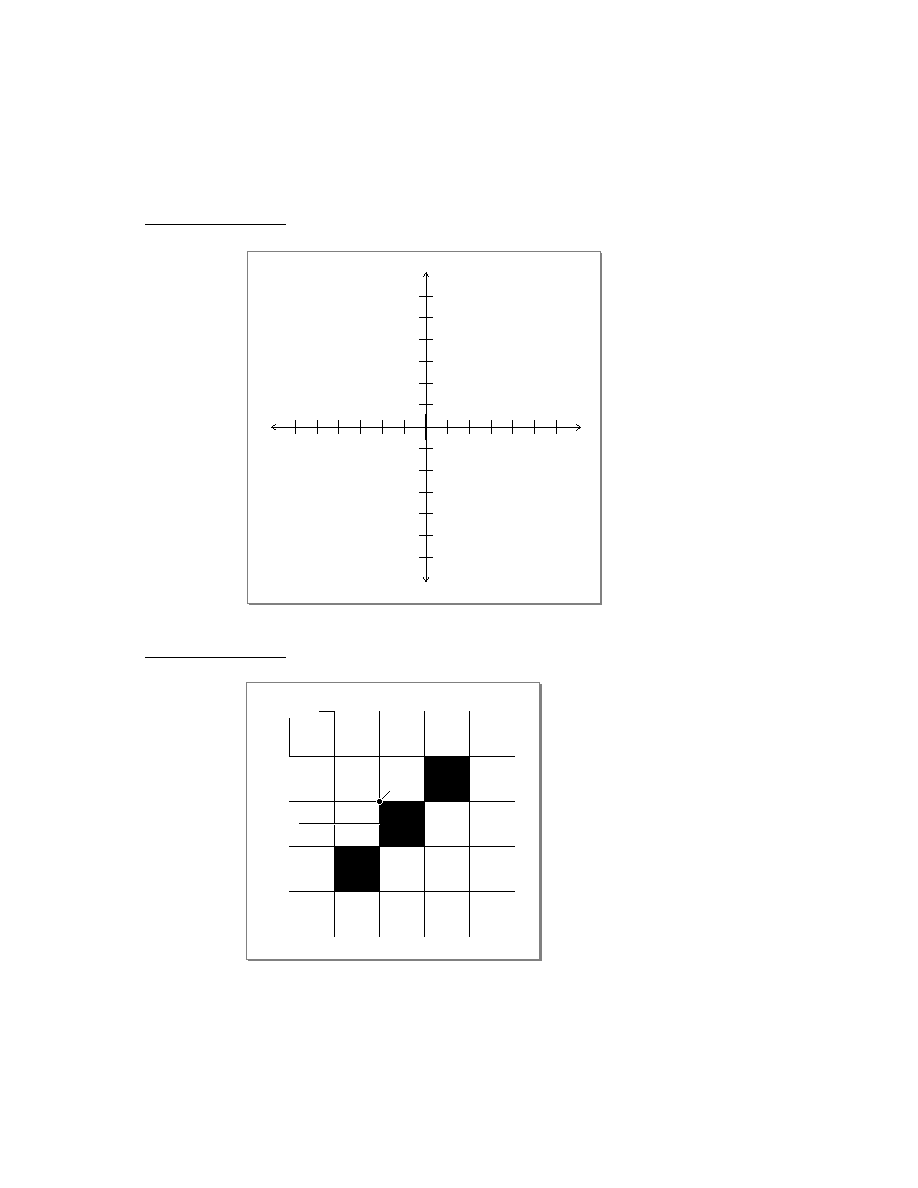
C H A P T E R 1 1
Data Storage and Retrieval
Summary of Data Storage
11-71
// optional tags query spec frame; see page 11-71
tagSpec: {equal:[
t1, t2, ...tN
], all:[
t1, t2, ...tN
],
any:[
t1, t2, ...tN
],none:[
t1, t2, ...tN
]},
// when non-nil, match entire string in 'words slot
entireWords:
Boolean
, // optional
// string(s) to match w/ word beginnings in entries
words:
string
|[
str1
,
str2
, ... ,
strN
], // optional
// string to match w/ any substring in entries
text:
string
, // optional
}
Tags Query Specification Frame
11
// this frame resides in tagSpec slot of query spec frame
// at least one of these slots must appear
// select only entries having identical set of tags
{equal:[
t1, t2, ...tN
],
// select only entries having identical tags or superset
all:[
t1, t2, ...tN
],
// select entries having any of these tags
any:[
t1, t2, ...tN
],
// select entries having none of these tags
none:[
t1, t2, ...tN
]}
Callback Functions for Soup Change Notification
11
func(
soupNameString
,
appSymbol
,
changeTypeSymbol
,
changeData
);
Data Storage Functions and Methods
11
Stores
11
store
:AtomicAction(
function
)
store
:BusyAction(
appSymbol
,
appName
,
action
)
store
:CheckWriteProtect()
GetDefaultStore()
store
:GetInfo(
slotSymbol
)
store
:GetName()
store
:GetSoup(
soupNameString
)
store
:GetSoupNames()
GetStores()
store
:HasSoup(
soupName
)
store
:IsReadOnly()

C H A P T E R 1 1
Data Storage and Retrieval
11-72
Summary of Data Storage
store
:IsValid()
SetDefaultStore(
newDefaultStore
)
store
:SetInfo(
slotSymbol
,
value
)
store
:TotalSize()
store
:UsedSize()
Soups
11
These functions and methods allow you to work with soup-level data such as
frames, soup indexes, soup information frames, and soup signatures.
Creating Soups
RegUnionSoup(
appSymbol
,
soupDef
);
UnRegUnionSoup(
name
,
appSymbol
);
store
:CreateSoupXmit(
soupName
,
indexArray
,
changeSym
)
CreateSoupFromSoupDef(
soupDef
,
store
,
changeSym
)
uSoup
:GetMember(
store
)
Adding and Copying Entries
uSoup
:AddToDefaultStoreXmit(
frame
,
changeSym
)
uSoup
:AddToStoreXmit(
frame
,
store
,
changeSym
)
soupOrUsoup
:AddFlushedXmit(
frameOrEntry
,
changeSym
)
soup
:AddXmit(
frame
,
changeSym
)
soup
:CopyEntriesXmit(
destSoup
,
changeSym
)
Retrieving Entries
soupOrUSoup
:Query(
querySpec
)
Change Notification
RegSoupChange(
soupName
,
callbackID
,
callBackFn
)
UnRegSoupChange(
soupName
,
callbackID
)
XmitSoupChange(
soupName
,
appSymbol
,
changeType
,
changeData
)
Manipulating Tags
soup
:HasTags()
soup
:GetTags()
soupOrUsoup
:ModifyTagXmit(
oldTag
,
newTag
,
changeSym
)
soupOrUsoup
:RemoveTagsXmit(
tags
,
changeSym
)
soupOrUsoup
:AddTagsXmit(
tags
,
changeSym
)
Additional Functions and Methods
soupOrUsoup
:AddIndexXmit(
indexSpec
,
changeSym
)
soup
:GetIndexes()
soup
:GetInfo(
slotSymbol
)
soupOrUsoup
:GetName()
soup
:GetSignature()

C H A P T E R 1 1
Data Storage and Retrieval
Summary of Data Storage
11-73
soupOrUsoup
:GetSize()
uSoup
:GetSoupList()
soup
:GetStore()
GetUnionSoupAlways(
soupNameString
)
soup
:MakeKey(
string
,
indexPath
)
IsSoupEntry(
object
)
soup
:IsValid()
soup
:RemoveAllEntriesXmit(
changeSym
)
soup
:RemoveFromStoreXmit(
changeSym
)
soupOrUsoup
:RemoveIndexXmit(
indexPath
,
changeSym
)
soup
:SetInfoXmit(
slotSymbol
,
value
,
changeSym
)
soup
:SetName(
soupNameString
)
Cursors
11
These functions and methods work with the cursor object returned by the
Query
method.
Cursor Validity
cursor
:Status()
Retrieving Entries and Manipulating the Cursor
cursor
:Entry()
cursor
:Next()
cursor
:Prev()
cursor
:Move(
n
)
cursor
:EntryKey()
cursor
:GoToKey(
key
)
cursor
:GoTo(
entry
)
cursor
:Reset()
cursor
:ResetToEnd()
cursor
:WhichEnd()
Additional Functions and Methods
MapCursor(
cursor
,
function
)
cursor
:CountEntries()
cursor
:Clone()
Entries
11
These functions allow you to work with individual soup entries returned by the
cursor object.
EntryChangeXmit(
entry
,
changeSym
)
EntryCopyXmit(
entry
,
newSoup
,
changeSym
)
EntryFlushXmit(
entry
,
changeSym
)

C H A P T E R 1 1
Data Storage and Retrieval
11-74
Summary of Data Storage
EntryIsResident(
entry
)
EntryModTime(
entry
)
EntryMoveXmit(
entry
,
newSoup
,
changeSym
)
EntryRemoveFromSoupXmit(
entry
,
changeSym
)
EntryReplaceXmit(
original
,
replacement, changeSym
)
EntrySize(
entry
)
EntrySoup(
entry
)
EntryStore(
entry
)
EntryTextSize(
entry
)
EntryUndoChangesXmit(
entry
,
changeSym
)
EntryUniqueId(
entry
)
FrameDirty(
frame
)
IsSameEntry(
entryOralias1
,
entryOralias2
)
Data Backup and Restore Functions
11
These functions are intended for use by special-purpose data backup and
restoration programs only. Many of them intentionally defeat the error-
checking features upon which the system relies to maintain values that identify
entries to the system and specify when they were last modified.
store
:Erase()
store
:GetAllInfo()
store
:GetSignature()
store
:SetName(
storeNameString
)
soup
:AddWithUniqueIdXmit(
entry
,
changeSym
)
soup
:GetAllInfo()
soup
:GetIndexesModTime()
soup
:GetInfoModTime()
soup
:GetNextUid()
soup
:SetSignature(
signature
)
soup
:SetAllInfoXmit (
frame
,
changeSym
)
EntryChangeWithModTimeXmit(
entry
,
changeSym
)
EntryReplaceWithModTimeXmit (
original
,
replacement
,
changeSym
)

About Special-Purpose Storage Objects
12-1
C H A P T E R 1 2
Special-Purpose Objects for Data
Storage and Retrieval
12
Figure 12-0
Table 12-0
This chapter describes the use of special-purpose objects to augment or replace
the behavior of the system-supplied store, soup, cursor, and entry objects. This
chapter describes
the use of entry alias objects to save references to soup entries
the use of virtual binary objects to store large amounts of binary data
the use of store parts to build read-only soup data into packages
the use of mock entry objects to implement your own suite of objects that
provide access to nonsoup data in the same manner as the system-provided
store, soup, cursor, and entry objects.
Before reading this chapter, you should understand the contents of Chapter 11,
"Data Storage and Retrieval," which provides an overview of the Newton data
storage system and describes how to use stores, soups, queries, cursors, and entries
to meet most applications' data storage needs.
About Special-Purpose Storage Objects
12
The special-purpose data storage objects described here can be used to augment or
replace the behavior of stores, soups, cursors, and entries.
Entry Aliases
12
An entry alias is an object that provides a standard way to save a reference to a
soup entry. Unless it uses an entry alias to do so, a soup entry cannot save a
reference to an entry in another soup--the referenced entry is copied into the host
entry when the host entry is written back to its soup. However, entry aliases may be
saved in soup entries without causing this problem.
Entry aliases are also useful for providing convenient access to entries from
multiple soups. For example, the built-in Find service uses entry aliases to present
entries from multiple soups in a single overview view.

C H A P T E R 1 2
Special-Purpose Objects for Data Storage and Retrieval
12-2
About Special-Purpose Storage Objects
Virtual Binary Objects
12
The size of any NewtonScript object is limited by the amount of memory available
in the NewtonScript heap. As a result, you cannot create binary objects larger than
the amount of available NewtonScript heap space. For similar reasons, the amount
of data that can be stored in a single soup entry is limited as well. (See "Saving
Frames as Soup Entries" beginning on page 11-58 for details.) You can use virtual
binary objects to work around these restrictions.
A virtual binary object or VBO is a special kind of object that is useful for
holding binary data larger than the available space in the NewtonScript heap. VBOs
can be used to store large amounts of raw binary data, such as large bitmaps, the
samples of large digitized sounds, fax data, packages, or application-specific binary
data. A package is actually a special kind of virtual binary object; however, a package
is read-only and is created in a slightly different manner than a normal VBO.
In the following ways, VBOs are like normal NewtonScript binary objects:
The VBO is not persistent until it is written to a soup. As with any soup entry data,
if a VBO in a soup entry is modified, the changes are not persistent until the
cached entry frame is written back to the soup. If a soup entry containing a VBO
is moved to another store, the binary data associated with the VBO is moved to
that store as well. For a discussion of the soup entry cache, see "Entries" on
page 11-17.
The space used by the VBO is made available for garbage collection when there
are no more references to the VBO.
Binary data--including VBO data--is not shared between soup entries, even
when their respective soups reside on the same store. As a result, you may need
to consider space issues when moving or duplicating entries that hold VBO data.
VBOs are different from normal NewtonScript binary objects in the following ways:
VBO data does not reside in the NewtonScript heap--it resides in store memory.
Store memory for VBO data is not allocated until it is needed to write data. "Using
Virtual Binary Objects" on page 12-8 discusses this important point in detail.
You cannot use a value stored in a virtual binary object as a soup index key.
VBOs can be created in compressed or uncompressed form. If the VBO is
compressed, the system compresses and decompresses its associated binary data
on demand. The fact that a VBO is compressed is normally transparent to your
code; however, the time required to compress and uncompress VBO data may
affect performance.
When passed a reference to a VBO residing on a store that is unavailable,
methods that write VBO data throw exceptions rather than displaying the
"Newton still needs the card" alert.

C H A P T E R 1 2
Special-Purpose Objects for Data Storage and Retrieval
About Special-Purpose Storage Objects
12-3
Normal binary objects encapsulate their data and reside entirely in the NewtonScript
heap; thus, creating one of these objects or reading any of its data requires an
amount of heap space sufficient to hold all its data. Therefore, the size of a normal
binary object is limited by the amount of NewtonScript heap space available at the
time it is created. For example, a binary object encapsulating 5 KB of data requires
5 KB of NewtonScript heap space. If sufficient heap space is not available, the
binary object cannot be created.
In contrast, VBO data resides on a store specified when the VBO is created. The
system manages VBO data automatically, providing NewtonScript objects with
transparent access to it on demand. A VBO can hold more data than a normal
binary object because it is not limited by the amount of free space available in the
NewtonScript heap. Contrasting the previous example, a VBO holding 5 KB of
data requires a negligible amount of heap space, because its data resides in store
memory, rather than in the NewtonScript heap.
Note
The system does not allocate store memory for VBO data until it
is needed to write data to the store. Testing the amount of store
memory available when the VBO is created does not guarantee
the future availability of this memory. Thus, it is possible to fail
due to lack of store space when writing to a VBO, even though the
VBO was created successfully. The only practical solution to this
problem is to enclose in a
try
block any code that writes VBO
data.
Parts
12
Recall that a package is the basic unit of downloadable Newton software: it
provides a means of loading code, resources, objects, and scripts into a Newton
device. A package consists of one or more constituent units called parts.
The format of a part is identified by a four-character identifier called its type or
its part code. Table 12-1 on page 12-4 lists the various kinds of parts and their
associated
type identifiers.
Some of the parts described in Table 12-1 may already be familiar to you.
Form
parts are the Newton application packages you create with Newton Toolkit.
Book
parts are the interactive digital books described in the Newton Book Maker User's
Guide
. Store parts (parts of type
soup
) are useful for the storage of read-only data
and are discussed later in this chapter. Dictionary parts (parts of type
dict
)
supplement the built-in word lists used by the recognition subsystem.
Font
parts
are used to add new typefaces to Newton devices; for more information about these
parts, contact Newton Developer Technical Support.
Auto
parts are described in
the Newton Toolkit User's Guide.

C H A P T E R 1 2
Special-Purpose Objects for Data Storage and Retrieval
12-4
About Special-Purpose Storage Objects
Except for
soup
parts, all the parts listed in Table 12-1 are called frame parts
because they include a part frame which holds the items comprising the frame part.
Such items may include icons, scripts, other parts, binary data and so on. A
soup
part, on the other hand, does not have a part frame and is composed of soup data only.
When a frame part is loaded, the system disperses the contents of its part frame to
the appropriate subsystems. For example, in addition to the application itself,
which is a
form
part used by the Extras Drawer, the part frame in an application
package might include a custom icon used by the Extras Drawer, a custom dictionary
used by the recognition subsystem, a soup part that provides application data, and
an
InstallScript
function that performs application-specific setup tasks.
Store Parts
12
A store part is a part that encapsulates a read-only store. Because you can build
store parts into application packages, the store part is sometimes referred to as a
package store.
Soups can reside on package stores, just as they do on normal stores; however,
because package stores are read-only, soups residing on package stores must also
be read-only. Store parts can be used to provide soup-like access to read-only data
residing in an application package.
For more information about the characteristics of soups, see "Soups" on page 11-7
and "Using Soups" on page 11-32.
Mock Entries
12
A mock entry is a NewtonScript object that mimics the behavior of a soup entry.
The mock entry is a foundation object you can use to build up a suite of objects
that acts like the system-supplied store, soup, cursor, and entry objects. For
example, you could create a mock entry object that uses a serial communications
link to retrieve a record from a remote database; additional objects could implement
methods to provide cursor-like access to these mock entries, just as if they resided
Table 12-1
Parts and type identifiers
Part
Type
Description
Application
form
Application.
Book
book
Book created by Newton Book Maker or Newton Press.
Auto part
auto
Background application/extension.
Store part
soup
Read-only soup.
Dictionary
dict
Custom dictionary for Newton recognition subsystem.
Font
font
Additional font.

C H A P T E R 1 2
Special-Purpose Objects for Data Storage and Retrieval
About Special-Purpose Storage Objects
12-5
in a local soup. Your mock entry could reside in a mock soup, which, in turn, could
reside on a mock store.
The mock entry counterparts to the system-supplied EntryXxx functions are
implemented as the methods of a NewtonScript frame known as the mock entry's
handler. You supply this frame, which implements these methods as well as any it
requires for its own purposes. The handler may also hold information local to a
specific mock entry or information required to retrieve the mock entry's data.
Like a normal soup entry, the mock entry caches its data in the NewtonScript heap
when the entry is accessed; thus, the data associated with a mock entry is called its
cached frame. As with normal soup entries, the cached frame appears to be the
mock entry itself when accessed by other NewtonScript objects. Your handler
provides an
EntryAccess
method that creates this frame in response to messages
from the system.
The cached frame must be self-contained, just as a normal soup entry is. Therefore,
the cached frame must not use
_proto
and
_parent
inheritance.
To create a mock entry, you call the
NewMockEntry
global function. Depending
on your needs, you can create the mock entry with or without its associated cached
frame. Either way, the mock entry object returned by this function manages other
objects' access to its cached frame.
When the mock entry's cached frame is present, the system forwards entry
accesses to it transparently. When the cached frame is not present, the system calls
the handler's
EntryAccess
method to generate a cached frame before forwarding
the access. You must supply this method, which creates and installs the cached
frame in the mock entry.
The handler's
EntryAccess
method is called only when a slot in the mock entry
is accessed. Simply referencing the mock entry does not cause the cached entry to
be created. For example, in the following code fragment, assigning
m
to
x
does not
create a cached entry--it just creates another reference to the mock entry. However,
accessing the mock entry's
foo
slot from either of the variables
m
or
x
may cause
the
EntryAccess
method of
myHandler
to be invoked.
local myHandler := {
object: {foo: 'bar},
EntryAccess: func (mockEntry)
begin
// install cached obj & notify system
EntrySetCachedObject(mockEntry, object);
// return cached obj
object;
end,
// your additional slots and methods here
...}

C H A P T E R 1 2
Special-Purpose Objects for Data Storage and Retrieval
12-6
About Special-Purpose Storage Objects
// create new mock entry w/ no cached frame
local m := NewMockEntry(myHandler, nil);
// referencing m doesn't create cached frame
local x := m;
// either statement could invoke myHandler:EntryAccess()
local a := x.foo;
local b := m.foo;
To almost all of the system, the mock entry appears to be a normal soup entry;
for example:
m.foo
evaluates to
'bar
ClassOf(m)
is
'frame
m.baz := 42
adds a slot to the
handler.object
frame and this modified
frame is returned the next time the mock entry is accessed.
Only the
IsMockEntry
global function can determine that
m
is a mock entry,
rather than a soup entry. Note that the
IsSoupEntry
function returns
true
for
both mock entries and normal soup entries.
Mock Stores, Mock Soups, and Mock Cursors
12
The current implementation of the Newton object system provides only mock
entries; you must implement appropriate mock cursors, mock soups, and mock
stores as required.
The mock store is a frame you supply which responds appropriately to all the
messages that might normally be sent to a store object. For example, when the
mock store's
GetSoup
method is invoked, it should return a mock soup.
The mock soup is a frame you supply which responds appropriately to all the
messages that might normally be sent to a soup object. For example, when the
mock soup's
Query
method is called, the mock soup should return a mock cursor.
Mock soups cannot participate in union soups; however, you can implement your
own mock union soup objects that manage the interaction of your mock soups with
normal soups or union soups.
A mock cursor is a frame you supply that can respond appropriately to all the
messages that might normally be sent to a cursor object. For example, when the
mock cursor's
Entry
method is invoked, it should return a mock entry.

C H A P T E R 1 2
Special-Purpose Objects for Data Storage and Retrieval
Using Special-Purpose Data Storage Objects
12-7
Using Special-Purpose Data Storage Objects
12
This section describes how to use entry aliases, virtual binary objects (VBOs),
store parts, and mock entries. This section presumes understanding of the
conceptual material presented in preceding sections.
Using Entry Aliases
12
This section describes how to create entry aliases, how to save them, and how to
resolve them.
Aliases can be created for any entry that resides in a soup or union soup. Aliases
cannot be created for mock entry objects.
You must not assume that an entry alias is valid. When the entry to which it refers
is deleted or is moved to another store, an entry alias becomes invalid. Renaming a
store renders invalid all aliases to entries residing on that store.
The
MakeEntryAlias
function returns an alias to a soup entry, as shown in the
following code fragment:
// return entries that contain "bob" and "Apple"
local myCurs:= namesSoup:Query({ entireWords: true,
words:["Bob", "Apple"]});
// keep an alias to bob around
local bobAlias := MakeEntryAlias(myCurs:Entry());
// but get rid of the cursor
myCurs := nil;
To save an entry alias, simply save it in a soup entry.
You can use the
ResolveEntryAlias
function to obtain the entry to which the
alias refers, as shown in the following code fragment:
// continued from previous example
local bobEntry := ResolveEntryAlias(bobAlias);
Note that the
ResolveEntryAlias
function returns
nil
if the original store,
soup, or entry to which the alias refers is unavailable.
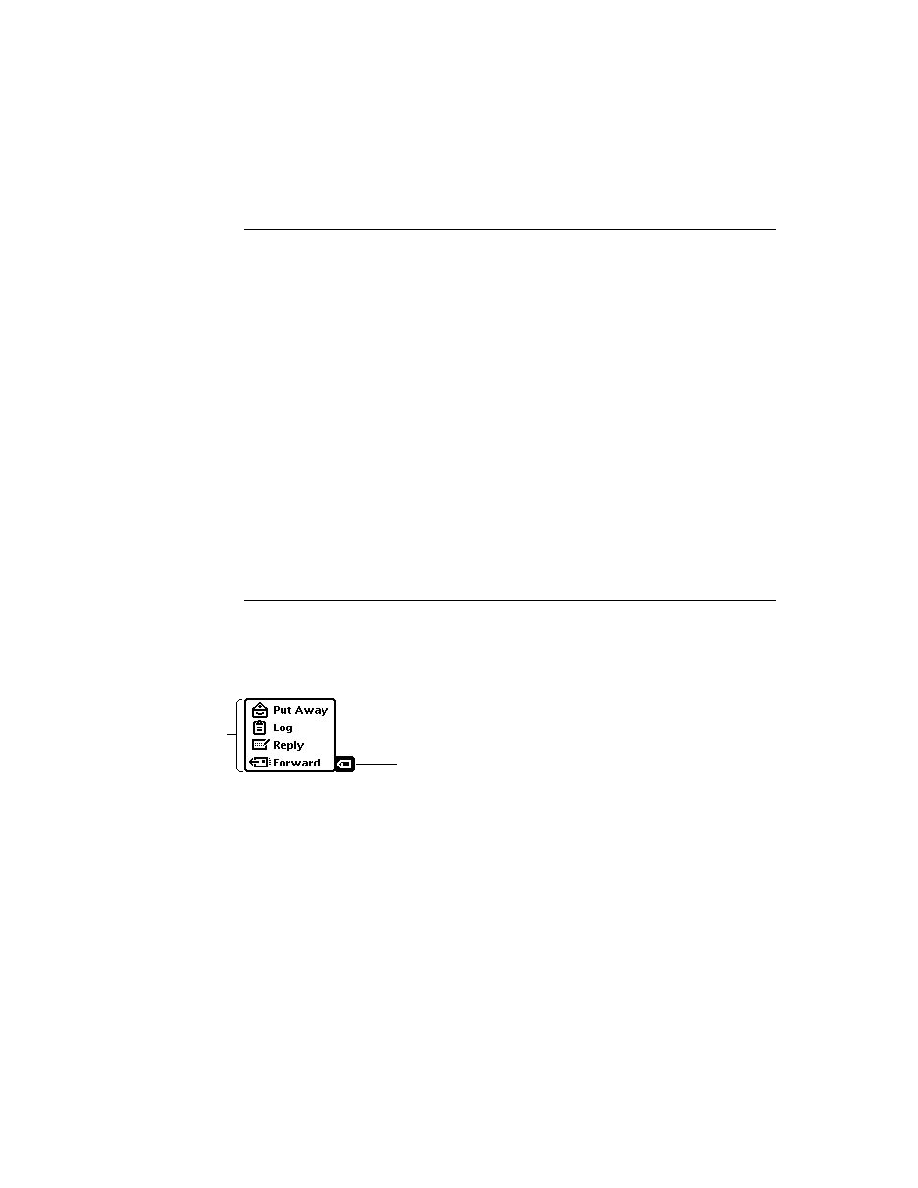
C H A P T E R 1 2
Special-Purpose Objects for Data Storage and Retrieval
12-8
Using Special-Purpose Data Storage Objects
You can use the
IsSameEntry
function to compare entries and aliases to each
other; this function returns
true
for any two aliases or references to the same
entry. For example:
// return entries that contain "bob" and "Apple"
local myCurs:= namesSoup:Query({ entireWords: true,
words:["Bob", "Apple"]});
local aBob:= myCurs:Entry();
// keep an alias to bob around
local bobAlias := MakeEntryAlias(aBob);
// the following comparison returns true
IsSameEntry(aBob, bobAlias)
The
IsEntryAlias
function returns
true
if its argument is an entry alias, as
shown in the following example:
// return entries that contain "bob" and "Apple"
local myCurs:= namesSoup:Query({ entireWords: true,
words:["Bob", "Apple"]});
// keep an alias to bob around
local bobAlias := MakeEntryAlias(myCurs:Entry());
// the following test returns true
IsEntryAlias(bobAlias);
Using Virtual Binary Objects
12
This section describes how to use a virtual binary object to store binary data that is
too large to fit into the NewtonScript heap. Topics discussed include:
creating compressed or uncompressed VBOs
saving VBOs in soup entries
adding data to VBOs
undoing changes to VBO data
In addition to the subjects discussed here, see "VBO Functions and Methods"
(page 9-74) in Newton Programmer's Reference for descriptions of VBO utility
functions.
Creating Virtual Binary Objects
12
When you create a VBO, you specify whether its associated binary data is to be
stored in compressed or uncompressed format. Whether you create compressed or
uncompressed VBO objects is a question of space versus speed: uncompressed
data provides faster access, but requires more store space than the equivalent
compressed data.

C H A P T E R 1 2
Special-Purpose Objects for Data Storage and Retrieval
Using Special-Purpose Data Storage Objects
12-9
The
NewVBO
and
NewCompressedVBO
store methods create virtual binary
objects. Both methods require that you specify the class of the binary object to be
created, as well as the store on which VBO data is to reside.
The following code fragment uses the store method
NewVBO
to create a new,
uncompressed, "blank" virtual binary object on the default store:
// create new uncompressed VBO of size 5 KB and class 'samples
local binData := GetDefaultStore():NewVBO('samples,5000);
Another way to create an uncompressed VBO is to pass
nil
as the
values of the companderName and companderData parameters to the
NewCompressedVBO
method, as the following code fragment shows:
// create new uncompressed VBO of size 5 KB and class 'samples
local binData := GetDefaultStore():NewCompressedVBO('samples, 5000,
nil, nil);
When you create a compressed VBO, you need to specify how the system is to
expand and compress data moved to and from the store associated with the VBO.
The system provides two compressor-expanders (also known as companders),
which compress and expand raw binary data on demand. The companderName
parameter to the
NewCompressedVBO
method indicates the compander to be used
for that particular VBO's data.
The Lempel-Ziv compander is a suitable for most data types; its use is specified by
passing the string
"TLZStoreCompander"
as the value of the companderName
parameter to the
NewCompressedVBO
method. The pixel map compander is
specialized for use with pixel map data; its use is specified by passing the string
"TPixelMapCompander"
as the value of the companderName parameter to the
NewCompressedVBO
method.
W A R N I N G
The pixel map compander makes certain assumptions about the
data passed to it; do not use it for any kind of data other than pixel
maps. For more information, see the description of the
NewCompressedVBO
method (page 9-75) in
Newton
Programmer's Reference
.
Because both of the companders provided by the current implementation of the
system initialize themselves automatically, you must always pass
nil
as the value
of the companderArgs parameter to the
NewCompressedVBO
method.
To create a new compressed VBO, specify a compander and a store in the arguments
to the
NewCompressedVBO
method, as shown in the following example:
// create new compressed VBO of size 5 KB and class 'pixMap
local binData := GetDefaultStore():NewCompressedVBO('pixMap,
5000,"TPixelMapCompander", nil);

C H A P T E R 1 2
Special-Purpose Objects for Data Storage and Retrieval
12-10
Using Special-Purpose Data Storage Objects
A VBO becomes permanent only when it is written to a soup entry, and its associated
binary data always resides on the same store as the entry. Thus, when creating a
VBO, it's usually best to specify that it use the same store as the soup entry into
which you'll save the VBO. If you try to put the same VBO in two different soup
entries, a duplicate VBO is created, even if both entries reside on the same store.
It is recommended that you enclose in a
try
block any code that writes VBO data.
Store memory for VBO data is not allocated when the VBO is created; rather, it is
allocated as needed to write VBO data. Thus, when writing an entry containing a
VBO back to its soup, it is possible to fail due to lack of store space for new or
changed VBO data, even though the VBO was created successfully.
Because the system manages store-backed VBO data transparently, calling a
function such as
StuffByte
on a VBO does not necessarily cause the system to
write new VBO data to the store. For similar reasons, VBOs may raise exceptions
at seemingly unusual times, as the system moves VBO data to and from store
memory as required to accommodate various objects' needs.
Finally, you may need to consider store space requirements when copying soup
entries that hold VBOs. When moving or copying a soup entry containing a VBO,
another copy of the VBO data is made by the destination soup's
Add
method
because VBO data is not shared between entries.
For a short code example that creates a VBO, saves data in it, and writes the VBO
to a soup, see the conclusion of the "Modifying VBO Data" section, immediately
following.
Modifying VBO Data
12
Recall that examining or modifying any slot in a soup entry causes the entire entry
to be read into the entry cache. When an entry containing a VBO is read into the
entry cache, the VBO data is not read into the entry cache, but made available to
the entry transparently.
Subsequently modifying the entry changes the cached data while leaving the
original soup entry untouched. The changes to the entry (and any VBOs residing in
it) are not saved until the entry is written back to the soup; for example, as the
result of an
EntryChangedXmit
call.
Note
Because store space for VBO data is not allocated until the data is
actually written, it's recommended that you enclose VBO write
operations in exception handling code.
To undo changes to binary data associated with a VBO that resides in a cached
soup entry, call the
EntryUndoChanges
function. This function disposes of the
cached soup entry and restores references to the original, untouched soup entry; it
also undoes changes to VBO data referenced by the entry.

C H A P T E R 1 2
Special-Purpose Objects for Data Storage and Retrieval
Using Special-Purpose Data Storage Objects
12-11
The following code fragment adds sound sample data to an empty VBO and
demonstrates the use of the
EntryUndoChanges
function to undo those changes:
// create a temporary soup
mySoup := RegUnionSoup('|foo:myApp:mySig|,
{name: "foo:myApp:mySig", indexes: '[]}) ;
// get a soup entry that is a sound
anEntry := mySoup:AddToDefaultStoreXmit('{sndFrameType: nil,
samples:nil,
samplingRate:nil,
dataType:nil,
compressionType: nil,
userName: nil}, nil) ;
// make a VBO to use for the samples
myVBO := GetDefaultStore():NewCompressedVBO('samples,5000,nil, nil);
// grab some samples from ROM and fill in most of sound frame
romSound := Clone(ROM_FunBeep) ;
anEntry.sndFrameType := romSound.sndFrameType ;
anEntry.samplingRate := romSound.samplingRate ;
anEntry.dataType := romSound.dataType ;
anEntry.compressionType := romSound.compressionType ;
anEntry.samples := myVBO ;
// put the samples in the VBO
BinaryMunger(myVBO, 0, nil, romSound.samples, 0, nil) ;
// write the VBO to the soup
try
EntryChangeXmit(anEntry, nil);
onException |evt.ex.fr.store| do
:Notify(kNotifyAlert, "My App", "Sorry, can't save changes.");
// listen to the sound to verify change
PlaySound(anEntry);
// change the sound
BinaryMunger(anEntry.samples,0, nil, ROM_PlinkBeep.samples, 0, nil);
PlaySound(anEntry) ;

C H A P T E R 1 2
Special-Purpose Objects for Data Storage and Retrieval
12-12
Using Special-Purpose Data Storage Objects
// decide to go back to the original
EntryUndoChanges(anEntry);
PlaySound(anEntry);
// clean up
foreach store in GetStores() do
begin
mySoup := store:GetSoup("foo:myApp:mySig") ;
if mySoup then
mySoup:RemoveFromStoreXmit(nil);
end ;
UnregUnionSoup("foo:myApp:mySig", '|foo:myApp:mySig|);
VBOs and String Data
12
In most cases, you should avoid using the
&
and
&&
string-concatenation operators
with VBO-based strings. These operators work by allocating a new string in the
NewtonScript heap and copying data from its arguments into the new object. You
can run out of heap space easily when attempting this operation with large strings.
Instead, use the
StrMunger
global function to concatenate two strings. The
following code fragment appends the
str2
string to the
str1
string, increasing
the size of
str1
as necessary, regardless of whether
str1
is VBO data or resident
in the NewtonScript heap.
StrMunger(str1, MAXINT, nil, str2, 0, nil);
The value of
MAXINT
is
1<<29-1
or
536870911
; however, any number larger
than
StrLen(str1)
works adequately.
Using Store Parts
12
This section describes how to create a store part and add soup data to it. This
discussion is followed by a description of how to access the store part's soups
from your application.
Note that other representations may provide better space efficiency or faster access
to data. Store parts are useful when you wish to avoid recoding soup data in a more
efficient representation, or when you need multiple indexes or some other
convenience that soup-based queries provide.

C H A P T E R 1 2
Special-Purpose Objects for Data Storage and Retrieval
Using Special-Purpose Data Storage Objects
12-13
Creating a Store Part
12
To create a store part, take the following steps using Newton Toolkit version 1.5
or greater:
Create a new project.
Select the Store Part radio button in the Output Settings dialog box. NTK disables
all other settings in this dialog box when the Store Part option is selected.
Configure the Package Settings dialog box as you normally would. The name
specified in this dialog box identifies the store part to the system in much the
same way that a package name identifies a package; thus, you need to ensure the
uniqueness of this identifier by basing it on your developer signature in some way.
Add a new text file to the project. You'll add to this document the NewtonScript
code that creates one or more soups to reside on the store part.
At compile time, NTK provides a global variable named
theStore
, which
represents the store part (package store) you are building. Any changes made to
this variable are reflected in the store part that is produced as the output of the build
cycle. Thus, to create your read-only soup, you can add to the text file some
NewtonScript code similar to the following example:
// some useful consts; note use of developer signature
constant kStoreName := "MyStore:MYSIG" ;
constant kSoupName := "MySoup:MYSIG" ;
constant kSoupIndices := '[] ;
// theStore is a global var provided by NTK
theStore:SetName(kStoreName) ;
// create the soup but don't xmit at build time
local soup:=theStore:CreateSoupXmit(kSoupName,
kSoupIndices, nil);
// add a couple entries
soup:Add({anInteger: 1}) ;
soup:Add({anInteger: 2}) ;
When the package is built, NTK incorporates the store part in it.

C H A P T E R 1 2
Special-Purpose Objects for Data Storage and Retrieval
12-14
Using Special-Purpose Data Storage Objects
Getting the Store Part
12
Store parts (also known as package stores) are made available by the
GetPackageStore
function. Package stores do not appear in the
GetStores
result array, which is reserved for normal store objects.
The
GetPackageStore
function retrieves the store by name, so each package
store must be given a unique name when it is built. Generally, this is ensured by
including the unique package symbol in the store name.
Accessing Data in Store Parts
12
Although store parts support most of the messages that normal soups do, remember
that store parts are read-only. Sending to a store part those messages that would
normally change a soup or its store (such as
CreateSoupXmit
,
SetName
and so
on) throws an exception.
Another thing to keep in mind is that soups on store parts do not participate in
union soups. You need to check explicitly for the presence of your store and soup.
The
GetPackageStore
and
GetPackageStores
functions provide two
different ways to find a store part. Usually, you use the global function
GetPackageStore
and pass the name of the store part you created as its
argument. Assuming the example code shown in "Creating a Store Part" on
page 12-13 was used to create the store part, you could use code similar to the
following example to check for the existence of the read-only soup residing on the
store part:
local pStore := GetPackageStore(kStoreName) ;
if pStore then
local pSoup := pStore:GetSoup(kSoupName) ;
Using Mock Entries
12
A mock entry has two parts: one is a cached frame, which the NewtonScript
interpreter treats as the entry when doing assignment, slot lookup, and so on; the
other is the handler frame that retrieves the actual entry data and implements a
suite of methods that manipulate it.
Topics discussed in this section include
implementing the
EntryAccess
method
creating a mock entry
testing the validity of a mock entry
getting entry cache data
getting and setting mock entry handlers
implementing additional handler methods

C H A P T E R 1 2
Special-Purpose Objects for Data Storage and Retrieval
Using Special-Purpose Data Storage Objects
12-15
Implementing the EntryAccess Method
12
Each of your mock entry handler frames must supply an
EntryAccess
method
that creates a cached frame containing the mock entry's data, installs the cached
frame in the mock entry, and returns the cached frame. This method is called when
the system attempts to access a cached frame that is not present.
The system passes the mock entry to your
EntryAccess
method when it is
invoked. This method calls the
EntrySetCachedObject
function to install the
cached frame in the mock entry and then returns the cached frame.
The following code fragment provides a simple example of an
EntryAccess
method:
myHandler := {
object: {foo: 'bar},
EntryAccess: func (mockEntry)
begin
// install cached frame
EntrySetCachedObject(mockEntry, object);
// return cached frame
object;
end,
// your additional slots and methods here
...}
Creating a New Mock Entry
12
The
NewMockEntry
global function creates a new mock entry object having a
specified handler and cached frame. Your application can use this method to create
a new mock entry; for example, in response to a mockSoup
:Add()
message.
The handler frame you pass to the
NewMockEntry
function must define an
EntryAccess
method, as described in "Implementing the EntryAccess Method"
on page 12-15. The handler may also contain supporting methods or data used by
the mock entry; for example, it might hold information local to a specific mock
entry or information required to retrieve the mock entry's data.
Depending on your needs, you can create new mock entries with or without their
corresponding cached frames. To create a mock entry with its cached frame already
installed, pass both the handler and the cached frame to this function.
To create a mock entry without a cached frame, pass
nil
as the value of the
cachedObject
parameter to the
NewMockEntry
function. When a slot in the
returned mock entry is accessed, the handler's
EntryAccess
method is invoked
to create the cached entry if it is not present.

C H A P T E R 1 2
Special-Purpose Objects for Data Storage and Retrieval
12-16
Using Special-Purpose Data Storage Objects
Testing the Validity of a Mock Entry
12
The
IsMockEntry
global function returns the value
true
for objects that are valid
mock entries. You can use this function to distinguish between mock entry objects
and other objects such as cache frames or soup entries. Note that the
IsSoupEntry
function returns
true
for both mock entries and normal soup entries.
Getting Mock Entry Data
12
The
EntryCachedObject
global function returns the cached frame associated
with a specified mock entry. You can call this function to retrieve the cached frame
associated with a specified mock entry. For example, your handler frame's
EntryChange
method must retrieve the cached frame in order to write it back to
a mock soup.
Changing the Mock Entry's Handler
12
The
EntrySetHandler
function is a special-purpose function that you can use to
replace a mock entry's handler. For example, you can use this function to install a
handler that implements debug versions of methods present in the mock entry's
original handler frame. Such methods might include breakpoints and print
statements that would not be present in the commercial version of an application.
Getting the Mock Entry's Handler
12
The system supplies the
EntryHandler
function for debugging purposes. The
EntryHandler
function returns a reference to the handler frame associated with
the mock entry specified by the value of the mockEntry parameter.
Implementing Additional Handler Methods
12
Your handler needs to provide additional methods that are the mock entry counter-
parts to system-supplied entry functions, such as
EntryUndoChangesXmit
, and
others. For a list of suggested methods that your handler may implement, see
"Application-Defined Mock Entry Handler Methods" on page 12-19.
C H A P T E R 1 2
Special-Purpose Objects for Data Storage and Retrieval
Summary of Special-Purpose Data Storage Objects
12-17
Summary of Special-Purpose Data Storage Objects
12
This section summarizes data structures, objects, methods and global functions
used by Newton devices for specialized data storage purposes.
Data Structures
12
Package Reference Information Frame
12
{
size:
nBytes
, // pkg's uncompressed size in bytes
store:
aStore
, // store on which pkg resides
title:
string
,// user-visible package name string
version:
int
, // version number
timeStamp:
int
,// date and time pkg was loaded
creationDate:
int
, // date pkg created
copyProtection:
value
, Non-nil means protected.
dispatchOnly:
value
, // Non-nil means dispatch-only pkg.
copyright:
string
, // copyright information string
compressed:
value
, // Non-nil value means pkg is compressed
cmprsdSz:
int
,// compressed size of pkg in bytes
numParts:
int
, // number of parts in pkg
parts: [
p1
,
p2
, ...
pN
], // parts comprising this package.
partTypes:[
sym1
,
sym2
, ...
symN
] // parallel to parts array.
Functions and Methods
12
Packages
12
GetPackageNames(
store
)
GetPackages()
GetPkgRef(
name
,
store
)
GetPkgRefInfo(
pkgRef
)
IsValid(
obj
)
IsPackage(
obj
)
IsPackageActive(
pkgRef
)
MarkPackageBusy(
pkgRef
,
appName
,
reason
)
MarkPackageNotBusy(
pkgRef
)
ObjectPkgRef(
obj
)

C H A P T E R 1 2
Special-Purpose Objects for Data Storage and Retrieval
12-18
Summary of Special-Purpose Data Storage Objects
SafeFreezePackage(
pkgRef
)
SafeMovePackage(
pkgRef
,
destStore
)
SafeRemovePackage(
pkgRef
)
store
:SuckPackageFromBinary(
binary
,
paramFrame
)
store
:SuckPackageFromEndpoint(
endPoint
,
paramFrame
)
ThawPackage(
pkgRef
)
Store Parts (Package Stores)
12
GetPackageStore(
name
)
GetPackageStores()
Entry Aliases
12
IsEntryAlias(
object
)
MakeEntryAlias(
entry
)
ResolveEntryAlias(
alias
)
IsSameEntry(
entryOralias1
,
entryOralias2
)
Virtual Binary Objects (VBOs)
12
store
:NewVBO(
class
,
size
)
store
:NewCompressedVBO(
class
,
size
,
companderName
,
companderArgs
)
IsVBO(
vbo
)
GetVBOStore(
vbo
)
GetVBOStoredSize(
vbo
)
GetVBOCompander(
vbo
)
Mock Entries
12
EntryCachedObject(
mockEntry
)
EntryHandler(
mockEntry
)
EntrySetCachedObject(
mockEntry
,
newCachedObj
)
EntrySetHandler(
mockEntry
,
newHandler
)
IsMockEntry(
object
)
NewMockEntry(
handler
,
cachedObj
)
NewWeakArray(
length
)

C H A P T E R 1 2
Special-Purpose Objects for Data Storage and Retrieval
Summary of Special-Purpose Data Storage Objects
12-19
Application-Defined Mock Entry Handler Methods
12
handler
:EntryAccess(
mockEntry
)
handler
:EntryChange(
mockEntry
)
handler
:EntryChangeWithModTime(
mockEntry
)
handler
:EntryCopy(
mockEntry
,
newSoup
)
handler
:EntryModTime(
mockEntry
)
handler
:EntryMove(
mockEntry
,
newSoup
)
handler
:EntryRemoveFromSoup(
mockEntry
)
handler
:EntryReplace(
original
,
replacement
)
handler
:EntryReplaceWithModTime(
original
,
replacement
)
handler
:EntrySize(
mockEntry
)
handler
:EntrySoup(
mockEntry
)
handler
:EntryStore(
mockEntry
)
handler
:EntryTextSize(
mockEntry
)
handler
:EntryUndoChanges(
mockEntry
)
handler
:EntryUniqueID(
mockEntry
)
handler
:EntryValid(
mockEntry
)

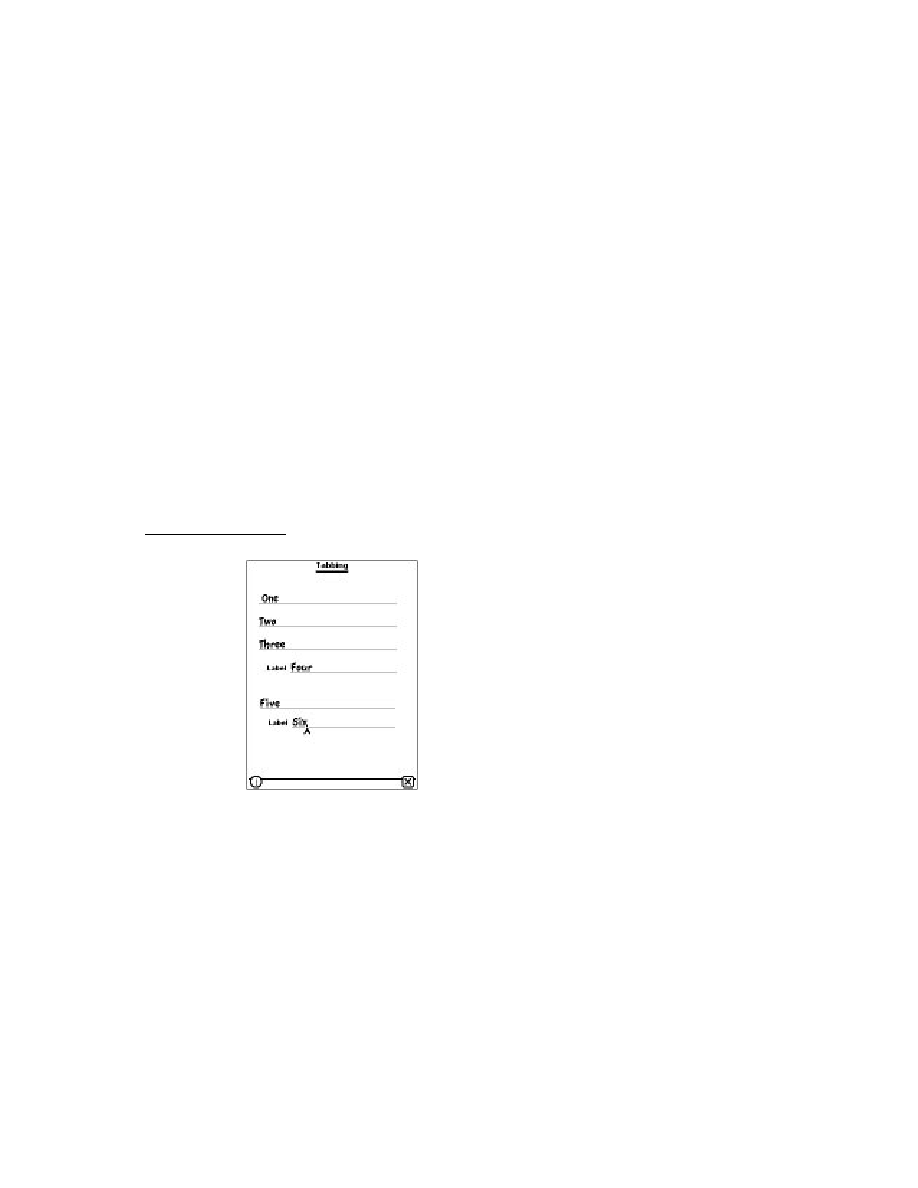
About Drawing
13-1
C H A P T E R 1 3
Drawing and Graphics
13
Figure 13-0
Table 13-0
This chapter describes how to draw graphical objects such as lines and rectangles
in Newton applications.
You should read this chapter if you are attempting to draw complex or primitive
graphical objects in a view. Before reading this chapter, you should be familiar
with the information in Chapter 3, "Views."
This chapter describes:
the types of graphical objects supported and how to draw them
drawing methods and functions used to perform specific tasks
drawing classes and protos that operate on graphics and drawing methods
and functions
About Drawing
13
The drawing interface provides a number of functions, methods, and protos that
allow you to create graphic objects in Newton applications. Objects can be shapes,
pictures, or rendered bitmaps. Additional functions and methods provide ways to
scale, transform, or rotate the images. All objects are drawn into views. See "View
Instantiation" (page 3-26) for complete details.
This section provides detailed conceptual information on drawing functions and
methods. Specifically, it covers the following:
supported shape objects
the style frame
new functions, methods, and messages added for Newton OS 2.0, as well as
modifications to existing pieces of the drawing code

C H A P T E R 1 3
Drawing and Graphics
13-2
About Drawing
Note that for all of the functions described in this chapter:
The coordinates you specify are interpreted as local to the view in which the
object is drawn.
The origin of the coordinate plane (0,0) is the upper-left corner of the view in
which the object is drawn.
Positive values are towards the right or the bottom of the screen from the origin.
For additional information on the Newton coordinate system see "Coordinate
System" (page 3-6).
Shape-Based Graphics
13
Newton system software provides functions for drawing primitive graphic objects
in a view. These drawing functions return a data structure called a shape that is
used by the drawing system to draw an image on the screen. The drawing system
supports the following shape objects:
lines
rectangles
rounded rectangles
ovals (including circles)
polygons
wedges and arcs
regions
text
pictures
bitmaps
Complex graphics can be drawn by passing arrays of shapes to the various drawing
functions. Primitive shapes can be combined procedurally by collecting them into a
shape called a picture. The appearance will be the same except that, when drawn,
the picture will not be affected by any style specifications. The styles are recorded
into the picture when you make it with
MakePict
--with the exception of any
transform or clipping slot. See "Controlling Clipping" (page 13-12) and
"Transforming a Shape" (page 13-13) for more information.
Each type of shape is described in the following pages.
A line is defined by two points: the current x and y location of the graphics pen and
the x and y location of its destination. The pen hangs below the right of the defining
points, as shown in Figure 13-1, where two lines are drawn with two different
pen sizes.

C H A P T E R 1 3
Drawing and Graphics
About Drawing
13-3
Figure 13-1
A line drawn with different bit patterns and pen sizes
A rectangle can be defined by two points--its top-left and bottom-right corners, as
shown in Figure 13-2, or by four boundaries--its upper, left, bottom, and right
sides. Rectangles are used to define active areas on the screen, to assign coordinate
systems to graphic entities, and to specify the locations and sizes for various
graphics operations.
Figure 13-2
A rectangle
Top
Bottom
Left
Right
C H A P T E R 1 3
Drawing and Graphics
13-4
About Drawing
Drawing also provides functions that allow you to perform a variety of mathematical
calculations on rectangles--changing their sizes, shifting them around, and so on.
An oval is a circular or elliptical shape defined by the bounding rectangle that
encloses it. If the bounding rectangle is a square (that is, has equal width and
height), the oval is a circle, as shown in Figure 13-3.
Figure 13-3
An oval
An arc is a portion of the circumference of an oval bounded by a pair of radii
joining at the oval's center; a wedge includes part of the oval's interior. Arcs and
wedges are defined by the bounding rectangle that encloses the oval, along with a
pair of angles marking the positions of the bounding radii, as shown in Figure 13-4.
Figure 13-4
An arc and a wedge
Oval
Bounding
rectangle
Bounding
rectangle
Bounding
rectangle
An arc
A wedge
Bounding
radius
Bounding
radius

C H A P T E R 1 3
Drawing and Graphics
About Drawing
13-5
A rounded rectangle is a rectangle with rounded corners. The figure is defined by
the rectangle itself, along with the width and height of the ovals forming the
corners (called the diameters of curvature), as shown in Figure 13-5. The corner
width and corner height are limited to the width and height of the rectangle itself; if
they are larger, the rounded rectangle becomes an oval.
Figure 13-5
A rounded rectangle
A polygon is defined by a sequence of points representing the polygon's vertices,
connected by straight lines from one point to the next. You define a polygon by
specifying an array of x and y locations in which to draw lines and passing it as a
parameter to
MakePolygon
. Figure 13-6 shows an example of a polygon.
Bounding
rectangle
Rounded
rectangle
Diameter
of curvature
Diameter
of curvature

C H A P T E R 1 3
Drawing and Graphics
13-6
About Drawing
Figure 13-6
A polygon
A region is an arbitrary area or set of areas, the outline of which is one or more
closed loops. One of drawing's most powerful capabilities is the ability to work
with regions of arbitrary size, shape, and complexity. You define a region by
drawing its boundary with drawing functions. The boundary can be any set of lines
and shapes (even including other regions) forming one or more closed loops. A
region can be concave or convex, can consist of one connected area or many
separate areas. In Figure 13-7, the region consists of two unconnected areas.
Figure 13-7
A region
Your application can record a sequence of drawing operations in a picture and play
its image back later. Pictures provide a form of graphic data exchange: one program

C H A P T E R 1 3
Drawing and Graphics
About Drawing
13-7
can draw something that was defined in another program, with great flexibility and
without having to know any details about what's being drawn. Figure 13-8 shows
an example of a picture containing a rectangle, an oval, and a triangle.
Figure 13-8
A simple picture
Manipulating Shapes
13
In addition to drawing shapes, you can perform operations on them. You can
offset shapes; that is, change the location of the origin of the shape's coordinate
plane, causing the shape to be drawn in a different location on the screen. Note
that offsetting a shape modifies it; for example, the offset shape will have
different
viewBounds
values than the original shape.
scale shapes; that is, draw the shape to fill a destination rectangle of a specified
size. The destination rectangle can be larger, smaller, or the same size as the
original shape. Note that scaling a shape modifies it; for example, the scaled
shape has different
viewBounds
values than the original shape.
hit-test shapes to determine whether a pen event occurred within the boundaries
of the shape. This operation is useful for implementing button-like behavior in
any shape.
The Style Frame
13
Any shape can optionally specify characteristics that affect the way it is imaged,
such as the size of the pen or the fill pattern to be used. These characteristics are
specified by the values of slots in a style frame associated with the shape. If the
value of the style frame is
nil
, the view system draws the shape using default
values for these drawing characteristics. See "Style Frame" (page 10-1) in the
Newton Programmer's Reference
for complete details.

C H A P T E R 1 3
Drawing and Graphics
13-8
About Drawing
Drawing Compatibility
13
The following new functionality has been added for Newton OS 2.0. For complete
details on the new drawing functions, see the "Drawing and Graphics Reference"
in the Newton Programmer's Reference.
New Functions
13
The following functions have been added:
GetShapeInfo
--returns a frame containing slots of interest for the shape.
DrawIntoBitmap
--draws shapes into a bitmap in the same way that the
DrawShape
method draws shapes into a view.
MakeBitmap
--returns a blank (white) bitmap shape of the specified size.
MungeBitmap
--performs various destructive bitmap operations such as
rotating or flipping the bitmap.
ViewIntoBitmap
--provides a screen-capture capability, writing a portion of
the specified view into the specified bitmap.
New Style Attribute Slots
13
Version 2.0 of Newton system software supports two new slots in the style frame:
clipping
and the
transform
.
Changes to Bitmaps
13
Previous versions of Newton system software treated bitmaps statically. They were
created only from compile-time data, and the operations one could perform on
them were limited to drawing them.
Version 2.0 of Newton system software provides a more dynamic treatment of
bitmaps. You can dynamically create and destroy them, draw into them, and
perform such operations as rotating and flipping them. This more flexible treatment
of bitmaps allows you to use them as offscreen buffers as well as for storage of
documents such as fax pages.
Changes to the HitShape Method
13
Previous versions of
HitShape
returned a non-
nil
value if a specified point lies
within the boundaries of one or more shapes passed to it. Version 2.0 of the
HitShape
function now returns additional information.

C H A P T E R 1 3
Drawing and Graphics
Using the Drawing Interface
13-9
Changes to View Classes
13
The
icon
slot of a view of the
clPictureView
class can now contain a graphic
shape, in addition to bitmap or picture objects.
Using the Drawing Interface
13
This section describes how to use the drawing interface to perform specific tasks.
See "Drawing and Graphics Reference" (page 10-1) in the Newton Programmer's
Reference for descriptions of the functions and methods discussed in this section.
How to Draw
13
Drawing on the Newton screen is a two-part process. You first create a shape object
by calling one or more graphics functions, such as
MakeRect
,
MakeLine
, and so
on. You then draw the shape object by passing any of the shapes returned by the
shape-creation functions, or an array of such shapes optionally intermixed with
style frames to the
DrawShape
method. If a style frame is included in the shape
array, it applies to all subsequent shapes in the array, until overridden by another
style frame.
In addition to the shape object, the
DrawShape
method accepts a style frame
parameter. The style frame specifies certain characteristics to use when drawing the
shape, such as pen size, pen pattern, fill pattern, transfer mode, and so on.
This system is versatile because it separates the shapes from the styles with which
they are drawn. You can create a single shape and then easily draw it using different
styles at different times.
DrawShape
can also accept as its argument an array of shapes instead of just a
single shape. Therefore, you can create a series of shapes and draw them all at once
with a single call to the
DrawShape
method. Additional style frames can be
included in the shape array to change the drawing style for the shapes that follow
them. "Using Nested Arrays of Shapes" (page 13-10), discusses the use of arrays of
shapes in more detail.
Responding to the ViewDrawScript Message
13
When the system draws a view, it sends a
ViewDrawScript
message to the view.
To perform your own drawing operations at this time, you must provide a
ViewDrawScript
method that calls the appropriate drawing functions.
The system also sends the
ViewDrawScript
message to the view whenever it is
redrawn. Views may be redrawn as the result of a system notification or a user action.

C H A P T E R 1 3
Drawing and Graphics
13-10
Using the Drawing Interface
If you want to redraw a view explicitly at any particular time, you need to send it
the
Dirty
message. This message causes the system to add that view to the area of
the screen that it updates in the next event loop cycle. To make the update area
redraw before the next event loop cycle, you must call the
RefreshViews
function after sending the
Dirty
message.
Drawing Immediately
13
If you want to draw in a view at times other than when the view is being opened
or redrawn automatically, you can execute drawing code outside of the
ViewDrawScript
method by using
DoDrawing
. For example, you might need
to perform your own drawing operations immediately when the user taps in the view.
You can use the
DoDrawing
method for this purpose. The
DoDrawing
method
calls another drawing method that you supply as one of its arguments.
W A R N I N G
Do not directly use
DrawShape
to draw shapes outside
of your
ViewDrawScript
. Standard drawing in
ViewDrawScript
and
DoDrawing
automatically set
up the drawing environment. If you use
DrawShape
without
setting up the drawing environment, your application could
accidentally draw on top of other applications, keyboards,
or floaters.
Using Nested Arrays of Shapes
13
The
DrawShape
method can draw multiple shapes when passed an array of shapes
as its argument. Style frames may be included in the shape array to change the
drawing style used to image subsequent elements of the array. Each element of
the array can itself be an array as well; this section refers to such an array as a
nested array.
Styles are maintained on a per-array basis in nested arrays, and the startStyle
parameter of
DrawShape
is always treated as though it were the first array
element of the topmost array. Therefore, compound shapes and multiple styles
remain intact when nested arrays are combined into larger groupings.
When the
DrawShape
method processes a nested array, the shapes are drawn in
ascending element order and drawing begins with the style of the parent array.
Although the drawing style may change while processing the elements of an
individual array, that style applies only to the elements of that particular array.
Therefore, if an array happens to be an element of another array--that is, a nested
array--style changes in the nested array affect the processing of its subsequent
elements but the drawing style of the parent array is restored after the last element
of the nested array is processed.
C H A P T E R 1 3
Drawing and Graphics
Using the Drawing Interface
13-11
For example, you might nest arrays to create the hierarchy of shapes and styles
depicted in Figure 13-9.
Figure 13-9
Example of nested shape arrays
If the nested shape array depicted in Figure 13-9 were passed to the
DrawShape
function, the results summarized in Table 13-1 would occur.
The Transform Slot in Nested Shape Arrays
13
Within a single shape array, the
transform
slot is treated like a style frame: only
one transform is active per array; if another transform is specified within the array,
the previous transform is overridden. Within nested arrays, however, the
transform
slot is treated a little differently than most style slots. As the
DrawShape
method
descends into nested arrays of shapes, changes to the
transform
slot are
cumulative; the resulting transform is the net sum of all the transforms in the
hierarchy. For example, if in Figure 13-9 startStyle has a transform of 10,10 and
Style 3 has a transform 50,0 then shapes 2a, 2b, 1, 3a would be drawn offset by
10,10 but Shape 3b would be drawn offset by 60,10.
Table 13-1
Summary of drawing results
Shape
Style
2a
2
2b
2
3a
startStyle
3b
3
1
startStyle
Style 2
Shape 3a
Shape 2a
Style 3
Shape 2b
Shape 3b
Start Style
Shape 1

C H A P T E R 1 3
Drawing and Graphics
13-12
Using the Drawing Interface
Default Transfer Mode
13
The default transfer mode is actually a split state: bitmaps and text are drawn with
a
modeOR
transfer mode, but other items (geometric shapes, pens, and fill patterns)
are drawn with a
modeCOPY
transfer mode. However, when you actually specify a
transfer mode (with a non-
nil
value in the
transferMode
slot of the style
frame), all drawing uses the specified mode.
Transfer Modes at Print Time
13
Only a few transfer modes are supported for printing. Only
modeCOPY
,
modeOR
,
and
modeBIC
may be used; other modes may produce
unexpected results.
Note
Most problems occur when using PostScript
printers, so you should test your code on
LaserWriters as well as StyleWriters.
Controlling Clipping
13
When the system draws a shape in a view for which the
vClipping
flag is set, it
draws only the part that fits inside the view in which drawing takes place. Any parts
of the shape that fall outside the boundaries of that view are not drawn, as if they
have been cut off or clipped. The term clipping refers to this view system behavior;
in common usage, the shape is said to have been "clipped to the destination view."
Note
Although the view system allows drawing outside the boundaries
of a view for which the
vClipping
flag is not set, it does not
guarantee that drawing outside the boundaries of the view will
occur reliably. You need to make your destination view large
enough to completely enclose the shapes you want to draw. You
could also set the destination view's
vClipping
flag to clip
drawing to the bounds of the destination view. Note also that an
application base view that is a child of the root view always clips
drawing to its boundaries.
When no other clipping region is specified and
vClipping
is set, the boundaries
of the destination view define the region outside of which drawing does not occur.
This area is known as the clipping region. If you want to specify different clipping
regions, you can use the style frame's
clipping
slot to do so. Because drawing is
always clipped to the boundaries of the destination view, regardless of any other
clipping region you specify, you cannot use the
clipping
slot to force drawing
outside the boundaries of a view.

C H A P T E R 1 3
Drawing and Graphics
Using the Drawing Interface
13-13
If the style frame includes a
clipping
slot, the drawing of all shapes affected by
this style frame is clipped according to the value of the
clipping
slot. If the
value of the
clipping
slot is
nil
or if the
clipping
slot is not supplied, the
clipping behavior of the destination view is used.
If the
clipping
slot contains a region shape, that region is used as the clipping
boundary for drawing operations affected by this style frame. If the
clipping
slot
contains an array of shapes or regions, the system passes the contents of the
clipping
slot to the
MakeRegion
function to automatically create a new
clipping region from the contents of this slot.
Note
Although putting an array of shapes in the
clipping
slot may
seem convenient, it significantly increases the time required to
process the style frame. For best performance from the view
system, do not use this shortcut in style frames that are used
repeatedly.
Transforming a Shape
13
The
transform
slot changes the size or location of a shape without altering the
shape itself. It accepts an array specifying an x, y coordinate pair or a pair of
rectangles. The x, y coordinate arguments relocate a shape by specifying an offset
from the origin of the destination view's coordinate plane. The rectangle arguments
specify a mapping of the source and destination views that alters both the size and
location (offset) of the source view when it is drawn in the destination view.
The rectangle arguments work the same way as the parameters to the
ScaleShape
function (although transforms won't accept
nil
for the boundaries
of the source rectangle): the size of the shape is changed proportionately according
to the dimensions of the destination rectangle, and the coordinates of the
destination rectangle can also be used to draw the shape in a new location.
The following code fragments demonstrate the use of offset coordinates and
mapping rectangles as the value of the
transform
slot:
transform: [30,50],// offset shapes by 30 h and 50 v
or
transform:
[SetBounds(0,0,100,100),SetBounds(25,25,75,75)],
// half width and height, centered in relation to
// the original object(not the view) assuming that
// the first rect actually specified correct bounds

C H A P T E R 1 3
Drawing and Graphics
13-14
Using the Drawing Interface
Using Drawing View Classes and Protos
13
Four view classes and three protos, which you can use to create your own templates,
are built into the system. The view classes include:
clPolygonView
--displays polygons or ink, or accepts graphic or ink input.
clPictureView
--displays a bitmap or picture object shape.
clEditView
--edits views that can accept both text and graphic user input.
clRemoteView
--displays a scaled image of another view.
The protos include:
protoImageView
--provides a view in which you can display, magnify, scroll,
and annotate images.
protoThumbnail
--is used in conjunction with a
protoImageView
. It
displays a small copy of the image with a rectangle representing the location and
panel in the image.
protoThumbnailFloater
--provides a way to use a thumbnail, but also
adjusts the thumbnail's size to reflect the aspect ratio of the image that it contains.
Displaying Graphics Shapes and Ink
13
Use the
clPolygonView
class to display polygons and ink, or to accept graphic
or ink input. The
clPolygonView
class includes these features:
Shape recognition and editing, such as stretching of shapes from their vertices,
view resizing, scrubbing, selection, copying to clipboard, duplicating, and other
gestures, as controlled by the setting of the
viewFlags
slot.
Snapping of new line endpoints to nearby vertices and midpoints of existing shapes.
Automatic resizing to accommodate enlarged shapes (when the view is enclosed
in a
clEditView
). This feature is controlled by the
vCalculateBounds
flag
in the
viewFlags
slot.
Views of the
clPolygonView
class are supported only as children of views of the
clEditView
class. In other words, you can put a
clPolygonView
only inside a
clEditView
.
You don't need to create polygon views yourself if you are accepting user input
inside a
clEditView
. You simply provide a
clEditView
and when the user
draws in it, the view automatically creates polygon views to hold shapes.

C H A P T E R 1 3
Drawing and Graphics
Using the Drawing Interface
13-15
Displaying Bitmaps, Pictures, and Graphics Shapes
13
You can use a view of the
clPictureView
class to display a bitmap, picture, or
graphic shape (polygon). The icon slot in this view can contain a bitmap, a picture
object, or a graphic shape.
Displaying Pictures in a clEditView
13
Use the
clEditView
view class to display and accept text and graphic data in a
view. Views of the
clEditView
class contain no data directly; instead, they have
child views that contain the individual data items. Pictures are contained in child
views of the class
clPictureView
. For details on displaying text, see "Using
Views and Protos for Text Input and Display" (page 8-6).
To add a picture to a
clEditView
, you need to create an appropriate template of
the
clPictureView
class, add the template to the
viewChildren
array, and
then open the view or call
RedoChildren
. You can also use the
AddView
method to add the picture to an existing view, and then mark the view as dirty so
that it will be redrawn.
The template holding the PICT items must contain the following slots:
viewStationery
--which must have the symbol
'pict
viewBounds
--which is a bounds frame; for example,
RelBounds(0,0,40,40)
icon
--which is a bitmap frame, a picture object, or a graphic shape
Displaying Scaled Images of Other Views
13
Use the
clRemoteView
view class to display a scaled image of another view.
This class can be used to show a page preview of a full-page view in a smaller
window, for example.
The view that you want to display inside the remote view should be specified as the
single child of the remote view. This child is always hidden, and is used internally
by the remote view to construct the scaled image.
A
clRemoteView
should never have more than one view, the scaled view,
otherwise the results are undefined and subject to change.
Here is an example of a view definition of the
clRemoteView
class:
myRemoteView := {...
viewclass: clRemoteView,
viewBounds: {left: 75, top: 203, right: 178,
bottom: 322},
viewFlags: vVisible+vReadOnly,

C H A P T E R 1 3
Drawing and Graphics
13-16
Using the Drawing Interface
viewFormat: nil,
ViewSetupFormScript: func()
begin
// aView is the view to be scaled
self.stepchildren := [aView];
end,
...};
Translating Data Shapes
13
You can use the global functions
PointsToArray
and
ArrayToPoints
to
translate points data between a polygon shape (
'polygonShape
) and a
NewtonScript array.
Finding Points Within a Shape
13
Use the
HitShape
function to determine whether a pen event occurred within the
boundaries of the shape. This operation is useful for implementing button-like
behavior in any shape. Possible results returned by the
HitShape
function include:
nil
// nothing hit
true
// the primitive shape passed was hit
[2,5] // X marks the shape hit in the following array
// shape := [s,s,[s,s,s,s,s,X,s],s,s]
You can retrieve the shape by using the value returned by the
HitShape
method
as a path expression, as in the following code fragment:
result := HitShape(shape,x,y);
if result then // make sure non-nil
begin
if IsArray(result) then // its an array path
thingHit := shape.(result);
else
thingHit := shape;// its a simple shape
end
Although the expression
shape.(result)
may look unusual, it is perfectly
legitimate NewtonScript. For further explanation of this syntax, see the "Array
Accessor" discussion in The NewtonScript Programming Language.

C H A P T E R 1 3
Drawing and Graphics
Using the Drawing Interface
13-17
Using Bitmaps
13
You can dynamically create and destroy bitmaps, draw into them, and perform
operations on them such as rotating, flipping, and sizing. This flexible treatment of
bitmaps allows you to use them as offscreen buffers and for storage of documents
such as fax pages.
You can create and use bitmap images with the drawing bitmap functions. To create
a bitmap you first allocate a bitmap that will contain the drawing with the
MakeBitmap
function. Then create a shape with the
MakeShape
function.
DrawIntoBitmap
takes the drawing and draws it into the bitmap. The final step
is to draw the bitmap on the Newton screen with the
DrawShape
function.
The following example shows how to draw a bitmap. It creates a bitmap by drawing
a shape and draws it onto the screen. This example then rotates the shape, scales it,
and redraws it on the Newton:
bitmapWidth := 90;
bitmapHeight := 120;
vfBlack := 5;
// allocate a new bitmap
bitmap := MakeBitmap(bitmapWidth, bitmapHeight, nil);
// make a shape and draw it into the bitmap
shapes := MakeOval(0, 0, 50, 75);
DrawIntoBitmap(shapes, {fillPattern: vfBlack}, bitmap);
// draw the bitmap
GetRoot():DrawShape(bitmap, {transform: [100, 100]});
// Rotation is a destructive operation: it replaces the
// old bitmap with the new rotated bitmap.
MungeBitmap(bitmap, 'rotateRight, nil);
// translate and scale the bitmap
fromRect := SetBounds(0, 0, bitmapWidth, bitmapHeight);
toRight := 100 + floor(bitmapWidth * 1.25);
toBottom := 200 + floor(bitmapHeight * 1.25);
toRight := 100 + bitmapWidth * 5 div 4;
toBottom := 200 + bitmapHeight * 5 div 4;
toRect := SetBounds(100, 200, toRight, toBottom);
// draw the bitmap again
GetRoot():DrawShape(bitmap, {transform: [fromRect,
toRect]});

C H A P T E R 1 3
Drawing and Graphics
13-18
Using the Drawing Interface
Making CopyBits Scale Its Output Bitmap
13
CopyBits
uses the bounds of the bitmap passed to it to scale the bitmap that it
draws; so, by changing the bounds of the bitmap passed to
CopyBits
, you can
make this method scale the bitmap it draws. If you want to scale the output bitmap
without changing the bounds of the original, call
ScaleShape
on a clone of the
original bitmap and pass the modified clone bitmap to the
CopyBits
method.
Storing Compressed Pictures and Bitmaps
13
NTK supports limited compression of pictures and bitmaps. If you store your
package compressed (using the "optimize for space" setting), all items in your
package are compressed in small (approximately 1 KB) pages, rather than object
by object.
You can use the NTK compile-time function
GetNamedResource
to get a
Macintosh PICT resource that can be drawn on the Newton in a view of the
clPictureView
class. PICT resources are generally smaller than bitmap
frames because each bitmap within the PICT resource contains compressed
bitmap data.
Note
This information applies to the Mac OS version of NTK; the
Windows version differs. See the Newton Toolkit User's Guide
for details.
Capturing a Portion of a View Into a Bitmap
13
Use the
ViewIntoBitmap
method to capture a portion of a specified view into a
specified bitmap. This function does not provide scaling capability, although
scaling can be accomplished by passing the destBitmap bitmap returned by this
method to the
DrawIntoBitmap
function as the value of its shape parameter.
Figure 13-10 shows the relationships between the view to be captured, the source
rectangle, the destination bitmap, and the destination rectangle.

C H A P T E R 1 3
Drawing and Graphics
Using the Drawing Interface
13-19
Figure 13-10
Example of
ViewIntoBitmap
method
Rotating or Flipping a Bitmap
13
Use the
MungeBitmap
function (page 10-22) to perform various bitmap operations
such as rotating or flipping the bitmap. These operations are destructive to the bitmap
passed as an argument to this function; the bitmap is modified in place and the
modified bitmap shape is returned. Figure 13-11 illustrates how the
MungeBitmap
function works. See "Using Bitmaps" (page 13-17) for a code example.
Figure 13-11
Example of
MungeBitmap
method
(0, 0)
(0, 0)
(50, 100)
(10, 10)
srcRect
destBitmap
destRect
view to capture
(115, 310)
(15, 10)
myBitmap
myBitmap
after calling
MungeBitmap (myBitmap, 'rotateLeft);
(315,110)
(15, 10)

C H A P T E R 1 3
Drawing and Graphics
13-20
Using the Drawing Interface
Importing Macintosh PICT Resources
13
The following information applies to the Mac OS version of NTK; the Windows
version differs. See the Newton Toolkit User's Guide for details.
A Macintosh PICT resource can be imported into the Newton in two ways: as a
bitmap or as a picture object. A Macintosh PICT resource is stored much more
compactly on the Newton as a picture object; however, it may be slower to draw
than a bitmap. The same Macintosh PICT resource may occupy much more space
when imported as a bitmap, but may draw significantly faster. The method you
should use depends on whether you want to optimize for space or speed.
A Macintosh PICT resource is imported as a bitmap by using the slot editor for the
icon
slot (an editor of the picture type). Alternatively, the resource can be
imported as a picture object by using the
GetResource
or
GetNamedResource
compile-time functions available in NTK. In this case, you must use an
AfterScript
slot to set the value of the
icon
slot to the picture object obtained
by one of these resource functions.
Note
The constant
clIconView
can also be used to indicate a
view of the
clPictureView
class. These two constants
have identical values.
Here is an example of a template defining a view of the
clPictureView
class:
aPicture := {...
viewClass: clPictureView,
viewBounds: {left:0, top:75, right:150, bottom:175},
viewFlags: vVisible+vClickable,
icon: myPicture,
...}
Drawing Non-Default Fonts
13
You can draw a font other than the default font by putting the font specifier style
frame close to the text shape so that another style frame won't override it. Use
either
DrawShape
or
MakePict
.
There are several places where it might seem reasonable to put the style frame with
the font specifier.
DrawShape
takes a style argument, so you could place it there:
:DrawShape(myText, {font: '{family: someFont,
face: 0, size: 9 }});
You can embed a style frame in an array of shapes:
:DrawShape ([{font: ...}, myText, shape ], nil);

C H A P T E R 1 3
Drawing and Graphics
Using the Drawing Interface
13-21
You can also use
MakePict
:
myText := MakePict([{penpattern: 0, font: ...}, rect,
{font: ...}, txtshape], {font: ...});
You can set the font in locations with
MakePict
. In this case the font gets
"encapsulated" into the PICT.
If the
{penpattern}
frame was not present in the picture shape, any of the above
places should suffice to set the font.
PICT Swapping During Run-Time Operations
13
To set a default picture for a
clPictureView
, use NTK's picture slot editor to set
the
icon
slot of the
clPictureView
. You may select a PICT resource from any
resource file that has been added to your project. The picture will be converted on
the Macintosh from a type 1 or 2 PICT into a bitmap, and stored in your package at
compile time. To change this picture at run time, you need to keep a reference to
each alternate picture or bitmap. This is done using
DefConst
at compile time in
a text file as follows:
OpenResFile(HOME & "Photos Of Ralph.rsrc");
// Here we convert a PICT 1 or PICT 2 into a BitMap.
// This is what NTK's picture slot editor does.
DefConst('kPictureAsBitMap,
GetPictAsBits("Ralph", nil));
// Here the picture is assumed to be in PICT 1 format.
// If it is not, the picture will not draw and you may
// throw exceptions when attempting to draw the object.
DefConst('kPictureAsPict,
GetNamedResource("PICT", "Ralph", 'picture));
// Verify this is a Format 1 PICT object!
if ExtractWord('kPictureAsPict, 10) <> 0x1101 then
print("WARNING: Ralph is not a Format 1 PICT
resource!");
// This is one way to get the picture's bounds
// information. You can also extract it from the
// picture's own bounds rectangle at either compile time
// or run time, by using ExtractWord to construct each
// slot of a bounds frame.
DefConst('kPictureAsPictBounds,
PictBounds("Ralph", 0, 0));
CloseResFile();

C H A P T E R 1 3
Drawing and Graphics
13-22
Using the Drawing Interface
Notice that there are two types of pictures: bitmaps (a frame with
bits
, a
bounds
, and
mask
slots) and Format 1 PICTs (binary objects of class picture).
clPictureView
can draw both of these types of objects,
so you just need to choose a format and use
SetValue
on the
icon
slot,
as follows:
SetValue(myView, 'icon, kPictureAsBitMap);
or
SetValue(myView, 'icon, kPictureAsPict);
Optimizing Drawing Performance
13
You can use several methods to make drawing functions execute faster.
If you have a fairly static background picture, you can use a predefined PICT
resource. Create the PICT in your favorite drawing program, and use the PICT as
the background (
clIconView
). The graphics system also has a picture-making
function that enables you to create pictures that you can draw over and over again.
If you want to improve hit-testing of objects, use a larger view in combination with
a
ViewDrawScript
or a
ViewClickScript
rather than using smaller views
with an individual
ViewClickScript
. This is especially true of a view that
consists of regular smaller views.

C H A P T E R 1 3
Drawing and Graphics
Summary of Drawing
13-23
Summary of Drawing
13
Data Structure
13
Style Frame
13
aStyle := {
transferMode :
constant,
// transfer mode for the pen
penSize :
integer,
// size of the pen in pixels
penPattern :
constant,
// the pen pattern
fillPattern :
constant,
// the fill pattern
font :
string,
// font to use for drawing text
justification :
symbol,
// alignment of text
clipping :
shape, region, or array of shapes,
// specifies clipping
transform :
array,
// offsets or scales the shape
View Classes
13
clPolygonView
13
clPolygonView := {
viewbounds :
int,
// size of view and location
points :
struct
, // binary data structure containing
polygon data
ink :
struct
, // binary data structure containing ink data
viewFlags :
const,
// controls the recognition behavior of
the view
viewFormat :
const
, // controls appearance of the view
clPictureView
13
clPictureView := {
icon :
bitmap, graphic shape, picture,
// icon to display
viewBounds:
int
, // size and location of the view
viewFlags :
const,
// controls the recognition behavior of
the view
viewFormat :
const
, // controls appearance of the view
C H A P T E R 1 3
Drawing and Graphics
13-24
Summary of Drawing
clRemoteView
13
clRemoteView := {
stepChildren :
int,
// specifies a single view
viewBounds:
int
, // size and location of the view
viewFlags :
const,
// controls the recognition behavior of
the view
viewFormat :
const
, // controls appearance of the view
Protos
13
protoImageView
13
aProtoImageView := {
_proto: ProtoImageView,
Image :
shape,
Annotations :
array,
scalingInfo :
frame,
viewBounds :
boundsFrame,
viewJustify:
justificationFlags,
viewFormat :
formatFlags,
zoomStops :
array,
dragCorridor :
integer,
grabbyHand :
shape,
myImageView:
penDown :
function,
// drags image
myImageView:
ScalingInfoChanged :
function,
// called when
scaling changes
myImageView:
Setup :
function,
// initializes the image
myImageView:
OpenImage :
function,
// opens image
myImageView:
ToggleImage :
function,
// closes image
myImageView:
GetScalingInfo :
function,
// returns scaling
information
myImageView:
HasAnnotations :
function,
// returns annotation
information
myImageView:
GetAnnotations :
function,
// returns an array of
views
myImageView:
SetAnnotationMode :
function,
// sets display
behavior
myImageView:
GetAnnotationMode :
function,
// returns a symbol
myImageView:
TargetChanged :
function,
// called when
annotation is changed
myImageView:
CanScroll :
function,
// returns scrolling
information
myImageView:
ScrollTo :
function,
// scrolls an image

C H A P T E R 1 3
Drawing and Graphics
Summary of Drawing
13-25
myImageView:
ScrollBy :
function,
// scrolls an image
myImageView:
ZoomBy :
function,
// makes an image larger
or smaller
myImageView:
ZoomTo :
function,
// changes the size of
the image
myImageView:
CanZoomBy :
function,
// changes the size of
the image
myImageView:
ZoomToBox :
function,
// resizes the image
...
}
protoThumbnail
13
protoThumbnail : = {
_proto: protoThumbnail,
ImageTarget :
view,
Image :
shape
or
bitmap,
viewBounds :
boundsFrame,
viewJustify :
justificationFlags,
trackWhileScrolling :
integer,
// tracks the grey box
myThumbnail:
Setup :
function,
// prepares thumbnail
myThumbnail:
OpenThumbnail :
function,
// opens thumbnail
myThumbnail:
ToggleThumbnail :
function,
// opens or closes
thumbnail
myThumbnail:
Update :
function,
// renders thumbnail view
myThumbnail:
GetScalingInfo :
function,
// returns scaling
information
myThumbnail:
PrepareToScroll :
function,
// prepares for
scrolling
myThumbnail:
ScrollTo :
function,
// scrolls a view
myThumbnail:
DoneScrolling :
function,
// cleans up a scroll
operation
...
}
protoThumbnailPointer
13
protoThumbnailPointer : = {
_proto: protoThumbnailPointer,
ImageTarget :
view,
Image :
shape
,
viewBounds :
boundsFrame,
viewJustify :
justificationFlags,

C H A P T E R 1 3
Drawing and Graphics
13-26
Summary of Drawing
trackWhileScrolling :
integer,
// tracks the grey box
...
}
Functions and Methods
13
Bitmap Functions
13
MakeBitmap(
widthInPixels, heightInPixels, optionsFrame
)
DrawIntoBitmap(
shape, styleFrame, destBitmap
)
MungeBitmap(
bitmap, operator, options
)
view
:ViewIntoBitmap(
view, srcRect
,
destRect
,
destBitmap
)
Hit-Testing Functions
13
HitShape(
shape
,
x
,
y
)
PtInPicture(
x
,
y
,
bitmap
)
Shape-Creation Functions
13
MakeLine (
x1
,
y1
,
x2
,
y2
)
MakeRect (
left
,
top
,
right
,
bottom
)
MakeRoundRect (
left
,
top
,
right
,
bottom
,
diameter
)
MakeOval (
left
,
top
,
right
,
bottom
)
MakeWedge (
left
,
top
,
right
,
bottom
,
startAngle
,
arcAngle
)
MakePolygon (
pointArray
)
MakeShape (
object
)
MakeRegion (
shapeArray
)
MakePict (
shapeArray
,
styleFrame
)
MakeText (
string
,
left
,
top
,
right
,
bottom
)
MakeTextLines(
string
,
bounds
,
lineheight
,
font
)
TextBox(
text, fontFrame, bounds
)
Shape Operation Functions and Methods
13
GetShapeInfo
(
shape
)
view:
DrawShape (
shape
,
styleFrame
)
OffsetShape (
shape
,
deltaH
,
deltaV
)
ScaleShape (
shape
,
srcRect
,
dstRect
)
ShapeBounds (
shape
)
InvertRect(
left
,
top
,
right
,
bottom
)
InsetRect(
rect
,
deltax
,
deltay
)
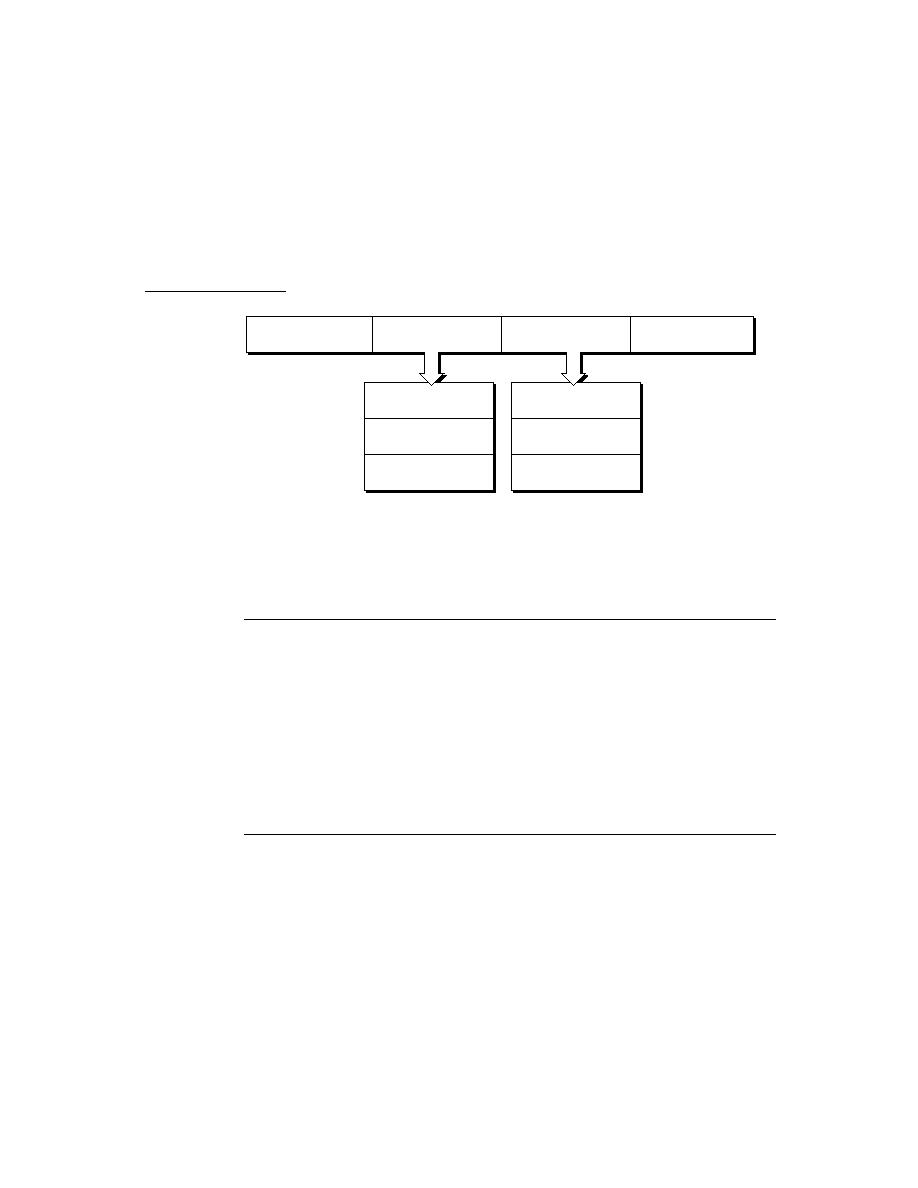
C H A P T E R 1 3
Drawing and Graphics
Summary of Drawing
13-27
IsPtInRect(
x
,
y
,
bounds
)
FitToBox(
sourceBox
,
boundingBox
,
justify
)
OffsetRect(
rect
,
deltaX
,
deltaY
)
SectRect(
rect1
,
rect2
)
UnionRect(
rect1
,
rect2
)
RectsOverlap
(
rect1
,
rect2
)
Utility Functions
13
view:
DoDrawing(
drawMethodSym
,
parameters
)
view:
CopyBits(
picture
,
x
,
y
,
mode
)
DrawXBitmap(
bounds
,
picture
,
index
,
mode
)
view:
LockScreen(
lock
)
IsPrimShape(
shape
)
PointsToArray(
polygonShape
)
ArrayToPoints(
pointsArray
)


About Newton Sound
14-1
C H A P T E R 1 4
Sound
14
Figure 14-0
Table 14-0
This chapter describes how to use sound in your application and how to manipulate
Newton sound frames to produce pitch shifting and other effects.
You should read this chapter if you are attempting to use sound in an application.
This chapter provides an introduction to sound, describing:
sounds, sound channels, and sound frames
specific tasks such as creating a sound frame, playing a sound, and manipulating
sound frames
methods, functions, and protos that operate on sound
About Newton Sound
14
This section provides detailed conceptual information on sound functions and
methods. Specifically, it covers the following:
overview of sound and the sound channel
sounds related to user events
a brief description of the sound frame
new functions, methods, and messages added for NPG System Software 2.0, as
well as extensions to sound code
Newton devices play only sampled sounds; sound synthesis is not supported.
However, a number of built-in sounds are supplied in the Newton ROM that you
can use in your application. See "Sound Resources" (page 11-10) in the Newton
Programmer's Reference for complete details. You can also use the Newton Toolkit
(NTK) to create custom sounds on desktop computers.
A Newton sound is represented as a sound frame. You can easily associate any
sound with a certain events or play sound frames programmatically. The system
allows you to play sound frames synchronously or asynchronously.

C H A P T E R 1 4
Sound
14-2
About Newton Sound
All operations on sound frames are created by sending messages to a sound
channel that encapsulates the sound frame and the methods that operate on it.
Sound channels can play sampled sounds starting from any point within the data.
For more advanced uses of sound you can open a sound channel which allows
multiple channels to play simultaneously, or multiple sounds to be queued in a
single channel. You use a sound channel by sending messages to a sound channel
frame. Additionally, playback can be paused at any point in the sample data and
later resumed from that point.
Sound channels have the following characteristics:
There is no visual representation of a sound to the user.
Sound channels must explicitly be created and destroyed.
The creation and disposal of sound channels follow this model:
To create a sound channel, you send the
Open
message to a sound channel frame.
To dispose of the sound channel, you send the
Close
message to it.
Event-related Sounds
14
Views can play sounds to accompany various events. For example, the system
plays certain sounds to accompany user actions such as opening the Extras Drawer,
scrolling the Notepad, and so forth.
Sounds in ROM
14
The system provides a number of sounds in ROM that are played to accompany
various events. See "Sound Resources" (page 11-10) in the Newton Programmer's
Reference for complete details.
Sounds for Predefined Events
14
All views recognize a set of predefined slot names that specify sounds to
accompany certain system events. To add a ROM-based sound to one of these
events, store the name of the ROM-based sound in the appropriate view slot.
The following predefined slots can be included in views to play event-related sounds:
showSound
The sound is played when the view is shown.
hideSound
The sound is played when the view is hidden.
scrollUpSound
The sound is played when the view receives a
ViewScrollUpScript
message.
scrollDownSound
The sound is played when the view receives a
ViewScrollDownScript
message.

C H A P T E R 1 4
Sound
About Newton Sound
14-3
For example, to play a sound in ROM when the view opens, place its name in the
view's
showSound
slot.
In fact, all
ROM_
soundName constants are pointers to Newton sound frames stored
in ROM. Instead of using one of these constants; however, you can store a Newton
sound frame in a slot, causing the sound stored in that frame to play in
accompaniment to the event associated with that slot. The next section describes
the format of a Newton sound frame.
Sound Data Structures
14
Three data structures are related to sounds: a sound frame, a sound result frame,
and a
protoSoundChannel
.
A sound frame stores sound sample data and additional information used internally
by the system. A sound result frame returns information to the sound frame when
the sound channel stops or pauses. Like any other frame, a sound frame and sound
result frame cannot be greater than 32 KB in size. See "Sound Data Structures"
(page 11-1) in the Newton Programmer's Reference, for a complete list of slots
required by for both types of frames.
The
protoSoundChannel
provides methods that implement pause and playback
of sounds and completion callbacks. It also provides query methods that return
whether the sound is running or paused.
If you are providing custom sounds, you can store them as virtual binary objects.
An example of storing a sound as a VBO is given in Chapter 11, "Data Storage and
Retrieval.".
Compatibility
14
Sound frames have been extended so that those in version 1.x can be played
without modification by devices based on version 2.0 of the Newton ROM. Not all
Newton 2.0 sound frames can be played by older Newton devices.
Two new functions have been added:
PlaySoundAtVolume
and
PlaySoundIrregardless
.
PlaySoundAtVolume
plays a sound specified by
the sound frame at a specific volume level.
PlaySoundIrregardless
plays a
sound no matter what the user's settings are.

C H A P T E R 1 4
Sound
14-4
Using Sound
Using Sound
14
This section describes how to use sound to perform specific tasks. See Newton
Toolkit User's Guide
for descriptions of the functions and methods discussed in
this section.
Creating and Using Custom Sound Frames
14
The following information applies to the Mac OS version of NTK. The Windows
version differs; see the Newton Toolkit User's Guide for details.
The compile-time functions
GetSound
and
GetSound11
allow you to use the
Newton Toolkit to create Newton sound frames from Mac OS
'snd '
resource
data. This section summarizes the main steps required to create custom sound
frames from Mac OS
'snd '
resources in NTK; for a complete discussion of this
material, see the Newton Toolkit User's Guide.
Follow these steps to add a custom sound to your application:
1. Include the sound resource file in your application's NTK project.
2. In your application, create an evaluate slot to reference the sound frame through
a compile-time variable.
3. In your Project Data file
Open the sound resource file with
OpenResFile
or
OpenResFileX
.
If using
OpenResFileX
, store the file reference it returns.
Use the functions
GetSound11
or
GetSound
to obtain the sound frame.
Use a compile-time variable to store the sound frame returned by
GetSound
or
GetSound11
.
Use the function
CloseResFile
or
CloseResFileX
, as appropriate, to
close the sound resource file. If you use the
CloseResFileX
function, you
need to pass as its argument the saved file reference originally returned by
OpenResFileX
.
4. In your application
Set the value of the evaluate slot to the name of the compile-time variable
that stores the sound frame.
Pass the name of the evaluate slot as the argument to the
PlaySoundSync
function. These run-time functions play sound from anywhere in your code.

C H A P T E R 1 4
Sound
Using Sound
14-5
Creating Sound Frames Procedurally
14
To create a sound frame, you usually need to create a copy of the sound frame you
wish to modify. Because you cannot modify sound frames in ROM, you must copy
the sound frame in order to modify the binary
sample data.
Cloning the original version of a sound frame you want to modify also allows you
to reset values to their original state and provides a means of recovering the original
sound frame easily if an operation fails.
Cloning Sound Frames
14
You can use the
Clone
function to make a modifiable copy of the sound frame by
passing the frame or its reference to
Clone
and saving the result in a variable, as in
the following example:
clonedSound := clone(ROM_simpleBeep);
This technique is an extremely efficient means of creating a modifiable sound
frame, because the copy created is a shallow clone; that is, the cloned frame
clonedSound
does not actually store a copy of the
ROM_simpleBeep
binary
data. Instead, the
clonedSound
frame stores a pointer to the ROM data in its
samples
slot. Thus, the
clonedSound
frame is fairly lightweight in terms of
overhead in the NewtonScript heap.
Playing Sound
14
Newton system software plays sound in two ways. The first is to use the global
sound functions
PlaySoundAtVolume
or
PlaySoundIrregardless
. The
other way is to instantiate a sound playback channel and send messages to it. Each
approach has benefits and drawbacks. Using the global functions is the simplest
and most efficient approach, but it offers less control than sending messages to a
sound channel.
Sound channels are appropriate for applications that require greater control over
playback, such as one that allows pausing playback and sound completion. Sound
channels are also useful for games, which might require having many sounds
available on short notice or playing multiple sounds at the same time.
Using a Sound Channel to Play Sound
14
Using a sound channel to play a sound is accomplished by creating a sound
channel and sending the
Start
message to it.

C H A P T E R 1 4
Sound
14-6
Using Sound
Creating a Sound Channel for Playback
14
You create a sound channel by sending it the
Open
function.
The code that creates a sound channel for playback might look like the
following example:
mySndChn := {_proto:protoSoundChannel};
mySndChn:Open();
Playing Sounds
14
Once you create the sound channel, you can use any of the following methods to
control the sound.
Schedule
--queues the sound for play.
Start
--starts playing the sounds in the order that they were scheduled.
Stop
--stops all scheduled sounds including currently playing sounds, if any.
Pause
--temporarily stops the current playback process in the specified
sound channel.
IsPaused
--checks to see if the sound channel is paused.
IsActive
--checks to see if the sound channel is playing.
Deleting the Sound Channel
14
When finished with the sound channel, you need to dispose of it by sending the
Close
message to it. Most applications can dispose of the sound channel as soon
as playback is completed; the callback function associated with a sound frame is an
appropriate way to send the
Close
message to the channel.
Note
The system sound channel is never automatically disposed of even
if the sound channel frame is garbage collected. You must send
the
Close
message to the channel to dispose of the system
sound channel.
Playing Sound Programmatically
14
You can use any of the global functions to play sound programmatically. For
example, you might want to play a sound when the user taps a button, or when
a lengthy operation is complete. Sounds can be played synchronously or
asynchronously, as described in the following section.

C H A P T E R 1 4
Sound
Using Sound
14-7
Synchronous and Asynchronous Sound
14
When a sound is played asynchronously, the playback can be intermixed with other
tasks because the system does not wait for the sound to finish before beginning
another task (such as updating the user interface, allowing user feedback; for
example with buttons, or playing a subsequent sound).
When playback must be allowed to complete, use the
PlaySoundSync,
PlaySoundAtVolume
, or
PlaySoundIrregardless
to guarantee
uninterrupted playback. Synchronous playback is generally preferred unless the
sound is so long as to be tedious or the application requires a high degree of
responsiveness to the user. The NewtonScript interpreter can do nothing else until
it completes synchronous playback.
Both approaches have benefits and drawbacks: synchronous playback can block
other NewtonScript code from running when it's inconvenient to do so; on the
other hand, asynchronous playback is never guaranteed to complete. Your use of
synchronous or asynchronous sound playback depends on your application's needs.
Differences Between Synchronous Asynchronous Playback
14
The following code example demonstrates the difference between asynchronous
playback and synchronous playback. To hear the demonstration of the two types
of sound playback, type following code example into the Inspector as it is shown
here, select all of these lines, and press Enter:
print ("Synchronous sound demo");
call func()
begin
for i := 0 to 20 do
PlaySoundSync(ROM_simplebeep);
end with();
print ("Async sound demo");
call func()
begin
for i := 0 to 20 do
PlaySoundSync(ROM_simplebeep);
end with();
The synchronous sound playback example plays the
ROM_simplebeep
sound
twenty times; the sound plays its entire length each time. Twenty repetitions may
seem a bit laborious until you hear how quickly the same calls are made in
asynchronous mode.
Note that the asynchronous version can call the sound chip so fast that the sound
does not have enough time to finish playing; as a result, part of the playback is
C H A P T E R 1 4
Sound
14-8
Using Sound
clipped off with each new call to the
PlaySoundSync
function. In fact, it's likely
that you won't hear twenty sounds in the asynchronous playback demo; the calls
occur faster than the Newton sound chip can respond.
About the Sound Chip
14
The Newton sound chip requires about 50 milliseconds to load a sound and begin
playing it. It also requires about 50 milliseconds to clear its registers and ready
itself for the next call after playback completes. Although most applications are not
affected by this timing information, it is included for interested developers, along
with the caveat not to rely on the ramp-up and ramp-down times specified here
because they may change in future Newton devices.
Generating Telephone Dialing Tones
14
Applications can use the
Dial
view method and the
RawDial
global function to
generate telephone dialing tones from NewtonScript. It is strongly recommended
that you use these functions rather than attempt to generate dialing tones yourself.
These functions produce dialing tones that meet the standards for all countries in
which Newton devices are available, sparing the application developer the effort of
dealing with widely varying telephone standards.
If you need to perform other actions while generating dialing tones, such as posting
status messages as various parts of the phone number are dialed, you can use the
global function
RawDial
to dial asynchronously. The
RawDial
function accepts
the same arguments as the
Dial
method; however, it dials asynchronously.
Note that both dialing functions map alphanumeric characters to the dialing tones
that a standard telephone keypad produces for these characters. Standard telephone
keypads do not implement the letters Q and Z; the
Dial
method and
RawDial
function map these letters to the tone for the digit 1. Pound (
#
) and asterisk (
*
)
characters are mapped to the same tones that a standard telephone keypad provides
for these characters.
Certain phone systems, such as those used for PBX and military applications, also
generate special tones (DTMF dialing tones) for the letters AD. Because the
Newton ROM does not generate these special tones, its dialing functions map the
characters
A
,
B
,
C,
and
D
to the tones they generate on a standard telephone keypad.
Advanced Sound Techniques
14
This section describes advanced techniques for manipulating the sound frame or its
playback. The topics discussed include pitch shifting and manipulating sample data
to produce altered sounds.

C H A P T E R 1 4
Sound
Using Sound
14-9
Pitch Shifting
14
In general, you can set the value of a sound frame's
samplingRate
slot to any
float value less than that specified by the
kFloat22kRate
constant. However, this
usually results in poor sound quality. What generally works best is to take an 11
kHz sound and play it at some higher rate. Of course, 22 kHz sound resources
cannot be played at any higher sampling rate.
You can experiment with pitch shifting by playing sounds in the Inspector using
the
PlaySoundSync
function. You can use any of the ROM sounds or your own
custom sounds. The following example shows how to shift a sound's pitch by
altering the value of the sound frame's
samplingRate
slot. Remember when
setting this slot that
samplingRate
must be a value of type
float
.
// keep a copy of original for future use
origSound := clone(ROM_simpleBeep);
// make a copy to modify
mySound := Clone(origSound);
// play the original sound
PlaySoundSync(mySound);
// play at half original pitch
mySound.samplingRate := origSound.samplingRate/2;
PlaySoundSync(mySound);
// note how easily we can return to normal pitch
mySound.samplingRate := origSound.samplingRate;
// play at twice speed
mySound.samplingRate := origSound.samplingRate*2;
PlaySoundSync(mySound);
By using the output from a control view to alter the value of the sound frame's
samplingRate
slot, you can allow the user to interactively modify the pitch of
playback. The following example code changes the value of the
samplingRate
slot according to the setting of a
protoSlider
view:
theSlider.changedSlider := func()begin
if viewValue = maxValue then
mySound.samplingRate := originalRate
else mySound.samplingRate := (viewValue*1.01);
PlaySoundSync(mySound);
end
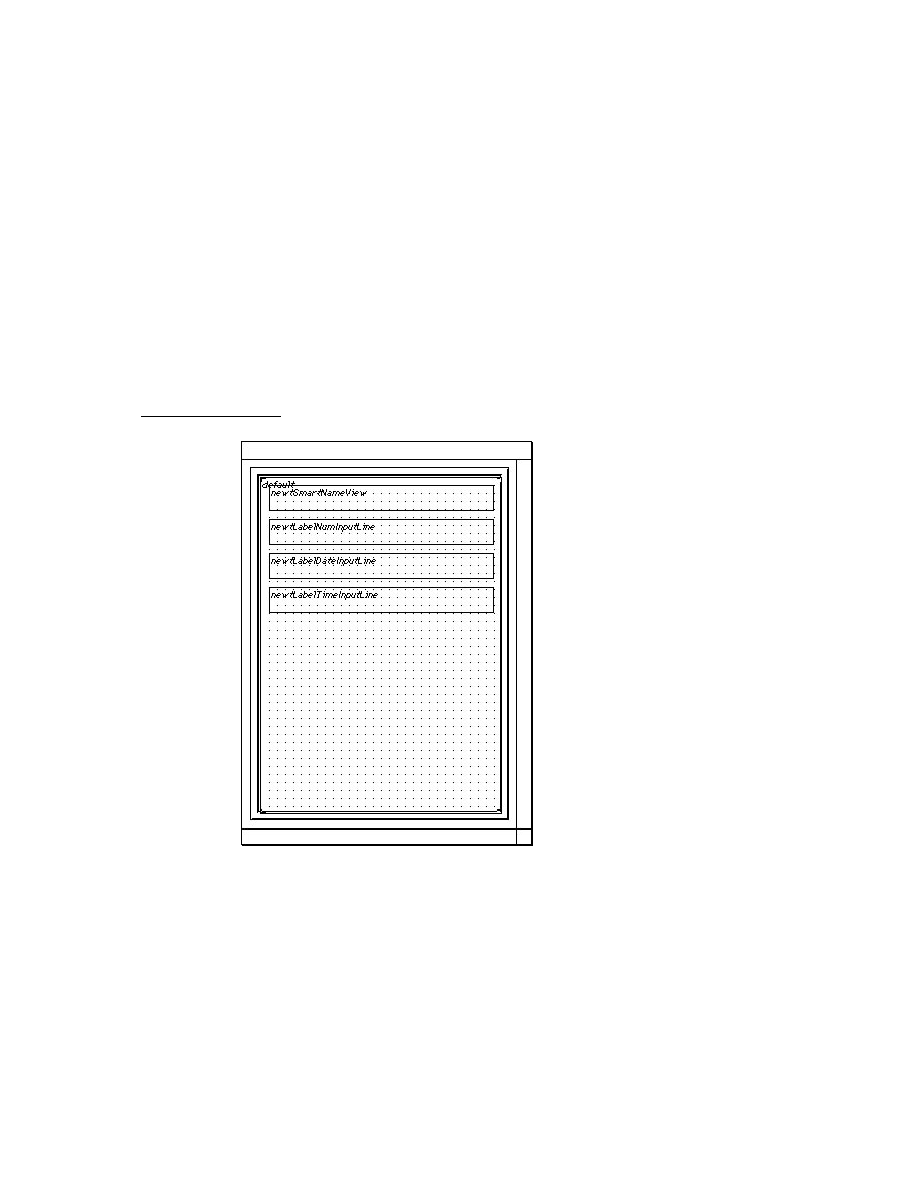
C H A P T E R 1 4
Sound
14-10
Using Sound
For an example that uses output from a view based on the
protoKeypad
prototype, see the Newton DTS sample code on this topic.
Manipulating Sample Data
14
This section describes how to use the utility functions
ExtractByte
and
StuffByte
to manipulate individual bytes in sound sample data. Because of
performance considerations, you'll want to manipulate sample data on the Newton
only when it's absolutely necessary. Even simple operations, like the example here,
can take a long time to perform on a relatively small sound sample.
The following example, extracts bytes from the end of the sample data and adds
them to its beginning, thus reassembling the samples in reverse order to create a
"backwards" sound.
// backwardSound is a slot in the app's base view
// if it's nil then create the backward sound
if (not backwardSound) then
begin
// get a frame to work with
backwardSound := deepclone(ROM_funbeep);
// a var to store the modified sample data
local sampleHolder := Clone(backwardSound.samples);
local theSize := Length(sampleHolder) -1 ;
// Copy bytes from one end of the binary object
// to the other.
for i := 0 to theSize do
StuffByte(backwardSound.samples,i,
ExtractByte(sampleHolder,theSize-i));
end;
A better solution is to provide the backwards sound as a resource that can be
played just like any other sound; a number of sound editors are available to create
such a resource on a desktop computer.

C H A P T E R 1 4
Sound
Summary of Sound
14-11
Summary of Sound
14
Data Structures
14
SndFrame Structure
14
mySndFrame := {
_proto: mySndFrame,
sndFrameType :
symbol,
// specifies format
samples :
frame,
// contains sampled binary data
samplingRate :
integer /floating point,
// specifies playback rate
compressionType :
integer,
// indicates no compression
dataType :
integer,
// indicates size of sample in bits
start :
integer,
// index of first sample to play
count :
integer,
// number of samples to play
loops :
integer,
// time to repeat sound
Callback :
function,
// indicates the state of the sound
SndResult Structure
14
mySndResult := {
_proto: mySndResult,
sound :
integer,
// reference to soundFrame that was paused
index :
function,
// index of sample that was paused/stopped
Protos
14
protoSoundChannel
14
aProtoSoundChannel := {
_proto: protoSoundChannel,
Open :
function,
// opens sound channel
Close :
function,
// closes sound channel
Schedule :
function,
// queues sound for play
Start :
function,
// starts sound channel
Stop :
function,
// stops sound channel
Pause :
function,
// pauses playback
IsPaused :
function,
// checks if sound channel is paused
IsActive :
function,
// checks if sound channel is active
...
}

C H A P T E R 1 4
Sound
14-12
Summary of Sound
Functions and Methods
14
view
:Dial(
numberString
,
where
)
GetVolume()
PlaySoundSync(
soundFrameRef
)
RawDial(
number
,
where
)
SetVolume(
volume
)
PlaySoundAtVolume(
soundFrameRef
,
volume
)
PlaySoundIrregardless(
soundFrameRef
)
PlaySoundIrregardlessAtVolume(
soundFrameRef
,
volume
)
PlaySoundEffect(
soundFrameRef
,
volume
,
type
)
Clicker()
Sound Resources
14
ROM_alarmWakeup // alarm sound
ROM_click // click sound
ROM_crumple // paper crumpling sound
ROM_drawerClose // drawer closing sound
ROM_drawerOpen // drawer opening sound
ROM_flip // page flipping sound
ROM_funBeep // trill sound
ROM_hiliteSound // squeek sound
ROM_plinkBeep // xylo sound
ROM_simpleBeep // bell sound
ROM_wakeupBeep // power on sound
ROM_plunk // paper hitting trash sound
ROM_poof // puff of air sound

About Filing
15-1
C H A P T E R 1 5
Filing
15
Figure 15-0
Table 15-0
This chapter describes how your application can support the Filing service. This
service allows the user to
associate data items with folders displayed by the user interface
create, edit, or delete folders at will
specify the store on which a soup entry is to reside when it is filed
Before reading this chapter, you should understand the use of views to image data,
as explained in Chapter 3, "Views." You should also understand the contents of
Chapter 11, "Data Storage and Retrieval," which describes the soup-based storage
model on which the Filing service is based. If your application does not save data
as soup entries, you need to implement mock entries and related objects to provide
soup-like access to your data, as described in Chapter 12, "Special-Purpose Objects
for Data Storage and Retrieval."
A related service called the Soupervisor allows the user to file or move all entries
in a specified soup at once. For more information, see the description of this
service in Chapter 19, "Built-in Applications and System Data."
About Filing
15
The Filing service enables the user to associate data items with tags that represent
folders in the user interface. In most cases, the filed items are soup entries that
reside in their respective soups, rather than in any sort of directory structure. Filing
an item displayed on the screen simply associates its corresponding soup entry
with the tag that represents a particular folder. Soup entries hold this tag in their
labels
slot. The Filing service also allows the user to move entries to a specified
store when they are filed.
The currently displayed application data to be filed is referred to as the target of
the filing action. The target may consist of multiple data items; for example, most
applications provide an overview view from which the user can file and move
multiple items simultaneously.

C H A P T E R 1 5
Filing
15-2
About Filing
Your application must provide a target view that can manipulate the target. The
target view is usually the same view that images the target data. Although the
application base view is often an appropriate target view, it may not be under all
circumstances. For example, each of these common situations has specialized
targeting needs:
Most applications allow the user to file and move multiple data items from
within an overview view. In this situation, the target may consist of multiple
items, and the overview view is usually the appropriate target view.
Applications that display more than one data item at a time, such as the built-in
Notes application, may need to specify which of several equal child views is
actually the target.
You might want the target view to be a floating window when one is present,
and the application's base view at all other times.
You can override the system-supplied
GetTargetInfo
method to vary the target
and target view according to circumstances.
Applications with less-elaborate targeting needs can use the default
GetTargetInfo
method supplied by the system. To use the
default
GetTargetInfo
method, your application base view must supply
target
and
targetView
slots. You are responsible for updating the values
of these slots whenever the target changes; that is, whenever the data item on
display changes.
To file the target, the user taps a file folder button you provide. This view, which is
based on the
protoFilingButton
system prototype, looks like a button with a
picture of a paper file folder on it. Figure 15-1 provides two examples of views
based on the
protoFilingButton
system prototype.
Figure 15-1
Two examples of filing button views
protoFilingButton
views

C H A P T E R 1 5
Filing
About Filing
15-3
When the user taps the
protoFilingButton
view, it displays the Filing slip
shown in Figure 15-2.
Figure 15-2
Filing slip
The Filing slip displays a set of categories in which the target can be filed. These
filing categories include all folders available to the application that displayed the
Filing slip, as well as the Unfiled category. This slip also provides a close box that
dismisses it without making any changes.
The user can create new folders and edit the names of existing ones by means of
buttons the Filing slip provides for this purpose. When a new folder is created, it
may be designated as visible only from within a specified application; such a folder
is said to be a local folder belonging to the application that created it. Any folder
not created as a local folder is visible from all applications, and is called a global
folder. The system permits the creation of a maximum of twelve local folders per
application and twelve global folders system-wide. The system does not permit the
creation of local and global folders having the same name.
Most applications allow the user to create and view any combination of local and
global folders; however, you can suppress the display of either kind of folder if
necessary. For example, the Extras Drawer displays only its own filing categories
because those created by other applications are not likely to be useful for
organizing the display of application packages, soups, and so on.
When the user adds, removes, or edits filing categories, the folder change
notification service executes your previously registered callback function to
respond appropriately to these changes. You use the
RegFolderChanged
global
function to register a callback function with this service. The companion function
UnRegFolderChanged
unregisters a specified callback function.
stores
Filing slip
filing categories
File button sends
FileThis
message and closes slip
close box closes slip without
making changes
Edit Folder button allows user to edit or delete filing categories
New button allows user to create new filing categories (folders)
appObjectFileThisOn
string

C H A P T E R 1 5
Filing
15-4
About Filing
Filing and other system services display user messages containing a string that is
the user-visible name of your application. For example, this string is used to complete
the text displayed when the user creates a local folder. You need to create in your
application's base view an
appName
slot that holds this string. Figure 15-3 depicts
the text displayed when the user creates a folder that is local to the Notepad
application.
Figure 15-3
Creating a local folder
The system determines whether to display global or local folders by testing the
values of optional slots you can supply in the application's base view. You can set
the value of the
localFoldersOnly
slot to
true
to cause the Filing slip and
folder tab views to display only the current application's local folders. You can set
the value of the
globalFoldersOnly
slot to
true
to cause the Filing slip and
folder tab views to display only global folders. When these slots are both
nil
or
missing, the Filing slip and folder tab display global folders and the current
application's local folders.
W A R N I N G
The
localFoldersOnly
and
globalFoldersOnly
must not
both hold non-
nil
values at the same time.
Your target view can provide an optional
doCardRouting
slot to control the
display of the buttons that specify the store on which to file the target. When an
external store is available and the value of the
doCardRouting
slot is
true
, the
Filing slip includes buttons that represent available stores.
You must supply the full text of the string that labels this group of store buttons.
This string is held in an
appObjectFileThisOn
slot that you provide. Similarly,
you must supply the full text of the string labelling the group of buttons that
represent filing categories. This string is held in an
appObjectFileThisIn
slot
that you provide. Figure 15-2 shows where the Filing slip displays these strings.
"Notepad"
string is from
appName
slot
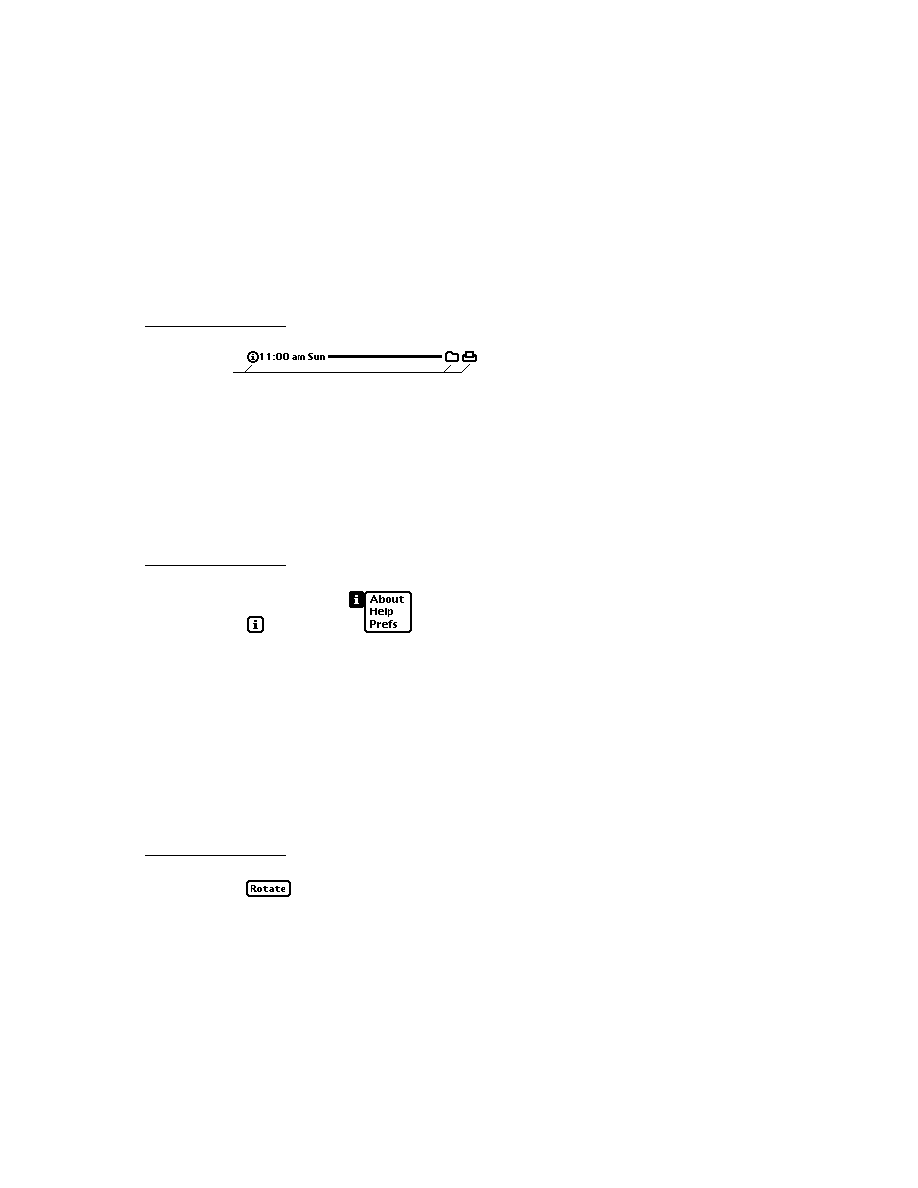
C H A P T E R 1 5
Filing
About Filing
15-5
When no external store is available or the value of the
doCardRouting
slot
is
nil
, the system displays the simplified version of the Filing slip shown in
Figure 15-4.
Figure 15-4
Filing slip without external store
This simplified version of the Filing slip does not include the buttons that allow
the user to choose a store. Note that the string labelling the group of buttons
representing filing categories differs slightly in this version of the Filing slip. This
string is provided by an
appObjectFileThisIn
slot that your application's base
view supplies.
Regardless of other options you may have implemented, the Filing slip always
opens with the current filing category selected; for example, the
'business
folder is selected in Figure 15-4. If you include a non-
nil
dontStartWithFolder
slot in your target view, the Filing slip opens with no
default folder selected. This feature is intended for use when you cannot
necessarily determine a useful default filing category, such as when the target view
is an overview that displays the contents of multiple folders.
When the value of the
doCardRouting
slot is the
'onlyCardRouting
symbol,
the Filing slip does not include the filing category buttons but allows the user to
move the target between available stores without changing its filing category.
Figure 15-5 shows the Filing slip when an external store is available and the value
of the target view's
doCardRouting
slot is the
'onlyCardRouting
symbol.
Figure 15-5
Filing slip for
'onlyCardRouting
appObjectFileThisIn
string
appObjectFileThisOn

C H A P T E R 1 5
Filing
15-6
About Filing
When the user taps the File button, the system
invokes the
GetTargetInfo
method to discover the target and the target view
sends the
FileThis
message to the target view
Your target view must supply a
FileThis
method that performs any tasks
necessary to file the target, such as the following:
moving its soup entry to a different store
redrawing the current view
setting the target's
labels
slot to its new value
performing any additional tasks that are appropriate
Your application must provide a folder tab view that
indicates the filing category of currently displayed data.
allows the user to choose a new filing category to display
The system provides
protoNewFolderTab
and
protoClockFolderTab
system prototypes you can use to create your folder tab view. Views based on either
proto can display a title text string in the area to the left of the folder tab. The
protoNewFolderTab
view displays a text string that you may supply optionally,
as shown in Figure 15-6.
Figure 15-6
A
protoNewFolderTab
view
data item to file
appAll
string displayed by folder tab view
protoNewFolderTab
view sends
NewFilingFilter
message when folder tab changes
title
child view sends
TitleClickScript
message when folder user taps here
protoFilingButton
view
optional
title.text
string

C H A P T E R 1 5
Filing
About Filing
15-7
The
protoClockFolderTab
is a variation on
protoNewFolderTab
that displays the current time as its title text. Do not attempt to replace this
text; if you want to display your own title text in a folder tab view, use a
protoNewFolderTab
view rather than a
protoClockFolderTab
view.
Figure 15-7 depicts a typical
protoClockFolderTab
view.
Figure 15-7
A
protoClockFolderTab
view
Either kind of folder tab view sends a
TitleClickScript
message to your
application when the user taps its title text. The
protoClockFolderTab
view's
default
TitleClickScript
method opens the built-in Clock application. The
protoNewFolderTab
view provides no default
TitleClickScript
method.
Your folder tab view can provide its own
TitleClickScript
method to
customize the action it takes in response to a tap on its title text. Your
titleClickScript
method accepts no arguments.
Both kinds of folder tab views rely on an
appObjectUnfiled
slot that you
provide in your application's base view. This slot contains the full text of the string
"Unfiled items", in which items is the plural form of the target your application
manipulates; for example, "Unfiled Notes." This string appears in the folder tab
view when the application displays data items not associated with any filing
category. This string is also displayed in the picker that opens when the user taps
the filing tab.
Both kinds of folder tab views also rely on the use of an
appAll
slot that you
provide in your application's base view. This slot contains the full text of the string
"All items" in which items is the plural form of the target your application mani-
pulates; for example, "All Notes." This string appears in the folder tab view when
the application displays all its data items (including those that are not filed). This
string is also displayed in the picker that opens when the user taps the folder tab.
Tapping the folder tab displays a picker from which the user can choose a filing
category. Your application must filter the display of filed items according to the
category selected in this list; hence, the value retrieved from this list is referred to
as the filing filter. A check mark appears next to the currently selected filing filter;
the user can tap an item in the list to select a new filing filter. In addition to
selecting a filing filter in this picker, the user can specify whether to display items
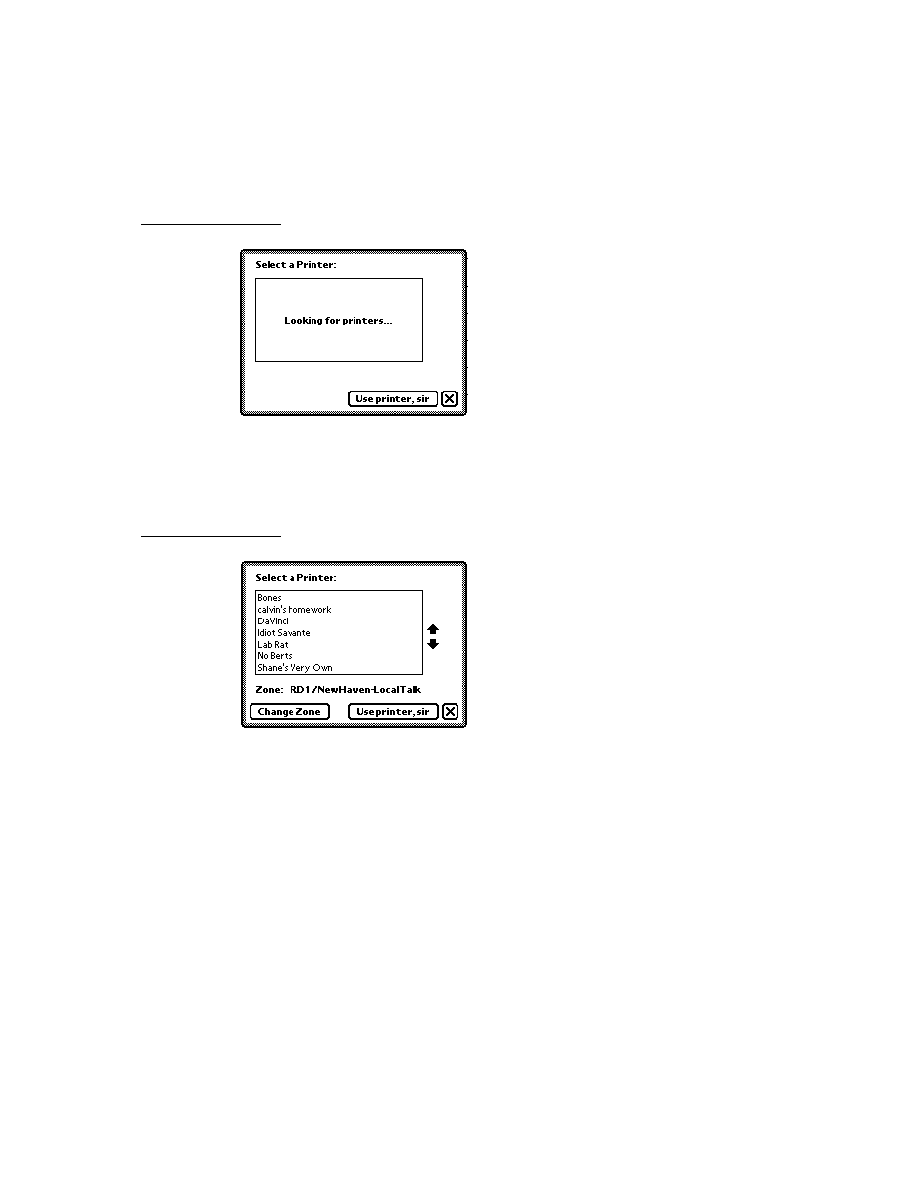
C H A P T E R 1 5
Filing
15-8
About Filing
on the internal store, the external store or both; that is, the user can specify a stores
filter in addition to a labels filter. Figure 15-8 shows the folder tab picker in a view
based on the
protoClockFolderTab
proto.
Figure 15-8
Choosing a filing filter
To display items according to the user's choice of store, your target view must
supply a
storesFilter
slot. When the target view has a
storesFilter
slot
and more than one store is available, the folder tab views allow the user to specify a
store in addition to a folder from which data items are retrieved for display. For
example, the user might choose to display only entries in the
'business
folder
on the internal store.
When the user chooses any filter from this picker, the system updates the
storesFilter
or
labelsFilter
slot and sends the target view a
NewFilingFilter
message. The argument passed to this method by the system
tells you what changed--the stores filter or the labels filter--but not its new value.
You must supply a
NewFilingFilter
method that examines the
storesFilter
or
labelsFilter
slot and queries your application's soups
appropriately. If the value of the
labelsFilter
slot is
nil
, your
NewFilingFilter
method must display all target items. Similarly, if
the value of the target view's
storesFilter
slot is
nil
, your
NewFilingFilter
method must display items on all available stores.
Your
NewFilingFilter
method must also perform any other actions
necessary to display the appropriate data, such as redrawing views affected by
the new filter value.
You can use the
RegFolderChanged
function to register your own callback
function to be executed when the user adds, deletes, or edits folder names. You
cannot respond adequately to these kinds of changes from within your
NewFilingFilter
or
FileThis
methods alone.
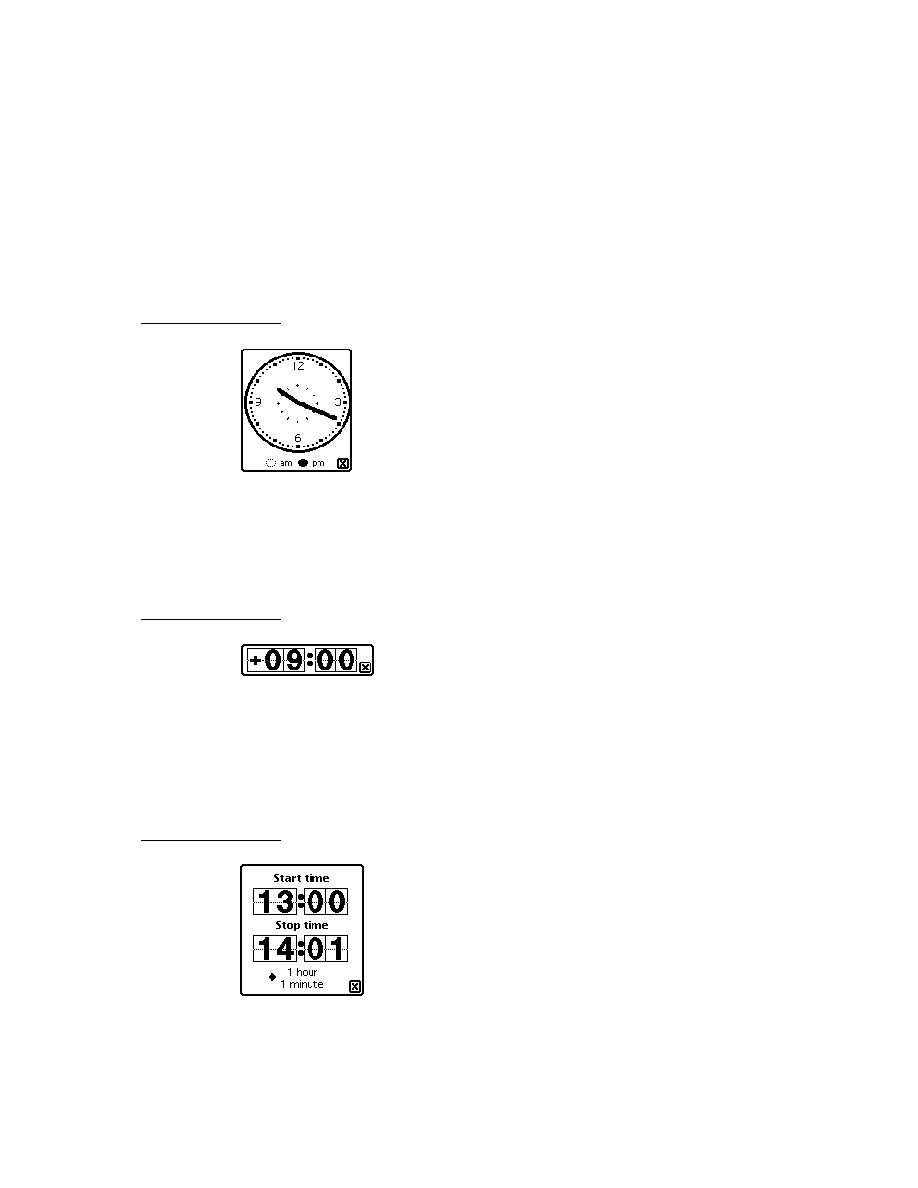
C H A P T E R 1 5
Filing
About Filing
15-9
Filing Compatibility Information
15
Version 2.0 of the Newton operating system supports earlier versions of the Filing
interface completely--no code modifications are required for older filing code to
continue working under the version 2.0 operating system. However, it is strongly
suggested that you update your application to the version 2.0 Filing interface to
take advantage of new features and to remain compatible with future versions of
the Newton operating system. This section provides version 2.0 compatibility
information for applications that use earlier versions of the Filing interface.
Users can now create folders visible only to a specified application; the folders are
said to be local to that application. Folders created using previous versions of the
Filing interface are visible to all applications when first read on a 2.0-based system.
Applications can now filter the display of items according to the store on which
they reside and according to whether they are filed in local or global folders.
The symbols that represent folders are no longer tied to the strings that represent
them to the user, as they were in previous versions of the Newton operating system.
This new scheme allows you to use the same folder symbol everywhere for a
particular concept, such as a business, while varying the user-visible string
representing that folder; for example the user-visible string could be localized for
various languages.
Applications can now route items directly to a specified store from the Filing slip.
In addition, registration for notification of changes to folder names has been
simplified.
The
protoFolderTab
proto is replaced by the
protoNewFolderTab
and
protoClockFolderTab
protos.
The
protoFilingButton
proto now supplies its own borders. You do not need
to enclose the filing button in another view to produce a border around the button.
The
FolderChanged
and
FilingChanged
methods are obsolete. They are
replaced by the
FileThis
method and the folder change notification mechanism.
If your application supplies a
FileThis
method, the system does not send
FolderChanged
and
FilingChanged
messages to your application. Instead of
supplying a
FolderChanged
method, your application should register a callback
function with the folder change notification mechanism to perform tasks when the
user adds, deletes, or edits folders.
The
FilterChanged
method is obsolete; your application should supply a
NewFilingFilter
method instead. Your
NewFilingFilter
method must
update the query that retrieves items matching the current filing category and
perform any other actions that are appropriate, such as redrawing views affected by
the change of filing filter. If your application supplies a
NewFilingFilter
method, the system does not send
FilterChanged
messages to your application.

C H A P T E R 1 5
Filing
15-10
Using the Filing Service
The new slots
appObjectFileThisIn
and
appObjectFileThisOn
support
localization of your application's Filing messages into languages having masculine
and feminine nouns.
The
DefaultFolderChanged
function is obsolete. Do not use this function.
The
target
and
targetView
slots are superseded by your override of the
GetTargetInfo
method. However, if you do not override the system-supplied
GetTargetInfo
method, you must include these slots in your application's
base view.
Registration for notification of changes to folder names has been simplified. Use
the new functions
RegFolderChanged
and
UnRegFolderChanged
to register
for folder change notification.
Using the Filing Service
15
To support the Filing service, your application must
provide three views (a folder tab view, a filing button view, and a view that
images the filing target)
respond to two messages (
FileThis
and
NewFilingFilter
)
register a callback function with the folder change notification service
Additionally, you can
support the use of multiple target items
customize the Filing slip and folder set that your application uses
The remainder of this section describes these tasks in detail.
Overview of Filing Support
15
You need to take the following steps to support the Filing service:
Add a
labels
slot to your application's soup entries.
Create in your application's base view the slots
appName
,
appAll
,
appObjectFileThisIn
,
appObjectFileThisOn
, and
appObjectUnfiled
.
Supply a filing target. It is recommended that you override the
GetTargetInfo
method; if you do not, your application base view must supply
target
and
targetView
slots for use by the default method. You are responsible for
keeping the values of these slots current.
Create a
labelsFilter
slot in your application's target view.

C H A P T E R 1 5
Filing
Using the Filing Service
15-11
Create a
storesFilter
slot in your application's target view
Implement the
FileThis
and
NewFilingFilter
methods.
Add a filing button view and a folder tab view to your application.
Register a callback function with the folder change notification mechanism.
Optionally, you can
create a
doCardRouting
slot in your application's base view
create a
dontStartWithFolder
slot in your target view
implement support for local or global folders only
customize the title text in your
protoNewFolderTab
view
provide a
TitleClickScript
method to customize the action your folder tab
view takes when the user taps its title text
The sections immediately following describe these tasks in detail.
Creating the Labels Slot
15
Each of your application's soup entries must contain a
labels
slot. It is
recommended that you make this slot part of a default soup entry created by a
frame-constructor function you supply. (For information on the use of frame-
constructor functions, see "Programmer's Overview" on page 11-25 in Chapter 11,
"Data Storage and Retrieval.")
When the user files a soup entry, the system stores a value in its
labels
slot.
Setting the value of the
labels
slot is really the only "filing" that is done--the
entry still resides in the soup, but your
FileThis
and
NewFilingFilter
methods provide the user-interface illusion that the data has been put in a folder.
The
labels
slot can store either a symbol or the value
nil
. If the value stored in
this slot is
nil
, your
FileThis
method must treat the item as unfiled. If a symbol
is stored in this slot, your
FileThis
method must test the value of this slot to
determine whether the entry should be displayed and then redraw the display
appropriately. Similarly, your
NewFilingFilter
method tests the value of this
slot to determine whether to display the item when the filing filter changes.
Creating the appName Slot
15
You must create in your application's base view an
appName
slot containing a
string that is the user-visible name of your application.

C H A P T E R 1 5
Filing
15-12
Using the Filing Service
Creating the appAll Slot
15
You must create in your application's base view an
appAll
slot containing a string
of the form
"All
Items
"
where Items is the plural for the items to be filed, such as cards, notes, and so on.
For example, when the user taps the folder tab view in the built-in Notes
application, the last item in the picker is "All Notes."
The following code fragment defines a typical
appAll
slot:
myAppBase := {... appAll: "All Notes", ...}
Creating the appObjectFileThisIn Slot
15
You must define the
appObjectFileThisIn
slot in your application's base
view. This slot holds the full text of the message to be displayed to the user when
filing a single item; for example,
"File this widget in"
This string is shown at the top of the Filing slip pictured in Figure 15-2 (page 15-3).
Creating the appObjectFileThisOn Slot
15
You must define the
appObjectFileThisOn
slot in your application's base
view. This slot holds the full text of the string labelling the group of buttons that
represent stores in the Filing slip; for example,
"File this
item
on"
where item is the singular case of the target your application files, such as a card, a
note, and so on.
For an example of this string, see Figure 15-5 (page 15-5).
Creating the appObjectUnfiled Slot
15
You must define an
appObjectUnfiled
slot in your application's base view.
This slot holds a string of the form
"Unfiled
Items
"
where Items is the plural case of the items to be filed, such as cards, notes, and so
on. For example, if the user taps the folder tab view in the built-in Notes application,
the first item in the picker is "Unfiled Notes."
The following code fragment defines a typical
appObjectUnfiled
slot:
myAppBase := {... appObjectUnfiled: "Unfiled Notes", ...}

C H A P T E R 1 5
Filing
Using the Filing Service
15-13
Specifying the Target
15
The
GetTargetInfo
method identifies the current target and target view to the
system. Depending on your needs, you can use the default version of this method
or override it.
If you use the default version, your application's base view must supply
target
and
targetView
slots that you update whenever the target or target view
changes. If you override this method, you provide these slots in the result frame
that it returns, rather than in your application's base view. These slots provide the
same information regardless of whether they reside in the
GetTargetInfo
method's result frame or in the application's base view.
Creating the Target Slot
15
The
target
slot contains the data item with which the user is working, such as the
soup entry that represents the currently displayed note to file. If there is no active
item, this slot must have the value
nil
.
Your application must update the value of the
target
slot every time the user
views a new item. Because the selection of a new item is an application-specific
detail, it is difficult to recommend a means of updating this slot that is appropriate
for every application; however, it is common to update the value of this slot from
the
ViewClickScript
method of the active view.
Creating the TargetView Slot
15
The
targetView
slot contains the view that receives messages from the Filing
service and can manipulate the target. The application's base view is usually an
appropriate value for this slot.
Overriding the GetTargetInfo Method
15
You can implement your own
GetTargetInfo
method if the default version
supplied by the system is not suitable for your application's needs. For example, if
your application images data items in floating windows or displays more than one
data item at a time, you probably need to supply a
GetTargetInfo
method that
can return an appropriate target and target view in those situations.
You must override the
GetTargetInfo
method in order to move an item to
another store when it is filed. The result frame returned by your
GetTargetInfo
override can include an optional
targetStore
slot that specifies the store on
which an item is to reside when it is filed.
To override this method, create in your application base view a slot named
GetTargetInfo
and implement this method as specified in the description of
the
GetTargetInfo
method (page 12-11) in
Newton Programmer's
Reference
.

C H A P T E R 1 5
Filing
15-14
Using the Filing Service
Creating the labelsFilter slot
15
Your application's target view must supply a
labelsFilter
slot. This slot holds
a value indicating the current filing filter selected by the user in the picker displayed
by the folder tab view. This slot can store either a symbol indicating the currently
displayed filing category or the value
nil
(which specifies that the Unfiled category
is currently displayed).
The system sets the value of the
labelsFilter
slot for you. Your
NewFilingFilter
method must update the display of your application's
data according to the value of this slot.
To display a predetermined filing category when your application opens, you can
set an initial value for the
labelsFilter
slot from within the application base
view's
ViewSetupFormScript
method.
Creating the storesFilter slot
15
Your application's target view must supply a
storesFilter
slot. This slot stores
a value indicating the current store filter selected by the user from the picker
displayed by the folder tab view. This slot can store either a symbol or the value
nil
.
The system sets the value of the
storesFilter
slot for you. Your
NewFilingFilter
method must update the display of your application's
data according to the value of this slot.
To display items on a particular store when your application opens, you can set an
initial value for the
storesFilter
slot from within the application base view's
ViewSetupFormScript
method.
Adding the Filing Button
15
You need to take the following steps to add the
protoFilingButton
view to
your application:
In NTK, sketch the filing button using the
protoFilingButton
proto and
declare it to the application's base view.
Set appropriate values for the button's
viewBounds
slot.
Adding the Folder Tab View
15
Your application's base view must provide a view that displays the currently
selected filing category and allows the user to select a new filing category. This
view is based on either the
protoNewFolderTab
or
protoClockFolderTab
system proto.
Adding the folder tab view to your application is easy. In NTK, sketch the folder
tab in your application's base view using the
protoNewFolderTab
proto and

C H A P T E R 1 5
Filing
Using the Filing Service
15-15
declare your folder tab view to the application's base view. The system sets the
folder tab view's bounds for you at run time, positioning the folder tab relative to
its parent, near the top of the screen.
Customizing Folder Tab Views
15
The
protoNewFolderTab
proto supplies a child view named
title
that images
a string that you may supply optionally. To display your own string as the title text
in a
protoNewFolderTab
view, use the global function
SetValue
to set the
value of the
text
slot in the
title
view child of your folder tab view.
For example,
SetValue(myNewFolderTab.title, 'text, "My text");
W A R N I N G
Do not create a
title
slot in any folder tab view. Do not replace
the title text in a
protoClockFolderTab
view.
Defining a TitleClickScript Method
15
The folder tab view's
TitleClickScript
method is invoked when the user taps
the title text in a
protoNewFolderTab
view or the time displayed as title text in
a
protoClockFolderTab
view. The default
TitleClickScript
method
provided for
protoNewFolderTab
views does nothing. The default
TitleClickScript
method provided by the
protoClockFolderTab
view
displays the built-in Clock application.
You can provide your own
TitleClickScript
method to customize the action
your folder tab views take when the user taps them.
Implementing the FileThis Method
15
When the user taps the File button in the Filing slip, the system sends the
FileThis
message to the target view. Your
FileThis
method must perform any
actions necessary to file the target and redraw the current display appropriately.
For example, if your application is displaying an overview list of unfiled items
when it receives this message, your
FileThis
method needs to redraw the list
without the newly filed item in it, providing the user-interface illusion that the item
has been moved.
Your
FileThis
method must also handle the case in which the user re-files an
item in the category under which it already resides. In this case, the appropriate
response is to do nothing; unnecessarily redrawing views that have not changed
makes the screen appear to flicker or flash. Because the value of the target's
labels
slot does not change unless you change it, you can test this slot's current
value to determine whether the new value is different.
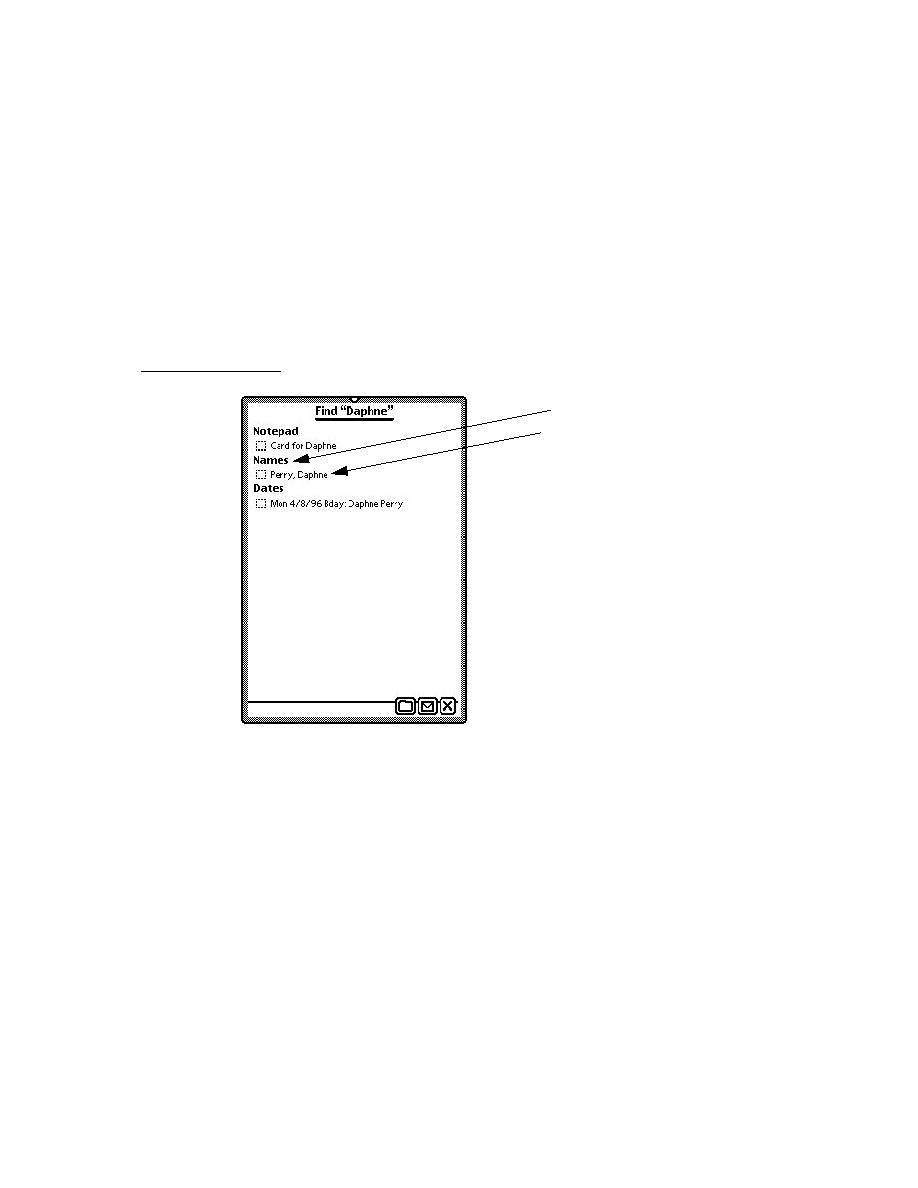
C H A P T E R 1 5
Filing
15-16
Using the Filing Service
The arguments to the
FileThis
method supply all the information necessary to file
a soup entry, including the item to file (the target), the category under which to file
it (the value to which you set the target's
labels
slot), and the store on which to
file it.
If the value of the
labelsChanged
parameter to the
FileThis
method is
true
,
your
FileThis
method must use the value of the
newLabels
parameter to
update the value of the target's
labels
slot. However, if the value of the
labelsChanged
parameter is
nil
, the value of the
newLabels
parameter is
undefined--don't use it!
Similarly, if the value of the
storesChanged
parameter is
true
, your
FileThis
method must move the target to the new store. However, if the value of
the
storesChanged
parameter is
nil
, the value of the
destStore
parameter
is undefined.
The following code example shows the implementation of a typical
FileThis
method. Remember to call
EntryChangeXmit
from this method so your changes
to filed entries are saved!
FileThis: // example code - your mileage may vary
func(target, labelsChanged, newLabels, storesChanged, destStore)
begin
if labelsChanged AND target.labels <> newLabels then
begin
target.labels := newLabels;
EntryChangeXmit(target, kAppSymbol);
end // labelsChanged
if storesChanged and (EntryStore(target) <> destStore) and
not destStore:IsReadOnly() then
begin
// move the entry to the new store & xmit change
// make sure you handle locked stores too
if EntryStore(target):IsReadOnly() then
EntryCopyXmit(target, destStore, kAppSymbol);
else
EntryMoveXmit(target, destStore, kAppSymbol);
end; //storesChanged
end; // FileThis
Implementing the NewFilingFilter Method
15
When the user changes the current filing filter in the folder tab view, the system
calls your application's
NewFilingFilter
method. You need to define this
method in your application's base view. Your
NewFilingFilter
method must
update the query that retrieves items matching the current filing category and

C H A P T E R 1 5
Filing
Using the Filing Service
15-17
perform any other actions that are appropriate, such as redrawing views affected by
the change in filing filter.
The symbol passed as the sole argument to your
NewFilingFilter
method
specifies which of the
storesFilter
or
labelsFilter
slots changed in value.
This argument does not specify the slot's new value, however. Your
NewFilingFilter
method must use the current value of the specified slot to
retrieve those soup entries that fall into the new filing category.
The following code example shows the implementation of a typical
NewFilingFilter
method, which queries the application soup for the entries
that match the current filing category and then redraws views affected by the
change in filing category.
NewFilingFilter: func(newFilterPath)
begin
// first figure out if query should be done on
// a union soup or on a specific store soup
// this is to make filter by store more efficient
local querySoup := GetUnionSoupAlways(kSoupName) ;
if storesFilter and storesFilter:IsValid() then
querySoup := querySoup:GetMember(storesFilter) ;
// now construct the query based on the labelsFilter
// and set my application cursor (called myCursor)
// to the new query
// the default is to show all items, i.e.,
// labelsFilter is '_all
local theQuery := nil ;
if NOT labelsFilter then
// labelsFilter is NIL, so show only those entries
// that do not have a valid tag in the labels
// slot
theQuery := {none: GetFolderList(appSymbol, nil)};
else if labelsFilter <> '_all then
// labelsFilter is some specific folder
theQuery := {all: labelsFilter} ;
myCursor := querySoup:Query(theQuery) ;

C H A P T E R 1 5
Filing
15-18
Using the Filing Service
// now redraw views affected by the change
// NOTE: You could keep track of the original
//
labelsFilter and storesFilter to see
//
whether you need to actually do work.
end
Using the Folder Change Notification Service
15
You can use the
RegFolderChanged
global function to register callback
functions that are executed when the user adds, removes, or edits folders. Most
applications register these functions only while the application is actually open, so
the application base view's
ViewSetupFormScript
is an ideal place from which
to call the
RegFolderChanged
function. For example,
myCallback1 := func(
oldFolder
,
newFolder
);
begin
// retag entries
end;
myAppBase.viewSetupFormScript := func ()begin
RegFolderChanged('|myFnId1:myApp:mySig|, myCallback1);
end;
The
UnRegFolderChanged
function removes a specified callback from use by
the folder change mechanism. Most applications unregister their folder change
callback functions when they close, making the application base view's
ViewQuitScript
method an appropriate place to unregister folder change
callback functions. For example,
myAppBase.viewQuitScript := func ()begin
UnRegFolderChanged('|myFnId1:myApp:mySig|);
end;
Creating the doCardRouting slot
15
If you want to move items between stores from within the Filing slip, you need to
create a
doCardRouting
slot in your application's base view. When an external
store is available and the value of this slot is non-
nil
, the Filing slip displays
buttons allowing the user to route the target to a specified destination store. If this
slot has a non-
nil
value but no external store is available, these "card-routing"
buttons are not displayed.

C H A P T E R 1 5
Filing
Using the Filing Service
15-19
Using Local or Global Folders Only
15
To suppress the display of either local or global folders in the Filing slip and the
folder tab views, you can set the values of optional
localFoldersOnly
and
globalFoldersOnly
slots that you supply in your application's base view. Note
that the use of local or global folders only is intended to be an application design
decision that is made once, rather than a user preference that can change.
When the
localFoldersOnly
slot holds the value
true
, the Filing slip and
folder tab views do not display the names of global folders. When the
globalFoldersOnly
slot holds the value
true
, the Filing slip and folder tab
views do not display the names of local folders.
W A R N I N G
The
localFoldersOnly
and
globalFoldersOnly
must not
both hold non-
nil
values at the same time.
Adding and Removing Filing Categories Programmatically
15
You can use the
AddFolder
and
RemoveFolder
global functions to modify the
set of folders (filing categories) available to your application. Note that the
RemoveFolder
function does not remove any folder that is also used by other
applications. For more information, see the descriptions of these methods in the
Newton Programmer's Reference
.
Interface to User-Visible Folder Names
15
Symbols that represent folders are not tied to the strings that represent those folders
to the user. As a result, you can use the same folder symbol everywhere for a
particular concept, such as a business, while varying the user-visible string
representing that folder; for example the user-visible string could be localized for
various languages.
You can use the
GetFolderStr
function to retrieve the user-visible string
associated with a folder symbol.

C H A P T E R 1 5
Filing
15-20
Summary
Summary
15
This section summarizes the data structures, protos, functions, and methods used
by the Filing service.
Data Structures for Filing
15
Application Base View Slots
15
myAppBaseView :=
{_parent: {...},// root view
_proto: {// myAppBaseViewTemplate
_proto: {...}, // protoApp,
// slots you supply in myAppBaseViewTemplate
appObjectUnfiled: "Unfiled Items",
appAll: "All Items",
appObjectFileThisOn: "File this item on",
storesFilter: NIL,
doCardRouting: 1,
GetTargetInfo: <function, 1 arg(s) #6000F951>,
labelsFilter: NIL,
appObjectFileThisIn: "File this item in",
appSymbol: |myApp:mySig|,
...},
// my filing button template, defined in app base view
myfilingButton: {_parent: <2> // myAppBaseView,
_proto: protoFilingButton, ...},
// my new folder tab template, defined in app base view
myNewFolderTab: {...}, // see summary on page 15-21
...}
Target Information Frame
15
// returned by the GetTargetInfo method
{target:
item
,// the item to file or route
targetView:
view
, // filing messages are sent to this view
targetStore:
store
, // store on which target resides
// this frame may also include your own slots
...}

C H A P T E R 1 5
Filing
Summary
15-21
Filing Protos
15
protoFilingButton
15
myFilingButtonView :=
// do not override ViewClickScript; use ButtonClickScript instead
{
_parent:{ // MyAppBaseView
_parent: {...}, // root view
_proto: {...}, // myAppBaseViewTemplate
...},
_proto: {// myFilingButtonTemplate
// set your own viewBounds in NTK view editor
viewBounds: {left: 10, top: 250,
right: 27, bottom: 263},
_proto: {// protoFilingButton
_proto: {...}, // protoPictureButton
// your ButtonClickScript must call inherited
ButtonClickScript:<function, 0 arg(s) ...>,
// your Update must call inherited
Update: <function, 0 arg(s) ...>,
// your viewSetupFormScript must call inherited
viewSetupFormScript:<function, 0 arg(s)...>
...},
...},
...}
protoNewFolderTab
15
myNewFolderTabView := {
{_parent: myAppBaseView, // see summary on page 15-20
_proto: { protoNewFolderTab,
// your folder tab's viewSetupFormScript must
// call this inherited method using conditional send
viewSetupFormScript: <function, 0 arg(s) ...>,
...},
// do not alter this slot; set only the text slot
title: {_parent: <2> // myNewFolderTabView,
_proto: {viewClass: clTextView, ...},
// string displayed at left of newFolderTab view
text: "My Text",
...},
}

C H A P T E R 1 5
Filing
15-22
Summary
protoClockFolderTab
15
myClockFolderTabView := {
{_parent: myAppBaseView, // see page 15-20
_proto: { protoClockFolderTab,
// your folder tab's viewSetupFormScript must
// call inherited:?viewSetupFormScript()
viewSetupFormScript: <function, 0 arg(s) ...>, ...},
// do not attempt to alter the time display text
...}
Filing Functions and Methods
15
view
:GetTargetInfo(
reason
) // override for multiple targets
view
:MoveTarget (
target
,
destStore
) // move target between stores
RegFolderChanged(
callbackID
,
callBackFn
)// register folder change callback
UnRegFolderChanged(
callbackID
) // unregister folder change callback
AddFolder(
newFolderStr
,
appSymbol
) // add local folder
RemoveFolder(
folderSym
,
appSymbol
) // remove local folder
GetFolderStr(
folderSym
) // get user-visible folder name from app sym
RemoveAppFolders(
appSym
) // remove specified app's local folders
GetFolderList(
appSymbol
,
localOnly
) // list the app's local folders
Application-Defined Filing Functions and Methods
15
// Optional. Specify filing target, target view, target store
GetTargetInfo(
reason
)
// Required. Respond to changes in filing filter or store filter
targetView
:NewFilingFilter(
newFilter
)
// Required. File the item as specified
targetView
:FileThis (
target
,
labelsChanged
,
newLabels
,
storesChanged
,
newStore
)

About the Find Service
16-1
C H A P T E R 1 6
Find
16
Figure 16-0
Table 16-0
This chapter describes how your application can support finding text, dates, or your
own data types in its data. If you want users to be able to use the system's Find
service to locate data in your application, you should be familiar with the material
discussed in this chapter.
Before reading this chapter, you should understand the concept of the target of an
action, explained in Chapter 15, "Filing." Familiarity with using views to image
data, covered in Chapter 3, "Views," is also helpful. If your application stores data
as soup entries, you should understand the contents of Chapter 11, "Data Storage
and Retrieval."
This chapter is divided into two main parts:
"About the Find Service" describes the core user interface to the Find service,
along with variations and optional features. A compatibility section covers
differences between the current version of the Find service and previous ones.
"Using the Find Service" provides a technical overview of Find operations, with
code examples to show how to implement support for this service in your
application.
In addition, the "Find Reference" (page 13-1) in Newton Programmer's Reference
provides complete descriptions of all Find service data structures, functions,
and methods.
About the Find Service
16
The Find service searches for occurrences of data items the user specifies on a Find
slip. The Find slip may be supplied by the system or by the developer. Figure 16-1
illustrates the system-supplied Find slip.

C H A P T E R 1 6
Find
16-2
About the Find Service
Figure 16-1
The system-supplied Find slip
The system-supplied Find slip contains an input line that specifies a search string,
several buttons indicate the scope of the search, and a Look For picker (pop-up
menu) that specifies the kind of search to perform. By choosing from the Look For
picker (pop-up menu) you may specify whether the search string is a text item or a
date, as shown in Figure 16-2.
Figure 16-2
Specifying text or date searches in the Find slip
Text searches are case insensitive and find only string beginnings. That is, a search
for the string "smith" may return the items "Smith" and "smithers," but not
"blacksmith." Date searches find items dated before, after, or on the date specified
by the search string.
From the application developer's perspective, text finds and date finds are nearly
identical. The only significant difference between them is the test an item must
pass to be included in the result of the search.
The system-supplied Find slip always contains an Everywhere button and Selected
button. If the current application supports the Find service, a button with the
application's name appears in this slip as well.

C H A P T E R 1 6
Find
About the Find Service
16-3
Searching for data in the current application only is called a Local find operation.
Figure 16-3 depicts a Local find in the Notepad application.
Figure 16-3
A local Find operation
The Everywhere and Selected buttons specify that the system perform searches in
applications other than the currently active one. Applications must register with the
Find service to participate in such searches.
Tapping the Everywhere button tells the system to conduct searches in all currently
available applications registered with the Find service. This kind of search is called
a Global find. Applications need not be open to participate in a Global find.
A Global find is similar to a series of Local find operations initiated by the system.
When the user requests a Global find, the system executes a Local find in each
application registered with the Find service.
Tapping the Selected button causes a checklist to appear at the top of the Find slip.
The list includes all currently available applications registered with the Find
service. Tapping items in the list places a check mark next to applications in which
the system should conduct a Local find. This kind of search is called a Selected
find. The slip in Figure 16-4 depicts a search for the string
"Daphne"
in the Notes
and Dates applications.
Figure 16-4
Searching selected applications

C H A P T E R 1 6
Find
16-4
About the Find Service
In addition, an application can support searches of multiple data sets. For example,
a personal finance program might allow you to search the check ledger, the account
list, and the credit charges list as separate searches, even though all the data resides
in a single application. For more information on how to implement this in your
application see "Adding Application Data Sets to Selected Finds" beginning on
page 16-19.
In addition, you can replace the Find slip in the currently active application.
Typically, you would do this to provide a customized user interface for specialized
searches. For more information, see "Replacing the Built-in Find Slip" beginning
on page 16-24.
After setting the parameters of the search with the Find slip, the user initiates the
search by tapping the Find button. Alternatively, the user can cancel the search by
tapping the close box to dismiss the Find slip.
While the search executes, the system provides user feedback through a Progress
slip. This slip provides a Stop button that allows the user to cancel a search in
progress. Figure 16-5 shows a typical Progress slip.
Figure 16-5
Progress slip
When the search is completed, the Find service displays an overview list of items
that match the search criteria. Figure 16-6 shows the Find overview as it might
appear after searching all applications for the string
"Daphne"
.

C H A P T E R 1 6
Find
About the Find Service
16-5
Figure 16-6
The Find overview
The user can tap items in the Find overview to display them. As items are displayed,
a status message at the top of the Find slip indicates which item is displayed and
whether there are more results to display. Figure 16-7 depicts this status message.
Figure 16-7
Find status message
When more than one item is found, the status message indicates that there are more
items to display.
Between uses, the Find service stores the setting of the Look For picker. The next
time this service is used, it reopens in the most recently set find mode. Note that in
order to conserve memory, the list of found items is not saved between finds.

C H A P T E R 1 6
Find
16-6
Using the Find Service
Compatibility Information
16
The current version of the Find service opens in the text or date find mode last
used. The Find slip in versions of Newton System Software prior to 2.0 always
opened in text find mode, regardless of the mode last used.
Find now performs "date equal" finds, and returns control to the user more quickly
than previous versions did. The Find slip no longer displays the total number of
items in the search result; that is, instead of displaying user feedback such as "This
is item 24. There are 36 items" the Find slip displays "This is item 24. There are
(no) more items."
The Find service now offers routines that allow you to include multiple data sets
from a single application in Selected find operations. Three new methods
support this functionality:
AppFindTargets
,
FindTargeted,
and
DateFindTargeted
. You use the
AppFindTargets
method to add identifying
strings for the data sets to the Selected picker. The two new Find methods with
which you implement targeted finds are
FindTargeted
and
DateFindTargeted
. They are identical to their nontargeted counterparts, except
the last parameter,
indexPath
, is a path to a data set within an application.
Do not modify any system data structures directly to register or unregister an
application with the Find service. Instead, use the
RegFindApps
and
UnRegFindApps
functions provided for this purpose. Applications running
on older Newton devices can use the
kRegFindAppsFunc
and
kUnregFindAppsFunc
functions provided by NTK for this purpose.
The
ShowFoundItem
method now has two parameters, a data item and a finder
frame. However, the old
ShowFoundItem
method, with one parameter (
item
) is
still supported.
The
SetStatus
method is obsolete; use the
SetMessage
method instead. In
addition, the
FileAs
and
MoveTo
methods are also obsolete; you should use
FileAndMove
instead.
Using the Find Service
16
This section includes a technical overview of Find operations and describes how to
implement Find support in your application.
Technical Overview
16
When the user taps the Find button, the system invokes your application's search
method. This can be a date find method (
DateFind
) or a text find method (
Find
).
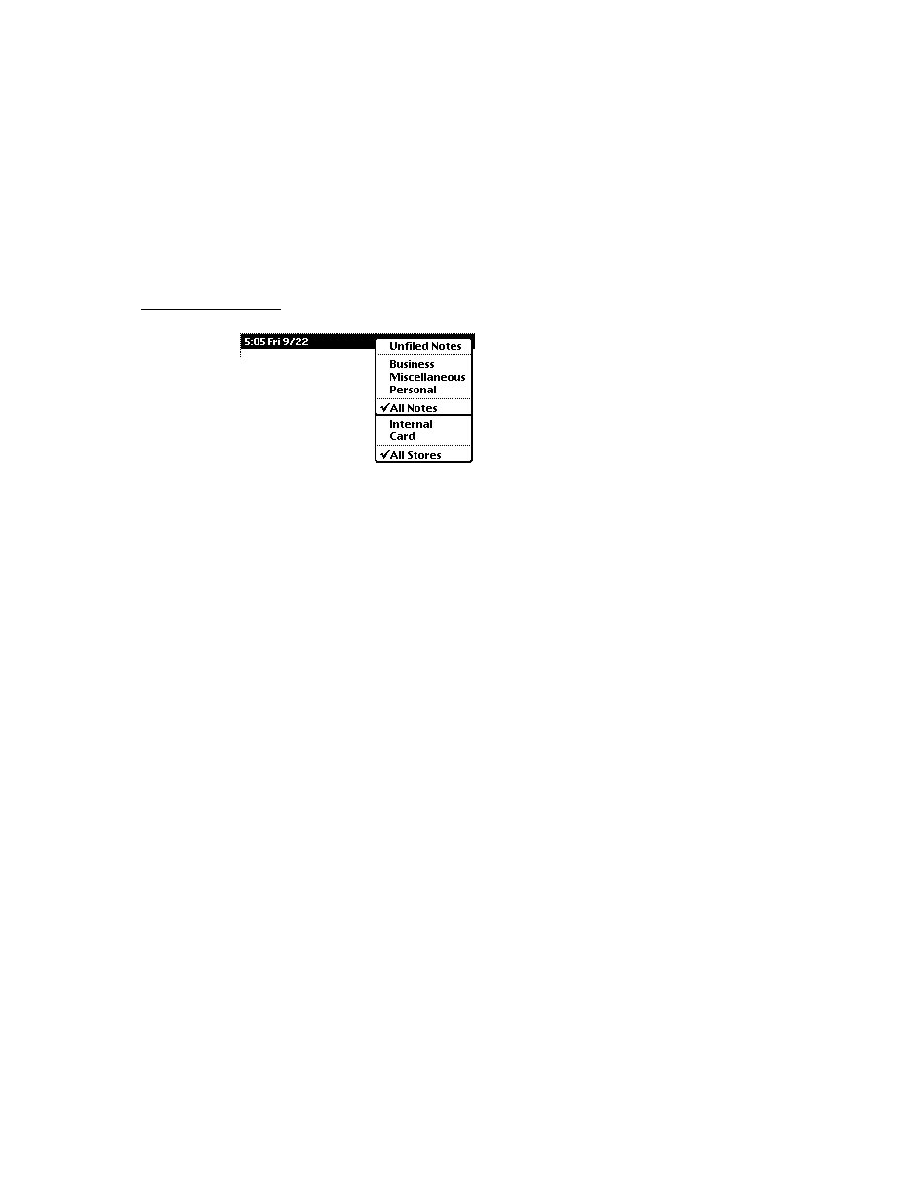
C H A P T E R 1 6
Find
Using the Find Service
16-7
The only significant difference between a date find and a text find is that a different
search method locates the items that are returned. To support text searches, you
must supply a
Find
method. To support searching by date, you must supply a
DateFind
method.
You can support any of these search methods independently of one another; for
example, you can implement the
Find
method without implementing the
DateFind
method.
You may also customize searches by adding a subset of data items from one
application to the Selected picker menu in the Find slip. Items added here may be,
for instance, a checkbook and ledger from a personal finance program.
A finder is a frame that enumerates items resulting from a Find operation. The
general characteristics of your finder are defined by the proto it's based on. The
system supplies two protos on which to base your finder: the
ROM_SoupFinder
or the
ROM_CompatibleFinder
.
The
ROM_SoupFinder
proto supports searching soup data. The
ROM_CompatibleFinder
proto provides a framework, which you should
override, that supports searching data that is not soup based. When a finder based
on the
ROM_SoupFinder
proto completes a search, it returns with a cursor which
is used to retrieve the found items from the application soup. When a finder based
on the
ROM_CompatibleFinder
proto completes a search, it returns with the
actual found items in an array (the
items
array).
If you store data in soups, there are standard find methods defined for the
ROM_SoupFinder
proto that you can use. When you devise a different scheme,
you must use the
ROM_CompatibleFinder
proto and define versions of the
finder methods that are tailored to your type of data storage.
After a search method scans your application's data and returns a finder frame, you
must append it to the system-supplied
results
array. Global and Selected finds
usually append more than one frame to this array, as multiple applications
complete their searches.
While a search continues, the system automatically provides user feedback on its
progress. When the search method completes, the system displays an overview list
of the items that were found.
For Global or Selected finds, each application (or data set, for a targeted data set
find) in which items were found is identified by a heading, with the found items
listed under it. The application name that appears in this heading is supplied by the
title
slot each application provides in its base view.
The system sends a
FindSoupExcerpt
message to your application, which must
have a
FindSoupExcerpt
method to respond to it. This method must extract and
return a string for the Find overview to display. If no items are found, the
FindSoupExcerpt
message is not sent. If you are using the

C H A P T E R 1 6
Find
16-8
Using the Find Service
ROM_CompatibleFinder
proto, the string to display for each found item is
contained in the
title
slot of each of the items in the
items
array in your finder.
When the user taps scroll buttons to scroll through this list of found items, the
system keeps track of the user's place in the array of found items. Figure 16-8
depicts the strings from both the
title
slot and the
FindSoupExcerpt
method
as they are used in a typical Find overview.
Figure 16-8
Strings used in a Find overview
When the user taps an item in the overview, the system sends a
ShowFoundItem
message to the view specified by the
owner
slot in your finder frame (which you
appended to the system's
results
array). In the template of the specified
owner
view, you define a
ShowFoundItem
method that must locate the found item in
your application's data and perform any actions necessary to display it, including
scrolling or highlighting the item as appropriate. Although the interface to the
ShowFoundItem
method varies according to the finder proto your finder is based
on, you can often use the same method to display the results of both text and date
searches. If you are using a finder based on
ROM_CompatibleFinder
, you must
override its
ShowFakeEntry
method to call your
ShowFoundItem
method.
text from
title
slot
text returned by
FindSoupExcerpt

C H A P T E R 1 6
Find
Using the Find Service
16-9
Figure 16-9
The
ShowFoundItem
method displays the view of an overview item
The Find overview provides Routing and Filing buttons. If you are using the
ROM_SoupFinder
the system will file, move, and delete your entries in
the overview of found items. In such an occurrence, the soup-change notification
mechanism notifies your application. (The soup-change notification mechanism is
described in Chapter 11, "Data Storage and Retrieval.")
If you are using the
ROM_CompatibleFinder
you may either not allow your
found item to be routed or override the relevant methods.
Note that if the system routes your soup-based data, your application is notified via
the soup-change notification mechanism. For a complete description of this
mechanism, see Chapter 11, "Data Storage and Retrieval."
Global and Selected Finds
16
When the user taps the Find button, the system invokes find methods in the
appropriate applications. For a Local find, only the currently active application is
sent a message. For a Global find, all applications registered with the Find service
are sent messages. Selected finds send messages to a user-specified subset of all
applications registered for Global finds. In terms of the messages sent, Global finds
and Selected finds are similar to Local finds; however, there are some differences in
these operations that your application needs to address.
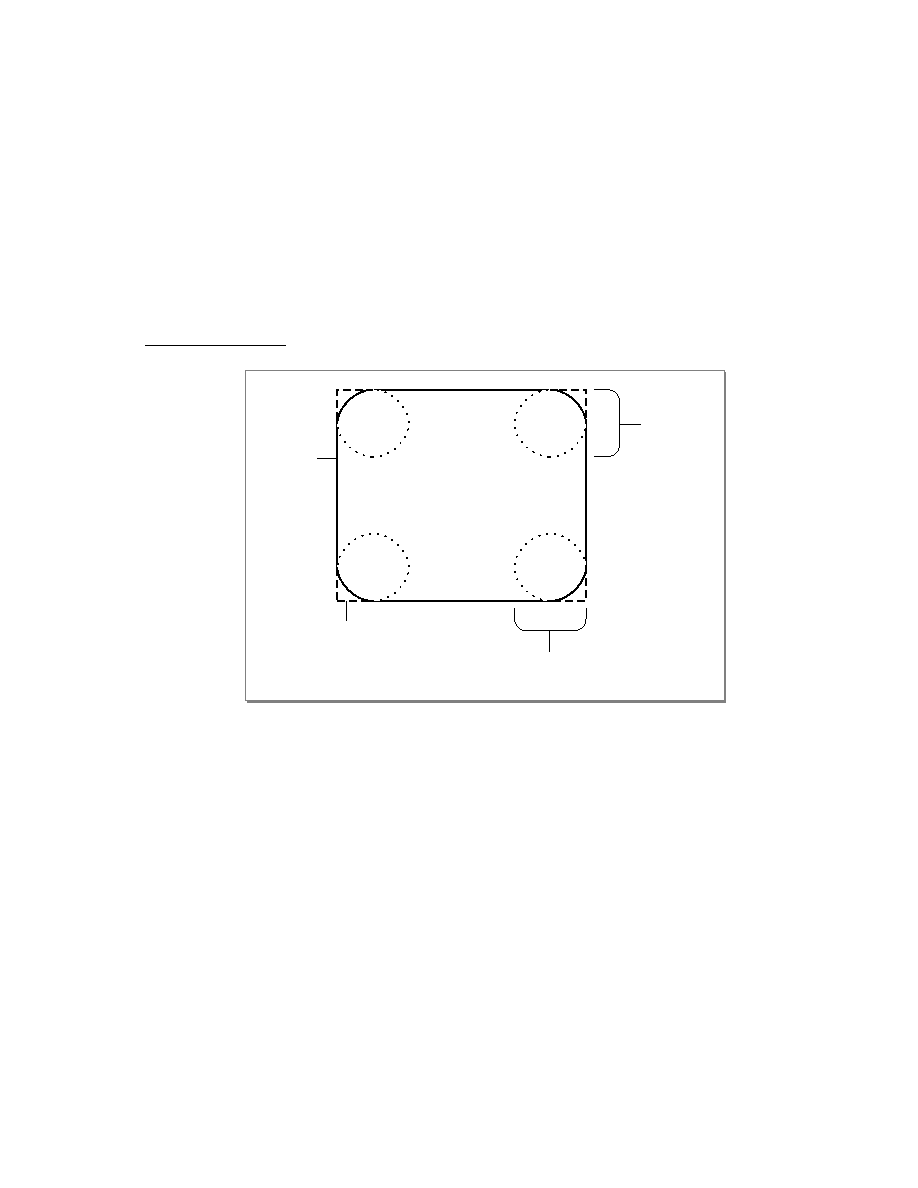
C H A P T E R 1 6
Find
16-10
Using the Find Service
The most important difference between Local finds and other kinds of find
operations is that when the system invokes your search method as part of a Global
or Selected find, your application may not be open. Therefore, you must test to see
that the application soup is available before searching it.
The system informs your search method of the scope of the search through the
scope
parameter. You can choose to ignore it or you can modify your application's
actions based on whether the value of this parameter is
'localFind
or
'globalFind
. The system passes the
'globalFind
symbol when it invokes
your search method for a Global or Selected find. The
'localFind
symbol is
passed for Local find operations.
Checklist for Adding Find Support
16
To add application support for the Find service, you need to do the following:
Create a
title
slot, in the view referenced by the
owner
slot of your finder
frame, that contains the user-visible name of the application.
Create the
appName
slot in your application's base view that contains the user-
visible name of the application.
Choose a finder proto on which to base your application's frame. You should
use
ROM_SoupFinder
if your data is stored in a single soup, and
ROM_CompatibleFinder
otherwise.
Supply at least one search method (
Find
,
DateFind
).
Append the resultant finder frame to the system-supplied
results
array at the
end of your search method(s).
Supply a
FindSoupExcerpt
method that extracts strings from soup entries for
display in the Find overview. This method is required only if you use the
ROM_SoupFinder
proto. If you use the
ROM_CompatibleFinder
proto you
must add a
title
slot with a string defining each found item to the frame
representing the item.
Supply a
ShowFoundItem
method that displays an individual entry from the
found items.
When using a
ROM_CompatibleFinder
proto, write a
ShowFakeEntry
method to call your
ShowFoundItem
method.
When using the
ROM_CompatibleFinder
, you should either not allow
your found items to be selected (and thus not routed), or override the relevant
routing methods.
Optionally, you may also do the following:
Register and unregister for participation in Global and Selected finds.

C H A P T E R 1 6
Find
Using the Find Service
16-11
Employ multiple data sets from one application in a Selected find by adding
the method
AppFindTargets
, and one or both of the search methods
FindTargeted
and
DateFindTargeted
.
Replace the system-supplied Find slip with one of your own by supplying a
CustomFind
method in your application's base view. This method will be
called when the user taps Find and your application is frontmost.
The sections immediately following describe these tasks in detail.
Creating the title Slot
16
A string that is your application's user-visible name must be available in a text slot
called
title
. You need to create this slot in the view referenced by the
owner
slot
of the finder frame returned by your search method. Commonly, the
owner
slot
references the application's base view and the
title
slot resides in this view.
The Find service uses this string in the list of application names displayed for
Selected finds as well as in the overview of found items.
Creating the appName Slot
16
Your application's base view must contain an
appName
text slot. This slot holds a
string that is your application's user-visible name. The value of this slot is used to
name the Find slip button that represents your application when it is the current
application. It is also employed by other system services to obtain a user-visible
name for your application.
Using the Finder Protos
16
You use a finder proto as the basis from which to construct the finder frame
returned by your search method. The two system-supplied finder protos are
employed according to the data type you use for your application's data storage.
You can create your own customizations at compile time by creating an item like
the following example:
kMySoupFinder:= {
_proto: ROM_SoupFinder,
Delete: func()
begin
print("About to delete " &
Length(selected) && "items");
inherited:Delete();
end
}
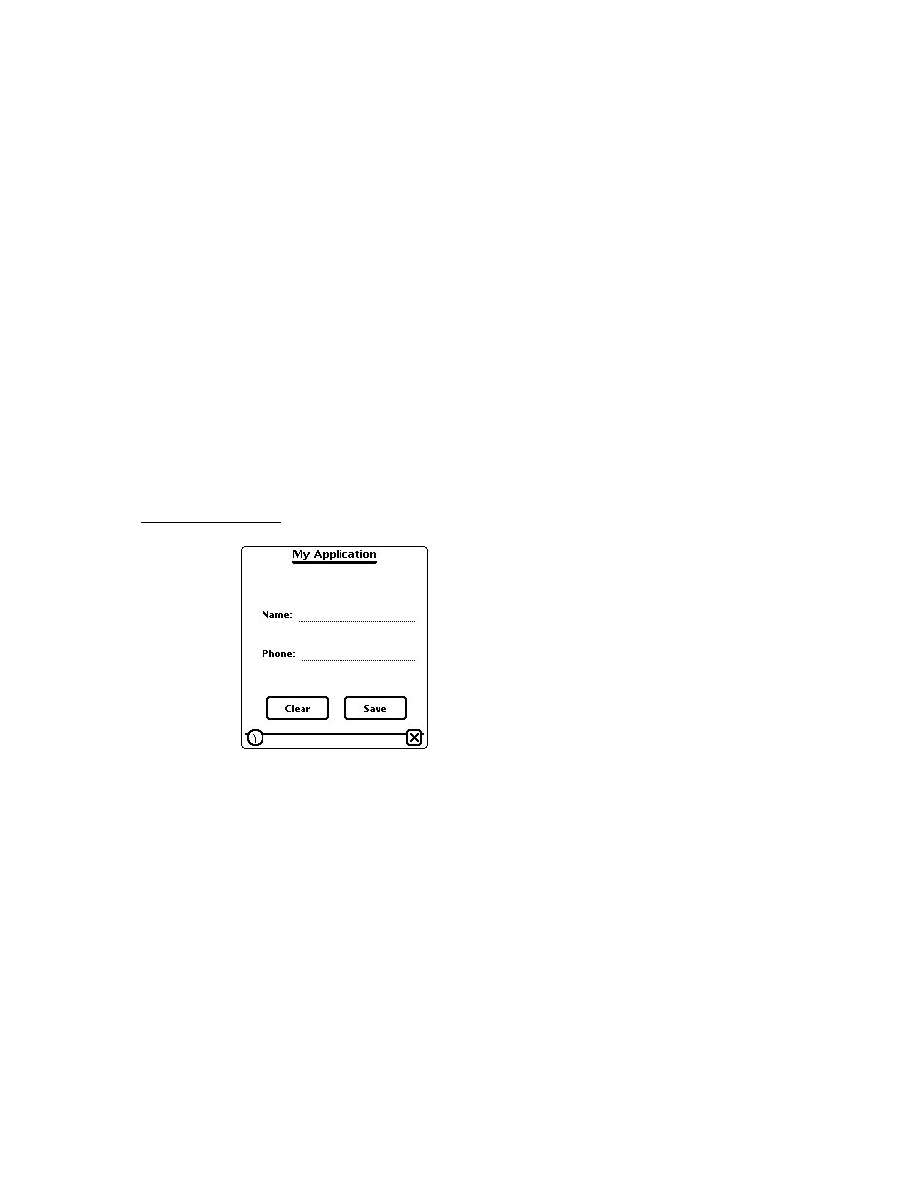
C H A P T E R 1 6
Find
16-12
Using the Find Service
The full complement of slots in the finder frame resulting from your searches
varies according to the finder proto it's based on. A finder frame based on the
ROM_SoupFinder
proto returns a finder containing a cursor with which to
retrieve found items from the application soup. A finder frame based on the
ROM_CompatibleFinder
proto results in a frame containing an array of the
actual found items.
The
ROM_CompatibleFinder
proto is meant to serve as a guideline for creating
a finder that works on a data storage set that does not use soups. The methods
included must be overridden to fit the data type in which your application data
is stored.
Several methods and slots are included by both system protos; they include:
The
selected
array stores selected items from the Find overview in an
internal format. All you can do is pass the array to the
Length
function to
determine the number of selected items.
The
Count
method returns an integer with the total number of found items.
The
Resync
method resets the finder to the first found item.
The
ShowFoundItem
method displays the overview data item that resides in
the overview's items array.
The
ShowOrdinalItem
method displays an item based on the ordinal number
or symbol (
'first
,
'prev
, or
'next
) passed to it.
Whenever possible, you should store your application's data in soups and use the
ROM_SoupFinder
proto to support the Find service, as shown in the following
code fragment:
if cursor:Entry() then begin
myFinder := {
_proto: ROM_SoupFinder,
owner: self,
title:"My Application",
findType:'text, //other possible values are
//'dateBefore,'dateOn, and 'dateAfter
findWords: [
searchedForTheseStrings
],
cursor: myCursor,};
Table 16-1 provides quick reference descriptions of the
ROM_SoupFinder
methods. Most should not be overridden, but those that may be are indicated.

C H A P T E R 1 6
Find
Using the Find Service
16-13
Note
The
ROM_SoupFinder
and
ROM_CompatibleFinder
methods
MakeFoundItem
and
AddFoundItem
are internal
methods, which should not be called or overridden under any
circumstances.
Table 16-1
Overview of
ROM_SoupFinder
methods
Method
Description
Override?
Reset
Resets cursor to first found entry. In
general you should use
ReSync
to reset
a finder.
No
ZeroOneOrMore
Returns 0 if no found entries, 1 for one
found entry, or other number for more.
No
ShowEntry
Causes the finding application to display
entry, which is passed to it as an argument.
Does not close the Find overview.
No
SelectItem
Marks the item, passed in as an argument,
as selected. If this method is set to
nil
a
checkbox does not appear in front of
the item.
No
IsSelected
Returns
true
if the item, passed in as an
argument, is selected.
No
ForEachSelected
Calls the callback function, passed in as an
argument, with each selected item. The
function has one argument: the entry from
the cursor.
No
FileAndMove
File and/or move the selected items. Has
four arguments: labelsChanged, newLabel,
storeChanged, newStore. If labelsChanged
or storeChanged, is
true
newLabel and
newStore indicate the new label and store.
If overridden you must check for selected
items as in
if selected then // do work;
Yes, but
should call
inherited
method to
do work.
Delete
Deletes all selected items from
writeable stores.
Yes, but
crumple
effect still
occurs.
GetTarget
Returns cursor for routing.
Yes

C H A P T E R 1 6
Find
16-14
Using the Find Service
If your application does not store data as soup entries, you can use the
ROM_CompatibleFinder
proto as the framework from which to create your
finder frame. Although
ROM_CompatibleFinder
provides most of the services
that
ROM_SoupFinder
does, it does not respond to messages sent by the system
when the user files, deletes, or moves items in the Find overview. The following
methods have the same definitions in the
ROM_CompatibleFinder
as they have
in the
ROM_SoupFinder
. If you use
ROM_CompatibleFinder
proto, in most
cases, you must define the following methods to work on your data structures:
FileAndMove
Delete
IsSelected
SelectItem
ForEachSelected
GetTarget
The commonality of definition between these methods causes problems in some
cases. For instance, when used with the
ROM_CompatibleFinder
proto, the
ForEachSelected
method must be overridden because it is expected to return
an array of soup entries.
The
ROM_CompatibleFinder
proto has the two following methods which are
not found in the
ROM_SoupFinder
proto:
ShowFakeEntry
ConvertToSoupEntry
When you use the
ROM_CompatibleFinder
proto, you should define a
ShowFakeEntry
method that makes sure your application is open, and calls your
ShowFoundItem
method.
The convenience method,
ConvertToSoupEntry
, returns a soup entry when
given a data item as a parameter.
Implementing Search Methods
16
Your application conducts searches in response to messages that it receives from
the system. You must supply a search method for each message that your application
supports. These methods are usually defined in your application's base view;
they include:
Find
DateFind
FindTargeted
DateFindTargeted

C H A P T E R 1 6
Find
Using the Find Service
16-15
Although the implementation of a search method is for the most part application
specific, some general requirements apply to all search methods. This section
describes these requirements and advises you of potential problems your search
methods may need to handle.
Your search method must be able to search for data in internal RAM as well as in
RAM or ROM on a PCMCIA card. Using union soups, which allow you to treat
multiple soups as a single soup regardless of physical location, to store your data
makes it easier to solve this problem.
As a search method proceeds through the application data, it must test items
against criteria specified in the Find slip and collect the ones meeting the test
criteria. It also needs to call the
SetMessage
method to provide a status string
that the system displays to the user while the search is in progress. Each of the
code examples included later in this section shows how to do this.
When the search is completed, it must append its finder frame to the system-
supplied
results
array. This task is described in detail in "Returning Search
Results" (page 16-21).
If your application registers for participation in Global finds, your search methods
may be invoked when your application is not open. Thus, your search methods
must not rely on your application being open when they are invoked.
Using the StandardFind Method
16
You can use the system-supplied
StandardFind
method to search for text in
soup-based application data. This method makes the necessary calls to display the
status message, gather matching data items, and to append the finder frame that
contains the cursor with which to fetch found items to the system's
results
array. The parameters are described in detail in "StandardFind" (page 13-13) in
Newton Programmer's Reference.
You must call the
GetUnionSoupAlways
function, saving the result, before
calling StandardFind. Note that your
Find
method must be defined in your
application's base view. Its use is illustrated in the following code example:
MyApplicationBase.Find :=
func(what, results, scope, statusView)
begin
// The following assignment forces the existence of
// a union soup. Always all GetUnionSoupAlways
//(saving the result in a local variable) before
// calling StandardFind.
local temp := GetUnionSoupAlways (kMySoupName);
:StandardFind(what, kMySoupName, results,
statusView, nil);
end;

C H A P T E R 1 6
Find
16-16
Using the Find Service
Using Your Own Text-Searching Method
16
The following code example illustrates the kinds of tasks you must perform when
the
StandardFind
method is not used. (However, it is strongly suggested that
you use the
StandardFind
method to implement your
Find
routine, if possible.)
This example searches for text in soup-based application data using the
ROM_SoupFinder
proto:
// This routine MUST be named Find; it is called by
// the system when the user chooses Find.
MyApplicationBase.Find :=
func(what, results, scope, statusView)
begin
local myFinder;
// Report status to the user;
// note use of GetAppName and Unicode ellipsis.
if statusView then
statusView:SetMessage("Searching in " &
GetAppName(kAppSymbol)& $\u2026);
// Presume our soup def is registered,
// however, app may be closed so get our own soup.
local mySoup:= GetUnionSoupAlways("My Soup");
// Make sure a member soup exists so query won't
// fail (GetMember creates the soup if necessary).
mySoup:GetMember(GetDefaultStore());
//Retrieve entries with strings beginning with "what".
local myCursor := mySoup: Query({text: what});
// Append finder to system-supplied results array
if cursor:Entry() then
begin
myFinder :=
{
_proto: ROM_SoupFinder,
owner: self,
title:"My Application",
findType: 'text,
findWords: :MyStringSplittingFn(what),
cursor: myCursor,
};
AddArraySlot(results, myFinder);
end;
end;

C H A P T E R 1 6
Find
Using the Find Service
16-17
Finding Text With a ROM_CompatibleFinder
16
The following example shows how to use the
ROM_CompatibleFinder
proto to
search for text in application data that is not soup based. The sample code
immediately following doesn't contain code that actually searches application data,
because the implementation of such a search would be specific to the data type
used to store the application data.
MyAppplicationBase.Find:=
func(what, results, scope, statusView)
begin
local item, foundItems, massagedFoundItems, myFinder;
// Set the message in the Find slip.
if statusView then
statusView:SetMessage("Searching in " &
GetAppName(kAppSymbol) & $\u2026);
// MyFindMethod does the actual searching, since
// this is too app-specific to do here. It returns
// an array of all the data items that match 'what.
foundItems := MyFindMethod(what);
// Now we create an array with frames of the form
// mandated for ROM_CompatibleFinder.
massagedFoundItems :=
foreach item in foundItems collect
{
// Use proto inheritance to protect data
_proto
: item,
// This is seen by the user in the Overview
// (pretend our data is frames w/'name slots)
title
: item.name,
// We may add any other slots here our
// methods may want later
};
// Construct the finder frame.
myFinder :=
{_proto: ROM_CompatibleFinder, // For non-soup data
owner: self,// View receiving ShowFoundItem message
title: "My App",
items: massagedFoundItems,
findType : 'text,
findWords: :MyStringSplittingFn(what),

C H A P T E R 1 6
Find
16-18
Using the Find Service
// We may also add slots here...
};
// Append myFinder frame to system's results array
AddArraySlot(results, myFinder);
end;
Implementing the DateFind Method
16
Date-based searches have a lot in common with their text-based counterparts; in
fact the only significant difference between these two operations is the search
criteria. Rather than matching a text string, the
DateFind
method tests items
against a time value according to the value of the
findType
parameter. This
parameter indicates whether the search should include results for items dated on,
after, or before a specified date.
You can simplify the implementation of date-based searches by time-stamping your
application's data when it is stored. If you store application data as frames that hold
the time they were created or modified in a particular slot, the
DateFind
method
simply tests the value of this slot to accept or reject the entry.
The sample code immediately following shows the implementation of a typical
DateFind
method using the
ROM_SoupFinder
proto. This code assumes that
soup entries have a
timeStamp
slot:
MyApplicationBase.DateFind :=
func(findTime, findType, results, scope, statusView)
begin
local myCursor ;
local querySpecFrame;
local querySpec;
local ourFinder;
local mySoup;
constant kOneDay := 60*24;
// report status to the user
if statusView then
statusView:SetMessage("Searching in " &
GetAppName(kAppSymbol) & $\u2026);
// Get the soup
mySoup:= RegUnionSoup(kAppSymbol, kSoupDef);

C H A P T E R 1 6
Find
Using the Find Service
16-19
querySpecFrame :=
{
dateBefore
:
{
indexPath : 'timeStamp,
endKey: findTime,
},
dateAfter
:
{
indexPath : 'timeStamp,
beginKey: findTime,
},
dateOn
:
{
indexPath : 'timeStamp,
beginKey: kOneDay *
(findTime div kOneDay) ,
endKey: kOneDay + kOneDay *
(findTime div kOneDay) ,
}
};
local querySpec := querySpecFrame.(findType);
// Get the cursor.
myCursor := mySoup:Query(querySpec);
// Set up finder frame and add it to the results
// array.
if myCursor:Entry() then
begin
ourFinder := {
_proto: ROM_SoupFinder,
owner: self,
title: "My Application",
findType: findType,
findWords: [DateNTime(findTime)],
cursor: myCursor
};
AddArraySlot(results, ourFinder);
end;
end;
Adding Application Data Sets to Selected Finds
16
You can allow users to choose data sets in an application to search by adding the
AppFindTargets
method and either or both of the
FindTargeted
or
DateFindTargeted
methods. This functionality is useful when you want to
C H A P T E R 1 6
Find
16-20
Using the Find Service
limit a Find operation to certain data sets of an application. For example, a personal
finance program may have a check ledger, an account list, and a credit card charges
list. Another example is an online sales catalog program that could allow users to
separately search different catalogs. Even though a single application is receiving
the
Find
message, a Selected find operation from the Find slip allows the user to
designate any or all of the associated data sets for the Find operation.
To enable multiple data sets in a find operation, first add the method
AppFindTargets
to your application's base view. This method must return an
array of frames that specify the data sets for the application. These data set frames
consist of a
name
and
target
pair of slots for each data set, in the following form:
[{name: "
userVisibleText
", target:
thisDataForYourUse
}, {...}]
The
name
slot of the data set frame holds the string to be displayed in the picker
which displays when the Find slip's Selected button is tapped. The
target
slot, of
the data set frame, can be set to anything; it is passed to your
FindTargeted
(or
DateFindTargeted
) method. There may be any number of these data set frames
included.
An example
AppFindTargets
method may be defined as follows:
MyApplicationBase.AppFindTargets: func()
begin
[{name:"Check Book", target:'check},
{name:"Accounts", target: 'accounts},
{name "Credit Cards", target:'credit}];
end;
You must then add the search methods to your finder frame. These methods
leverage from the built-in
Find
and
DateFind
methods, adding the data set you
refer to in the
target
slot as an additional parameter. You define a
FindTargeted
method as shown in the following example:
MyApplicationBase.FindTargeted:
func (what,sysResultArray,scope, statusView,target)
// N.B. Scope for Selected find is always 'globalFind
begin
local mySoup;
// Assume the target parameter is the name of the
// soup to search... (We provided this value in
// base.AppFindTargets.)
// Must include the following line... See "Using the
// StandardFind Method."
local temp := GetUnionSoupAlways(target)
:StandardFind( what, target, sysResultArray,
statusView, 'text);
end;

C H A P T E R 1 6
Find
Using the Find Service
16-21
Note
Applications implementing these methods must also implement
the usual
Find
and
DateFind
methods since a find operation
may be dispatched as other than a Selected find.
Returning Search Results
16
After constructing the finder frame, your search method needs to append it to the
system-supplied
results
array. Each element in this array is a finder frame. In
the case of a finder based on the
ROM_SoupFinder
, the array the frame has a
cursor for obtaining the items found in the search. In the case of a finder based on
the
ROM_CompatibleFinder
proto, your finder frame contains an array of the
found items themselves. You need to use the global function
AddArraySlot
to
append your finder frame to the
results
array.
The following example shows a line of code that would be placed at the end of
your application's search method to store the results of the search. In this code
fragment, the
results
parameter is the system-supplied array passed to the
Find
method, and the
myFinder
parameter is the finder frame resulting from the
search. The following call to
AddArraySlot
places the finder frame,
myFinder
,
at the end of the
results
array:
AddArraySlot(results, myFinder);
Note that the system's
results
array is cleared when the Find slip closes.
Implementing Find Overview Support
16
The messages described in this section are sent to your application when the user
taps buttons in the Find overview. These include:
the
FindSoupExcerpt
message
the
ShowFoundItem
message
If your finder frame is based on
ROM_CompatibleFinder
, you do not need to
write a
FindSoupExcerpt
method, but you must also write a
ShowFakeEntry
method to call your
ShowFoundItem
method.
The FindSoupExcerpt Method
16
If you use the
ROM_SoupFinder
proto to construct a finder frame, your
application must supply a
FindSoupExcerpt
method. This methods must extract
the name of a found item when it is given the soup entry and the finder frame, and
return it to the system as a string to display in the Find overview.

C H A P T E R 1 6
Find
16-22
Using the Find Service
Your
FindSoupExcerpt
method may also extract extra information if the finder
frame has been set up to hold additional data. For example, if the date associated
with each found item was saved, you could use this information to build more
descriptive titles for overview items.
The following example shows the implementation of a simple
FindSoupExcerpt
method:
myApplication.FindSoupExcerpt:=
func(entry, myFinder)
begin
//We simply return the string in our entry's name slot
entry.name;
end
For a complete description of the
FindSoupExcerpt
method, see
"FindSoupExcerpt" (page 13-19) in Newton Programmer's Reference.
If you are using the
ROM_CompatibleFinder
proto, this finder must contain the
strings that a
ROM_SoupFinder
's
FindSoupExcerpt
method would return. For
more information see the description of the
items
array in
"ROM_CompatibleFinder" (page 13-7) in Newton Programmer's Reference.
The ShowFoundItem Method
16
This method locates the specified item in your application's data and displays it,
performing any scrolling or highlighting that is appropriate. A typical
ShowFoundItem
method may need to
open a view appropriate for displaying the target
set the cursor or the
target
slot to reference the target
scroll the contents of the display view to make the target visible
highlight the target in the display view
The implementation of a
ShowFoundItem
method depends on which finder proto
you use. This section describes an example
ShowFoundItem
method suitable for
use with the
ROM_SoupFinder
proto.
If you've based your finder frame on the
ROM_SoupFinder
proto, the
ShowFoundItem
method is passed two arguments: the soup entry that
the user tapped in the Find overview, and the finder frame your application
added to the
results
array of finder frames.
The system expects your application's
ShowFoundItem
method to look like the
following example:
ShowFoundItem: func(myEntry, myFinder) begin . . . end

C H A P T E R 1 6
Find
Using the Find Service
16-23
In the body of this method, you need to do whatever is necessary to display the
soup entry
myEntry
. Typically, you first send a
Close
message to the Overview
and then open the view that displays the entry. The following code fragment shows
the implementation of a typical
ShowFoundItem
method.
// For use with ROM_SoupFinder proto
myApplication.ShowFoundItem:=
func(entry, myFinder)
begin // close my overview if it's open
if currentView = myOverview then begin
myOverView:Close();
myDisplayView:Open();
// open view that displays the entry
end;
// scroll, highlight, etc. as necessary
// to display the entry
myDisplayView:DisplayEntry(entry, cursor);
end
Your application is always open when the
ShowFoundItem
message is sent to it.
For example, this message is sent when the user scrolls between found items from
within the Find slip. The system also invokes this method when the user taps an
item in the Find overview. In this case, the system opens your application, if
necessary, before sending the
ShowFoundItem
message to it.
Note that if no items are found this message is never sent.
Using ShowFoundItem with ROM_CompatibleFinder
16
If you are using a finder based on
ROM_CompatibleFinder
, you still need to
implement a
ShowFoundItem
in your application's base view. Your finder also
needs to override the
ShowFakeEntry
method. Your
ShowFakeEntry
method
needs to call your
ShowFoundItem
method, making sure that your application is
open first. Your
ShowFoundItem
method should accept an element of the finder's
items
array as its first parameter, instead of a soup entry. It should perform the
same actions as a
ShowFoundItem
method that expects a soup entry, as described
in "The ShowFoundItem Method" (page 16-22).
The following example demonstrates a typical
ShowFakeEntry
method:
myFinder :=
{
_proto : ROM_CompatibleFinder,
ShowFakeEntry : func (index)
begin
local myApp;
if myApp := GetRoot.(kAppSymbol) then

C H A P T E R 1 6
Find
16-24
Using the Find Service
begin
myApp:Open();
myApp:ShowFoundItem (items[index], self);
end;
end,
....
}
Replacing the Built-in Find Slip
16
Applications can replace the system-supplied Find slip with a customized version,
which is called when the application is frontmost. To implement a custom Find slip
that displays in your application, include a method named
CustomFind
in the
application's base view. This
CustomFind
method must open the Find slip you
constructed and do anything else that's appropriate, including displaying found items.
Reporting Progress to the User
16
It is strongly recommended that your status messages be consistent with those that
the built-in Newton applications display while a Find operation is in progress; for
example, you can use a message such as "Searching in appName."
Your search method is passed a statusView parameter which is the view the system
is using to report progress. You can display a string in this view, by calling its
SetMessage
method. Figure 16-10 depicts a typical status message from the Find
service.
Figure 16-10
Typical status message
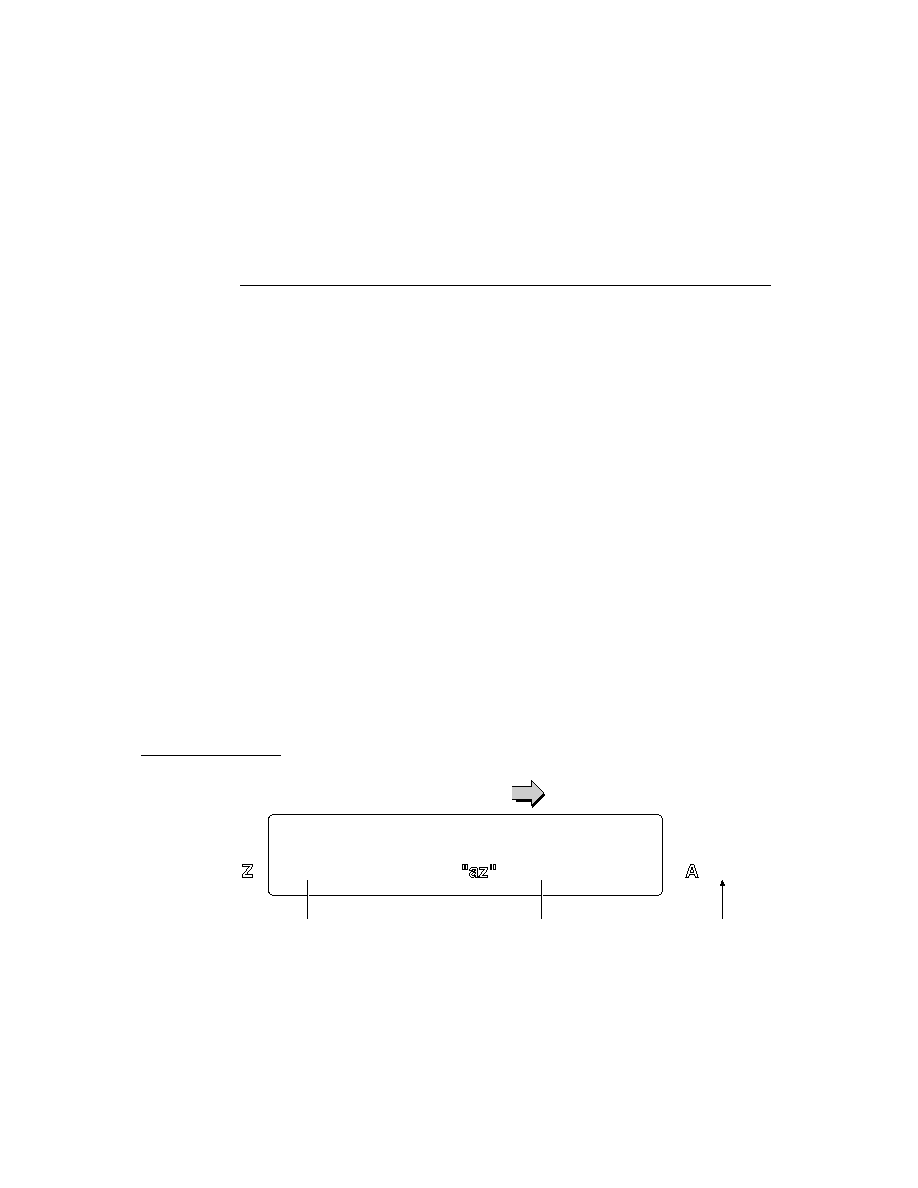
C H A P T E R 1 6
Find
Using the Find Service
16-25
The following code fragment shows how to use the
statusView
parameter to
display a progress message to the user:
MyAppplicationBase.Find:=
func(what, results, scope, statusView)
begin
if statusView then
statusView:SetMessage("Searching in" &
GetAppName(kAppSymbol)&
$/u2026);
...
end;
There are several ways to obtain the application name string that replaces the
appName
variable; they are listed here in order of recommended use:
You can retrieve this string from the
appName
slot in your application's base view.
You can retrieve this string from the
title
slot in your finder frame.
You can retrieve this string by calling
GetAppName(kAppSymbol);
Registering for Finds
16
Applications registered with the Find service participate in Global finds; they also
participate in selective finds when specified by the user.
You do not need to register with the Find service to support Local finds. Global
and Local find support use the same mechanism, which relies on the
Find
and
ShowFoundItem
methods that your application supplies. A Global find is simply
a series of Local finds initiated by the system in applications that have registered
for participation in Global finds.
Use the
RegFindApps
function to register your application with the Find service
and its counterpart, the
UnRegFindApps
function, to reverse the effect. You
should call these functions from your application part's
InstallScript
and
RemoveScript
functions.

C H A P T E R 1 6
Find
16-26
Summary
Summary
16
Finder Protos
16
mySoupFinder:= {
// Use to find soup entries.
_proto: ROM_SoupFinder,
owner:self, // View that gets ShowFoundItem message
// usually your app's base view
title: "My Application",// Displayed in Find overview
// usually inherited from owner
cursor:
myCursor
,// Returned by search method's query
findType:'text// Must use this value for text search
findWords:[
search strings
] // Array of words to match
selected: [], // Internal array of selected items
Count: func(),//Returns # found items; don't override
Delete: func(), // Deletes all selected items
FileAndMove: func
(
labelsChanged
,
newLabel
,
storeChanged
,
newStore
),
// Files and/or moves selected items
ForEachSelected: func(
callbackFunction
), // Calls callback
// func for each selected found item; dont override
GetTarget: func(), //Returns target frame; for routing
IsSelected: func(
item
), // Returns true if item
// selected; don't override.
Reset: func(), // Resets cursor; don't override.
ReSync: func(), // Resets soupFinder; do not override.
SelectItem: func(
item
), // Marks item as selected
ShowFoundItem:func(
item, finder
),
ShowEntry: func(
entry
), // Displays entry;
// don't override
ShowOrdinalItem: func(
ordinal
), //Shows found item
// specified by integer
ZeroOneOrMore: func(), // Returns number of items;
// don't override
}

C H A P T E R 1 6
Find
Summary
16-27
myCompatibleFinder:= {// Use to find data stored in
// non-soup data structures.
//Override most to fit your data.
_proto: ROM_CompatibleFinder,
owner:self, // Required. View that gets ShowFoundItem
// message;usually your app's base view.
title: "My Application",// Displayed in Find overview;
// usually inherited from owner.
findType:'text// Can also be 'dateBefore,
//'dateOn, or 'dateAfter.
findWords:[
textOrDate]
// Text or date to find.
items:[// Array of the items found by your search.
{_proto: myFoundItem, //Optional; but better
//to reference data as it
//gets altered destructively.
title: "My Application",//String displayed in
//Find overview.
},
{ /* and other such frames... */ },
]
selected: [], // Internal array of selected items.
ConvertToSoupEntry: func(
item
),//Return a soup entry
//corresponding to data item.
Count: func(),//Returns number of found items;
// don't override.
Delete: func(), // Deletes all selected items.
FileAndMove: func(
labelsChanged
,
newLabel
,
storeChanged
,
newStore
),
// Files and/or moves selected items
ForEachSelected: (
callbackFunction
), // Calls callback
// function for each selected
// found item; don't override.
GetTarget: func(), //Returns target frame; for routing
IsSelected: func(
item
), // Returns true if item is
// selected; don't override.
ReSync: func(), // Resets finder to its initial
// state; do not override.
SelectItem: func(
item
), // Marks item as selected
ShowFakeEntry: func(
index
), // Displays the index(th)
// number found item. Replaces
// ShowFoundItem in compatabile finder.
}

C H A P T E R 1 6
Find
16-28
Summary
Functions and Methods
16
RegFindApps(
appSymbol
)
//registers app. for global &
//selected finds
UnRegFindApps(
appSymbol
) //unregs. app for non-local finds
statusView
:SetMessage(
msg
)//sets string in progress view
view
:StandardFind (
what
,
soupName
,
results
,
statusView
,
indexPath
)
//searches soups
Application-Defined Methods
16
appBase
:Find (
what
,
results
,
scope
,
statusView
) //text find
appBase
:FindTargeted (
what
,
results
,
scope
,
statusView
,
target
)
// targeted text find
appBase
:DateFind (
findTime
,
compareHow
,
results
,
scope
,
statusView
)
// date find
appBase
:DateFindTargeted (
what
,
results
,
scope
,
statusView
,
target
)
// targeted date find
appBase
:AppFindTargets ()//sets targets for targeted finds
targetView
:FindSoupExcerpt(
entry
,
resultFrame
)// returns string
// to display in find overview
targetView
:ShowFoundItem (
foundItem
,
myFinder
) //show found
//item
appBase
:CustomFind() //Does all find work

About Additional System Services
17-1
C H A P T E R 1 7
Additional System Services
17
Figure 17-0
Table 17-0
This chapter discusses system services not covered elsewhere in this book. The
topics covered in this chapter are
Providing the capability to undo and redo user actions.
Using idler objects to perform periodic operations.
Using the notification service to respond to soup, folder, or user configuration
change messages.
Using the alerts and alarms service to display user messages and execute
callback functions at specified times.
Using progress indicators to provide user feedback.
Using the power registry to execute callback functions when the Newton is
powered on or off.
Using a custom help book to provide online help to the user.
If you are developing an application that utilizes any of these objects or services,
you should familiarize yourself with the material discussed in this chapter.
About Additional System Services
17
This section briefly describes the undo, idler objects, alerts and alarms, change
notification, progress reporting, and power registry services. These are discussed in
greater detail later in this chapter.
Undo
17
The Undo service is the mechanism the system provides for undoing and redoing
the user's most recent action. From within each function or method that must
support Undo, your application registers a function object that can reverse the
actions of that function or method. This function object is called an undo action,
and is called when the user taps the Undo button. The undo action can then register

C H A P T E R 1 7
Additional System Services
17-2
About Additional System Services
a function object to redo the original function or method. Thus tapping the Undo
button twice completes an undo/redo cycle.
Undo Compatibility
17
The user interface standards for version 2.0 of the Newton operating system call for
the user's second tap on the Undo button to provide a Redo rather than a second
level of Undo. Your undo action must create an undo action for itself to implement
this interface. For more information, see the section "Using Undo Actions"
beginning on page 17-8.
The global function
AddUndoAction
is obsolete, replaced by the view method of
the same name that provides similar functionality. Existing code that uses the
global function can be converted by prefixing a colon to the message selector.
For example:
AddUndoAction(....)
becomes
:AddUndoAction(...)
Idler Objects
17
An idler object sends a message to your view periodically to execute the
ViewIdleScript
method you provide for that view. This allows you to perform
periodic tasks from any view for which you have installed an idler object.
Note, however, that the time the
ViewIdleScript
message is sent is not
guaranteed to be the exact interval you specify. This is because the idler
may be delayed if a method is executing when the interval expires. The
ViewIdleScript
message cannot be sent until an executing method returns.
Change Notifications
17
The system provides notification services send your application a message when a
soup, folder, or user configuration variable has been changed. These are described
in the following chapters:
The soup change notification service is discussed in Chapter 11, "Data Storage
and Retrieval."
The folder change notification service is discussed in Chapter 15, "Filing."
The user configuration change notification service is discussed in Chapter 19,
"Built-in Applications and System Data."

C H A P T E R 1 7
Additional System Services
About Additional System Services
17-3
Online Help
17
Your application can provide a
protoInfoButton
view that displays customized
online help to the user (or a
newtInfoButton
if working in the NewtApp
framework). Help can also be displayed from the Intelligent Assistant. For a
complete description of how to create a help book and integrate it with your
application, see version 2.0 of the Book Maker User's Guide. For a description of
the
protoInfoButton
, see Chapter 7, "Controls and Other Protos." For a
description of the
newtInfoButton
proto, see Chapter 4, "NewtApp
Applications." For information about displaying online help from the Assistant, see
Chapter 18, "Intelligent Assistant."
Alerts and Alarms
17
The Alert service enables you to display messages to the user. The Alarms service
in addition to displaying a user alert, provides applications with a way to perform
actions at specified times.
User Alerts
17
The view method
Notify
displays a user alert slip similar to the one shown in
Figure 17-1. The system saves the last four alert messages. The user can scroll
through them by tapping the universal scroll arrows while the alert view is open.
Also, the user can tap the circled "i" to display the date and time of the message.
Figure 17-1
User alert
User Alarms
17
The Alarms service can be used to display an alert slip and execute a callback
function at a specified time. If the Newton is asleep at the time the alarm is to
execute, the alarm powers up the Newton and executes the callback function. The
user can temporarily dismiss the alert for a specified time period by tapping the
Snooze button included in the alarm slip, as shown in Figure 17-2.

C H A P T E R 1 7
Additional System Services
17-4
About Additional System Services
Figure 17-2
Alarm slip with Snooze button
Periodic Alarms
17
The periodic alarm service sends messages to your application at a specified time.
This can be used, for example, by an email client application to periodically log on
to a server to check for incoming messages.
The interface to the periodic alarm service is the system-supplied
protoPeriodicAlarmEditor
, shown in Figure 17-3. You can create views
from this proto to allow the user of your application to schedule periodic alarms.
When the alarm times scheduled in this view come up, a message is sent to your
application.
Figure 17-3
A view based on
protoPeriodicAlarmEditor

C H A P T E R 1 7
Additional System Services
About Additional System Services
17-5
Alarms Compatibility
17
All alarm information described here is new to the Newton 2.0 system. Alarm
functionality for 1.x devices is provided by the NTK platform file. See the platform
file release notes for the 1.x platform for important compatibility information.
Progress Indicators
17
This section describes the automatic busy cursor, the notification icon, and the status
slip, which you can use to provide feedback to the user during lengthy operations.
Automatic Busy Cursor
17
When the system is temporarily unavailable for user input, it displays the busy
cursor shown in Figure 17-4. Your application need not do anything extra to
support the busy cursor; the system displays it automatically. There is a function,
ShowBusyBox
, however, which shows or hides the busy cursor.
Figure 17-4
Busy cursor
Notify Icon
17
The notify icon is a small blinking star you can display at the top of the screen to
remind the user that an operation is in progress without using the amount of screen
space a progress slip requires. The notify icon allows you to register callback
functions that are accessible to the user from a pop-up menu that the notify icon
displays. For example, you would normally register a function that allows the user
to cancel the operation in progress. Figure 17-5 illustrates the notify icon and a
menu typical of those it can display.
Figure 17-5
Notify icon
Notify icon
Notify icon's
popup menu

C H A P T E R 1 7
Additional System Services
17-6
About Additional System Services
Status Slips With Progress Indicators
17
For complex operations requiring more user feedback than the automatic busy
cursor offers, you can provide a status slip. You can use the
DoProgress
function
to call the function that implements that operation. The
DoProgress
function
displays a status slip with graphical progress indicators and informative messages.
Figure 17-6 depicts a typical progress slip displayed by the
DoProgress
global function.
Figure 17-6
Progress slip with barber pole gauge
The status slip that this function displays is based on the
protoStatusTemplate
system prototype. You can also use this system prototype to provide your own
status slips.
Status slips based on the
protoStatusTemplate
may contain any of the
following optional items:
Title text; for example, the name of the application or the operation in progress.
Message text; for example, "Searching in ApplicationName...", "Connecting to
modem..." and so on.
Either a bar gauge, barber pole, or progress indicator that displays relative
completeness of the current operation as a shaded portion of the entire gauge. A
bar gauge is a horizontal rectangle which is filled from left to right. A barber
pole gauge animates a set of diagonal stripes while the operation progresses but
does not indicate how much of the operation has been completed. A progress
indicator looks like a piece of paper which is progressively filled in.
An icon; visually identifying the application or present operation. The Find slip
in Figure 17-6 on (page 17-6) uses a custom icon.
A button; this is usually used to allow the user to cancel the present operation.

C H A P T E R 1 7
Additional System Services
Using Additional System Services
17-7
Power Registry
17
The Power Registry implements a cooperative model for powering the Newton on
and off. When power is turned on or off, this service
notifies registered applications of the impending change in power status
allows applications to temporarily halt the shutdown process
executes registered callback functions
The Power Registry model is based on the registration of callback functions to
execute when the Newton is powered on or off. You can use the
RegPowerOn
function to register a callback function for execution when the Newton is powered
on. The
UnRegPowerOn
function reverses the action of the
RegPowerOn
function; that is, it removes the specified function from the registry of functions
called when the Newton is powered on.
Power-on functions can also be tied to the login screen. The login screen appears
when the user powers on a Newton device. Password-protected Newton devices
display the login screen until the password is correctly entered. If your power-on
function has a visible component, you should tie this function into the login screen,
instead of as a regular power-on function. The
RegLogin
and
UnRegLogin
methods are used to register and unregister login functions respectively.
You can use the
RegPowerOff
function to register a callback function for
execution when the Newton is powered off. The
UnRegPowerOff
function
removes the specified function from the registry of functions called when the
Newton is powered off.
Note that "power-off" callback functions can delay an impending shutdown when
necessary. For example, your callback function might delay an impending power-
off operation until it can successfully tear down a communications endpoint.
Power Compatibility Information
17
Applications can now register callback functions to execute when the Newton
powers on or off. All of the functions that provide this service are new.
The
BatteryLevel
function is obsolete. It has been replaced by the
BatteryStatus
function.
Using Additional System Services
17
This section discusses how to use the undo, idler objects, alerts and alarms, change
notification, progress reporting, and power registry services.

C H A P T E R 1 7
Additional System Services
17-8
Using Additional System Services
Using Undo Actions
17
The following code example shows how to provide undo capability in a view.
Imagine you have a view that uses cards. The view has a particular method,
DeleteCard
, that it uses to delete a card. Within the
DeleteCard
method, you
call the
AddUndoAction
method, passing as its arguments the name of the card
deleted and a different method that will add the card (thereby undoing the delete
operation). Your call to view:
AddUndoAction
would look like the one in the
following code fragment:
DeleteCard: func(theCard)
begin
// statements that delete a card
...
// call AddCard as an undo action
:AddUndoAction ('AddCard, [theCard])
end,
You also need to supply the
AddCard
method, which would look similar to the
following example. It too provides an undo action--one that calls the original
action, thereby completing the Undo/Redo cycle.
AddCard: func(theCard)
begin
// statements that add a card
. . .
// call DeleteCard as an undo action
:AddUndoAction ('DeleteCard, [theCard])
end,
The Various Undo Methods
17
The
AddUndoAction
method ties an undo action to a specific view. If that view is
no longer open when the user taps Undo, the action does not take place. Because
an undo action should generally cause a visible change, it is often desirable to tie
the undo actions to views.
When it is not desirable or feasible to tie an undo action to an open view, you can
use the
AddUndoCall
or
AddUndoSend
functions to execute the undo action
unconditionally. For example, view methods usually use the
AddUndoAction
view method to post their undo action; however, if the view will not be open when
the user taps Undo, you may need to use the
AddUndoCall
or
AddUndoSend
functions to post the undo action. If your action relies on the view being open or
some other condition, it must test that condition explicitly.

C H A P T E R 1 7
Additional System Services
Using Additional System Services
17-9
Avoiding Undo-Related "Bad Package" Errors
17
The
AddUndoAction
method saves the current context (
self
) so that later it can
send the "redo" message (the argument to the methodName parameter of the
AddUndoAction
method) to the appropriate object. As a result, it is possible that
references to your application can stay in the system inside the Undo mechanism's
data structures after the application has been removed. These references can cause
-10401 (bad package) errors when the user taps Undo after ejecting the card on
which the application resides. Using the
EnsureInternal
function on all
parameters passed to the
AddUndoAction
function does not remedy this problem.
You can use the
ClearUndoStacks
function to clean up dangling references
to
self
that are left behind by the
AddUndoAction
method. The
ClearUndoStacks
function is generally called from the
ViewQuitScript
method of the application base view. You can call this function elsewhere as
necessary but you must do so very cautiously to avoid damaging other
applications' undo actions.
Note
The
ClearUndoStacks
function deletes all pending undo
actions--including those posted by other applications. Use this
function cautiously.
Using Idler Objects
17
This section describes how to install an idler object for a specified view. An idler
object sends
ViewIdleScript
messages to the view periodically.
Note that an idler object cannot guarantee its
ViewIdleScript
message to be
sent at precisely the time you specify. The
ViewIdleScript
message cannot be
sent until an executing method returns; thus the idler's message may be delayed if a
method is executing when the interval expires.
Using an idler object is straightforward; you need to
Send the
SetUpIdle
message to the view that is to receive the
ViewIdleScript
message. This message takes a single parameter: the
number of milliseconds to wait before sending the first
ViewIdleScript
message.
Implement the
ViewIdleScript
method that is to be executed. This method
should return the number of milliseconds before the next
ViewIdleScript
message is sent.
Call
SetUpIdle
again, this time passing in the value 0, or return
nil
from
your
ViewIdleScript
. This removes the idler object.
The idler object is removed in any case when the view is closed.
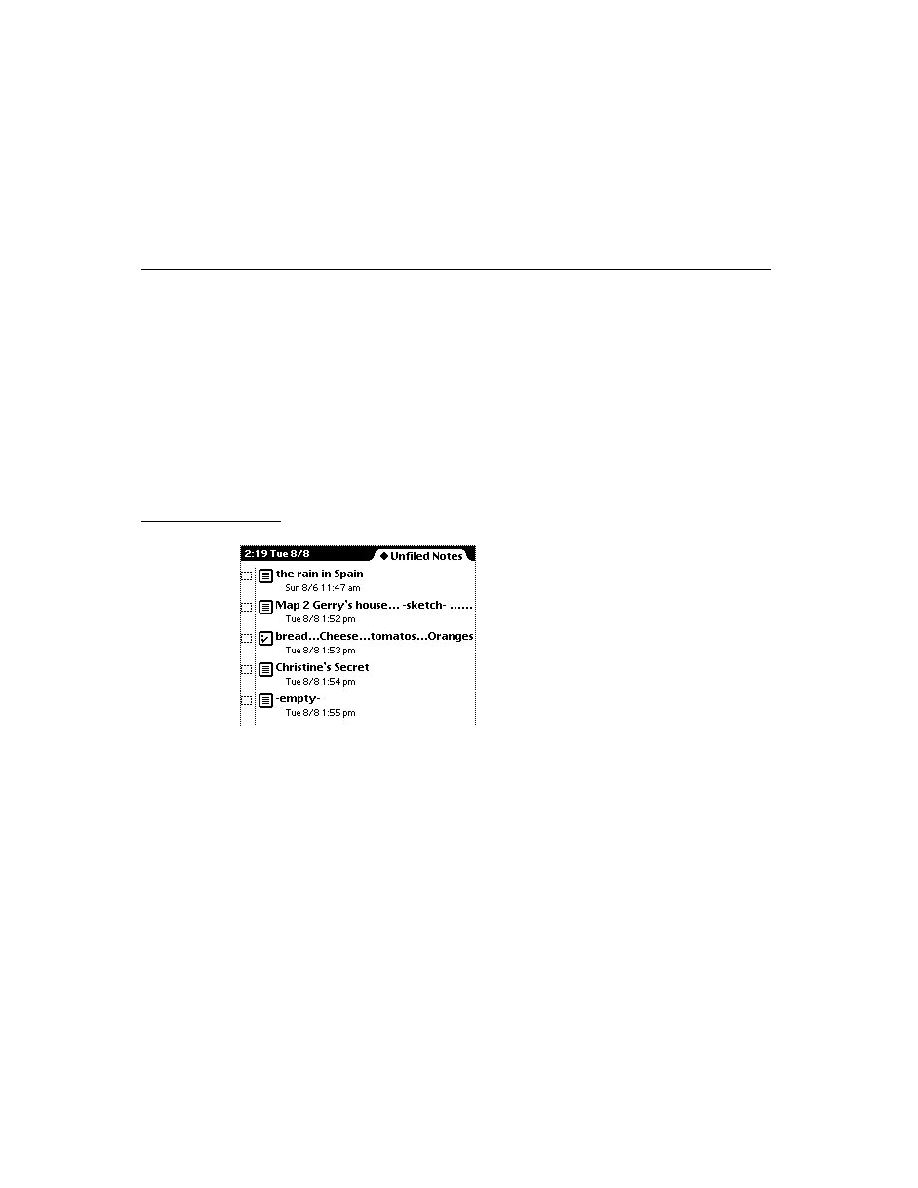
C H A P T E R 1 7
Additional System Services
17-10
Using Additional System Services
Note
Do not install idler objects having idle time intervals of
less than 100 milliseconds.
The following example prints a random five-letter word in the Inspector until the
view is closed:
myButton := {
_proto : protoTextButton,
ButtonClickScript : func() :SetUpIdle(100);//start the
//cycle
text : "Print silly words",
ViewIdleScript: func()
begin
print( GetRandomWord (5,5) );
//this function's return value
//determines when it is called next
2 * 1000; //come back in 2 secs.
end;
...
}
Using Change Notification
17
For a complete description of these services, see the appropriate chapter:
For information on soup change notification, see Chapter 11, "Data Storage
and Retrieval."
For information on folder change notification, see Chapter 15, "Filing."
For information on user configuration change notification, see Chapter 19,
"Built-in Applications and System Data."
Using Online Help
17
You create online help by creating a help book using Newton Book Maker. For
information on how to do this see version 2.0 of the Book Maker User's Guide. The
help book can then be displayed from the information ("i") button. This button is
based on
protoInfoButton
, or
newtInfoButton
if you are working within
the NewtApp framework. For a description of the
protoInfoButton
proto, see
Chapter 7, "Controls and Other Protos." For a description of the
newtInfoButton
proto, see Chapter 4, "NewtApp Applications."
Help can also be displayed from the Intelligent Assistant. For information about
this, see Chapter 18, "Intelligent Assistant."

C H A P T E R 1 7
Additional System Services
Using Additional System Services
17-11
Using Alerts and Alarms
17
This section describes the use of functions and methods that provide alerts and
alarms, and the
protoPeriodicAlarmEditor
.
Using the Notify Method to Display User Alerts
17
The
Notify
method offers a simple way to display a message to the user. This
method takes three arguments. The first specifies which type of alert is displayed;
some alerts beep, some only log their notice instead of displaying it, and so on. The
other two arguments are strings shown to the user in the alert.
The following code fragment creates the slip shown in Figure 17-7:
:Notify(kNotifyAlert,"LlamaCalc",
"You've run out of Llamas!");
Figure 17-7
A user alert
Creating Alarms
17
The
AddAlarm
and
AddAlarmInSeconds
functions are used to schedule a new
alarm. You can also use these functions to substitute a new alarm for one that is
currently scheduled but has not yet executed.
The
AddAlarm
function creates each new alarm as a soup entry (thus, alarms
persist across restarts) and returns an alarm key that uniquely identifies the new
alarm. This alarm key is a string you provide as one of the arguments to the
function that creates the alarm; it includes your developer signature as a suffix. For
example, a typical alarm key might be the string
"lunch:myApp:mySig"
or
something similar. Note that only the first 24 characters of an alarm key are
significant.
IMPORTANT
Do not manipulate the alarm soup or its entries directly. Use only
the interface described in this chapter to manipulate alarms.

C H A P T E R 1 7
Additional System Services
17-12
Using Additional System Services
The following code example adds an alarm set to execute in five minutes:
AddAlarm("Alarm1:MyApp:MySig", Time()+5,
["Title String","Message String"], nil, nil);
The first argument is the alarm key (which this function call returns). The second is
when the alarm is to execute. The third is an array of strings to use as arguments to
the
AlarmUser
function that displays the alarm slip. If a three-element array is
passed in as
AddAlarm
's third argument, these array elements are used as
arguments to the
Notify
function that is used to display the slip. The fourth and
fifth arguments are a callback function, and its arguments, which is executed when
the alarm executes.
If an installed alarm has the key specified in the call to
AddAlarm
, the installed
alarm is removed, and the new alarm is installed.
After an alarm executes, it is made available for garbage collection; thus, alarms
that have already executed may no longer exist. For this reason, it is unwise to store
references to alarms or try to manipulate them by any means other than the
interface the system provides.
Obtaining Information about Alarms
17
The
GetAlarm
function returns a frame with information about an alarm. The
alarm is identified by its key. The frame returned has the following slots:
key
The alarm key.
time
The time at which the alarm is to execute.
notifyArgs
The array of arguments to pass to
Notify
or
AlarmUser
.
callBackFunc
The function object to execute, or
nil
.
callBackParams
Array of arguments to
callBackFunc
, or
nil
.
This frame may contain other slots; do not rely on the values (or future existence)
of these slots. You must also not modify this frame in any way.
Retrieving Alarm Keys
17
The
GetAppAlarmKeys
function returns an array containing the alarm keys of all
alarms installed by an application. These keys can be used to pass to the
AddAlarm
,
GetAlarm
, and
RemoveAlarm
functions.
This function relies on all of your application's alarms ending with the same suffix.
For this reason it is important for all alarms created by a particular application to
use alarm keys ending with the same suffix.

C H A P T E R 1 7
Additional System Services
Using Additional System Services
17-13
The following code example removes all alarms an application has scheduled for
the next five minutes:
foreach alarmKey in GetAppAlarmKeys(":MyApp:MySig") do
if not (GetAlarm(alarmKey).time > Time() + 5) then
RemoveAlarm (alarmKey);
Removing Installed Alarms
17
The functions
RemoveAlarm
and
RemoveAppAlarms
remove a particular alarm
and all of an application's alarms, respectively. The
RemoveAlarm
function takes
the alarm key of the alarm to remove as its single argument. Use of this function is
demonstrated in the code example in "Retrieving Alarm Keys" beginning on
page 17-12.
The
RemoveAppAlarms
function takes an alarm key suffix as an argument and
removes all alarms whose key ends with this suffix. For this reason it is important
for all alarms created by a particular application to use alarm keys ending with the
same suffix. If your application's alarm are not meaningful if your application is
not installed, you should call this function in your application's
RemoveScript
function.
Common Problems With Alarms
17
This section describes common problems encountered with use of the alarm service.
Problems With Alarm Callback Functions
17
Alarms are kept in a soup; thus, they persist across restarts and installation or
removal of packages. This means that the arguments you pass to your callback
function are also stored in a soup; hence, these arguments are also copied deeply.
(See the description of the
DeepClone
function in Newton Programmer's
Reference.) Therefore, you must avoid indirectly referencing large objects lest
they unnecessarily inflate the size of your entries in the alarm soup.
A classic example of accidentally referencing a large object is in dynamically
creating the function object executed with the alarm. Function objects may contain
references to the lexical environment and the current receiver (
self
) at the time
they are created. For example, function objects created from a view method reference
the root view through their parent chain. If you pass such a function object to the
AddAlarm
function, the system attempts to copy the entire root view into the
alarm soup. One way to minimize the size of your callback function object is to
pass as your callback a one-line function that invokes a method in your application
package to actually do the work.

C H A P T E R 1 7
Additional System Services
17-14
Using Additional System Services
In any case, debugging your callback function is difficult because any exceptions it
raises are caught and ignored by the alarm mechanism. Thus, you need to debug
your callback functions thoroughly before passing them to the
AddAlarm
function.
Since your application may not be open, or even installed when its alarm executes,
your code needs to handle these eventualities appropriately. The following code
fragment shows how to test for the presence of an application before sending a
message to it:
if GetRoot().(kAppSymbol) then
GetRoot().(kAppSymbol):DoSomething()
else
GetRoot():Notify(...)
Alarms and Sound
17
The Alarm panel in user preferences controls the volume of alarm sounds. Do not
change preferences without the user's knowledge.
Courteous Use of Alarms
17
Each alarm you schedule uses space in the internal store. You need to exercise
reasonable judgment when creating multiple alarms. Your application needs to
schedule and use alarms in a way that does not hamper the activities of other
applications residing on the user's Newton. While limiting your application to a
single alarm might be too restrictive, scheduling a daily wake-up alarm for the next
year by creating 365 different alarms would use up a lot of the internal store.
Similarly, your alarm actions should be brief, so they don't interfere with other
alarms. If you need to do something time consuming or repetitive, use a deferred
action or set up a
ViewIdleScript
.
Using the Periodic Alarm Editor
17
There is no way to set a periodic alarm programmatically. You can, however, create
a view from
protoPeriodicAlarmEditor
, and allow your application's users
to set periodic alarms. To attain the functionality of periodic alarms without using
the
protoPeriodicAlarmEditor
, you would need to programmatically add
new alarms from the callback functions executed when your alarms go off.
There are three steps required to support the alarm editor:
1. Add a method in your application's base view called
AlarmsEnabled
. This
method takes no arguments, and should return a Boolean indicating whether
your application should be sent the
PeriodicAlarm
message (see next item).
If the alarms are not a feature that can be disabled, you can simply define your
AlarmsEnabled
method as:
func() true;

C H A P T E R 1 7
Additional System Services
Using Additional System Services
17-15
2. Define another method in your application's base view named
PeriodicAlarm
.
This method is called whenever the alarm "goes off." This method is passed a
single parameter, alarm, that contains information about the present alarm. For
information on the alarm parameter, see
PeriodicAlarm
in Newton
Programmer's Reference.
3. Create a view that is based on
protoPeriodicAlarmEditor
. You need to
set three slots in this view:
A
title
slot set to a string that is displayed at the top of the view.
An
ownerSymbol
slot set to your application symbol. The system sends
PeriodicAlarm
messages are sent to
GetRoot().(ownerSymbol)
.
An
ownerApp
slot set to a string that names of your application.
IMPORTANT
Do not add child views to a view that is based on
protoPeriodicAlarmEditor
.
Using Progress Indicators
17
This section describes how to use the automatic busy cursor, the notify icon, the
DoProgress
function, and
protoStatusTemplate
views.
Using the Automatic Busy Cursor
17
Your application need not do anything extra to support the busy cursor; it
is displayed automatically when the system is temporarily unavailable for user
input. If you want the busy cursor to appear, or to suppress it's appearance, you
may call the
ShowBusyBox
function. This global function takes one parameter,
showIt
, which is a Boolean that determines whether the busy cursor is shown.
Using the Notify Icon
17
To report progress to the user, most applications display a status slip based on
protoStatusTemplate
. Normally, this slip includes a close box you can use to
hide the status slip and add an action to the notify icon. The action shows the status
slip again.
Note
Status views that use the
DoProgress
function are an exception
to this rule. Do not include a close box in these views.
The notify icon maintains a list of these actions. When the user taps the notify icon,
a pop-up menu of actions appears. Choosing an item from the menu invokes that
action and removes it.

C H A P T E R 1 7
Additional System Services
17-16
Using Additional System Services
To add an action to the notify icon and display it, call the
AddAction
method as
in the following example:
myFunc := func() GetRoot():SysBeep();
theAct := GetRoot().notifyIcon:AddAction("Beep", myFunc,
nil);
You can remove an action by calling the
KillAction
method--for example, if
your task in progress completes while the
protoStatusTemplate
view is
hidden, you should close the status view and remove the action from the notify
icon's menu. You need to save the result the
AddAction
method returns. Pass this
object to the
KillAction
method to remove the action from the notify icon's list
of actions, as in the following example:
GetRoot().notifyIcon:KillAction(theAct);
Using the DoProgress Function
17
To provide user feedback during a lengthy operation, you can use the
DoProgress
function to display a status view and call the function that implements that operation.
The
DoProgress
function is suitable only for tasks that complete synchronously.
To report the progress of asynchronous work, you must display your own
protoStatusTemplate
view and update it yourself, as described in "Using
protoStatusTemplate Views" beginning on page 17-18.
The
DoProgress
function accepts as its arguments a symbol specifying the kind
of progress indicator to display (a thermometer gauge or a barber pole), an options
frame that allows you to customize the progress-reporting view further, and a
function that actually performs the operation on which you are reporting progress.
You must not allow the user to close the progress slip without cancelling the
progress-reporting operation--if the
DoProgress
method sends status messages
to a nonexistent view, the Newton hangs. You must hide the Close button normally
provided by the
DoProgress
method. You can do this by including a
closebox
slot having the value
nil
, in the options frame that you pass to
DoProgress
as
shown in the following code fragment:
local myOpts := { closebox:nil,
icon: kMyIcon,
statusText: kAppName,
gauge: 10,
titleText:"One moment, please..."}
The function you pass to
DoProgress
must accept as its sole argument the view
that displays
SetStatus
strings to the user. For example, to report status while

C H A P T E R 1 7
Additional System Services
Using Additional System Services
17-17
performing the
myFunc
function, pass it as the value of the workFunc parameter to
the
DoProgress
function, as illustrated in the following code fragment:
// options and data are accessible from workFunc because
// the workFunc "closes over" this context
myOpts := { wFnData:"Confabulating",
closebox:nil,
icon: kMyIcon,
statusText: kAppName,
gauge: 10,
titleText:"One moment, please."};
workFunc := func (theContextView)
begin
for x := 1 to 10 do
begin
myOpts.titleText:= :SomeWork(myOpts.wFnData);
myOpts.gauge := x * 10;
try
theContextView:SetStatus('vGauge,myOpts);
// handle any exceptions you anticipate
onexception |evt.ex.foo| do
// handle & possibly rethrow if it's fatal
onexception |evt.ex.bar| do
// handle & possibly rethrow if it's fatal
onexception |evt.ex| do
// either an unexpected exception has been
// thrown or the user has canceled our
// operation. Perform any cleanup
// necessary, and be sure to rethrow..
ReThrow();
end; // for loop
end; // workFunc
progress := DoProgress('vGauge, myOpts, workFunc);
if progress = 'cancelled then
// this is another place to clean up after being
// cancelled
The
workFunc
function's argument,
theContextView
, is the status slip that
contains the gauge. A reference to this view is passed to your work function so that
you can send it
SetStatus
messages. Note that
workFunc
is structured in a way
that permits it to call the progress slip's
SetStatus
method at regular intervals,
passing values used to update the progress slip's gauge and message string.

C H A P T E R 1 7
Additional System Services
17-18
Using Additional System Services
The code above shows the two ways in which your code can respond when the user
cancels the operation. If the user taps the Stop button an exception is thrown by
SetStatus
. You may catch this exception and perform any clean-up necessary.
(In the code above the all-inclusive
|evt.ex| onexception
clause catches this
exception.) You must, however, rethrow this exception so the system can perform
its own cleanup, otherwise the Newton device appears to hang. You must ensure
that any exceptions you do not specifically anticipate are rethrown by your
exception-handling code.
You may also perform any necessary housecleaning after an uncompleted operation
by comparing the result of the
DoProgress
function. If the user tapped the Stop
button,
DoProgress
returns the symbol
'cancelled
.
Using DoProgress or Creating Your Own protoStatusTemplate
17
The
DoProgress
function creates a view based on the
protoStatusTemplate
to report progress to the user. Using this function is the simplest way to create a
protoStatusTemplate
view. However, it is not suitable for all applications.
You should use
DoProgress
if
Your code is structured synchronously; that is,
DoProgress
does not return
until the workFunc function has completed or the user cancels the operation.
The built-in bar gauge or barber pole status slips which
DoProgress
uses are
suitable for your needs.
The action is modal; that is, the user cannot do anything until the action finishes
or is canceled.
If any of these is not true, use
protoStatusTemplate
; that is you should create
your own
protoStatusTemplate
if
Your code is structured asynchronously; that is, it allows user events to be
processed normally.
Your code uses communications; these usually have asynchronous components.
Your code requires a custom status template type; possibly for a transport.
Your actions are not modal; that is, the user could proceed in your application or
other applications while the action is in progress.
Using protoStatusTemplate Views
17
You need to take the following steps to use a
protoStatusTemplate
view to
report progress to the user:
1. Specify the components of the status slip and their initial values. You can use
one of the system-supplied templates or create your own template.

C H A P T E R 1 7
Additional System Services
Using Additional System Services
17-19
2. Open the status slip. There are three parts to this process:
Instantiate your status view by passing its template to the
BuildContext
function.
Initialize the status slip by passing the template's setup frame to the status
slip's
ViewSet
method.
Invoke the status slip's
Open
method to display the slip.
3. Perform the operation on which you are reporting progress, updating the status
slip periodically by invoking the status view's
UpdateIndicator
or
ViewSet
method.
4. Write a
CancelRequest
method which is executed when the user cancels
your operation with a "Cancel" or "Stop" button. If your action cannot be
cancelled, do not provide such a button.
Each of these steps is described in detail in the following sections.
Defining Status View and Component View Templates
17
You can create a status slip view from the system-supplied templates
vStatus
,
vGauge
,
vBarber
,
vConfirm
,
vProgress
, or
vStatusTitle
(shown in
Figure 17-8), or you can create your own template for this view.
Your status view template must have a
_proto
slot that holds the value
protoStatusTemplate
. It may also include
Methods and data that must be available to the status view or its child views.
An optional
initialSetup
slot. If this slot is present, the view system uses its
contents to initialize the status slip automatically when the slip is opened.
A frame describing a custom component template. This is needed only if you do
not wish to use one of the built-in templates. This frame must contain the
following slots:
height
Height of the status slip, (not the component view) expressed
in pixels. Making this value part of the component view
template allows status slips to resize themselves based on the
height specified by their component views.
name
A symbol representing this template to the
ViewSet
method. For example, if the name of your component
template is
'vMyBarber
, this slot should hold the
'vMyBarber
symbol.
kids
Array of frames specifying the view templates used to
instantiate the components of this view. These templates
should be based on one of the protos described in "Status
View Components" (page 14-14) in Newton Programmer's
Reference.

C H A P T E R 1 7
Additional System Services
17-20
Using Additional System Services
Figure 17-8
Built-in status view configurations
If you want to use a system-supplied template, you can simply define your status
template as
myStatusTemplate := {_proto : protoStatusTemplate};
The definition of
myStatusTemplate
above does not include an
initialSetup
slot, so it is necessary to call the
ViewSet
method to initialize
the view when it is instantiated. (This is discussed in "Opening the Status Slip"
beginning on page 17-23.)
The following status template defines a more complicated, self-animating, custom
barber pole gauge. The
myStatusTemplate
template defined in this example
vStatus
vStatusTitle
vConfirm
vProgress
vGauge
vBarber
icon
statusText
icon
titleText
progress
primary
icon
primary
titleText
primary
closeBox
closeBox
closeBox
closeBox
closeBox
closeBox
statusText
icon
secondary
primary
statusText
statusText
icon
titleText
gauge
primary
statusText
icon
titleText
barber
primary
statusText
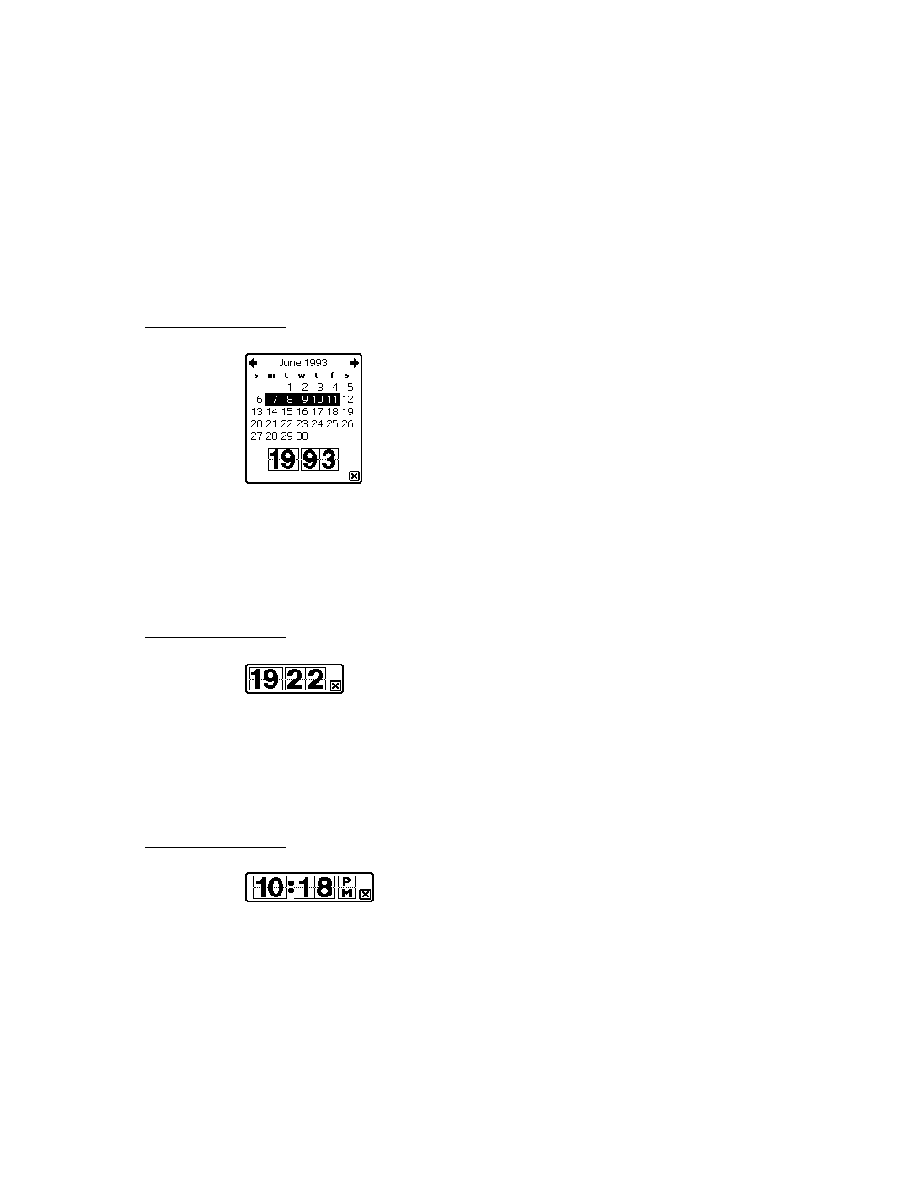
C H A P T E R 1 7
Additional System Services
Using Additional System Services
17-21
includes an
InitialSetup
frame initializes this view automatically before
it opens.
myStatusTemplate := {
_proto: protoStatusTemplate,
// custom self-animating barber pole
vMyBarber:
{
height:105,
name:'vMyBarber,
kids:
[
protoStatusText,
{
_proto: protoStatusBarber,
//we animate ourself in this script
ViewIdleScript: func()
begin
// if hidden, don't bother with updating barber
if Visible(self) then
// animate barber pole
base:UpdateIndicator({name: 'vMyBarber,
values: {barber: true}});
// return number of ticks to wait
// before returning to ViewIdleScript
300;
end,
ViewSetupDoneScript: func()
begin
inherited:?ViewSetupDoneScript();
:SetupIdle(100);// kick off idle script
end,
},
{
_proto: protoStatusButton,
text: "Stop",
// ButtonClickScript: func() ...
// default is statusView:CancelRequest()...
},
//Note that we do not need to include a closebox or an
//icon these are provided by the protoStatusTemplate,
//All views created from protoStatusTemplate have
//these two children.
],
C H A P T E R 1 7
Additional System Services
17-22
Using Additional System Services
initialSetup: // used to initialize view automatically
{
name: 'vMyBarber,
appSymbol: kAppSymbol,
values:
{
icon: kDummyActionIcon,
statusText: "Computing IsHalting...",
closeBox: func()
begin
base:Hide(); //close the status view
//add an action to the Notify Icon, this allows
//the user to reopen the status view, which is
//necessary to allow the user to cancel the
//operation... (we save a reference to the
//action in the app base view to kill later)
GetRoot().(kAppSymbol).theNotifyIconAction :=
GetRoot().notifyIcon:AddAction(
"IsHalting",kNotifyCallbackFunc,nil)
//the notify icon will need this reference to
//the status slip
GetRoot().(kAppSymbol).theStatusSlip := base;
end;
}, //values
}, //initialSetup
} //myStatusTemplate
We defined
kNotifyCallbackFunc
at compile time, so as to avoid creating
run-time functions (closures) as:
DefConst ('kNotifyCallbackFunc,
func()
begin
if not Visible ( GetRoot().(kAppSymbol) ) then
GetRoot().(kAppSymbol):Open();
GetRoot().(kAppSymbol).theStatusView:Show();
//won't need any more
GetRoot().(kAppSymbol).theStatusView := nil;
end);

C H A P T E R 1 7
Additional System Services
Using Additional System Services
17-23
And be sure to include this in your application's
ViewQuitScript
to get rid of
the notify icon's action:
if theNotifyIconAction then
begin
GetRoot().notifyIcon:KillAction(theNotifyIconAction);
theNotifyIconAction := nil;
end;
Opening the Status Slip
17
To instantiate a status slip view from its template, pass the template to the
BuildContext
function, as shown in the following code fragment:
statusView := BuildContext(myStatusTemplate);
You should use only the
BuildContext
function to instantiate this template.
Next, you need to initialize the view. If your status view template provided an
initialSetup
slot containing a setup frame, the system uses the frame in this
slot to perform this initialization automatically. Otherwise, you need to set some
initial values for the status view from within its
ViewSetupDoneScript
method. Pass the
ViewSet
method a setup frame, as described in
ViewSet
in
Newton Programmer's Reference.
Once the view has been initialized, send it the
Open
message to display it, as in the
following code fragment:
statusView:Open();
Reporting Progress
17
Once your status slip is open you can perform the task on which you report
progress. You should structure the task to alternate between performing some work
and updating the status slip.
You can use the status slip's
UpdateIndicator
method to update the gauge
view only, as in the following example:
statusView:UpdateIndicator({values:{gauge: 50}});
To update other items in the status slip, you need to use the
ViewSet
method.
Although you can use the
ViewSet
method to initialize all the status slip's
components, you need not always pass all of these values. Once the status slip is
open you need only pass to this method the values to be changed.
statusView:ViewSet({
name: 'vGauge,
values: {statusText: "Waiting for host...",
gauge: 30} // 30% filled
});

C H A P T E R 1 7
Additional System Services
17-24
Using Additional System Services
Because the
ViewSet
method rebuilds and updates all the status slip's child views,
you'll obtain better performance by calling
UpdateIndicator
rather than
ViewSet
when you just need to update the gauge view. The
UpdateIndicator
method rebuilds and updates only the gauge, barber pole, and
progress sheet views.
Implementing a CancelRequest Method
17
If your status slip provides a "Stop" or "Cancel" button, you may include a
ButtonClickScript
with the button or write a
CancelRequest
method to
handle the necessary housekeeping. The
CancelRequest
method can be
implemented either in the status slip or in the application (or transport) base view.
The system checks if the status slip has a
CancelRequest
method, and if not
sends this message to the application (or transport) base view.
Using the Power Registry
17
This section describes the cooperative model that Newton devices use to turn
power on and off, and the battery information functions.
Registering Power-On Functions
17
You may register functions to be called when a Newton device is powered on with
the
RegPowerOn
function. When the Newton device is powered on, the system
calls your "power-on" callback function passing it a symbol indicating the reason it
was called. This allows your code to condition its actions accordingly. For example,
you might perform one set of actions when the user presses the power switch and
another set of actions when the device is powered on by the execution of an alarm.
The
'user
symbol indicates that the user pressed the power switch. The
'emergencyPowerOn
symbol is passed any time the Newton device is powered
up after an emergency power-off. An emergency power-off is any shutdown in
which one or more power-off scripts did not execute. The
'serialgpi
symbol
indicates the presence of +5 volts on the serial port general-purpose input pin (pin
7). The
'alarm
symbol indicates that the power-on was caused by the execution
of an alarm. The
'cardlock
symbol indicates that a PCMCIA card was inserted
or removed.
The
UnRegPowerOn
function unregisters functions added with
RegPowerOn
.
IMPORTANT
The callback function registered with
RegPowerOn
must not
itself call
RegPowerOn
nor
UnRegPowerOn
.
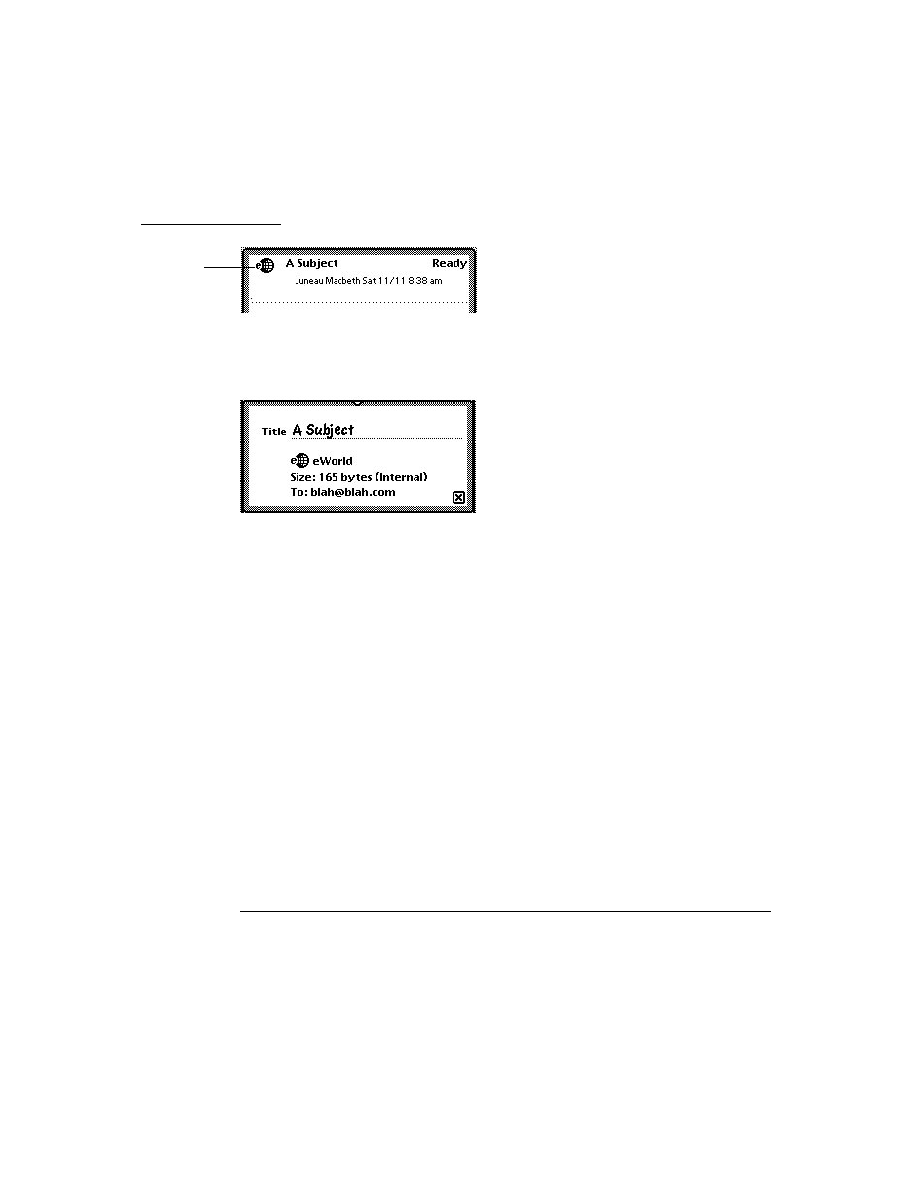
C H A P T E R 1 7
Additional System Services
Using Additional System Services
17-25
Registering Login Screen Functions
17
If you want a power-on function that brings up some sort of visible component,
you should register that function as login function. These functions are only called
after the login screen has been displayed and the password entered (if the user has
installed a password). Note that future Newton devices may not support the login
screen. In this case the login functions will still be executed.
The methods that register login functions are defined in the
sleepScreen view
,
to get a reference to the
sleepScreen
view to send it
RegLogin
and
UnRegLogin
messages, use code such as:
GetRoot().sleepScreen:RegLogin(callBackFn,callBackFnArgs);
IMPORTANT
The callback function registered with
RegLogin
must not itself
call
RegLogin
nor
UnRegLogin
.
Registering Power-Off Functions
17
You may register callback functions to be called when a Newton device is powered
off with the
RegPowerOff
function. As with power-on functions, when the
Newton is powered off, the system passes a symbol to your "shutdown" callback
function indicating the reason it was called. This symbol, passed as the value of
your callback's why parameter, allows it to condition its actions according to the
way the system was powered off. The
'user
symbol indicates that the user
initiated the shutdown. The
'idle
symbol indicates the system initiated shutdown
after the Newton was left idle for the period of time specified by the user's Sleep
preferences. The
'because
symbol indicates that the Newton powered off for
some other unspecified reason.
The system also passes a symbol to your callback function indicating the current
status of the shutdown operation. This symbol is passed as the value of your
callback's what parameter. The value of this parameter is used as the basis for
the cooperative shutdown process. Your callback function must return a value
indicating whether to continue the power-off sequence or delay it. This value is
passed to all registered shutdown functions, allowing each to indicate whether it is
ready to shut down or needs time to complete a task.
The
'okToPowerOff
symbol indicates that the system has received a request to
shut down. In response to the
'okToPowerOff
symbol, your callback can return
true
to specify that shutdown may continue, or it can return
nil
to cancel the
shutdown process. Note that an
'okToPowerOff
symbol does not guarantee that
shutdown will occur--another callback function may cancel the power-off sequence.
The
'powerOff
symbol indicates that shutdown is imminent. If the callback
function must first perform an operation asynchronously, such as the disposal of a

C H A P T E R 1 7
Additional System Services
17-26
Using Additional System Services
communications endpoint, it can return the
'holdYourHorses
symbol to delay
shutdown. After completing the task for which you delayed shutdown, you must
call the
PowerOffResume
function as soon as possible to resume the power-
off sequence.
Returning
nil
in response to the
'powerOff
symbol allows the power-off
sequence to continue. Your callback function must return the value
nil
in response
to any symbols other than those described here.
The
UnRegPowerOff
function unregisters functions added with
RegPowerOff
.
IMPORTANT
The callback function registered with
RegPowerOff
must not
itself call
RegPowerOff
nor
UnRegPowerOff
.
Using the Battery Information Functions
17
Two functions return battery-related information. The
BatteryCount
function
returns the count of installed battery packs. The
BatteryStatus
function returns
a frame with information about the status of a battery pack. This frame contains
information about the battery type and charge status, whether the Newton device is
plugged in, and other power-related data. Note that the contents of this frame differ
depending on the hardware responsible for the battery's operation.

C H A P T E R 1 7
Additional System Services
Summary of Additional System Services
17-27
Summary of Additional System Services
17
This section summarizes the services documented in this chapter.
Undo
17
Functions and Methods
17
AddUndoCall(
callBackFn
,
argArray
) //registers a function to
//call for Undo
AddUndoSend(
receiver
,
message
,
argArray
) //registers a message
//to be sent for Undo
view
:AddUndoAction(
methodName
,
argArray
) //registers an Undo
//action for a specific view
ClearUndoStacks() // clears Undo stack
Idlers
17
Method
17
view
:SetupIdle(
milliseconds
) //sets up an idler object
Notification and Alarms
17
Proto
17
aProtoPeriodicAlarmEditor := { //creates periodic alarms
_proto: protoPeriodicAlarmEditor,
title :
string
,
//text at top of view
ownerSymbol :
symbol
,
//your appSymbol
ownerApp :
string
,
//your app's name
viewBounds :
frame
,
//bounds frame
//don't add child views
...
}
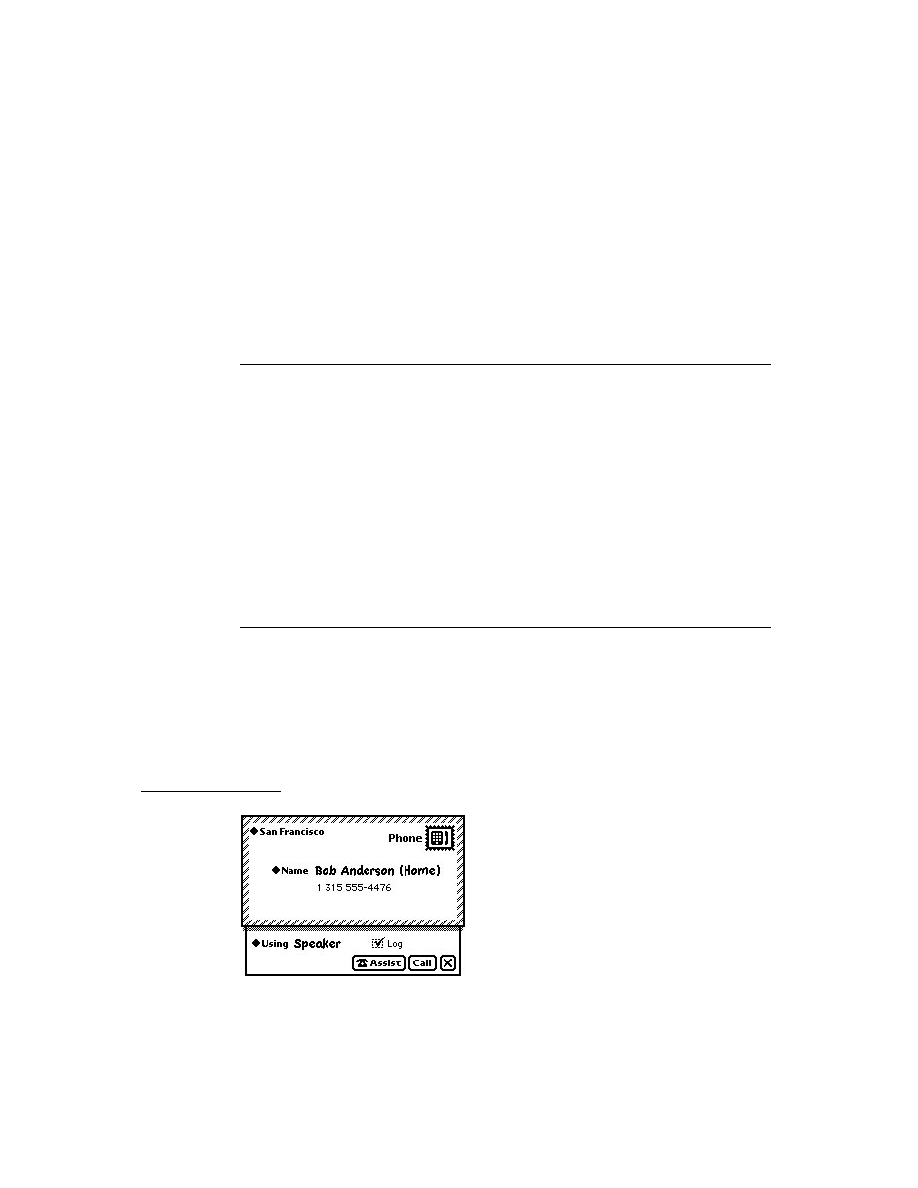
C H A P T E R 1 7
Additional System Services
17-28
Summary of Additional System Services
Functions and Methods
17
myApp
:AlarmsEnabled() //call PeriodicAlarms?
myApp
:PeriodicAlarms(
alarm
) //called when periodic alarm
//triggers
AddAlarm(
alarmKey
,
time
,
argsArray
,
callBackFn
,
callBackParams
) //adds
//an alarm
AlarmUser(
title
,
message
) //brings up slip
RemoveAlarm(
alarmKey
) //removes alarms
GetAlarm(
alarmKey
) //gets an alarm
GetAppAlarmKeys(
alarmKeySuffix
) //gets an app's alarm keys
RemoveAppAlarms(
alarmKeySuffix
) //removes an app's alarms
view
:Notify(
level
,
headerStr
,
messageStr
) //brings up slip
Reporting Progress
17
Proto
17
aProtoStatusTemplate := { // report asynch task progress
_proto: protoStatusTemplate,
viewBounds :
boundsFrame
,
//bounds of slip
initialSetup:
frame
,
// initial setup values frame
ViewSet: func(
setup
),
// update the view
UpdateIndicator: func(
setup
), // change progress indicator
CancelRequest: func(
why
), // called on cancel
...
}
Functions and Methods
17
contextView
:SetMessage(
msgText
)// for user msgs in find slip
DoProgress(
kind
,
options
,
workFunc
) // for synchronous tasks
notifyIcon
:AddAction(
title
,
cbFn
,
args
) //adds action to notify
//icon
notifyIcon
:KillAction(
obj
) //removes action from notify icon
ShowBusyBox(
showIt
) //shows/hides busy box - Platform file
//function

C H A P T E R 1 7
Additional System Services
Summary of Additional System Services
17-29
Power Registry
17
Functions and Methods
17
BatteryCount() //returns battery count
BatteryStatus(
which
) //returns info about battery
RegPowerOff(
callbackID
,
callBackFn
) //registers a power-off
//callback fn.
UnRegPowerOff(
callBackID
) //unregisters a power-off
//callback fn.
PowerOffResume(
appSymbol
) //resumes power-off sequence
RegPowerOn(
callbackID
,
callBackFn
) //registers a power-on
//callback fn.
UnRegPowerOn(
callbackID
) //unregisters a power-on handler
loginScreen
:RegLogin(
appSymbol
,
callBackFn
) //registers a login
//screen callback fn.
loginScreen
:UnRegLogin(
callbackID
) //unregisters a login
//screen callback fn.


About the Assistant
18-1
C H A P T E R 1 8
Intelligent Assistant
18
Figure 18-0
Table 18-0
The Intelligent Assistant is a system service that attempts to complete actions
specified by the user's written input. You can think of the Assistant as an alternate
interface to Newton applications and services.
The Assistant can use the built-in applications to complete predefined tasks such as
calling, faxing, printing, scheduling, and so on. You can also program the Assistant
to execute any task that your application performs. In addition, you can display
your application's online help from the Assistant.
This chapter describes how to make application behaviors and online help available
from the Assistant. If you want to provide a textual interface to your application or
its online help, you should become familiar with the Assistant and the concepts
discussed in this chapter.
Before reading this chapter, you should be familiar with the concept of the target of
an action, as explained in Chapter 15, "Filing," and you should understand the
behavior or service that your application provides through the Assistant. Although
it is not essential, it is helpful if you are familiar with lexical dictionaries. Lexical
dictionaries are described in Chapter 9, "Recognition."
About the Assistant
18
This section describes the Assistant's behavior in a variety of user scenarios, and
then provides an overview of the templates, frames, and methods that provide
this behavior.
Introduction
18
When the user invokes the Assistant, the system passes the current text selection to
it. If no text is selected, the system passes to the Assistant the contents of a buffer
that holds the most recent text input.
The Assistant then attempts to match words in the input string with templates and
dictionaries that classify the words as actions, targets, or unknown entities. The

C H A P T E R 1 8
Intelligent Assistant
18-2
About the Assistant
templates may be supplied by the system or by your application. Some system-
supplied templates make use of lexical dictionaries, which are also supplied by the
system. For more information about lexical dictionaries, see Chapter 9,
"Recognition."
Depending on the amount of information that parsing the input string provides, the
Assistant either attempts to complete a task or prompts the user to supply
additional information.
Input Strings
18
The Assistant is preprogrammed with a list of words representing tasks that the
built-in applications can perform. In addition to using these words, you can
program the Assistant to associate your own words with tasks your application
performs. The user cannot add words to the Assistant's vocabulary.
You can associate multiple verbs with a single action; for example, the system
supplies a template that maps the words
"call"
,
"dial"
,
"phone"
, and
"ring"
to the same task.
The Assistant uses some of the same dictionaries as the recognition system when
attempting to classify items in the input string. For example, it uses the system's
built-in lexical dictionaries to classify strings as phone numbers.
The word order in the input phrase is not significant-- for example, the input
phrase
"Bob fax"
produces the same result as the phrase
"Fax Bob"
. This
syntax-independent architecture allows easier localization of applications for
international audiences.
Note
The input string passed to the Assistant must not contain more
than 15 words. The Assistant does not attempt to interpret strings
containing more than 15 words.
No Verb in Input String
18
If the Assistant cannot determine the user's intended action, it displays an Assist
slip that prompts the user to tap the Please picker for more options. The Please
picker allows the user to specify an action when the Assistant cannot determine one
by parsing the input string.
For example, using the string
"Bob"
as partial input, the Assistant can perform a
number of actions: it can find Bob, fax Bob, call Bob, schedule a meeting with
Bob, and so on. However, this input string does not indicate which of these actions
is the user's actual intent. Figure 18-1 shows the Assist slip as it would appear if
the string
"Bob"
were the only input provided to the Assistant.

C H A P T E R 1 8
Intelligent Assistant
About the Assistant
18-3
Figure 18-1
Assist slip
When prompted by the Assist slip, the user must provide additional information on
its input line or choose an action from the Please picker. The top portion of the
Please picker displays all of the actions currently registered with the Assistant. The
Please picker is shown in Figure 18-2.
Figure 18-2
The Please picker
The built-in tasks that the Assistant can complete include calling, faxing, finding,
mailing, printing, remembering (adding To Do items), scheduling (adding
meetings), getting time information from the built-in Time Zones application and
displaying online help. Note that the top portion of this menu displays only one
word for each action the Assistant can perform. For example, the word
"call"
appears here but the synonyms
"ring"
and
"phone"
do not. Recently used
synonyms may appear in the bottom half of the slip, however.

C H A P T E R 1 8
Intelligent Assistant
18-4
About the Assistant
To allow the user to repeat recent actions easily, the bottom portion of the Please
picker displays the eight strings most recently passed to the Assistant. Thus, the
string
"ring Maurice"
appears here, even though the action of placing a phone
call is represented only by the verb
"call"
in the top portion of the picker.
After making corrections to the input string, the user can tap the Do button in the
Assist slip to pass the corrected string to the Assistant once again.
Ambiguous or Missing Information
18
If the input string specifies an action, the Assistant does not display the Assist slip
containing the Please picker, but may still need to obtain additional information in
order to complete the task.
When an action is specified but required information is still missing, the Assistant
tries to supply as much of the required information as possible. For example, if the
input string is
"fax bob"
, the Assistant can query the Names soup for information
such as Bob's name and fax number. However, the user may still need to correct
the input if the Assistant chooses the wrong Bob from the Names soup, cannot find
Bob in the Names soup, or cannot find Bob's fax number in this soup.
The user can resolve ambiguities or provide additional information from within a
task slip that the Assistant displays for this purpose.
The Task Slip
18
The task slip provides the user with a final opportunity to correct input to the
Assistant and confirm or dismiss execution of the task before the Assistant actually
takes action. Although it's recommended that you always provide this opportunity
to confirm, modify, or cancel the task before taking action, it's especially important
to do so when execution of the task will open other applications or otherwise
inconvenience the user.
Figure 18-3
Calling task slip

C H A P T E R 1 8
Intelligent Assistant
About the Assistant
18-5
Programmer's Overview
18
This section describes how the templates, frames and methods used by the
Assistant interact to provide services to the user.
You can think of any user operation as a set of one or more actions to complete. A
single action is represented to the Assistant by an action template. You can use
action templates supplied by the system and you can also define your own action
templates.
Some actions require data or objects on which to operate. For example, a
phone-dialing action requires a phone number to dial. The data or object on which
an action operates is represented to the Assistant by a target template. The system
provides a variety of target templates, and you can define your own as well.
Each action template or target template defines a set of one or more strings known
as its lexicon. In general, an action template's
lexicon
slot holds one or more
verbs, while the
lexicon
slot of a target template holds one or more nouns.
When any of the words in a template's lexicon appear in the input string passed to
the Assistant, the Assistant builds a frame based on that template. For example, the
lexicon for the built-in
call_act
template includes the strings
"call"
,
"ring"
,
and
"dial"
. When any of these strings appear in the Assistant's input string, the
Assistant builds a frame based on the
call_act
template. Frames created from
action templates are called action frames; frames created from target templates are
called target frames.
A task is a behavior (such as calling, printing, faxing, and so on) that is made
available to the user by the Assistant. Usually a task consists of multiple actions
and targets, although a task can be as simple as a single action having no target.
You define a task to the Assistant by using the
RegTaskTemplate
function to
register a task template with the system. A task template is like a recipe: it
specifies everything required to perform a particular task, including
the actions and targets required to provide a specified behavior
the behavior to provide
supporting methods and data structures
The task template must specify all of the actions and targets required to perform
the task it defines. You provide this information as an array of action templates and
target templates residing in your task template's
signature
slot. When the task
template is registered with the Assistant, all of the templates in the
signature
slot are registered as well. Once your task template is registered, the Assistant can
match user input with words in any of the lexicons of templates specified in the
task template's
signature
slot.

C H A P T E R 1 8
Intelligent Assistant
18-6
About the Assistant
Your task template designates one action template as its primary action. The
primary action is the one that the Assistant associates with a specified verb in its
input string. The primary action is represented by an action template that resides in
the task template's
primary_act
slot. Because task templates do not provide
lexicons, the designation of a primary action provides the Assistant with a way to
associate a verb in the input string with a task template.
In addition to items required by the Assistant, your task template can hold any
additional methods or data structures you require to perform the task.
Recall that the Assistant creates an action frame or target frame for each word in
the input string that matches a lexicon item in a registered template. If the Assistant
can match an action frame with the
primary_act
slot in a task template, it uses
that template to create a task frame. The task frame holds all the information defined
in the task template, as well as some additional slots that the Assistant provides.
The Assistant creates slots in the task frame to hold action frames and task frames
that are created as templates in the
signature
slot are matched. These slots are
named using symbols that reside in a
preConditions
slot that your task
template provides.
Each element of the
preConditions
array specifies the name of the slot that is
to hold the frame created from the template in the corresponding element of
the
signature
array. For example, presume that the fourth element of the
signature
array holds the
call_act
template and the fourth element of the
preConditions
array holds the
'myCallAction
symbol. When the
call_act
template is matched, the Assistant creates in a slot named
'myCallAction
in the task frame and places in that slot the action frame created
from the
call_act
template. Later in this chapter, the section "The Signature and
PreConditions Slots" (page 18-10) discusses this process in more detail.
If the Assistant cannot match an action frame with any of the task templates
currently registered, it displays the Assist slip, which prompts the user to specify
an action.
If the Assistant matches more than one action frame with a currently registered task
template's
primary_act
slot, it attempts to resolve the conflict by determining
whether additional frames required by the task template are present. The conflict
resolution process is described in "Resolving Template-Matching Conflicts"
(page 18-13).
Once the Assistant has matched as many templates as possible and stored the
resulting frames in the task frame, it sends the
PostParse
message to the
task frame.
Figure 18-4 illustrates a simple example of how the Assistant builds a task frame
by matching user input strings with registered templates.

C H A P T E R 1 8
Intelligent Assistant
About the Assistant
18-7
Figure 18-4
Simplified overview of the Assistant's matching process
Action Template
call_act := {
isa: 'action,
value: "call action",
Lexicon: ["yo", "call",
"phone", "ring"],
...}
Target Template
Parse raw input
person := {
isa: 'who_obj,
value: "person",
...}
aCall_act := {
isa: "action,
lexicon: ["call",
...}
calling_task:=
{
name: "Calling Task",
isa:task_template,
primary_act:call_act,
signature: [call_act,
who_obj,
where_obj],
preconditions:['action,
'who,
'where],
score:nil,
postParse:func () begin ... end,
taskslip:mySlip,// view templt
}
aCalling_task :=
{isa:'action,
score:nil
raw:[...], // for internal use
phrases:[Call", "Bob"],
noisewords: ["for"]
origphrase: [Call for Bob"],
postparse:<function, 0 args>,
action:aCall_act
who:aPerson
// more template info,
}
aPerson :=
{isa: 'person,
value: "Bob",
...}
Call
For
Bob
Matching
"fax"
in lexicon
of
fax_action
template
causes action frame to be
created from this template
Matching
call_act
template with the
primary action in
calling_task
template
causes the Assitant to use the
calling_task
template to create the task frame
Matching
"Bob"
in
lexicon of
person
template causes
target frame to be
created from this
template
Because
"for"
is not matched,
it is added to the
noisewords
array. If a target is not found in
the original parse, your
PostParse
method can try to
extract it from the task frame or
the appropiate soup.
Lexical matching & tokenization
Create frames from
registered templates
that match input
Create the task frame
Store action and target frames in
slots specified by
preconditions
Invoke post parse task

C H A P T E R 1 8
Intelligent Assistant
18-8
About the Assistant
You define the
PostParse
method in your task template. Your
PostParse
method must perform any actions required to complete the primary task. The
PostParse
method usually acts as a dispatching method that executes the
subtasks comprising the primary action. In doing so, the
PostParse
method may
validate data and retrieve information that the Assistant was unable to find on its own.
IMPORTANT
Once your
PostParse
method is invoked, it is in complete
control of the error-handling and user interface on the Newton.
Your
PostParse
method must include any code necessary to
complete the primary action, such as code required to display a
task slip, validate input, and handle errors.
Matching Words With Templates
18
This section discusses the process of extracting words or phrases from user input
and matching them to templates registered with the Assistant. In particular, this
section provides more detail regarding unmatched words, partially matched
phrases, and words that match multiple templates.
When the user taps the Assist button, the system passes the current input string to
the
ParseUtter
function, which matches words in the input string with elements
in the lexicons of templates currently registered with the Assistant. Normally, you
do not need to call the
ParseUtter
function yourself; however, you can
experiment with the Assistant by passing strings to this function in the NTK
Inspector window.
When parsing the input string, the
ParseUtter
function matches entire words only.
For example if the word
"telephone"
appears in a template's
lexicon
slot,
that template is not matched when the word
"phone"
appears in the input string.
The Assistant's matching process is case insensitive; thus, if the word
"phone"
appears in a registered template's
lexicon
slot, that template is matched when
"Phone"
or
"phone"
appears in the input string.
If absolutely nothing in the input string is matched, the return result of the
ParseUtter
function is unspecified. However, if any word in the input string is
matched, the
ParseUtter
function returns a frame containing frames created
from the appropriate templates and additional information about the matched
words. For more information about the result frame returned by the
ParseUtter
function, see the description of this function in Newton Programmer's Reference.
When none of the words in the input string matches an action template, the
Assistant may use the information it did match to try to determine a likely action.
For example, when the user enters the phrase
"buzz 555-1234"
, the Assistant
does not match the word
"buzz"
to an action template but it can identify

C H A P T E R 1 8
Intelligent Assistant
About the Assistant
18-9
"555-1234"
as having the format of a telephone number. Based on that
information, the Assistant creates a task frame from the built-in
call_act
template and displays a call slip to prompt the user for additional information.
When no action template is matched, or more than one is matched, the Assistant
compares the number of matched target templates for each task with the total
number of targets for that task. The Assistant creates the task frame from the task
template having the highest percentage of targets matched and then invokes that
task frame's PostParse method.
If two or more tasks have the same percentage of matched target templates, then
the Assistant displays the slip containing the Please picker and prompts the user to
choose an action. Under these circumstances, the Please picker contains only words
representing the candidate templates.
To permit more natural interaction, the Assistant ignores words that do not appear
in any registered template's lexicon. Rather than limiting the user to terse
commands, the Assistant extracts meaningful words from phrases such as
"Make
a call to Bob at work"
and ignores the others. For example, the words
"call"
,
"Bob"
and
"work"
are meaningful to the Assistant because they appear
in the lexicons of registered templates. (In this case, the templates are supplied and
registered by the system.) On the other hand, because the words
"a"
,
"to"
, and
"at"
do not appear in the lexicons of any registered templates, they are not
matched and are therefore ignored.
Unmatched words appear in the
noiseWords
slot of the frame that the
ParseUtter
function returns. Your
PostParse
method may be able to use the
contents of this array to determine further information about the user's intended
action. For example, if there are no entries for Bob in the Names soup, the word
"bob"
is not matched and is returned as an element of the
noiseWords
array.
The word
"to"
is also likely to show up in this array. Because words are added to
this array in the order they were parsed, your
PostParse
method can extract the
word following
"
to"
from the
noiseWords
array and attempt to use it as a
target. The recommended action in this situation is to use this information to fill out
a task slip that is displayed to the user for confirmation.
When a word appears in the lexicon of more than one template, it can cause the
Assistant to match the wrong template. For example, two games might both
register action templates having the word
"play"
in their lexicon, or you might
attempt to register a template that duplicates a word in the lexicon of one of the
system-supplied templates. A strategy for resolving these kinds of conflicts is
described in "Resolving Template-Matching Conflicts" (page 18-13).

C H A P T E R 1 8
Intelligent Assistant
18-10
About the Assistant
The Signature and PreConditions Slots
18
Your task template must define two slots, called
signature
and
preConditions
, which store arrays of templates and symbols, respectively.
The
signature
slot holds action templates and target templates that must be
matched to complete the primary action. The
preConditions
slot specifies the
names of slots that the Assistant creates in the task frame as templates in the
signature
slot are matched.
Each element of the
preConditions
array is related to the corresponding
element of the
signature
array. Specifically, an element of the
preConditions
array specifies the name of the slot that the Assistant creates in the task frame when
the template in the corresponding element of the
signature
array is matched.
For example, to send a fax the Assistant needs frames representing the action of
faxing, a fax number, the name of the person to whom the fax is sent, and the time
at which the fax is to be sent. The
signature
slot in the following code fragment
specifies by name the templates required to create these frames.
{...
// example: when fax_number is matched, Assistant creates
// a 'number slot in task frame & puts target frame in it
signature: [fax_action, fax_number, who_obj, when_obj],
preConditions: ['action, 'number, 'recipient, 'when],
...}
The corresponding elements of the
preConditions
slot specify the names of
slots that the Assistant creates in the task frame to hold the frames created as the
templates in the
signature
slot are matched. For example, the
preConditions
array in the previous code fragment specifies that the Assistant creates slots named
action
,
number
,
recipient
and
when
in the task frame as necessary.
Continuing with the example based on the previous code fragment, when the
Assistant parses the input phrase
"fax Bob"
, it matches the word
"fax"
to the
fax_action
template in the first element of the
signature
array and creates an
action frame from this template. The Assistant places this action frame in an
action
slot (named for the symbol in the first element of the
preConditions
array) that it creates in the task frame. Similarly, the Assistant creates a target
frame when the word
"Bob"
is matched to the
who_obj
template in the third
element of the
signature
array. The Assistant places this target frame in a
recipient
slot (named for the symbol in the third element of the
preConditions
array) that it creates in the task frame.
Words representing elements of the
signature
array do not necessarily need to
appear in the input string in order to be matched to a template; for example, your
PostParse
method might supply Bob's fax number by finding it in the
Names soup.

C H A P T E R 1 8
Intelligent Assistant
About the Assistant
18-11
The Assistant creates a slot in the task frame only when a template is matched. For
example, if the
when_obj
template is not matched, the
when
slot is not created.
If any frame represented in the
signature
array is not present (that is, if its
lexicon was not matched) the Assistant may still call your
PostParse
method
if it can match an action frame with your task template's primary action. Your
PostParse
method must validate all input and deal with missing objects
appropriately. For example, if your
PostParse
method cannot obtain the missing
information by parsing the task frame or looking elsewhere for it (such as in the
appropriate soup), it can display a task slip to solicit further input from the user.
The Task Frame
18
When your
PostParse
method is called, the
ParseUtter
function will have
added slots to the task frame. You can use the information in these slots for your
own purposes. For example, your
PostParse
method can extract additional
information for use in displaying a task slip.
This section describes the
entries
,
phrases
,
noiseWords
,
value
and
origPhrase
slots that the
ParseUtter
function adds to the task frame. These
slots are added only when they are needed to hold information. For example, if no
soup entries are matched in the parsing process, the
entries
slot is not added to
the task frame.
The Entries Slot
18
If a template matches a soup entry, an alias to that entry is returned as an element
of the array residing in the
entries
slot of the task frame. To retrieve an entry
from this array, use the
GetMatchedEntries
global function.
The Phrases Slot
18
The result frame returned by the
ParseUtter
function contains a
phrases
slot
that holds an array of strings. Each word in the input phrase that matches a template
is returned as an element of the
phrases
array.
For example the following code fragment depicts the
phrases
array that might be
returned after parsing the input string
"call Bob".
// input string is "call Bob"
{...
phrases: ["call", "Bob"],
...}
Elements of the
phrases
array can store more than a single word. For example, if
the parser searches the Names soup for an object of the type
who_obj
having the

C H A P T E R 1 8
Intelligent Assistant
18-12
About the Assistant
value
"Bob Anderson"
, that element of the
phrases
array stores the entire
string
"Bob Anderson"
, as the following code fragment shows:
// input string is "call bob anderson"
{...
phrases: ["bob anderson", "call"],
...}
Note that strings may appear in the
phrases
array in a different order than they
did in the original input to the Assistant.
The OrigPhrase Slot
18
The original input phrase is returned as a single string that resides in the task
frame's
origPhrase
slot. You can examine this slot to determine the number and
ordering of words in the original input string.
The Value Slot
18
Some values can be parsed correctly only by using a lexical dictionary that
describes their format. These values include formatted numbers such as phone
numbers, currency values, dates, and times.
When the Assistant uses a lexical dictionary to parse an object, it returns the parsed
phrase as a single string in the
value
slot. For example, if the user had entered the
phrase
"Call 555-1212"
the Assistant would store the phone number in the
value
slot, as shown in the following example:
{...
input: [{isa: {value: "action"},
Lexicon: [["call", "phone", "ring", "dial"]],
value: "call"},
{isa: {isa: {isa: {#4B9F1D},
value: NIL,
Lexicon: [#4B9FA1]}},
value: "555-1212"}],
...}
Note that the
value
slot is created only when the Assistant uses a lexical
dictionary to parse a formatted string such as a time, date, phone number, or
monetary value.

C H A P T E R 1 8
Intelligent Assistant
About the Assistant
18-13
Resolving Template-Matching Conflicts
18
Template matching conflicts may arise when a template's lexicon includes a word
that appears in the lexicon of another registered template. This section describes
the means by which the Assistant attempts to resolve such conflicts.
When a verb matches more than one action template, the Assistant must choose the
appropriate action template. For example, imagine that two games, Chess and
Checkers, are currently loaded in the Extras Drawer. If both games specify the
word
"play"
in their action template's lexicon, the Assistant cannot open the
correct application by simply matching this verb; the correct game to open must be
determined by some other means. For example, the code fragment below shows the
template for an action,
play_act
, that might conceivably be defined by both games:
play_act := { value: "play action",
isa: 'dyna_user_action,
lexicon: [ "play" ]
}
The task templates for each of these games might look like the following example.
Note that both templates define
play_act
as the primary action:
chessTemplate := {
value: "Chess Template",
isa: 'task_template,
primary_act: play_act,
preConditions: ['generic_action,'action, 'game],
signature: ['dyna_user_action, play_act,
chess_obj],
PostParse: func()
begin
print("we made it, chess!");
end,
score: nil},
checkersTemplate := { value: "Checkers Template",
isa: 'task_template,
primary_act: play_act,
preConditions: ['generic_action, 'action,
'game],
signature: ['dyna_user_action, play_act,
chkrs_obj],
PostParse: func()
begin
print("we made it, checkers!");
end,
score: nil},

C H A P T E R 1 8
Intelligent Assistant
18-14
About the Assistant
If you specify the
'dyna_user_action
symbol as the first element of your task
template's
signature
slot, any target that distinguishes one template from
another enables the Assistant to select the correct template. For example, the two
target templates in the following code fragment represent the games Chess and
Checkers, respectively:
chess_obj := {value: "chess obj",
isa: 'dyna_user_obj,
lexicon: [ "chess" ]
}
chkrs_obj := {value: "checkers obj",
isa: 'dyna_user_obj,
lexicon: [ "checkers" ]
}
The fact that the lexicons in these templates do not match allows the Assistant to
resolve the ambiguity. When the string
"play chess"
is passed to the Assistant,
the word
"play"
is matched to the
play_act
template and the Assistant creates
an action frame from that template. Similarly, the Assistant matches the word
"chess"
with the
chess_obj
template's lexicon and creates a target frame from
that template.
Note that the
play_act
action frame can be matched to the
primary_act
of
either the
chess_Template
or the
checkers_Template
. Because the
signatures of both of these templates specify the
dyna_user_action
and
play_act
frame types as their first two elements, the conflict is not resolved until
the third element of one of these
signature
arrays is matched.
The
chess_obj
target frame matches the third element of the signature for the
chess_template
. It does not match any elements of the signature in the
checkers_Template
. Thus, matching the word
"chess"
resolves the conflict
because the only
signature
array that has been matched completely is that of the
chess_Template
.
Compatibility Information
18
The Assistant now matches entire words only, instead of allowing partial matches.
The Assistant no longer uppercases the words that it returns.
The Assistant now adds the eight most recently parsed phrases to the bottom of the
Please pop-up menu. Phrases do not need to be interpreted successfully by the
Assistant to be included in this list.
The result frame returned by the
ParseUtter
function contains a new slot named
entries
, which holds an array of aliases to soup entries that were matched when
parsing the input string. To retrieve these entries, you must use the new
GetMatchedEntries
global function.

C H A P T E R 1 8
Intelligent Assistant
Using the Assistant
18-15
Using the Assistant
18
This section describes how to make an application behavior available through the
Assistant, as well as how to display online help from the Assistant. This material
presumes understanding of the conceptual material provided in previous section.
Making Behavior Available From the Assistant
18
You need to take the following steps to make an application behavior available
through the Assistant:
1. Create an action template for your primary action. If necessary, create additional
action templates that define subtasks of the primary action.
2. Create zero or more target templates. (Some actions require no target; others
may use system-supplied target templates.)
3. Implement your
PostParse
method.
4. Create a task template.
5. Register and unregister your task template with the Assistant at the
appropriate times.
The sections immediately following describe these tasks in detail.
It is recommended that you begin by defining the action and target templates
required to complete the primary action. After doing so, you will have a better idea
of the tasks your
PostParse
method needs to handle. After creating all the
necessary templates and writing a suitable
PostParse
method, defining the task
template itself is likely to be a trivial chore.
Defining Action and Target Templates
18
Action templates and target templates are simply frames that contain a specified set of
slots and values. You need to define templates for all the actions and targets required
to complete a task. One of the action templates must define the primary action.
Take the following steps to define an action template or a target template:
1. Define a frame containing the
value
,
isa
and
lexicon
slots.
2. Assign the frame to a slot or variable that is the name of the template.
3. Place in the
value
slot a string that identifies the action or target that this
template defines.
4. If the template defines an action, place the symbol
'dyna_user_action
in its
isa
slot. If the template defines a target, place the symbol
'dyna_user_obj
in its
isa
slot.

C H A P T E R 1 8
Intelligent Assistant
18-16
Using the Assistant
5. Define the words or phrases this template is to match as an array of strings in its
lexicon
slot. If you place the name of a system-supplied template in your
template's
isa
slot, your template inherits its lexicon from the system-supplied
template. You should be aware, however that
isa
slot values other than the
symbols
'dyna_user_action
and
'dyna_user_obj
may interfere
with the system's ability to match your template successfully. For more
information, see the section "Defining Your Own Frame Types to the Assistant,"
immediately following.
Sample Action Template
18
The following code fragment defines an action template called
myPayAction
that
might be used by a home banking application:
myPayAction := {
value:
"Pay Action",
// name of action
isa:
'dyna_user_action
// must use this value
lexicon: ["pay", "paid"]
// words to match
}
Sample Target Template
18
The following code fragment defines a target template called
cbPayee
that a
home banking application might use:
myPayee := {
value:
"Who Object",
// name of target
isa:
'dyna_user_obj
// must use this value
lexicon: ["to", "Bob"]
// words to match
}
Defining Your Own Frame Types to the Assistant
18
The conflict resolution mechanism relies on the use of system-supplied dynamic
user object templates. You can define your own symbol for your template's
isa
slot as long as it ultimately refers to a template with the symbol
'dyna_user_action
or
'dyna_user_obj
as the value of its
isa
slot. For example, you can define a
my_action
template that is a
'dyna_user_action
, as shown in the following code fragment:
my_action := {
value:
"my action"
// name of this action
isa:
'dyna_user_action,
// must use this value
lexicon: ["jump", "hop"]
// words to match action
}

C H A P T E R 1 8
Intelligent Assistant
Using the Assistant
18-17
Based on the definition above, you can derive a
my_other_action
template that
holds the value
'my_action
in its
isa
slot, as in the following example:
my_other_action := {
// name of this action
value:
"my other action",
// subclass of 'dyna_user_action
isa:
'my_action,
// words matching this action
lexicon: ["leap", "lunge"]
}
You can take a similar approach to define your own target object types by placing
the
'dyna_user_obj
symbol in your target template's
isa
slot. For example,
you can define a template
my_target
that is a
dyna_user_obj
and use its
symbol in this slot also, as in the following code fragment:
my_target := {
value:
"my target"
// name of this target
isa:
'dyna_user_obj // must use this value
}
Based on the definition above, you can derive another target template from
my_target
, and store the value
'my_target
in its
isa
slot, as in the following
example:
my_other_target := {
value:"my other target",// name of this targe
isa:
'my_target,
// subclass of 'dyna_user_obj
}
Implementing the PostParse Method
18
Your
PostParse
method implements the behavior your application provides
through the Assistant. This method resides in the
PostParse
slot of your
task template. It is called after all the templates in the
signature
slot have
been matched.
Your
PostParse
method must provide any behavior required to complete the
specified task, such as obtaining additional information from the
ParseUtter
result frame as necessary, and handling error conditions.

C H A P T E R 1 8
Intelligent Assistant
18-18
Using the Assistant
Sample PostParse Method
18
The following code fragment is an example of a
PostParse
method that tests for
the existence of the
value
slot and accesses its content:
PostParse: func()
begin
local thePhraseText;
// self is the task frame
if hasSlot(self, 'value) then
thePhraseText := self.value;
else
// handle missing input
end;
// display phrase text in task slip
end;
end;
Defining the Task Template
18
Your task template defines a primary action and its supporting data structures.
Take the following steps to define a task template:
1. Define a frame containing the
value
,
isa
,
primary_act
,
PostParse
,
signature
,
preConditions
, and
score
slots. Subsequent bullet items in
this section describe the contents of these slots.
2. Assign the frame to a slot, variable, or constant that is the name of the task
template.
3. Place a string in the
value
slot that identifies the task that this template defines.
4. Place the
'task_template
symbol in the
isa
slot.
5. Place the name of the slot or variable defining your primary action in the
primary_act
slot.
6. Place the name of the slot, variable or constant defining your
PostParse
method in the
PostParse
slot.
7. Place in the
signature
slot an array of the names of all action and target
templates required to complete this task.
8. Place an array of symbols in the
preConditions
slot that specifies the names
of slots the Assistant must create to hold frames built from the templates
specified in the
signature
array. The
preConditions
and
signature
arrays must have the same number of elements. Furthermore, the symbols in the
preConditions
array must appear in the same ordinal position as their
counterparts in the
signature
array; that is, the first element of the

C H A P T E R 1 8
Intelligent Assistant
Using the Assistant
18-19
preConditions
array is related to the first element of the
signature
array,
the second element of the
preConditions
array is related to the second
element of the
signature
array, and so on. For more information, see the
section "The Signature and PreConditions Slots" (page 18-10).
9. Place the value
nil
in the score slot. This slot is used internally by the Assistant.
Sample Task Template
18
The following code fragment is an example of a task template. This template might
be used to implement an action in a home banking application:
payTemplate := {
value:
"Pay Template",
// name of this template
isa:
'task_template,
// must use this value
primary_act: myPayAction,
// primary action
PostParse:
func () begin ... end, // PostParse method
// required templates
signature:
[myPayAction, myWho, myAmount, myWhen],
// slots to create as required templates are matched
preConditions: ['action, 'name, 'amount, 'when],
score:
nil
// for internal use
}
Registering and Unregistering the Task Template
18
To register your task template, call the
RegTaskTemplate
function from your
application part's
InstallScript
function. When the task template is registered
successfully, the value returned by
RegTaskTemplate
is a reference to the task
frame. You need to save a reference to the value returned by this function, because
you'll need that value later to unregister the task template. If
RegTaskTemplate
returns
nil
, the template was not registered successfully.
To unregister your task template, call the
UnRegTaskTemplate
function, passing
as its argument the result that was returned by
RegTaskTemplate
when you first
registered the task template. It is recommended that you call the
UnRegTaskTemplate
function from your application part's
RemoveScript
method.
Displaying Online Help From the Assistant
18
Application help takes the form of a help book created with Newton Book Maker.
You need to take the following steps to open a help book from the Assistant:
1. In your application's base view, define a
viewHelpTopic
slot. The value of
this slot is a string that is the name of a topic in the help book to be opened.
C H A P T E R 1 8
Intelligent Assistant
18-20
Using the Assistant
2. Define an action template for opening the appropriate help book. The global
functions
ShowManual
and
OpenHelpTo
open the system-supplied help
book. The
OpenHelpBook
and
OpenHelpBookTo
functions open a help book
that you supply. The
ShowManual
function is described in "Utility Functions"
(page 26-1). All of these functions are described in version 1.1 of the Newton
Book Maker User's Guide .
3. Define a task template that holds the name of your action template as the value
of its
primary_act
slot.
4. Register and unregister the task template at the appropriate times.
For information on defining, registering, and unregistering templates, see the
preceding section, "Making Behavior Available From the Assistant" (page 18-15).
For information on displaying online help from an information button that
your application provides, see "protoInfoButton" (page 6-10) in Newton
Programmer's Reference.
Routing Items From the Assistant
18
When routing an item from the Assistant--for example, when filing, faxing,
printing, or mailing the item--the Assistant sends a
GetTargetInfo
message to
your application. The root view supplies a default
GetTargetInfo
method that
returns information such as the item to be routed and the view that is able to
manipulate it. This method relies on
target
and
targetView
slots supplied by
your application's base view. You can define your own
GetTargetInfo
method
if you need to supply different target information. For more information, see
"Specifying the Target" (page 15-13). For detailed information on supporting
routing in your application, see "Routing Interface" (page 21-1).
Normally the
GetTargetInfo
message is sent to the application's base view;
however, such behavior may not be appropriate for applications having more than
one view with user data. For example, the built-in Notepad application can display
multiple active Notes.
To specify that the
GetTargetInfo
message be sent to a view other than your
application base view, your application's base view must provide a
GetActiveView
method that returns the view to which the
GetTargetInfo
message is sent. The
GetTargetInfo
message is sent to the view specified by
the return result of the
GetActiveView
method.

C H A P T E R 1 8
Intelligent Assistant
Summary
18-21
Summary
18
Data Structures
18
Task Frame
18
// Returned by ParseUtter function
{
// original user input phrase
origphrase: ["
str1
", "
str2
", ... "
strN
"],
// strings that matched registered templates
phrases: ["
aStr1
", "
aStr2
", ... "
aStrN
"],
// strings that did not match registered templates
noisewords: ["
noiseStr1
", "
noiseStr2
", ... "
noiseStrN
"],
// Aliases to soup entries that were matched
// You must use GetMatchedEntries fn to retrieve
entries: [
alias1
,
alias2
, ...
aliasN
],
// formatted strings returned by lexical parse, if any
value : ["
lexStr1
", "
lexStr2
", ... "
lexStrN
"],
// method that performs primary act
PostParse : func() begin ... end,
// additional slots & methods defined in task template
...}
Templates
18
Task Template
18
// defines task and provides supporting objects & methods
myTask := {
isa: 'task_template, // Required. Must use this value
// Action template that defines lexicon for this task
primary_act:
myAct
, // Required.
// Required. Templates used by this task
signature: [
myTarget1
,
myAct1
, ... ,
myTargetN
,
myActN
],
// Required. Names of slots created in the task frame
// as templates are matched
preconditions : ['
mySlot1
, '
mySlot2
, ... '
mySlotN
],
// Required. Method that performs the task
PostParse: func() begin ... end,

C H A P T E R 1 8
Intelligent Assistant
18-22
Summary
// Optional. View template that defines task slip
taskslip :
myTaskSlipView
,
// internal use only - always put nil in this slot
score: nil,
// your additional slots and methods
...}
Action Template
18
// defines action words to Assistant
my_act := {
// string may be replaced in lexical parse
value:
string
, //Required.
// object type that this template creates
// must use this value or one descended from it
isa: 'dyna_user_action, // Required.
// Words or phrases to match with this template
lexicon: [
string1
,
string2
,...
stringN
],// Required.
}
Target Template
18
// defines object of an action to Assistant
my_Target := {
// string may be replaced in lexical parse
value:
string
, //Required.
// object type that this template creates
// must use this value or one descended from it
isa: 'dyna_user_obj, // Required.
// Words or phrases to match with this template
lexicon: [
string1
,
string2
,...
stringN
],// Required.
// your template can include your own slots as well
...}
Developer-Supplied Task Template
18
You must always supply a task template, which defines the application behavior
made available through the Assistant.

C H A P T E R 1 8
Intelligent Assistant
Summary
18-23
System-Supplied Action Templates
18
// base your action templates on this generic action
dyna_user_action:= {
// this template has no lexicon
...}
// Action template for dialing the telephone
call_act:= {
// Words or phrases to match with this template
// lexicon: ["call", "phone", "ring","dial"],
...}
// Action template for using the Find service.
find_act := {
lexicon :["find", "locate", "search for", "look for"],
...}
//Action template for faxing the target data item
fax_act:= {
lexicon: ["fax"],
...}
//Action template for printing the target data item
print_act:= {
lexicon: ["print"],
...}
// Action template for displaying the About box
about_act := {
lexicon: ["about newton"],
...}
// Action template for retrieving time values
// from the Time Zones application
time_act := {
lexicon: ["time", "time in","the time in",
"what time is it", "what time is it in",
"the time in", "what time",
"what is the time", "what is the time in"],
...}

C H A P T E R 1 8
Intelligent Assistant
18-24
Summary
// Action template for creating To Do items
remind_act := {
lexicon: ["remember", "remind", "remind me",
"to do", "todo", "don't forget to",
"don't let me forget to"],
...}
// Action template for sending electronic mail
mail_act := {
lexicon: ["mail", "send", "email"],
...}
// Action template for scheduling meetings
// and events in the Dates application
schedule_act := {
lexicon: ["schedule"],
...}
// Action template for scheduling meetings
// and events in the Dates application
meet_act := {
lexicon: ["meet", "meet me", "see", "talk to"],
...}
// Action template for scheduling meals in Dates app
meal_act := {...}
Meals
18
// Action template for scheduling breakfast in Dates app
breakfast_act := {
isa: 'meal_act,
usualTime:"7:00 am",
lexicon: ["breakfast"],
...}
// Action template for scheduling brunch in Dates app
brunch_act := {
isa: 'meal_act,
usualTime:"10:00 am",
lexicon: ["brunch"],
...}

C H A P T E R 1 8
Intelligent Assistant
Summary
18-25
// Action template for scheduling lunch in Dates app
lunch_act := {
isa: 'meal_act,
usualTime:"12:00 pm",
lexicon: ["lunch"],
...}
// Action template for scheduling dinner in Dates app
dinner_act := {
isa: 'meal_act,
usualTime:"7:00 pm",
lexicon: ["dinner"],
...}
Special Events
18
birthday := {
isa: 'special_event_act,
Lexicon: ["birthday","bday","b-day"],
...}
anniversary := {
isa: 'special_event_act,
Lexicon: ["anniversary"],
...}
holiday := {
isa: 'special_event_act,
Lexicon: ["holiday"],
...}
Developer-Supplied Action Templates
18
You must supply the action template specified by the value of your task template's
primary_act
slot.
You must supply any additional templates specified by the
signature
slot of the
task template.

C H A P T E R 1 8
Intelligent Assistant
18-26
Summary
System-Supplied Target Templates
18
Places
18
// list of system-supplied where_obj target templates
// system uses lexical dictionaries to match these
// templates so they do not provide lexicons
address, city, region, country, postal_code,
phone,parsed_phone, phone_tag, faxPhone, homePhone,
workPhone, carPhone, mobilePhone, beeper, places, company,
city, county, state, country, town, province
Times
18
// list of system supplied when_obj frames
// system uses lexical dictionaries to match these
// templates so they do not provide lexicons
time, date
User Objects
18
// System supplied generic target template has no lexicon
// your target templates must be based on this template
dyna_user_obj:= {
isa: 'user_obj
...}
// System supplied generic person template has no lexicon
// do not base your target templates on this template
who_obj:= {
isa: 'user_obj
...}
// System supplied generic object template has no lexicon
// do not base your target templates on this template
what_obj:= {
isa: 'user_obj
...}
// System supplied generic place template has no lexicon
// do not base your target templates on this template
where_obj:= {
isa: 'user_obj
...}

C H A P T E R 1 8
Intelligent Assistant
Summary
18-27
People
18
person := { // generic person template
isa: 'who_obj,
value: nil // system use only
...}
title := { // "owner", "manager", and so on
isa: 'who_obj,
...}
affiliate:= { // "friend", "brother", "sister", and so on
isa: 'person,
...}
group := { // "Engineering", "Marketing", and so on
isa: 'person,
...}
custom := { // customized 'person template
isa: 'person,
...}
Miscellaneous
18
salutationPrefix := {
ISA: 'parser_obj,
Lexicon: ["dear", "to", "attention", "attn",
"attn." , "hey"],
...}
Developer-Supplied Target Templates
18
You must supply any target template your task template requires that is not
supplied by the system. Required target templates are specified by the task
template's
signature
slot.
Assistant Functions and Methods
18
ParseUtter(
inputString
)
// matches input to templates
tmpltRef
:= RegTaskTemplate(
myTemplt
)//register w/ Assistant
UnRegTaskTemplate(
tmpltRef
)
// unregister task template
GetMatchedEntries(
which
,
entries
) // returns array of aliases

C H A P T E R 1 8
Intelligent Assistant
18-28
Summary
Developer-Supplied Functions and Methods
18
taskFrame
:PostParse()
// called after input is parsed
Application Base View Slots
18
viewHelpTopic
// topic in help book

19-1
C H A P T E R 1 9
Built-in Applications and
System Data
19
Figure 19-0
Table 19-0
This chapter describes the interfaces to the built-in applications. It also describes
the soup formats used by the built-in applications and the soup format of the
System soup.
You should read the appropriate section of this chapter if your application needs to
interact with any of the built-in applications, receive faxes, use auxiliary buttons, or
access system data. Specifically, the following areas are covered in this chapter:
interacting with the Names application and its soup
interacting with the Dates application and its soups
interacting with the To Do List application and its soup
interacting with the Time Zones application
interacting with the Notes application and its soup
retrieving entries from the Fax soup
adding panels to the Prefs and Formula rolls
adding auxiliary buttons to other applications
creating and managing icons in the Extras Drawer
accessing user configuration data and storing application preferences in the
System soup
At the end of this chapter is a summary of all the functions, methods, data
structures, protos, and soup formats that are associated with the material discussed
in this chapter. Everything listed in this summary section is described in more
detail in Newton Programmer's Reference.

C H A P T E R 1 9
Built-in Applications and System Data
19-2
Names
IMPORTANT
Soup formats are subject to change. Applications that rely on soup
formats risk incompatibility with future versions of Newton
software. To avoid future compatibility problems with soup
format changes, you should use the methods provided by the
built-in applications (if any exist) or the global functions
GetSysEntryData
and
SetSysEntryData
to get or change
entries in any of the built-in soups. They allow you to get and set
the values of slots in a soup entry.
Familiarity with Chapter 1, "Overview," Chapter 5, "Stationery," and Chapter 11,
"Data Storage and Retrieval," of this manual is particularly valuable in reading
this chapter.
Note
Future Newton devices may not include all the built-in
applications described in this chapter.
Names
19
This section describes the application program interface (API) to the Names
application. The Names application manages a database of people and places. It
presents information either as a business card, or as a list of all the available
information. These two views are shown in Figure 19-1.
About the Names Application
19
The Names application is built with the NewtApp framework using data definitions
(commonly called "dataDefs") and view definitions (commonly called "viewDefs").
This architecture allows extensibility--the addition of new data views, card types,
and card layout styles--without altering the Names application itself. For more
information on dataDefs and viewDefs, see Chapter 4, "NewtApp Applications,"
and Chapter 5, "Stationery."
The Names application interface allows you to programmatically add complete cards
and add information to an existing card. In addition, several Names methods let
you access information in a Names soup entry.
The Names application can be extended by adding auxiliary buttons, as described
in "Auxiliary Buttons" beginning on page 19-36.
The application is called Names, because that is what the user sees, but in program-
ming the term "cardfile" is used interchangeably and appears in the code.

C H A P T E R 1 9
Built-in Applications and System Data
Names
19-3
Figure 19-1
Names application Card and All Info views
Names Compatibility
19
All the Names methods, variables, and constants are new in this version. The
'group
,
'owner
, and
'worksite
types are new. The
'person
and
'company
types include many new slots.
The Names application converts incoming soup entries that contain 1.x data into
soup entries that conform to the 2.0 data format. Conversion includes adding
particular slots to soup entries and, in some cases, removing slots. The data
conversion occurs when the Newton receives 1.x entries by beaming, synchronizing
using Newton Connection, restoring from a backup, or updating a 1.x card to 2.0.
A user can beam a card created in version 2.0 to a Newton running an earlier
version of the system and it will read and edit the card, and vice versa.
In addition to changes in the programmatic interface, the 2.0 version has extensive
changes in the user interface to accommodate the increased number of card types,
layout styles, and data.

C H A P T E R 1 9
Built-in Applications and System Data
19-4
Names
Using the Names Application
19
This section describes
adding a new type of card to the Names application
adding a new data item to a card
adding a new card layout style
using the Names methods
using the Names soup
using two protos with pickers for personae and emporia
Adding a New Type of Card
19
The New button on the Names status bar creates its picker by looking at the
registered dataDefs for the Names application. All dataDefs whose
superSymbol
slot is set to
'Names
show up in the New picker. When the user picks a choice, the
MakeNewEntry
routine defined for that dataDef is called.
Built-in choices on the New picker include Person, Company, and Group. You
can create a new type of card for the Names application by supplying a new
data definition.
In addition to the usual slots found in a dataDef frame, Names dataDefs contain
two special slots,
overviewIcon
and
viewsToDisplay
.
These slots are described in "Names Data Definition Frame" (page 16-2) in Newton
Programmer's Reference. For information on dataDefs in particular, and stationery
in general, see Chapter 5, "Stationery."
Adding a New Data Item
19
The Add button on the Names status bar allows the user to add new items of
information to a card, such as a phone number or an address for a person. There is
a Custom choice on the Add picker (pop-up menu), through which the user can
create special data items that contain a simple text field. However, you can
programmatically add new choices to the picker by creating and registering new
view definitions with the Names application.
The Add button creates its picker from the viewDefs registered for the card type of
the current card. Of these, only viewDefs whose
type
slot is set to
'editor
show
up in the Add picker.
Names viewDefs must contain a special slot called
infoFrame
, in addition to
those slots required of all viewDefs. The
infoFrame
slot is described in "Names
View Definition Frame" (page 16-3), and the slots common to all viewDefs are
described in "viewDef Frame" (page 4-1) in Newton Programmer's Reference.
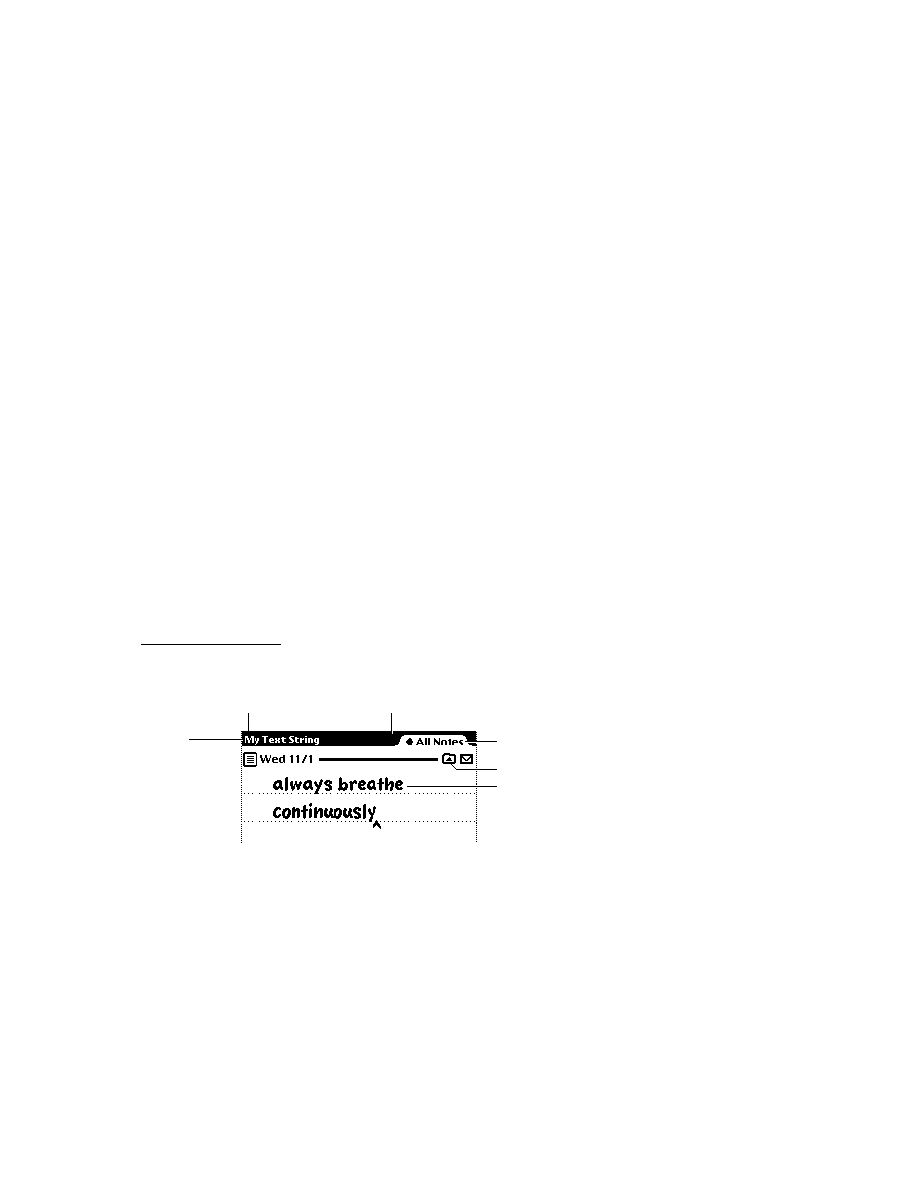
C H A P T E R 1 9
Built-in Applications and System Data
Names
19-5
Here is an example of an
infoFrame
for a Names viewDef defining a view that
has two fields,
Make
and
Model
:
infoFrame:{checkPaths: '[carMake, carModel],
checkPrefix: '[true, [pathExpr: carInfo]],
stringData: nil,
format: "^?0Make: ^0\n||^?1Model: ^1||" }
When chosen from the Add picker the first time, this view initially fills in the
carMake
and
carModel
slots in the soup entry with the user's entries. If chosen
again, this view creates an array called
carInfo
containing one frame for each
additional data set. These frames would look like this:
{carMake:
make
, carModel:
model
}
The reason this is necessary is that after information for the first car is entered, the
soup entry will contain the slots
carMake
and
carModel
. The information for the
second car could not also be stored in the
carMake
and
carModel
slots of the
soup entry. Instead a
carInfo
slot is added to the soup entry, this slot holds a
frame containing
carMake
and
carModel
slots.
When a view from the Add picker is instantiated, the system creates a slot called
selectedPath
in the view that was instantiated. This slot is set to the path
expression where data should be entered (or to
nil
if the data should be entered
directly into the soup entry). For example, when chosen from the Add picker the
first time, the view in this example would have its
selectedPath
slot set to
nil
,
meaning that the information should be put directly into the soup entry. When
chosen from the picker the second time, the
selectedPath
slot is set to
[pathExpr: carInfo, 0]
, to indicate that the new car information should go
into the first frame in the
carInfo
array. The third time,
selectedPath
is set to
[pathExpr: carInfo, 1]
, and so on.
Adding a New Card Layout Style
19
When the "Card" layout is selected in the Show picker, the Names application
looks at the
cardType
slot of the current card to determine which kind of business
card layout to use for that card. You can create new viewDefs and register them
with the Names application to use a custom card layouts. Card viewDefs must have
the
type
slot set to
'bizcard
, and must contain a
bizCardNum
slot and a
bizCardIcon
slot.
The
bizCardNum
slot contains an integer that corresponds to the value stored in
the
cardType
slot of the card entries. The values 0-6 correspond to the business
card layouts that are built into the system. You should pick integers over 1,000 to
use as a
bizCardNum
, and register your number with Newton DTS.

C H A P T E R 1 9
Built-in Applications and System Data
19-6
Names
The
bizCardIcon
slot contains an icon representing the new layout, to be shown
in the Card Style view, where the user can change the type of card layout to use for
a particular card. This icon should be 38x23 since this is the size of the built-in icons.
Adding New Layouts to the Names Application
19
The Show picker allows the user to chose from the two built-in layouts: Card and
All Info. You can programmatically add a new layout by calling the Names method
AddLayout
. It takes a single parameter, which is the layout to add. This layout
should be based on the
newtLayout
proto, and must include the following slots:
name
A string shown in the Show picker.
symbol
A symbol, which includes your developer signature, uniquely
identifying this layout. This symbol must be passed to the
EnsureInternal
function.
type
Set this slot to the symbol
'viewer
.
protection
Set this slot to the symbol
'private
.
For more details see
AddLayout
(page 16-8), and its counterpart function
SafeRemoveLayout
(page 16-13) in Newton Programmer's Reference.
Using the Names Methods and Functions
19
There are a number of methods provided by the Names application. To obtain a
reference to the Names application in order to send these methods, use the
following code:
GetRoot().cardfile
Note that future Newton devices may not include the Names application. You should
therefore check for the existence of the Names application before trying to access
it. Use the following code to test for this:
if GetRoot().cardfile then ...
The methods provided allow you to
add a new card (
AddCard)
add data to an existing card (
AddCardData
)
turn to a particular card if Names is open (
ShowFoundItem
)
open the Names application to a particular card (
OpenTo
)
replace ink data in a card with a string (
ReplaceInkData
)
add an action to the Action picker (
RegNamesRouteScript
)
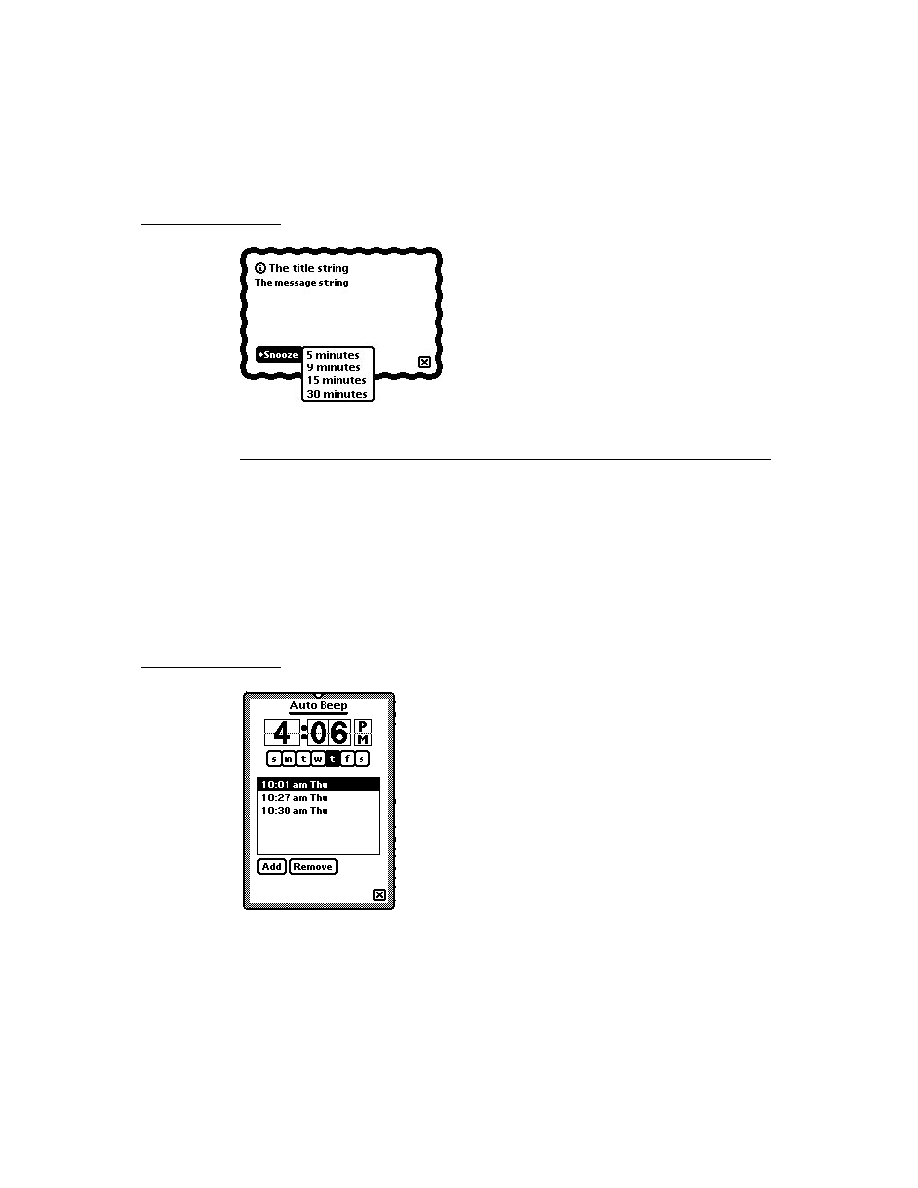
C H A P T E R 1 9
Built-in Applications and System Data
Names
19-7
get information from Names soup entries
for credit/phone card information (
BcCreditCards
)
for custom fields information (
BcCustomFields
)
for e-mail address information (
BcEmailAddress
)
for e-mail network information (
BcEmailNetwork
)
for phone number information (
BcPhoneNumber
)
These functions and methods are all described in Newton Programmer's Reference.
Using the Names Soup
19
The Names application stores its data in the
ROM_CardFileSoupName
("Names")
soup. Entries in this soup are frames for either a person, an owner, a group, a
company, or a worksite card.
The soup formats for each of these types of entries are described in "Names Soup
Format" (page 16-15) in Newton Programmer's Reference. A list of these frames is
available in the Summary; see "Names Soup" (page 19-49).
To avoid future compatibility problems with soup format changes, you should use
the Names methods provided for getting or setting information in the Names soup.
If none is available for getting the information you want, use the global functions
GetSysEntryData
and
SetSysEntryData
to get or change entries in any of
the built-in soups. They allow you to get and set the values of slots in a soup entry.
If you don't use these functions to get and set entry slots in the built-in soups, your
application may break under future versions of system software.
Using the Names Protos
19
The Names application uses two protos which are available to you:
protoPersonaPopup
and
protoEmporiumPopup
. These protos provide
pickers that maintain lists of personae and emporia. Personae are people who use
the Newton device, and emporia are places where the Newton device is used.
Note that you can get the information on the current
owner
and
worksite
from
the
user configuration
data stored by the system. This data is described in
"System Data" beginning on page 19-44.
protoPersonaPopup
19
This proto is used for a picker that lets the user maintain and switch between
different owner cards, or "personae." Here's an example:

C H A P T E R 1 9
Built-in Applications and System Data
19-8
Dates
The diamond appears only if there is more than one owner card; otherwise you see
just a name without a diamond. Tapping the name produces a picker showing the
names of all owner cards stored by the Names application in this Newton device.
protoEmporiumPopup
19
This proto is used for a picker that lets the user maintain and switch between different
information relevant to various locations where she may be. Here's an example:
When the user chooses a different city, information like time zone, area code, and
so on is changed to reflect the different location. Choosing "Other City" allows the
user to pick a different city anywhere in the world.
Dates
19
This section describes the Dates API. The Dates application manages meetings and
events, and is closely integrated with the To Do List application. Dates can display
the user's schedule by day, week, month, and year. It also integrates its information
with the To Do List in the Day's Agenda view. Figure 19-2 shows the Day and the
Day's Agenda views.
About the Dates Application
19
The Dates application interface consists of many methods of the calendar object
(for a list, see "Summary" beginning on page 19-46). Always use these methods to
access or modify Dates application data. Even though the soup format is
documented for your information, do not directly modify Dates soup entries,
except for any special slots that you might want to add and maintain yourself.
The Dates application can schedule meetings and events.
A meeting is an entry for a specific time during the day. People can be invited
and the meeting can be scheduled for a particular location. Note that meetings
use two kinds of icons, one for regular meetings and a special icon for weekly
meetings (meetings that repeat at the same time each week).
An event is an entry for a day but not for a particular time during that day.
Examples include a birthday, an anniversary, or a vacation. Events are entered
into the blank space at the top of the Dates application while in the Day view.
Events use three kinds of icons: one for single-day events, one for multiday
events, and one for annual events (such as birthdays).

C H A P T E R 1 9
Built-in Applications and System Data
Dates
19-9
Figure 19-2
Dates application Day and Day's Agenda views
Meetings and events can repeat. That is, they can recur on one or more days in
addition to the original meeting or event date.
The application is called Dates, because that is what the user sees, but in
programming the term "calendar" is used interchangeably and appears in the code.
Dates Compatibility
19
This section describes Dates features that are new, changed, or obsolete in system
software version 2.0, compared to 1.x versions.
All the Dates methods, variables, and constants described in this chapter are new.
The following slots are new in Dates soup meeting frames:
class
,
instanceNotesData
,
mtgIconType
,
mtgInvitees
,
mtgLocation
, and
version
. In addition, the
mtgText
slot may contain a rich string instead of a
plain string.
Dates soup notes frames are new; see "Notes Frames" (page 16-62) in Newton
Programmer's Reference.
The Dates application converts incoming soup entries that contain 1.x data into
soup entries that conform to the 2.0 data format. Conversion includes adding
particular slots to soup entries and, in some cases, removing slots. The data
conversion occurs when the Newton receives 1.x entries by beaming,
synchronizing using the Newton Connection Kit, or restoring from a backup.

C H A P T E R 1 9
Built-in Applications and System Data
19-10
Dates
In addition to changes in the programmatic interface, the 2.0 version has
extensive changes in the user interface.
In system software version 1.x, the Dates application allowed notes (text and
graphics) to be written without an associated meeting marker. In system
software 2.0, such notes, previously called annotations, cannot be written.
Annotations imported via Newton Connection Kit from a 1.x system are still
visible and editable, however. As in version 1.x, these objects are stored in the
ROM_CalendarSoupName
soup.
In 1.x versions, all instances of a repeating meeting or repeating events share the
same set of notes. A repeating meeting is one that recurs at a periodic time
interval. In 2.0, notes of a repeating meeting and repeating events are local to
each occurrence of the meeting. When a 1.x repeating meeting is converted to
2.0 format, all the notes are typically added to the meeting instance whose
meeting slip the user opens first.
Using the Dates Application
19
This section describes
adding meetings or events
deleting meeting or events
finding meetings or events
moving meetings or events
getting and setting information for meetings or events
creating and using a new meeting type
performing miscellaneous operations
controlling the Dates display
using the Dates soups
To get a reference to the Dates application, in order to send it the messages
described in this section, use this code:
GetRoot().calendar;
Note that future Newton devices may not include the Dates application. You should
therefore check for the existence of the Dates application before trying to access it.
Use the following code to test for this:
if GetRoot().calendar then ...

C H A P T E R 1 9
Built-in Applications and System Data
Dates
19-11
Adding Meetings or Events
19
You can programmatically add meetings and events by using the
AddAppointment
and
AddEvent
methods. You should use these methods rather
than adding entries in the Dates soups directly.
Here are some examples of adding meetings. Note that the parameters to
AddAppointment are (
mtgText, mtgStartDate
,
mtgDuration
,
repeatPeriod
,
repeatInfo
).
To schedule a one-hour lunch appointment:
GetRoot().calendar:AddAppointment("lunch with Ellen",
StringToDate("6/30/95 11:30am"), 60, nil, nil);
To schedule a twice weekly meeting on Mondays and Wednesdays:
GetRoot().calendar:AddAppointment("design meeting",
StringToDate("11/6/95 10:30am"), 60, 'weekly, [1, 3]);
To schedule a yearly party engagement at New Year's Eve:
GetRoot().calendar:AddAppointment("New Year's Eve Party",
StringToDate("12/31/96 9:00pm"), 120, 'yearly, nil);
Here are some examples of adding events; note that the parameters to
AddEvent
are:
(
mtgText, mtgStartDate
,
repeatPeriod
,
repeatInfo
).
To schedule an event:
GetRoot().calendar:AddEvent("buy flowers",
StringToDate("6/30/95"), nil, nil);
To schedule a birthday that repeats yearly:
GetRoot().calendar:AddEvent("George's birthday",
StringToDate("2/22/95"), 'yearly, nil);
To schedule Mother's Day:
GetRoot().calendar:AddEvent("Mother's Day",
StringToDate("5/14/95"), 'yearlyByWeek, nil);

C H A P T E R 1 9
Built-in Applications and System Data
19-12
Dates
Deleting Meetings and Events
19
The Dates application provides three methods for deleting meetings or events:
DeleteAppointment
,
DeleteRepeatingEntry
, and
DeleteEvent
.
These three methods all take the same parameters, as in
DeleteAppointment(
mtgTextOrFrame
,
mtgStartDate
,
deleteOneOnly
)
. The
meeting or event to be deleted can be identified in one of two ways:
By matching the title (in the mtgTextOrFrame parameter) and the start date (in
the mtgStartDate parameter) of the meeting or event.
By passing in a meeting frame for the mtgTextOrFrame parameter. A meeting
frame can be obtained either by calling one of two searching methods
(
FindAppointment
or
FindExactlyOneAppointment
) described in
"Finding Meetings or Events" (page 19-13), or by querying one of the Dates
soups, described in "Dates Soup Formats" (page 16-56) in Newton
Programmer's Reference.
As is explained in "Using the Dates Soups" (page 19-22), repeating meetings and
events are stored as a single soup entry (meeting frame) in either the "Repeat
Meetings" or "Repeat Notes" soups. Calling
DeleteAppointment
or
DeleteEvent
with a meeting title and start date (as in the first bullet above)
deletes only that instance of a repeating meeting or event. However, calling one of
these methods with a meeting frame (as in the second bullet above) stored in one of
these two soups deletes the entire series.
DeleteRepeatingEntry
deletes the
entire series of repeating events or meetings, regardless of whether a meeting frame
or the title and start date of an event or meeting is used.
Here are some examples of deleting meetings or events of different types:
To delete a meeting by title/start time:
GetRoot().calendar:DeleteAppointment ("lunch with Ellen",
StringToDate("6/30/95 11:30am"), true);
To delete the same meeting passing in a meeting frame returned by
FindExactlyOneAppointment
:
GetRoot().calendar:DeleteAppointment
(GetRoot().calendar:FindExactlyOneAppointment
("lunch with Ellen",
nil,
StringToDate("6/30/95 11:30am"),
'Meeting),
nil,
// these last two params. are ignored when
nil); // supplying a meeting frame.

C H A P T E R 1 9
Built-in Applications and System Data
Dates
19-13
To delete a single instance of the repeating event created in "Adding Meetings
or Events":
GetRoot().calendar:DeleteEvent ("George's birthday",
StringToDate("2/22/95"), true);
To delete the whole series of George's birthdays by passing in a meeting frame
for a repeating meeting:
GetRoot().calendar:DeleteEvent
( GetRoot().calendar:FindAppointment
("George's birthday",
nil,
StringToDate("2/22/95"),
'RepeatingEvent,
nil)
[0], //FindAppointment returns an array
nil,
// again, these two params. are ignored
nil);
The preferred way to delete the repeating event series is by calling
DeleteRepeatingEntry
:
GetRoot().calendar:DeleteRepeatingEntry
("George's birthday", StringToDate("2/22/95"), true);
Finding Meetings or Events
19
The Dates application provides two methods to find meetings or events in one of
the Dates soups:
FindAppointment
and
FindExactlyOneAppointment
.
The
FindAppointment
method takes the following parameters:
FindAppointment(
mtgText
,
findWords
,
dateRange
,
type
,
maxNumberToFind
)
. The
FindExactlyOneAppointment
method shares the
same first four parameters, but (not surprisingly) does not use a maxNumberToFind
parameter. The
FindExactlyOneAppointment
method functions exactly like
FindAppointment
, except that if more than one meeting or event fits the search
criteria, an exception (error 48418) is thrown.
The following examples show how to find meetings with these two methods:
To find all meetings in the month of June 1995 with the word "lunch" in the title
or the notes:
GetRoot().calendar:FindAppointment
(nil,
'["lunch"],

C H A P T E R 1 9
Built-in Applications and System Data
19-14
Dates
[StringToDate("6/1/95 12:00am"),
StringToDate ("6/30/95 11:59pm")],
nil,
nil);
To find the unique meeting in the month of June with the word "lunch" in the
title or the notes, and handle the possibility of an exception being thrown if this
criterion is not unique:
try
GetRoot().calendar:FindExactlyOneAppointment
(nil,
'["lunch"],
[StringToDate("6/1/95 12:00am"),
StringToDate("6/30/95 11:59pm")],
nil);
onexception |evt.ex| do
if CurrentException().data.errorCode = -48418
then //handle this case
else Rethrow()
The Dates application also provides a method,
FindNextMeeting
, which returns
an array with the meeting start date and duration, for the first meeting after a
specified time. The
FindNextMeeting
method is thus particularly useful for
finding an open time slot in the user's schedule.
Here is an example, which finds the next meeting after 2
P.M.
on November 1, 1996:
GetRoot().calendar:FindNextMeeting
(StringToDate("11/1/96 2pm"));
Moving Meetings and Events
19
To move an appointment programmatically you employ the
MoveAppointment
method.
Here is an example; note that the parameters to
MoveAppointment
are:
(
mtgText,mtgStartDate,newStartDate,newDuration
)
.
GetRoot().calendar:MoveAppointment(
"Job Review",
StringToDate("9/1/96 9:30am"),
StringToDate("9/8/96 4:00pm"),
nil //do not change duration
);

C H A P T E R 1 9
Built-in Applications and System Data
Dates
19-15
To move a meeting half an hour earlier and give it a different (90 minute)
duration:
GetRoot().calendar:MoveAppointment(
"lunch with Ellen",
StringToDate("6/30/95 12:00pm"),
StringToDate("6/30/95 11:30am"),
90);
MoveOnlyOneAppointment
works just like
MoveAppointment
except that if
it finds a nonexception instance of a repeating meeting or event that fits the criteria,
it moves only that instance.
MoveAppointment
would move all the
nonexceptions in that case.
To move a single occurrence of a repeating meeting:
GetRoot().calendar:MoveOnlyOneAppointment(
"design meeting",
StringToDate("11/13/95 10:30am"),
StringToDate("11/14/95 2:00pm"),
nil);
The
IncrementMonth
function can be especially useful when moving
appointments.
This example moves an appointment two months ahead:
GetRoot().calendar:MoveAppointment(
"lunch with Ellen",
StringToDate("6/30/95 12:00pm"),
IncrementMonth(StringToDate("6/30/95 11:30am"),2),
nil);
Getting and Setting Information for Meetings or Events
19
There are a number of Dates methods that get/set information stored in the
Dates soups:
Set a stop date for a repeating meeting with
SetRepeatingEntryStopDate
.
Set an alarm for a meeting with
SetEntryAlarm.
Get or set the meeting invitees with
GetMeetingInvitees
and
SetMeetingInvitees
.
Get or set a meeting location with
GetMeetingLocation
and
SetMeetingLocation
.
Get or set the meeting notes with
GetMeetingNotes
and
SetMeetingNotes
.

C H A P T E R 1 9
Built-in Applications and System Data
19-16
Dates
Get or set the meeting icon type with
GetMeetingIconType
and
SetMeetingIconType
.
The remainder of this section presents sample code that uses these methods. You
may wish to look at the summary section at the end of this chapter to see what the
parameters to these methods are.
// useful abbreviations
cal
:= GetRoot().calendar;
mtgName
:= "App Design Mtg";
mtgDur :=
60;
startDate
:= StringToDate("2/20/96 12:00pm");
appDueDate := StringToDate("7/23/96 12:00pm");
// schedule a weekly meeting at noon Tuesdays (2/20/96
// falls on a Tuesday)
cal:AddAppointment(mtgName,startDate,mtgDur,'weekly,nil);
// we stop having these meetings when app is due
cal:SetRepeatingEntryStopDate(mtgName,startDate,
appDueDate);
// set a 15-minute advance notice alarm for the meeting
cal:SetEntryAlarm (mtgName, startDate, 15);
// Add an invitee to the meeting. We know that there are
// presently no invitees, since we have just created this
// meeting. But in general, you would add to the present
// list of invitees. Here we add to the (empty) array.
invitees := cal:GetMeetingInvitees(mtgName,startDate);
AddArraySlot(invitees,{name:{first:"Jan",last:"Smith"}});
cal:SetMeetingInvitees(mtgName, startDate, invitees);
// set the location of a meeting to a place not in the
// Names soup
cal:SetMeetingLocation(mtgName, startDate, "Blue Room");
// if the meeting is not in the Blue Room beep
theRoom = cal:GetMeetingLocation(mtgName, startDate)
if not strEqual ("Blue Room", theRoom.company)
then GetRoot():SysBeep();

C H A P T E R 1 9
Built-in Applications and System Data
Dates
19-17
// get the notes of the last meeting. If there are no
// meeting notes, GetMeetingNotes returns nil
meetingNotes := cal:GetMeetingNotes(mtgName, appDueDate);
// add a paragraph to these notes, then set the meeting
// notes to this new array. Note, how care is taken
// not to overwrite any existing notes.
newNote := {viewStationery
:
'para,
text
:
"Last Design Meeting",
viewBounds
:
SetBounds(5, 5, 10, 10)
};
//Bounds will be expanded
//by system
if meetingNotes then
begin
lowestBottom := 0;
foreach elem in meetingNotes do
if elem.viewBounds.bottom > lowestBottom then
lowestBottom := elem.viewBounds.bottom;
newNote.viewBounds.top := lowestBottom + 5;
newNote.viewBounds.bottom := lowestBottom + 50;
AddArraySlot(meetingNotes, newNote);
end;
else
meetingNotes := [newNote];
// Now add the new note array to the meeting
cal:SetMeetingNotes (mtgName,AppDueDate,meetingNotes);
// check if the icon is of type 'WeeklyMeeting
// if it isn't make it so
if NOT (cal:GetMeetingIconType( mtgName, startDate)
= 'WeeklyMeeting)
then cal:SetMeetingIconType(mtgName, startDate,
'WeeklyMeeting);
Creating a New Meeting Type
19
You can programmatically add new meeting types by calling the Dates method
RegMeetingType
. The meeting type will appear in the New picker in the Dates
status bar. The
RegMeetingType
method takes two parameters, a symbol
identifying the meeting type--which should include your developer signature--
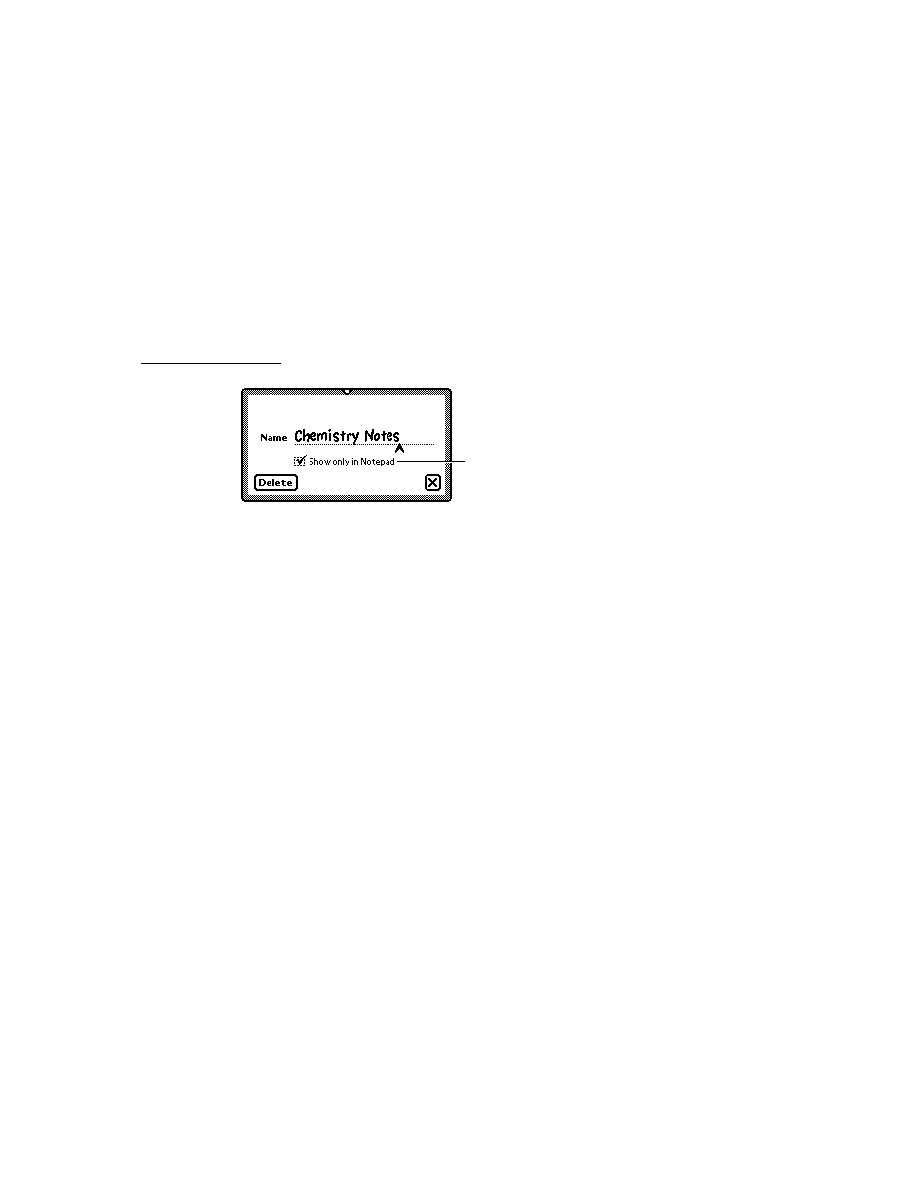
C H A P T E R 1 9
Built-in Applications and System Data
19-18
Dates
and a frame containing the definition of the new meeting type. This frame has the
following slots; see "RegMeetingType" (page 16-48) in Newton Programmer's
Reference for full details:
Slot description
item
Required. A string that is the meeting type name to appear in
the New picker.
icon
Required. The icon shown in the New picker. It should be no
larger than 24x15 pixels.
NewMeeting
Required.
Method called if the user chooses this meeting type
in the New picker.
smallIcon
Optional. The icon displayed in the meeting slip. It should be
no more than 12 pixels high. If this icon is not provided,
icon
is used, which may look ugly.
OpenMeeting
Optional. Method called when user taps an icon for a
meeting or event of this type. If this method is not provided,
Dates opens the default meeting slip.
memory
Optional. Where to store meeting titles of this type.
The
NewMeeting
method is passed in the date and time the note was created and
the
viewBounds
of the Dates application. It must create a meeting (or event)
using either
AddAppointment
(or
AddEvent
), and must add a slot to the
appointment created called
meetingType
. This slot must be set to the symbol
that identified the meeting type in the call to
RegMeetingType
. Remember to
call
EntryChange
to save this new slot.
If
NewMeeting
returns the meeting (or event) created, Dates then opens the
default meeting slip. You may also return
nil
from
NewMeeting
, in which case
you must have already opened the meeting slip from within
NewMeeting
. The
meeting slip should be opened by using the Dates method
RememberedOpen
,
which records this so that Dates can close the view, if Dates is closed. Use
RememberedClose
to close this view.
If you do define a custom meeting slip, you should also define an
OpenMeeting
method. This method is called when the user taps an icon of the type you have
created. For more information see
OpenMeeting
(page 16-50) in Newton
Programmer's Reference.

C H A P T E R 1 9
Built-in Applications and System Data
Dates
19-19
Examples of Creating New Meeting Types
19
The following example code registers a new meeting type for a monthly meeting:
GetRoot().calendar:RegMeetingType (
'|MonthlyMeeting:MySig|,
{
item: "Monthly Meeting",
icon: myIcon,
smallicon: mySmallIcon,
NewMeeting: func(date, parentBox)
begin
local appt:= GetRoot().calendar
:AddAppointment ("",date, 60,
'monthly, nil);
appt.meetingType:=
'|MonthlyMeeting:MySig|;
EntryChange(appt);
appt; // the calendar will open the
// default meeting slip if we
// return the new appointment
end,
});
To register a new meeting type for a monthly event with a custom meeting slip:
GetRoot().calendar:RegMeetingType (
'|Monthly Event:MySig|,
{
item: "Monthly Event",
icon: myIcon,
smallicon: mySmallIcon,
NewMeeting: func(date, parentBox)
begin
local appt := GetRoot().calendar
:AddEvent("", date, 'monthly, nil);
appt.meetingType := '|MonthlyEvent:MySig|;
EntryChange(appt);
:OpenMeeting(appt,date,cal:GlobalBox());
nil;
// tells calendar not to open
// default meeting slip
end,
OpenMeeting: func(meeting, date, parentBox)
begin
local cal := GetRoot().calendar;

C H A P T E R 1 9
Built-in Applications and System Data
19-20
Dates
local slip :=
BuildContext(
{_proto: protoFloater
viewFlags:vClickable + vFloating +
vApplication + vClipping,
viewJustify:0,
viewBounds:SetBounds (
parentBox.left+40,
parentBox.top+40,
parentBox.right-40,
parentBox.bottom-100),
declareSelf:'base,
stepChildren:
[
{viewStationery: 'para,
text:
"test slip",
viewBounds:RelBounds(10, 10,50, 20)
},
{_proto: protoCancelButton,
buttonClickScript: func()
//closes the view and tells
//calendar the view was closed
AddDeferredSend(
cal,
'RememberedClose,
[base]),
}
],
});
// open the view and tell Dates it was opened
GetRoot().calendar:RememberedOpen(slip);
nil;
// tells Dates not to open
// default meeting slip
end,
});
Miscellaneous Operations
19
Dates provides a number of methods that have not been mentioned elsewhere:
DisplayDate
displays meetings in the Dates application, To Do items, or the
agenda for a specified date.
GetSelectedDates
returns an array of the currently selected and
displayed dates.

C H A P T E R 1 9
Built-in Applications and System Data
Dates
19-21
OpenMeetingSlip
opens the meeting slip for a specific meeting or event.
RegInfoItem
adds and
UnRegInfoItem
or deletes an item in the Info picker
in the base view of the Dates application. This example shows how to add a
command that displays the next day's To Do List to the Info button:
GetRoot().calendar:RegInfoItem('|NextDayToDo:MyApp|,
{
item: "Next Day's To Do",
doAction: func()
begin
local cal := GetRoot().calendar;
cal:DisplayDate
(cal:GetSelectedDates() [0]
+(24*60),'ToDoList);
end;
});
Controlling the Dates Display
19
There are two system variables you can set to control specific features of the Dates
display:
firstDayOfWeek
and
useWeekNumber
.
The Dates variable
firstDayOfWeek
specifies what the first day of the week
should be, for display purposes. It holds an integer value from 0 to 6, where 0
means Sunday, 1 means Monday, and so on. The default value is 0, which means
that by default all months show Sunday as the first day of the week.
Once this value has been set, all new views of the class
clMonthView
and views
that display meeting frequency reflect the new value, but existing views must be
closed and reopened to reflect the new value. This variable is part of the
system-stored user configuration data (the Dates application checks there first), or
in the locale bundle frame (Dates checks there next).
The Dates variable
useWeekNumber
controls display of a week number in the
upper-left corner of the Dates view. If this slot is non-
nil
, the Dates application
displays the week number there. The first week of the year is number 1 and the last
week is number 52. This variable is a slot in the locale bundle frame.
To get and set the value of user configuration variables, use the functions
GetUserConfig
and
SetUserConfig
; this frame and the two functions are
described in "System Data" (page 19-44). To return the current locale bundle
frame, use the global function
GetLocale
.

C H A P T E R 1 9
Built-in Applications and System Data
19-22
To Do List
Using the Dates Soups
19
The Dates application stores meeting and event information and notes in the
following soups:
The slot structures of meeting frames and note frames are described in "Meeting
Frames" (page 16-57) and "Notes Frames" (page 16-62) in Newton Programmer's
Reference. A list of these frames is available in the Summary; see "Dates Soups"
(page 19-52).
Although the format of the various Dates soups is documented in this section, you
should not directly change entries. It is best to use the methods supplied by the
Dates application to get and set entries.
To Do List
19
This section describes the To Do List API. The To Do List application is integrated
into the Dates application; it is accessed through the Dates Show button. The To Do
List is shown in Figure 19-3.
About the To Do List Application
19
The To Do List API allows you to create To Do List items programmatically, check
them off, obtain them according to date and other criteria, and remove them by date
and other criteria.
Soup (name string)
Description
ROM_CalendarSoupName
("Calendar")
Entries are meeting frames for nonrepeating
meetings.
ROM_RepeatMeetingName
("Repeat Meetings")
Entries are meeting frames for repeating
meetings and notes frames for notes associated
with specific instances of a repeating meeting. A
single meeting frame entry describes all the
instances of a repeating meeting.
ROM_CalendarNotesName
("Calendar Notes")
Entries are meeting frames for nonrepeating
events.
ROM_RepeatNotesName
("Repeat Notes")
Entries are meeting frames for repeating events
and notes frames for notes associated with
specific instances of a repeating event.
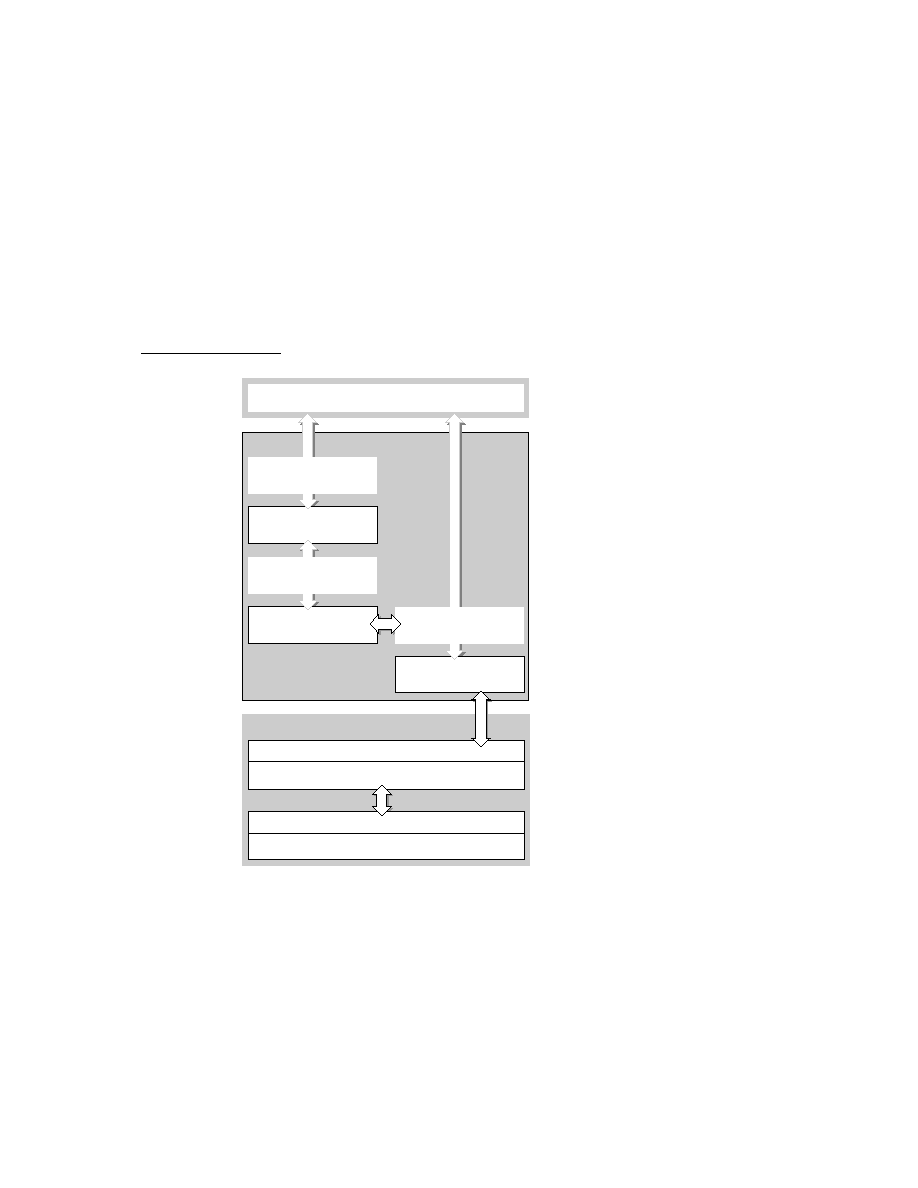
C H A P T E R 1 9
Built-in Applications and System Data
To Do List
19-23
Figure 19-3
The To Do List application
To Do List Compatibility
19
Version 2.0 reads and converts all 1.x To Do List soups. It does not reproduce
styling of text, because 2.0 doesn't support styling. It does not allow shapes and
sketches in a task, so shapes and sketches are thrown away.
Because the internal structure of the 2.0 To Do List soup is completely different
from that of the 1.x version, when you transmit a 2.0 soup to a 1.x system it creates
a 1.x entry.
Using the To Do List Application
19
This section provides information about the use of the To Do List soup and
methods. To obtain a reference to the To Do List in order to send it messages, use
the following code:
GetRoot().calendar:GetToDo();
Note that future Newton devices may not include the To Do List application. You
should therefore check for the existence of the To Do List application before trying
to access it. Use the following code for this test:
if GetRoot().calendar then
if GetRoot().calendar:?GetToDo() then ...

C H A P T E R 1 9
Built-in Applications and System Data
19-24
To Do List
Also, note that some of these methods only work when the To Do List is open. You
can ensure the To Do List is open by calling the Dates method
DisplayDate
passing in
'toDoList
for the format parameter as in the following code:
//open Dates and make it show today's To Do List
GetRoot().calendar:Open();
GetRoot().calendar:DisplayDate(time(),'toDoList);
This section describes
creating and removing To Do tasks
accessing tasks
checking-off tasks
using miscellaneous To Do List methods
using the To Do List soup
Creating and Removing Tasks
19
There are two To Do List methods that add a task:
CreateToDoItem
and
CreateToDoItemAll
. The
CreateToDoItem
method takes four parameters, as
in
CreateToDoItem(
date
,
richString
,
reminder
,
frequency
)
. The
CreateToDoItemAll
method takes two additional parameters, priority and
completed, which set the priority and completion status of the new task.
The following code example adds a task to today's To Do List:
GetRoot().calendar:GetToDo():CreateToDoItem (time(),
"test", nil, nil);
The To Do List
GetToDoEntry
method (discussed in "Accessing Tasks" beginning
on page 19-24) will also create a soup entry if one does not exist for that date.
To remove tasks, use the To Do List method
RemoveOldToDoItems
, which
removes either all or those tasks that have been marked-off before a specific date.
The following code sample removes all the nonrepeating To Do List tasks in the
twentieth century:
GetRoot().calendar:GetToDo():
RemoveOldToDoItems(StringToDate("1/1/2000"),'all,nil);
Accessing Tasks
19
The To Do List provides three methods for accessing tasks:
GetToDoItemsForThisDate
GetToDoEntry
GetToDoItemsForRange
.

C H A P T E R 1 9
Built-in Applications and System Data
To Do List
19-25
GetToDoItemsForThisDate
returns an array of tasks. Tasks are elements of
the array stored in the
topics
slot of a day's soup entry. For the structure of these
frames, see "To Do List Soup Format" (page 16-77) in Newton Programmer's
Reference. The following code example obtains today's tasks:
todaysTasksArray := GetRoot().calendar:GetToDo():
GetToDoItemsForThisDate(time());
GetToDoEntry
returns an array of soup entries for a specific day. Since the To
Do List stores tasks in a soup entry for each day, this array will contain an element
for each store that has a task stored under that day. The following code example
obtains today's soup entries:
todaysEntries := GetRoot().calendar:GetToDo():
GetToDoEntry(time(),nil);
Note
The
GetToDoEntry
method requires that the To Do
List be open.
GetToDoItemsForRange
returns an array of frames for each day in the range
passed in. The following code example retrieves the tasks for the next seven days:
nextWeeksTasks := GetRoot().calendar:GetToDo():
GetToDoItemsForRange(time(), time() + 7*24*60);
There is also a To Do List method,
NextToDoDate(
date
),
which returns the
date of the next task on or after date. This method can be useful in this context.
Checking-Off a Task
19
A tasks is marked as completed with the To Do List method
SetDone
. This
method requires the To Do List to be open; you can make sure the To Do List is
open by calling the Dates method
DisplayDate
. The following code sample
marks off a task:
//open Dates and make it show today's To Do List
GetRoot().calendar:Open();
GetRoot().calendar:DisplayDate(time(),'toDoList);
//get a reference to today's tasks
todaysTasksArray := GetRoot().calendar:GetToDo():
GetToDoItemsForThisDate(time());
//find a task that says "test"
for i := 0 to length(todaysTasksArray) - 1 do
if StrEqual (todaysTasksArray[i].text, "test") then

C H A P T E R 1 9
Built-in Applications and System Data
19-26
To Do List
begin
theTask
:= todaysTasksArray[i];
theIndex := i;
end;
//and mark it as done
GetRoot().calendar:GetToDo():
SetDone(theIndex,theTask,true,nil,nil);
The third parameter to
SetDone
determines whether a task is checked off; passing
nil
unchecks it.
Miscellaneous To Do List Methods
19
The To Do List also provides the following methods:
GetTaskShapes
and
GetToDoShapes
return the shapes necessary to draw
tasks, which are used for printing.
LastVisibleTopic
returns the index in the
topics
array of the last
task drawn.
SetPriority
sets the priority of a task. (This method requires the To Do List
to be open.)
EnsureVisibleTopic
scrolls the To Do List as necessary to ensure that a
task is visible. (This method requires the To Do List to be open.)
Using the To Do List Soup
19
The To Do List stores its data in the "To Do List" soup. Entries in this soup are
frames for either a particular day, or for all repeating to do items.
In this soup, each day has a single entry that includes a
topics
slot, which is an
array of tasks for that day. All repeating tasks are saved in a single entry, with a
date
slot of 0.
If one day is represented by an entry on each of several stores of the soup--for
example, if there was one entry in internal store and one on a storage card--the To
Do List merges the entries for display purposes. The entries are not actually moved
from one store to another in this process.
For information about the structure of entries in this soup, see "To Do List Soup
Format" (page 16-77) in Newton Programmer's Reference. A list of these frames is
available in the Summary; see "To Do List Soup" (page 19-53).
To avoid future compatibility problems with soup format changes, you should use
the global functions
GetSysEntryData
and
SetSysEntryData
to get or
change entries in any of the built-in soups. They allow you to get and set the values
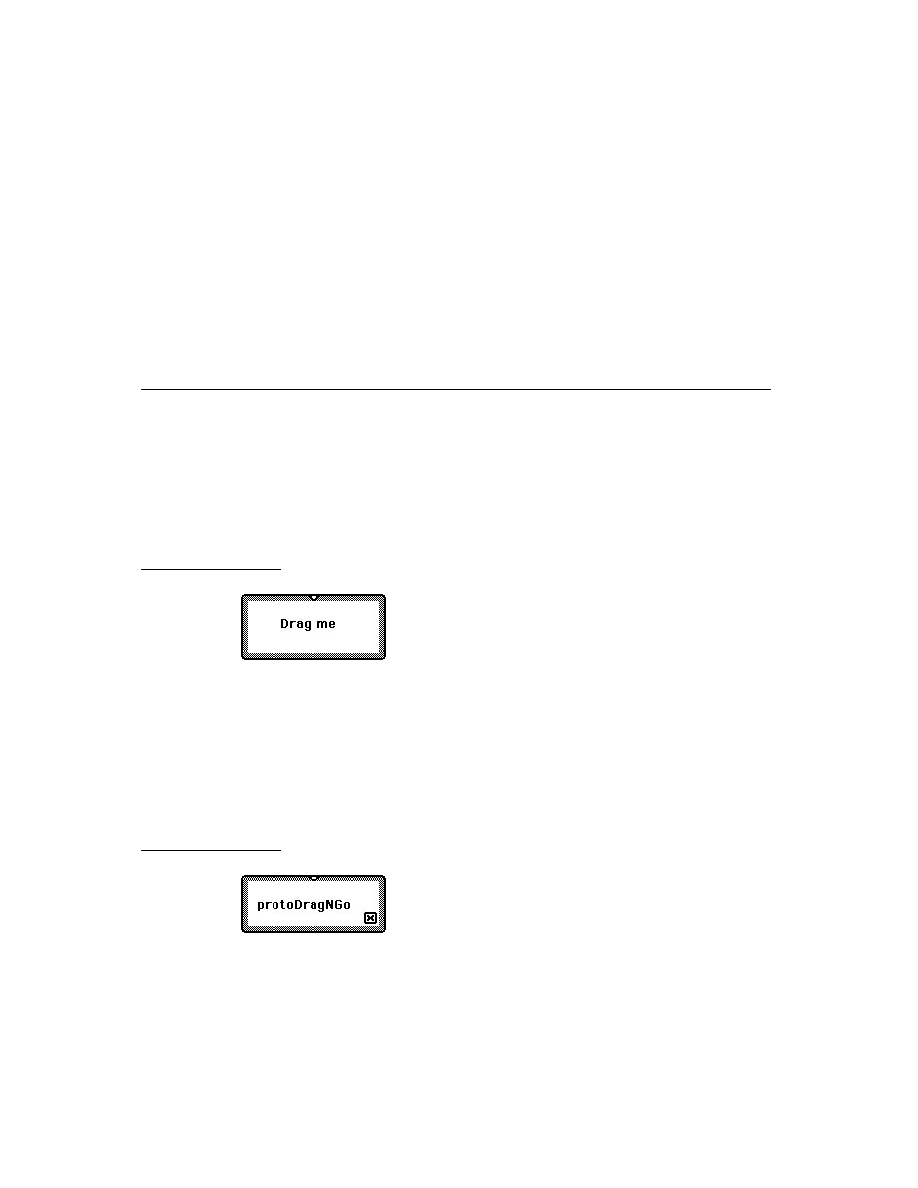
C H A P T E R 1 9
Built-in Applications and System Data
Time Zones
19-27
of slots in a soup entry. If you don't use these functions to get and set entry slots
in the built-in soups, your application may break under future versions of
system software.
Time Zones
19
This section describes the Time Zones API. The Time Zones application is shown
in Figure 19-4.
Figure 19-4
The Time Zones application
About the Time Zones Application
19
The Time Zone application lets the user access information about locations, which
may come from the system, the user, or from another application. The user can
browse the cities of the world for the time and other travel information, such as
network access phone numbers. The user can define a Home City, an Away City,
and other locations of interest (emporia). Information the user specifies is
available to your application. When the user specifies that the Newton device is in a
new location, local information, such as network phone numbers, is available to
your application. For more information on localization, see Chapter 20,
"Localizing Newton Applications."
Time Zone Compatibility
19
The Time Zone application runs only on version 2.0, and is fully compatible with
older versions back to 1.3.

C H A P T E R 1 9
Built-in Applications and System Data
19-28
Time Zones
Using the Time Zone Application
19
The application program interface provides functions for retrieving information
about cities and countries, a method to add a city to a Newton device's list of cities,
and a method to set the home city. To call a Time Zones method, you need a
reference to the application. To obtain this reference, use the following code:
GetRoot().worldClock
Note that future Newton devices may not include the Time Zones application. You
should therefore check for the existence of the Time Zones application before
trying to access it. Use the following code to test for this:
if GetRoot().worldClock then ...
Obtaining Information About a City or Country
19
The
GetCityEntry
and
GetCountryEntry
global functions return information
about a number of cities and countries around the world. This information is
available to the user by picking All Info from the Show picker, shown in Figure 19-5.
Figure 19-5
Time Zones application's All Info view
Both these functions take a string as an argument for the city or country to return
information about. The search is conducted by string comparison with this
argument. You should be aware that although there may be variations of the name
of a city or country, only one name is stored on the Newton device. For example,
GetCityEntry("Los Angeles")
returns a frame with information about Los
Angeles, but
GetCityEntry("LA")
does not. You should check the spelling in
the Time Zones application of city or country names you wish to use. Keep in mind

C H A P T E R 1 9
Built-in Applications and System Data
Time Zones
19-29
though that the list of cities and countries is not necessarily the same on your
Newton device and the user of your application. Your application should also check
string names for cities and countries entered by the user.
The
GetCountryEntry
function performs an additional search based on the
class of the string passed in. This is done in order to take into account the language
of the ROM used; the symbols are all in English. To set the class of a string, use the
SetCountryClass
function, described in Chapter 20, "Localizing Newton
Applications."
The frame returned by the
GetCityEntry
function is the same as the
newCityFrame parameter to the
NewCity
function described in "Adding a City to
a Newton Device" beginning on page 19-29. For information on the frame returned
by the
GetCountryEntry
function see the description of this function in Newton
Programmer's Reference.
Adding a City to a Newton Device
19
The Time Zones
NewCity
method adds a city to a Newton device. It takes a
newCityFrame parameter which is a frame with the following slots:
Slot descriptions
name
Required. A string containing the name of the location.
longitude
Required. The longitude of the location. The formula for
generating this value appears in "Using Longitude and
Latitude Values" beginning on page 19-30.
latitude
Required. The latitude of the location.
gmt
Required. The offset in minutes from Greenwich Mean Time.
country
Required. A symbol representing the country in which the
city is located.
areaCode
Optional. A string for the area code of the location.
region
Optional. A string for the region of the location. For cities
in the U.S. this should be the state; for cities in Canada
the province.
airport
Optional. A string for the airport designation for the city, or
an array of strings if the city is served by multiple airports.
Here is an example of such a frame:
{name:"Portland",
longitude:354036540,
latitude:67929083,
gmt:
-28800,
country:'USA,

C H A P T E R 1 9
Built-in Applications and System Data
19-30
Notes
areaCode: "503",
region:"OR",
airport:"PDX"}
Using Longitude and Latitude Values
19
To calculate the latitude or longitude of a location, create and use the
following function:
CalcLngLat := func(dgrs, min, secs, westOrSouth) begin
local loc;
loc := dgrs / 180 + min / (180 * 60) + secs
/ (180 * 60 * 60);
loc := rinttol(loc * 0x10000000);
if westOrSouth then
loc := 0x20000000 - loc;
loc;
end;
The built-in utility functions
LatitudeToString
and
LongitudeToString
return a string representation of an encoded integer latitude or longitude value. For
information on these functions see Newton Programmer's Reference.
Setting the Home City
19
The
SetLocation
method sets the home city. It takes a single parameter
whichCity which is the same as the newCityFrame parameter of the
NewCity
method; see "Adding a City to a Newton Device" beginning on page 19-29. The
following code makes Los Angeles the home city:
GetRoot().worldClock:SetLocation( GetCityEntry
("Los Angeles") [0] );
Notes
19
This section describes the Notes API. The Notes application uses three types of
stationery: regular notes, checklists, and outlines. Figure 19-6 shows a note and a
checklist; an outline (not shown) is like the checklist without the checkboxes.

C H A P T E R 1 9
Built-in Applications and System Data
Notes
19-31
Figure 19-6
Notes note and Checklist views
About the Notes Application
19
Notes is a simple application based on NewtApp that allows the user to create new
stationery, scroll up and down, route and file notes, and scan an overview.
The Notes API is limited to a few methods which allow you to create new notes.
The Notes application can be extended by adding auxiliary buttons, as described in
"Auxiliary Buttons" beginning on page 19-36.
The name of the application is Notes, which is what the user sees, but in
programming the term
paperroll
is also used and appears in the code.
Notes Compatibility
19
There are some anomalies in converting ink from system software 2.0 to earlier
versions of the system. Version 2.0 ink text is converted to straight ink when
viewed in 1.x versions. Paragraphs with mixed regular and ink text are converted so
that the regular text loses any styles; for example in 1.x versions, it becomes
18-point user font. Any paragraph that contains ink text is reflowed in 1.x versions
so that line layouts (breaks) are different from the original. This means that the
paragraph may grow taller. Ink works converted from 2.0 to 1.x straight ink appear
in the size originally drawn, not in the 2.0 scaled size.

C H A P T E R 1 9
Built-in Applications and System Data
19-32
Notes
Using the Notes Application
19
This section describes the methods that add new notes, and the Notes soup format.
To obtain a reference to the Notes application in order to send it messages, use the
following code:
GetRoot().paperroll
Note that future Newton devices may not include the Notes application. You should
therefore check for the existence of the Notes application before trying to access it.
Use the following code to test for this:
if GetRoot().paperroll then ...
Creating New Notes
19
The Notes method
MakeTextNote(
string
,
addIt
)
creates a note that consists of a
single string. The addIt parameter is a Boolean; pass
true
for addIt to add the note
to the Notes soup. The following code adds a note programmatically:
GetRoot().paperroll:MakeTextNote
("Isn't this easy?",true);
If you want to add a more sophisticated note, follow these steps:
1. Create a note with
MakeTextNote
, but pass
nil
for the addIt parameter.
MakeTextNote
returns a note frame.
2. Modify the
data
slot of the frame returned by
MakeTextNote
. The
data
slot
must be an array of frames that have the format described in "Notes Soup
Format" (page 16-82) in Newton Programmer's Reference.
3. Call the Notes method
NewNote
with the modified note frame.
Below is an example of this procedure:
// create a note frame
notes :=
GetRoot().paperroll;
theNote := notes:MakeTextNote ( "", nil);
// modify the data slot. Note that the data array now
// contains a frame for the empty string.
theNote.data :=
[{viewStationery :'para, // a text object
viewBounds : {top:3, left:3, right:97, bottom:97},
text : "I'm just a string."},
{viewStationery :'poly, //a polygon object
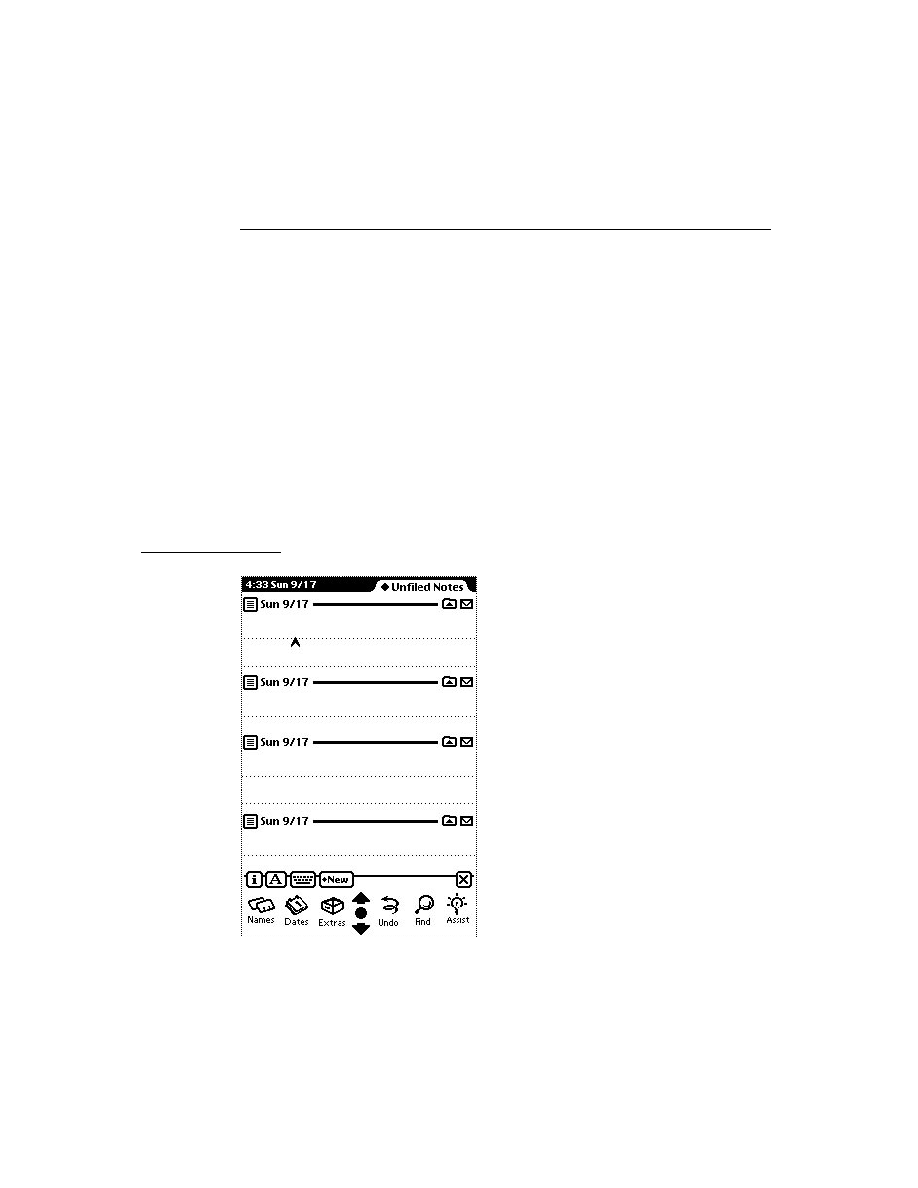
C H A P T E R 1 9
Built-in Applications and System Data
Notes
19-33
points :ArrayToPoints ([11, // a rectangle
5,
//how many points
0,0,
//first point
0,25, //second
150,25,//third
150,0,//fourth
0,0]),//back home
viewBounds : {top:0, left:0, right:100, bottom:100}}
];
//Add the note to the Notes application
notes:NewNote ( theNote, true, nil);
This creates the note shown in Figure 19-7.
Figure 19-7
Note added using
NewNote
method
Adding Stationery to the Notes Application
19
The Notes application includes three types of built-in stationery: notes, outlines,
and checklists. In addition, you can create your own stationery. For information on
how to do this see Chapter 5, "Stationery," which includes an extended example of
adding stationery to the Notes application.
Using the Notes Soup
19
The Notes soup holds individual entries for the different kinds of built-in stationery
as follows:
note--the lined paper used for the Notes
outline--paper with automated outlining
checklist--outline paper with a box to check off completed items

C H A P T E R 1 9
Built-in Applications and System Data
19-34
Fax Soup Entries
Detailed information on the data structures that support these stationeries is provided
in "Notes Soup Format" (page 16-82) in Newton Programmer's Reference. A list of
these frames is available in the Summary; see "Notes Soup" (page 19-53).
To avoid future compatibility problems with soup format changes, you should use
the global functions
GetSysEntryData
and
SetSysEntryData
to make
change entries in any of the built-in soups. These allow you to get and set the
values of slots in a soup entry. If you don't use these functions to get and set entry
slots in the built-in soups, your application may break under future versions of
system software.
Fax Soup Entries
19
This section describes Fax soup entries.
About Fax Soup Entries
19
If you want to use a received fax in your application, you can find it in the In/Out
Box soup or set up a process to route it to your application by means of the
PutAwayScript
or the
AutoPutAway
messages, both described in Newton
Programmer's Reference.
The
PutAwayScript
message results from a user action. An application can
register to handle putting away fax data by using the
RegAppClasses
function,
see
RegAppClasses
in Newton Programmer's Reference.
The
AutoPutAway
message requires no user action. The In Box checks for an
AutoPutAway
method in the base view of the application whose
appSymbol
slot
matches that in the item. If the
AutoPutAway
method exists, the In Box sends the
AutoPutAway
message to the application, passing the incoming item as a
parameter.
In either case, the
body
slot from the In/Out Box entry is passed to the application.
All the fax data that an application needs is embedded within the
body
slot; see
"Using Fax Soup Entries" (page 19-34).
You may also want to use the system prototypes that relate to viewing and
manipulating images with your fax data. They are
protoImageView
,
protoThumbnail
, and
protoThumnailFloater
.
Using Fax Soup Entries
19
When an entry is submitted to the In/Out Box from a transport such as fax receive,
or from an application, the fax is stored in the
body
slot of the In/Out Box soup
entry. The In/Out Box stores the original application soup entry in a frame called

C H A P T E R 1 9
Built-in Applications and System Data
Prefs and Formulas Rolls
19-35
body
within the In/Out Box soup entry, where a user can view it. Applications may
be passed an In/Out Box soup entry as part of the putting away process. For more
information on handling items coming from the In/Out Box, see "Receiving Data"
beginning on page 21-31 in Newton Programmer's Guide.
The structure of the
body
frame is described in "Fax Soup Entries Reference"
(page 16-94) in Newton Programmer's Reference.
Prefs and Formulas Rolls
19
This section describes the Prefs and Formulas API's. Figure 19-8 shows custom
panels added to these two applications by DTS sample code.
Figure 19-8
Custom Prefs and Formulas Panels
About the Prefs and Formulas Rolls
19
The Prefs application presents the user with a list of items for which such preferences
as handwriting recognition and sound levels can be set. These are system-wide or
system-level preferences, do not add application-specific preferences to the Prefs
roll. The Formulas application contains a list of items that perform some sort of
calculation for the user.
You can extend the Prefs and Formulas rolls through the registry functions:
RegPrefs
and
RegFormulas
.

C H A P T E R 1 9
Built-in Applications and System Data
19-36
Auxiliary Buttons
Prefs and Formulas Compatibility
19
The functions
RegPrefs
,
UnRegPrefs
,
RegFormulas
, and
UnRegFormulas
are new to the 2.0 system.
Using the Prefs and Formulas Interfaces
19
This section describes how to add panels to the Prefs and Formulas rolls.
Adding a Prefs Roll Item
19
The
RegPrefs
function adds a panel to the Prefs rolls. This roll is not intended for
application-specific preferences, but rather for system-wide preferences.
Application-specific preferences should be set through an information button (an
"i" button) in the application base view's status bar. For more on the information
button, see
newtInfoButton
or
protoInfoButton
, depending on whether
you are working in the NewtApp framework or not.
The item added to the Prefs roll should be based on
protoPrefsRollItem
. The
UnRegPrefs
function reverses the effects of the
RegPrefs
function.
Adding a Formulas Roll Item
19
The
RegFormulas
function adds a panel to the Formulas roll. There is no proto
tailored for use as a Formulas panel. Instead, you should attempt to make your
panel look and act like the system-supplied panels. For an example of a template
with the look of the built-in Formulas panels, see the DTS sample code related to
the Prefs and Formulas rolls.
The
UnRegFormulas
function reverses the effects of the
RegFormulas
function.
Auxiliary Buttons
19
This section describes the use of auxiliary buttons. Figure 19-9 shows the effect of
adding an auxiliary button to the Notes application.
About Auxiliary Buttons
19
A set of functions allow you to add buttons to the status bars of the Notes and
Names applications. Third-party applications can use this mechanism to allow
themselves to be extended.
Auxiliary Buttons Compatibility
19
The auxiliary buttons mechanism is new to the Newton 2.0 system.
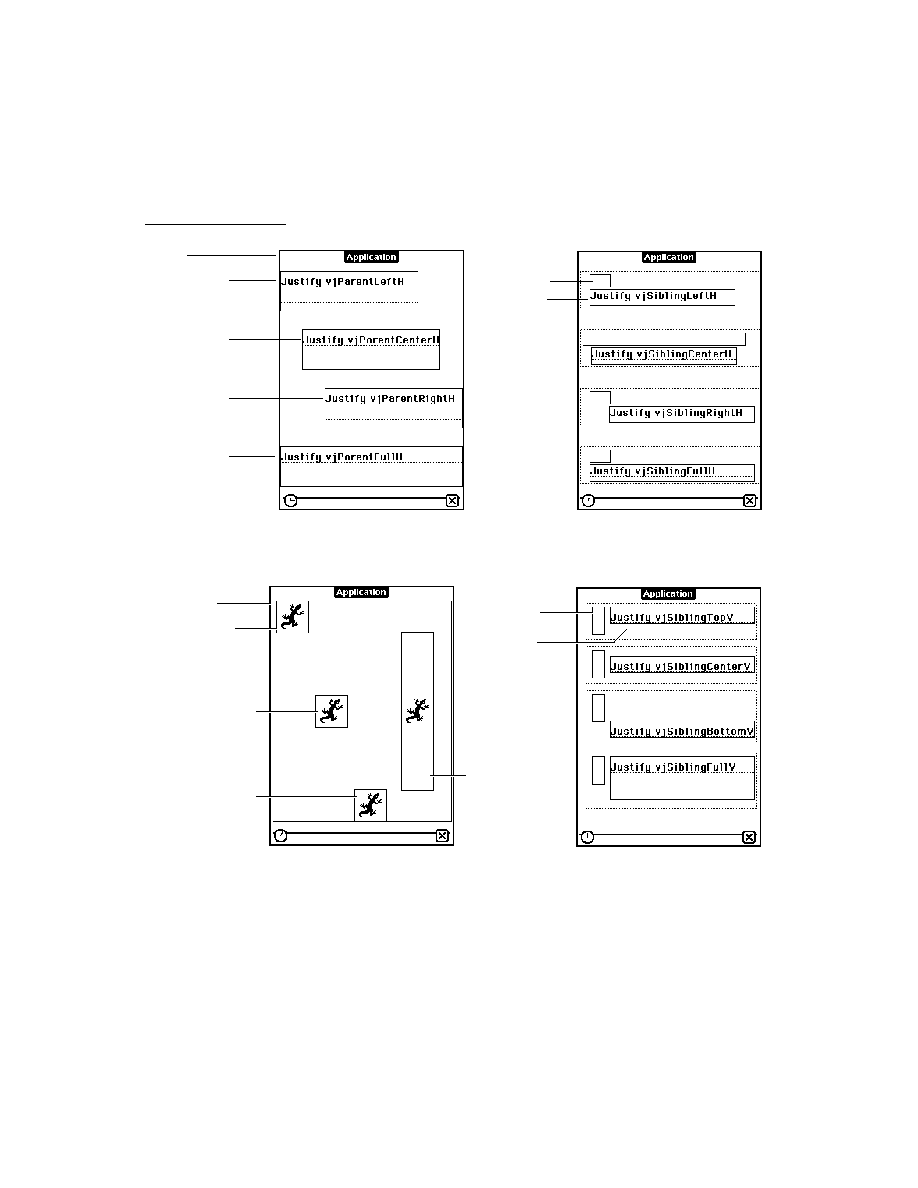
C H A P T E R 1 9
Built-in Applications and System Data
Auxiliary Buttons
19-37
Figure 19-9
The Notes application with and without an auxiliary button
Using Auxiliary Buttons
19
You can add buttons to the status bars or other locations in the Notes and Names
applications. Your application may also use this mechanism to allow itself to be
extended.
RegAuxButton
and
UnRegAuxButton
are the functions that add and remove a
button from the auxiliary button registry; they are called by button providers.
Button providers can ignore the descriptions of the other functions, which are
called by button hosts.
Here is an example of registering a button with the Notes application:
RegAuxButton('|smileButton:PIEDTS|,
{destApp: 'paperroll,// Add buttons to Notes
_proto: protoTextButton,
text: "Smile!",
viewBounds: RelBounds(0,0,40,10),
buttonClickScript: func() print("Cheese!")
});
This code added the auxiliary button shown in Figure 19-9.
The following code shows how this button should be removed:
UnRegAuxButton('|smileButton:PIEDTS|);
You should be careful what assumptions you make about the environment where
the button will appear. The buttons may not be on a
protoStatusBar
or have a
base
slot available by inheritance, and the implementation details of the built-in
applications may well change in the future. Remember to check your assumptions
and catch exceptions.

C H A P T E R 1 9
Built-in Applications and System Data
19-38
Icons and the Extras Drawer
Any application that adds buttons to another application should provide a preference
that allows the user to enable or disable the display of the source application buttons
in the destination application. The user may want to suppress buttons because the
buttons from several source applications may be too many to fit in a single destination
application. The user should be able to choose which should appear, and the
preference should normally default to not registering the button.
Note that a button you register might not appear at all if too many buttons are
already registered in the destination application, so you must ensure alternative
access to your application through conventional means, such as the Extras Drawer.
Also note that packages that install buttons into other applications may cause the
system to display the card reinsertion warning if they are on a card that has been
ejected. It is wise to advise or require users to install packages on the internal store
if they are going to register buttons in other applications.
The functions
GetAuxButtons
,
AddAuxButton
, and
RemoveAuxButton
are
for use by button hosts that are adding the buttons to their own status bars (or
wherever is appropriate). You should call
GetAuxButtons
in your base view's
ViewSetupChildrenScript
and merge the resulting array with the buttons
that always appear on your status bar. You should probably also override the
viewBounds
or
viewJustify
slots of the buttons, to place them correctly.
If your application is the backdrop application, this array contains both the buttons
specific to your application and any designated for the backdrop application. You
do not need to write any special code to detect whether your application is the
backdrop application.
Icons and the Extras Drawer
19
This section describes the Extras Drawer's API for icon management.
About Icons and the Extras Drawer
19
As you may know, you can design custom icons for your application in NTK.
Information on how to do this is provided in the Newton Toolkit User's Guide. You
can also programmatically change the picture of the icon and the text displayed
under it.
There are two special purpose icons you can add to the Extras Drawer--script
icons and soup icons. A script icon is an icon that executes a function object when
tapped. A soup icon acts as a container, under which the icons of various soups are
combined. You should create a soup icon if your application creates more than one
soup, since this will unclutter the Extras Drawer. You also need to create soup icons
to support the soupervisor mechanism (described later in this section).

C H A P T E R 1 9
Built-in Applications and System Data
Icons and the Extras Drawer
19-39
This section also covers creating a cursor that iterates over icons in the Extras
Drawer, and a number of functions that manipulate the entries these cursors iterate
over. With these functions you can programmatically open an icon (which has the
same effect as a user tapping the icon), and get information about the package the
icon represents.
In addition, the Newton 2.0 system creates an icon for any soup on a mounted store
in the Storage folder of the Extras Drawer. Tapping this icon brings up a slip that
displays information about the memory consumption of the soup (see Figure 19-10).
It also provides a delete button, which can delete the soup. And, without too much
work, you can provide a filing button that allows the user to move the soup to a
different store or folder. This is accomplished through what is called the
soupervisor mechanism.
Figure 19-10
The information slips for an application's soup that do and do not
support the soupervisor mechanism (note extra filing button)
Extras Drawer Compatibility
19
Everything described in this section is new to the Newton 2.0 system.
Using the Extras Drawer's Interface for Icon Management
19
This section covers the following topics:
creating cursors that iterate over the icons in the Extras Drawer
changing an icon's information
creating script and soup icons
supporting the soupervisor mechanism
To accomplish some of these tasks, you need to send messages to the Extras
Drawer. Use this code to get a reference to the Extras Drawer:
GetRoot().extrasDrawer

C H A P T E R 1 9
Built-in Applications and System Data
19-40
Icons and the Extras Drawer
Using Extras Drawer Cursors
19
The Extras Drawer method
GetPartCursor
creates a cursor that can iterate over
parts (icons) in the Extras Drawer. You can create a cursor that iterates over parts in
a specific store, a particular folder of the Extras Drawer, a particular package, or a
combination of these criteria. This cursor is a normal soup cursor, as described in
Chapter 11, "Data Storage and Retrieval."
Entries returned by part cursors are subject to change. These entries should be
manipulated only with one of the following three Extras Drawer methods:
GetPartEntryData
returns information about a part.
LaunchPartEntry
has the same effect as the user tapping the icon.
SetExtrasInfo
sets data in a part entry; see "Changing Icon Information."
Changing Icon Information
19
The Extras Drawer method
SetExtrasInfo
can be used to change the icon or
text under an icon. It can also change the
labels
slot of an icon, which has the
effect of filing the icon. If the icon is a soup icon, you may also change the array of
soups that this icon represents and the application that owns these soups.
Adding a Soup Icon
19
If your application uses more than one soup or you want to file or move entire
soups through the soupervisor mechanism, you should consider using a soup icon,
so that only one icon appears in the Extras Drawer. You should store this icon in the
internal store, otherwise all the component soups will reappear when the external
store is removed. Also, you should give the icon a different package name from
your application in your call to
AddExtraIcon
, both as the pkgName parameter
and in the
app
slot of the paramFrame parameter. Again, this is so that it is not
removed when your application is.
You add a soup icon to the Extras Drawer by calling its
AddExtraIcon
method.
Passing the symbol
'soupEntry
for the first parameter specifies that the icon to
add is a soup icon.
The rest of this section provides sample code for installing a soup icon. Before
trying to understand this code, you should read the description of
AddExtraIcon
(page 16-88) in Newton Programmer's Reference.
//Useful constants
constant kMySoupNamesArray := '["soup1:NDTS",
"soup2:NDTS", "soup3:NDTS" ];
constant kMySoupUserName := "Souper Thing";
DefConst('kSoupPackageName, "Soups:" & kPackageName);

C H A P T E R 1 9
Built-in Applications and System Data
Icons and the Extras Drawer
19-41
InstallScript := func (partFrame)
begin
local ed
:= GetRoot().extrasDrawer;
local iStore
:= GetStores()[0];
//check if our icon is already installed
if Length (ed:GetExtraIcons ('soupEntry,
kSoupPackageName, iStore)) = 0 then
call kAddExtraIconFunc with
('soupEntry,
{
//soups we are combining
soupNames: kMySoupNamesArray,
//title shown under the icon
text : kMySoupUserName,
//for the soupervisor mechanism
ownerApp : kAppSymbol,
//for access via SetExtrasInfo
app : kSoupPackageName,
}
//Note, we do not use kPackageName since
//we don't want the icon moved when the
//package is moved.
kSoupPackageName,
iStore);
end;
The Extras Drawer method
GetExtraIcons
used in the above code to obtain an
array of soup icons that match the package name is described in
GetExtraIcons
(page 16-90) in Newton Programmer's Reference.
Removing a Soup Icon
19
Use the Extras Drawer method
RemoveExtraIcon
to remove your soup icon, as
in the following code:
//A good place for this would be in a DeletionScript
local ed := GetRoot().extrasDrawer;
foreach icon in ed:GetExtraIcons ('soupEntry,
kSoupPackageName, GetStores()[0]) do
ed:RemoveExtraIcon (icon);

C H A P T E R 1 9
Built-in Applications and System Data
19-42
Icons and the Extras Drawer
Creating a Script Icon
19
Installation of a script icon is basically the same as that for a soup icon. The two
main differences are that the symbol
'scriptEntry
is passed in for the iconType
parameter of
AddExtraIcon
, and the paramFrame argument contains different
slots. However, with a script icon it is not important to keep this icon in the internal
store. Instead, you should ensure that the icon is installed on the same store as the
package with which it is associated.
The most likely use for a script icon is for a transport to bring up an interface for
user preferences. The code sample shown below brings up a such a slip:
//Useful constants.
DefConst('kMyConfigSlipSym,
Intern("configSlip:" & kAppSymbol));
constant kScriptIconName
:= "ScriptIcon Slip";
constant kScriptIconPkgName:= Intern ("Script:" &
kAppSymbol);
// get the icon picture
r := OpenResFileX(HOME & "pictures");
DefConst('kMyScriptIcon, GetPictAsBits("TARDIS", nil));
CloseResFileX(r);
// the tap action, small and simple
DefConst('kTapScript, func()
GetGlobalVar(kMyConfigSlipSym):Open() );
DefConst('kScriptIconParamFrame,
{
// name in the Extras Drawer
text: kScriptIconName,
// icon in the Extras Drawer
icon: kMyScriptIcon,
// to allow access via SetExtrasInfo
app:kScriptIconPkgName,
// function to call when icon is tapped
tapAction: kTapScript
}
);

C H A P T E R 1 9
Built-in Applications and System Data
Icons and the Extras Drawer
19-43
InstallScript := func(partFrame, removeFrame)
begin
local mySlip := GetLayout("MySlip.t") ;
// install the slip
DefGlobalVar (kMyConfigSlipSym, BuildContext(mySlip));
local ed := GetRoot().extrasDrawer;
//Figure out which store our package is in. This code
//will work for a form part, as long as the argument
//to ObjectPkgRef is a reference type (i.e., a
// pointer).
local myStore := GetVBOStore(ObjectPkgRef(mySlip));
//check if our icon is already installed
if Length(ed:GetExtraIcons('ScriptEntry, kPackageName,
myStore)) = 0 then
call kAddExtraIconFunc with
('ScriptEntry,
kScriptIconParamFrame,
kPackageName,
myStore);
end;
RemoveScript := func(removeFrame)
// remove the slip
UnDefGlobalVar(kMyConfigSlipSym);
Note that you do not have to remove the script icon, since it is associated with your
package. When the package is removed, the icon is removed as well. But if you
wish to remove it at some other time, you can do so with a call to the Extras
Drawer method
RemoveExtraIcon
.
Using the Soupervisor Mechanism
19
In order to take advantage of the soupervisor mechanism, you need to do
the following:
1. At build time, add an
ownerApp
slot to your part frame. This slot should be set
to your application symbol. You can do this with a call to
SetPartFrameSlot
,
as in the following code:
call SetPartFrameSlot with ('ownerApp, kAppSymbol);

C H A P T E R 1 9
Built-in Applications and System Data
19-44
System Data
2. Add a frame called
soupervisor
to your application's base view. Note that
this means you cannot add a
soupervisor
frame to an autopart unless
GetRoot.(kAppSymbol)
exists. This frame must have a slot called
type
.
The possible values for the
type
slot are
'moveOnly
Allows a user to move all soup entries to a different store.
'fileOnly
Allows a user to file all soup entries to a different folder.
'all
Allows a user to move and file all soup entries.
3. Create a soup icon whose
ownerApp
slot is your application's application
symbol; see "Adding a Soup Icon" beginning on page 19-40.
If you wish to gain control over this process (or some part of it), you may define
one or more of the following optional methods in your soupervisor frame:
FileSoup
,
FileEntry
, and
MoveEntry
. These three methods are described in
"The Soupervisor Frame" (page 16-86) in Newton Programmer's Reference.
System Data
19
This section describes the API to system stored data and how to store application
preferences in the system soup.
About System Data
19
The system stores user preferences and other system information in a soup called
"System," which you should reference with the constant
ROM_SystemSoupName
.
This soup holds information such as the user's address and phone number, the
currently selected printer, and handwriting recognition settings.
Your application can use this data to customize itself to the user's current situation,
and save the user some writing or tapping. Your application can be registered to be
notified when changes are made to this data.
You may also store a single entry in this soup with application-specific preferences.
Using System Data
19
This section describes
The functions used to access user configuration data, and to register an
application to be notified of changes to this data.
How to create an entry in the system soup for your application's preferences.

C H A P T E R 1 9
Built-in Applications and System Data
System Data
19-45
Functions for Accessing User Configuration Data
19
The global functions
GetUserConfig
and
SetUserConfig
get and set the
values of user configuration variables in the system soup. These variables, see
"User Configuration Variables" (page 16-101) in Newton Programmer's Reference.
A list of these variables is available in the Summary; see 19 "User Configuration
Variables."
Your application can also register with the system to receive notification of changes
to these variables. To do this, use the functions
RegUserConfigChange
and
UnRegUserConfigChange
described in Newton Programmer's Reference.
IMPORTANT
The
RegUserConfigChange
global function registers a
callback function for execution in response to changes the user
configuration variables. This callback function must not call
RegUserConfigChange
or
UnRegUserConfigChange
.
Storing Application Preferences in the System Soup
19
Each application that needs to save user preference or state information should
create a single entry in the system soup to store its data. Each entry in the system
soup must contain a slot named
tag
whose value is a string uniquely identifying
the application to which the entry belongs. The system soup is indexed on the
tag
slot, allowing quick access to your application's entry.
Use the utility function
GetAppPrefs
to add your application's preferences entry
to the system soup.
GetAppPrefs
takes a default frame as a parameter, so you do
not need to create an entry in the system soup. The default is used if one doesn't
already exist. The following sample code illustrates how this is done:
//define a default frame
constant kDefaultPrefs :=
'{curCity : "Cupertino",
//... and other application specific slots.
// Note: we do not include a 'tag slot,
// this will be added by GetAppPrefs.
}
// then when we have information to store...
ourPrefsEntry := GetAppPrefs(kAppSymbol, kDefaultPrefs);
ourPrefsEntry.curCity := newCity;
EntryChange(ourPrefsEntry);
The
GetAppPrefs
function is described in Newton Programmer's Reference.

C H A P T E R 1 9
Built-in Applications and System Data
19-46
Summary
Summary
19
Constants and Variables
19
Names Card Layouts
19
Dates Variables
19
firstDayOfWeek
useWeekNumber
Dates Constants for the Day of the Week
19
Constant
Value
kSquiggle
0
kPlain
1
kSeparate
2
kCross
3
Constant
Value
kSunday
0x00000800
kMonday
0x00000400
kTuesday
0x00000200
kWednesday
0x00000100
kThursday
0x00000080
kFriday
0x00000040
kSaturday
0x00000020
kEveryday
0x00000FE0

C H A P T E R 1 9
Built-in Applications and System Data
Summary
19-47
Dates Constants for repeatType
19
Other Date Constants
19
Dates Constants for the Weeks in a Month
19
User Configuration Variables
19
address
cityZip
company
country
countrySlot
currentAreaCode
Constant
Value
kDayOfWeek
0
kWeekInMonth
1
kDateInMonth
2
kDateInYear
3
kPeriod
4
kNever
5
kWeekInYear
7
Constant
Value
kForever
0x1FFFFFFF
kMaxyear
2919
kYearMissing
2920
Constant
Value
kFirstWeek
0x00000010
kSecondWeek
0x00000008
kThirdWeek
0x00000004
kFourthWeek
0x00000002
kLastWeek
0x00000001
kEveryWeek
0x0000001F

C H A P T E R 1 9
Built-in Applications and System Data
19-48
Summary
currentCountry
currentEmporium
currentPersona
currentPrinter
dialingPrefix
doAutoAdd
doInkWordRecognition
doTextRecognition
doShapeRecognition
emailPassword
faxPhone
homePhone
leftHanded
learningEnabledOption
lettersCursiveOption
letterInFieldsOption
letterSetSelection
letterSpaceCursiveOption
location
mailAccount
mailNetwork
mailPhone
name
paperSize
paperSizes
phone
signature
speedCursiveOption
timeoutCursiveOption
userFont
Protos
19
protoPersonaPopup
19
myPersonaPopup := {
_proto: protoPersonaPopup,
SetUpText:
function
,// returns string to display as current
// persona
JamIt:
function
, // calls SetUpText and updates screen
...}

C H A P T E R 1 9
Built-in Applications and System Data
Summary
19-49
protoEmporiumPopup
19
myEmporiumPopup := {
_proto: protoEmporiumPopup,
SetUpText:
function
,// returns string to display as current
// emporium
JamIt:
function
, // calls SetUpText and updates screen
...}
protoRepeatPicker
19
myRepeatPicker := {
_proto: protoRepeatPicker,
selectedMeeting:
meetingFrame
, // the selected meeting
originalMtgDate:
date
, // if a repeating meeting, date of
// instance, else ignored
newMtgDate:
date
, // the mtgStartDate of the selected
// meeting
viewBounds:
boundsFrame
, // the bounds frame
...}
protoRepeatView
19
myRepeatView := {
_proto: protoRepeatView,
viewFlags:
integer
, // defaults to vClickable+vFloating
viewFormat:
integer
, // defaults to vfFillWhite +
// vfFrameDragger + vfPen(7) +
// vfInset(1) + vfRound(5)
viewJustify:
integer
, // defaults to vjParentCenterH
viewBounds:
boundsFrame
, // defaults to RelBounds
// (0, 0, 204, 190)
GetRepeatSpec:
function
, // returns a frame with repeating
// info
...}
Soup Formats
19
Names Soup
19
Person Entries
19
aPersonEntry := {
version:
integer
,
class:
symbol
,

C H A P T E R 1 9
Built-in Applications and System Data
19-50
Summary
cardType:
integer
,
name:
frame
,
names:
array
,
company:
stringOrRichString
,
title:
stringOrRichString
,
companies:
array
,
address:
stringOrRichString
,
address2:
stringOrRichString
,
addresses:
array
,
city:
stringOrRichString
,
region:
stringOrRichString
,
postal_code:
stringOrRichString
,
country:
stringOrRichString
,
phones:
array
,
email:
stringOrRichString
,
emailAddrs:
array
,
emailPassword: nil,
pagers:
array
,
bday:
integerOrStringOrRichString
,
bdayEvent:
entryAlias
,
anniversary:
integerOrStringOrRichString
,
anniversaryEvent:
entryAlias
,
notes:
array
,
sorton:
string
,
...}
Owner Entries
19
anOwnerEntry := {
version:
integer
,
class:
symbol
,
cardType:
integer
,
name:
frame
,
names:
array
,
company:
stringOrRichString
,
title:
stringOrRichString
,
companies:
array
,
address:
stringOrRichString
,
address2:
stringOrRichString
,
addresses:
array
,
city:
stringOrRichString
,
region:
stringOrRichString
,
postal_code:
stringOrRichString
,
country:
stringOrRichString
,

C H A P T E R 1 9
Built-in Applications and System Data
Summary
19-51
phones:
array
,
email:
stringOrRichString
,
emailAddrs:
array
,
emailPassword:
string
,
pagers:
array
,
bday:
integerOrStringOrRichString
,
bdayEvent:
entryAlias
,
anniversary:
integerOrStringOrRichString
,
anniversaryEvent:
entryAlias
,
notes:
array
,
sorton:
string
,
owner:
frame
,
...}
Group Entries
19
aGroupEntry := {
version:
integer
,
class:
symbol
,
cardType:
integer
,
group:
stringOrRichString
,
goupInfo:
frame
,
members:
array
,
notes:
array
,
sorton:
string
,
...}
Company Entries
19
aCompanyEntry := {
version:
integer
,
class:
symbol
,
cardType:
integer
,
name:
frame
,
names:
array
,
company:
stringOrRichString
,
address:
stringOrRichString
,
address2:
stringOrRichString
,
addresses:
array
,
city:
stringOrRichString
,
region:
stringOrRichString
,
postal_code:
stringOrRichString
,
country:
stringOrRichString
,
phones:
array
,
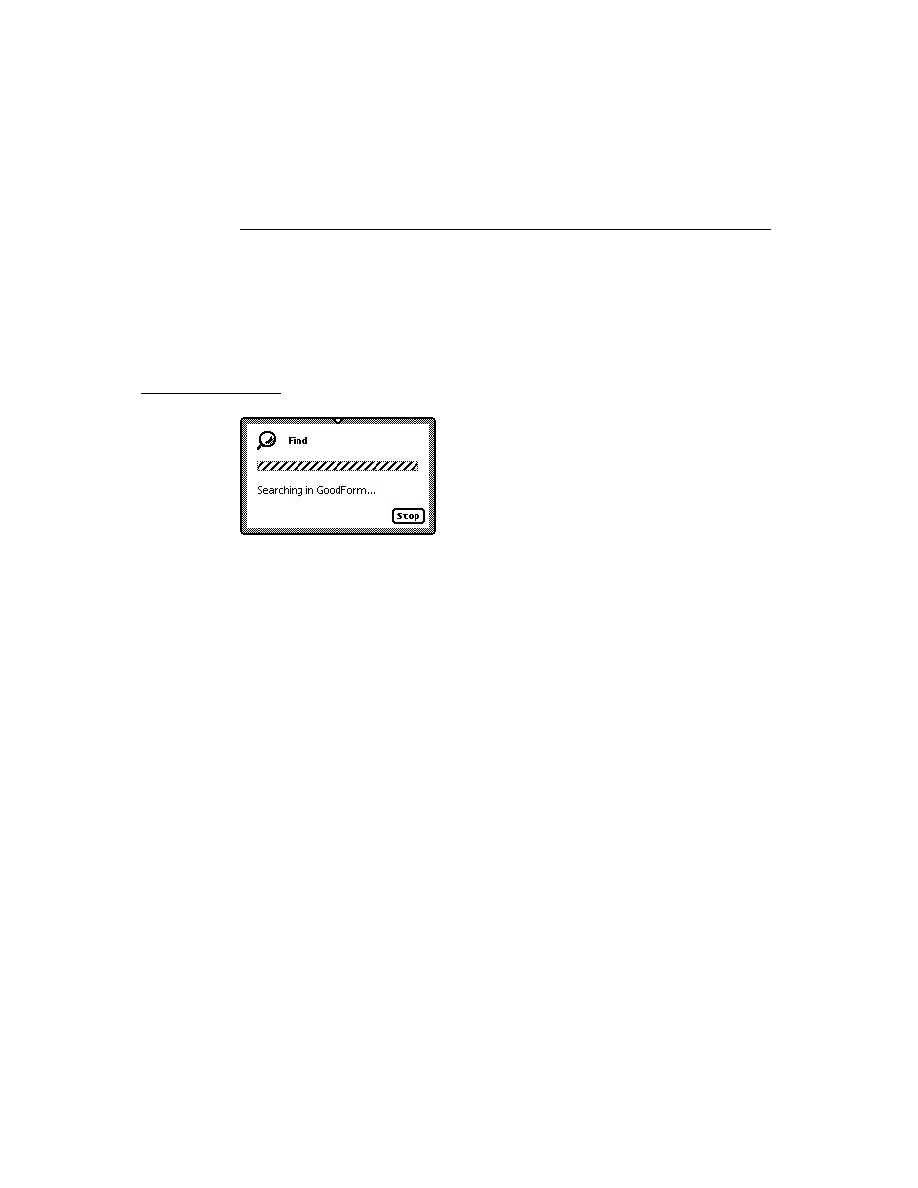
C H A P T E R 1 9
Built-in Applications and System Data
19-52
Summary
email:
stringOrRichString
,
emailAddrs:
array
,
notes:
array
,
sorton:
string
,
...}
Worksite Entries
19
aWorksiteEntry := {
version:
integer
,
class:
symbol
,
cardType:
integer
,
place:
stringOrRichString
,
dialingPrefix:
stringOrRichString
,
areaCode:
stringOrRichString
,
printer:
string
,
mailAccess:
array
,
connectionPhone:
string
,
connectionNetwork:
string
,
cityAlias:
entryAlias
,
countrySymbol:
symbol
,
country:
stringOrRichString
,
notes:
array
,
sorton:
string
,
...}
Dates Soups
19
Meeting Frames
19
aMeetingFrame := {
viewStationery:
symbol
,
mtgStartDate:
integer
,
mtgDuration:
integer
,
mtgText:
stringOrRichString
,
mtgStopDate:
integer
,
repeatType:
integer
,
mtgInfo:
frame
,
mtgAlarm:
integer
,
mtgIconType:
symbol
,
mtgInvitees:
array
,
mtgLocation:
nameReference
,
notesData:
array
,
instanceNotesData:
array
,

C H A P T E R 1 9
Built-in Applications and System Data
Summary
19-53
version:
integer
,
viewBounds:
frame
,
exceptions:
array
,
...}
Notes Frames
19
aNotesFrame := {
notes:
array
,
repeatingMeetingAlias:
entryAlias
,
...}
To Do List Soup
19
aToDoListEntry := {
class:
symbol
,
needsSort:
Boolean
,
date:
integer
,
topics:
array
,
...}
Notes Soup
19
aNotesEntry := {
viewStationery:
symbol
,
class:
symbol
,
height:
integer
,
timeStamp:
integer
,
labels:
symbol
,
data:
array
,
topics:
array
,
...}
Functions and Methods
19
Names Application Methods
19
cardfile
:AddCard(
dataDefType, entryFrame
) // creates a new
// card in the Names application
cardfile
:AddCardData(
entry
,
layoutSym
,
newData
) // adds data
// to an existing card
cardfile
:AddLayout(
layout
) // adds a view definition to
// the Show picker

C H A P T E R 1 9
Built-in Applications and System Data
19-54
Summary
cardfile
:BcCreditCards(
inEntry
,
inWhich
) // returns the
// credit card information
cardfile
:BcCustomFields(
inEntry
,
inWhich
) // returns custom
// field information
cardfile
:BcEmailAddress(
entry
,
which
) // returns e-mail
// information
cardfile
:BcEmailNetwork(
entry
,
type
)// returns e-mail
// network information
cardfile
:BcPhoneNumbers(
inEntry
,
inWhich
) // returns an
// array of phone numbers
cardfile
:OpenTo(
entry
, nil) // opens Names to a card
cardfile
:ReplaceInkData(
entry
,
layoutSym
,
oldString
,
checkPath
,
newString
) // replaces a specified ink string with a
// recognized string
RegNamesRouteScript(
symbol
,
routeScriptFrame
) // adds an
// action to the Action picker (platform file func)
cardfile
:SafeRemoveLayout(
layout
) // removes a layout added
// with AddLayout (platform file function)
cardfile
:ShowFoundItem(
entry, nil) // opens a card if Names
// is open
UnRegNamesRouteScript(
symbol
) // removes an action added
// with RegNamesRouteScript (platform file function)
Dates Application Methods
19
calendar
:AddAppointment(
mtgText, mtgStartDate
,
mtgDuration
,
repeatPeriod
,
repeatInfo
) // adds a meeting to a Dates soup
calendar
:AddEvent(
mtgText
,
mtgStartDate
,
repeatPeriod
,
repeatInfo
)
// adds an event to a Dates soup
calendar
:DeleteAppointment(
mtgTextOrFrame
,
mtgStartDate
,
deleteOneOnly
) // deletes specified meeting(s)
calendar
:DeleteEvent(
mtgTextOrFrame
,
mtgStartDate
,
deleteOneOnly
) // deletes specifed event
calendar
:DeleteRepeatingEntry(
mtgTextOrFrame
,
mtgStartDate
,
deleteOneOnly
) // deletes specified repeating meeting or
// event series
calendar
:DisplayDate(
date
,
format
)// displays meetings,
// events, or To Do tasks for a date
calendar
:FindAppointment(
mtgText
,
findWords
,
dateRange
,
type
,
maxNumberToFind
) // returns specified mtgs or events
calendar
:FindExactlyOneAppointment(
mtgText
,
findWords
,
dateRange
,
type
) // returns a specified mtg or event
calendar
:FindNextMeeting(
date)
// returns startDate and
// duration of next meeting after a date
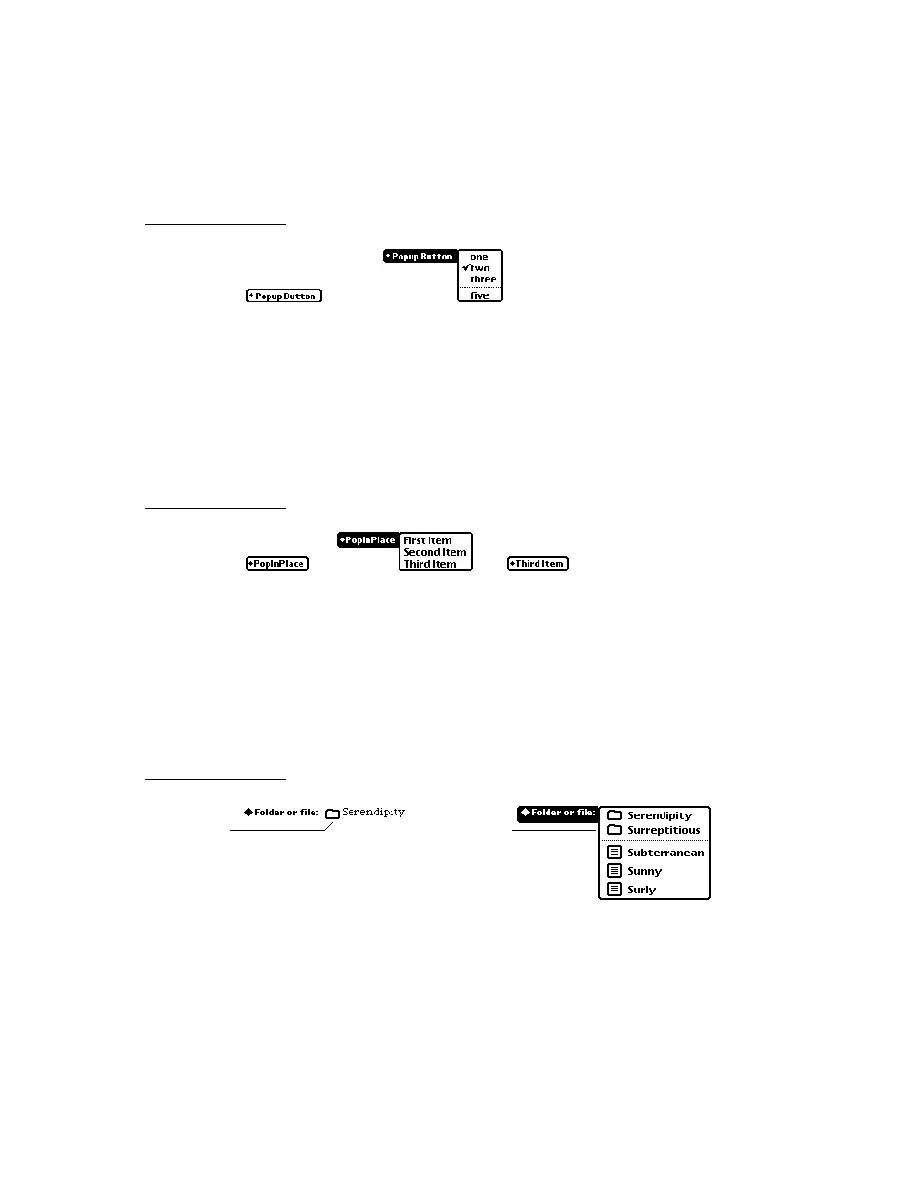
C H A P T E R 1 9
Built-in Applications and System Data
Summary
19-55
calendar
:GetMeetingIconType(
mtgTextOFrame
,
mtgStartDate
)
// returns the type of icon of a meeting or event
GetCalendarMeetingType() // returns an array of meeting
// types registered with Dates (platform file func)
GetCalendarMeetingTypeInfo(
typeSymbol
) // returns
// information about a meeting type registered with
// Dates (platform file function)
calendar
:GetMeetingInvitees(
mtgText
,
mtgStartDate
) // returns
// list of invitees
calendar
:GetMeetingLocation(
mtgText, mtgStartDate
) // returns
// meeting location
calendar
:GetMeetingNotes(
mtgText, mtgStartDate
) // returns
// notes for a meeting
calendar
:GetSelectedDates() // returns currently selected
// date(s)
calendar
:MoveAppointment(
mtgText, mtgStartDate, newStartDate,
newDuration
) // changes date or duration of specified
// meetings or events or repeating series
calendar
:MoveOnlyOneAppointment(
mtgText, mtgStartDate,
newStartDate, newDuration
) // changes date or duration of
// a specified meeting or event or repeating meeting
// or event instance
calendar
:OpenMeetingSlip(
meetingFrame, date, openDefaultSlip
)
// opens slip for specified meeting
calendar
:RegInfoItem(
symbol, frame
) // adds item to info
// picker
calendar
:RegMeetingType(
symbol, frame
) // adds meeting type
// to New picker
myMeetingType
:NewMeeting (
date, parentBox
) // creates a new
// meeting for custom meeting type
myMeetingType
:OpenMeeting(
meeting
,
date
,
parentBox
) // opens
// meeting slip for custom meeting type
calendar
:RememberedClose(
view
)// closes view opened with
// RememberedOpen
calendar
:RememberedOpen(
view
) // opens view and sets up
// closing of view with calendar
calendar
:SetEntryAlarm(
mtgText
,
mtgStartDate
,
minutesBefore
)
// sets alarm for specified meeting
calendar
:SetMeetingIconType(
mtgText
,
mtgStartDate
,
newIconType
)
// sets icon type for specified meeting or event
calendar
:SetMeetingInvitees(
mtgText, mtgStartDate, invitees
)
// sets list of invitees for specified meeting
calendar
:SetMeetingLocation(
mtgText, mtgStartDate, location
)
// sets location for specified meeting

C H A P T E R 1 9
Built-in Applications and System Data
19-56
Summary
calendar
:SetMeetingNotes(
mtgText, mtgStartDate, notes
)
// sets notes for specified meeting or event
calendar
:SetRepeatingEntryStopDate(
mtgText, mtgStartDate, mtgStopDate
)
// sets last date for specified repeating
// meeting or event
calendar
:UnRegInfoItem(
symbol
) // removes item from info
// picker
calendar
:UnRegMeetingType(
symbol
) // removes meeting type
// from New picker
To Do List Methods
19
toDoFrame
:CreateToDoItem(
date
,
richString
,
reminder
,
frequency
)
// adds a task on specified date
toDoFrame
:CreateToDoItemAll(
date
,
richString
,
reminder
,
frequency
,
priority, completed
) // Adds a task with
// priority and completion information
toDoFrame
:EnsureVisibleTopic(
index
) // Scrolls the To Do
// List as necessary to display a task
toDoFrame
:GetToDoItemsForRange (
beginDate
,
endDate
) //Returns
// topics for a range of dates
toDoFrame
:GetToDoItemsForThisDate (
date
) // Returns
// topics for date
toDoFrame
:GetTaskShapes (
originalShapes, task, yOffset, width
,
font
)
// Returns an array of shapes for the task
toDoFrame
:GetToDoShapes (
date
,
yOffset
,
width
,
font
) // Returns
// an array of shapes for the task
toDoFrame
:LastVisibleTopic() // Returns the index of the
// last topic drawn in the view
toDoFrame
:NextToDoDate(
date
) // Returns the date of the
// next task
toDoFrame
:RemoveOldTodoItems(
beforeDate
,
removeWhich
,
nil
)
// Removes tasks from before a sppecified date
toDoFrame
:SetDone(
index, topic, done, nil, nil
) // Marks a task
// completed
SetPriority(
index, priority, undo
) //Sets the priority of a task

C H A P T E R 1 9
Built-in Applications and System Data
Summary
19-57
Time Zone Functions
19
GetCityEntry(
name
) // returns information about the
// specified city
GetCountryEntry(
name
) // returns information about the
// specified country
worldClock
:SetLocation(
whichCity
) // sets the current city
worldClock
:NewCity(
newCity
, nil,
makeHome
) // adds a city
Notes Methods
19
paperroll:
MakeTextNote(
string
,
addIt
) // adds a text note to
// Notes soup
paperroll
:NewNote(
note
,
goto
,
store
) // adds a note to
// Notes soup
Prefs and Formulas Functions
19
RegFormulas(
appSymbol
,
formulasTemplate
) //registers a template
// to be added to the Formulas roll
UnRegFormulas(
appSymbol
) //unregisters a template added
// with RegFormulas
RegPrefs(
appSymbol
,
prefsTemplate
) //registers a template
// to be added to the Prefs roll
UnRegPrefs(
appSymbol
) //unregisters a template added
// with RegPrefs
Auxiliary Button Functions
19
app
:AddAuxButton(
buttonFrame
) // message sent when
// RegAuxButton is called with your app as destApp
GetAuxButtons(
appSymbol
) // returns array of your app's
// buttons
RegAuxButton(
buttonSymbol, template
) // registers a button to
// be added to another application
app:
RemoveAuxButton(
buttonSymbol
) // message sent when
// UnRegAuxButton is called for one of your app's
// buttons
UnRegAuxButton(
buttonSymbol
) // removes an auxilary button
// added with RegAuxButton
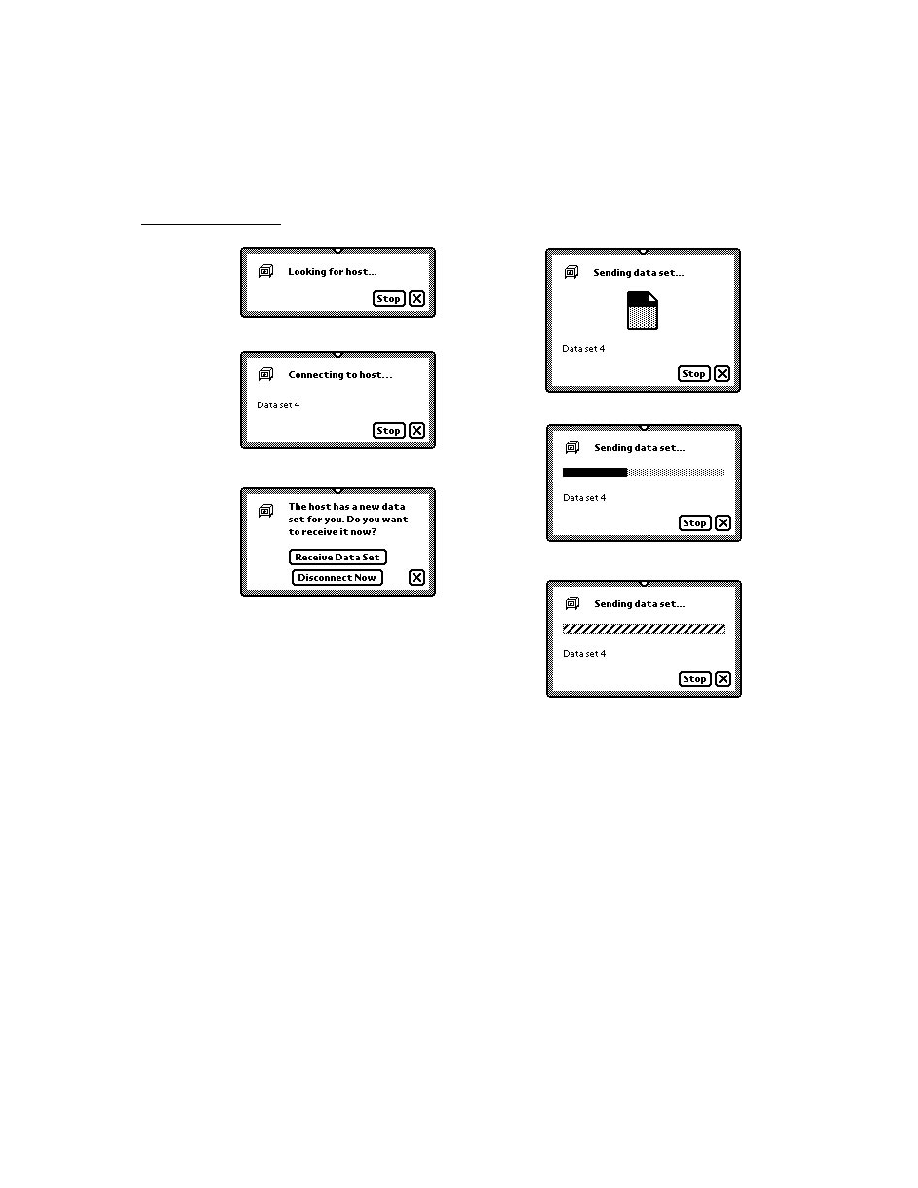
C H A P T E R 1 9
Built-in Applications and System Data
19-58
Summary
Extras Drawer Functions and Methods
19
extrasDrawer
:AddExtraIcon(
iconType
,
paramFrame
,
pkgName
,
store
)
// adds an icon (platform file function)
extrasDrawer
:GetExtraIcons(
iconType
,
pkgName
,
store
)
// returns array of icons added with AddExtraIcon
extrasDrawer
:GetPartCursor(
packageName
,
store
,
folderSym
)
// returns cursor that iterates over parts (icons)
// (platform file function)
extrasDrawer
:GetPartEntryData(
entry
) // returns information
// about a part (platform file function)
extrasDrawer
:LaunchPartEntry(
entry
) // launches a part entry
// (platform file function)
extrasDrawer
:RemoveExtraIcon(
extraIcon
) // removes an icon
// added with AddExtraIcon
extrasDrawer
:SetExtrasInfo(
paramFrame
,
newInfo
) //changes
// information about an icon (platform file function)
System Data and Utility Functions
19
GetSysEntryData(
entry
,
path
) // returns the value of a
// specifed slot in a built-in soup entry
GetUserConfig(
configSym
) // returns the value of a user
// configuration variable
RegUserConfigChange(
callbackID
,
callBackFn
) // registers
// a function called when a user configuration
// variable changes
SetSysEntryData(
entry
,
path
,
value
) // sets the value of a
// specifed slot in a built-in soup entry
SetUserConfig(
configSym
,
theValue
) // sets the value of a
// user configuration variable
UnRegUserConfigChange(
appSymbol
) // unregisters a
// function registered by RegUserConfigChange
UseCurrentEmporium() //makes system update user
// configuration variables based on the value of the
// currentEmporium variable
UseCurrentPersona() //makes system update user
// configuration variables based on the value of the
// currentPersona variable

About Localization
20-1
C H A P T E R 2 0
Localizing Newton
Applications
20
Figure 20-0
Table 20-0
This chapter discusses how to support multiple languages and use locale-specific user
preferences to customize the way an application handles numbers, dates, and times.
This chapter also discusses how locale settings affect the set of dictionaries the
system uses for handwriting recognition. The recognition information in this
chapter assumes a basic understanding of handwriting recognition issues. If you
need more information on this subject, you should read Chapter 9, "Recognition."
About Localization
20
The goal of localization functions is to let you set up applications so you can build
versions in different languages without changing the source files.
There are two basic approaches to localization:
You can fully localize your application at compile time, replacing objects in
English with objects in other languages. This is discussed in "Defining
Language at Compile Time" (page 20-3).
You can check preferences that the user sets to indicate preferred formats for
output of dates and currency amounts. The next section discusses these user
settings. "Determining Language at Run Time" (page 20-6) discusses this and
related issues.
The Locale Panel and the International Frame
20
The Locale panel lets a user tell the Newton device the conventions that should be
used to interpret input and display information. The user can specify values for the
country, keyboard type, and paper size in this panel, which is shown in Figure 20-1.
The system stores the Locale panel settings in the International Frame.

C H A P T E R 2 0
Localizing Newton Applications
20-2
About Localization
Figure 20-1
The Locale settings in Preferences
The most important of these settings is the Country pop-up menu. Every Newton
device contains a number of frames for tailoring the system's responses to match
the conventions of a specified location. These frames are called locale bundles. At
any time, one and only one of these locale bundles is active; that is called the active
locale bundle. The user can change the active locale bundle by using the Country
pop-up menu from the Locale panel.
The values in a locale bundle specify a variety of items, such as locally popular
formats for displaying currency values and other numbers.
Each Newton device may contain different locale bundles:
Every Newton device contains locale bundles in its ROM, which vary depending
on what ROM the device has. For example, the German version of the Newton
MessagePad does not have the same built-in locale bundles as the English
version.
Applications can add locale bundles to provide locale settings for additional
countries, or to override built-in locale bundles. For information on how to do
this, see "Adding a New Bundle to the System" (page 20-8).
Locale and ROM Version
20
Newton devices are sold with ROMs in different versions, such as an English ROM
and a German ROM. However, it is the active locale, rather than the ROM version,
that controls localized information.
How Locale Affects Recognition
20
As you change settings in the Locale panel, the set of dictionaries used for word
recognition does not change. However, altering the locale changes the set of
system lexical dictionaries and change the recognizable formats for dates, times,
and numbers.
For entering dates, times, and numbers, you can think of the entry process as
consisting of three stages:
Recognizing the handwriting. This uses the recognition lexical dictionaries.
Understanding what the recognized text means. This uses the system lexical
dictionaries.

C H A P T E R 2 0
Localizing Newton Applications
Using the Localization Features of the Newton
20-3
Displaying the text. This uses the date, time, and number formatting attributes of
the active locale bundle.
The recognition lexical dictionaries need to be, and are, most tolerant. Because
the formats specified in these dictionaries are more loosely defined, you can actually
combine the different formats being used in different countries. These dictionaries
accept constructs such as "77/34/56", a string that doesn't make much sense.
The system lexical dictionaries are used to interpret (that is, parse) recognized text,
so they need to be more strict about accepted formats. For example, if given the
string "12/10/96", the parser needs to know whether the user means that to represent
December 10 or October 12. The system lexical dictionaries impose these restrictions,
and are local-specific.
For more information about dictionary-based recognition, see Chapter 9,
"Recognition."
Using the Localization Features of the Newton
20
This section describes how to localize your applications using the built-in features
of the Newton.
Defining Language at Compile Time
20
You can write an application so that the language used in strings and other objects
is determined at compile time. There are essentially three parts to doing this:
You define objects called localization frames that define the objects for
different languages. "Defining a Localization Frame" (page 20-4) discusses how
to do this.
You use the
LocObj
function in place of using the language-dependent object
directly. "Using LocObj to Reference Localized Objects" (page 20-4) discusses
how to do this.
You define the language for a build by using the Project Settings item in the
Project menu. See the Newton Toolkit User's Guide for information on
project settings.
When you do this, you may also want to build strings from components and
measuring the lengths of strings at compile time so that you can arrange your
displays. "Use ParamStr Rather Than "&" and "&&" Concatenation" (page 20-5)
and "Measuring String Widths at Compile Time" (page 20-6) discuss how to do
those tasks.
C H A P T E R 2 0
Localizing Newton Applications
20-4
Using the Localization Features of the Newton
Defining a Localization Frame
20
You define the alternative language frames with the
SetLocalizationFrame
function in a text file included in the project. Here is an example:
SetLocalizationFrame({
Swedish: {
find: {
searchFor:
"Söker efter ^0...",
// "Searching for ^0..."
. . .}},
French: {
find: {
searchFor:
"Recherche dans ^0...",// "Searching for ^0..."
. . .}}
});
When the Language setting in the Project Settings dialog box is English, NTK uses
the string included in the code itself ("Searching for name"). When the Language
setting is Swedish, NTK looks for the string contained in the slot
Swedish.find.searchFor
in the language frame.
You can place other kinds of objects in localization frames. For example, suppose
that you have an integer value that varies by language:
SetLocalizationFrame({
French: {
languageInt: 1,
},
Swedish: {
languageInt: 2,
},
German: {
languageInt: 3.
}
});
To avoid name collisions, it's a good idea to use at least one extra naming level,
such as in the first example, which uses
find
. You can set up data objects in as
complex a hierarchy as you need within the language frame.
Using LocObj to Reference Localized Objects
20
The
LocObj
function takes two parameters:
A string or other object; this is used in the English-language version of the
application.

C H A P T E R 2 0
Localizing Newton Applications
Using the Localization Features of the Newton
20-5
A frames path the compiler uses to find the alternative object when the
Language setting in the Project Settings dialog box is for anything other than
English. You should avoid having reserved words in the path--refer to Appendix
A of The NewtonScript Programming Language for a complete list of reserved
words in NewtonScript.
If you display a message while searching for an object, for example, you can set up
the message for any language by wrapping the string in the
LocObj
function:
msg := LocObj("Searching for ^0...", 'find.searchfor)
When an English-language version of the application is compiled, the
LocObj
function simply returns its first argument; this implementation helps keep code
readable by allowing you to use English strings in your code. For non-English
versions of the application, the
LocObj
function uses the value of the
language
slot in NTK Package Settings and the path expression passed as its second
argument to return the appropriate object from the localization frame.
As another example, an application that is not localized might provide user feedback
by passing the string
"Not found."
to the
SetStatus
function, as in the
following code fragment:
:SetStatus("Not found.");
The localized version of the same code uses the
LocObj
function to return a path
expression based on the
'find.nope
argument and the language for which the
application is compiled. The
SetStatus
function then uses this path expression
to reference the localized string. Because the
LocObj
function returns this path
expression as its result, the argument to
SetStatus
can be "wrapped" in a call to
the
LocObj
function, as in the following line of code:
:SetStatus( LocObj("Not found", 'find.nope) );
The object passed to the
LocObj
method doesn't have to be a string; it can be an
array or an immediate value.
The path expression that references the object must be unique across the entire
system. Thus, to avoid name collisions, it's recommended that you use additional
naming levels based on your application symbol; for example,
'
myApp.find.nope
introduces a third naming level to the path expression.
Use ParamStr Rather Than "&" and "&&" Concatenation
20
While it is often convenient to use the ampersand string concatenators
&
and
&&
,
the
ParamStr
function provides a much more flexible and powerful way to
parameterize the construction of strings, which helps you customize your strings
for different languages by, for example, varying word order.

C H A P T E R 2 0
Localizing Newton Applications
20-6
Using the Localization Features of the Newton
Measuring String Widths at Compile Time
20
When the size of a screen element depends on the size of associated text, you can
use the
MeasureString
function to determine, at compile time, how big to make
the screen element. If you want to determine the size at runtime, use
StrFontWidth
.
You could establish the width of the search message, for example, by using
MeasureString
and
LocObj
together.
MeasureString(LocObj("What is your name?",
'find.nameQ), simpleFont12);
At compile time, the
MeasureString
call is replaced with a constant as long as
the arguments to
MeasureString
are also constant. (
LocObj
produces a
constant result at compile time.) You could access the width at run time from the
view's
ViewDrawScript
method with this function:
func()
begin
local newBounds := deepClone(viewBounds);
newBounds.right := newBounds.left +
MeasureString("This is a string", simpleFont12);
SetValue(self, 'viewBounds, newBounds);
end
Determining Language at Run Time
20
You can determine the language at run time, and your program can use that
information to modify its behavior.
There are two ways to determine the current language:
Examine the active locale bundle. You can also add new locale bundles to give
the user new locale options and can set the locale from within your program.
The sections that follow discuss how to examine the active locale bundle.
Use the
GetLanguageEnvironment
function to find out the native language
for which the ROMs on the Newton device are implemented.
Note that you need to decide which of these methods your application should use
in order to determine its behavior.
Examining the Active Locale Bundle
20
The global function
GetLocale
returns the active locale bundle, which is the
locale bundle that the Country pop-up is currently set to. Use this function rather
than accessing the frame directly.

C H A P T E R 2 0
Localizing Newton Applications
Using the Localization Features of the Newton
20-7
For example:
activeLocale:=GetLocale();
Once you've obtained a bundle, you can examine it to see how your application
should interpret user input or display output.
See "Contents of a Locale Bundle" (page 17-1) in Newton Programmer's
Reference for information on the slots of a locale bundle.
Changing Locale Settings
20
You cannot change settings in the active locale bundle. To change locale settings,
you need to create a new locale bundle that has the values you want and make it the
active locale. This is called a custom locale bundle. See the next section for
information on how to create on of those.
Creating a Custom Locale Bundle
20
Every custom locale bundle has a
_proto
slot that references another locale
bundle. To create your application's custom locale bundle, use the
FindLocale
function to get the frame to be referenced by your custom locale bundle's
_proto
slot.
IMPORTANT
Your custom bundle's
_proto
slot must ultimately reference a
system-supplied locale bundle. That does not have to be direct--
you can reference a custom bundle that you know references a
system-supplied bundle, for example.
Your custom locale bundle is simply a frame that includes this
_proto
reference
and any additional slots you wish to define to override the values of those inherited
from the prototype. Your custom locale bundle should look like the code in the
following example:
usLocaleBundle := FindLocale('usa);
myLocaleBundle :=
{
_proto: usLocaleBundle,
// add slots to be modified
title: "myLocaleBundle:PIEDTS",
localeSym: '|myLocaleBundle:PIEDTS|,
};
The
FindLocale
function accepts as its argument a symbol specifying the locale
bundle it is to return. This function returns the locale bundle that has this value in
its
localeSym
slot.

C H A P T E R 2 0
Localizing Newton Applications
20-8
Using the Localization Features of the Newton
In the preceding code example the
myLocaleBundle
frame is based on the U.S.
locale bundle. It gives a new
title
and
localeSym
value, as it must, but
implements no functional changes to the locale. To make changes to the locale
bundle, you can add your own slots in place of the comment that says
// add slots to be modified
Your custom locale bundle must have a
localeSym
slot of its own, as well as a
title
slot that gives the string that you want to appear in the Country pop-up
menu. Since there can't be another locale bundle in the system with the same
symbol as your new bundle, and shouldn't be one with the same title, be careful to
avoid name clashes when creating your bundle's
title
and
localeSym
values.
The problems associated with creating a unique name string for a locale bundle are
similar to those you might encounter when creating a name for a soup; for
suggestions regarding the creation of unique name strings, see "Naming Soups"
(page 11-32). Basically, you should incorporate your developer or application
symbol in the bundle's title and symbol slots.
Adding a New Bundle to the System
20
Once you have created a locale bundle, you need to make it available to the system
by using the
AddLocale
function. The following code sample shows how to pass
the previously created locale bundle
myLocaleBundle
to this function:
Call kAddLocaleFunc with (myLocaleBundle);
(You call this function in this way because it is a platform file function.)
If the
localeSym
slot in
myLocaleBundle
is not unique, the new locale
overrides the existing locale with the same symbol. You can override a built-in
locale bundle.
Removing a Locale Bundle
20
To remove the custom locale bundle you have installed use the system-supplied
RemoveLocale
function.
As with any shared data, the appropriate time to remove your locale bundle is left
up to you because it can be difficult to determine whether other applications are
using a bundle. Even if your own application is the only one using the custom
locale bundle, it can be difficult to decide whether to remove it. You wouldn't
necessarily want to install it every time the application opened and remove it every
time the application closed.
If you remove the active locale bundle,
RemoveLocale
makes one of the built-in
locales the active locale; the locale it chooses depends on the ROM version. If your
application makes a new bundle active, you may want to save the symbol of the
previously active bundle, so that you can reset the value before you remove your
locale bundle.

C H A P T E R 2 0
Localizing Newton Applications
Using the Localization Features of the Newton
20-9
The
RemoveLocale
function accepts as its argument a symbol specifying the
locale bundle it is to remove. The following code shows how to pass the locale
bundle's symbol to this function:
RemoveLocale('|myLocaleBundle:PIEDTS|);
Changing the Active Locale
20
The
SetLocale
function searches for a specified locale bundle and makes that
bundle the active locale bundle. This is equivalent to the user setting the Country
value from the Country pop-up menu, and overrides the user's action. You should,
therefore, save the previous setting and reset it when you finish using your locale.
This function accepts as its argument a symbol identifying the bundle to install.
The following code example shows how to use the
SetLocale
function to install
the custom locale frame created in "Defining a Localization Frame" (page 20-4):
SetLocale('|myLocaleBundle:PIEDTS|);
Using a Localized Country Name
20
When the name of a country is stored in a soup, the program that stores it should
call
SetCountryClass
on the name string. That function sets the string to a
class that represents the country so that if the soup entry is read on a Newton with a
different ROM, a program can use
GetCountryEntry
to get the name of the
country in that ROM's language. See "Obtaining Information About a City or
Country" (page 19-28) for information on using
GetCountryEntry
.
Summary: Customizing Locale
20
The following code sample summarizes the information discussed in the
preceding sections:
// get a bundle to use as a proto
usLocaleBundle := FindLocale('usa);
// define your custom locale bundle
myLocaleBundle :=
{
_proto: usLocaleBundle,
// add slots to be modified here
title: "myLocaleBundle:PIEDTS",
localeSym: '|myLocaleBundle:PIEDTS|,
}
// add myLocaleBundle to the system
AddLocale(myLocaleBundle);

C H A P T E R 2 0
Localizing Newton Applications
20-10
Using the Localization Features of the Newton
//save the current locale setting
previousLocale:=GetLocale().localeSym;
//install myLocaleBundle as the active locale bundle
SetLocale('|myLocaleBundle:PIEDTS|);
//reset the previous locale setting
SetLocale(previousLocale);
//remove your locale
RemoveLocale('|myLocaleBundle:PIEDTS|);
Localized Output
20
Your application should employ locale-specific user preferences to customize its
handling of numbers, dates, and times. In addition to information available from
the active locale bundle, your application should use the utility functions described
here to display localized strings representing dates, times, and monetary values.
Date and Time Values
20
The Newton system deals with dates and times as either the number of minutes
since midnight, January 1, 1904 or the number of seconds since midnight, January
1, 1993. Those functions are listed in "System Clock Functions" (page 20-15) in
this manual and detailed in "System Clock Functions" (page 17-20) in Newton
Programmer's Reference.
Obviously, you generally need date and time values in formatted strings that the
user can enter or read. The system has several ways of helping you get these strings:
Some functions use the current locale setting to determine the proper format
Some functions take a format specification as a parameter; in this case, some of
the output (such as the words used for days of the week) are still determined by
the locale setting)
Some functions convert system clock values to and from date frames that have
the pieces of date and time information broken into individual slots
Some parts of the strings returned are always determined by the locale bundle. In
particular, the active locale bundle determines:
The order in which date elements appear
The delimiters that separate the various elements of the date or time string
Words used for months and days of the week
Times always appear in hour/minute/seconds order, although you can use format speci-
fications to vary the display of individual elements and delimiters in the time string.

C H A P T E R 2 0
Localizing Newton Applications
Using the Localization Features of the Newton
20-11
Functions that Use the Locale Setting To Determine Format
20
These functions are quite simple. You pass in a system clock value or a string, and
the function uses the date and time format information in the current locale bundle
to produce a string or a system clock value. Here are the functions of this type:
DateNTime(
time
)
HourMinute(
time
)
ShortDate(
time
)
StringToDate(
dateString
)
StringToTime(
timeString
)
For example:
DateNTime(Time());
Depending on the locale, this might return the string:
"04/17/1996 10:53am"
See the Newton Programmer's Reference for more information on these functions.
Functions that Take Format Specifications
20
These functions take a time value and a string format specification and return a
string formatted accordingly:
LongDateStr(
time, dateStrSpec
)
ShortDateStr(
time, dateStrSpec
)
TimeStr(
time, timeStrSpec
)
You can pass three kinds of format specifications:
You can use one of the pre-defined format specifications in
ROM_dateTimeStrSpecs
You can use the
GetDateStringSpec
function to create a new format
specification
You can use the
kIncludeAllElements
constant, which tells the functions
to use the format in the active locale
In all cases, the active locale bundle determines certain features of date and time
strings, specifically the order of elements and the separators used.
Using Formats from ROM_dateTimeStrSpecs
20
For commonly used format specifications, the system defines formats that can be
passed directly to the functions that accept format specifications. These formats are
stored in
ROM_dateTimeStrSpecs.
See Table 17-5 (page 17-12) in Newton
Programmer's Reference
for the list of available formats.

C H A P T E R 2 0
Localizing Newton Applications
20-12
Using the Localization Features of the Newton
To use one of these values, access the appropriate slot by dereferencing
ROM_dateTimeStrSpecs
with a dot operator, as in the following example:
LongDateStr(Time(),ROM_datetimestrspecs.longDateStrSpec);
Using these predefined format specifications also saves the trouble of defining them
at compile time and initializing slots with the compile-time variables at run time.
Format specifications available from the
ROM_dateTimeStrSpecs
object are
listed in "System-Defined Format Specifications" (page 17-11) in Newton
Programmer's Reference
Using GetDateStringSpec
20
A date or time format specification is an array, the elements of which are
themselves two-element arrays. The first element in each two-element array is a
constant specifying the item to display. The second element is a constant specifying
the format in which to display that item.
The complete set of constants is listed in "Constants to Create Your Own
Specification" (page 17-13) in Newton Programmer's Reference.
For example, the two-element array
[kElementDayOfWeek, kFormatAbbr]
specifies that the day in a date string is to be displayed in abbreviated format, such
as "Wed". On the other hand, the two-element array
[kElementDayOfWeek,
kFormatLong]
specifies that the day of the week is to be displayed in long
format, such as "Wednesday".
The following code example uses system-supplied constants to build an array of
[
element
,
format
]
pairs specifying the output of a date string. This array is
supplied as the argument to the
GetDateStringSpec
function, which returns the
format specification passed to the
LongDateStr
function. The
LongDateStr
function returns a string with the current time (returned by the
Time
function)
formatted as specified by the format specification:
// at compile time, define my array of
// element and format pairs
DefConst('myArray,
[
[kElementYear, kFormatNumeric],// year
[kElementDay, kFormatNumeric],// day of month
[kElementMonth, kFormatLong],// name of month
[kElementDayOfWeek, kFormatLong]// day of week
]);
// create the formatSpec
// this spec returns a string such as "February 1, 1994"
DefConst('kmyDateSpec, GetDateStringSpec(myArray));
C H A P T E R 2 0
Localizing Newton Applications
Using the Localization Features of the Newton
20-13
// get the current time
theTime:= Time();
// pass the time and the format to LongDateStr
LongDateStr(theTime,kmyDateSpec);
This example is deliberately verbose for purposes of illustrating how to build a
format specification array.
The kIncludeAllElements Constant
20
If you want to use the default format for time or date strings as specified by the
active locale bundle, you can pass the
kIncludeAllElements
constant to the
functions
LongDateStr
,
ShortDateStr
, and
TimeStr
. You'll get the results
summarized inTable 20-1.
Currency Values
20
Currency strings reflect localized formatting characteristics that distinguish them
from other number strings. They
typically display a prefix or suffix indicating their denomination
may require an additional prefix and/or suffix that indicates whether the amount
is negative.
Currency strings must also adhere to regional conventions for
grouping numbers
the delimiter that indicates these groupings
the character that represents the decimal point
These values are stored in a frame in the active locale bundle's
numberFormat
slot.
For example, the
currencyPrefix
slot stores the value
"$"
for the U.S. locale
and
"£"
for the United Kingdom locale, while in the French Canadian locale, the
currencyPrefix
slot has no value and the
currencySuffix
slot stores the
value
"$"
.
Table 20-1
Using the
kIncludeAllElements
constant
Function
Format of output
LongDateStr
day of week, month, day, year in locale's default format
ShortDateStr
year, month, day in locale's default short date format
TimeStr
hour, minute, second, AM/PM, and suffix

C H A P T E R 2 0
Localizing Newton Applications
20-14
Summary of Localization Functions
Summary of Localization Functions
20
This section categorizes the date, time, locale, and utility functions in this chapter
according to task.
Compile-Time Functions
20
These functions allow you to build an application for various language environments.
LocObj(
obj
,
pathexpr
)
MeasureString(
str
,
fontSpec
)
Locale Functions
20
These functions manipulate locale bundles:
AddLocale(
theLocaleBundle
) // platform file function
FindLocale(
locSymbol
) // platform file function
GetLocale()
RemoveLocale(
locSymbol
) // platform file function
SetLocale(
locSymbol
)
SetLocalizationFrame(
frame
)
Date and Time Functions
20
These functions return date or time information from the system clock. They are
grouped into two categories: those that return formatted strings and those that do not.
Formatted Date/Time Functions
20
These functions return formatted date or time strings. Some of the functions in this
list format the string according to a format specification supplied as one of their
arguments; others format the string according to values stored in the active locale
bundle. See the descriptions of individual functions for more information.
DateNTime(
time
)
HourMinute(
time
)
LongDateStr(
time
,
dateStrSpec
)
ShortDate(
time
)
ShortDateStr(
time
,
dateStrSpec
)
StringToDate(
dateString
)
StringToDateFrame(
str
)

C H A P T E R 2 0
Localizing Newton Applications
Summary of Localization Functions
20-15
StringToTime(
timeString
)
TimeStr(
time
,
timeStrSpec
)
Date Frame Functions
20
These functions convert system clock values to or from date frames. A system
clock value is an integer giving the number of minutes since midnight, January 1,
1904 or the number of seconds since midnight, January 1, 1993; a date frame has
slots with day, date, year, and so on. See Table 17-8 (page 17-27) in Newton
Programmer's Reference
for details of a date frame.
Date(
time
)
DateFromSeconds(
timeInSeconds
)
TotalMinutes(
dateFrame
)
TotalSeconds(
dateFrame
)
System Clock Functions
20
These functions get and set system clock values, and convert those values between
seconds and minutes.
IncrementMonth(
time
,
numMonths
)
SetTime(
time
)
SetTimeInSeconds(
time
)
Ticks()
Time()
TimeInSeconds()
TimeInSecondsToTime(
seconds
)
TimeToTimeInSeconds(
minutes
,
extraSeconds
)
Utility Functions
20
These functions perform tasks related to the presentation of data in regionalized
formats.
GetDateStringSpec(
formatArray
)
GetLanguageEnvironment() // platform file function
IsValidDate(
date
)
SetCountryClass(
countryName
)

About Routing
21-1
C H A P T E R 2 1
Routing Interface
21
Figure 21-0
Table 21-0
This chapter describes the Routing interface in Newton system software. The
Routing interface allows applications to send, receive, and perform other operations
on data, such as deleting or duplicating. The Routing interface provides a common
user interface mechanism that all applications should use to provide routing services.
You should read this chapter if your application needs to provide routing services
to the user. This chapter describes how to
route items through the Out Box using transport-supplied actions
route items using application-supplied actions
receive incoming items through the In Box
support viewing items in the In/Out Box
About Routing
21
Routing is a term that describes nearly any action taken on a piece of data. Some
typical routing actions include printing, faxing, mailing, beaming (infrared
communication), deleting, and duplicating. In addition to system-supplied routing
services, applications can implement their own routing actions that operate on data.
Routing also describes the process of receiving data through the In Box.
The Routing interface provides the link between an application and the In/Out Box
for sending and receiving data using transports. The Routing interface also
provides a standard mechanism for an application to make available its own routing
actions that do not use transports, such as deleting and duplicating.
The In/Out Box
21
The In/Out Box is a central repository for incoming and outgoing data handled by
the Routing and Transport interfaces. The In/Out Box application is accessed
through the In Box or Out Box icons in the Extras Drawer. The user can tap either
icon to open the In/Out Box to view and operate on its contents. Once it's open, the

C H A P T E R 2 1
Routing Interface
21-2
About Routing
user can switch between the In Box and the Out Box by tapping radio buttons in
the application.
When open, the In/Out Box displays either the In Box, containing incoming items,
or the Out Box, containing outgoing items. The user can choose to sort items in
both the boxes in various ways, such as by date, transport type, or status. A transport
is a type of communication service such as fax, e-mail, or beam. Figure 21-1 shows
the In Box and Out Box overviews where the items are sorted by transport type.
Figure 21-1
In Box and Out Box overviews
The In/Out Box uses the Transport interface internally to perform its operations.
The In Box
21
Incoming data items are received into the In Box and stored there. For example, the
user may receive beamed items, e-mail, or fax messages. Many kinds of In Box
items can be viewed in the In Box and then put away into another application residing
on the Newton device. For example, the user may receive an e-mail message, read
it in the In Box, and then put it away into the Notes application. The act of putting
away an item transfers it to the selected application. The user can optionally delete
the item from the In Box at the same time.
The In Box also supports an automatic "put away" feature. An application can
register to automatically receive items designated for it. In this case, as soon as the

C H A P T E R 2 1
Routing Interface
About Routing
21-3
In Box receives such an item, it is automatically transferred from the In Box to the
application, without user intervention. For example, incoming stock quotes from a
wireless modem could be automatically transferred to a stock tracking application.
The In Box itself also supports routing certain items. For example, you can read
incoming e-mail, reply to it, print it, or fax it directly from within the In Box.
The Out Box
21
Outgoing data items are stored in the Out Box until a physical connection is
available or until the user chooses to transmit the items. For example, the user may
fax and e-mail several items while aboard an airplane. These items are stored in the
Out Box until the user reaches a destination, connects the Newton to a phone line,
and sends the items.
While items are stored in the Out Box, most can be viewed, some can be edited,
and routing or addressing information can be changed. For example, you can add
more recipients to an e-mail message or change a fax number.
Individual transports can support automatic connection features. For example, the
transport could be configured to automatically connect and send items at a certain
time each day.
The Out Box itself also supports routing actions. Items in the Out Box can be sent
through other transports directly from there. For example, if a fax is queued to
send, the user can also print it from the Out Box.
Action Picker
21
Routing actions are accessed in an application from the Action button--the small
envelope icon. When the user taps this button, a picker (pop-up menu) listing
routing actions appears, as shown in Figure 21-2. These routing actions apply to
the current target object. The target object typically consists of one or more
selected items or the data in a view, such as the current note in the Notes application.
Usually this corresponds to a soup entry or to multiple soup entries.
Figure 21-2
Action picker
Action picker
Action button
C H A P T E R 2 1
Routing Interface
21-4
About Routing
In the user interface of your application, the Action button should be positioned
differently, depending on how your application displays individual items. If your
application can have more than one selectable item on the screen at a time (like
Notes), the Action button should be attached to the top of the view it will act on.
For example, each note in the Notes application has its own Action button, which
applies just to that note. If your application displays only one data item at a time,
the Action button must be on the status bar at the bottom of the screen.
You can add an Action button to the user interface of your application by adding a
view based on the
protoActionButton
proto. This proto contains the
functionality to create and pop up the picker.
The picker displayed when a user taps the Action button lists the routing actions
available for the particular type of data selected. There are two kinds of routing
actions that can appear on the Action picker:
routing actions that correspond to transports installed in the Newton device
application-defined actions that do not use the Out Box and a transport to
perform the routing operation, such as Delete and Duplicate
Transport-based actions that support the type of data being routed are shown at the
top of the Action picker. Application-defined routing actions appear at the bottom
of the picker, below a separator line.
Note that the first action listed in the Action picker has the name of the target item
appended to it (for example, "Print Note"). The Action picker obtains the name of
the item from the
appObject
slot. Most applications define this slot in their base
view. It holds an array of two strings, the singular and plural forms of the name of
the item (for example,
["Entry", "Entries"]
).
The system builds the list of routing actions dynamically, at the time the Action
button is tapped. This allows all applications to take advantage of new transports
that are added to the system at any time. Applications and transports need know
nothing about each other; the Routing interface acts as the bridge, creating the
picker at run time.
Applications don't specify that particular transports be included on the picker.
Instead, applications enable transports based on the class of data to route and the
types of formats available for that data class: for example, view formats (for printing
and faxing), frame formats (for beaming), text formats (for e-mail), and so on.
Here's a summary of the main steps that occur when the user taps the Action button:
1. The system obtains the target by sending the
GetTargetInfo
message to the
Action button view, and then determines the class of the target.
2. Using the class of the target, the system builds a list of routing formats that can
handle that class of data by looking them up in the view definition registry using
the
GetRouteFormats
function. Note that only routing formats are included
in the list; other view definitions are ignored.

C H A P T E R 2 1
Routing Interface
About Routing
21-5
3. Using the list of formats, the system builds a list of transports that can handle at
least one of the data types supported by any of the formats. The matching
transports are shown on the Action picker. Application-defined actions such as
delete or duplicate are also added to the picker.
4. If the user chooses a transport-based action from the picker, the system sends
the
SetupItem
message to the current (last-used) format for that transport and
the data type being routed. Then the routing slip is opened, where the user can
supply addressing information and confirm the routing action. If the user
switches formats from among those available, the
SetupItem
message is sent
to the new format.
5. If the user chooses an application-defined action from the picker, the system
sends the Action button view the message defined by the application for that
action (in the
RouteScript
slot of the
routeScripts
frame).
The following section describes routing formats in more detail and explains how
they're used to determine what transport-based routing actions appear on the
Action picker. The steps in this summary are explained in greater detail in the
section "Providing Transport-Based Routing Actions" beginning on page 21-9.
Routing Formats
21
To implement the sending of data using the Routing interface and a transport, an
application uses one or more routing formats that specify how data is to be formatted
when it is routed. A routing format is a frame specifying items such as the title of
the format, a unique identifying symbol, the type of data the format handles, and
other information controlling how the data is handled. Some types of routing
formats, such as print formats, are view templates that contain child views that lay
out the data being printed. Other types of routing formats, such as frame formats,
simply control how a frame of data is sent; these have no visual representation.
Here is an example of a routing format frame:
{_proto: protoPrintFormat,// based on this proto
title: "Two-column", // name of format
symbol: '|twoColumnFormat:SIG|, // format id
// construct child views that do the actual layout
ViewSetupChildrenScript: func() begin ... end,
// handle multiple pages
PrintNextPageScript: func() begin ... end,
...}
The
dataTypes
slot in the format indicates the types of data handled by the
format. This slot and the class of the data object being routed are used to determine

C H A P T E R 2 1
Routing Interface
21-6
About Routing
which transports show up in the Action picker. The system builds a list of all
routing formats registered under the symbol matching the class of the object being
routed. This list contains all the formats that can be used with that class of object.
Remember that the class of a frame object is simply the value of the
class
slot in
the frame. So, to route a frame, it must have a
class
slot that contains a value
corresponding to one of the classes under which routing formats are registered. For
more details about registering routing formats, see the section "Registering Routing
Formats" beginning on page 21-16.
Each transport installed in the system contains a
dataTypes
array that indicates
the data types it can handle, for example,
['text, 'frame]
. For the item being
routed, the Action picker lists every transport whose
dataTypes
slot includes one
of the types specified by the
dataTypes
slots of the routing formats associated
with that item. This selection mechanism is illustrated in Figure 21-3.
For more information about transports, see Chapter 22, "Transport Interface."
Figure 21-3
Transport selection mechanism for action picker
Once the user chooses a transport from the Action picker, the routing slip for that
transport is displayed. All the routing formats that support the class of data being
routed and are handled by that transport are listed in the format picker in the routing
slip, as shown in Figure 21-4. The last used format for that transport in that
application is set as the current format; if no last format is found, the first format
found is used.
If there is an auxiliary view associated with a format, it is opened automatically
when that format is selected. For more details on auxiliary views, see "Displaying
an Auxiliary View" (page 21-15).
{
class: foo,
..
}
{foo: {
Fmat1:{dataTypes:['view],
...},
Fmat2:{dataTypes:['view],
...},
Fmat3:{dataTypes:['frame],
...}}
baz: {
FmatB1:{dataTypes:['view],
...}},
...
}
[Fax:{dataTypes:['view],
...},
Print:{dataTypes:['view],
...},
Mail1:{dataTypes:['text],
...},
Mail2:{dataTypes:
['frame,'text], ...},
...
]
Routed object
Routing formats in view definition registry
Installed transports
Resulting Action picker lists the
transports Fax, Print, and Mail2
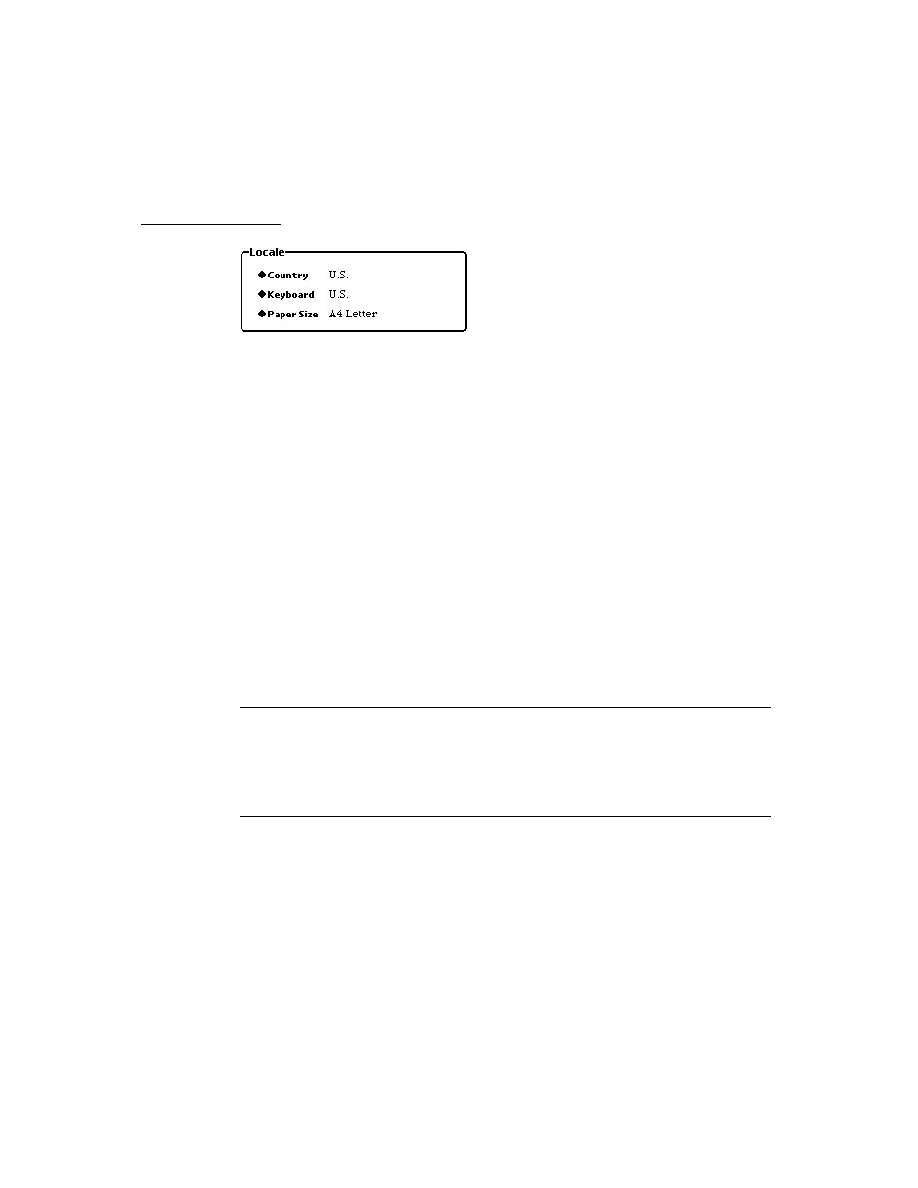
C H A P T E R 2 1
Routing Interface
About Routing
21-7
Figure 21-4
Format picker in routing slip
The built-in applications and transports support routing of the basic data types
listed in Table 21-1. Other data types may be defined by applications, but only
those transports aware of them can use them. If you do create a custom data type,
you must append your developer signature to make it unique.
Typically, an application defines multiple routing formats to allow routing that uses
different types of transports. For example, an application might define one
'frame
format, one
'text
format, and two
'view
formats.
An application may make use of built-in routing formats and other routing formats
that have been registered in the system, if the application sends data of the class
handled by those formats. But typically an application registers unique formats of
its own that are custom designed for its own data.
1
This column lists the built-in transports that support each of the routing data types. Note
that this information is firmware-dependent. All Newton devices may not have all these
transports built in, and some devices may have additional transports not listed here.
Table 21-1
Routing data types
Data type
Description
Built-in
transport support
1
'view
Data is exported in page-by-page views for
operations such as printing and faxing.
print, fax
'frame
Data is exported as a NewtonScript frame.
beam
'text
Data is exported as a string.
mail
'binary
Data is exported as a binary object.
not applicable
Format Picker

C H A P T E R 2 1
Routing Interface
21-8
Using Routing
You must register all routing formats that you define with the system, usually in
your application part
InstallScript
function. Registration is discussed in the
section "Registering Routing Formats" beginning on page 21-16.
Current Format
21
The routing system maintains a "current format," which is the last routing format
used by your application for a specific transport, or the first routing format
available otherwise. The current format sets the format picker in the routing slip the
next time the user chooses to route an item using the same transport.
The current format is saved in a slot in the application base view. It is your
responsibility to save this information to a soup if you want to preserve it. For more
information, see the section "Getting and Setting the Current Format" (page 21-11).
Routing Compatibility
21
The Routing interface described in this chapter is entirely new in system software
2.0. The previous Routing interface, documented in the original edition of Newton
Programmer's Guide
, is obsolete, but still supported for compatibility with older
applications. Do not use the old Routing interface, as it will not be supported in
future system software versions.
Note that if a Newton 1.x application that includes the routing capability is run
under system software version 2.0, the names of routing actions in the Action
pickers may appear slightly differently than they do under Newton 1.x because of
the way the picker is constructed in Newton 2.0.
Also, note that custom transports designed using the Transport interface will not be
available to Newton 1.x applications.
Print Formats
21
In the Newton 1.x system, print formats have left and right default margins of
60 pixels. In Newton 2.0, the default margins are 0. In Newton 2.0, you must let the
print format set up its own view bounds and design its child views to be positioned
relative to their parent's bounds. In other words, do not modify the
viewBounds
and
viewJustify
slots of the print format.
Using Routing
21
This section describes how to use the Routing interface to perform these specific tasks:
provide transport-based routing actions
provide application-specific routing actions
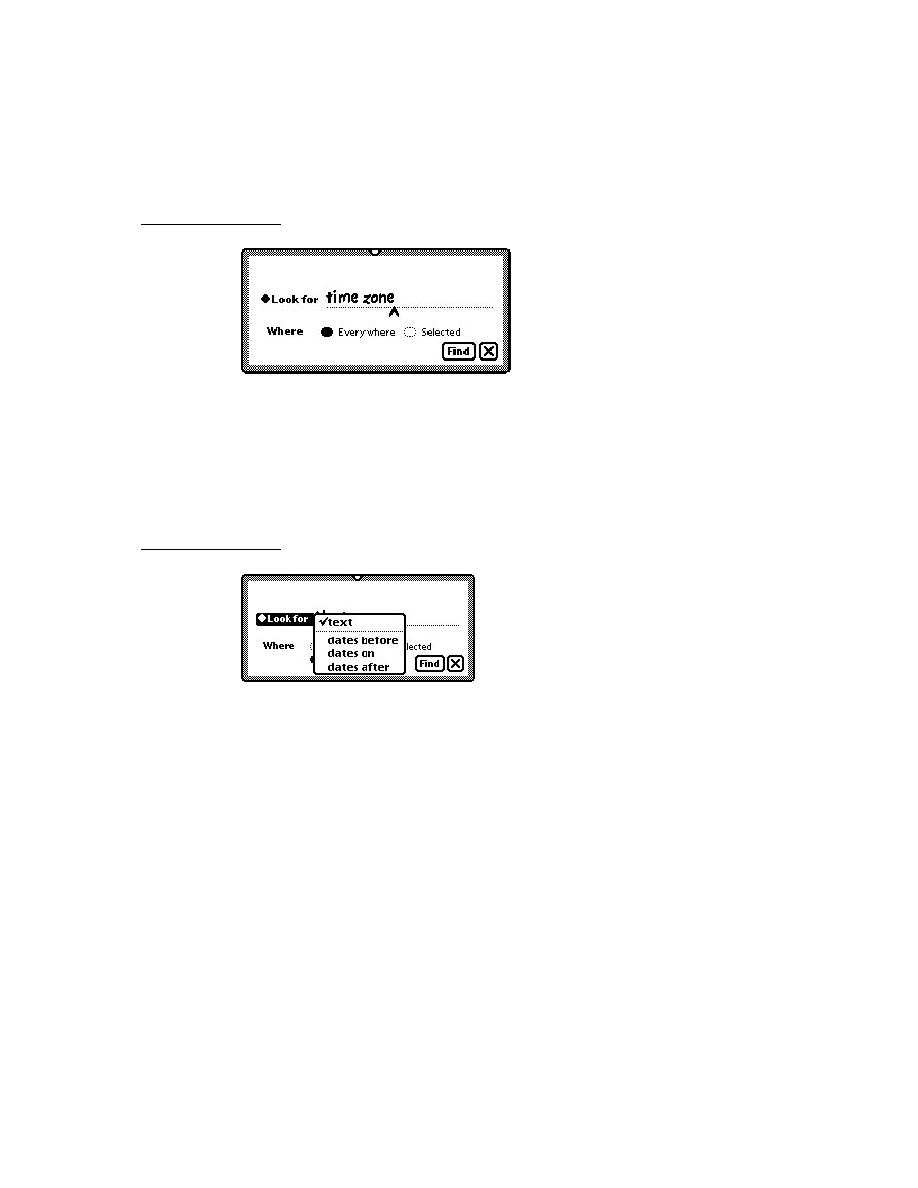
C H A P T E R 2 1
Routing Interface
Using Routing
21-9
send items programmatically
receive items
allow items to be viewed in the In/Out Box
Providing Transport-Based Routing Actions
21
Here's a summary of the minimum things you need to do to support routing by the
Action button in an application:
Include the Action button in your application (or in individual views) by adding
a view based on the
protoActionButton
proto.
Supply a
GetTargetInfo
method in your application (or in individual views)
or ensure that the
target
and
targetView
slots are set up correctly with the
target object and target view, so the system can determine what is being routed.
Ensure that the target data object has a meaningful class (for frame objects, this
is the
class
slot). The data class is used to determine the appropriate formats,
and thus transports, available to an item.
Create one or more routing formats, using one of the routing format protos. Give
your formats unique
symbol
and
title
slots, and supply the
SetupItem
method, if necessary. View formats may need a
PrintNextPageScript
method for multiple pages, and may need a
FormatInitScript
method if
much preparation must be done before printing or faxing. Text formats may
need a
TextScript
method.
Register your routing formats in the application part
InstallScript
function
and unregister them in the
RemoveScript
function.
To support routing through transports, your application uses one or more routing
formats. These may be custom formats registered by your application or other
formats built into the system or installed separately. For more information about
routing formats, see the section "Routing Formats" beginning on page 21-5. There
are some prototype formats built into the system that you must use to create your
own formats:
To create a format for routing a
'view
data type, use the
protoPrintFormat
; see "Creating a Print Format" (page 21-18).
To create a format for routing
'frame
and
'text
data types, use the
protoFrameFormat
; see "Creating a Frame Format" (page 21-21).
To create a new kind of format for data types other than
'view
or
'frame
, you
can use the
protoRoutingFormat
; see "Creating a New Type of Format"
(page 21-22).
The following sections describe the more detailed aspects of supporting transport-
based routing.
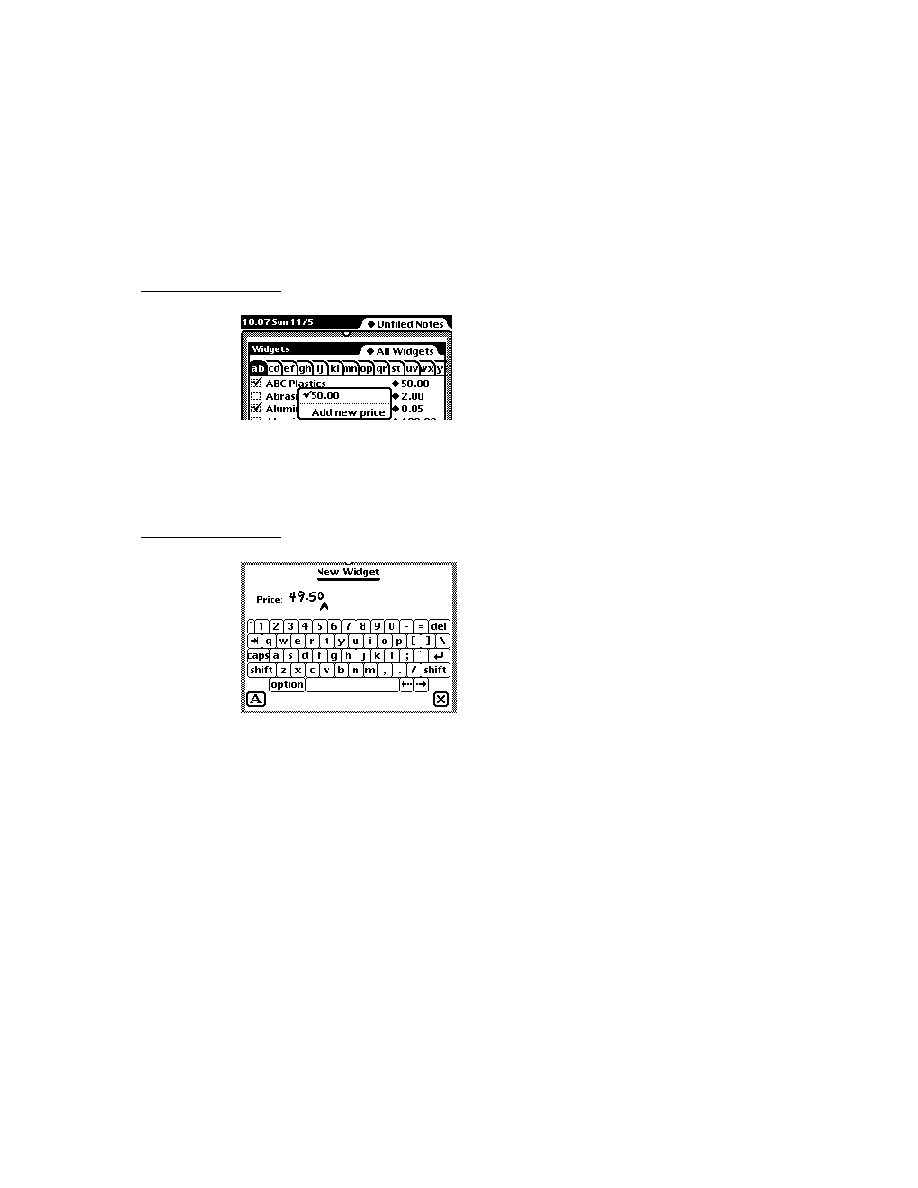
C H A P T E R 2 1
Routing Interface
21-10
Using Routing
Getting and Verifying the Target Object
21
When the user first taps the Action button, but before a choice is made from the
picker, the Routing interface sends the Action button view the
GetTargetInfo
message, passing the symbol
'routing
as a parameter. The purpose of this
message is to get the target object to be routed and the target view in which it
resides. Usually, these items are stored in slots named
target
and
targetView
in your application. If you set up and use such slots in your views, you don't need
to implement the
GetTargetInfo
method because this is a root view method
that is found by inheritance. The root view method simply looks for the slots
target
and
targetView
, starting from the receiver of the message, which is the
Action button view. It returns these slots in a frame called the target information
frame. If you don't use these slots in your views, you'll need to implement the
GetTargetInfo
method to return them.
You'll need to implement the
GetTargetInfo
method if the user has selected
multiple items to route. In this case, you'll need to construct a single object that
encapsulates the multiple items selected for routing, because the target must be a
single object and it can't be a standard cursor. In your
GetTargetInfo
method
you can use the function
CreateTargetCursor
to create a multiple-item target
object from the selected items.
Note
In most cases the target object is a frame. In some cases you
might want to route a nonframe object such as a string or binary.
The Routing interface supports nonframe target objects; however,
other system services such as Filing may require target objects
that are frames, so you may not be able to use the same target
with them. Note also that nonframe target objects must have a
meaningful class for use with the Routing interface.
Once the user chooses a transport-based routing action from the Action picker, the
system creates a new item frame containing some default slots and values for the
target item. This is done by means of the transport method
NewItem
. One slot that
is initialized by
NewItem
is the
appSymbol
slot of the item frame. The value for
this slot is obtained from the
appSymbol
slot of the application doing the routing
(through inheritance from the Action button view).
Then, just before the routing slip is opened, the Routing interface sends the
message
VerifyRoutingInfo
to the view identified by the
appSymbol
slot in
the item frame. This is normally your application base view. However, if you are
doing routing from a view created by
BuildContext
, for example, the
appSymbol
slot might be missing because such views don't automatically include
this slot. You must include an
appSymbol
slot in such a view, if you need to use
the
VerifyRoutingInfo
message, since the
appSymbol
slot determines where
this message is sent.

C H A P T E R 2 1
Routing Interface
Using Routing
21-11
The
VerifyRoutingInfo
method is passed two parameters, the target
information frame obtained by
GetTargetInfo
, and the partially initialized item
frame obtained from
NewItem
. The
VerifyRoutingInfo
method allows you a
chance to verify or change the target item before the routing slip is opened.
Normally you would return the same target frame that was passed in, possibly
modified. To cancel the routing operation, you can return
nil
from this method.
Note that the system sends the
VerifyRoutingInfo
message only if it is imple-
mented by your application; otherwise, the routing operation continues without it.
If multiple items are being routed, the target object (constructed by
CreateTargeCursor
) encapsulates them all. In your
VerifyRoutingInfo
method, you can use the function
GetTargetCursor
to return a cursor to
navigate the items. Then you can iterate through the cursor using the cursor
methods
Entry
,
Next
, and
Prev
, as described in Chapter 11, "Data Storage and
Retrieval." Note that only these three cursor methods are supported for use with
cursors returned by
GetTargetCursor
.
Getting and Setting the Current Format
21
Next, the Routing interface sends your application base view the
GetDefaultFormat
message. The purpose of this message is to get the default
format so that when the routing slip is opened, the format can be initially set to the
default. Normally, the default format for a particular transport is simply the last
format used with that transport from that application. This information is stored in
the
lastFormats
slot of your application base view. Unless you want to do
something special, you don't need to implement the
GetDefaultFormat
method
because this is a root view method that is found by inheritance. The root view
method simply gets the default format symbol from the
lastFormats
slot.
The format can be changed by the user, or by the system (if no last format is found,
the default is set to the first one that is found). When the format is changed, the
Routing interface sends your application base view the
SetDefaultFormat
message. The purpose of this message is to store the default format symbol for later
use. Normally, this is stored in the
lastFormats
slot in the application base
view. Unless you want to do something special, you don't need to implement the
SetDefaultFormat
method because this is a root view method that is found by
inheritance. The root view method simply sets the new format symbol in the
lastFormats
slot of your application base view.
The
lastFormats
frame contains a slot for each transport that has been used
from your application. Whenever a transport is selected, the system first checks
your application for the
lastFormats
frame and for a slot within that frame
named with the symbol of the transport being used. If the slot is found, it contains
the symbol of the last format used by that transport. Then the system searches for a
format whose
symbol
slot matches it.

C H A P T E R 2 1
Routing Interface
21-12
Using Routing
If your application does not have a
lastFormats
slot, or if a matching format
is not found (the format was unregistered), the first format found becomes the
current format.
It is your responsibility to save the
lastFormats
frame to a soup if you want to
maintain it, since this information is cleared on a system reset or if your application
is uninstalled.
Supplying the Target Object
21
Next, the Routing interface sends the
SetupItem
message to the current format.
This message informs the format that it is selected and an item is being routed. The
SetupItem
method is passed two parameters: a partially initialized item frame,
and a target information frame, as returned by
GetTargetInfo
. The item frame
is obtained from the transport method
NewItem
, which creates a new Out Box
item frame containing some default slots and values. This is the frame that is to be
stored in the Out Box. It must be filled in with the data object being sent.
The target information frame contains two important slots,
target
and
targetView
, which define the data object to be routed and the view that contains
it, respectively. The
SetupItem
method must set the
body
slot of the item frame
to the value contained in the
target
slot of the target information frame. This fills
in the item frame with the actual data to be sent.
You are not required to provide a
SetupItem
method in routing formats since this
method is defined in the routing format protos. The
SetupItem
method defined in
the protos simply assigns the
target
slot in the target information frame to the
body
slot of the item frame. You can override this method if you want to perform
additional operations and still call the inherited
SetupItem
method. Note that
there's a potential problem with not copying the target object. If the object is
viewable and editable and the user edits the object in the Out Box, that potentially
changes the original object stored by the application, since there are potentially not
two separate objects, but two pointers to the same object.
If you want to modify the
body
slot of the item in some way, you should supply
your own
SetupItem
method instead of calling the inherited version. Then
in your own
SetupItem
method, clone the
target
slot of the target information
frame into the
body
slot of the item frame.
When sending data to another Newton device (for example, by beaming) it's a
good idea to ensure that the sent object contains a
version
slot (inside the
item.body
frame) that holds the current version of your application. This will help
to reduce compatibility problems in future versions of your application. If the data
format changes, your application can easily identify older and newer data formats.

C H A P T E R 2 1
Routing Interface
Using Routing
21-13
Storing an Alias to the Target Object
21
When there is a single target object, if there is not enough storage space, or the
target object is larger than a specified size, you can specify that an alias to the
target object, rather than the target object itself, be stored in the
item.body
slot.
This can be a soup entry alias or you can implement your own alias handling. You
enable the storing of an alias by setting the
storeAlias
slot in the routing format
frame to
true
. Additionally, you can specify a maximum size limit for target
objects by setting the
sizeLimit
slot in the routing format frame. If any target
object is larger than the size specified in this slot, and
storeAlias
is also
true
,
an alias to the target object is stored in the
item.body
slot. To store every target
as an alias, set
sizeLimit
to 0.
The default
SetupItem
method provided in the routing format protos reads the
storeAlias
slot and performs the appropriate operations if this slot is
true
;
otherwise, it assigns the actual target object to the
item.body
slot, as usual. If an
alias to the target object is stored in the
item.body
slot, the routing interface also
sets the
item.needsResolve
slot to
true
, to signal that the
body
slot contains
an alias that needs to be resolved.
When it's time to send an item, the format
ResolveBody
method is used to resolve
an alias before the item is sent. The item won't be sent until the alias is resolved
(
ResolveBody
returns a non-
nil
value), since there's no point in sending an alias.
If an alias to an item is stored, the item can still be viewed and operated upon in the
In/Out Box, just like any other item.
Note that there are some potential problems if an alias to the target object is stored.
If the target entry resides on a card store, and the card is removed before the item is
actually sent from the Out Box, the alias cannot be resolved and the send operation
on that item will fail. No matter where the original object resides, even if it is simply
deleted, the send operation on that item will fail. Therefore, whenever an alias is
stored, the user is warned by an alert slip explaining that the original item must be
available when the routed item is actually sent. You can set the routing format slot
showMessage
to
nil
to prevent the warning message from being displayed.
Another problem with storing an alias is that the alias is just a pointer to the
original data. For example, say the user faxes a note and chooses to send it later,
and you store an alias to the note in the Out Box. Then the user opens the fax item
in the Out Box and changes the note. This actually changes the original note in the
Notes application, since the alias is a pointer to the original soup entry. Similarly, if
the user changed the original note before the fax was sent, then the fax text would
be changed without the user being aware of it.
Most target objects are soup entries, for which the routing format protos can handle
the operations of determining the object size, making an alias, and resolving the
alias when needed. However, in some cases, you may want to route objects that are
not soup entries. If you want to create custom aliases to such objects, you must

C H A P T E R 2 1
Routing Interface
21-14
Using Routing
override the routing format methods that handle the alias operations:
TargetSize
,
MakeBodyAlias
, and
ResolveBody
.
The
TargetSize
method must determine the size of the target object passed to it.
The default method does this for soup entries, but you must override it and do it
yourself for other kinds of objects. The size of the object is used to determine if the
object is greater than the size specified by the
sizeLimit
slot in the routing
format, or greater than the available space on the store. If either of these conditions
is true, an alias is created for the object.
Storing Multiple Items
21
You may want to send multiple items in one routing operation. This allows you to
use a single routing slip to address several items at once, for example, if the user
selects multiple items from an overview. If you've constructed a multiple-item
target object for a group of items, you can specify that these items be stored as
individual items in the Out Box or that the single multiple-item target object be
stored in the Out Box. The
storeCursors
slot in the routing format controls this
feature, along with the transport. This feature works only if the transport
also supports it and is able to handle a multiple-item target (the transport
allowBodyCursors
slot is also
true
). For example, the built-in beam transport
does not support the storing of a multiple-item target for multiple items, so the
storeCursors
slot in the routing format is ignored for that transport.
The default value of the
storeCursors
slot is
true
.
Set the
storeCursors
slot to
true
to store a single multiple-item target object
for the items in the Out Box. When the items are sent, the cursor is resolved into its
component entries.
Set the
storeCursors
slot to
nil
to store each of the selected items as a separate
item in the Out Box. Each item can later be sent or operated on individually from
the Out Box.
Using the Built-in Overview Data Class
21
The system includes a built-in overview data class,
'newtOverview
, that you can
use to simplify routing from overviews. Special formats that handle the data types
'view
,
'frame
, and
'text
are registered under this data class. (You should not
register any other formats under the
'newtOverview
class.)
At the time data is actually sent from the Out Box, these special formats handle
each item from the overview separately, looking for the first nonoverview format
registered in the system that can handle the data class of that item. At this time,
formats you have registered would be invoked separately for the individual items in
the overview selection. For example, for printing, each item would be printed on a
new page.

C H A P T E R 2 1
Routing Interface
Using Routing
21-15
If your
GetTargetInfo
method returns a multiple-item target object by using the
function
CreateTargetCursor
, you can set the class of that target object to
'newtOverview
to enable this special behavior. You'd do this using code like this:
CreateTargetCursor('newtOverview, myItemArray);
There is a limitation to using the
'newtOverview
data class, which is that this
data class handles data types of
'view
,
'frame
, and
'text
only. If you want to
enable other data types, or restrict the data types to just a subset of these, you'll
need to create your own overview data class and register formats under that class.
Note that the overview-handling code discussed here is contained in
protoRoutingFormat
, so any format that you create can support this same
functionality. To use it, you must define a multiple-item data class and then register
formats under that data class.
Displaying an Auxiliary View
21
When the user chooses a format in the format picker, you may need to get
additional information from the user in the routing slip view. You can do this
by means of an auxiliary view template that you specify in the
auxForm
slot
of the routing format. If you specify a view template in this slot, when the format
is selected, this auxiliary view template is instantiated with the function
BuildContext
and is sent an
Open
message.
Figure 21-5 shows an example of the auxiliary view used with the built-in Memo
format for Note stationery in the Notes application. This view gets information to
be used for the Name and Subject fields of the memo header.
Figure 21-5
Auxiliary view example
If you need access to information about the item being routed, you can access the
fields
slot in the auxiliary view. The system sets the
fields
slot to the frame
that becomes the In/Out Box entry for the item being routed. For details on this
frame, see "Item Frame" (page 18-1) in Newton Programmer's Reference.

C H A P T E R 2 1
Routing Interface
21-16
Using Routing
If you need to read the
body
slot within the
fields
frame, note that it might
contain an alias. In order to access it you must get the format and send it the
ResolveBody
message, like this:
theFormat := GetCurrentFormat(fields);
resolvedBodySlot := theFormat:ResolveBody(fields);
The
ResolveBody
method returns the data in the
body
slot whether or not it is
referenced by an alias, so you can always use it.
You can store information you obtain from an auxiliary view in the
fields
frame,
preferably in the
body
slot (or if
body
contains an alias, in the entry the alias
points to). If you store data from the auxiliary view in a different slot, be sure the
slot name has your developer signature appended to avoid future slot name
conflicts.
Registering Routing Formats
21
All routing formats are specified as view definitions and are registered with the
system by means of the global function
RegisterViewDef
. The formats that
handle data types other than
'view
are not actually views, but they are registered
as view definitions to take advantage of the central registration mechanism.
Registering formats in this way makes them available to all applications in the
system. Routing formats are specially identified in the view definition registry
because the
type
slot of all routing formats is set to the symbol
'routeFormat
(or
'printFormat
in some ROM versions).
Register formats with the class of the object you want them to act on. Here is an
example of registering a format:
RegisterViewDef(myPrintFormat, '|myDataClass:SIG|);
This call registers the format
myPrintFormat
as working with data whose
class is
'|myDataClass:SIG|
. If the class of any target data object is
'|myDataClass:SIG|
, the format
myPrintFormat
will be available when
that item is routed. The fact that this print format (with a
'view
data type) has
been registered means that you can print and fax that class of data items. This
mechanism enables you to have separate routing formats (and thus routing actions)
for individual views, if they use different data classes for data, rather than using the
same formats (and routing actions) for all views in an application.
Typically, your application registers routing formats when it is installed, in its part
InstallScript
function, and unregisters formats in its
RemoveScript
function. You use the function
UnRegisterViewDef
to unregister routing formats.
In an application part
InstallScript
function, when registering your
routing formats, you must not use the Newton Toolkit function
GetLayout
to obtain a reference to the routing format layout, so that you can pass it to

C H A P T E R 2 1
Routing Interface
Using Routing
21-17
RegisterViewDef
. Nor should you use
DefConst
, or any other method
that directly references the routing format. This is because the entire
InstallScript
function is passed to
EnsureInternal
(for application parts).
Your routing format layouts would be copied into the NewtonScript heap, wasting
precious memory.
Instead, you should use an indirect method to reference your routing format
layouts. One way is to store a reference to your routing format layouts (by using
GetLayout
) in a slot in your application base view (for example,
myRoutingFormat
). Then in the
InstallScript
function, you can reference
that slot through the expression
partFrame.theForm.myRoutingFormat
.
Because the reference to the layout is found at run time through an argument to
InstallScript
, it is not copied into NewtonScript memory by
EnsureInternal
when your application is installed.
For example, first you could store the routing format layout in an application base
view slot:
myRoutingFormat: GetLayout("MyNiceLayout");
Then in the
InstallScript
function, you could use code like this to register the
format:
InstallScript(partFrame)
begin
local myApp := partFrame.theForm;
...
RegisterViewDef(myApp.myRoutingFormat,
kMyMainDataClassSym);
end;
For more information about view definitions and the functions that act on them,
refer to Chapter 5, "Stationery."
Note
If your application uses the NewtApp framework, registering
routing formats is much easier. The NewtApp framework does it
for you. All you have to do is add your formats to the
allViewDefs
frame in the application base view (that is based
on the
newtApplication
proto). For more information, see
"Using the Required NewtApp Install and Remove Scripts"
beginning on page 4-21.

C H A P T E R 2 1
Routing Interface
21-18
Using Routing
Creating a Print Format
21
You create a print format by using
protoPrintFormat
. This proto is required
for routing formats with a
'view
data type, such as views that you would print or
fax. This proto format is actually a view template, which displays the target object
visually. The data to be displayed is laid out as child views of the
protoPrintFormat
view.
Here is an example of a format based on this proto:
// in NTK you create a new layout for view formats
MyPrintFormat := {
_proto: protoPrintFormat,
symbol: '|myPrintFormat:SIG|,
title: "PrintIt",
ViewSetupChildrenScript: func() begin
// construct child views for first page here
end,
PrintNextPageScript: func() begin
nil;
// construct child views for next page here
end,
};
For more information about the slots and methods provided by this proto, see
"Routing Format Protos" (page 18-9) in Newton Programmer's Reference.
Topics unique to
protoPrintFormat
are discussed in the following subsections.
Page Layout
21
The view based on the
protoPrintFormat
proto is automatically sized (in the
ViewSetupFormScript
method) to fit the dimensions of a page on the output
device to which it is being routed. Do not change the values of the
viewBounds
or
viewJustify
slots in the print format view.
You can increase the margins used on the page by setting the
margins
slot. Set
this slot to a bounds rectangle frame, like this:
{left: 25, top: 20, right: 25, bottom: 30}
Each slot in this frame is interpreted as an inset from each edge of the printable
area of the paper in pixels. You must specify only non-negative values, to make
sure that you don't print off the page. The default value of the
margins
slot is
{left:0, top:0, right:0, bottom:0}
.
Also, you can control the orientation of the data on the paper by setting the
orientation
slot. Specify a symbol indicating whether to use the paper vertically

C H A P T E R 2 1
Routing Interface
Using Routing
21-19
in portrait mode (
'portrait
) or horizontally in landscape mode (
'landscape
).
The default value of the
orientation
slot is
'portrait
. Your format should
always use relative view justification and/or check the actual bounds of the print
format by using the
LocalBox
view method. Note that you cannot change the
orientation between a series of pages being printed by a single print format.
If multiple items are being routed (as from a multiple selection in an overview), you
may want to print each item on a separate page or print the items one after another,
placing multiple items on the same page before starting a new page. You can control
this feature by setting the
usesCursors
slot. The default setting of this slot is
nil
.
If you want to lay out multiple items on a page, set the
usesCursors
slot of the
format to
true
. In this case, the target object encapsulates all the items being
routed in a single multiple-item object created by
CreateTargetCursor
. Your
format should call the
GetTargetCursor
method to return a cursor for this
object, on which you can iterate over the individual items to be routed using the
cursor methods
Entry
,
Next
, and
Prev
. If your format can use other print
formats, you can use the
GetCursorFormat
method of the
protoPrintFormat
to find formats for the individual items.
If you want to lay out each item on a separate page, or if this format cannot handle
a multiple-item target object, set the
usesCursors
slot to
nil
. In this case, this
format is invoked multiple times, once for each item being routed, and each item
begins on a separate page.
Printing and Faxing
21
When an item in the Out Box is actually printed or faxed using your print format,
the view represented by the print format is instantiated and drawn to the output
device. As when any view is instantiated, the system sends the print format view
standard messages and also routing-specific messages. For optimal printing
performance, and to avoid timing out a fax connection, you need to be aware of the
sequence of events and know which operations are time-critical.
Here is the sequence of events during a printing or faxing operation:
1. The transport sends the print format the
FormatInitScript
message, to give
you an opportunity to perform initialization operations. You must perform any
lengthy initialization operations in this method, before the transport connection
is made. You can store initialized data in
self
. For more information about
using
FormatInitScript
, see Newton Programmer's Reference.
2. For sending a fax only, the transport sends the print format the
CountPages
message. If you can determine the number of pages in the fax ahead of time, you
should override this method in your print format and have it return the number
of pages (not including the cover page). If you don't override this message, the
transport opens the print format view in an offscreen window and performs steps
3, 4, and 6, below, to go through each page so it can count the number of pages.

C H A P T E R 2 1
Routing Interface
21-20
Using Routing
Then the print format view is closed. Note that the
ViewShowScript
and
ViewDrawScript
messages are not sent to the view. This takes a lot of time
for the transport to determine the number of pages, so if you can, override the
CountPages
method with one of your own.
3. The transport instantiates the print format view and sends it the
ViewSetupFormScript
message. Depending on certain factors, the transport
connection might be made at the beginning of this step or in step 4. You can rely
only on the connection being made sometime after step 2.
4. The transport sends the
ViewSetupChildrenScript
message to the print
format view, then the child views are instantiated (and sent the standard view
messages), and finally the transport sends the
ViewSetupDoneScript
and
ViewShowScript
messages to the view.
5. The transport draws the print format view and sends the
ViewDrawScript
message to the view. Note that each child view on the page is also drawn and sent
the
ViewDrawScript
message, in hierarchical order. The page might be printed
or faxed in "bands" (sections), so this step may repeat several times for the page.
If you need to draw something in your
ViewDrawScript
method, you can call
the view method
GetDrawBox
to determine the band that is currently being
drawn. Then you can draw just those shapes that are necessary for the current
band. The transport does not draw any views or shapes outside the current band.
Any shapes extending outside the current band are automatically clipped.
IMPORTANT
The
ViewDrawScript
message is sent at a time-critical point
in a fax operation. It is imperative that you do as little work as
possible in the
ViewDrawScript
method.
6. The transport sends the
PrintNextPageScript
message to the print format
view. If your print format handles more than a single page of data, you must
define the
PrintNextPageScript
method in your print format. The transport
sends this message each time it reaches the end of a page, to allow you to
construct the next page of data. While there is more data to route, this method
should return a non-
nil
value; in that case, the printing process continues
with the next page at step 4. When there is no more data to route, the
PrintNextPageScript
method should return
nil
; in that case the printing
process ends and the connection is closed.
You set up the child views containing the data for the first page in the
ViewSetupChildrenScript
method of your print format. Typically, you do
this by setting the value of the
stepChildren
array. Don't forget to call the
inherited method (
inherited:?ViewSetupChildrenScript
) so that the
proto behavior is preserved.

C H A P T E R 2 1
Routing Interface
Using Routing
21-21
The
PrintNextPageScript
method should construct the view for the next page
of data so that the message
self:Dirty()
shows the view. Typically, you do this
by keeping track of what data has been routed so far. When the format receives this
message, you select a new set of child views representing the next page of data to
send. Then you call the view method
RedoChildren
, which closes and then
reopens the child views. This method also causes the transport to send your print
format view the
ViewSetupChildrenScript
message again.
Note that in the
PrintNextPageScript
method, you can also change the
content of child views on the current page. For example, you might want to change
the content of a text field. To do this, use the
SetValue
function to pass in a new
value for the view content, like this:
SetValue(myParagraphView, 'text, newRichString);
When faxing, it's best not to perform lengthy operations in the
PrintNextPageScript
method, since the connection stays open between
pages. However, this is less time critical than the
ViewDrawScript
method. If
possible, execute lengthy operations in the
FormatInitScript
method, which
is called just once before the connection is opened.
If you need to create any custom shapes to be drawn on the page by the
ViewDrawScript
method, create the shapes in the
FormatInitScript
method. Alternatively, you can create shapes at compile time, if they are static.
Because of fax connection time-out issues, minimize shape creation in the
ViewDrawScript
method, as shape creation takes too much time and the
connection might time out as a result.
Creating a Frame Format
21
You create a frame format by using
protoFrameFormat
. This is the standard
format for routing objects with
'frame
or
'text
data types, such as for beaming
and e-mail. To enable these types of transports for your data, you must register at least
one format based on this proto. Here is an example of a format based on this proto:
MyFrameFormat := {
_proto: protoFrameFormat,
symbol: '|myFrameFormat:SIG|,
title: "No comments",
SetupItem: func(item, targetInfoFrame) begin
local myData := clone(myTargetInfo.target);
RemoveSlot(myData, 'comments); // remove some stuff
item.body := myData;
// this item.body is not a soup entry.
// if it MIGHT be a soup entry, call
// inherited:SetupItem(item, targetInfoFrame)

C H A P T E R 2 1
Routing Interface
21-22
Using Routing
// which takes targetInfoFrame.target and makes an
// alias, if appropriate
end,
TextScript: func(item,target) begin . . . end,
...
};
Note that one application can have multiple frame formats. You would simply
supply a different
SetupItem
method for the different formats (as well as unique
symbol
and
title
slots), to construct the item frame differently.
If your frame format doesn't support the
'text
data type, you should override the
dataTypes
slot and set it to
['frame]
.
For routing formats that support the
'text
data type, you must override the
default
TextScript
method that obtains the string data, if there are no data
definitions for the data that contain their own
TextScript
method.
For more information about the slots and methods provided by this proto, see
"Routing Format Protos" (page 18-9) in Newton Programmer's Reference.
Creating a New Type of Format
21
You create a new type of routing format by using
protoRoutingFormat
. This is
the base routing format, which serves as a proto for the other routing format protos.
Here is an example of a format based on this proto:
MyNewFormat := {
_proto: protoRoutingformat,
dataTypes: ['binary],
symbol: '|myFormat:SIG|,
title: "Custom",
SetupItem: func(item, targetInfoFrame) begin
call kMyFunkySetup with (item, targetInfoFrame);
end,
...
};
For more information about the slots and methods provided by this proto, see
"Routing Format Protos" (page 18-9) in Newton Programmer's Reference.
Providing Application-Specific Routing Actions
21
First, to provide the Action button in the user interface of your application, you
must include a view based on the
protoActionButton
proto. For details, see
protoActionButton
(page 18-7) in Newton Programmer's Reference.

C H A P T E R 2 1
Routing Interface
Using Routing
21-23
Your application can provide internal application-defined actions, such as deleting
and duplicating, that do not use the Out Box and a transport to perform the routing
operation. These routing actions appear at the bottom of the Action picker.
You define these routing actions by providing a slot named
routeScripts
in
your application. The Action button searches its own context for the first
routeScripts
slot that it finds. Usually you define
routeScripts
in the base
view of your application. That way, all child views can find it by inheritance. But if
you want to have different routing actions active for different views, you can define
a
routeScripts
slot in each child view definition, where it will override the one
in the base view.
Alternatively, instead of defining an array of application-specific routing actions in
the
routeScripts
slot, you may want to build the array dynamically. To do this,
you can override the root view method
GetRouteScripts
, which is used by the
Routing interface to obtain the
routeScripts
array from your application. The
default version of this method simply returns the contents of the
routeScripts
slot to the Routing interface. In the
GetRouteScripts
method, build and return
an array like one you would define in the
routeScripts
slot.
If you provide a
routeScripts
slot, it must contain an array of frames, one for
each routing action item, that look like this:
{title: "MyAction", // name of action
icon: GetPictAsBits("MyActionIcon",nil), // picker icon
RouteScript: 'MyActionFunc, // called if action selected
// other slots and methods you need
...}
To include a separator line in the Action picker's list of application-specific routing
actions, include the symbol
'pickSeparator
in the
routeScripts
array
between the two items you want to separate. Alternatively, you can include a
nil
value to include a separator line.
For delete and duplicate actions, there are bitmaps available in ROM that you can
use as icons. For the
icon
slot of a delete action, you can specify the magic
pointer constant
ROM_RouteDeleteIcon
. For the
icon
slot of a duplicate
action, you can specify the magic pointer constant
ROM_RouteDuplicateIcon
.
If your application registers view definitions with the system, note that each view
definition can define its own
routeScripts
array. The routing action items that
apply to the individual view definition are added below those that apply to the
whole application in the Action picker. See the following section for more
information about specifying
routeScripts
in stationery.

C H A P T E R 2 1
Routing Interface
21-24
Using Routing
Performing the Routing Action
21
The important slot in each frame in the
routeScripts
array is the
RouteScript
slot. This slot contains either a symbol identifying a method, or a
function directly, that is called if the user chooses this action from the Action
picker. This function is where you perform the routing action. The function you
define is passed two parameters, target and targetView, which define the data object
to be routed and the view that contains it, respectively.
The two values, target and targetView, are obtained from your application by the
Routing interface. As soon as the Action button is first tapped, the Routing interface
sends the Action button view the
GetTargetInfo
message to obtain these two
values. The
GetTargetInfo
method returns a frame containing these and other slots.
If you set up and use
target
and
targetView
slots in your views, you don't
need to implement the
GetTargetInfo
method because this is a root view
method that is found by inheritance. The root view method looks for the slots
target
and
targetView
, starting from the receiver of the message, which is the
Action button view. It returns these slots in a frame called the target information
frame. If you don't use these slots in your views, you'll need to implement the
GetTargetInfo
method to return them.
The
RouteScript
slot can contain either a symbol identifying a function or it
can contain a function directly. If you are defining the
routeScripts
array in a
registered view definition, the
RouteScript
slot must contain a function directly.
Alternatively, if your view definition is used only within your application, you can
specify an
appSymbol
slot in the
routeScripts
frame and specify a symbol
for the
RouteScript
slot. The
appSymbol
slot tells the system in what
application to find the method identified by the
RouteScript
slot. Using the
latter alternative ties the view definition to a single application.
Here is an example of how you might define the function identified by the
RouteScript
slot shown in the example frame above:
MyActionFunc: func(target,targetView) begin
targetView:DeleteStuffFunc(target);
end,
Handling Multiple Items
21
The target item, as returned by
GetTargetInfo
, may actually be a multiple-item
target object that encapsulates several individual items to be routed. You can check
if this is the case by using the function
TargetIsCursor
. If the target item is a
multiple-item target object, and you need to act separately on the individual items,
you can obtain a cursor for the items by using the function
GetTargetCursor
.
Then you can use the standard cursor methods
Entry
,
Next
, and
Prev
to iterate
over the cursor and return individual items. For more information about using

C H A P T E R 2 1
Routing Interface
Using Routing
21-25
cursors, refer to Chapter 11, "Data Storage and Retrieval." Note that only these
three cursor methods are supported for use with cursors returned by
GetTargetCursor
.
Note that
GetTargetCursor
works with any kind of target data, whether or not
it's a cursor. So you don't need to call
TargetIsCursor
to check before calling
GetTargetCursor
.
Here's an example of a
RouteScript
method that uses
GetTargetCursor
to
operate on multiple items:
MyActionFunc := func(target,targetView)
begin
local curs := GetTargetCursor(target,nil);
local e := curs:Entry();
while e do begin
:DoMyAction(e); // do the operation
e := curs:Next();
end;
// update display here
end;
Handling No Target Item
21
If the target item returned by
GetTargetInfo
is
nil
, this indicates that no target
item is selected or there is nothing to do when the Action button is pressed. In this
case, the system displays a warning message to inform the user of that fact. To take
advantage of this warning message feature, all application-specific routing actions
must be disabled when there is no target. (You may want to include some actions
even when there is no target; in this case, you can ignore this section.)
To disable application-specific routing actions when there is no target, you can do
one of two things:
Define a
GetTitle
method in the
routeScripts
frame for each action,
instead of a
title
slot. Then return
nil
from the
GetTitle
method to
prevent that action from showing up on the picker.
Define a
GetRouteScripts
method in your application, instead of a
routeScripts
slot. Then return
nil
or an empty array from the
GetRouteScripts
method to prevent any actions from showing up on
the picker.
Note that there are different messages displayed when there is no target item (the
target is
nil
) and when there are no actions available for the target item.

C H A P T E R 2 1
Routing Interface
21-26
Using Routing
Sending Items Programmatically
21
Your application can send an item programmatically, using a specific transport or
transport group, without any user intervention. The Action button is not used in this
case. This is done using the global function
Send
.
Here is an example of how to use the
Send
function:
myItem := {
toRef: [nameRefObject, ...], // array of fax name refs
title: "The Subject", // title of item
body: {class: kMyDataSym, // fax data frame
myData: ...},
appSymbol: kAppSymbol,
currentFormat: kOtherPrintFormatSym
};
Send('fax, myItem);
You must construct an item frame containing the data and other slots that you
want to set in the item. You then pass this item frame as an argument to the
Send
function.
Before calling the
Send
function, you may want to allow the user to choose a
format for the item being sent. To do this, you'll need a list of formats that can
handle the item. To get a list of appropriate formats, you can use the
GetRouteFormats
function. Using this list, you could display a picker from
which the user can choose a format.
You may also want to allow the user to choose a transport for the item being sent.
To do this, you'll need a list of transports that can handle specific formats. To get a
list of appropriate transports, you can use the
GetFormatTransports
function.
In the
Send
function, it's best to specify a transport group or let the user choose
the transport. If you specify a specific transport, it may not be installed and the
operation will fail.
In the
Send
function, the Routing interface obtains a default item frame from the
selected transport by sending the
NewItem
message to the transport. The slots you
specify in your item frame are copied into the default item frame obtained from the
transport. Note that the default frame supplied by the transport may contain other
slots used by the transport.
The slots you include in the item frame vary, depending on the transport. The In/
Out Box and transports ignore slots they don't care about. Applications can use this
feature to communicate information to multiple transports with the same item
frame. For a comprehensive list of slots and detailed descriptions, see "Item
Frame" (page 18-1) in Newton Programmer's Reference.

C H A P T E R 2 1
Routing Interface
Using Routing
21-27
The following frame shows a summary of the slots you can include in the item
frame. Note that some of the slots shown are specific to a particular transport, and
you should include them only if you are sending to that transport. Also, don't include
any additional slots in the item frame unless they are specific to a particular transport.
itemFrame := {
appSymbol:
symbol
, // appSymbol of sender
destAppSymbol:
symbol
, // receiving app, if different
body:
frame
, // the data to send
title:
string
, // item title, e-mail subject
toRef:
array
, // array of name refs for recipients
cc:
array
, // array of name refs for copied recipients
bcc:
array
, // array of name refs for blind copies
currentFormat:
symbol
, // routing format to use
connect:
Boolean
, // try to connect immediately?
hidden:
Boolean
, // hide in Out Box?
covert:
Boolean
, // not logged or saved in Out Box?
completionScript:
Boolean
, // notify app of state change?
needsResolve:
Boolean
, // body slot contains an alias?
// transport-specific slots
printer:
frame
, // the printer to use for printing
coverPage:
Boolean
, // use a cover page for fax?
faxResolution:
symbol
, // 'fine or 'normal fax resolution
phoneNumber:
string
, // phone number, for call transport
name:
string
, // name, for call transport
serviceProvider:
symbol
, // call; 'modem, 'speaker, or nil
saveAsLog:
Boolean
, // log call in Calls app?
}
Note that you can set any of the Boolean slots in the
SetupItem
method of the
routing format.
Applications implementing their own custom sending functionality apart from the
Action button may need to open the transport routing slip view for the user. If you
need to do this, you can use the global function
OpenRoutingSlip
, as described
in the section "Opening a Routing Slip Programmatically" beginning on page 21-29.
Creating a Name Reference
21
For the built-in fax and call transports, and for e-mail and other transports that use
addresses, addressing information for an item to send is stored in the
toRef
slot of
the item frame, and certain other slots such as
cc
,
bcc
, and so on. These slots
contain arrays of one or more name reference objects. A name reference is simply a
frame that serves as a wrapper for a soup entry (often from the Names soup, thus
the term "name reference"). The name reference may contain an alias to a soup

C H A P T E R 2 1
Routing Interface
21-28
Using Routing
entry and even some of the slots from the soup entry. Note that you must use name
references; you cannot specify soup entries directly.
To create a name reference object, use name reference data definitions registered
with the system in the data definition registry. There are built-in name reference
data definitions for e-mail (
'|nameRef.email|
), fax (
'|nameRef.fax|
), and
call (
'|nameRef.phone|
) information associated with names from the Names
file. These data definitions contain a method,
MakeNameRef
, that creates and
returns a name reference.
You can pass a Names soup entry directly to
MakeNameRef
, or you can construct
your own simple frame of information that contains the appropriate slots. Fax and
call name references should include the slots
name
,
phone
, and
country
. E-mail
name references should include the slots
name
,
email
, and
country
. For more
information about these slots, see "Names Soup Format" (page 16-15) in Newton
Programmer's Reference.
Here's an example of how to create a name reference for a fax phone number or an
e-mail address:
// use a Names file entry directly
local myData := aNamesFileEntry; // entry from Names soup
// or create your own fake entry frame based on other info
local myData := {
name:{first:"Juneau", last:"Macbeth"},
phone: "408-555-1234", // fax phone string
email: "
[email protected]", // e-mail address string
country: "USA",
}
// then create the fax name reference
aToRef := GetDataDefs('|nameRef.fax|):MakeNameRef(myData,
'|nameRef.fax|);
// or create the e-mail name reference
aToRef := GetDataDefs('|nameRef.email|):MakeNameRef(myData,
'|nameRef.email|);
For more information about name references and the
MakeNameRef
method, see
the documentation of
protoListPicker
in Chapter 6, "Pickers, Pop-up Views,
and Overviews."
Specifying a Printer
21
For print operations, the
printer
slot of the item frame specifies which printer to
use. This slot must contain a printer frame. The only valid way of obtaining a
printer frame is from the
currentPrinter
variable of the user configuration

C H A P T E R 2 1
Routing Interface
Using Routing
21-29
data. That variable holds the printer selected by the user as the current printer. You
can use this function to obtain the current printer for the item:
item.printer := GetUserConfig('currentPrinter);
If you want to provide a way for the user to select a different printer, you can
use the printer chooser proto,
protoPrinterChooserButton
. This proto
changes the setting of the current printer in the system; it actually changes the
currentPrinter
variable.
If you don't want to change the current printer in the user's system, but just want
to let them select a printer for this one print job, then you'll need to do the
following things:
1. Get and temporarily save the current value of the
currentPrinter
variable in
the user configuration data, using
GetUserConfig
.
2. Display the printer chooser button, allowing the user to select a printer for this
print job. When they select one, the printer chooser proto automatically changes
the
currentPrinter
variable to the chosen one.
3. Retrieve the new value of the
currentPrinter
variable, using
GetUserConfig
, and use that for the
printer
slot in the item frame.
4. Reset the user's original printer choice by resetting the
currentPrinter
variable in the user configuration data to the value you saved in step 1. To do
this you must use the function
SetUserConfig
.
Opening a Routing Slip Programmatically
21
To open a routing slip programmatically for a transport, use the
OpenRoutingSlip
function. First, create a new item by using the transport's
NewItem
method; then
add routing information such as the recipient or other information to the new item
frame; and finally, use
OpenRoutingSlip
to open the routing slip for the transport.
Here's an example of how to do these steps to open a routing slip for the built-in
Call transport:
// opening the Call Transport routing slip
local curs, item, anEntry, class, nameRef;
// get a new item frame from the transport
// '|phoneHome:Newton| identifies the Call transport
item := TransportNotify('|phoneHome:Newton|, 'NewItem, [nil]);
if item = 'noTransport or not item then
return 'noTransport;

C H A P T E R 2 1
Routing Interface
21-30
Using Routing
// get an entry from the Names soup to use for the recipient
curs:=GetUnionSoupAlways(ROM_CardfileSoupName):Query(nil);
if curs:Entry() then
begin
// set the toRef slot in the item frame
class := '|nameRef.phone|; // transport addressing class
nameRef := GetDataDefs(class):MakeNameRef(anEntry, class);
item.toRef := [nameRef];
targetInfo := {
targetView: getroot(),
target: {}, // for non-Call transports, add your data here
appsymbol: '|my:SIG|
};
// open the routing slip
OpenRoutingSlip(item, targetInfo);
// returns view (succeeded), or fails with
// nil or 'skipErrorMessage
end;
For the built-in fax and call transports, and for e-mail transports, addressing
information for an item is stored in the
toRef
slot of the item frame. E-mail
transports may also store addresses in additional slots such as
cc
and
bcc
. These
slots contain arrays of one or more name reference objects. The example code
above illustrates a name reference created from the data definition registered for the
addressing class of the transport (in this case the Call transport). For more
information about creating name references, see "Creating a Name Reference"
beginning on page 21-27.
For transports that handle data (unlike the Call transport example here), you must
also pass a target information frame to the
OpenRoutingSlip
function. The
target
slot in this frame contains the data to send. Note that the target slot can
contain a multiple-item target object, which you can create using the function
CreateTargetCursor
.
Supporting the Intelligent Assistant
21
Besides using the standard interface for routing (the Action button), the user can
also invoke routing actions by using the Intelligent Assistant and writing the name
of the action. In order to determine what item to route, the Intelligent Assistant
sends the
GetActiveView
message to your application. This method returns the
view to which the
GetTargetInfo
message should be sent.
The
GetActiveView
method is implemented by default in the root view and
simply returns
self
, the current receiver. If this return value is not appropriate for
your application, you must override this method in your application base view.

C H A P T E R 2 1
Routing Interface
Using Routing
21-31
Receiving Data
21
Incoming data arrives first as an entry in the In Box. If there is a public view
definition registered for the class of the entry, the item may then be viewed directly
in the In Box.
IMPORTANT
Generally, the
body
slot of every received item must have a
meaningful class. (This is not strictly required if the item has an
appSymbol
slot.) If
body
contains a frame, its
class
slot
identifies its data class. Items received from other Newton devices
generally have a
body.class
slot. For items received from
other systems, the transport must assign a meaningful class
(use
SetClass
).
An incoming item may be stored in the In Box until the user chooses to manually
put away the item into an application, or an incoming item may be transferred
automatically to an application as soon as the item arrives in the In Box. This is
controlled by the applications present on the Newton and described in detail in the
following sections.
If an In Box item contains an
appSymbol
slot, that slot identifies the receiving
application for the item. The system uses this slot to identify the default application
to which the item should be put away (if any). If the original item contained a
destAppSymbol
slot when submitted to the In Box, that slot is copied into the
appSymbol
slot to identify the application that should receive it. The receiving
transport does this before the item is passed to the In Box by using the transport
method
NewFromItem
.
These are the minimum steps you need to take to support receiving items through
the In/Out Box in your application:
Supply a
PutAwayScript
method in your application base view. When a user
chooses to put away an item to your application from the In/Out Box, the item is
passed to this method.
Register the data classes that your application can accept by using the
RegAppClasses
function in the application part
InstallScript
function.
Unregister using
UnRegTheseAppClasses
or
UnRegAppClasses
in the
application part
RemoveScript
function.
Automatically Putting Away Items
21
The first thing the In Box does with an incoming item is to determine which
applications might want to accept the item immediately. The In Box does this by
checking the In Box application registry to find out if any applications have
registered to accept such items; see the section "Registering to Receive Foreign

C H A P T E R 2 1
Routing Interface
21-32
Using Routing
Data" (page 21-34). If a matching application is found in the registry, the
appSymbol
slot of the item is set to the value of the
appSymbol
slot in the
matching application. If no matching applications are found in the registry, the item
may have a pre-existing
appSymbol
slot, which determines the application to
which it belongs. If no matching application is located in the registry and the item
has no existing
appSymbol
slot, it cannot be put away automatically.
Next, the In Box checks for an
AutoPutAway
method in the base view of the
application whose
appSymbol
slot matches that in the item. If the
AutoPutAway
method exists, the In Box sends the
AutoPutAway
message to the application,
passing the incoming item as a parameter. In this way, items can be automatically
transferred to an application, with no user intervention.
If the
AutoPutAway
method returns
nil
, this signals that the item could not be
put away and the item is left in the In Box.
If the
AutoPutAway
method returns a non-
nil
value, it is assumed that the
application handled the item. The item is either saved in the In Box or deleted from
the In Box, depending on the user's preference.
If your application implements the
AutoPutAway
method, it can inform the
system of this fact when it is installed, to receive any items that may have arrived
for it while it was uninstalled. In the application part
InstallScript
function,
call the global function
AppInstalled
to let the system know that the
application is present. The
AppInstalled
function prompts the In Box to send
an
AutoPutAway
message to the application for each In Box item that may have
arrived for the application before the application was installed. Note that you must
call the
AppInstalled
function using a deferred action, like this:
AddDeferredCall(GetGlobalFn('AppInstalled),[kAppSymbol]);
This feature is useful in cases where the application resides on a card that is not
always installed in the system. Messages are held in the In Box while the application
is not installed, and then when it is installed, those received messages are sent to the
application with the
AutoPutAway
message.
The item passed to your application's
AutoPutAway
method is the entry from the
In Box. It has several slots that are used by the In Box or the transport. The data
your application uses is contained in the
body
slot.
If the item was sent by a custom transport that sends multiple-item target objects
(such as those created by
CreateTargetCursor
), you might need to check if
the body slot contains such an object by using
TargetIsCursor
. If so, you can
get a cursor for the object by using
GetTargetCursor
, and then iterate over the
cursor to handle individual items.
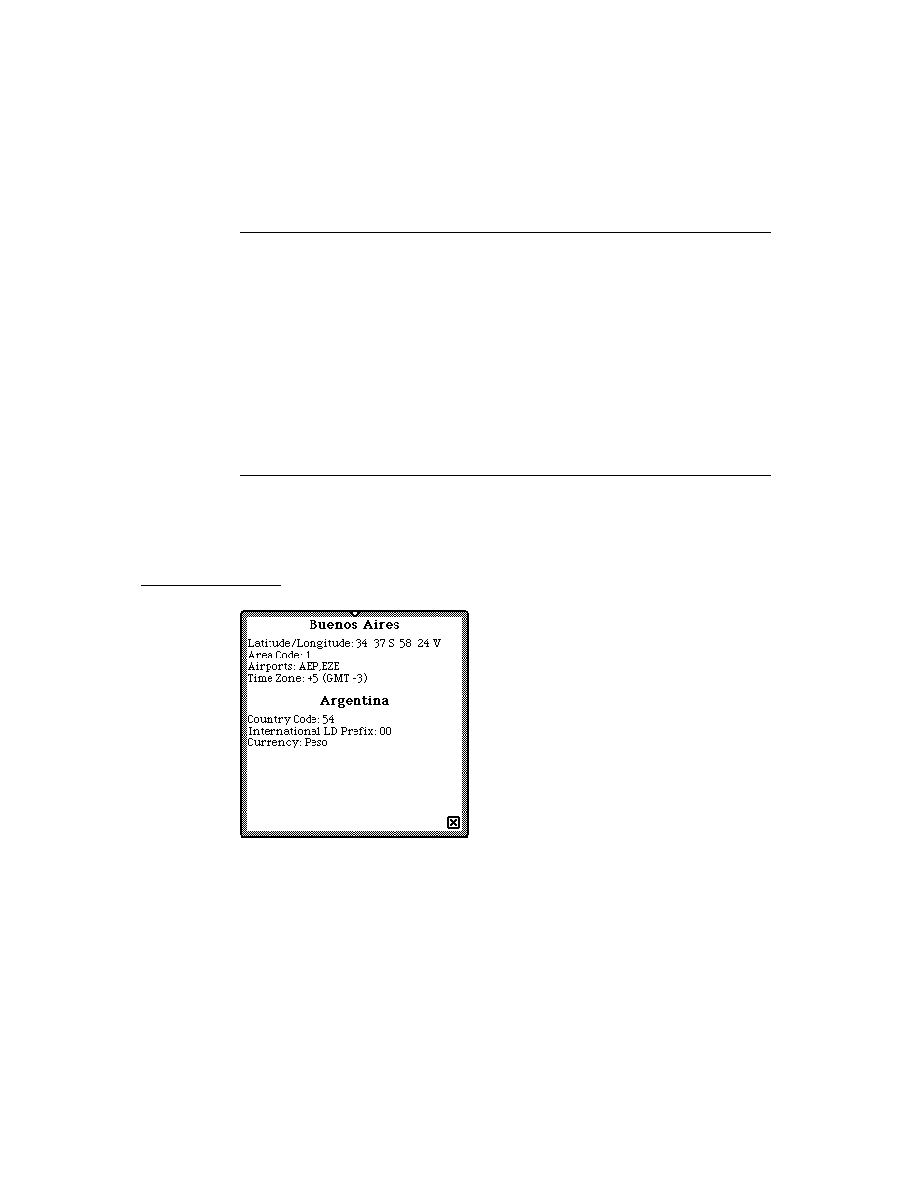
C H A P T E R 2 1
Routing Interface
Using Routing
21-33
Manually Putting Away Items
21
If an item is not put away automatically, it resides in the In Box until the user
chooses to put it away manually by tapping the Put Away button. When the user
taps the Put Away button, the In Box displays a slip showing to which application
the item will be put away. This application is the one that matches the
appSymbol
slot in the item. The In Box sends the
PutAwayScript
message to the base view
of that application. The item is passed as a parameter.
The item passed to your application's
PutAwayScript
method is the entry from
the In Box. It has several slots in it that are used by the In Box or the transport. The
data your application uses is contained in the
body
slot.
Because the item could have been sent by a custom transport that sends
multiple-item target objects (such as those created by
CreateTargetCursor
),
you might need to check if the
body
slot contains such an object by using
TargetIsCursor
. If so, you can get a cursor for the object by using
GetTargetCursor
, and then iterate over the cursor to handle individual items.
If the
PutAwayScript
method returns
nil
, this signals that the item could not
be put away and the In Box leaves the item in the In Box and an alert is displayed
telling the user that the item could not be put away.
If the
PutAwayScript
method returns a non-
nil
value, it is assumed that the
application handled the item. The item is either saved in the In Box or deleted from
the In Box, depending on the user's preference as set in the Put Away slip.
If multiple applications have registered to accept data of the item's class, the system
displays a picker listing those applications in the Put Away slip. The application
that matches the
appSymbol
slot of the item is listed as the default choice. If there
is no
appSymbol
slot, or the application is missing, then a different application is
the default choice. The user can choose the application to which the data is to be
sent, and the
PutAwayScript
message is sent to that application.
The registry used for this operation is called the application data class registry;
note that it is different from the In Box application registry mentioned above.
Applications can register to accept data of one or more classes by using the
RegAppClasses
function.
It is recommended that all applications wanting to receive items through the In Box
register their capability to receive data of particular classes by calling the
RegAppClasses
function. If your application is no longer interested in data of
these classes, or your application is being uninstalled, you can unregister to receive
these data classes by using the
UnRegTheseAppClasses
function.
You can check which applications can accept data of a particular class by using the
ClassAppByClass
function.

C H A P T E R 2 1
Routing Interface
21-34
Using Routing
Registering to Receive Foreign Data
21
To receive data from a different application or from a non-Newton source, your
application must register its interest in such data with the In Box application
registry. To do this, use the
RegInboxApp
function.
If your application is no longer interested in foreign data, or is being uninstalled,
you can unregister to receive foreign data by using the
UnRegInboxApp
function.
Note that your application can register to receive data from a different application.
If you register a test function with
RegInBoxApp
, and that test function returns
true
for a particular item, the Routing interface changes the value of the
appSymbol
slot in the item to be the value of the
appSymbol
slot in
your application.
Be careful not to intercept incoming items that should be destined for other
applications when using this feature. The In Box application registry overrides the
appSymbol
slot of the item. The system uses the
appSymbol
slot as well as the
application data class registry (
RegAppClasses
) to find applications to which an
incoming item can be put away. The application identified by the
appSymbol
slot
is used as the default for the automatic put away feature (
AutoPutAway
) and for
the Put Away picker.
Filing Items That Are Put Away
21
When an item is put away by an application, by default it is filed in the same folder
on the receiving Newton as it was in on the sending Newton. This often makes it
difficult for users to find new items, since they may be put away in folders that are
undefined. To alleviate this problem, it is recommended that all incoming items be
put away unfiled, so that users can more easily find items and file them where they
want to. Incoming items should be put away unfiled even if the recipient has a
folder of the same name as the sender.
For most applications, you put away an item unfiled by setting the
item.body.labels
slot to
nil
. However, filing techniques vary, so
this may not work for all applications.
Viewing Items in the In/Out Box
21
When data is queued in the Out Box, or has been received in the In Box and not
automatically put away, the user can view the data directly in the In/Out Box.
When the user chooses to view an item in the In/Out Box by tapping the item, the
system looks for a view definition of the type
'editor
or
'viewer
that is
registered for the class of that item.
Your application should register such view definitions with the system if you want
users to be able to view items from your application in the In/Out Box. If you do

C H A P T E R 2 1
Routing Interface
Using Routing
21-35
not provide a view definition, and there are no other view definitions available for
that data class, the In/Out Box displays a generic blank view for the item. Items
formatted with the
'view
data type do not need a separate view definition because
the In/Out Box itself provides a page preview view for these items.
Of the view definitions registered by your application, you can identify which
should be made available to the In/Out Box and which should be hidden from the
In/Out Box, by setting the
protection
slot in the view definition. Set the
protection
slot to
'public
to make the view definition available to the In/Out
Box. Set the
protection
slot to
'private
to hide the view definition from the
In/Out Box.
If more than one view definition is available to the In/Out Box for viewing an item,
the In/Out Box lets the user choose which view they want to see.
Note that view definitions for In Box items are opened by the In Box in a read-only
state. That is, if the view definition is of the type
'editor
, the user won't be able
to edit existing fields or write in new information. In other words, all child views
based on the
clParagraphView
class are read-only. However, views can receive
and respond to taps; that is,
ViewClickScript
messages are sent. If you want to
prevent your view definition from receiving all pen input, you can place a transparent
view of the
clView
class over the top of it to catch any taps.
Out Box items are opened in a writable state, if they are normally writable; that is,
the Out Box does nothing special to prevent editing if the view is editable. You may
want to make your out box items writable or not, depending on whether or not you
want the user to be able to change them in the out box.
You can use the
newtEntryView
method
EntryCool
to test if an item in the
In/Out Box is writable or not. This method returns
nil
for all In Box items, since
they are read-only.
Note also that application view definitions used in the In/Out Box must not expect
data defined within the context of the application.
For more information about writing and registering view definitions, refer to
Chapter 5, "Stationery." Note that the In/Out Box does not need data definitions,
only view definitions.
View Definition Slots
21
View definitions to be used by the In/Out Box have other slots of interest besides
the
target
slot.
One other slot of interest is named
fields
. When the view is open, the
fields
slot contains a reference to the In/Out Box entry. If the entry has a
body
slot and
the
body
slot contains a frame with a
class
slot, then the In/Out Box sets
target
to the
body
slot of the entry. This allows view definitions written for your
application to be used by the In/Out Box without modification. If you need to
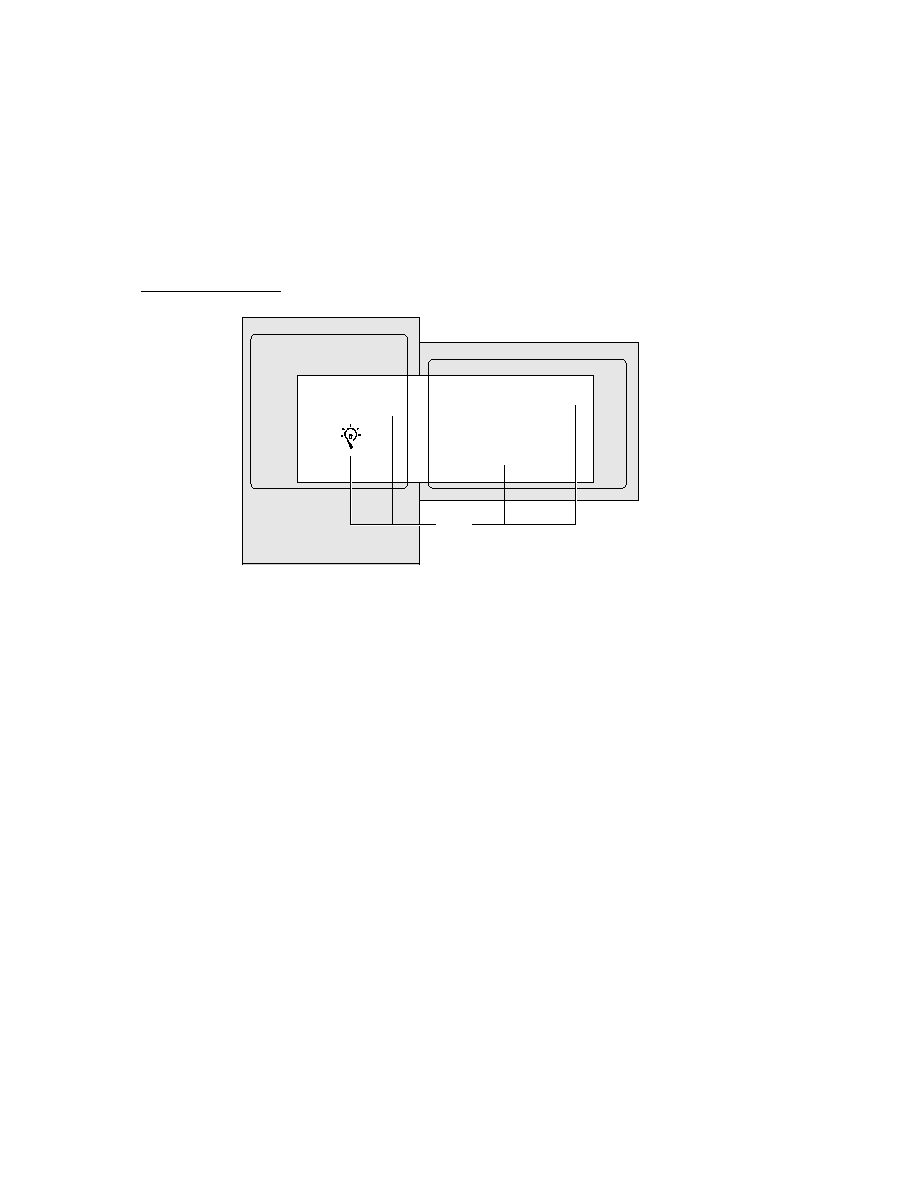
C H A P T E R 2 1
Routing Interface
21-36
Using Routing
access addressing or other information in the entry besides the actual data being
routed, look at the frame in the
fields
slot. However, use of the
fields
slot is
for special cases only and is generally discouraged. This is because it works only in
the In/Out Box, and so ties your stationery to it. If you need to use the
fields
slot
in your stationery, you should always check for the existence of this slot before
using it, and you must be able to handle the case where it is missing.
Also, view definitions to be used by the In/Out Box can have a
rollScrolling
slot. This slot contains a Boolean value. If you set this slot to
true
, the view is
treated as a paper roll-based view that specifies its height. In this case, the In/Out
Box handles scrolling within the view for you, when the user taps the built-in scroll
arrows. If the
rollScrolling
slot is set to
nil
, scrolling functionality must be
provided by the view definition itself, typically with scroll arrows inside the view.
If the
rollScrolling
slot is set to
true
, the target item must have a
height
slot that specifies the height of the item in pixels.
Note that the
newtEditView
proto sets the
rollScrolling
slot to
true
, and
is useful for creating a paper roll-based view definition.
Advanced Alias Handling
21
For sending data, an application may register a routing format that stores
a sent object as an alias in the In Box. In fact, you can set a slot,
storeAlias
, in
the routing format that allows this to happen. When such an object is to be sent by
the transport, the Routing interface automatically resolves the alias into the actual
object that is sent.
However, in some circumstances, you might want to provide your own custom
alias handling. For example, you might want to store an object in the In Box as a
complex frame consisting of some directly stored data and some slots that contain
aliases. In this case, you would override the routing format method
MakeBodyAlias
to construct your own object.
When the system needs to access the item, such as when it is viewed in the In/Out
Box, it sends the message
ResolveBody
to the format. You must override this
method and use it to resolve the alias you constructed in the
MakeBodyAlias
method.
Note that if the send operation fails, the Out Box continues to store the original
unresolved entry.

C H A P T E R 2 1
Routing Interface
Summary of the Routing Interface
21-37
Summary of the Routing Interface
21
Constants
21
ROM_RouteDeleteIcon
// bitmap for delete icon
ROM_RouteDuplicateIcon
// bitmap for duplicate icon
Data Structures
21
Item Frame
21
itemFrame := {
appSymbol:
symbol
,
// appSymbol of sender
destAppSymbol:
symbol
, // receiving app, if different
body:
frame
,
// the data to send
title:
string
,
// item title, e-mail subject
toRef:
array
,
// array of name refs for recipients
cc:
array
,
// array of name refs for copied recipients
bcc:
array
, // array of name refs for blind copies
fromRef:
frame
,
// name ref for sender
currentFormat:
symbol
, // routing format to use
connect:
Boolean
,
// try to connect immediately?
hidden:
Boolean
,
// hide in Out Box?
covert:
Boolean
,
// not logged or saved in Out Box?
completionScript:
Boolean
,
// notify app of state change?
needsResolve:
Boolean
, // body slot contains an alias?
// transport-specific slots
printer:
frame
,
// printer frame; the printer to use
coverPage:
Boolean
,
// use a cover page for fax?
faxResolution:
symbol
, // 'fine or 'normal fax resolution
phoneNumber:
string
,
// phone number, for call transport
name:
string
,
// name, for call transport
serviceProvider:
symbol
, // 'modem, 'speaker, or nil
saveAsLog:
Boolean
,
// log call in Calls app?
}

C H A P T E R 2 1
Routing Interface
21-38
Summary of the Routing Interface
RouteScripts Array Element
21
RouteScriptsArrayElement := {
title:
string
,
// string name of picker item
icon:
bitmap object
,
// icon for picker item
appSymbol:
symbol
,
// used if defined in a view def
RouteScript:
symbol
or
function
,// function called if this
// action is chosen
GetTitle:
function
,
// supplied instead of title slot
...
}
Protos
21
protoActionButton
21
aProtoActionButton := {
_proto: protoActionButton,
viewBounds :
boundsFrame
,
...
}
protoPrinterChooserButton
21
aPrinterChooserButton := {
_proto: protoPrinterChooserButton,
viewBounds :
boundsFrame
,
}
protoRoutingFormat, protoPrintFormat, and protoFrameFormat
21
aFormat := {
_proto: protoRoutingFormat, // or one of the other protos
type: 'routeFormat, // some ROMs also use 'printFormat
title:
string
,
// name of format
symbol:
symbol
,
// unique id - include signature
dataTypes: ['frame, 'text],// supports frame & text data
version:
integer
,
// version number
auxForm:
viewTemplate
,
// for auxiliary view
storeAlias:
Boolean
,
// store alias?
showMessage:
Boolean
,
// warn user when aliasing?
sizeLimit:
integer
,
// maximum size without aliasing
storeCursors:
Boolean
, // store cursor to multiple items?
SetupItem:
function
,
// puts target into item frame

C H A P T E R 2 1
Routing Interface
Summary of the Routing Interface
21-39
TextScript:
function
,
// gets text data
TargetSize:
function
,
// determines target size
MakeBodyAlias:
function
, // makes an alias
ResolveBody:
function
,
// resolves alias body slot
// for protoPrintFormat variant only
dataTypes: ['view], // print formats support view data
usesCursors:
Boolean
, // handles multiple items on a page?
orientation:
symbol
,
// 'portrait or 'orientation
margins:
boundsFrame
,
// inset from edges
pageWidth:
integer
,
// width of view
pageHeight:
integer
,
// height of view
ViewSetupChildrenScript:
function
, // set up the children
PrintNextPageScript:
function
,
// for multiple pages
GetCursorFormat:
function
, //returns format for next item
FormatInitScript:
function
,
// initialization
CountPages:
function
,
// counts pages for a fax
...
}
Functions and Methods
21
Send-Related Functions and Methods
21
Send(
transportSym
,
item
)
GetRouteFormats(
item
)
GetFormatTransports(
formatArray
,
target
)
app
:GetDefaultFormat(
transportSym
,
target
)
app
:SetDefaultFormat(
transportSym
,
target
,
formatSym
)
OpenRoutingSlip(
item
,
targetInfo
)
Cursor-Related Functions
21
CreateTargetCursor(
class
,
dataArray
)
GetTargetCursor(
target
,
param2
)
TargetIsCursor(
target
)
Utility Functions and Methods
21
AppInstalled(
appSymbol
)
ClassAppByClass(
dataClass
)
app
:GetActiveView()

C H A P T E R 2 1
Routing Interface
21-40
Summary of the Routing Interface
GetItemTransport(
item
)
view
:GetRouteScripts(
targetInfoFrame
)
RegAppClasses(
appSymbol
,
dataClasses
)
RegInboxApp(
appSymbol
,
test
)
TransportNotify(
transportSym
,
message
,
paramArray
)
UnRegAppClasses(
appSymbol
)
UnRegInboxApp(
appSymbol
)
UnRegTheseAppClasses(
appSymbol
,
dataClasses
)
Application-Defined Methods
21
app
:AutoPutAway(
item
)
app
:PutAwayScript(
item
)
app
:ItemCompletionScript(
item
)
app
:VerifyRoutingInfo(
targetInfo
,
item
)
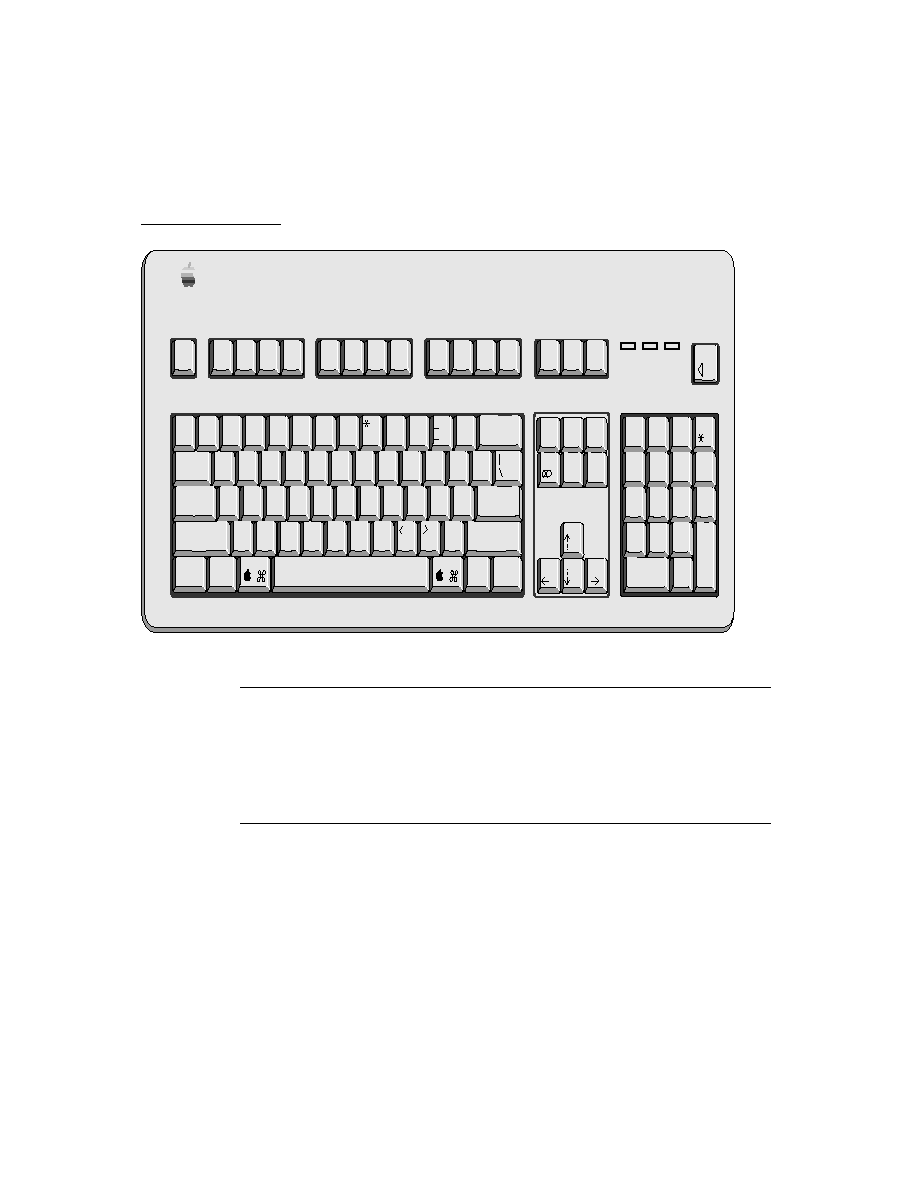
About Transports
22-1
C H A P T E R 2 2
Transport Interface
22
Figure 22-0
Table 22-0
This chapter describes the Transport interface in Newton system software. The
Transport interface lets you provide additional communication services to the system.
You should read this chapter if you are writing a low-level communication tool or
special endpoint that you want to make available as a transport for applications to
use. If you are writing only an application, you need only use the Routing interface
described in Chapter 21, "Routing Interface."
This chapter describes how to
create a transport and make it available to the system
create a routing information template, for use by the In/Out Box
control the built-in status templates, if you need to provide status information to
the user
create a routing slip template, if your transport sends data
create a transport preferences template, if your transport has user-
configurable options
About Transports
22
A transport is a NewtonScript object that provides a communication service to the
Newton In/Out Box. It usually interfaces between the In/Out Box and an endpoint
(see Figure 1-2 on page 1-12), moving data between the two. This chapter describes
the transport object and its interface to the In/Out Box.
Applications interact with transports through the Routing interface and the In/Out
Box. The In/Out Box serves as the bridge between applications and transports,
neither of which knows about the other.
Most transports are visible as items in the Action picker menu. The transports
available in the picker are not specified directly by an application, but consist of all
the transports found that can handle the kind of data the application routes. Because
this menu is constructed dynamically, applications can take advantage of additional

C H A P T E R 2 2
Transport Interface
22-2
About Transports
transports that might be installed in the system at any time. An application need not
know anything about the transports available. Likewise, transports can be removed
from the system without any effect on applications.
Transport Parts
22
In writing a transport, you need to supply the following parts:
the transport object itself, created from
protoTransport
an optional routing information template for the In/Out Box, created from
protoTransportHeader
an optional status template for displaying status information to the user, created
from
protoStatusTemplate
(if you don't provide one, a default status view
is used)
a routing slip template for obtaining routing information from the user, created
from
protoFullRouteSlip
(used only for transports that send data)
a preferences template for user-configuration settings, created from
protoTransportPrefs
(needed only for transports that have user-
configurable options that you want to store as preferences)
Item Frame
22
Anything sent or received through the In/Out Box by a transport is passed as a
single frame, called the item frame, though it may contain references to multiple
objects to send or receive. The frame can contain any number of slots. Some slots
are required, and others are optional. Some slots (
body
) have meaning only to the
application that created the item, others have meaning only to the In/Out Box itself,
and still others are reserved for the transport. You should ignore any slot not
documented, since it may be used internally.
The following are slots in the item frame that you should know about:
timestamp
The time this item was submitted to the In/Out Box. For
e-mail transports and other kinds of transports where the sent
and received times are typically different, the transport
should set this slot to the time the item was originally sent,
for incoming items. For more information, see the section
"Setting the timeStamp Slot of an Item" (page 22-11). Other
transports or applications shouldn't change this value.
appSymbol
A symbol identifying the owner application. For an incoming
item, if this symbol is missing, or the application cannot be
located, the
class
slot inside the
body
frame is used to find
an application that can put away the item.

C H A P T E R 2 2
Transport Interface
About Transports
22-3
destAppSymbol
Optional. A symbol identifying the application to receive the
item, if it is different from the sending application.
Applications that send data should set this slot to identify the
receiving application, if it is different from the sending one.
On the receiving side, the transport method
NewFromItem
copies this value into the
appSymbol
slot of the received
item frame.
body
The frame being sent (or references to the data). This is
supplied by the application. This can be a multiple-item
target object that references more than one data object to
send. All application-specific data should be stored within the
body
slot.
title
Optional. This string is used in the In/Out Box as the item's
title. The transport may provide this for received items that
do not contain a data definition. If this slot is not provided,
the transport obtains a title from the item's data definition.
remote
A value interpreted as a Boolean. Any non-
nil
value
indicates an item whose body is stored remotely. The
transport must set this slot if it downloads just the title of an
item but leaves the body stored remotely. When the user tries
to view the item, the In Box alerts the transport to download
the body of the item from the remote host by sending it the
ReceiveRequest
message.
connect
A Boolean used for items to be sent. This slot is set to
true
if the user chooses to send the item immediately with the
Send button in the routing slip. If the user chooses to send the
item later, this slot is set to
nil
. Note that this slot can also
be set by the format method
SetupItem
or the
Send
function.
error
An integer error code; non-
nil
indicates an error. This is
usually set by
ItemCompleted
.
currentFormat
A symbol identifying the selected format for this item.
hidden
A Boolean; if
true
, the item is not displayed in the In/Out
Box. If set to true, the
completionScript
slot must also
be set to
true
and the application must have an
ItemCompletionScript
method.
covert
A Boolean; if
true
, the item is not logged or saved.
state
A symbol indicating status:
'ready
,
'sent
,
'received
,
'read
,
'inLog
,
'outLog
, or
'pending
. This is usually
set by
ItemCompleted
. Do not set this
slot directly.

C H A P T E R 2 2
Transport Interface
22-4
About Transports
completionScript
A Boolean; if
true
, the transport sends the
ItemCompletionScript
message to the application when
the item's state changes or when errors occur. For more
details on this mechanism, see the section "Completion and
Logging" beginning on page 22-16.
needsResolve
A Boolean that is set to
true
if the
body
slot contains an
alias, rather than the actual data. This means that the format
method
ResolveBody
must be called before the item is sent.
For transports that need addressing information, this is usually encapsulated in
name references. A name reference is a frame that contains a soup entry or an
alias to one, usually from the Names soup, hence the term name reference. The
system includes built-in data definitions that can access name references, along
with associated view definitions to display the information stored in or referenced
by a name reference. For more information about using name references for
addressing information, see the section "Creating a Name Reference" beginning on
page 21-27. For more on name references in general, see "Name References"
(page 5-1) in Newton Programmer's Reference.
The following slots in the item frame define the recipient and sender addresses:
toRef
An array containing one or more name references used to
identify the recipient(s) of the item.
fromRef
A frame containing a name reference that identifies the
sender. This information is usually extracted from the
sender's current owner card, or current persona. The transport
normally sets this slot in its
NewItem
method. For more
information, see the section "Obtaining an Item Frame"
beginning on page 22-13.
cc
An array containing one or more name references used to
identify recipients of copies of the item. Typically, this slot is
used by e-mail transports.
bcc
An array containing one or more name references used to
identify recipients of blind copies of the item. Typically, this
slot is used by e-mail transports.
In addition, there may be other address slots used by some transports.
For a detailed description of all the item frame slots that are important to the Routing
interface, see "Item Frame" (page 18-1) in Newton Programmer's Reference.

C H A P T E R 2 2
Transport Interface
Using the Transport Interface
22-5
Using the Transport Interface
22
This section describes how to use the Transport interface to perform these
specific tasks:
create a new transport object
create a routing information template, for use by the In/Out Box
control the built-in status template, if you need to provide status information to
the user
create a routing slip template, if your transport sends data
create a transport preferences template, if your transport has user-
configurable options
Providing a Transport Object
22
To make a new transport object, create a frame with a prototype of
protoTransport
.
Transports are not built as applications, but are built as auto parts. This means that
when installed, they add their services to the system but do not add an application
to the Extras Drawer. (They are represented by an icon in the Extras Drawer, but
you can't tap it to open it like you can an application icon.)
For a complete description of the
protoTransport
object, see "protoTransport"
(page 19-2) in Newton Programmer's Reference.
The following subsections describe operations that a transport can perform, and
the methods that you must supply or call in your transport object to support
these operations.
Installing the Transport
22
To install a new transport in the system, call the
RegTransport
function from the
InstallScript
function of your transport part and pass it the transport
appSymbol
and transport template. The
RegTransport
function additionally
sends your transport object the
InstallScript
message; this message is
unrelated to the
InstallScript
function used by package parts. The
InstallScript
message sent to your transport object lets the transport perform
initialization operations when it is installed.
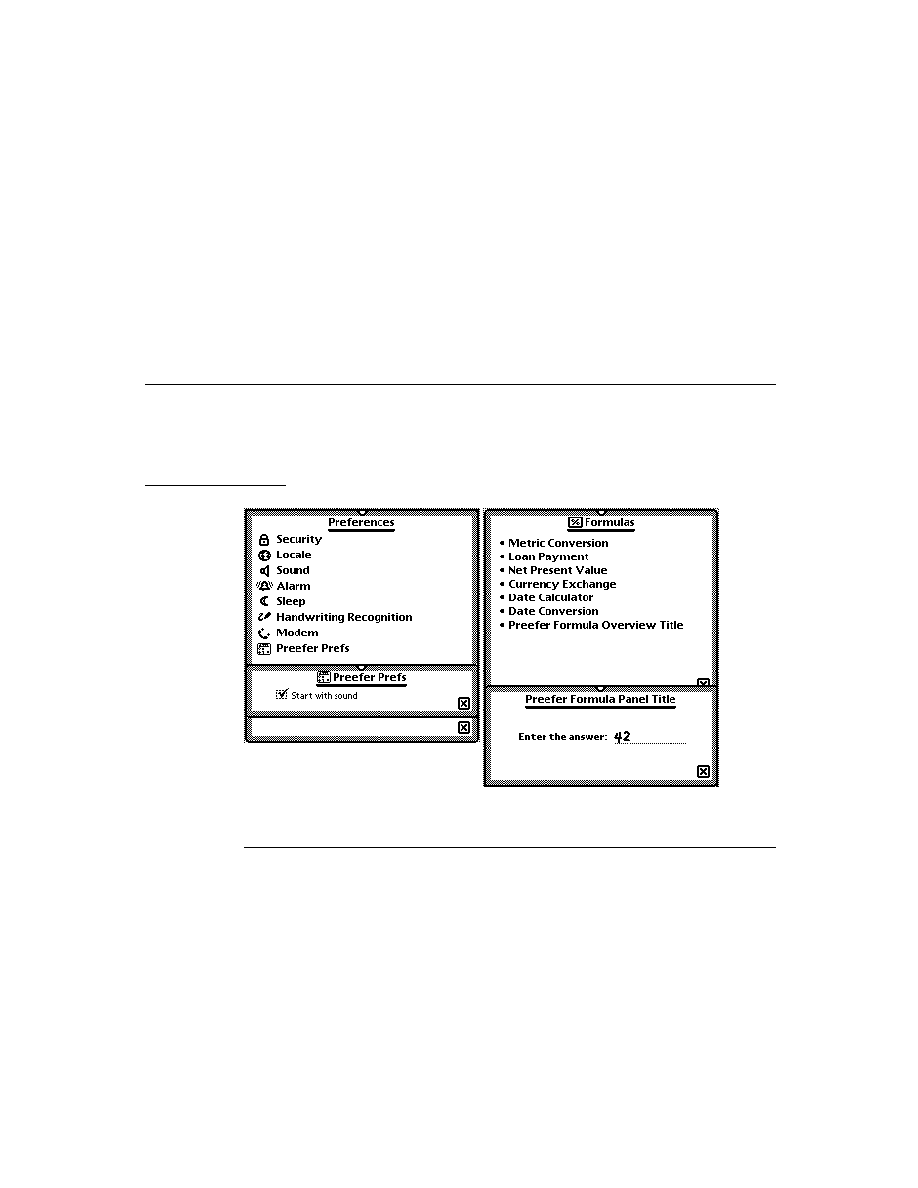
C H A P T E R 2 2
Transport Interface
22-6
Using the Transport Interface
Here is an example of installing a transport in the part
InstallScript
function:
InstallScript := func(partFrame,removeFrame)
begin
RegTransport(kAppSym, partFrame.partData.(kAppSym));
// assumes that partData.(kAppSym) holds the transport
end;
When your transport is removed, use the
UnRegTransport
function to unregister
the transport from the system. You pass the
UnRegTransport
function the
transport
appSymbol
like this:
RemoveScript := func(removeFrame)
begin
UnRegTransport(kAppSym);
end;
If your transport is scrubbed by the user from the Extras Drawer, the system
also calls the
DeletionScript
function in its package part. In the
DeletionScript
function, you should call the
DeleteTransport
function,
which removes user configuration information related to the transport. Here's an
example of a
DeletionScript
function:
SetPartFrameSlot('DeletionScript,func(removeFrame)
begin
// delete prefs and other temporary data
DeleteTransport(kAppSym);
end)
Setting the Address Class
22
The transport object contains a slot,
addressingClass
, that holds a symbol.
This symbol identifies the class of the address information used by the transport,
such as that stored in the
toRef
and
fromRef
slots of an item. (See the section
"Item Frame" beginning on page 22-2.) The In/Out Box uses this symbol to look
up and display the to and from address information based on soup entries (usually
from the Names soup).
The class of address information is defined by name reference data definitions
registered in the system. You can specify one of the following built-in name
reference data definitions in the
addressingClass
slot:
'|nameRef.email|
, for use with a transport that handles e-mail
'|nameRef.fax|
, for use with a transport that handles fax phone calls
'|nameRef.phone|
, for use with a transport that handles other phone calls
Or you can specify a custom name reference data definition that you have created
and registered with the system. Note that all name reference data definitions must
be registered under a symbol that is a subclass of
'nameref
.

C H A P T E R 2 2
Transport Interface
Using the Transport Interface
22-7
The default setting of the
addressingClass
slot is the symbol
'|nameRef.email|
For more information about how to use name references for addressing information,
see the section "Creating a Name Reference" beginning on page 21-27. For more
on name references in general, see "Name References" (page 5-1) in Newton
Programmer's Reference.
Grouping Transports
22
Two or more transports can be grouped together in the Action picker under a single
action. For example, there might be several different e-mail transports grouped
together under the single action "Mail." The user selects a particular e-mail
transport from a picker supplied by the system in the routing slip, if there are
multiple transports registered for that group. (The picker doesn't appear if there is
only one installed transport in the group.)
Each group of transports is identified by a common symbol, called the group
symbol. You indicate that your transport should be a member of a group by
specifying its group symbol in the
group
slot, its title in the
groupTitle
slot,
and its icon in the
groupIcon
slot. All transports in the same group should
specify the same group icon. This icon is shown in the Action picker for that
transport group. The individual transport icon (specified in the
icon
slot) is shown
in the routing slip when the transport is selected from the transport group picker.
You can use the following built-in bitmaps in the
groupIcon
slot of your transport,
if it belongs to one of the predefined groups. Here are the magic pointer constants:
After the user chooses a particular transport in a group from the picker in the
routing slip, the system remembers the last choice and sets the routing slip to that
choice when the user later chooses the same routing action from the Action picker.
If the user changes the transport in the routing slip group picker, the system closes
and reopens the routing slip for the current target item, since the routing slip may
be different for a different transport.
Before the routing slip is closed, it is sent the
TransportChanged
message. This
allows the routing slip to take any necessary action such as alerting the user that
addressing information might be lost as a result of changing transports. If
TransportChanged
returns a non-
nil
value, the transport is not changed and
Group
Icon bitmap constant
'mail
ROM_RouteMailIcon
'print
ROM_RoutePrintIcon
'fax
ROM_RouteFaxIcon
'beam
ROM_RouteBeamIcon

C H A P T E R 2 2
Transport Interface
22-8
Using the Transport Interface
the routing slip is not closed. If
TransportChanged
returns
nil
, then the
transport is changed and operations continue normally.
You can use the function
GetGroupTransport
to determine the name of the
current (last-used for sending by the user) transport in a group. Note that when you
install a grouped transport, it becomes the current transport for that group.
Transports that are part of a group are individually selectable on the Send, Receive,
and Preferences pickers in the In/Out Box.
Sending Data
22
The Out Box sends the
SendRequest
message to your transport when data needs
to be sent. If your transport supports sending data, you must define this method to
actually send the data. For a complete description of the
SendRequest
method,
see "SendRequest" (page 19-33) in Newton Programmer's Reference.
The Out Box puts its own query information in the request frame argument to
SendRequest
. Your
SendRequest
method must pass this frame to the
ItemRequest
message to get the item (or next item) to send. In your
SendRequest
method, keep calling
ItemRequest
until it returns
nil
,
signalling no more items to send. For a complete description of the
ItemRequest
method, see "ItemRequest" (page 19-26) in Newton Programmer's Reference.
If the
body
slot of an item originally contained an alias, the alias is automatically
resolved by
ItemRequest
. That is, items returned by
ItemRequest
always
contain a
body
slot that is not an alias.
Note that you can save entry aliases to items returned by
ItemRequest
, if you
want. Later, when using them, make sure that
ResolveEntryAlias
returns a
non-
nil
value, and that the item
state
slot is set as expected.
You can choose to comply with or ignore any request to send, depending on the
communication resources available and their status. If you choose to comply, your
SendRequest
method must obtain one or more items from the Out Box by using
the
ItemRequest
method, and send them by whatever means the transport uses
to communicate. For example, most transports use the Endpoint interface to
establish and operate a connection.
If request.
cause
is
'submit
, the item is queued in the Out Box for later sending,
but the Out Box still notifies the transport by sending it this
SendRequest
message so that the transport knows there are items waiting to be sent. Typically, a
transport doesn't need to take any immediate action on items where request.
cause
is
'submit
, so you can use code like this to simply return:
If request.cause = 'submit then return nil;
The
item.connect
slot contains a Boolean value indicating if the user chose to
send the item now (
true
) or later (
nil
).

C H A P T E R 2 2
Transport Interface
Using the Transport Interface
22-9
After sending an item (successfully or unsuccessfully), you must call
ItemCompleted
to inform the In/Out Box. If there was an error,
the
ItemCompleted
method informs the In/Out Box that an item was not sent.
ItemCompleted
uses
HandleError
to inform the user of an error. If you want
to perform your own error notification, you can override the
HandleError
method.
Sending All Items
22
If your transport establishes a connection, and you want to take advantage of it to
send all queued items from the Out Box, you can send your transport the message
CheckOutbox
. This method is defined in
protoTransport
and it causes the
In/Out Box to send your transport a
SendRequest
for all queued items waiting to
be sent. The
SendRequest
message sent back to your transport includes a request
argument in which the
cause
slot is set to
'user
.
Applications can also send the
CheckOutbox
message directly to transports by
using the
TransportNotify
global function.
Note that a side effect of the
CheckOutbox
message is that if there is nothing to
send, an alert explaining that is displayed to the user. If you want to perform this
operation but avoid the alert in that case, you can use the function
QuietSendAll
.
This function causes the In/Out Box to send your transport a
SendRequest
for all
queued items waiting to be sent, however the
cause
slot of the
SendRequest
request
argument is set to
'periodic
.
Converting an E-Mail Address to an Internet Address
22
If you are implementing a new e-mail transport that communicates with another
e-mail system, you may need to convert e-mail addresses from that system to
Internet-compatible addresses. The transport method
NormalizeAddress
allows
you to do this. You pass it a name reference containing an e-mail address, and it
returns a string containing an Internet-compatible e-mail address.
To register a new e-mail system so that it shows up on e-mail pickers throughout
the system and to register a conversion for Internet addresses, use the function
RegEmailSystem
.
Receiving Data
22
The Out Box sends the
ReceiveRequest
message to your transport to request
the transport to receive items. If your transport supports receiving data, you must
define this method to receive it. For a complete description of the
ReceiveRequest
method, see "ReceiveRequest" (page 19-32) in Newton
Programmer's Reference.
The
ReceiveRequest
method takes one parameter, a frame containing a
cause
slot whose value is a symbol.

C H A P T E R 2 2
Transport Interface
22-10
Using the Transport Interface
Some transports may ignore the
ReceiveRequest
message, since they receive
data continuously. Others may use this message as a trigger to initiate a connection.
You can choose to comply with or ignore any request to receive, depending on the
communication resources available and their status. If you choose to comply, the
ReceiveRequest
method should establish a connection and begin receiving by
whatever means the transport uses to communicate. For example, many transports
use the Endpoint interface to establish and operate a connection. After receiving the
item, you should call the transport method
NewFromItem
to copy it into a
standard item frame used by the In/Out Box. Finally, you must call
ItemCompleted
to write the item to the In Box.
If your transport creates virtual binary objects, you must use the method
GetDefaultOwnerStore
to determine on which store to create them.
Note
The
body
slot within every received item must have a
class
slot
to identify its data class. Data objects received from other Newton
devices always have a
class
slot. For data received from other
systems, your transport must assign a meaningful class to the
item.body
object.
Deferring Reception of the Item Data
22
Some transports might want to download just part of an item initially, such as its
title, then download the actual item data when a user requests it. For example, upon
connection an e-mail transport might download just the titles of messages or other
data objects. When the user attempts to view one of these items in the In Box, the
transport then downloads the body of the item from the remote host.
This feature is accomplished by the use of the
cause
slot in the parameter passed
to the
ReceiveRequest
method, and by the use of a
remote
slot in the item frame.
If a transport initially downloads just a part of each item, such as its title, it must
insert a slot called
remote
, whose value is
true
in the item frame of those items.
This slot serves as a flag to tell the In/Out Box that the body of the item is stored
remotely and has not yet been downloaded.
When the user attempts to view one of these items in the In Box, the In Box sees
the
remote
slot, and sends the transport the
ReceiveRequest
message with the
'remote
cause. This alerts the transport to download the body of the item from
the remote host. If the user selected multiple remote items for downloading, you
must use the
ItemRequest
method to retrieve subsequent requested items and
download them. Keep calling
ItemRequest
until it returns
nil
, which signals
that there are no more items to retrieve.

C H A P T E R 2 2
Transport Interface
Using the Transport Interface
22-11
After downloading all the remote data, you must refresh the In Box view, so the
items are updated. To do so, send the
Refresh
message to the application
identified by the
ownerApp
slot in the transport, like this:
ownerApp:Refresh();
Note
In Newton OS version 2.0, the
ownerApp
slot in the transport
must first be set up by using the NTK platform file function
kSetupOwnerAppFunc
in the transport
InstallScript
method.
To delete partially downloaded (remote) items from the In Box, send the
RemoveTempItems
message to the application identified by the
ownerApp
slot
in the transport, like this:
ownerApp:RemoveTempItems(
transportSym
);
// then refresh the in box view
ownerApp:Refresh();
Typically, after disconnecting, transports that handle remote items delete those
items from the In Box that the user has not chosen to fully download. Also, you
must send the
Refresh
message following
RemoveTempItems
.
Setting the timeStamp Slot of an Item
22
The
timeStamp
slot of the item frame holds the time that an item was submitted
to the In/Out Box. This slot is ordinarily set by the In/Out Box when an item is
received or submitted for sending. Many transports won't need to do anything
special, but some transports must set this slot themselves. Such transports include
those that receive data that contains internal information about when an item was
sent, and where the time the item was sent typically differs from the time it was
received by the transport.
For example, this applies to most e-mail transports. Typically an e-mail message is
sent by a user to a mail system where it waits to be downloaded by a client transport
running on a Newton device. The time the item was originally sent always differs
from the time the item is eventually received by the Newton transport.
In this case, your transport will need to set the
item.timeStamp
slot to the time
the original mail was sent. You must decode this information however it is stored in
the mail message and set it in the
item.timeStamp
slot before you call the
ItemCompleted
method. The
timeStamp
slot must contain the time in the
same format as returned by the
Time
function; that is, the number of minutes since
midnight, January 1, 1904.
If your transport sets the
timeStamp
slot, the In/Out Box does not override it.
C H A P T E R 2 2
Transport Interface
22-12
Using the Transport Interface
Handling Requests When the Transport Is Active
22
While the transport is actively sending or receiving data in the background, the user
might request another send or receive operation from the In/Out Box. One way to
handle such requests is to queue them up and append them to the current communi-
cation transaction or to start another connection when the transport is finished.
You can use the transport method
QueueRequest
to queue up requests for
sending or receiving, if the transport already has an active communication session
in progress. Call
QueueRequest
from the
SendRequest
or
ReceiveRequest
method, whichever one you receive as a result of a user request.
Depending on how you call it, you can make
QueueRequest
append the new
request to a request in progress or start another connection when the current
request is finished. To append the new request to one in progress, for the first
parameter, specify the request frame of a request already in progress. A request
frame is the frame passed to
SendRequest
or
ReceiveRequest
to begin the
request in progress. The second parameter is the new request frame.
The following is an example of a
SendRequest
method in which
QueueRequest
is called to append the new request to the one in progress.
// SendRequest method
func (newRequest)
begin
if status <> 'idle then // check if I'm active
// append to current request
:QueueRequest(currentRequest, newRequest);
else
// do a normal send here
end,
When a new request is appended to an in-progress request, items from the new
request are returned from the
ItemRequest
method after all items from the
in-progress request are exhausted. In this way, new items are sent as part of the
current communication session.
To queue a new request so that the transport finishes its current transaction before
beginning a new one, specify a symbol for the first parameter of
QueueRequest
.
The symbol should be the name of a method that you want the system to call when
the transport state returns to idle. Usually this is another
SendRequest
or
ReceiveRequest
method. The following is an example of a
SendRequest
method in which
QueueRequest
is called to defer a new request until the
transport returns to the idle state.

C H A P T E R 2 2
Transport Interface
Using the Transport Interface
22-13
// SendRequest method
func (newRequest)
begin
if status <> 'idle then // check if I'm active
// wait for idle and then call SendRequest again
:QueueRequest('SendRequest, newRequest);
else
// do a normal send here
end,
Canceling an Operation
22
The system sends the
CancelRequest
message to the transport when the user
cancels the current transaction or for other reasons, such as when the system wants
to turn off. This method must be defined by all transports.
When a transport receives this message, it must terminate the communication
operation as soon as possible.
The
CancelRequest
method should return non-
nil
if it is OK to turn off power
immediately after this method returns, or
nil
if it is not OK to turn off power
immediately. In the latter case, the system waits until your transport returns to the
idle state before turning off. This allows you to send an asynchronous cancel
request to your communication endpoint, for example, and still return immediately
from the
CancelRequest
method. When you receive the callback message from
your endpoint cancel request confirming cancellation, use the
SetStatusDialog
method to set the transport status to idle to alert the system that it is OK to turn off.
Obtaining an Item Frame
22
The system sends the
NewItem
message to the transport to obtain a new item
frame to make a new In/Out Box entry.
This method is supplied by the
protoTransport
, but should be overridden by
your transport to fill in extra values your transport uses. If you override this
method, you must first call the inherited
NewItem
method, as shown in the
example below. The item frame returned by the
NewItem
method should contain
default values for your transport.
The item frame returned by the default method supplied in
protoTransport
is
not yet a soup entry. The
item.category
slot is initialized to the
appSymbol
slot in your transport. For more information on the
item
frame, see the section
"Item Frame" beginning on page 22-2.
The
NewItem
message is sent to your transport during both send and receive
operations. When the user sends an item, the system sends the
NewItem
message
to the transport to create a new In/Out Box entry before opening a routing slip
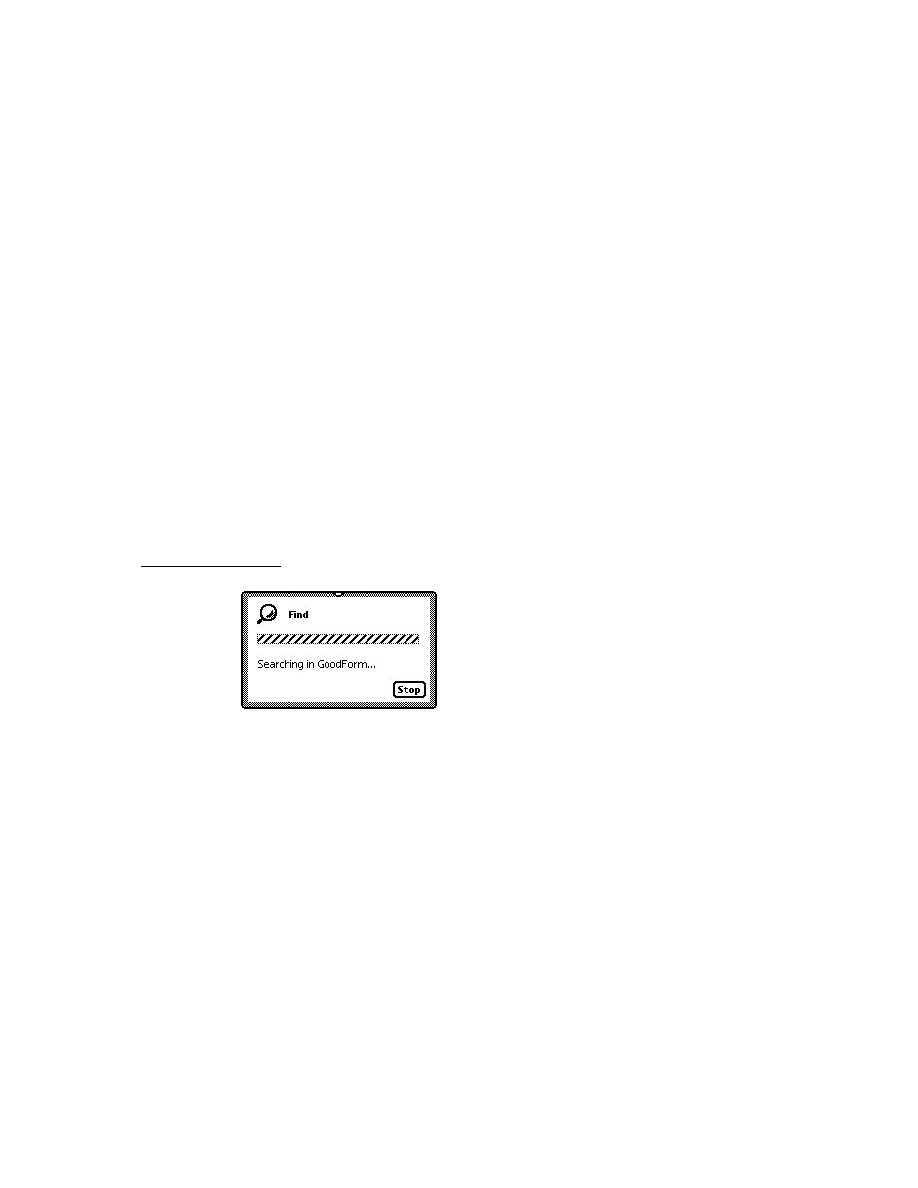
C H A P T E R 2 2
Transport Interface
22-14
Using the Transport Interface
for the item. This allows the transport an opportunity to add its own slots to the
item frame.
Most transports will want to add a
fromRef
slot to the item frame. This slot must
contain a name reference that identifies the sender. This information is usually
extracted from the sender's current owner card, or persona. You shouldn't just use
the value of
GetUserConfig('currentPersona)
because it is simply an alias
to a names file entry. Instead, construct a name reference from this value. For example:
persona := GetUserConfig('currentPersona);
dataDef := GetDataDefs(addressingClass);
fromRef := dataDef:MakeNameRef(persona,addressingClass);
Most transports will want to extract and send only the needed information from the
fromRef
name reference. For example, an e-mail transport would typically just
extract the sender name and e-mail address from the name reference and send them
as strings. One method of name reference data definitions that you can use to
extract useful information from a name card includes
GetRoutingInfo
. Here is
an example of using this method:
// extract just routing info using GetRoutingInfo
routeInfo:= datadef:GetRoutingInfo(fromRef);
// returns an array like this:
[{name: "Chris Smith", email: "
[email protected]"}]
The
GetRoutingInfo
method returns an array of at least one frame that has at
least a
name
slot containing a string. Depending on the
addressingClass
slot
passed to the
GetDataDefs
function, the returned frame also contains other
information particular to the type of address used for the transport. In the example
above, the frame also contains an
email
slot with an e-mail address.
If you want to add other slots to the
fromRef
frame, you can either define your
own name reference data definition and override the method
GetItemRoutingFrame
(called by
GetRoutingInfo
), or add the slots you
want to the
fromRef
frame by extracting them from the original name reference
with the
Get
method. For example:
// use Get to extract info from certain slots
fromRef.myInfo := dataDef:Get(fromRef,'myInfo,nil);
Note that a sender may have multiple e-mail addresses and the transport should set
the e-mail address in the
fromRef
frame to the one that is appropriate to itself. For
example, for an internet e-mail transport, you would typically set the
fromRef

C H A P T E R 2 2
Transport Interface
Using the Transport Interface
22-15
e-mail address to the sender's internet address. Here's an example of code that sets
the appropriate e-mail address in the
fromRef
object:
owner:=ResolveEntryAlias(GetUserConfig('currentPersona));
if owner and GetRoot().cardfile then begin
addrs := GetRoot().cardfile:BcEmailAddress(owner,
['|string.email.internet|]);
if addrs then
fromRef := clone(addrs[0]);
end
You can find a description of
BcEmailAddress
and other similar functions that
extract information from Names soup entries in "Names Functions and Methods"
(page 16-5) in Newton Programmer's Reference.
If, instead of extracting the address and sending it as a string, your transport sends
addressing information as a frame, like the beam transport, you must remove any
soup entry aliases from the name reference before it is transmitted. You can do
this by using the name reference data definition method
PrepareForRouting
,
as follows:
// strip the aliases from a name ref
fromRef := datadef:PrepareForRouting(fromRef);
In general, however, you should not send all the information in a user's persona
with a message, since it can include personal or confidential information such as
credit card numbers.
For more information about name references and the methods of name reference
data definitions, see the section "Creating a Name Reference" beginning on
page 21-27, and "Name References" (page 5-1) in Newton Programmer's
Reference.
The following is an example of how to override the
NewItem
method during a
send operation to add a
fromRef
slot:
// a sample overridden NewItem method
mytransport.NewItem := func(context) begin
// first call inherited method to get default frame
local item := inherited:NewItem(context);
// get sender info and insert fromRef slot
local persona:= GetUserConfig('currentPersona);
local dataDef := GetDataDefs(addressingClass);

C H A P T E R 2 2
Transport Interface
22-16
Using the Transport Interface
if dataDef then
begin
item.fromRef := dataDef:MakeNameRef(persona,
addressingClass);
// add other slots or extract routing info here
end;
item;
end;
During a receive operation, the transport itself must invoke the
NewFromItem
method to get a new In/Out Box item frame. This method copies most slots from
the received item to the new In/Out Box item frame. Additionally, it inserts the
destAppSymbol
slot value (if included) in the received frame into the
appSymbol
slot in the new frame.
Finally, the transport should call
ItemCompleted
to register the item in the In
Box (see the following section).
Completion and Logging
22
After your transport finishes processing an item (either sending or receiving, with
or without errors), you must send the transport the message
ItemCompleted
.
This method must be used when an item is altered in any way. It performs several
operations, including setting the state and error status of the item; sending the
ItemCompletionScript
callback message to the application; handling error
conditions; and saving, logging, or deleting the item, depending on the logging
preferences.
Send the
ItemCompleted
message only after your transport has completely
processed an item. If you send this message before you know that the item was
delivered successfully, for example, there's a possibility that the item will be lost.
If
ItemCompleted
was called as the result of an error, it calls
HandleError
to
translate the error code and notify the user. If you want to perform your own error
notification, you can override the
HandleError
method.
Note that the
ItemCompleted
method in
protoTransport
sends the
ItemCompletionScript
callback message to the application only if the item
contains a
completionScript
slot that is set to
true
. You must set this slot
if you want the callback message to be sent. For more information on
ItemCompletionScript
see Newton Programmer's Reference (page 18-33).
To perform logging,
ItemCompleted
sends your transport the message
MakeLogEntry
, passing a log entry to which you can add slots. The
protoTransport
object includes a default
MakeLogEntry
method, but you
should override this method to add transport-specific slots to the log entry.
The default method simply adds a
title
slot to the log entry. The
GetItemTitle
transport method is called to get the title.

C H A P T E R 2 2
Transport Interface
Using the Transport Interface
22-17
Storing Transport Preferences and Configuration Information
22
Transports can store user-configurable preferences and other configuration
information. Typically, you store several chunks of data that correspond to
individual preferences or other kinds of configuration information that you want to
save for your transport. You must use the transport methods
GetConfig
and
SetConfig
to retrieve and set configuration information for your transport.
Default preferences for a transport are set by the
defaultConfiguration
slot
in the transport object. This slot holds a frame containing values that correspond to
items in a preferences slip that lets the user set preferences for your transport. For
more information about displaying a preferences slip to the user, see the section
"Providing a Preferences Template" beginning on page 22-33.
If you don't want to use this preferences dialog or the setting of the
defaultConfiguration
slot in
protoTransport
, override the initial
setting by creating your own default preferences frame and including it in the
defaultConfiguration
slot of your transport object. Note that you can't
use a
_proto
slot in the default frame since the contents of the
defaultConfiguration
slot are stored in a soup and
_proto
slots can't be
stored in soup entries.
Extending the In/Out Box Interface
22
Your transport can extend the In/Out Box interface if items the transport handles
can be viewed in the In/Out Box. You can add additional actions to the In/Out Box
Tag picker in the In/Out Box. The In/Out Box Tag picker is displayed when the
user taps the Tag button in the In/Out Box, as shown here:
The In/Out Box Tag picker includes only the Put Away and Log items by default.
You can add other transport-dependent items by implementing the
GetTransportScripts
method. For example, the picker shown above includes
Reply and Forward items added by an e-mail transport to let the user perform those
operations on e-mail directly in the In/Out Box.
When the user taps the Tag button, the system sends your transport the
GetTransportScripts
message, if you've implemented it. This method must
return an array of frames that describe new items to be added to the In/Out Box Tag
picker. The array is exactly the same as the
routeScripts
array that adds items
Tag button
In/Out Box
Tag picker

C H A P T E R 2 2
Transport Interface
22-18
Using the Transport Interface
to the Action picker in an application. Here is an example of a return value that
adds two items to the picker:
[ {title: "Reply", // name of action
icon: ROM_RouteReply, // picker icon
// called if action selected
RouteScript: func(target, targetView) begin ... end,
},
{title: "Forward", // name of action
icon: ROM_RouteForward, // picker icon
// called if action selected
RouteScript: func(target, targetView) begin ... end,
} ]
The
RouteScript
slot contains a method that is called if the user selects that
item from the picker. Alternatively, in the
RouteScript
slot you can specify a
symbol identifying a transport method, and then supply your transport symbol in
another slot named
appSymbol
.
For more detailed information about the items in the array, see the section
"Providing Application-Specific Routing Actions" beginning on page 21-22.
For the
icon
slot of each frame in the array, you can specify an icon that appears
next to the name of the action in the picker. There are standard bitmaps available in
the ROM for the following actions:
reply,
ROM_RouteReply
forward,
ROM_RouteForward
add sender to the Names application,
ROM_RouteAddSender
copy text to Notes application,
ROM_RoutePasteText
If you are adding one of these actions, use the indicated magic pointer constant for
the standard bitmap, to keep the interface consistent among transports.
Also, when the user taps the Tag button, the system sends your transport the
CanPutAway
message, if you've implemented it. This method allows your
transport to add a put away option for the item to the Put Away picker. This hook
allows a transport to put away items that could not otherwise be put away.
Remember that applications (or transports) that need to put away items must
implement the
PutAwayScript
method.
Whenever an item belonging to your transport is displayed in the In/Out Box, the
In/Out Box also sends your transport the
IOBoxExtensions
message. This hook
lets your transport add functionality to items in the In/Out Box by adding to the list
of view definitions available for an item.
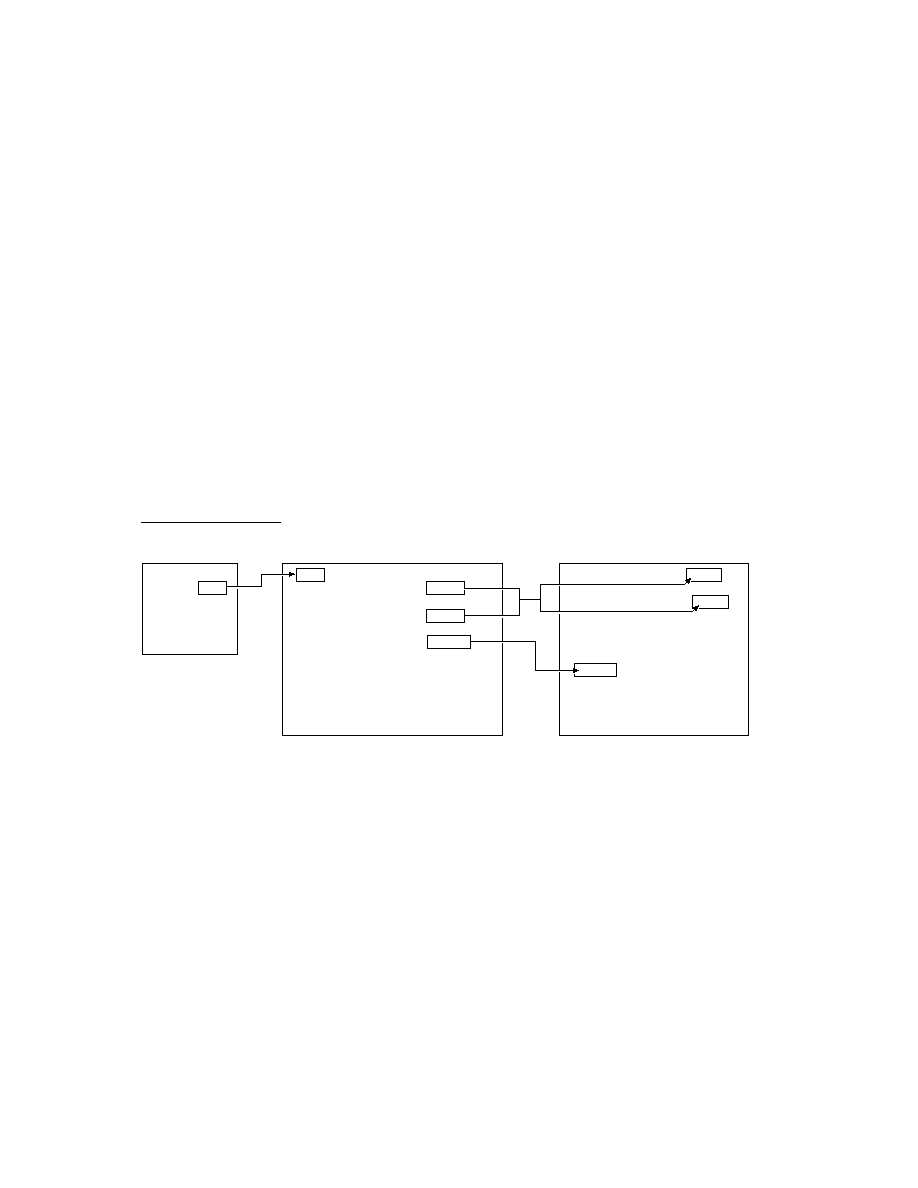
C H A P T E R 2 2
Transport Interface
Using the Transport Interface
22-19
Application Messages
22
Applications can send messages directly to a single transport or to all transports by
using the
TransportNotify
global function. This mechanism serves as a
general way for applications to communicate with transports. Here is an example
of using this function:
TransportNotify('_all,'AppOpened,[appSymbol])
The In/Out Box uses this mechanism to send three different messages to transports:
AppOpened
,
AppClosed
, and
AppInFront
. The
AppOpened
message notifies
the transport that an application has opened and is interested in data from the
transport. The In/Out Box sends this message to all transports when it opens. This
method is not defined by default in
protoTransport
since it's transport-specific.
If you want to respond to the
AppOpened
message, you must define this method in
your transport.
This message is designed to support applications that might poll for data, such as a
pager. For example, when the application is open, it can notify the transport with
this message so that the transport can poll more frequently (and use more power)
than when the application is closed. Another use might be for an application to
notify a transport that automatically makes a connection whenever the application
is open.
The
AppClosed
message notifies the transport that an application has closed. The
In/Out Box sends this message to all transports when it closes. Again, this method
is not defined by default in
protoTransport
since there is no default action--
it's transport-specific. If you want to respond to the
AppClosed
message, you
must define this method in your transport.
Note that more than one application can be open at a time in the system. If you
want your transport to do something like disconnect when it receives this message,
keep track of how many times it's received the
AppOpened
message and don't
actually disconnect until it receives the same number of
AppClosed
messages.
The
AppInFront
message notifies the transport of a change in the frontmost
status of an application--either the application is no longer frontmost, or it now is.
The In/Out Box sends this message to all transports when another application is
opened in front of the In/Out Box view, or when the In/Out Box view is brought to
the front. Note that the
AppInFront
message is not sent when an application is
opened or closed, so you need to check for the
AppOpened
and
AppClosed
messages to catch those occurrences.
Again, this method is not defined by default in
protoTransport
since there is
no default action--it's transport-specific. If you want to respond to the
AppInFront
message, you must define this method in your transport. Not that this method is
used only in special circumstances and is not needed by most transports.

C H A P T E R 2 2
Transport Interface
22-20
Using the Transport Interface
Error Handling
22
The default exception handling method implemented by
protoTransport
is
HandleThrow
, which catches and handles exceptions resulting from any supplied
transport methods such as
SendRequest
and
ReceiveRequest
. You must
provide your own exception handler for any methods that you define, or you can
pass them to
HandleThrow
, as follows:
try begin
... // do something
Throw();
onException |evt.ex| do
:HandleThrow();
end
When handling an exception,
HandleThrow
first calls
IgnoreError
to give
your transport a chance to screen out benign errors. If
IgnoreError
returns
true
,
HandleThrow
returns
nil
and stops.
Assuming the error is not rejected by
IgnoreError
,
HandleThrow
next checks
to see if an item is currently being processed. If so, it sends your transport the
ItemCompleted
message and returns
true
. Note that
ItemCompleted
calls
HandleError
to display an error alert to the user. If no item is currently being
processed,
HandleThrow
sends the
HandleError
message itself to display an
error alert.
The
HandleError
method calls
TranslateError
to give your transport a
chance to translate an error code into an error message that can be displayed to the
user. If your transport can't translate the error (for example, because it's a
system-defined error) you should simply call the inherited
TranslateError
method, which handles system-defined errors.
Power-Off Handling
22
The
protoTransport
object registers a power-off handler with the system
whenever the transport is not in the idle state. If the system is about to power off,
this power-off handler sends the transport the
PowerOffCheck
message.
The default
PowerOffCheck
method in
protoTransport
displays a slip
asking the user to confirm that it is OK to break the connection. Then, when the
power is about to be turned off, the system sends the transport the
CancelRequest
message and waits until the transport is idle before turning the
power off.
You can override the default
PowerOffCheck
method if you wish.
There is also a power-on handler that sends a
CancelRequest
message to the
transport when the system turns on after shutting down unexpectedly while
the transport is active.

C H A P T E R 2 2
Transport Interface
Using the Transport Interface
22-21
Providing a Status Template
22
A status template for a transport is based on the proto
protoStatusTemplate
.
The status template displays status information to the user. A transport should
generally display a status view whenever it is sent the
ReceiveRequest
or
SendRequest
messages.
You probably won't need to create your own status template. The
protoTransport
is defined with a default status template named
statusTemplate
(based on
protoStatusTemplate
), which includes six predefined subtypes, described in
Table 22-1 and shown in Figure 22-1. Each subtype consists of a set of child views
that are added to the base status view. The base status view includes a transport
icon and a close box, to which different child views are added, depending on the
specified subtype name.
Table 22-1
Status view subtypes
Subtype name
Important values
Description
vStatus
statusText
(top string)
A view that incorporates a status line.
This is the default subview created by
SetStatusDialog
.
vStatusTitle
statusText
(top string),
titleText
(lower string)
A view that incorporates a status line and
a line for the item's title.
vConfirm
statusText
(top string),
primary
(lower-button text
and method:
{text:
string
, script:
function
}
),
secondary
(upper-button text and
method:
{text:
string
,
script:
function
}
)
A view that has space for three lines of
text, and two buttons. This view is
suitable for situations where the user
must choose between two options.
vProgress
statusText
(top string),
titleText
(lower string),
progress
(integer,
percentage completed)
A view that incorporates status and title
lines, as well as a dog-eared page image
that fills from top to bottom, based on the
progress of the transfer.
vGauge
statusText
(top string),
titleText
(lower string),
gauge
(integer, percentage
completed)
A view that incorporates status and title
lines, as well as a horizontal gauge that
fills from left to right, based on the
progress of the transfer.
vBarber
statusText
(top string),
titleText
(lower string),
barber
(set to
true
)
A view that incorporates status and title
lines, as well as a horizontal barber
pole-like image that can be made to
appear to move from left to right.

C H A P T E R 2 2
Transport Interface
22-22
Using the Transport Interface
Figure 22-1
Status view subtypes
Each child view included in a subtype has one important value that controls the
appearance of that child element. For example, the
vProgress
subtype consists of
three child views that have these important values:
statusText
(the string
displayed at the top of the view),
titleText
(the string displayed at the bottom of
the view), and
progress
(an integer indicating the percentage of the page that
should be shown filled with black). The important values for each subtype appear in
Table 22-1. This information is necessary for use in the
SetStatusDialog
method.
A transport specifies the use of a subtype in the status view by passing the subtype
name in the name parameter to the
SetStatusDialog
transport method.
Transports can dynamically switch from one status subtype to another without
closing the status view, and can easily update the contents of the status view as well
(for example, updating the progress indicator).
vStatus
vStatusTitle
vProgress
vGauge
vConfirm
vBarber
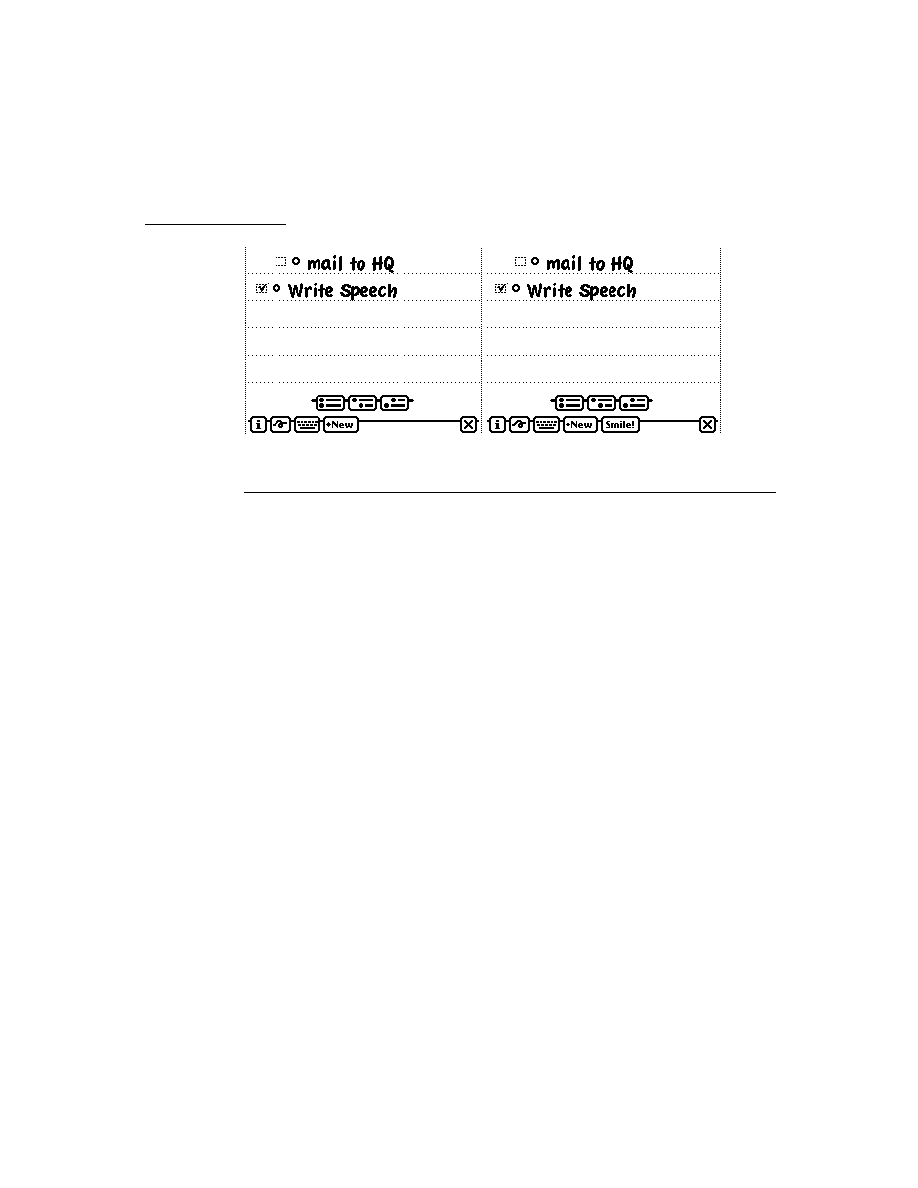
C H A P T E R 2 2
Transport Interface
Using the Transport Interface
22-23
Using this set of predefined status templates gives all transports a similar user
interface and matches the use of other status views throughout the system.
For more detailed information on
protoStatusTemplate
and the predefined
subtypes, refer to Chapter 17, "Additional System Services."
Controlling the Status View
22
Your transport should display a status view to the user whenever it is engaged in
a lengthy activity such as sending or receiving data. In general, this means you
must display a status view as part of the processing you do whenever you receive
a
SendRequest
or
ReceiveRequest
message that results in the transmission
of data.
To display a status view, use the transport method
SetStatusDialog
. If the
autoStatus
slot of the transport preferences frame is
true
, the status view
opens automatically when you send the
SetStatusDialog
message with a
status other than
'idle
as the first parameter. If the status view is already open,
SetStatusDialog
updates the status view with the new status information you
pass to it. If
autoStatus
is
nil
, the status view does not open because the user
has set a preference that it not be shown.
Here is an example of how to use the
SetStatusDialog
method:
:SetStatusDialog('Connecting, 'vStatus, "Looking for host...");
The
SetStatusDialog
method takes three parameters. The first is a symbol
indicating what the new transport status is. This is typically one of the slots in
the
dialogStatusMsgs
frame, such as
'Connecting
, or
'Idle
. The
second parameter is the name of the status subtype you want to use. You can
specify one of the built-in subtypes described in the previous section, or the
name of a custom subtype that you have constructed. (You specify the value of
the
name
slot in the subtype template.) For information on constructing
custom
protoStatusTemplate
view subtypes, see Chapter 17, "Additional
System Services."
The third parameter is typically a frame that contains one or more slots of values.
Each slot corresponds to a single child view within the subtype you are using, and
it sets the value of that child view. A slot name is the value of the
name
slot in the
child view you are setting, and the value is whatever important value that type of
view uses. The slot names and the expected values for the predefined status
subtypes are listed in the "Important values" column in Table 22-1.
The following examples show how you'd use the
SetStatusDialog
method to
set the different status subtypes to create the status views shown in Figure 22-1.

C H A P T E R 2 2
Transport Interface
22-24
Using the Transport Interface
// vStatus subtype
:SetStatusDialog('Connecting, 'vStatus, "Looking for host...");
// vStatusTitle subtype
:SetStatusDialog('Connecting, 'vStatusTitle, {statusText: "Connecting
to host...", titleText: "Data set 4"});
// vConfirm subtype
:SetStatusDialog('Confirming, 'vConfirm, {statusText: "The host has a
new data set for you. Do you want to receive it now?",
secondary:{text:"Receive Data Set", script: func() ... },
primary:{text:"Disconnect Now", script: func() ... }});
// vProgress subtype
:SetStatusDialog('Sending, 'vProgress, {statusText: "Sending data
set...", titleText: "Data set 4", progress:40});
// vGauge subtype
:SetStatusDialog('Sending, 'vGauge, {statusText: "Sending data
set...", titleText: "Data set 4", gauge:40});
// vBarber subtype
:SetStatusDialog('Sending, 'vBarber, {statusText: "Sending data
set...", titleText:"Data set 4", barber:true});
Once the status view is open, each time you call
SetStatusDialog
, the system
closes and reopens all its child views. This is fairly fast, but if you just want to
update a progress indicator that is already visible in the subtypes
vProgress
,
vGauge
, or
vBarber
, you can use the alternate method
UpdateIndicator
.
This
protoStatusTemplate
method updates the progress indicator child of the
status view: the page image for the
vProgress
subtype, the horizontal bar for the
vGauge
subtype, and animation of the barber pole for the
vBarber
subtype.
For example, you'd use
UpdateIndicator
to update the
vGauge
subtype
as follows:
statusDialog:UpdateIndicator({name:'vGauge, values:{gauge: 50,}});
Note that the frame of data you pass to
UpdateIndicator
consists of two slots,
name
and
values
, that hold the name of the subtype and the value(s) you want to
set, respectively. The
values
slot is specified just like the values parameter to
SetStatusDialog
.
Also, note that
UpdateIndicator
is a method of
protoStatusTemplate
,
and you need to send this message to the open status view. A reference to the open
status view is stored in the
statusDialog
slot of the transport frame, so you can
send the message to the value of that slot, as shown above.

C H A P T E R 2 2
Transport Interface
Using the Transport Interface
22-25
The
vBarber
subtype shows a barber pole-like image, but it doesn't animate
automatically. To make it appear to move, use the
UpdateIndicator
method in
a
ViewIdleScript
method, as shown here:
// create the initial vBarber status view
:SetStatusDialog('Sending, 'vBarber, {statusText: "Sending data
set...", titleText:"Data set 1", barber:true});
...
// set up the status view data frame
statusDialog.barberValueFrame:={name:'vBarber,values:{barber:true}};
...
// set up the idle script
statusDialog.ViewIdleScript:= func()
begin
:UpdateIndicator(barberValueFrame); // spin the barber
return 500; // idle for 0.5 seconds
end;
...
// start the idler
statusDialog:Setupidle(500);
If the
autoStatus
slot of the transport preferences frame is
true
, the status
view closes automatically when you send the
SetStatusDialog
message with
'idle
as the first parameter.
You can force the status view to close manually by sending the transport the
message
CloseStatusDialog
. However, the next time you send the message
SetStatusDialog
with a state other than
'idle
as the first parameter, the
dialog reopens.
Providing a Routing Information Template
22
When viewing an item in the In/Out Box, the user can tap the transport icon to the
left of the item title to display a view that gives routing information about the item.
For example, for a fax item, the fax phone number is displayed; for a mail item, the
e-mail header is shown. Figure 22-2 (page 22-26) shows an example of a routing
information view.
You should create a template for a routing information view for your transport,
using
protoTransportHeader
. If you don't specify a header view, your
transport uses the default view, which displays the item title, the transport icon and
name, and the item's size in the In/Out Box soup (the first three elements in the
picture above).
C H A P T E R 2 2
Transport Interface
22-26
Using the Transport Interface
Figure 22-2
Routing information view
In your transport object, store a reference to your routing information template in
the
transportInfoForm
slot.
To add your own information to the routing information view, you can supply a
BuildText
method. From
BuildText
, call the
AddText
method for each
additional line of text you want to add below the existing elements. Alternatively,
you can add child views to the routing information view.
If you do add additional lines or views to the routing information view that cause it
to increase in height, you must also set the
addedHeight
slot in the routing
information view or in your
BuildText
method (or anywhere before the inherited
ViewSetupFormScript
method is called). In this slot, specify the number of
pixels by which you are increasing the height of the view.
The header view may include editable fields. If the user changes something in an
editable field, you probably want to know about it so that you can save the new
information or perform other operations. The
InfoChanged
message is provided
for this purpose. This message is sent to whatever object you designate when the
header view is closed.
Providing a Routing Slip Template
22
A transport uses a routing slip when sending an item in order to get all the informa-
tion necessary to transmit the item. Since the user interface for the routing slip is
provided by the transport, the application does not need to know anything about
what is required to send the item.
Tap
transport
icon next to
Routing
information
view is

C H A P T E R 2 2
Transport Interface
Using the Transport Interface
22-27
Store a reference to your routing slip template in the
routingSlip
slot in your
transport object.
Use the
protoFullRouteSlip
template, described in the following section, to
create a routing slip.
One additional proto for use in routing slips is described in the section "Using
protoAddressPicker" (page 22-31).
Using protoFullRouteSlip
22
This routing slip proto already includes most of the elements required in a routing
slip. Figure 22-3 shows an example of this proto. For a complete description of the
slots and methods in this proto, see "protoFullRouteSlip" (page 19-38) in Newton
Programmer's Reference.
Figure 22-3
protoFullRouteSlip
view
The transport name and stamp icon in the upper-right corner of the routing slip are
automatically supplied. They are based on the transport
.actionTitle
and
transport
.icon
slots.
The format picker child in
protoFullRouteSlip
provides the picker list for
choosing among multiple formats. The current format is initially displayed. The
picker provides for opening an auxiliary view if one is associated with the current
format. This child view uses the
currentFormat
slot in the item (the
fields.currentFormat
slot in the routing slip), a list of routing formats
compatible with the item, and the
activeFormat
slot in the routing slip to set up
the picker with the correct choices. These slots are set up by the system.
When the user picks another format, the
activeFormat
slot is updated, which
changes the format choice shown next to the label. Additionally, the
SetDefaultFormat
message is sent to the application, and
currentFormat
in
Sender pop-up
Format picker
Send button
Cancel button
(Appears only if there are multiple formats)
This is a picker if there are multiple
transports in the group

C H A P T E R 2 2
Transport Interface
22-28
Using the Transport Interface
the item is updated. The format picker also sends the
SetupItem
message to the
format itself. If the format contains an
auxForm
slot, the view specified in the
auxForm
slot opens when the format is selected.
The sender pop-up child view allows the sender of the item to select a different
owner persona or worksite from a picker, which might affect how the owner's name
and address appear and how the item is sent. For example, if you choose a worksite
location with a different area code from your company worksite, and send a fax to
your company, the system automatically inserts a "1" and the company area code
before the phone number, which it wouldn't do if you told the system you were at a
location in that area code.
The default owner name (or persona as it is sometimes called) shown by this picker
is the one corresponding to the last-used owner name for a routing operation. The
default worksite for the owner is the one corresponding to the last worksite used for
a routing operation, or the setting of the home location in the Time Zones
application (whichever was done last). Note that additional owner names and
worksites can be created by users in the Owner Info application.
The Send button child in
protoFullRouteSlip
provides the button that
actually sends the item to the Out Box, and can also activate the transport. When
tapped, the button may display a picker with the choices "Now" and "Later," or it
may immediately send the item now or later. Its operation depends on the user
preference setting of the
nowOrLater
slot in the preferences configuration frame
described in Table 19-1 (page 19-7) in Newton Programmer's Reference, and on
the return value of the transport
ConnectionDetect
method, which can force
the button to send now or later without displaying a picker.
The Send button also handles submitting multiple items to the Out Box when the
user has selected many entries from an overview. If the user has selected multiple
items but the transport cannot handle cursors (the
allowBodyCursors
transport
slot is
nil
), the system sends the transport the
VerifyRoutingInfo
method.
This method allows the transport to modify the individual items, if necessary.
When only a single item (not a multiple-item target object) is submitted to the Out
Box,
VerifyRoutingInfo
is not called. In this case, if you need to modify the
item before it is sent, you can do this in the routing slip method
PrepareToSend
.
The function of the Send button is to submit the contents of the
fields
slot in the
routing slip to the Out Box. (The
fields
slot holds the item being routed and
other information about it.) After the item is submitted, the Out Box sends the
transport the
SendRequest
message to alert it that an item is waiting to be sent. If
the
cause
slot in the request argument to
SendRequest
is set to
'submit
, this
indicates the user chose to send the item later from the Send button. If the
cause
slot is
'item
, this indicates the user chose to send the item immediately.
Additionally, the
connect
slot in the item contains a Boolean value indicating if
the user chose to send the item now (
true
) or later (
nil
).

C H A P T E R 2 2
Transport Interface
Using the Transport Interface
22-29
The name of the current transport appears in the upper-right corner of the
protoFullRouteSlip
view. If that transport belongs to a group, the transport
name is actually a picker, from which the user can choose any of the other
transports in the group. The picker is displayed only if there is more than one
transport that belongs to the group. If the user changes the transport, the system
closes and reopens the routing slip for the current target item, since the routing slip
may be different for a different transport. Before the routing slip is closed, it is sent
the
TransportChanged
message. This allows the routing slip to take such
necessary action as alerting the user that addressing information might be lost as a
result of changing transports. For more information on grouped transports, see the
section "Grouping Transports" beginning on page 22-7.
Besides the supplied elements, your transport needs to add additional
transport-specific elements to the routing slip view. For example, transports are
responsible for adding the views that occupy the middle of the envelope area, to
obtain routing or addressing information for the item. And transports typically add
other elements to the area below the envelope. Figure 22-4 shows what a complete
routing slip might look like, after you add transport-specific items.
Figure 22-4
Complete routing slip
The middle of the envelope portion of a routing slip template typically includes a
view that gathers and displays recipient information for the item being sent. You'll
probably want to use the
protoAddressPicker
to allow the user to choose
recipients for the item. For details on how to use this proto, see the section "Using
protoAddressPicker" beginning on page 22-31.
protoAddressPicker

C H A P T E R 2 2
Transport Interface
22-30
Using the Transport Interface
Positioning Elements in the Lower Portion of the Routing Slip
22
The height of the lower portion of the routing slip is controlled by the
bottomIndent
slot. Placing your own user interface elements in this portion of
the routing slip is complicated by the fact that the format picker may or may not be
inserted by the system. It is included only if there is more than one format for the
item. Also, the system performs animation on the routing slip, changing the
location of the bottom bounds.
Any user interface elements you add to this portion of the routing slip must be
positioned relative to the bottom of the slip dynamically, at run time. You can
determine the position of the bottom of the slip by calling the routing slip method
BottomOfSlip
. An alternative method of positioning elements dynamically is to
make them sibling bottom-relative to the last child of the routing slip proto, which
is the Send button.
Note that only the first child element you add needs to follow these rules.
Additional elements can be positioned sibling-relative to it.
Using Owner Information
22
The
protoFullRouteSlip
view sends the
OwnerInfoChanged
callback
method to itself if the user changes the selection of owner name or worksite
location in the sender pop-up view. The
OwnerInfoChanged
method provides
the chance to update any information in the routing slip that depends on data in the
sender's current owner card or worksite. In addition, the
fromRef
slot in the item
will probably need to be updated with new sender information. For more informa-
tion about setting the
fromRef
slot, see the section "Obtaining an Item Frame"
beginning on page 22-13.
In your
OwnerInfoChanged
method, you can obtain any changes by checking
variables in which you are interested in the user configuration data, using the
GetUserConfig
function. For example, the area code at the user's location can
be found by using this code:
GetUserConfig('currentAreaCode);
For a list of variables in the user configuration data, see "User Configuration
Variables" (page 16-101) in Newton Programmer's Reference.
One issue to consider when saving items in the Out Box for later transmission is
when to read the sender's owner card and worksite information. In general, data
from the owner card should be obtained from the current persona at the time the
item is queued by the user. Such information might include the sender's name,
return address, credit card information, and so on.
However, if you use worksite information (for example, for addressing), you may
want to wait until the item is actually transmitted to obtain the most current
information based on the user's current worksite setting, and modify addressing

C H A P T E R 2 2
Transport Interface
Using the Transport Interface
22-31
information at that time. For example, if a user queued several fax items from
home but didn't send them until she got to work, the area code information for
telephone numbers might need to be changed.
Using protoAddressPicker
22
This proto consists of a labeled field that you can use in the routing slip to allow
the user to choose the recipient(s) of the item being sent. The first time the user
taps on the address picker, it opens a view that displays a list of names from the
Names file, from which the user can choose one or more recipients (Figure 22-5).
Figure 22-5
protoPeoplePicker
view
This view uses the
protoPeoplePicker
to provide the name picking facility. The
address picker is customizable so that you can substitute a name picking service
other than
protoPeoplePicker
by setting the
_picker
slot. For example, an
e-mail transport might use this facility to provide an alternate directory service.
When the user picks a name, the information is saved, and the next time the address
picker opens, it displays a small picker with the saved name and the choice "Other
Names." The user can choose "Other Names" to reopen the
protoPeoplePicker
view and select from the comprehensive list of names. Each time a new name is
selected, it is saved and added to the initial address picker list, giving the user a
convenient way to select from recently used addresses, as shown in Figure 22-6.
The address picker remembers the last eight names selected.
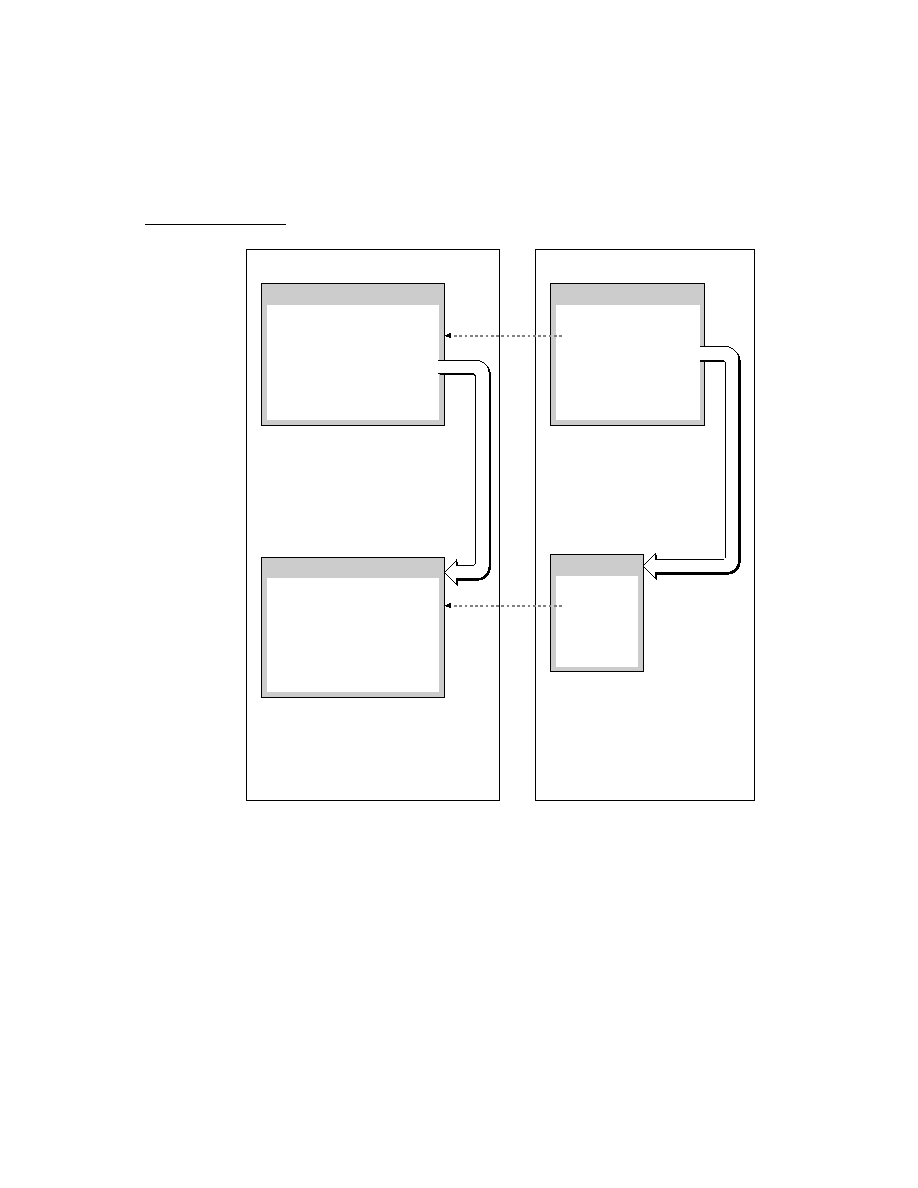
C H A P T E R 2 2
Transport Interface
22-32
Using the Transport Interface
Figure 22-6
Address picker with remembered names
The Intelligent Assistant also interacts with the address picker. If the user invokes a
routing action such as "fax Bob" with the Intelligent Assistant, the Intelligent
Assistant sets up the address picker with a list of alternatives from the Names file,
as shown in Figure 22-7.
Figure 22-7
Address picker set up by Intelligent Assistant
The
protoAddressPicker
uses name references to refer to individual names. A
name reference is a frame that contains a soup entry or an alias to a soup entry,
usually from the Names soup, hence the term name reference. The system includes
built-in data definitions that can access name references and has associated view
definitions that can display the information stored in or referenced by a name
reference. The built-in data definitions and view definitions are registered under
subclasses of the symbol
'nameRef
. For more information about name references,
see "Name References" (page 5-1) in Newton Programmer's Reference.

C H A P T E R 2 2
Transport Interface
Using the Transport Interface
22-33
Most transports can use the built-in name reference data and view definitions to
handle and display name references. For example, one place you might need to use
these is if you need to build a string representing the address or addresses chosen in
the
protoAddressPicker
. The
selected
slot of the
protoAddressPicker
contains an array of name references for the names selected by the user in the picker.
You can use the name reference data definition method
GetRoutingTitle
to
return a string representing all the selected addresses, truncated to the length you
specify. Alternately, you can use the transport method
GetNameText
to do the
same thing.
Providing a Preferences Template
22
Transport preferences are accessed and changed from the information button in the
In/Out Box. (The information button is the small button with an "i" in it.) Each
transport with a preferences view is listed in the information picker, as shown in
Figure 22-8.
Figure 22-8
Information picker and preferences view
To make a preferences view for a transport, create a template with a prototype of
protoTransportPrefs
. In your transport object, store a reference to your
preferences view template in the
preferencesForm
slot. When the information
picker is displayed, it automatically includes an item for each transport that has a
preferences template registered in the transport's
preferencesForm
slot.
Each transport may add its own preferences view for configuring any options that
apply to that transport. Some common options include
enable/disable logging
deferred/immediate send
enable/disable listening
Information picker
Preferences view

C H A P T E R 2 2
Transport Interface
22-34
Using the Transport Interface
default folders for new and read or sent items
show/hide status and progress dialogs
The
protoTransportPrefs
proto provides a dialog containing the preferences
items shown in Figure 22-9.
Figure 22-9
protoTransportPrefs
view
You can selectively remove any of the elements shown above by setting the
corresponding slot to
nil
in the
protoTransportPrefs
view. To include
additional items in your preferences view, add child views to the
protoTransportPrefs
view. The default child elements positioned in the center
of the view are added from the bottom up and are justified relative to the bottom of
the preferences view or to the top of their preceding sibling view. To add other
child elements, increase the height of the view and add your elements above the
existing ones, except for the title.
The
protoTransportPrefs
template also automatically checks your transport
and displays or hides the In/Out Box preference elements. If your transport does
not contain a
SendRequest
method, the Out Box preference element is not
displayed; if your transport does not contain a
ReceiveRequest
method, the In
Box preference element is not displayed. If the latter element is missing, the Out
Box element is automatically drawn at the bottom of the preferences view.
Controlled by
'silentPrefs
slot
Controlled by
'sendPrefs
slot
Controlled by
'outboxPrefs
slot
Controlled by
'inboxPrefs
slot
Controlled by
'infoPrefs
slot

C H A P T E R 2 2
Transport Interface
Using the Transport Interface
22-35
For example, the built-in Print transport uses the
protoTransportPrefs
proto
for its preferences view. Since the
ReceiveRequest
method does not exist in
the Print transport, the In Box preference element is not displayed, as shown in
Figure 22-10.
Figure 22-10
Print preferences
The Info button is included in the
protoTransportPrefs
template so you can
give the user access to About and Help views for the transport. The button is built
from the standard
protoInfoButton
proto. To include items on the Info picker,
you must provide handler methods in the
infoPrefs
slot of your transport
preferences view. The
protoTransportPrefs
template includes a handler for
the "Help" item that displays the system help book, open to the routing section.
You'll need to override this method if you want to provide your own help information.
You can add custom items to the Info picker by supplying
GenInfoAuxItems
and
DoInfoAux
methods in the
infoPrefs
frame. For more information about
these methods and how the Info button works, see "protoInfoButton" (page 6-10)
in Newton Programmer's Reference.
The
defaultConfiguration
slot in the
protoTransport
holds the initial
preferences associated with the transport. This slot is set up by default with a frame
holding an initial selection of preferences items. The child views of the
protoTransportPrefs
proto are designed to manipulate the slots in this frame.
If you want to override the default preferences frame, you need to construct an
identical one with different values. You can't use a
_proto
slot in your default
frame since the contents of the
defaultConfiguration
slot are stored in a
soup and
_proto
slots can't be stored in soup entries.

C H A P T E R 2 2
Transport Interface
22-36
Summary of the Transport Interface
Summary of the Transport Interface
22
Constants
22
ROM_RouteMailIcon // bitmap for mail group icon
ROM_RoutePrintIcon // bitmap for print group icon
ROM_RouteFaxIcon // bitmap for fax group icon
ROM_RouteBeamIcon // bitmap for beam group icon
ROM_RouteReply // bitmap for reply action icon
ROM_RouteForward // bitmap for forward action icon
ROM_RouteAddSender // bitmap for add sender to Names icon
ROM_RoutePasteText // bitmap for copy text to Notes icon
Protos
22
protoTransport
22
myTransport := {
_proto: protoTransport, // proto transport object
appSymbol:
symbol
, // transport symbol
title:
string
, // transport name
dataTypes:
array
, // symbols for routing types supported
actionTitle:
string
, // name of transport action
icon:
bitmapFrame
, // transport icon
group:
symbol
, // transport group symbol
groupTitle:
string
, // group name
groupIcon:
bitmapFrame
, // group icon
routingSlip:
viewTemplate
, // routing slip template
transportInfoForm:
viewTemplate
, // routing info template
preferencesForm:
viewTemplate
, // preferences template
statusTemplate:
viewTemplate
, // status template
statusDialog:
view
, // status view
modalStatus:
Boolean
, // modal status dialogs?
dialogStatusMsgs:
frame
, // status strings
status:
symbol
, // current status
addressingClass:
symbol
, // name reference symbol
addressSymbols:
array
, // don't translate e-mail classes
allowBodyCursors:
Boolean
, // allow cursors in body slot?
defaultConfiguration:
frame
, // user preferences defaults
AppClosed:
function
, // notifies transport of app closing

C H A P T E R 2 2
Transport Interface
Summary of the Transport Interface
22-37
AppInFront:
function
, // notifies transport of change in
app frontmost status
AppOpened:
function
, // notifies transport of app opening
CancelRequest:
function
, // cancels in-progress operation
CanPutAway:
function
, // put away hook for transport
CheckOutbox:
function
, // invokes SendRequest operation
CloseStatusDialog:
function
, // closes status dialog
ConnectionDetect:
function
, // force send now or later
GetConfig:
function
, // returns a prefs value
GetDefaultOwnerStore:
function
, // returns default store
GetFolderName:
function
, // gets folder name for item
GetFromText:
function
, // hook to supply item sender
GetItemInfo:
function
, // returns item to or from info
GetItemStateString:
function
, // returns item status string
GetItemTime:
function
, // returns item time stamp info
GetItemTitle:
function
, // returns item title
GetNameText:
function
, // returns name string from namerefs
GetStatusString:
function
, // returns transport status
GetTitleInfoShape:
function
, // returns info shape
GetToText:
function
, // hook to supply item recipient(s)
GetTransportScripts:
function
,// extends In/Out Box actions
HandleError:
function
, // displays error alert
HandleThrow:
function
, // handles exceptions
IgnoreError:
function
, // screens errors
InstallScript:
function
, // notification of installation
IOBoxExtensions:
function
, // extends In/Out Box view defs
IsInItem:
function
, // is item in the In or Out Box?
IsLogItem:
function
, // has item been logged?
ItemCompleted:
function
, // processes an item
ItemDeleted:
function
, // called when item is deleted
ItemDuplicated:
function
, // called when item is duplicated
ItemPutAway:
function
, // called after item is put away
ItemRequest:
function
, // gets next queued item
MakeLogEntry:
function
, // makes log entry
MissingTarget:
function
, // notification of missing target
NewFromItem:
function
, // gets item frame for received data
NewItem:
function
, // gets new item frame
NormalizeAddress:
function
, // translates e-mail address
PowerOffCheck:
function
, // notification of power-off
QueueRequest:
function
, // queues item for later handling
ReceiveRequest:
function
, // receives data
SendRequest:
function
, // sends data
SetConfig:
function
, // sets a prefs value
SetStatusDialog:
function
, // opens/updates status dialog

C H A P T E R 2 2
Transport Interface
22-38
Summary of the Transport Interface
TranslateError:
function
, // returns a string translation
VerifyRoutingInfo:
function
, // called on send of multiple
// item target that is being split
...
}
protoTransportHeader
22
aHeader := {
_proto: protoTransportHeader, // proto header object
transport:
frame
, // transport object
target:
frame
, // target object
addedHeight:
integer
, // height you're adding to header
context:
view
, // view to notify with InfoChanged msg
changed:
Boolean
, // user changed a field?
BuildText:
function
, // builds additional header lines
AddText:
function
, // adds lines to header
InfoChanged:
function
, // notifies view of changed field
...
}
protoFullRouteSlip
22
aFullRoutingSlip := {
_proto: protoFullRouteSlip, // proto full routing slip
viewJustify:
integer
, // viewJustify flags
envelopeHeight:
integer
, // height of envelope portion
envelopeWidth:
integer
, // width of envelope portion
bottomIndent:
integer
, // height of lower portion
fields:
frame
, // item frame
target:
frame
, // target object
activeFormat:
frame
, // currently selected format
transport:
frame
, // transport object
formatPicker:
frame
, // the format picker child view
sendButton:
frame
, // the send button child view
BottomOfSlip:
function
, // returns bottom of slip
FormatChanged:
function
, // notifies slip of new format
OwnerInfoChanged:
function
, // notifies slip of new sender
PrepareToSend:
function
, // notifies slip when item is sent
ContinueSend:
function
, // continues send process
TransportChanged:
function
, // notifies of transport change
...
}

C H A P T E R 2 2
Transport Interface
Summary of the Transport Interface
22-39
protoAddressPicker
22
anAddressPicker := {
_proto: protoAddressPicker, // address picker
viewBounds:
boundsFrame
, // location and size
text:
string
, // picker label
otherText:
string
, // last item (pops up people picker)
selected:
array
, // name refs to be initially selected
alternatives:
array
, // name refs to be shown in picker
class:
symbol
, // name ref data def class
_picker:
viewTemplate
, // picker for other addresses
...
}
protoTransportPrefs
22
myTransportPrefs := {
_proto: protoTransportPrefs, // transport prefs proto
viewBounds:
boundsFrame
, // location and size
title:
string
, // transport name
appSymbol:
symbol
, // transport appSymbol
silentPrefs:
frame
, // controls checkbox element in prefs
sendPrefs:
frame
, // controls send element in prefs
outboxPrefs:
frame
, // controls out box prefs element
inboxPrefs:
frame
, // controls in box prefs element
infoPrefs:
frame
, // defines more info button choices
...
}
Functions and Methods
22
Utility Functions
22
RegTransport(
symbol
,
transport
)
UnRegTransport(
symbol
)
DeleteTransport(
symbol
)
GetCurrentFormat(
item
)
GetGroupTransport(
groupSymbol
)
QuietSendAll(
transportSym
) // platform file function
ownerApp
:Refresh()
ownerApp
:RemoveTempItems(
transportSym
)


About the Endpoint Interface
23-1
C H A P T E R 2 3
Endpoint Interface
23
Figure 23-0
Table 23-0
This chapter describes the basic Endpoint interface in Newton system software.
The Endpoint interface allows you to perform real-time communication using any
of the communication tools available in the system. The Endpoint interface is well
suited for communication needs such as database access and terminal emulation.
You should read this chapter if your application needs to perform real-time
communications--that is, communication operations that do not use the Routing
and Transport interfaces described in the previous chapters. This chapter describes
how to
set options to configure the underlying communication tool
establish a connection
send and receive data
set up an input specification frame to control how data is received
cancel communication operations
This chapter describes the general approach to using the Endpoint interface, but
does not discuss details specific to using individual communication tools. For
specific details on using particular built-in communication tools, see Chapter 24,
"Built-in Communications Tools."
About the Endpoint Interface
23
The Endpoint interface is based on a single proto--
protoBasicEndpoint
--
which provides a standard interface to all communication tools (serial, modem,
infrared, AppleTalk, and so on). This proto provides methods for
interacting with the underlying communication tool
setting and getting endpoint options
opening and closing connections
sending and receiving data

C H A P T E R 2 3
Endpoint Interface
23-2
About the Endpoint Interface
The endpoint object created from this proto encapsulates and maintains the details
of the specific connection. It allows you to control the underlying communication
tool to perform your communication tasks.
The Endpoint interface uses an asynchronous, state-driven communications model.
In asynchronous operation, communication requests are queued, and control is
returned to your application after each request is made but before it is completed.
Many endpoint methods can also be called synchronously. In synchronous operation,
execution of your application is blocked until the request completes; that is, the
endpoint method does not return until the communication operation is finished.
The Endpoint interface supports multiple simultaneous connections. That is, you
can have more than one active endpoint at a time. Each endpoint object controls an
underlying communication tool, and these tools run as separate operating system
tasks. However, remember that the endpoint objects you create and control all
execute within the single Application task.
The number of simultaneously active endpoints you can use is limited in practice
by available system memory and processor speed. Each communi-
cation tool task requires significant memory and processor resources. Note that
memory for the communication tools that underlie endpoints is allocated from the
operating system domain, whereas memory for the endpoint objects is allocated
from the NewtonScript heap.
Asynchronous Operation
23
Almost all endpoint methods can be called asynchronously. This means that calling
the method queues a request for a particular operation with the underlying communi-
cation tool task, and then the method returns. When the operation completes, the
communication tool sends a callback message to notify the endpoint that the
request has been completed. The callback message is the
CompletionScript
message, and it is defined by your application in a frame called the callback
specification, or callback spec. (For more details, see "Callback Spec Frame"
(page 20-9) in Newton Programmer's Reference.)
You define the callback spec frame in your application and pass it as an argument
to each endpoint method you call asynchronously. The callback spec frame
contains slots that control how the endpoint method executes, and it contains a
CompletionScript
method that is called when the endpoint operation
completes. The
CompletionScript
method is passed a result code parameter
that indicates if the operation completed successfully or with an error.
A special type of callback spec, called an output spec, is used with the
Output
method. An output spec contains a few additional slots that allow you to pass
special protocol flags and to define how the data being sent is translated. Output
specs are described in "Output Spec Frame" (page 20-10) in Newton Programmer's
Reference.

C H A P T E R 2 3
Endpoint Interface
About the Endpoint Interface
23-3
This kind of asynchronous operation lends itself nicely to creating state-machine
based code, where each part of the communication process is a state that is invoked
by calling an endpoint method. The
CompletionScript
method of each state
invokes the next state, and the state machine automatically progresses from one
state to the next in a predefined fashion.
Synchronous Operation
23
Many endpoint methods can be called synchronously as well as asynchronously.
Synchronous operation means that invoking a method queues a request for a
particular operation with the underlying communication tool task, and the method
does not return until the operation is completed. This means that your application is
blocked from execution until the synchronous method returns.
Only a few endpoint methods must be called synchronously. Most can be called
either asynchronously or synchronously. For methods that can be called in either
mode, it is recommended that you use the asynchronous mode whenever possible.
If you call such a method synchronously, the communication system spawns a
separate task associated with the method call, while putting your application task
on hold. This results in higher system overhead and can reduce overall system
performance if you use many synchronous method calls.
Input
23
In the Endpoint interface, you receive data by defining a frame called an input
specification, or input spec, and then waiting for input. The input spec defines how
incoming data should be formatted, termination conditions that control when the
input should be stopped, data filtering options, and callback methods. The main
callback method is the
InputScript
method, which is passed the received data
when the input operation terminates normally. Receiving data with the Endpoint
interface is always asynchronous.
Here is an overview of the way you can use input spec methods to obtain the
received data:
Let the termination conditions specified in the input spec be triggered by the
received data, thus calling your
InputScript
method. For example, when a
particular string is received, the
InputScript
method is called.
Periodically sample incoming data by using the input spec
PartialScript
method, which is called periodically at intervals you specify in the input spec.
Cause the system to send the
InputScript
callback method by using the
Input
method. This immediately returns the contents of the input buffer and
clears it.
Immediately return the input buffer contents without terminating the active input
spec and without clearing the buffer by using the
Partial
method.

C H A P T E R 2 3
Endpoint Interface
23-4
About the Endpoint Interface
If the input operation terminates normally--that is, the
InputScript
method is
called--the system automatically reposts the input spec for you to receive
additional input. Of course, you can alter this process if you want to.
Data Forms
23
All NewtonScript data needs to be transformed whenever it is sent to or received
from a foreign environment. That foreign environment may be a server or host
computer at the other end of the connection, or it may even be the communication
tool that's processing the configuration options you've passed to it. Typically,
communication tools expect C-type option data.
Whether you're sending, receiving, or using data to set endpoint options, you can
tag the data with a data form. A data form is a symbol that describes the transfor-
mations that need to take place when data is exchanged with other environments.
When you send data or set endpoint options, the data form defines how to convert
the data from its NewtonScript format. When you receive data or get endpoint
options, the data form defines the type of data expected.
Data forms are used in output specs, input specs, and endpoint option frames. The
data form is defined by a slot named
form
in these frames. If you don't define the
data form in a particular case, a default data form is used, depending on the type of
operation and the type of data being handled.
Note that when sending data, you can take advantage of the default data forms by
not explicitly specifying a data form. Because NewtonScript objects have type
information embedded in their values, the system can select appropriate default
data forms for different kinds of data being sent. For example, if you send string
data and don't specify the data form, the
'string
data form is used by default.
The symbols you use to indicate data forms are
'char
,
'number
,
'string
,
'bytes
,
'binary
,
'template
, and
'frame
. Each is best suited to certain data
and operations.:
For simple scalar values, use
'char
for characters and
'number
for integers.
For semi-aggregate forms of these kinds of data, use
'string
for a
concatenation of characters plus a terminating byte, and use
'bytes
for an
array of bytes.
For binary data, use
'binary
. This is the fastest option for sending and
receiving, since the data processing is minimal.
For more complex data, there are two aggregate data forms. You may want to
use the
'template
form if you're communicating with a remote procedure call
service that expects C-type data and that follows the exact same marshalling
restrictions the Newton does. The
'frame
form is convenient if you're
exchanging frames with another Newton.

C H A P T E R 2 3
Endpoint Interface
About the Endpoint Interface
23-5
The different types of data forms and the defaults are described in more detail in
"Data Form Symbols" (Table 20-1 on page 20-2) in Newton Programmer's
Reference.
Only a subset of data form values is applicable for any particular operation.
Table 23-1 enumerates the data forms and their applicability to output specs, input
specs, and endpoint option frames.
Template Data Form
23
The
'template
data form enables you to pass data as if you were passing C
structures, and is thus extremely useful in communicating with the lower level
communication tools in getting and setting endpoint options.
When you set options or send data using the
'template
data form, the data is
expected to be a frame containing two slots,
arglist
and
typelist
. The
arglist
slot is an array containing the data, the list of arguments. The
typelist
slot is a corresponding array containing the types that describe the data.
To get endpoint options, the data in the
data
slot must be a frame containing the
arglist
and
typelist
arrays. The
arglist
array should contain placeholder
or default values. The system supplies the actual
arglist
values when the option
list is returned.
In the same manner, to receive data, you must add a
target
slot to your input
spec containing the
arglist
and
typelist
arrays. The
arglist
array contains
Table 23-1
Data form applicability
Data form
Output spec
Input spec
Option frame
'char
default for characters
OK
OK
'number
default for numbers
OK
OK
'string
default for strings
default
OK
'bytes
OK OK
OK
'binary
default for binary objects;
output spec can include
optional
target
slot
OK; input spec
must include
target
slot
OK
'template
OK
OK; input spec
must include
target
slot
default
'frame
OK
OK
not applicable

C H A P T E R 2 3
Endpoint Interface
23-6
About the Endpoint Interface
placeholder or default values, which the system fills in when the data is received.
For more information, see the section "Specifying the Data Form and Target"
beginning on page 23-13.
The data types that can be used in the
typelist
array are identified by these
symbols:
'long
,
'ulong
,
'short
,
'byte
,
'char
,
'unicodechar
,
'boolean
,
'struct
, and
'array
. They are described in detail in "Data Type
Symbols" (Table 20-2 on page 20-3) in Newton Programmer's Reference.
Note that the
'struct
and
'array
data types are not used alone, but in
conjunction with other elements in a
typelist
array. They modify how the other
elements are treated. The
'struct
data type defines the array as an aggregate
structure of various data types that is padded to a long-word boundary (4 bytes in
the Newton system). Note that the whole structure is padded, not each array
element. You must specify the
'struct
data type in order to include more than
one type of data in the array.
The
'array
data type defines the array as an aggregate array of one or more
elements of a single data type. The
'array
data type is specified as a NewtonScript
array of three items, like this:
['array,
dataTypeSymbol
,
integer
]
Replace the dataTypeSymbol with one of the other simple data types. And integer is
an integer specifying the number of units of that data type to convert. To convert an
entire string, including the terminator, specify zero for integer. A nonzero value
specifies the exact number of units to be converted, independent of a termination
character in the source string.
Here are some examples of how to use the
'array
data type to represent C strings
and Unicode strings in NewtonScript. The first example shows how to convert
between a NewtonScript string of undefined length and a C string (translated
to/from Unicode):
['array, 'char, 0]
This example shows how to convert a four-character NewtonScript string to a C string:
['array, 'char, 4]
This example shows how to convert between a NewtonScript string and a
Unicode string:
['array, 'unicodechar, 0]
The
'template
data form is intended primarily as a means of communicating
with the lower level communication tools in the Newton system. You can use this
data form to communicate with a remote system, however, you must be careful and
know exactly what you are doing to use it for this purpose. Remember that the
lengths of various data types and the byte order may be different in other systems
and may change in future releases of the Newton operating system.

C H A P T E R 2 3
Endpoint Interface
About the Endpoint Interface
23-7
Endpoint Options
23
You configure the communication tool underlying an endpoint object by setting
endpoint options. An endpoint option is specified in an endpoint option frame that
is passed in an array as an argument to one of the endpoint methods. Options select
the communication tool to use, control its configuration and operation, and return
result code information from each endpoint method call. An alternative way to set
options is to directly call the endpoint
Option
method.
There are three kinds of options you can set, each identified by a unique symbol:
'service
options, which specify the kind of communication service, or tool,
to be controlled by the endpoint
'option
options, which control characteristics of the communication tool
'address
options, which specify address information used by the
communication tool
For details on the particular options you can use with the built-in communication
tools, see Chapter 24, "Built-in Communications Tools."
Compatibility
23
The
protoBasicEndpoint
and
protoStreamingEndpoint
objects and all
the utility functions described in this chapter are new in Newton system software
version 2.0. The
protoEndpoint
interface used in system software version 1.x is
obsolete, but still supported for compatibility with older applications. Do not use
the
protoEndpoint
interface, as it will not be supported in future system
software versions.
Specific enhancements introduced by the new endpoint protos in system software
2.0 include the following:
Data forms. You can handle and identify many more types of data by tagging it
using data forms specified in the
form
slot of an option frame.
Asynchronous behavior and callback specs. Most endpoint methods can now
be called asynchronously.
Flexible input specs. Enhancements include support for time-outs and the
ability to specify multiple termination sequences.
Better error handling. Consistent with other system services, errors resulting
from synchronous methods are signaled by throwing an exception.
Binary data handling. The way binary (raw) data is handled has changed
significantly. For input, you can now target a direct data input object, which
results in significantly faster performance. For output, you can specify offsets
and lengths, which allows you to send the data in chunks.

C H A P T E R 2 3
Endpoint Interface
23-8
Using the Endpoint Interface
Multiple communication sessions. The system now supports multiple
simultaneous communication sessions. In other words, you can have more than
one active endpoint at a time.
Using the Endpoint Interface
23
This section describes
setting endpoint options
initializing and terminating an endpoint
establishing a connection
sending data
receiving data
sending and receiving streamed data
working with binary data
canceling operations
handling errors
linking the endpoint with an application
Setting Endpoint Options
23
Endpoint options are specified in an endpoint option frame that is passed as an
argument to an endpoint method. Typically you specify an array of option frames,
setting several options at once. Note that you cannot nest an option array inside
another one.
You must specify a single
'service
option, to select a communication tool. Then
you usually specify one or more
'option
options to configure the communication
tool--for example, to set the baud rate, flow control, and parity of the serial tool.
Note that if you are using the modem communication tool, you can use the utility
function
MakeModemOption
to return a modem dialing option for use with the
built-in modem tool.
You may also need to specify an
'address
option, depending on the communi-
cation tool you are using. The only built-in tools that use an
'address
option are
the modem and AppleTalk tools. Note that you should use the global functions
MakePhoneOption
and
MakeAppleTalkOption
to construct
'address
options for the modem and AppleTalk tools.
The slots in an endpoint option frame are described in detail in "Endpoint Option
Frame" (page 20-7) in Newton Programmer's Reference.

C H A P T E R 2 3
Endpoint Interface
Using the Endpoint Interface
23-9
All option data you set gets packed together into one block of data. Each option
within this block must be long-word aligned for the communication tools. So,
when using the
'template
data form, you need to use the
'struct
type (at the
beginning of the
typelist
array) to guarantee that the option is long-word
aligned and padded. To set the serial input/output parameters, for instance, the
option frame might look like this:
serialIOParms := {
type: 'option,
label: kCMOSerialIOParms,
opCode: opSetNegotiate,
data: {
arglist: [
kNoParity, //
parity
k1StopBits, // stopBits
k8DataBits, // dataBits
k9600bps, //
bps
],
typelist: [
'struct,
'uLong,
'long,
'long,
'long
]
}
};
To get the connection information, the option frame you construct might look like this:
connectInfoParms := {
type: 'option,
label: kCMOSerialIOParms,
opCode: opGetCurrent,
data: {
arglist: [
0, // parity placeholder
0, // stopBits placeholder
0, // dataBits placeholder
0, // bps placeholder
],
typelist: [
'struct,
'ulong,
'long,

C H A P T E R 2 3
Endpoint Interface
23-10
Using the Endpoint Interface
'long,
'long
]
}
};
When you set endpoint options, the cloned option frame is returned to you so that
you can check the result codes for individual options. If you set options with an
asynchronous method call, the cloned option frame is returned as a parameter to
the
CompletionScript
callback method. If you set options with a synchronous
method call, the cloned option frame is returned as the value of the synchronous
method itself.
The
result
slot in each option frame is always set for returned options. It can be
set to any of the error codes listed in "Option Error Code Constants" (Table 20-5
on page 20-5) in Newton Programmer's Reference. If an option succeeds without
errors, the
result
slot is set to
nil
.
Exceptions are not thrown when individual options fail. This allows a request to
succeed if, for example, every specified option except one succeeds. If you need to
determine whether a particular option succeeds or fails, you must check the
result
slot of the option in question.
Note that in one array of option frames, you can specify options that are of the
same type, and that seem to conflict. Since options are processed one at a time, in
order, the last option of a particular type is the one that is actually implemented by
the communication tool.
Note
When instantiating an endpoint for use with the modem tool, you
can have options specified by the options parameter to the
Instantiate
method, as well as options specified by a modem
setup package (see Chapter 25, "Modem Setup Service."). Any
options from a modem setup package are appended to those set by
the
Instantiate
method.
For details on the specific options you can set for the built-in communication tools,
see Chapter 24, "Built-in Communications Tools."
Initialization and Termination
23
Before using an endpoint, you must instantiate it using the
Instantiate
method.
This method allocates memory in the system and creates the endpoint object.
Then, you must bind the endpoint object to the communication hardware by calling
the
Bind
method. This allocates the communication tool resources for use by
the endpoint.

C H A P T E R 2 3
Endpoint Interface
Using the Endpoint Interface
23-11
When you are finished with an endpoint, you must unbind it using the
UnBind
method, then dispose of it using the
Dispose
method.
Establishing a Connection
23
After instantiating and binding an endpoint, you establish a connection.
There are two ways you can create a connection. One way is to call the
Connect
method. If the physical connection is serial, for instance, you don't even need to
specify an address as an option. The
Connect
method immediately establishes
communication with whatever is at the other end of the line.
Certain communication tools--for example, the modem and AppleTalk tools--
require you to specify an option of type
'address
in order to make a connection.
The modem tool requires a phone number as an
'address
option. You should
use the global function
MakePhoneOption
to return a proper phone number
'address
option. The AppleTalk tool requires an AppleTalk Name Binding
Protocol (NBP)
'address
option. You should use the global function
MakeAppleTalkOption
to return a proper NBP
'address
option.
To establish a connection where you expect someone else to initiate the connection,
you need to call the
Listen
method. Once the connection is made by using
Listen
, you need to call the
Accept
method to accept the connection, or the
Disconnect
method to reject the connection and disconnect.
Sending Data
23
To send data, use the
Output
method. This method is intelligent enough to figure
out the type of data you're sending and to convert it appropriately for transmission.
This is because NewtonScript objects have type information embedded in their
values, allowing the system to select appropriate default data forms for different
kinds of data being sent.
You can specify output options and a callback method by defining an output spec,
which you pass as a parameter to the
Output
method.
Certain communication tools may require or support the use of special flags
indicating that particular protocols are in use. For example, the built-in infrared and
AppleTalk tools expect framed (or packetized) data, and there are special flags to
indicate that this kind of protocol is in use. If you are using such a communication
tool to send data, you need to specify the
sendFlags
slot in the output spec
frame. In this slot, you specify one or more flag constants added together.
To send packetized data, you set
sendFlags
to
kPacket+kMore
for each packet
of data that is not the last packet. For the last packet, set
sendFlags
to
kPacket+kEOP
.

C H A P T E R 2 3
Endpoint Interface
23-12
Using the Endpoint Interface
Receiving Data Using Input Specs
23
The most common way to receive data is to use input specs. An input spec is a
frame that defines what kind of data you are looking for, termination conditions
that control when the input should be stopped, and callback methods to notify you
when input is stopped or other conditions occur.
An input spec consists of many pieces. It contains slots that define
the type of data expected (
form
slot)
the input target for template and binary data (
target
slot)
the data termination conditions (
termination
slot)
protocol flags for receiving data (
rcvFlags
slot)
an inactivity time-out (
reqTimeout
slot)
the data filter options (
filter
slot)
the options associated with the receive request (
rcvOptions
slot)
a method to be called when the termination conditions are met
(
InputScript
method)
a method to be called periodically to check input as it accumulates
(
PartialScript
method,
partialFrequency
slot)
a method to be called if the input spec terminates unexpectedly
(
CompletionScript
method)
Table 23-2 summarizes the various input data forms and the input spec slots that
are applicable to them. Input spec slots not included in the table apply to all data
forms. For more details on the input spec frame, see "Input Spec Frame"
(page 20-11) in Newton Programmer's Reference.
After you've connected or accepted a connection, you set up your first input spec
by calling
SetInputSpec
. When one input spec terminates, the system
automatically posts another input spec for you when the
InputScript
method
defined in the previous input spec returns. This new input spec duplicates the
one that just terminated. If you don't want this to happen, you can call the
SetInputSpec
method from within the
InputScript
method of your input
spec to change the input spec or terminate the input. Pass
nil
to
SetInputSpec
to terminate the input.
You also use the
SetInputSpec
method if you need to set up an input spec at
some other point. Note that if you want to terminate a current input spec to set up a
new one, you must call the
Cancel
method before calling
SetInputSpec
with
your new spec. (This applies inside an
InputScript
that is called as a result of
calling the
Input
method.)
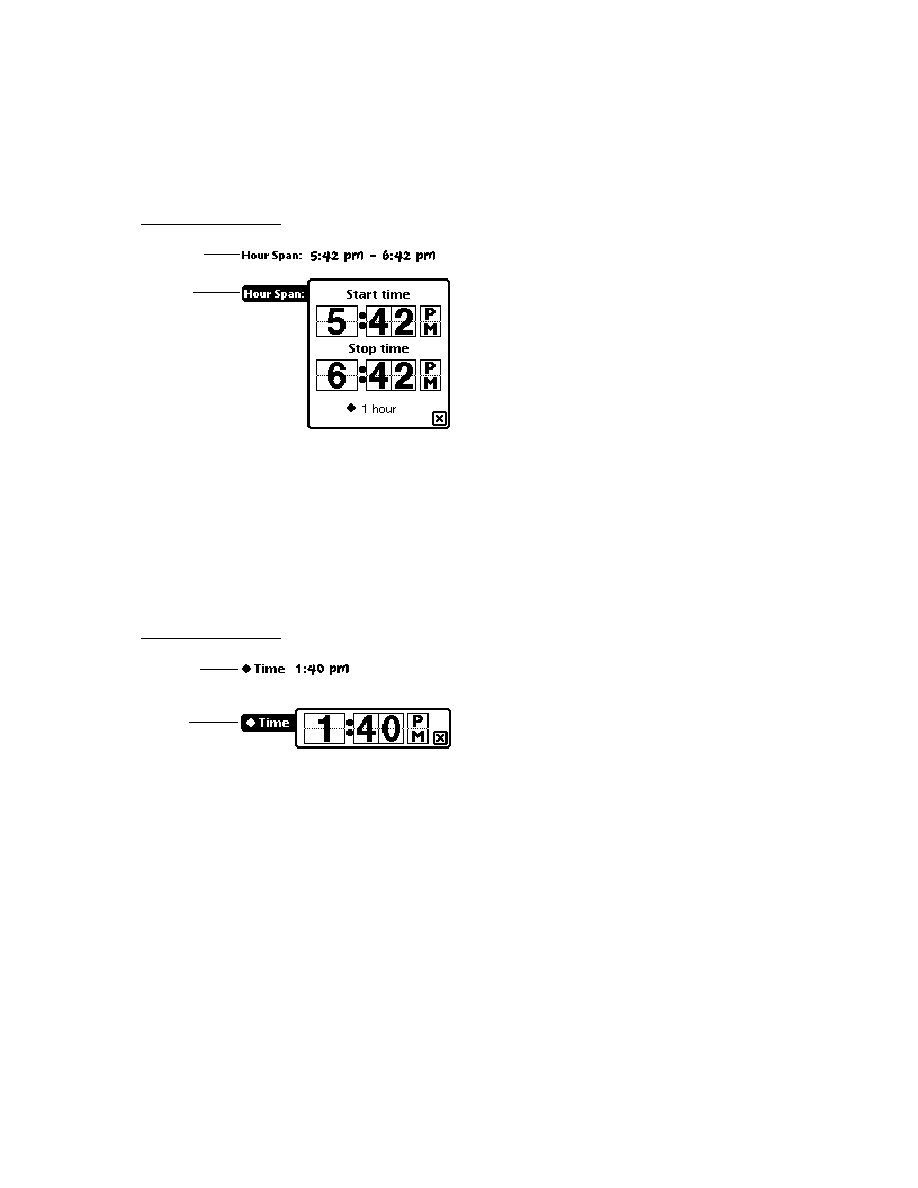
C H A P T E R 2 3
Endpoint Interface
Using the Endpoint Interface
23-13
The following sections describe how to set the various slots in the input spec to
accomplish specific tasks.
Specifying the Data Form and Target
23
You can choose how you want the received data formatted by setting the
form
slot in the input spec. In this slot, you specify one of the standard data forms
described in "Data Form Symbols" (Table 20-1 on page 20-2) in Newton
Programmer's Reference.
In preparation for receiving data, the system creates an input buffer. The buffer's
size is based on the input spec slot
termination.byteCount
, on the slot
discardAfter
, or on the intrinsic size of the data. The system receives all the
data in to this buffer, then translates the data into a newly created object whose type
is specified by the input spec's
form
slot. It is this object that is passed back to the
InputScript
method.
Table 23-2
Input spec slot applicability
Data form
target
slot
termination
slot
discard
After
slot*
filter
slot
partial
Frequency
and
partial
Script
slots
'char
na (not applicable)
determined
automatically
na
OK
na
'number
na
determined
automatically
na
OK
na
'string
na
OK
OK
OK
OK
'bytes
na
OK
OK
OK
OK
'binary
data
and
offset
slots only
all slots except
endSequence
na
na
na
'template
typelist
and
arglist
slots only
determined
automatically
na
na
na
'frame
na
determined
automatically
na
na
na
*
discardAfter
is written as one word, broken here because of space limitations.
partialFrequency
and
partialScript
are written as one word, broken here because of space limitations.

C H A P T E R 2 3
Endpoint Interface
23-14
Using the Endpoint Interface
If you specify the form
'template
or
'binary
, you also must specify a
target
slot in the input spec. The
target
slot is a frame used to define additional
information pertaining to the data form.
If your input form is
'template
, then you must set the
arglist
and
typelist
slots in the
target
frame. The
arglist
array contains placeholder data, which
is filled in with actual data when it is received, and the
typelist
array contains
the template's array of types.
If your input form is
'binary
, data is written directly into the binary object that
you specify in the
data
slot of the
target
frame. You can specify a binary object,
virtual binary object, or string. Note that the binary object must be the same size as
the received data; the system will not expand or shrink the object. For information
on virtual binary objects, see Chapter 11, "Data Storage and Retrieval."
The
offset
slot in the
target
frame allows you to specify an offset in the binary
object at which to write incoming data. For instance, if you want to write the
received data in consecutive blocks in a binary object that already exists, you must
set the
data
slot to the binary object, and set the
offset
slot to the byte offset at
which you want the new data to be written for each block.
Specifying Data Termination Conditions
23
For
'string
and
'bytes
data forms, you must indicate when the input
terminates by specifying a
termination
slot. You can terminate the input on
these conditions:
when a certain number of bytes has been received (set the
byteCount
slot)
when a specific set of characters in the input stream has been found (set the
endSequence
slot)
when the communication tool returns an end-of-packet indicator (set the
useEOP
slot)
Normally with the
'binary
data form, the input is terminated when the target
object fills up. However, you can also use the
termination
slot with binary data
to specify a byte count that causes the input to terminate after a certain number of
bytes has been received. This feature is useful when you want to provide user
feedback as a large binary object is being received. Set the
byteCount
slot in the
termination
frame, and, when the input terminates, repost the input spec with the
target.offset
slot offset by the value of the
termination.byteCount
slot.
If you want to receive data that ends with a particular sequence of data, define
that sequence in the
endSequence
slot in the
termination
frame. The
endSequence
slot allows you to terminate input based on a particular sequence
of incoming data called the termination sequence. You can specify a single

C H A P T E R 2 3
Endpoint Interface
Using the Endpoint Interface
23-15
termination sequence, or an array of items, any one of which will cause the input to
terminate. A termination sequence can be a single character, a string, a number, or
an array of bytes. If you don't want to look for a termination sequence, don't define
this slot.
For the
'binary
data form, you cannot use the
endSequence
slot to specify a
termination condition.
Note
Note that the system executes byte-by-byte comparisons between
the termination sequence and the input stream. To facilitate this
process, the termination sequence (or elements within the
endSequence
array) is converted to a byte or binary format to
speed the comparison. Internally, single characters are converted
to single bytes using the translation table specified by the
endpoint
encoding
slot. Numbers are converted to single bytes;
strings are converted to binary objects. An array of bytes is also
treated as a binary object. For large numbers, you must encode
your number as an array of bytes if there are significant digits
beyond the high order byte of the number.
If you want to terminate input based on a transport-level end-of-packet (EOP)
indicator, then you can set the
useEOP
slot in the
termination
frame. This slot
holds a Boolean value specifying whether or not to look for EOP indicators.
Specify this slot only if the input spec
rcvFlags
slot includes the
kPacket
flag.
Moreover, if the
rcvFlags
slot includes the
kPacket
flag and you do not specify
the
termination.useEOP
slot, the system effectively sets
useEOP
to the
default value
true
. For more information, see the following section, "Specifying
Flags for Receiving."
It is not appropriate to specify the
termination
slot for data forms other than
'string
,
'bytes
, and
'binary
. The
'char
and
'number
data forms
automatically terminate after 1 and 4 bytes, respectively. The
'frame
data form is
terminated automatically when a complete frame has been received, and the
'template
data form terminates when the number of bytes received matches the
typelist
specification in the
target
frame.
To limit the amount of accumulated data in the input buffer, you can define a
discardAfter
slot in the input spec. You can do this only when you have not
specified a
termination.byteCount
slot for
'string
and
'bytes
data
forms. The
discardAfter
slot sets the input buffer size. If the buffer overflows,
older bytes are discarded in favor of more recently received bytes.
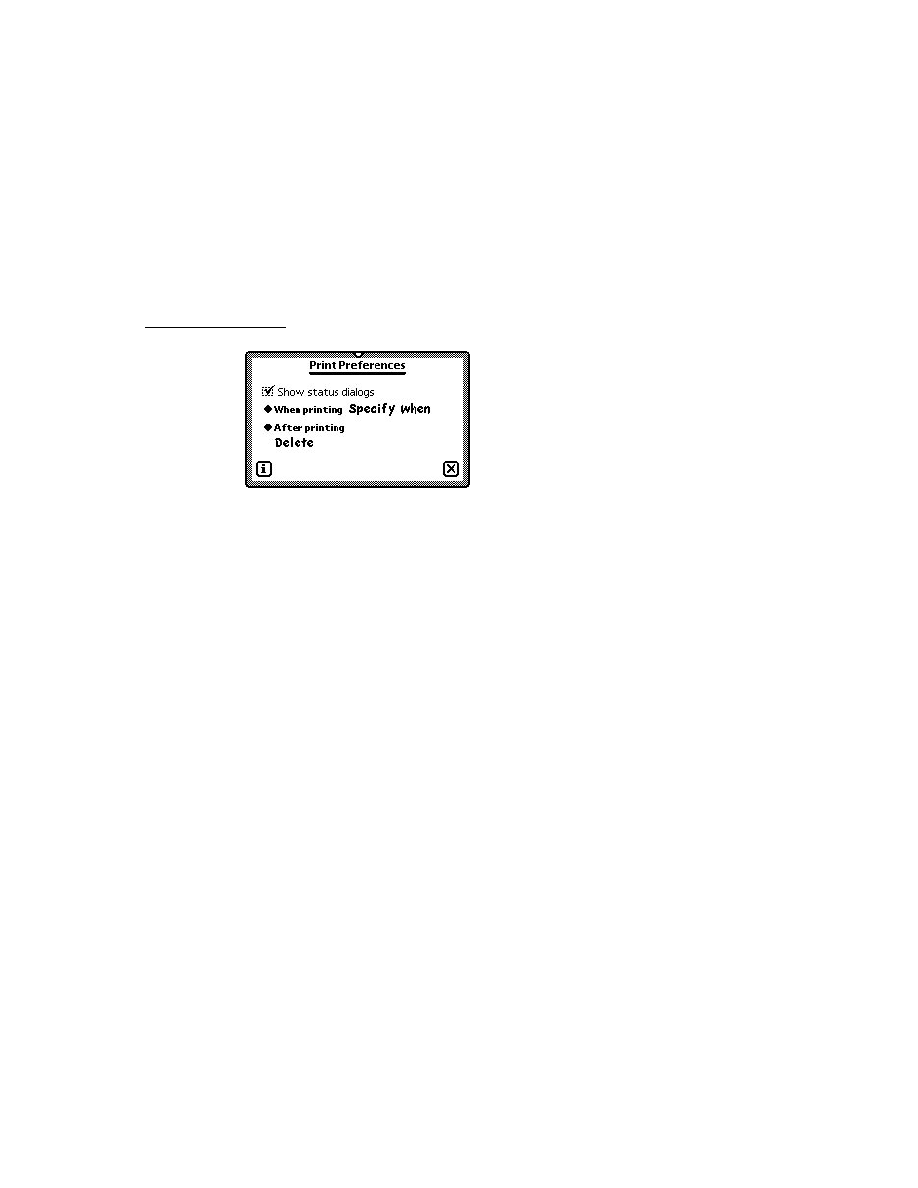
C H A P T E R 2 3
Endpoint Interface
23-16
Using the Endpoint Interface
Specifying Flags for Receiving
23
For certain communication tools, it may be necessary to use special protocol flags
when receiving data. You do this by specifying one or more flag constants in the
rcvFlags
slot in the input spec. You can use such flags only if the communication
tool supports them.
For example, some of the built-in communication tools, such as the infrared and
AppleTalk tools, support only framed receiving (packetized data). In order to use
framed receiving, you must set the
rcvFlags
slot to the constant
kPacket
. With
the infrared tool, if you do not specify a
rcvFlags
value of
kPacket
, the tool
will behave unexpectedly.
Do not define the
rcvFlags
slot if the underlying communication tool does not
support EOP indicators. If you do so, your input will terminate after each physical
buffer of data is received. If you wish to terminate an input spec based on an EOP
indicator, set the
useEOP
slot in the
termination
frame to
true
.
Of the built-in communication tools, only the infrared, AppleTalk, and framed
asynchronous serial tools support framed packets and the
kPacket
flag.
If you set the
kPacket
flag and set the
useEOP
slot to
true
, you cannot also use
the
byteCount
slot in the termination frame--if you do,
byteCount
will be
ignored. In this case, only an EOP indicator will terminate input. If you do want to
use the
byteCount
slot with the
kPacket
flag, set the
useEOP
slot to
nil
. In
the latter case, the remote system should send an EOP indicator with every packet,
though input won't terminate until the
byteCount
condition is met.
Specifying an Input Time-Out
23
You can specify a time-out for input in the
reqTimeout
slot of the input spec. In
this slot, you specify the time, in milliseconds, of inactivity to allow during input.
If there is no input for the specified interval, the time-out expires, the input is
terminated, and the
CompletionScript
message is sent to the input spec frame.
In this case, the result code passed with the
CompletionScript
message
is 16005.
Don't specify a
reqTimeout
value less than 30 milliseconds.
Note that if a time-out expires for an asynchronous request such as receiving, that
request and all outstanding requests are canceled.
Specifying Data Filter Options
23
As incoming data is received in the input buffer, the data can be processed, or
filtered. This filtering can occur on all types of received data, except binary data
(defined by the
'binary
data form). This filtering of data is defined by the
filter

C H A P T E R 2 3
Endpoint Interface
Using the Endpoint Interface
23-17
slot in the input spec. The
filter
slot is a frame containing two slots,
byteProxy
and
sevenBit
, which allow you to perform two different kinds of processing.
The
byteProxy
slot allows you to identify one or more characters or bytes in the
input stream to be replaced by zero or one characters. You may, for instance,
replace null characters (
0x00
) with spaces (
0x20
). Note that if your input data
form is set to
'string
, you are encouraged to use this slot. Otherwise, null
characters embedded in your string may prematurely terminate that string.
(Remember, NewtonScript strings are null-terminated.)
The
byteProxy
slot contains an array of one or more frames. Each frame must
have a
byte
slot, identifying the single-byte character or byte to be replaced, and a
proxy
slot, identifying the single-byte character or byte to be used instead. The
proxy
slot can also be
nil
, meaning that the original byte is to be removed
completely from the input stream.
Note
Note that the system executes byte-by-byte comparisons and
swaps between the bytes in the input stream and the replacements
in the
proxy
slot. To facilitate this process, the values in the
byte
and
proxy
slots are converted to a byte format to speed the
comparison and swap. Internally, single characters are converted
to single bytes using the translation table specified in the endpoint
encoding
slot. Numbers are converted to single bytes. If a
number has significant digits beyond the high-order byte, they
will be dropped during the comparison and swap.
You can also specify the
sevenBit
slot in the
filter
frame. Set this slot to
true
to specify that the high-order bit of every incoming byte be stripped ("zeroed
out"). This is a convenient feature if you plan to communicate over links
(particularly private European carriers) that spuriously set the high-order bit.
Specifying Receive Options
23
You can also set communication tool options associated with the receive request.
To do this, specify an option frame or an array of option frames in the
rcvOptions
slot in the input spec. The options are set when the input spec is posted by the
SetInputSpec
method. The processed options are returned in the options
parameter passed to the
InputScript
method.
Note that the options are used only once. If your
InputScript
method is called,
for example, and it returns expecting the input spec to remain active, the options
are not reposted. To explicitly reset the options in this example, you must call
SetInputSpec
within your
InputScript
method.

C H A P T E R 2 3
Endpoint Interface
23-18
Using the Endpoint Interface
Handling Normal Termination of Input
23
The
InputScript
message is sent to the input spec frame when one of the
termination conditions is met. You define the
InputScript
method in the input
spec frame.
The received data is passed as a parameter to the
InputScript
method. Another
parameter describes the specific condition that caused the input to terminate, in
case you had specified more than one in the input spec.
When the
InputScript
method returns, the system automatically posts another
receive request for you using the same input spec as the last one. You can prevent
this by calling
SetInputSpec
within the
InputScript
method. In the
SetInputSpec
method, you can set a different input spec, or you can prevent a
new input spec from being posted by setting the inputSpec parameter to
nil
. Note
that while the input spec is
nil
, incoming data may be lost.
Periodically Sampling Incoming Data
23
You can sample the incoming data without meeting any of the termination
conditions by specifying a
PartialScript
method in the input spec. The system
sends the
PartialScript
message to the input spec frame periodically, at the
frequency you define in the
partialFrequency
slot in the input spec, as long as
there are one or more bytes of data in the input buffer. The system passes to the
PartialScript
method all of the data currently in the input buffer, but the data
is not removed from the input buffer. If you want to remove this data from the input
buffer, you can call the
FlushPartial
method.
Note that the sending of
PartialScript
messages is controlled by system idle
events and is in no way triggered by receive request completions. The current input
spec remains in effect after the
PartialScript
method returns.
You typically would use a
PartialScript
method to detect abnormal or
out-of-band data not found by any of the usual input termination conditions.
You can specify
PartialScript
methods only for those input data forms that
allow termination conditions --specifically, the
'string
and
'bytes
data forms.
To use the
PartialScript
method, you must also include the
partialFrequency
slot in the input spec. The
partialFrequency
slot
specifies the frequency, in milliseconds, at which the input data buffer should be
checked. If new data exists in the buffer, the
PartialScript
message is sent to
the input spec frame.

C H A P T E R 2 3
Endpoint Interface
Using the Endpoint Interface
23-19
Handling Unexpected Completion
23
The
CompletionScript
message is sent to the input spec frame when the input
spec completes unexpectedly--for example, because of a time-out expiring or a
Cancel
message.
If you do not specify a
CompletionScript
method in your input spec frame, an
exception is forwarded to the endpoint
ExceptionHandler
method.
Special Considerations
23
If you want to set up an input spec, but you never want to terminate the input, you
can set up the input form to be either
'string
or
'bytes
data, and not define
any of the data termination conditions. In this case, it is up to you to read and flush
the input. You can do this by using a
PartialScript
method that calls the
FlushPartial
method at the appropriate times. Note that if the input exceeds
the
discardAfter
size, the oldest data in the buffer is deleted to reduce the size
of the input.
Alternatively, if you omit the
InputScript
method, yet define the input data
form and termination conditions, the input continues to be terminated and flushed
at the appropriate times. The only difference is that without an
InputScript
method, you'll never see the complete input.
Receiving Data Using Alternative Methods
23
The methods described in this section allow you to receive data in ways other than
letting an input spec terminate normally. You may not need to use these methods;
they're provided for flexibility in handling special situations.
You can force the system to send a pending input spec the
InputScript
message
by calling the
Input
method. Note that this method is appropriate to use only
when receiving data of the forms
'string
and
'bytes
. Also, in an
InputScript
method that is called as a result of calling
Input
, you cannot use
SetInputSpec
to change or terminate the input spec. Instead, you must first send the
Cancel
message to cancel the current input spec.
You can look at incoming data outside the scope of your
InputScript
or
PartialScript
method by calling the method
Partial
. This method returns
data from the input buffer but doesn't remove it from the buffer. You can use this
method to sample incoming data without affecting the normal operation of your
input spec and its callback methods. Note that this method is appropriate to use
only when receiving data of the forms
'string
and
'bytes
.

C H A P T E R 2 3
Endpoint Interface
23-20
Using the Endpoint Interface
IMPORTANT
Do not call the
Input
or
Partial
methods in a polling loop to
look for incoming data. The Newton communications architecture
requires a return to the main event loop in order to process
incoming data from the endpoint's underlying communication
tool. These methods are included as an alternate way of retrieving
data from the incoming data buffer, not as a way to implement
synchronous data receives.
To flush data from the input buffer, you can use the methods
FlushInput
and
FlushPartial
. The
FlushInput
method discards all data in the input buffer,
and
FlushPartial
discards all data read by the last call to the
Partial
method.
Streaming Data In and Out
23
Besides
protoBasicEndpoint
, there is another type of endpoint proto called
protoStreamingEndpoint
. The purpose of this streaming endpoint is to
provide a way to send and receive large frames without having first to flatten or
unflatten them.
Flattening refers to the process of converting a frame object into a stream of bytes.
Unflattening refers to the process of converting those bytes back into a frame object.
With the streaming endpoint, frame data is flattened or unflattened in chunks as it is
sent or received. This allows large objects to be sent and received without causing
the NewtonScript heap to overflow as a result of having to convert an entire object
at once.
The
protoStreamingEndpoint
proto is based on
protoBasicEndpoint
and includes a method,
StreamIn
, that allows you to receive streamed data. This
method automatically unflattens received data into a frame object in memory, and
can place embedded virtual binary objects directly on a store. Another method,
StreamOut
, allows you to send frame data as a byte stream. Note that these two
methods are synchronous; that is, they don't return until the operation is complete.
However, they do provide progress information during the operation by means of a
periodic callback.
Working With Binary Data
23
For receiving binary data, the data is returned as a raw byte stream. The data is not
converted and is block-moved directly into a binary object that you have
preallocated and specified as the target for the input.
To create this target object, specify a
target
frame in your input spec. This frame
contains a
data
slot and optionally an
offset
slot. The
data
slot contains the
preallocated binary (or virtual binary) object, while the
offset
slot is the offset

C H A P T E R 2 3
Endpoint Interface
Using the Endpoint Interface
23-21
within the binary object at which to stream data. For more information on receiving
binary data and using the
target
frame, see the section "Specifying the Data
Form and Target" beginning on page 23-13.
For sending data, the data is expected to be a binary object and is interpreted as a
raw byte stream. That is, the data is not converted and is passed directly to the
communication tool. This is the default data form for sending binary objects.
If you wish to send only a portion of your binary data at once, you can specify a
target
frame in the output spec. Within the
target
frame, the
offset
slot
defines the offset from the beginning of the binary object at which to begin sending
data, and the
length
slot defines the length of the data to send.
These binary capabilities are very useful if you wish to send and receive flattened
frames "packetized" for a communication protocol. By using the global function
Translate
, you can flatten a frame. Then you can packetize the transmission by
using the
target
frame in the output spec.
On the receiving end, you can preallocate a virtual binary object, and then assemble
the packets using the
target
frame in the input spec. Once all binary data has
been received, you can unflatten the frame using the
Translate
function again.
Canceling Operations
23
To stop endpoint operations, you can use the endpoint method
Cancel
or
Disconnect
. Endpoint operations can also be canceled indirectly as a result of a
time-out expiring. Remember that you can set a time-out for a request in the
callback spec that you pass to most endpoint methods, and you can set a time-out
in an input spec.
Note that you cannot specify what is canceled. When you or the system cancel
operations, all outstanding synchronous and asynchronous requests are canceled.
The cancellation process proceeds differently depending on whether you are
canceling asynchronous or synchronous requests that you have previously queued.
Following a cancellation, it is safe to proceed with other endpoint operations at
different times, according to the following rules:
If you use only asynchronous calls in your application, you can safely proceed
after you receive the
CompletionScript
message resulting from the
Cancel
call (or from the method whose time-out expired).
If you use only synchronous calls in your application, you can safely proceed
after the cancelled synchronous call throws an exception as a result of the
cancellation.
Mixing asynchronous and synchronous methods in your application is not
recommended. However, if you do so, you should treat the cancellation process as
if you had used all synchronous calls, and proceed only after an exception is thrown.

C H A P T E R 2 3
Endpoint Interface
23-22
Using the Endpoint Interface
The cancellation itself can be invoked asynchronously or synchronously, and is
handled differently in the system depending on how it's done. The details are
explained in the following subsections.
Asynchronous Cancellation
23
Cancellation can be invoked asynchronously in the following ways:
calling the
Cancel
method asynchronously, or calling the
Disconnect
method asynchronously with the cancelPending parameter set to
true
having a time-out expire for an asynchronous request
When cancellation is invoked asynchronously, the system first cancels all pending
asynchronous requests. This means that the
CompletionScript
message is sent
to the callback spec for each of these requests, and the
CompletionScript
result
parameter is set to 16005.
Note
When calling
Cancel
asynchronously, it is possible that
additional asynchronous requests might be queued (by a
CompletionScript
method) after the
Cancel
request is
queued but before it is executed. These additional requests will
fail with error 36003 since they will be processed after the
cancel process begins. In fact, any endpoint request that is made
while a cancel is in progress will fail with error 36003.
Next, the cancel request itself completes by sending the
CompletionScript
message. This message is sent to the callback spec passed to the
Cancel
(or
Disconnect
) method. Or, if the cancellation was invoked as the result of a
time-out expiration, the
CompletionScript
message is sent to the callback spec
of whatever method timed out (or to the input spec, if input was in progress).
Finally, any pending synchronous request is canceled by throwing an exception that
contains error code 16005.
Synchronous Cancellation
23
Cancellation can be invoked synchronously in the following ways:
calling the
Cancel
method synchronously, or calling the
Disconnect
method
synchronously with the cancelPending parameter set to
true
having a time-out expire for a synchronous request
When cancellation is invoked synchronously, the system first cancels any pending
asynchronous requests. This means that the
CompletionScript
message is sent
to the callback spec for each of these requests, and the
CompletionScript
result
parameter is set to 16005.

C H A P T E R 2 3
Endpoint Interface
Using the Endpoint Interface
23-23
Next, the
Cancel
(or
Disconnect
) method returns, and any pending
synchronous request is canceled by throwing an exception that contains error code
16005. Or, if the cancellation was invoked as the result of a time-out expiration,
then whatever method timed out throws an exception containing error code 16005.
Other Operations
23
The
Option
method allows you to get and set options apart from the options
parameter to the
Bind
,
Connect
,
Listen
,
Accept
, and
Output
methods.
You can check the state of a connection by calling the
State
method.
Custom communication tools can return special events to the endpoint object
through the
EventHandler
message. This message is sent to the endpoint
whenever an event occurs that is not handled by one of the usual endpoint event
handlers. A custom communication tool and an endpoint can use this mechanism to
pass events from the communication tool up to the endpoint layer.
Error Handling
23
By specifying an
ExceptionHandler
method in your endpoint, you can handle
exception conditions not caught by local
try...onexception
clauses, as well
as exceptions not caught by
CompletionScript
methods.
When you call an endpoint method synchronously, and an error occurs in that
method, the system throws an exception (usually of type
|evt.ex.comm|
). You
can catch these exceptions in your application by using the
try
. . .
onexception
construct. It's a good idea to bracket every endpoint method call
with this exception catching construct.
If an error occurs as a result of an asynchronous request, no exception is thrown,
but the error is returned in the result parameter to the
CompletionScript
method associated with that request. If you did not define a
CompletionScript
method, or if the error is unsolicited, the error is forwarded to your
ExceptionHandler
method. If you did not define an
ExceptionHandler
method, then the communication system throws an exception. This exception is
caught by the operating system, which displays a warning message to the user.
Constants for error codes generated by the Endpoint interface are defined in
"Endpoint Error Code Constants" (Table 20-4 on page 20-4) in Newton
Programmer's Reference
.
When you use the
Option
method (or any method that takes options as a
parameter), not only can the method itself fail, but a failure can occur in processing
each of the individual option requests. If the latter happens, the
result
slot in the
returned option frame is set to one of the option error codes listed in "Option Error
Code Constants" (Table 20-5 on page 20-5) in Newton Programmer's Reference. If

C H A P T E R 2 3
Endpoint Interface
23-24
Using the Endpoint Interface
an option succeeds without errors, the
result
slot is set to
nil
. For more general
information on setting options, see the section "Endpoint Options" beginning on
page 23-7.
Power-Off Handling
23
During send and receive operations, you may want to protect against the system
powering off so that the connection is not broken. The system can power-off
unexpectedly as a result of the user inadvertently turning off the power or as a
result of a low battery. If you want to be notified before the system powers off, you
can register a callback function that the system will call before the power is turned
off. Depending on the value you return from your callback function, you can
prevent, delay, or allow the power-off sequence to continue.
For details on registering power handling functions, see Chapter 17, "Additional
System Services."
Linking the Endpoint With an Application
23
If your endpoint is going to be driven by an application, you'll have a reference to
the endpoint frame in your application. Also, you'll probably want to have a
reference to your application base view in the endpoint frame, so you can handle
endpoint messages in your application through inheritance.
The easiest way to link the endpoint and application together is to create a slot in
your application base view like this:
ViewSetupFormScript: func ()
begin
self.fEndPoint: {_proto: protoBasicEndpoint,
_parent: self};
end
This creates an endpoint frame as a slot in the application base view at run time,
and makes the application base view (
self
here) the parent of the endpoint frame,
so it can receive endpoint messages through inheritance.

C H A P T E R 2 3
Endpoint Interface
Summary of the Endpoint Interface
23-25
Summary of the Endpoint Interface
23
Constants and Symbols
23
Data Form Symbols
23
'char
'number
'string
'bytes
'binary
'template
'frame
Data Type Symbols
23
'long
'ulong
'short
'byte
'char
'unicodechar
'boolean
'struct
'array
Option Opcode Constants
23
opSetNegotiate
256
opSetRequired
512
opGetDefault
768
opGetCurrent
1024

C H A P T E R 2 3
Endpoint Interface
23-26
Summary of the Endpoint Interface
Endpoint State Constants
23
Other Endpoint Constants
23
Data Structures
23
Option Frame
23
myOption := {
type:
symbol
, // option type
label:
string
, // 4-char option identifier
opCode:
integer
, // an opCode constant
form: 'template, // default form for options
result: nil, // set by the system on return
data: {
arglist: [], // array of data items
typelist:[], // array of data types
}
}
kUninit
0
kUnbnd
1
kIdle
2
kOutCon
3
kInCon
4
kDataXfer
5
kOutRel
6
kInRel
7
kInFlux
8
kOutLstn
9
kNoTimeout
0
kEOP
0
kMore
1
kPacket
2

C H A P T E R 2 3
Endpoint Interface
Summary of the Endpoint Interface
23-27
Callback Spec Frame
23
myCallbackSpec := {
async:
Boolean
, // asynch request?
reqTimeout:
integer
, // time-out period, or 0
CompletionScript: // called when request is done
func(
endpoint
,
options
,
result
)...,
}
Output Spec Frame
23
myOutputSpec := {
async:
Boolean
, // asynch request?
reqTimeout:
integer
, // time-out period, in milliseconds
sendFlags:
integer
, // flag constant(s)
form:
symbol
, // data form identifier
target: { // used for 'binary data forms
offset:
integer
, // offset to begin sending from
length:
integer
// number of bytes to send
},
CompletionScript: // called when request is done
func(
endpoint
,
options
,
result
)...,
}
Input Spec Frame
23
myInputSpec := {
form:
symbol
, // data form identifier
target: { // used with 'template and 'binary data forms
typelist: [], // array of data types
arglist: [], // array of data items
data:
object
, // binary object to receive data
offset:
integer
// offset at which to write data
},
termination: { // defines termination conditions
byteCount:
integer
, // number of bytes to receive
endSequence:
object
, // char,string,number,or byte array
useEOP:
Boolean
// terminate on EOP indicator?
},
discardAfter:
integer
, // buffer size
rcvFlags:
integer
, // receive flag constant(s)
reqTimeout:
integer
, // time-out period, in milliseconds

C H A P T E R 2 3
Endpoint Interface
23-28
Summary of the Endpoint Interface
filter: { // used to filter incoming data
byteProxy: [{ // an array of frames
byte:
char
, // char or byte to replace
proxy: char // replacement char or byte, or nil
}, ...],
sevenBit:
Boolean
// strip high-order bit
},
rcvOptions: [], // array of options, or a single frame
partialFrequency:
integer
,// freq, in milliseconds, to call
// PartialScript
InputScript: // called when input is terminated
func(
endpoint
,
data
,
terminator
,
options
)...,
PartialScript: // called at partialFrequency interval
func(
endpoint
,
data
)...,
CompletionScript: // called on unexpected completion
func(
endpoint
,
options
,
result
)...,
}
Protos
23
protoBasicEndpoint
23
myEndpoint := {
_proto: protoBasicEndpoint, // proto endpoint
encoding:
integer
,//encoding table,default=kMacRomanEncoding
Instantiate: // instantiates endpoint object
func(
endpoint
,
options
) ...,
Bind: // binds endpoint to comm tool
func(
options
,
callbackSpec
) ...,
UnBind: // unbinds endpoint from comm tool
func(
options
,
callbackSpec
) ...,
Dispose: // disposes endpoint object
func(
options
,
callbackSpec
) ...,
Connect: // establishes connection
func(
options
,
callbackSpec
) ...,
Listen: // passively listens for connection
func(
options
,
callbackSpec
) ...,
Accept: // accepts connection
func(
options
,
callbackSpec
) ...,
Disconnect: // disconnects
func(
cancelPending
,
callbackSpec
) ...,
Output: // sends data
func(
data
,
options
,
outputSpec
) ...,
SetInputSpec: // sets input spec
func(
inputSpec
)...,

C H A P T E R 2 3
Endpoint Interface
Summary of the Endpoint Interface
23-29
Input: // returns data from input buffer and clears it
func() ...,
Partial: // returns data from input buffer
func() ...,
FlushInput: // flushes whole input buffer
func() ...,
FlushPartial: // flushes input buffer previously read
func() ...,
Cancel: // cancels operations
func(
callbackSpec
) ...,
Option: // sets & gets options
func(
options
,
callbackSpec
) ...,
ExceptionHandler: // called on exceptions
func(
error
) ...,
EventHandler: // called on unhandled events
func(
event
) ...,
State: // returns endpoint state
func() ...,
...
}
protoStreamingEndpoint
23
myStreamEndpoint := {
_proto: protoStreamingEndpoint, // proto endpoint
StreamIn: // receives stream data
func({
form: 'frame, // required
reqTimeout:
integer
, // time-out in ms.
rcvFlags:
integer
, // receive flag constant(s)
target: {
store:
store
}, // store for VBOs
ProgressScript: // progress callback
func(
bytes
,
totalBytes
)...
}) ...,
StreamOut: // sends stream data
func(
data
,
{form: 'frame, // required
reqTimeout:
integer
, // time-out in ms.
sendFlags:
integer
, // send flag constant(s)
ProgressScript: // progress callback
func(
bytes
,
totalBytes
)...
}) ...,
...
}

C H A P T E R 2 3
Endpoint Interface
23-30
Summary of the Endpoint Interface
Functions and Methods
23
Utility Functions
23
MakeAppleTalkOption(
NBPaddressString
)
MakeModemOption()
MakePhoneOption(
phoneString
)
Translate(
data
,
translator
,
store
,
progressScript
)
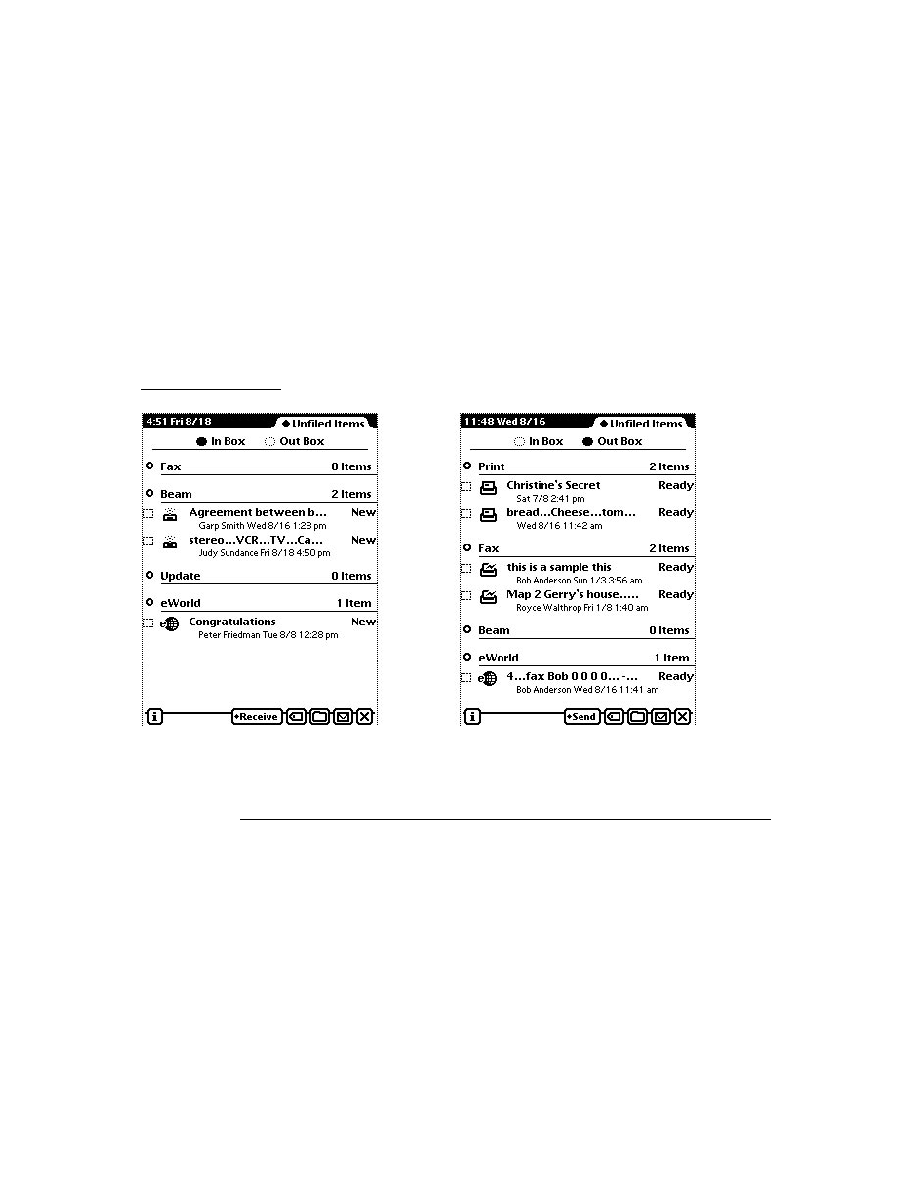
Serial Tool
24-1
C H A P T E R 2 4
Built-in Communications Tools
24
Figure 24-0
Table 24-0
This chapter describes the built-in communications tools provided in Newton
system software 2.0. The following tools are built into the system:
Serial
Modem
Infrared
AppleTalk
These communications tools are accessed and used through the Endpoint interface.
This chapter provides an introduction to each tool and the options that you use with
each. For detailed descriptions of the options, see "Built-in Communications Tools
Reference" (page 21-1) in Newton Programmer's Reference.
For basic information on using communications endpoints, see "Endpoint
Interface" (page 23-1).
Serial Tool
24
Three varieties of the serial tool are built into Newton system software:
a standard asynchronous serial tool
a standard asynchronous serial tool with Microcom Networking Protocol (MNP)
compression
a framed asynchronous serial tool
These serial tool varieties are described in the following three subsections.
Standard Asynchronous Serial Tool
24
You use the standard asynchronous serial communications tool to perform
standard, asynchronous communications, including sending and receiving data.

C H A P T E R 2 4
Built-in Communications Tools
24-2
Serial Tool
The following is an example of how to create an endpoint that uses the standard
asynchronous serial tool:
myAsyncEP := {_proto:protoBasicEndpoint};
myOptions := [
{ label: kCMSAsyncSerial,
type: 'service,
opCode: opSetRequired } ];
returnedOptions:= myAsyncEP:Instantiate(myAsyncEP,
myOptions);
Table 24-1 summarizes the standard serial options. Each of these options is
described in detail in "Options for the Standard Asynchronous Serial Tool"
(page 21-2) in Newton Programmer's Referencee.
Table 24-1
Summary of serial options
Label
Value
Use when
Description
kCMOSerialHWChipLoc
"schp"
Before or at
binding
Sets which serial
hardware to use.
kCMOSerialChipSpec
"sers"
Before or at
binding
Sets which serial
hardware to use and
returns information
about the serial
hardware.
kCMOSerialCircuitControl
"sctl"
After connecting
Controls usage of the
serial interface lines.
kCMOSerialBuffers
"sbuf"
Before or at
binding
Sets the size of the
input and output
buffers.
kCMOSerialIOParms
"siop"
Any time
Sets the bps rate, stop
bits, data bits, and
parity options.
kCMOSerialBitRate
"sbps "
Any time
Changes the bps rate.
kCMOOutputFlowControlParms
"oflc"
Any time
Sets output flow
control parameters.
kCMOInputFlowControlParms
"iflc"
Any time
Sets input flow
control parameters.
continued

C H A P T E R 2 4
Built-in Communications Tools
Serial Tool
24-3
You can get or set most of the standard serial options in the endpoint method that
established the state, as shown in Table 24-1. You set the endpoint options by passing
an argument to the communications tool when calling one of the endpoint methods
such as
Instantiate
,
Bind
, and
Connect
. For example, when you pass an
option to the
Bind
method, the system sets the option and then does the binding.
Many of the communications options can only be used when the communications
tool is in a certain state. For example, the first option in Table 24-1,
kCMOSerialHWChipLoc
, can only be used after the endpoint has been instantiated
and before the binding is made. That means you could use it in the
Instantiate
and
Bind
methods, but not in the
Connect
method.
All of these options have default values, so you may not need to use an option if
the default values provide the behavior you want. However, the default values do
not apply partially. This means that if you do use an option, you must specify a
value for each field within it.
kCMOSerialBreak
"sbrk"
After connecting
Sends a break.
kCMOSerialDiscard
"sdsc"
After connecting
Discards data in input
and/or output buffer.
kCMOSerialEventEnables
"sevt"
Any time
Configures the serial
tool to complete an
endpoint event on
particular state
changes.
kCMOSerialBytesAvailable
"sbav"
After connecting
Read-only option
returns the number of
bytes available in the
input buffer.
kCMOSerialIOStats
"sios"
After connecting
Read-only option
reports statistics from
the current serial
connection.
kHMOSerExtClockDivide
"cdiv"
After binding
Used only with an
external clock to set
the clock divide factor.
Table 24-1
Summary of serial options (continued)
Label
Value
Use when
Description

C H A P T E R 2 4
Built-in Communications Tools
24-4
Serial Tool
Serial Tool with MNP Compression
24
The asynchronous serial communications tool with MNP compression works
just like a standard asynchronous serial endpoint, except that it uses MNP data
compression.
The following is an example that shows how to create an endpoint that uses the
serial tool with MNP compression:
myMnpEP := {_proto:protoBasicEndpoint};
myOptions := [
{ label: kCMSMNPID,
type: 'service,
opCode: opSetRequired } ];
returnedOptions:= myMnpEP:Instantiate(myMnpEP,
myOptions);
The serial tool with MNP endpoint uses all of the standard serial options, as well as
two MNP options, which are summarized in Table 24-2. These options are
described in detail in "Options for the Serial Tool with MNP Compression"
(page 21-27) in Newton Programmer's Reference.
Framed Asynchronous Serial Tool
24
The framed asynchronous serial communications tool is a superset of the standard
asynchronous serial communications tool. This tool supports the sending and
receiving of framed data. If you use this tool and do not specify framing for a send
or receive operation, the framed asynchronous serial tool works exactly like the
standard asynchronous serial tool.
When you use framing for input, the framed asynchronous serial tool discards
characters until a start of frame sequence is detected and terminates input with an
end-of-file (EOF) indication when the end-of-frame sequence is detected. The tool
reports an error is if a CRC error is detected.
When you use framing for output, the data is prefixed with the start-of-frame
sequence. The end-of frame-sequence and the calculated CRC are sent at the end of
the data. The escape character is used for data transparency during framed operations.
Table 24-2
Summary of serial tool with MNP options
Label
Value
Use when
Description
kCMOMNPCompression
"mnpc"
Before connecting
Sets the data compression type.
kCMOMNPDataRate
"eter"
Any time
Configures internal MNP timers.

C H A P T E R 2 4
Built-in Communications Tools
Serial Tool
24-5
An endpoint can include
kPacket
,
kEOP
, and
kMore
flags to control the sending
and receiving of framed (packetized) data with the framed asynchronous serial
tool. For more information on these flags, see "Sending Data" (page 23-11).
The following is an example that shows how to create an endpoint that uses the
framed asynchronous serial tool:
myFramedEP := {_proto:protoBasicEndpoint};
myOptions := [
{ label: kCMSFramedAsyncSerial,
type: 'service,
opCode: opSetRequired } ];
returnedOptions:= myFramedEP:Instantiate(myFramedEP,
myOptions);
The framed asynchronous serial tool uses the standard asynchronous serial tool
options, as well as two framing options, which are summarized in Table 24-3.
These options are described in detail in "Options for the Framed Asynchronous
Serial Tool" (page 21-29) in Newton Programmer's Reference.
The default settings for the
kCMOFramingParms
option implement BSC framing,
as shown in Figure 24-1.
Figure 24-1
Default serial framing
Each packet is framed at the beginning by the 3-character SYN-DLE-STX header.
The packet data follows; if a DLE (escape character) occurs in the data stream,
Table 24-3
Summary of framed serial options
Label
Value
Use when
Description
kCMOFramingParms
"fram"
Any time
Configures data framing parameters.
kCMOFramedAsyncStats
"frst"
Any time
Read-only option returns the number
of bytes discarded while looking for
a valid header.
Octet 1
SYN
Flag
0001011
DLE
Flag
0001000
STX
Flag
0000001
Message . . .
DLE
Flag
0001000
ETX
Flag
0000001
Frame
Check
Sequence
2
3
. . . . . . . . . . . . . . . . . .
N-3
N-2
N-1
N

C H A P T E R 2 4
Built-in Communications Tools
24-6
Modem Tool
both that character and an additional DLE character are sent; conversely, two
consecutive DLE characters on input are turned into a single DLE data byte. The
packet is framed at the end by the 2-character DLE-ETX trailer. Finally, a
2-character frame check sequence is appended. This frame check is initialized to
zero at the beginning, and calculated on just the data bytes and the final ETX
character, ignoring the header bytes, any inserted DLE characters, and the DLE
character in the trailer.
The frame trailer is sent when an output is done that specifies end of frame.
Conversely, on input, when a trailer is detected, the input is terminated with an
end of frame indication; if a CRC error is detected,
kSerErr_CRCError
is
returned instead.
Modem Tool
24
The modem communications tool includes built in support of V.42 and V.42bis.
The alternate error-correcting protocol in V.42, also known as MNP, is supported
(LAPM is not implemented). V.42bis data compression and MNP Class 5 data
compression are supported.
The following is an example of how to create an endpoint that uses the built-in
modem communications tool:
myModemEP := {_proto:protoBasicEndpoint};
myOptions := [
{ label: kCMSModemID,
type: 'service,
opCode: opSetRequired } ];
results := myModemEP:Instantiate(myModemEP, myOptions);
Table 24-4 summarizes the modem options you can use to configure the modem
communications tool. These options are described in detail in "Options for the
Modem Tool" (page 21-31) in Newton Programmer's Reference.

C H A P T E R 2 4
Built-in Communications Tools
Modem Tool
24-7
Table 24-4
Summary of modem options
Label
Value
Use When
Description
kCMOModemPrefs
"mpre"
Any time
Configures the modem
controller.
kCMOModemProfile
"mpro"
Any time
Override modem setup
selected in preferences. Use
when instatiating.
kCMOModemECType
"mecp"
Any time
Specifies the type of error
control protocol to be used in
the modem connection.
kCMOModemDialing
"mdo"
Any time
Controls the parameters
associated with dialing.
kCMOModemConnectType
"mcto"
Any time
Configures the modem
endpoint for the type of
connection desired (voice,
fax, data, or cellular data).
kCMOModemConnectSpeed
"mspd"
After
connecting
Read-only option indicating
modem-to-modem raw
connection speed.
kCMOModemFaxCapabilities
"mfax"
After bind,
before
connecting
Read-only option indicating
the fax service class
capabilities and modem
modulation capabilities.
kCMOModemFaxEnabledCaps
"mfec"
Any time
Determines or sets which
fax and modem capabilities
are enabled.
This option is available
only for System Software
version 2.1 or later.
kCMOModemVoiceSupport
"mvso"
After bind,
before
connecting
Read-only option indicating if
the modem supports line
current sense (LCS).
kCMOMNPSpeedNegotiation
"mnpn"
Any time
Sets MNP data rate speed.
kCMOMNPCompression
"mnpc"
Before
connecting
Sets the data compression
type.
kCMOMNPStatistics
"mnps"
After
connecting
Read-only option reporting
performance statistics from
the current MNP connection.

C H A P T E R 2 4
Built-in Communications Tools
24-8
Infrared Tool
Infrared Tool
24
You use the infrared (IR) communications tool to perform half-duplex infrared
communications. Since the infrared tool does not support full-duplex communica-
tions, you cannot activate an input specification and expect to output data.
The infrared tool supports packetized data, which means that an endpoint can
include
kPacket
,
kEOP
, and
kMore
flags to control sending and receiving framed
(packetized) data. For more information on these flags, see "Sending Data"
(page 23-11).
The following is an example of how to create an endpoint that uses the infrared
communications tool:
myIrEP := {_proto:protoBasicEndpoint};
myOptions := [
{ label: kCMSSlowIR,
type: 'service,
opCode: opSetRequired }
];
returnedoptions:= myIrEP:Instantiate(myIrEP, myOptions);
The infrared tool supports three options, which are summarized in Table 24-5.
These options are described in detail in "Options for the Infrared Tool"
(page 21-65) in Newton Programmer's Reference.
Table 24-5
Summary of Infrared Options
Label
Value
Use when
Description
kCMOSlowIRConnect
"irco"
When initiating,
connecting, or
listening
Controls how the
connection is made
kCMOSlowIRProtocolType
"irpt"
After connecting
or accepting
Read-only option returns
the protocol and speed of
the connection
kCMOSlowIRStats
"irst"
After connecting
or accepting
Read-only option returns
statistics about the data
received and sent

C H A P T E R 2 4
Built-in Communications Tools
AppleTalk Tool
24-9
The infrared tool uses the Sharp Infrared protocol. Because of the characteristics of
this protocol, Apple recommends setting
sendFlags
to
kPacket
and to
kEOP
every time you send data. For more information on
sendFlags
see, "Sending
Data" (page 23-11).
If you don't set
sendFlags
as recommended above, the tool only sends data after
it queues 512 bytes of data, which means that input scripts do not terminate as you
might expect. On the receiving side, the queuing means you terminate after every
output if you set
useEOP
to
true
. If you are using
byteCount
, you should set
useEOP
to
nil
to trigger on
byteCount
instead of
EOP
. For more information on
useEOP
and
byteCount
, see "Specifying Data Termination Conditions"
(page 23-14).
AppleTalk Tool
24
The AppleTalk tool enables access to the ADSP (Apple Data Stream Protocol
component of the AppleTalk protocol stack.
The following is an example of how to create an AppleTalk endpoint:
myATalkEP := {_proto:protoBasicEndpoint};
myOptions := [
{ label: kCMSAppleTalkID,
type: 'service,
opCode: opSetRequired
},
{ label: kCMSAppleTalkID,
type: 'option,
opCode: opSetRequired,
data:
{ arglist: ["adsp"],// or KCMOAppleTalkADSP
typelist:[
'struct
['array, 'char, 4]
]
}
},
{ label: kCMOEndpointName,
type: 'option,
opCode: opSetRequired,
data: { arglist: [kADSPEndpoint],
typelist:[
'struct
['array, 'char, 0]
]

C H A P T E R 2 4
Built-in Communications Tools
24-10
Resource Arbitration Options
}
} ];
results := myATalkEP:Instantiate(myATalkEP, myOptions);
The AppleTalk tool options are summarized in Table 24-6. These options are
described in detail in "Options for the AppleTalk Tool" (page 21-71) in Newton
Programmer's Reference.
Resource Arbitration Options
24
You can construct a communications tool to share its resources with other
communications tools. For example, you might need to use a hardware port that
other tools want to use. This section describes how you can implement resource
sharing in your communications tool.
The communications tool base provides a default implementation of resource
arbitration that uses two options to control the release of a tool's resources:
The resource-passive claim option (
kCMOPassiveClaim
) has a Boolean
value that specifies whether or not a communications tool is claiming its
resources passively or actively. If this value is
true
, the communications tool is
Table 24-6
Summary of AppleTalk options
Label
Value
Use When
Description
kCMARouteLabel
"rout"
When connecting
or listening
Sets an AppleTalk
NBP address.
kCMOAppleTalkBuffer
"bsiz"
When connecting,
listening, or
accepting
Sets the size of the
send, receive, and
attention buffers.
kCMOSerialBytesAvailable
"sbav"
After connecting
Read-only option
returns the number of
bytes available in the
receive buffer.
kCMSAppleTalkID
"atlk"
For instantiation
Specifies AppleTalk
tool type.
kCMOEndpointName
"endp"
For instantiation
Specifies AppleTalk
endpoint. Must be used
as above.

C H A P T E R 2 4
Built-in Communications Tools
Resource Arbitration Options
24-11
claiming its resources passively and will allow another tool to claim it. If this
value is
nil
, the communications tool is claiming its resources actively and will
not allow another tool to claim it.
The resource-passive state option (
kCMOPassiveState
) has a Boolean value
that specifies whether or not the current state of the communications tool
supports releasing resources. If this value is set, and
kCMOPassiveClaim
is
true
, your communications tool is willing to relinquish use of its passively
claimed resources. If this value is
nil
, the communications tool is not willing to
relinquish use of its passively claimed resources.
Table 24-7 shows the resource arbitration options. These options are described in
detail in "Options for Resource Arbitration" (page 21-82) in Newton Programmer's
Reference.
The following example demonstrates how to instruct a communications tool to
claim its resources passively. You must do this before binding the tool. By default
all tools are claimed actively.
{
label: kCMOPassiveClaim,
type: 'option,
opCode: opSetRequired,
data: {
arglist: [
true, // passively claim modem
],
typelist: [
kStruct,
kBoolean,
]
}
}
Table 24-7
Resource arbitration options
Label
Value
Use when
Description
kCMOPassiveClaim
"cpcm"
Before bind
Specifies whether your tool claims
resources actively or passively
kCMOPassiveState
"cpst"
Typically
on listen
Specifies whether your tool releases
resources

C H A P T E R 2 4
Built-in Communications Tools
24-12
AppleTalk Functions
The following example shows how to instruct a communications tool to allow its
resources to be claimed by another tool. For instance, you might send this option
with an
arglist
value of
true
if you are listening for an incoming connection.
The default for all tools is to be in an active state.
{
label: kCMOPassiveState,
type: 'option,
opCode: opSetRequired,
data: {
arglist: [
true, // passively claim modem
},
typelist: [
kStruct,
kBoolean,
]
}
AppleTalk Functions
24
The Newton system software provides a number of global functions for obtaining
the addresses of other devices on the network.
If you are using an endpoint with the AppleTalk tool, the AppleTalk drivers are
opened automatically when you call the endpoint
Bind
method. The drivers are
closed when you call the endpoint
UnBind
method.
To manually open the AppleTalk drivers, you need to call the
OpenAppleTalk
function. When you are done with AppleTalk, call the
CloseAppleTalk
function
to close the drivers.
Note that you call the AppleTalk zone access functions without first calling
OpenAppleTalk
. Each of the AppleTalk zone access functions opens the drivers
(if necessary), performs its operations, and closes the drivers (if necessary). If you
are making multiple AppleTalk calls, it is more efficient for you to manually open
the drivers, make your calls, and then close the drivers.
Table 24-8 summarizes the AppleTalk functions. These functions are described in
detail in "AppleTalk Functions" (page 21-76) in Newton Programmer's Reference.

C H A P T E R 2 4
Built-in Communications Tools
AppleTalk Functions
24-13
The Net Chooser
24
The Newton system provides a NetChooser as part of the root view. The Net
Chooser is similar in operation to the Mac OS Chooser. You can use the function
GetRoot().NetChooser:OpenNetChooser
to display a list of network entities
from which the user can make a selection. This function is declared as follows:
NetChooser:OpenNetChooser(
zone
,
lookupName
,
startSelection
,
who
,
connText
,
headerText
,
lookforText
)
The
OpenNetChooser
method displays the NetChooser view on the user's
screen. The following is an example that shows the use of this function:
GetRoot().NetChooser:openNetChooser(nil,"=:LaserWriter@",ni
l, self, "Use printer, sir", "Printer", "printers");
This example opens the NetChooser view and displays the lookforText string while
the search is in progress, as shown in Figure 24-2 (page 24-14).
Table 24-8
AppleTalk functions
Function
Description
OpenAppleTalk
Opens the AppleTalk drivers.
CloseAppleTalk
Closes the AppleTalk drivers.
AppleTalkOpenCount
Returns the open count for the AppleTalk drivers.
HaveZones
Returns
true
if a connection exists and zones are
available. Returns
nil
if there are no zones.
GetMyZone
Returns a string naming the current AppleTalk zone.
GetZoneList
Returns an array containing strings of all the existing
zone names
GetNames
Returns the name for a network address or an array
of names for an array of network addresses.
GetZoneFromName
Returns the zone name for a network address.
NBPStart
Begins a lookup of network entities.
NBPGetCount
Returns the number of entities the currently running
NBP lookup has found.
NBPGetNames
Returns an array of names found by
NBPStart
.
NBPStop
Terminates a lookup started by
NBPStart
.

C H A P T E R 2 4
Built-in Communications Tools
24-14
AppleTalk Functions
Figure 24-2
NetChooser view while searching
When the search has been completed, the NetChooser fills in the available choices
and allows the user to make a selection, as shown in Figure 24-3.
Figure 24-3
NetChooser view displaying printers
After the user has made a selection, the system calls a method that you provide
named
NetworkChooserDone
. The system fills in the parameters to this
method with the name of the selection and zone chosen by the user. The
NetworkChooserDone
method must have the following format:
myChooser
:NetworkChooserDone(
currentSelection
,
currentZone
)
The two parameters, currentSelection and currentZone, are filled in by the system
after the user makes a choice.

C H A P T E R 2 4
Built-in Communications Tools
AppleTalk Functions
24-15
The following is an example that shows the use of this function:
ChooserSample := {
// open network connection
openNetworkScript: func()
begin
GetRoot().NetChooser:openNetChooser(nil,"=:LaserWriter@",ni
l, self, "Use printer, sir", "Printer", "printers");
end,
// called when the user selects an item
networkChooserDone: func(currentSelection, currentZone)
begin
Print("Current Selection =" && currentSelection);
Print("Current Zone =" && currentZone);
end
};
The following is an example of running this code in the inspector:
ChooserSample:OpenNetworkScript()
#1A TRUE
// select the network entity, close the Chooser
"Current Selection = Idiot Savante"
"Current Zone = RD1/NewHaven-LocalTalk"
The NetChooser methods are described in detail in "NetChooser Methods"
(page 21-81) in Newton Programmer's Reference.

C H A P T E R 2 4
Built-in Communications Tools
24-16
Summary
Summary
24
Built-in Communications Tool Service Option Labels
24
kCMSAsyncSerial
"aser"
kCMSMNPID
"mnps"
kCMSModemID
"mods"
kCMSSlowIR
"slir"
kCMSFramedAsyncSerial
"fser"
kCMSAppleTalkID
"atlk"
Options
24
Asynchronous Serial Tool Options
24
kCMOSerialHWChipLoc
"schp"
kCMOSerialChipSpec
"sers"
kCMOSerialCircuitControl
"sctl"
kCMOSerialBuffers
"sbuf"
kCMOSerialIOParms
"siop"
kCMOSerialBitRate
"sbps "
kCMOOutputFlowControlParms
"oflc"
kCMOInputFlowControlParms
"iflc"
kCMOSerialBreak
"sbrk"
kCMOSerialDiscard
"sdsc"
kCMOSerialEventEnables
"sevt"
kCMOSerialBytesAvailable
"sbav"
kCMOSerialIOStats
"sios"
kHMOSerExtClockDivide
"cdiv"
Serial with MNP Tool Options
24
kCMOMNPCompression
"mnpc"
kCMOMNPDataRate
"eter"

C H A P T E R 2 4
Built-in Communications Tools
Summary
24-17
Framed Serial Tool Options
24
kCMOFramingParms
"fram"
kCMOFramedAsyncStats
"frst"
Modem Options
24
kCMOModemPrefs
"mpre"
kCMOModemProfile
"mpro"
kCMOModemECType
"mecp"
kCMOModemDialing
"mdo"
kCMOModemConnectType
"mcto"
kCMOModemConnectSpeed
"mspd"
kCMOModemFaxCapabilities
"mfax"
kCMOModemFaxEnabledCaps
"mfec"
kCMOModemVoiceSupport
"mvso"
kCMOMNPSpeedNegotiation
"mnpn"
kCMOMNPCompression
"mnpc"
kCMOMNPStatistics
"mnps"
Infrared Tool Options
24
kCMOSlowIRConnect
"
irco
"
kCMOSlowIRProtocolType
"
irpt
"
kCMOSlowIRStats
"
irst
"
AppleTalk Tool Options
24
kCMARouteLabel
"
rout
"
kCMOAppleTalkBuffer
"
bsiz
"
kCMOSerialBytesAvailable
"
sbav
"
kCMSAppleTalkID
"atlk"
kCMOEndpointName
"endp"
Resource Arbitration Options
24
kCMOPassiveClaim
"cpcm"
kCMOPassiveState
"cpst"

C H A P T E R 2 4
Built-in Communications Tools
24-18
Summary
Constants
24
Serial Chip Location Option Constants
24
kHWLocExternalSerial
"extr"
kHWLocBuiltInIR
"infr"
kHWLocBuiltInModem
"mdem"
kHWLocPCMCIASlot1
"slt1"
kHWLocPCMCIASlot2
"slt2"
Serial Chip Specification Option Constants
24
kSerCap_Parity_Space
0x00000001
kSerCap_Parity_Mark
0x00000002
kSerCap_Parity_Odd
0x00000004
kSerCap_Parity_Even
0x00000008
kSerCap_DataBits_5
0x00000001
kSerCap_DataBits_6
0x00000002
kSerCap_DataBits_7
0x00000004
kSerCap_DataBits_8
0x00000008
kSerCap_DataBits_All
0x0000000F
kSerCap_StopBits_1
0x00000010
kSerCap_StopBits_1_5
0x00000020
kSerCap_StopBits_2
0x00000040
kSerCap_DataBits_All
0x00000070
kSerialChip8250
0x00
kSerialChip16450
0x01
kSerialChip16550
0x02
kSerialChip8530
0x20
kSerialChip6850
0x21
kSerialChip6402
0x22
kSerialChipUnknown
0x00

C H A P T E R 2 4
Built-in Communications Tools
Summary
24-19
Serial Circuit Control Option Constants
24
kSerOutDTR
0x01
kSerOutRTS
0x02
kSerInDSR
0x02
kSerInDCD
0x08
kSerInRI
0x10
kSerInCTS
0x20
kSerInBreak
0x80
Serial Configuration Option Constants
24
k1StopBits
0
k1pt5StopBits
1
k2StopBits
2
kNoParity
0
kOddParity
1
kEvenParity
2
k5DataBits
5
k6DataBits
6
k7DataBits
7
k8DataBits
8
kExternalClock
1
k300bps
300
k600bps
600
k1200bps
1200
k2400bps
2400
k4800bps
4800
k7200bps
7200
k9600bps
9600
k12000bps
12000
k14400bps
14400
k19200bps
19200
k38400bps
38400
k57600bps
57600
k115200bps
115200
k230400bps
230400

C H A P T E R 2 4
Built-in Communications Tools
24-20
Summary
Serial Event Configuration Option Constants
24
kSerialEventBreakStartedMask
0x00000001
kSerialEventBreakEndedMask
0x00000002
kSerialEventDCDNegatedMask
0x00000004
kSerialEventDCDAssertedMask
0x00000008
kSerialEventHSKiNegatedMask
0x00000010
kSerialEventHSKiAssertedMask
0x00000020
kSerialEventExtClkDetectEnableMask
0x00000040
Serial External Clock Divide Option Constants
24
kSerClk_Default
0x00
kSerClk_DivideBy_1
0x80
kSerClk_DivideBy_16
0x81
kSerClk_DivideBy_32
0x82
kSerClk_DivideBy_64
0x83
Modem Error Control Type Option Constants
24
kModemECProtocolNone
0x00000001
kModemECProtocolMNP
0x00000002
kModemECProtocolExternal
0x00000008
Modem Fax Capabilities Option Constants
24
kModemFaxClass0
0x00000001
kModemFaxClass1
0x00000002
kModemFaxClass2
0x00000004
kModemFaxClass2_0
0x00000008
kV21Ch2Mod
0x00000001
kV27Ter24Mod
0x00000002
kV27Ter48Mod
0x00000004
kV29_72Mod
0x00000008
kV17_72Mod
0x00000010
kV17st_72Mod
0x00000020
kV29_96Mod
0x00000040
kV17_96Mod
0x00000080
kV17st_96Mod
0x00000100

C H A P T E R 2 4
Built-in Communications Tools
Summary
24-21
kV17_12Mod
0x00000200
kV17st_12Mod
0x00000400
kV17_14Mod
0x00000800
kV17st_14Mod
0x00001000
MNP Compression Option Constants
24
kMNPCompressionNone
0x00000001
kMNPCompressionMNP5
0x00000002
kMNPCompressionV42bis
0x00000008
Infrared Protocol Type Option Constants
24
kUsingNegotiateIR
0
kUsingSharpIR
1
kUsingNewton1
2
kUsingNewton2
4
kUsing9600
1
kUsing19200
2
kUsing38400
4
Functions and Methods
24
AppleTalk Driver Functions
24
OpenAppleTalk()
CloseAppleTalk()
AppleTalkOpenCount()
AppleTalk Zone Information Methods
24
HaveZones()
GetMyZone()
GetZoneList()
GetNames(
fromWhat
)
GetZoneFromName(
fromWhat
)
NBPStart(
entity
)
NBPGetCount(
lookupID
)
NBPGetNames(
lookupID
)
NBPStop(
lookupID
)

C H A P T E R 2 4
Built-in Communications Tools
24-22
Summary
NetChooser Function
24
NetChooser:OpenNetChooser(
zone
,
lookupName
,
startSelection
,
who
,
connText
,
headerText
,
lookforText
)

About the Modem Setup Service
25-1
C H A P T E R 2 5
Modem Setup Service
25
Figure 25-0
Table 25-0
This chapter contains information about the modem setup capability in Newton
system software. You need to read this chapter if you want to define a modem setup
package for your application. The built-in modem communications tool uses these
packages for communicating with modems. For more information about the built-in
modem communications tool, see "Built-in Communications Tools" (page 24-1).
This chapter describes:
The modem setup service and how it works with modem setup packages.
The user interface for modem setup.
The modem characteristics required by the Newton modem tool.
The constants you use in defining a modem setup. These constants are described
in detail in "Modem Setup Service Reference" (page 22-1) in Newton
Programmer's Reference.
About the Modem Setup Service
25
This section provides detailed conceptual information on the modem setup service.
Specifically, it covers the following:
a description of the modem setup user interface
the programmatic process by which a modem is setup
modem requirements
The modem setup service allows many different kinds of modems to be used with
Newton devices. Each kind of modem can have an associated modem setup
package, which can configure a modem endpoint to match the particular modem.
A modem setup package is installed on the Newton as an automatically loaded
package. This means that when the package is loaded, the modem setup
information is automatically stored in the system soup and then the package is
removed. No icon appears for the modem setup in the Extras Drawer. Instead,
modem setups are accessed through a picker in the Modem preferences view.

C H A P T E R 2 5
Modem Setup Service
25-2
About the Modem Setup Service
Modem setup packages can be supplied by modem manufacturers, or can be
created by other developers.
A modem setup package can contain four parts:
General information. The beginning of a modem setup package specifies
general information about the modem corresponding to the package--for
example, the modem's name and version number.
A modem tool preferences option. The part of the package that contains
specifications that configure the modem controller. For a description of this
option, see "Modem Preferences Option" (page 21-34) in Newton Programmer's
Reference.
A modem tool profile option. This part of the package describes the
characteristics of the modem--for example, whether the modem supports error
correction protocols. For more information on this option, see the section
"Modem Profile Option" (page 21-38) in Newton Programmer's Reference.
A fax profile option. This part of the package describes the characteristics of
the fax--for example, the speed at which faxes can be sent and received. This
option is particularly useful to limit fax speeds over cellular connections.
If a modem supports both cellular and landline operations and does not
automatically configure itself, you need to create a separate modem profile or setup
for each operation. If you want to give the user the option to limit fax speeds,
which is a common practice with cellular connections, you may want a third profile
that specifies the fax profile option.
Note
The constants and code shown in this chapter apply to the
NTK project that is provided by Newton Technical Support. This
project provides an easy way to create modem setups.
The Modem Setup User Interface
25
The user chooses the current modem setup in the Modem preferences, as shown in
Figure 25-1 (page 25-3). The Modem Setup item is a picker, which when tapped
displays all of the modem setups installed in the system. The chosen modem setup
is the default used by all applications.

C H A P T E R 2 5
Modem Setup Service
About the Modem Setup Service
25-3
Figure 25-1
Modem preferences view
The Modem Setup Process
25
All communication applications that use a modem endpoint make use of the
modem setup service. The current modem setup is automatically invoked when
an application calls the modem endpoint's
Instantiate
method.
Note
If the modem endpoint option list includes the modem profile
option (
kCMOModemProfile
), the modem setup is not invoked.
This allows modem applications to override the modem setup
when configuring the modem for special purposes.
Here is what happens in the
Instantiate
method when the modem setup
is invoked:
1. The
kCMOModemPrefs
option is added to the endpoint configuration options,
and the
fEnablePassThru
field is set to
true
. This enables the endpoint to
operate in pass-through mode. In this mode, the modem endpoint is functionally
equivalent to a serial endpoint for input and output.
2. The modem endpoint is instantiated and connected in pass-through mode.
3. The Newton system software sets the modem preferences (
kCMOModemPrefs
),
modem profile (
kCMOModemProfile
), and fax profile
(
kCMOModemFaxCapabilities
) options as defined in the modem setup.
Note
A modem setup method is executed only once--when the
endpoint is instantiated--even if the endpoint is subsequently
used for multiple connections.

C H A P T E R 2 5
Modem Setup Service
25-4
About the Modem Setup Service
4. The modem endpoint is reconfigured with pass-through mode disabled, and
control is returned to the client application, which can proceed with its
Bind
and
Connect
calls.
"Defining a Modem Setup" (page 25-5) describes how to define a modem setup.
Modem Communication Tool Requirements
25
The Newton modem communication tool expects certain characteristics from a
modem. These characteristics are described here.
The modem tool expects a PCMCIA modem to use a 16450 or 16550 UART chip.
The modem tool expects hardware flow control in both serial and PCMCIA
modems. In modems not supporting hardware flow control, direct connect
support is required, and the modem profile constant
kDirectConnectOnly
must be set to
true
. This means that the modem tool and the modem must be
running at the same bit rate, allowing for no compression or error correction
protocols to be used by the modem. (When operating in direct connect mode,
the data rate of the modem tool is automatically adjusted to the data rate stated
in the "CONNECT SEXTETS" message.)
The modem tool expects control signals to be used as follows:
The modem tool uses RTS to control data flow from the modem.
The modem uses CTS to control data flow from the modem tool.
Support of the DCD signal is optional. In general, the modem tool expects
DCD to reflect the actual carrier state. The usage of this signal by the modem
tool is governed by the
kUseHardwareCD
constant.
The modem tool expects non-verbose textual responses from the modem.
The modem tool expects no echo.
The modem tool currently supports the Class 1 protocol for FAX connections;
under some circumstance (see the note below), the modem tool supports the
Class 2 protocol. The configuration string defined by the constant
kConfigStrNoEC
is used for sending and receiving FAX documents.
Additionally, these other requirements apply to the FAX service:
Flow control is required. In modems not supporting hardware flow control
(where
kDirectConnectOnly
=
true
), XON/XOFF software flow
control must be enabled.
Buffering must be enabled.
The
kConfigSpeed
constant must be set to higher than the highest connect
rate of which the modem is capable. For example, if the modem supports
14400, set
kConfigSpeed
to 19200; if the modem supports 28800, set
kConfigSpeed
to 54600.

C H A P T E R 2 5
Modem Setup Service
Defining a Modem Setup
25-5
Note
The modem tool has been upgraded to support the Class 2 and
Class 2.0 FAX protocols in release 2.1 of the Newton System
Software. This upgrade is also available in the German version
of release 2.0 of the Newton System Software. To enable the
use of these protocols, you must define the fax profile in your
modem setup.
Defining a Modem Setup
25
The parts of a modem setup are specified in a Newton Toolkit (NTK) text file,
which is provided by Newton Technical Support. The modem preferences and
profile options are specified by setting constants. The following sections describe
each part of the modem setup.
Setting Up General Information
25
The beginning of a modem setup contains general information about the setup and
the modem to which it corresponds. Here is an example:
constant kModemName
:= "Speedy Fast XL";
constant kVersion
:= 1;
constant kOrganization
:= "Speedy Computer, Inc.";
The value of
kModemName
appears in the Modem preferences. It is usually the
name of the modem. The constant
kVersion
identifies the (integer-only) version
of the modem setup package. The constant
kOrganization
indicates the source
of the modem setup package. For detailed descriptions of these constants, see
"Modem Setup General Information Constants" (page 22-2) in Newton
Programmer's Reference.
Setting the Modem Preferences Option
25
This modem option configures the modem controller. Here is an example:
constant kIdModem
:= nil;
constant kUseHardwareCD
:= true;
constant kUseConfigString
:= true;
constant kUseDialOptions
:= true;
constant kHangUpAtDisconnect
:= true;
For detailed descriptions of these constants, see "Modem Setup Preference
Constants" (page 22-3) in Newton Programmer's Reference. For more information

C H A P T E R 2 5
Modem Setup Service
25-6
Defining a Modem Setup
about the modem preferences option, see "Modem Preferences Option"
(page 21-34) in Newton Programmer's Reference.
Setting the Modem Profile Option
25
This modem profile option describes the modem characteristics, to be used by the
modem controller. Here is an example:
constant kSupportsEC
:= true;
constant kSupportsLCS
:= nil;
constant kDirectConnectOnly:= nil;
constant kConnectSpeeds
:= '[300, 1200, 2400, 4800,
7200, 9600, 12000, 14400];
constant kConfigSpeed
:= 38400;
constant kCommandTimeout
:= 2000;
constant kMaxCharsPerLine
:= 40;
constant kInterCmdDelay
:= 25;
constant kModemIDString
:= "unknown";
constant kConfigStrNoEC
:=
"ATE0&A0&B1&C1&H1&M0S12=12\n";
constant kConfigStrECOnly
:=
"ATE0&A0&B1&C1&H1&M5S12=12\n";
constant kConfigStrECAndFallbac
:=
"ATE0&A0&B1&C1&H1&M4S12=12\n";
constant kConfigStrDirectConnec
:=
"ATE0&A0&B0&C1&H0&M0S12=12\n";
For detailed descriptions of these constants, see "Modem Setup Profile Constants"
(page 22-4) in Newton Programmer's Reference. For more information about the
modem preferences option, see "Modem Profile Option" (page 21-38) in Newton
Programmer's Reference.
When the modem tool establishes communication with a modem through an
endpoint, the tool normally sends a configuration string to the modem (as long as
kUseConfigString
is
true
). Several configuration strings are defined in a
typical modem profile; the one that is sent depends on the type of connection
requested and other parameters set in the modem profile. Table 25-1 summarizes
when each kind of configuration string is used:

C H A P T E R 2 5
Modem Setup Service
Defining a Modem Setup
25-7
Setting the Fax Profile Option
25
The fax profile option describes the fax characteristics to be used by the fax tool.
Here is an example:
constant kTransmitDataMod
:=
kV21Ch2Mod + KV27Ter24Mod+ kV27Ter48Mod;
constant kReceiveDataMod:=
kV21Ch2Mod + KV27Ter24Mod + kV27Ter48Mod;
constant kServiceClass
:=
kModemFaxClass1 + kModemFaxClass2;
This example limits the faxing to 4800 bps for both send and receive messages. If
neither of these constants is defined, then the fax send and receive speeds are not
restricted.
Table 25-1
Summary of configuration string usage
Configuration string
When used
kConfigStrNoEC
The default configuration used for data
connections when
kDirectConnectOnly
is
nil
. Also used for FAX connections. See
"The No Error Control Configuration String"
(page 22-7) in Newton Programmer's Reference
for an example.
kConfigStrECOnly
Used for data connections that require error
correction. This configuration string is used
only if requested by an application. The
constant
kSupportsEC
must be
true
for this
configuration string to be used. See "The Error
Control Configuration String" (page 22-8) in
Newton Programmer's Reference for an example.
kConfigStrECAndFallback
Used for data connections that allow error
correction, but that can fall back to non-error-
corrected mode. This configuration string is
used only if requested by an application. See
"The Error Control with Fallback Configuration
String" (page 22-9) in Newton Programmer's
Reference for an example.
kConfigStrDirectConnect
The default configuration used for data
connections when
kDirectConnectOnly
is
true
. See "The Direct Connect Configuration
String" (page 22-9) in Newton Programmer's
Reference for an example.

C H A P T E R 2 5
Modem Setup Service
25-8
Defining a Modem Setup
Note
You can only set the service class (use the
kServiceClass
constant) for versions of the software that support the Class 2 fax
protocol. Newton System Software version 2.1 and the German
version of Newton System Software version 2.0 support the Class
2 fax protocol.
For detailed descriptions of these constants, see "Fax Profile Constants"
(page 22-10) in Newton Programmer's Reference.
The constants that you can use to specify speeds in defining your fax profile values
are shown in Table 22-5 (page 22-11) in Newton Programmer's Reference.

C H A P T E R 2 5
Modem Setup Service
Summary of the Modem Setup Service
25-9
Summary of the Modem Setup Service
25
Constants
25
Constants for Modem Setup General Information
25
kModemName
kVersion
kOrganization
Constants for Modem Setup Preferences
25
kIdModem
kUseHardwareCD
kUseConfigString
kUseDialOptions
kHangUpAtDisconnect
Constants for the Modem Setup Profile
25
kSupportsEC
kSupportsLCS
kDirectConnectOnly
kXonnectSpeeds
kXommandTimeout
kMaxCharsPerLine
kInterCmdDelay
kModemIDString
kConfigStrNoEC
kConfigStrECOnly
kConfigStrECAndFallback
kConfigStrDirectConnect
Constants for the fax profile
25
kTransmitDataMod
kReceiveDataMod
kServiceClass

C H A P T E R 2 5
Modem Setup Service
25-10
Summary of the Modem Setup Service
Fax Speed Constants
25
kV21Ch2Mod
kv27Ter24Mod
kV27Ter48Mod
kV29_72Mod
kV17_72Mod
kV17st_72Mod
kV29_96Mod
kV17_96Mod
kV17st_96Mod
kV17_12Mod
kV17st_12Mod
kV17st_14Mod
Fax Class Constants
25
kModemFaxClass0
kModemFaxClass1
kModemFaxClass2
kModemFaxClass2_0

26-1
C H A P T E R 2 6
Utility Functions
26
Figure 26-0
Table 26-0
This chapter provides a listing of a number of utility functions documented in the
"Utility Functions Reference" in the Newton Programmer's Reference. The
following groups of functions are included:
Object system
String
Bitwise
Array and sorted array
Integer Math
Floating point math
Control of floating point math
Financial
Exception handling
Message sending and deferred message sending
Data extraction
Data stuffing
Getting and Setting Global Variables
Miscellaneous
Four of the functions described in the Object system section are designed to clone,
or copy, objects. These functions each behave slightly differently. Table 26-1
summarizes their actions. The "Recurs" column indicates if references within the
object are copied. The "Follows magic pointers" column indicates if objects
referenced through magic pointers are copied. The "Ensures object is internal"
column indicates if the function ensures that all parts of the object exist in internal
RAM or ROM. The "Copies object" column indicates if the object is copied.

C H A P T E R 2 6
Utility Functions
26-2
Compatibility
Compatibility
26
This section describes the changes to the utility functions for Newton System
Software 2.0.
New Functions
26
The following new functions have been added for this release.
New Object System Functions
26
The following new object system functions have been added.
GetFunctionArgCount
IsCharacter
IsFunction
IsInteger
IsNumber
IsReadOnly
(existed in 1.0 but now documented)
IsReal
IsString
IsSubclass
(existed in 1.0 but now documented)
IsSymbol
MakeBinary
SetVariable
SymbolCompareLex
Table 26-1
Summary of copying functions
Function name
Recurs
Follows
magic pointers
Ensures object
is internal
Copies
object
Clone
--
--
--
yes
DeepClone
yes
yes
--
yes
EnsureInternal
yes
--
yes
as needed
TotalClone
yes
--
yes
yes

C H A P T E R 2 6
Utility Functions
Compatibility
26-3
New String Functions
26
The following new string functions have been added.
CharPos
LatitudeToString
LongitudeToString
StrExactCompare
StrFilled
(existed in 1.0 but now documented)
StrTokenize
StyledStrTruncate
SubstituteChars
New Array Functions
26
The following new array functions have been added.
ArrayInsert
InsertionSort
LFetch
LSearch
NewWeakArray
StableSort
New Sorted Array Functions
26
The following new functions have been added that operate on sorted arrays. These
functions are based on binary search algorithms, hence the "B" prefix to the
function names.
BDelete
BDifference
BFetch
BFetchRight
BFind
BFindRight
BInsert
BInsertRight
BIntersect
BMerge
BSearchLeft
BSearchRight

C H A P T E R 2 6
Utility Functions
26-4
Compatibility
New Integer Math Functions
26
The following new functions related to integer math have been added.
GetRandomState
SetRandomState
New Financial Functions
26
The following new functions that perform operations related to the currency
exchange rate have been added.
GetExchangeRate
SetExchangeRate
GetUpdatedExchangeRates
New Exception Handling Functions
26
The following new exception handling function has been added.
RethrowWithUserMessage
New Message Sending Functions
26
The following new utility functions for sending immediate messages have
been added.
IsHalting
PerformIfDefined
ProtoPerform
ProtoPerformIfDefined
New Deferred Message Sending Functions
26
The following new utility functions for delayed and deferred actions have been added.
AddDeferredCall
AddDelayedCall
AddProcrastinatedCall
AddDeferredSend
AddDelayedSend
AddProcrastinatedSend
These new functions replace
AddDelayedAction
and
AddDeferredAction
(although both remain in the ROM for compatibility with existing applications).
These two older functions have several problems, and you should not use them--
they will likely be removed in future versions of system software.

C H A P T E R 2 6
Utility Functions
Compatibility
26-5
New Data Stuffing Functions
26
The following new data stuffing functions have been added.
StuffCString
StuffPString
New Functions to Get and Set Globals
26
The following new functions that get, set, and check for the existence of global
variables and functions have been added.
GetGlobalFn
GetGlobalVar
GlobalFnExists
GlobalVarExists
DefGlobalFn
DefGlobalVar
UnDefGlobalFn
UnDefGlobalVar
New Debugging Functions
26
The following debugging functions have been added.
StrHexDump
TrueSize
ViewAutopsy
The following debugging functions have been changed.
StackTrace
BreakLoop
New Miscellaneous Functions
26
The following miscellaneous functions have been added.
AddMemoryItem
AddMemoryItemUnique
Backlight
BacklightStatus
BinEqual
Gestalt
GetAppName
GetAppPrefs
GetMemoryItems

C H A P T E R 2 6
Utility Functions
26-6
Compatibility
GetMemorySlot
MakePhone
MakeDisplayPhone
ParsePhone
PowerOff
Translate
Enhanced Functions
26
The following string function has been enhanced in Newton 2.0.
ParamStr
has been enhanced to support conditional substitution.
Obsolete Functions
26
Some utility functions previously documented in the Newton Programmer's Guide
are obsolete, but are still supported for compatibility with older applications. Do
not use the following utility functions, as they may not be supported in future
system software versions:
AddDeferredAction
(use
AddDeferredCall
instead)
AddDelayedAction
(use
AddDelayedCall
instead)
AddPowerOffHandler
(use
RegPowerOff
instead)
ArrayPos
(use
LSearch
instead)
GetGlobals (
use
GetGlobalVar
or
GetGlobalFn
instead)
RemovePowerOffHandler
(use
UnRegPowerOff
instead)
SmartStart
(use other string manipulation functions)
SmartConcat
(use other string manipulation functions)
SmartStop
(use other string manipulation functions)
StrTruncate
(use
StyledStrTruncate
instead)
StrWidth
(use
StrFontWidth
instead)

C H A P T E R 2 6
Utility Functions
Summary of Functions and Methods
26-7
Summary of Functions and Methods
26
Object System Functions
26
ClassOf(
object
)
Clone(
object
)
DeepClone(
object
)
EnsureInternal(
obj
)
GetFunctionArgCount(
function
)
GetSlot(
frame
,
slotSymbol
)
GetVariable(
frame
,
slotSymbol
)
HasSlot(
frame
,
slotSymbol
)
HasVariable(
frame
,
slotSymbol
)
Intern(
string
)
IsArray(
obj
)
IsBinary(
obj
)
IsCharacter(
obj
)
IsFrame(
obj
)
IsFunction(
obj
)
IsImmediate(
obj
)
IsInstance(
obj
,
class
)
IsInteger(
obj
)
IsNumber(
obj
)
IsReadOnly(
obj
)
IsReal(
obj
)
IsString(
obj
)
IsSubclass(
sub
,
super
)
IsSymbol(
obj
)
MakeBinary(
length
,
class
)
Map(
obj
,
function
)
PrimClassOf(
obj
)
RemoveSlot(
obj
,
slot
)
ReplaceObject(
originalObject
,
targetObject
)
SetClass(
obj
,
classSymbol
)
SetVariable(
frame
,
slotSymbol
,
value
)
SymbolCompareLex(
symbol1
,
symbol2
)
TotalClone(
obj
)
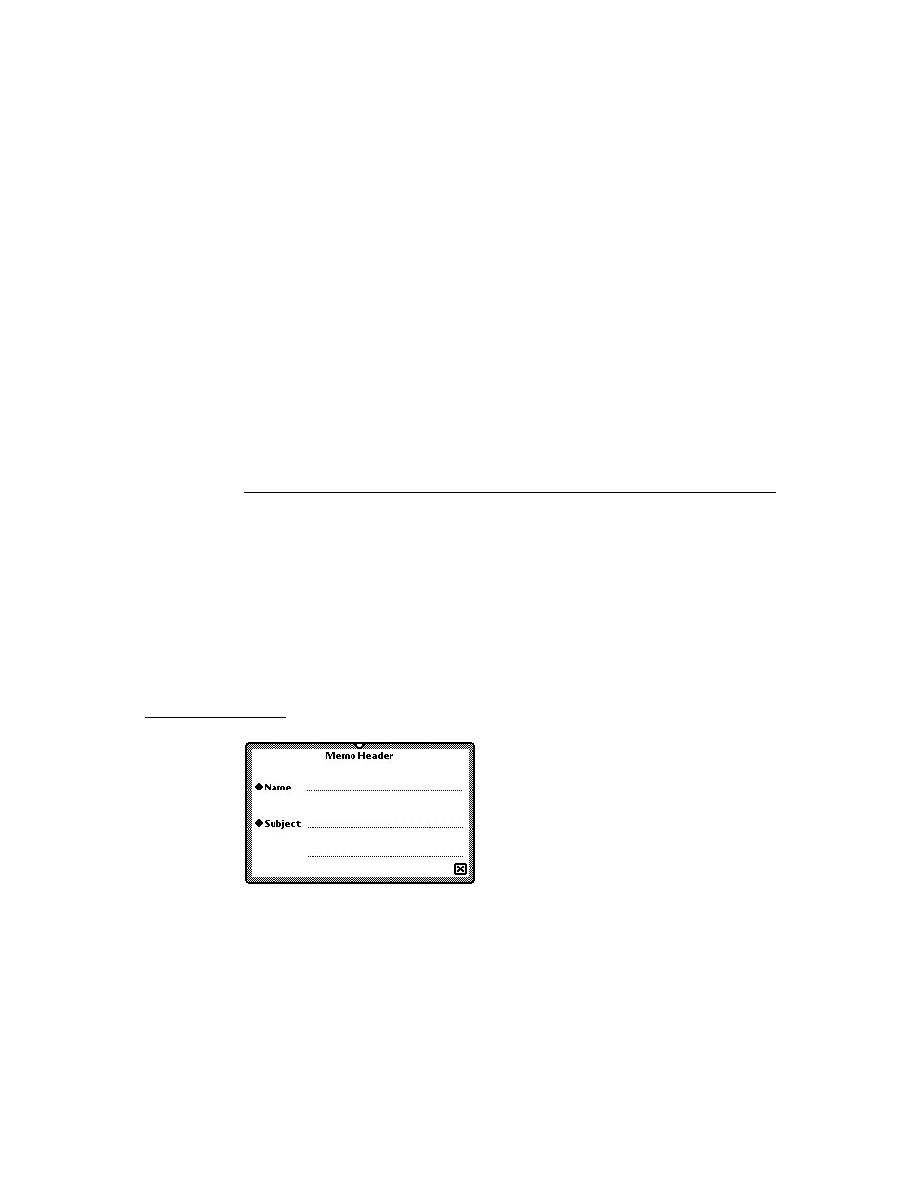
C H A P T E R 2 6
Utility Functions
26-8
Summary of Functions and Methods
String Functions
26
BeginsWith(
string
,
substr
)
Capitalize(
string
)
CapitalizeWords(
string
)
CharPos(
str
,
char
,
startpos
)
Downcase(
string
)
EndsWith(
string
,
substr
)
EvalStringer(
frame
,
array
)
FindStringInArray(
array
,
string
)
FindStringInFrame(
frame
,
stringArray
,
path
)
FormattedNumberStr(
number
,
formatString
)
IsAlphaNumeric(
char
)
IsWhiteSpace(
char
)
LatitudeToString(
latitude
)
LongitudeToString(
longitude
)
NumberStr(
number
)
ParamStr(
baseString
,
paramStrArray
)
SPrintObject(
obj
)
StrCompare(
a
,
b
)
StrConcat(
a
,
b
)
StrEqual(
a
,
b
)
StrExactCompare(
a
,
b
)
StrFilled(
string
)
StrFontWidth(
string
,
fontSpec
)
Stringer(
array
)
StringFilter(
str
,
filter
,
instruction
)
StringToNumber(
string
)
StrLen(
string
)
StrMunger(
dstString, dstStart, dstCount, srcString, srcStart, srcCount
)
StrPos(
string
,
substr
,
start
)
StrReplace(
string
,
substr
,
replacement
,
count
)
StrTokenize(
str
,
delimiters
)
StyledStrTruncate(
string
,
length
,
font
)
SubstituteChars(
targetStr
,
searchStr
,
replaceStr
)
SubStr(
string
,
start
,
count
)
TrimString(
string
)
Upcase(
string
)

C H A P T E R 2 6
Utility Functions
Summary of Functions and Methods
26-9
Bitwise Functions
26
Band(
a
,
b
)
Bor(
a
,
b
)
Bxor(
a
,
b
)
Bnot(
a
)
Array Functions
26
AddArraySlot (
array
,
value
)
Array(
size
,
initialValue
)
ArrayInsert(
array
,
element
,
position
)
ArrayMunger(
dstArray
,
dstStart
,
dstCount
,
srcArray
,
srcStart
,
srcCount
)
ArrayRemoveCount(
array
,
startIndex
,
count
)
InsertionSort(
array
,
test
,
key
)
Length (
array
)
LFetch(
array
,
item
,
start
,
test
,
key
)
LSearch(
array
,
item
,
start
,
test
,
key
)
NewWeakArray(
length
)
SetAdd (
array
,
value
,
uniqueOnly
)
SetContains(
array
,
item
)
SetDifference(
array1
,
array2
)
SetLength (
array
,
length
)
SetOverlaps(
array1
,
array2
)
SetRemove (
array
,
value
)
SetUnion(
array1
,
array2
,
uniqueFlag
)
Sort(
array
,
test
,
key
)
StableSort(
array
,
test
,
key
)
Sorted Array Functions
26
BDelete(
array
,
item
,
test
,
key
,
count
)
BDifference(
array1
,
array2
,
test
,
key
)
BFetch(
array
,
item
,
test
,
key
)
BFetchRight(
array
,
item
,
test
,
key
)
BFind(
array
,
item
,
test
,
key
)
BFindRight(
array
,
item
,
test
,
key
)
BInsert(
array
,
element
,
test
,
key
,
uniqueOnly
)
BInsertRight(
array
,
element
,
test
,
key
,
uniqueOnly
)
BIntersect(
array1
,
array2
,
test
,
key
,
uniqueOnly
)

C H A P T E R 2 6
Utility Functions
26-10
Summary of Functions and Methods
BMerge(
array1
,
array2
,
test
,
key
,
uniqueOnly
)
BSearchLeft(
array
,
item
,
test
,
key
)
BSearchRight(
array
,
item
,
test
,
key
)
Integer Math Functions
26
Abs(
x
)
Ceiling(
x
)
Floor(
x
)
GetRandomState()
Max(
a
,
b
)
Min(
a
,
b
)
Real(
x
)
Random (
low
,
high
)
SetRandomSeed (
seedNumber
)
SetRandomState(
randomState
)
Floating Point Math Functions
26
Acos(
x
)
Acosh(
x
)
Asin(
x
)
Asinh(
x
)
Atan(
x
)
Atan2(
x
,
y
)
Atanh(
x
)
CopySign(
x
,
y
)
Cos(
x
)
Cosh(
x
)
Erf(
x
)
Erfc(
x
)
Exp(
x
)
Expm1(
x
)
Fabs(
x
)
FDim(
x
,
y
)
FMax(
x
,
y
)
FMin(
x
,
y
)
Fmod(
x
,
y
)
Gamma(
x
)
Hypot(
x
,
y
)

C H A P T E R 2 6
Utility Functions
Summary of Functions and Methods
26-11
IsFinite(
x
)
IsNaN(
x
)
IsNormal(
x
)
LessEqualOrGreater(
x
,
y
)
LessOrGreater(
x
,
y
)
LGamma(
x
)
Log(
x
)
Logb(
x
)
Log1p(
x
)
Log10(
x
)
NearbyInt(
x
)
NextAfterD(
x
,
y
)
Pow(
x
,
y
)
RandomX(
x
)
Remainder(
x
,
y
)
RemQuo(
x
,
y
)
Rint(
x
)
RintToL(
x
)
Round(
x
)
Scalb(
x
,
k
)
SignBit(
x
)
Signum(
x
)
Sin(
x
)
Sinh(
x
)
Sqrt(
x
)
Tan(
x
)
Tanh(
x
)
Trunc(
x
)
Unordered(
x
,
y
)
UnorderedGreaterOrEqual(
x
,
y
)
UnorderedLessOrEqual(
x
,
y
)
UnorderedOrEqual(
x
,
y
)
UnorderedOrGreater(
x
,
y
)
UnorderedOrLess(
x
,
y
)
FeClearExcept(
excepts
)
FeGetEnv()
FeGetExcept(
excepts
)
FeHoldExcept()
FeRaiseExcept(
excepts
)
FeSetEnv(
envObj
)
FeSetExcept(
flagObj
,
excepts
)

C H A P T E R 2 6
Utility Functions
26-12
Summary of Functions and Methods
FeTestExcept(
excepts
)
FeUpdateEnv(
envObj
)
Financial Functions
26
Annuity(
r
,
n
)
Compound(
r
,
n
)
GetExchangeRate(
country1
,
country2
)
SetExchangeRate(
country1
,
country2
,
rate
)
GetUpdatedExchangeRates()
Exception Functions
26
Throw(
name
,
data
)
Rethrow()
CurrentException()
RethrowWithUserMessage(
userTitle
,
userMessage
,
override
)
Message Sending Functions
26
Apply(
function
,
parameterArray
)
IsHalting(
functionObject
,
args
)
Perform(
frame
,
message
,
parameterArray
)
PerformIfDefined(
receiver
,
message
,
paramArray
)
ProtoPerform(
receiver
,
message
,
paramArray
)
ProtoPerformIfDefined(
receiver
,
message
,
paramArray
)
Deferred Message Sending Functions
26
AddDeferredCall(
functionObject
,
paramArray
)
AddDelayedCall(
functionObject
,
paramArray
,
delay
)
AddDeferredSend(
receiver
,
message
,
paramArray
)
AddDelayedSend(
receiver
,
message
,
paramArray
,
delay
)
AddProcrastinatedCall(
funcSymbol
,
functionObject
,
paramArray
,
delay
)
AddProcrastinatedSend(
msgSymbol
,
receiver
,
message
,
paramArray
,
delay
)

C H A P T E R 2 6
Utility Functions
Summary of Functions and Methods
26-13
Data Extraction Functions
26
ExtractByte(
data
,
offset
)
ExtractBytes(
data
,
offset
,
length
,
class
)
ExtractChar(
data
,
offset
)
ExtractLong(
data
,
offset
)
ExtractXLong(
data
,
offset
)
ExtractWord(
data
,
offset
)
ExtractCString(
data
,
offset
)
ExtractPString(
data
,
offset
)
ExtractUniChar(
data
,
offset
)
Data Stuffing Functions
26
StuffByte(
obj
,
offset
,
toInsert
)
StuffChar(
obj
,
offset
,
toInsert
)
StuffCString(
obj
,
offset
,
aString
)
StuffLong(
obj
,
offset
,
toInsert
)
StuffPString(
obj
,
offset
,
aString
)
StuffUniChar(
obj
,
offset
,
toInsert
)
StuffWord(
obj
,
offset
,
toInsert
)
Getting and Setting Global Variables and Functions
26
GetGlobalFn(
symbol
)
GetGlobalVar(
symbol
)
GlobalFnExists(
symbol
)
GlobalVarExists(
symbol
)
DefGlobalFn(
symbol
,
function
)
DefGlobalVar(
symbol
,
value
)
UnDefGlobalFn(
symbol
)
UnDefGlobalVar(
symbol
)
Debugging Functions
26
BreakLoop()
DV(
view
)
GC()
ExitBreakLoop()
StackTrace()
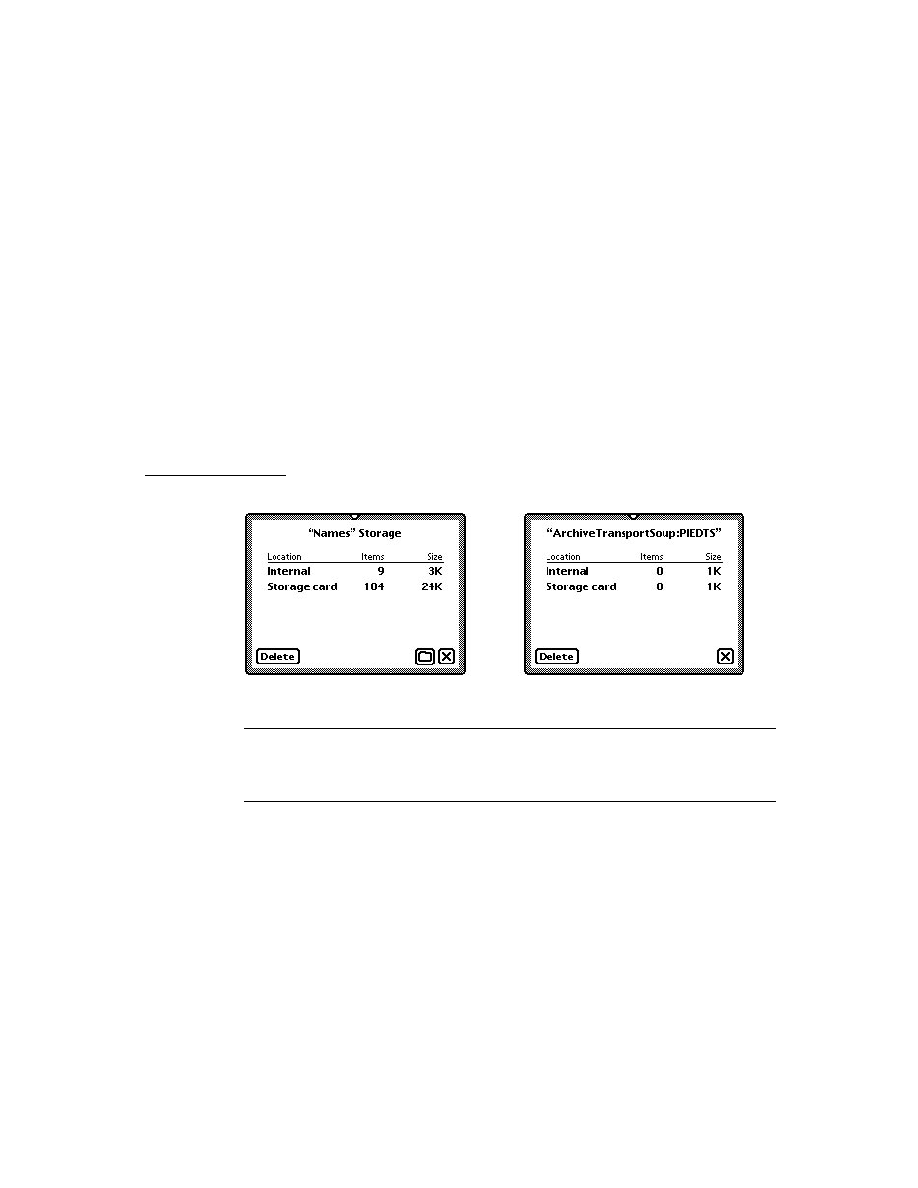
C H A P T E R 2 6
Utility Functions
26-14
Summary of Functions and Methods
Stats()
StrHexDump(
object
,
spaceInterval
)
TrueSize(
object
,
filter
)
ViewAutopsy(
functionSpec
)
Miscellaneous Functions
26
AddMemoryItem(
memSymbol
,
value
)
AddMemoryItemUnique(
memorySlot
,
value
,
testFunc
)
Backlight()
BacklightStatus(
state
)
BinEqual(
a
,
b
)
BinaryMunger(
dst
,
dstStart
,
dstCount
,
src
,
srcStart
,
srcCount
)
Chr(
integer
)
Compile(
string
)
Gestalt(
selector
)
GetAppName(
appSymbol
)
GetAppParams( )
GetAppPrefs(
appSymbol
,
defaultFrame
)
GetMemoryItems(
memSymbol
)
GetMemorySlot(
memorySlot
,
op
)
GetPrinterName(
printerFrame
) //platform file function
MakePhone (
phoneFrame
)
MakeDisplayPhone(
phoneStr
)
rootView
:MungePhone(
inNum
,
country
)
ParsePhone(
phoneStr
)
PowerOff(
reason
)
Ord (
char
)
RegEmailSystem(
classSymbol
,
name
,
internet
)
RegPagerType(
classSymbol
,
name
)
RegPhoneType with (
classSymbol
,
name
,
number
)
ShowManual()
Sleep(
ticks
)
rootView
:SysBeep()
Translate(
data
,
translator
,
store
,
callback
)
UnRegEmailSystem(
classSymbol
)
UnregPagerType(
classSymbol
)
UnregPhoneTypeFunc(
classSymbol
)

Compile-Time Results
A-1
A P P E N D I X
The Inside Story on Declare
A
This appendix describes the technical details of the declare mechanism. Knowing
these technical details is not necessary to understanding what declaring a view
means; they are provided primarily for completeness and to help you when you are
debugging. You shouldn't write code that depends on these details.
For a basic discussion of the declare mechanism, see the section "View Instantiation"
beginning on page 3-26. You should be familiar with that material before reading
this appendix.
To serve as an example here, imagine a calculator application whose base view is
named "Calculator." It has (among others) a child view named "Display." The
Display view is declared in the Calculator view. See Figure A-1 for an illustration
of this example.
In the following sections, we'll explain what happens at compile time and at run
time as a result of the declare operation. A number of slots are created, which
you may see in the Newton Toolkit (NTK) Inspector if you are examining the
view templates.
Compile-Time Results
26
As a result of the declare operation, at compile time, NTK creates a slot in the place
where the view is declared--that is, in the Calculator template. The name of the slot
is the name of the declared view,
Display
. This slot's value is initially set to
nil
.
Another slot, called
stepAllocateContext
, is also created in the Calculator
template. This slot holds an array of values (two for each view declared there). The
first value in each pair is a symbol used by the system at run time to identify the
name of the slot in the Calculator view that holds a reference to the declared view.
This symbol is simply the name of the declared view,
Display
.
The second value in each pair is a reference to the template for the declared view.
At run time, the system will preallocate a view memory object for the declared
view from this template.
Figure 27-0
Table 27-0

A P P E N D I X
A-2
Run-Time Results
Note
Protos built into the system use an analogous slot called
allocateContext
, that holds the same thing as
stepAllocateContext
. The
allocateContext
slot is for
declared children from the
viewChildren
array and the
stepAllocateContext
slot is for declared children from the
stepChildren
array.
Also, as a result of the declare operation, NTK creates a slot in the Display template
called
preallocatedContext
. This slot holds a symbol that is the name of the
template, in this case
'Display
. This symbol will be used by the system when the
view is instantiated to find the preallocated view memory object for the Display view.
Run-Time Results
26
When the Calculator view is opened (even before its
ViewSetupFormScript
method is executed), a view memory object is preallocated for each view declared
in Calculator. (The information required to do this is obtained from the
allocateContext
and
stepAllocateContext
slots.) In our example, a view
memory object is created for the Display view.
The
Display
slot in the Calculator view is updated so that it points to the newly
allocated Display view object.
Later in the instantiation process for the Calculator view, its child views are created
and shown, including the Display view. At this time, the view system looks at the
template for the Display view, sees the
preallocatedContext
slot, and knows
that a view memory object has been preallocated for this view. Using this slot, the
system can find the preallocated view.
The value of the
preallocatedContext
slot is the name of another slot in the
Calculator view. The system locates this slot in the Calculator view, and finds there
a reference to the preallocated view object. Instead of creating a new view object
for the Display view, the system uses the preallocated view.

A P P E N D I X
Run-Time Results
A-3
Figure A-1
Declare example
Calculator
Display
Display
{
preallocatedContext:
'Display
.
.
}
Calculator
As a result of the declare, two
slots are added to the Calculator
template. The
Display
slot will
eventually hold the address of the
Display view.
In the Calculator view, the
address of the newly created
Display view is stored in the
slot whose name matches the
first entry in the
stepAllocateContext
array in the Calculator
template.
Also as a result of the declare,
one slot is added to the Display
template. It holds the name of the
slot in the Calculator template
where its view address will be
stored.
Later, when the Display view is to
be shown, the system finds the
preallocated view by using the
preallocatedContext
slot
(in the template) and looking for a
slot with that name in the Calculator
view. That slot holds the address of
the preallocated Display view.
Templates
(compile time)
Views
(run time)
{
_proto:
Display: Display
.
.
}
{
Display:
nil
stepAllocateContext:
['Display, Display]
.
.}
When the
Calculator view
is opened, this
Display view is
preallocated.
{
_proto:
.
.
}


GL-1
Glossary
Action button The small envelope button used
in applications to invoke routing functions.
When tapped, it displays a picker listing routing
actions available for the current item.
alias An object that consists of a reference to
another object. An alias saves space, since the
alias object is small, and can be used to
reference very large objects. Resolving an alias
refers to retrieving the object that the alias
references. See also entry alias.
application base view The topmost parent
view in an application. The application base view
typically encloses all other views that make up
the application.
arc A portion of the circumference of an oval
bounded by a pair of radii joining at the oval's
center. Contrast a wedge, which includes part of
the oval's interior. Arcs and wedges are defined
by the bounding rectangle that encloses the oval,
along with a pair of angles marking the
positions of the bounding radii.
array A sequence of numerically indexed
slots (also known as the array elements) that
contain objects. The first element is indexed by
zero. Like other nonimmediate objects, an array
can have a user-specified class, and can have its
length changed dynamically.
away city The emporium that's displayed as a
counterpoint to your home city. It defines such
information as dialing area, time zone, and so
on. Sometimes it is called the "I'm here" city.
binary object A sequence of bytes that can
represent any kind of data, can be adjusted
dynamically in size, and can have a user-
specified class. Examples of binary objects
include strings, real numbers, sounds, and
bitmaps.
Boolean A special kind of immediate value. In
NewtonScript, there is only one Boolean, called
true
. Functions and control structures use
nil
to represent false. When testing for a true/false
value,
nil
represents false, and any other value
is equivalent to
true
.
button host An application that receives
buttons from other applications (button
providers).
button provider An application that adds a
button to another application (the button host).
callback spec A frame passed as an argument
to an endpoint method. The callback spec frame
contains slots that control how the endpoint
method executes, along with a completion
method that is called when the endpoint
operation completes. See also
output spec.
card Short for a PCMCIA card. Also, a view
of information about an entry in the Names
soup, formatted as a business card.
child A frame that references another
frame (its parent) from a
_parent
slot. With
regard to views, a child view is enclosed by
its parent view.
class A symbol that describes the data
referenced by an object. Arrays, frames, and
binary objects can have user-defined classes.
constant A value that does not change. In
NewtonScript the value of the constant is
substituted wherever the constant is used in code.

G L O S S A R Y
GL-2
cursor An object returned by the
Query
method. The cursor contains methods that iterate
over a set of soup entries meeting the criteria
specified in the query. The addition or deletion
of entries matching the query specification is
automatically reflected in the set of entries
referenced by the cursor, even if the changes
occur after the original query was made.
data definition A frame containing slots that
define a particular type of data and the methods
that operate on it. The entries defined are used
by an application and stored in its soup. A data
definition is registered with the system. The
shortened term dataDef is sometimes used. See
also view definition.
data form A symbol that describes the
transformations that must occur when data is
exchanged with other environments. When you
send data or set endpoint options, the data form
defines how to convert the data from its
NewtonScript format. When you receive data or
get endpoint options, the data form defines the
type of data expected.
declaring a template Registering a template
in another view (usually its parent) so that the
template's view is preallocated when the other
view is opened. This allows access to methods
and slots in the declared view.
deferred recognition The process of
recognizing an ink word that was drawn by the
user at an earlier time. Deferred recognition is
usually initiated when the user double-taps on
an ink word. See also ink and ink word.
desktop computer Either a Mac OS or
Windows-based computer. Sometimes called
simply "desktop."
emporium The permanent internal
descriptions of places the user works with the
Newton PDA. (Home and Office are obvious
examples, but so might be "Tokyo Office" if the
user travels a lot.) Choosing an emporium sets
up information such as local area code, dialing
prefixes, time zone, and so on. This term is
sometimes called "locale." The plural
is "emporia."
endpoint An object created from
protoBasicEndpoint
, or one of its
derivative protos, that controls a real-time
communication session. This object
encapsulates and maintains the details of the
specific connection, and allows you to control
the underlying communication tool.
endpoint option An endpoint option is
specified in a frame passed in an array as an
argument to one of the endpoint methods.
Endpoint options select the communication tool
to use, control its configuration and operation,
and return result code information from each
endpoint method call.
entry A frame stored in a soup and accessed
through a cursor. An entry frame contains
special slots that identify it as belonging to a
soup.
entry alias An object that provides a standard
way to save a reference to a soup entry. Entry
aliases themselves may be stored in soups.
enumerated dictionary A list of words that
can be recognized when this dictionary is
enabled. See also lexical dictionary.
EOP End of packet indicator.
evaluate slot A slot that's evaluated when
NTK (Newton Toolkit) compiles the application.
event An entry in the Dates application for a
day, but not a particular time during that day.
field An area in a view where a user can write
information.
finder A frame containing methods and/or
objects that enumerate data items found to
match criteria specified via the Find slip.
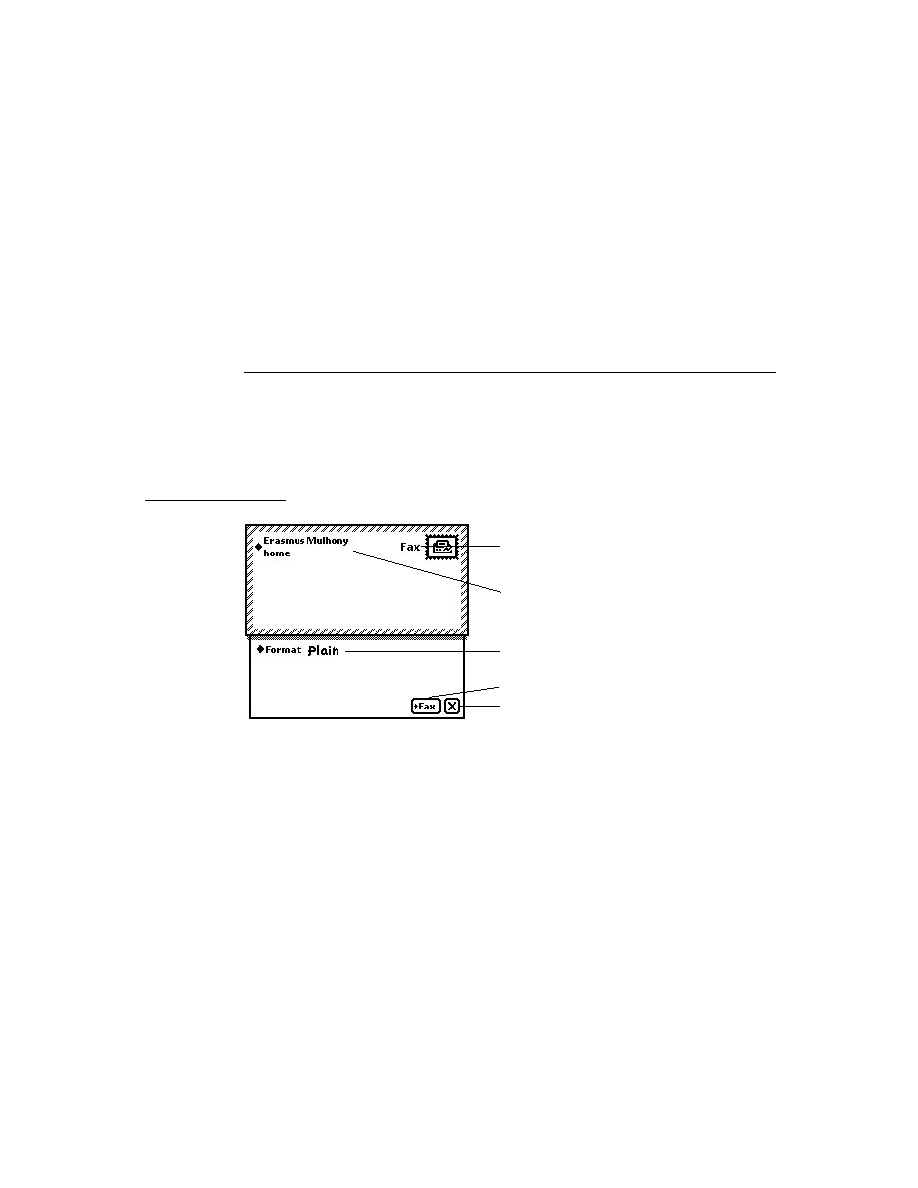
G L O S S A R Y
GL-3
flag
A value that is set either on or off to
enable a feature. Typically, flag values are single
bits, though they can be groups of bits or a
whole byte.
font spec A structure used to store information
about a font, including the font family, style, and
point size.
frame An unordered collection of slots, each
of which consists of a name and value pair. The
value of a slot can be any type of object, and
slots can be added or removed from frames
dynamically. A frame can have a user-specified
class. Frames can be used like records in Pascal
and structs in C, and also as objects that respond
to messages.
free-form entry field A field of a
protoCharEdit
view that accepts any
characters as user input.
function object A frame containing
executable code. Function objects are created by
the function constructor:
func(
args
)
funcBody
An executable function object includes values
for its lexical and message environment, as well
as code. This information is captured when the
function constructor is evaluated at run time.
gesture A handwritten mark that is recog-
nized as having a special meaning in the Newton
system, such as tap, scrub, caret, and so on.
global
A variable or function that is accessible
from any NewtonScript code.
grammar A set of rules defining the format of
an entity to be recognized, such as a date, time,
phone number, or currency value. Lexical
dictionaries are composed of sets of grammars.
See also lexical dictionary.
home city The emporium the system uses to
modify dialing information, time zone, and so
on. It is usually the user's home, but the user
may set it to another city when traveling.
immediate A value that is stored directly
rather than through an indirect reference to a
heap object. Immediates are characters, integers,
or Booleans. See also reference.
implementor The frame in which a method is
defined. See also receiver.
In/Out Box The application that serves as a
central repository for all incoming and outgoing
data handled by the Routing and Transport
interfaces.
inheritance The mechanism by which
attributes (slots or data) and behaviors (methods)
are made available to objects. Parent inheritance
allows views of dissimilar types to share slots
containing data or methods. Prototype inheritance
allows a template to base its definition on that of
another template or prototype.
ink
The raw data for input drawn by the user
with the stylus. Also known as raw ink or
sketch ink.
ink word The grouping of ink data created by
the recognition system, based on the timing and
spacing of the user's handwriting. Ink words are
created when the user has selected "Ink Text" in
the Recognition Preferences slip. Ink words can
subsequently be recognized with deferred
recognition.
input spec A frame used in receiving endpoint
data that defines how incoming data should be
formatted; termination conditions that control
when the input should be stopped; data filtering
options; and callback methods.
instantiate To make a run-time object in the
NewtonScript heap from a template. Usually
this term refers to the process of creating a view
from a template.

G L O S S A R Y
GL-4
item frame The frame that encapsulates a
routed (sent or received) object and that is stored
in the In/Out Box soup.
lexical dictionary A list of valid grammars,
each specifying the format of an entity to be
recognized, such as a date, time, phone number
or currency value. See also enumerated
dictionary and grammar.
line A shape defined by two points: the current
x and y location of the graphics pen and the x
and y location of its destination.
local A variable whose scope is the function
within which it is defined. You use the
local
keyword to explicitly create a local variable
within a function.
magic pointer A constant that represents a
special kind of reference to an object in the
Newton ROM. Magic pointer references are
resolved at run time by the operating system,
which substitutes the actual address of the ROM
object for the magic pointer reference.
meeting An entry in the Dates application for
a specific time during the day. People can be
invited and the meeting can be scheduled for a
particular location.
message A symbol with a set of arguments. A
message is sent using the message send syntax
frame
:
messageName
()
, where the message
messageName is sent to the
receiver frame.
method A function object in a frame slot that
is invoked in response to a message.
name reference A frame that contains a soup
entry or an alias to a soup entry, often, though
not necessarily, from the Names soup. The
frame may also contain some of the individual
slots from the soup entry.
NewtonScript heap An area of RAM used by
the system for dynamically allocated objects,
including NewtonScript objects.
nil
A value that indicates nothing, none, no,
or anything negative or empty. It is similar to
(void*)0
in C. The value
nil
represents
"false" in Boolean expressions; any other value
represents "true."
object A typed piece of data that can be an
immediate, array, frame, or binary object. In
NewtonScript, only frame objects can hold
methods and receive messages.
option frame A frame passed as a parameter
to an endpoint method that selects the
communication tool to use; controls its
configuration and operation; and returns result
code information from the endpoint method.
origin The coordinates of the top-left corner
of a view, usually (0, 0). The origin can be
shifted, for example, to scroll the contents of
a view.
output spec A special type of callback spec
used with an endpoint method. An output spec
contains a few additional slots that allow you to
pass special protocol flags and to define how the
data being sent is translated.
oval A circular or elliptical shape defined by
the bounding rectangle that encloses it.
package
The unit in which software can be
installed on and removed from the Newton.
A package consists of a header containing the
package name and other information, and one or
more parts containing the software.
package file A file that contains downloadable
Newton software.
package store See store part.
parent A frame referenced through the
_parent
slot of another frame. With regard to
views, a parent view encloses its child views.
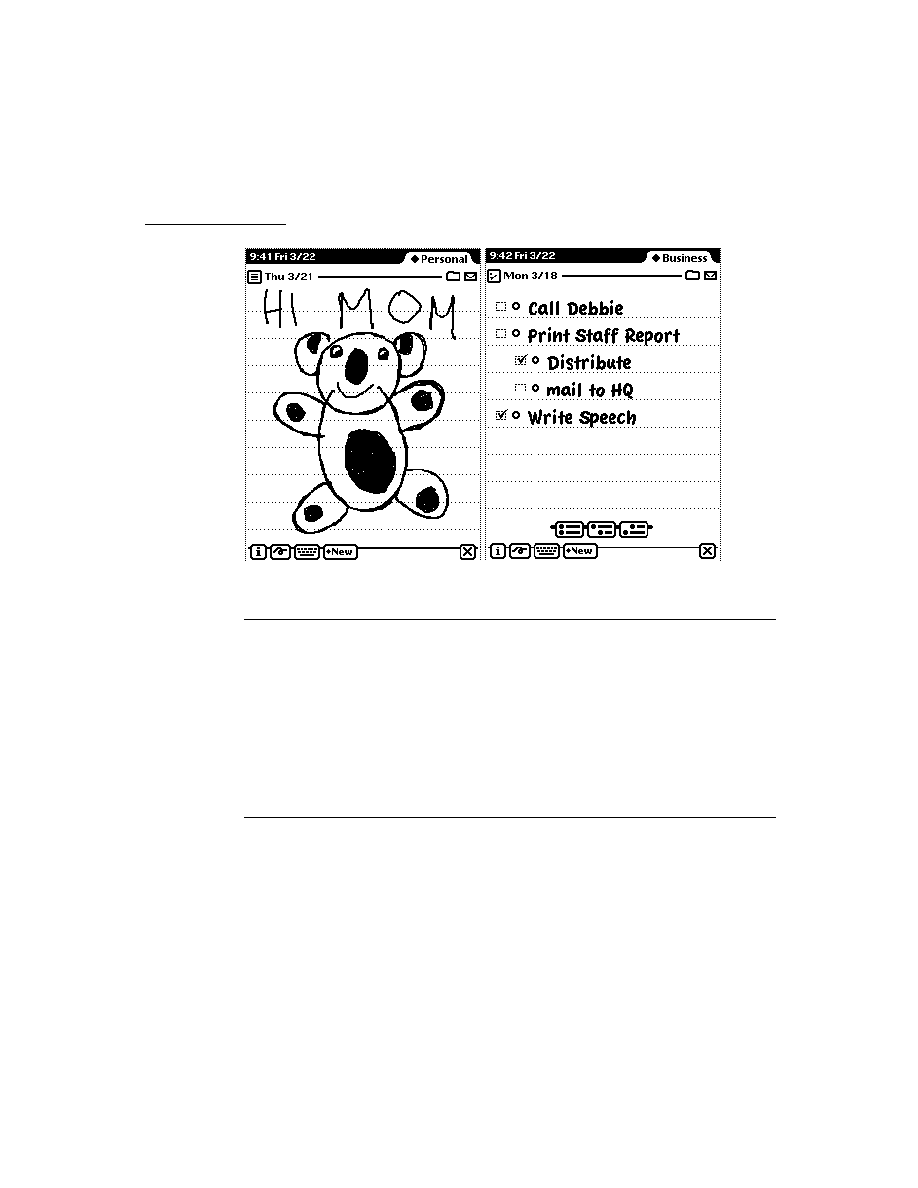
G L O S S A R Y
GL-5
part A unit of software--either code or data--
held in a part frame. The format of the part is
identified by a four-character identifier called its
type or its part code.
part frame The top-level frame that holds an
application, book, or auto part.
PCMCIA Personal Computer Memory Card
International Association. This acronym is used
to describe the memory cards used by the
Newton PDA. Newton memory cards follow the
PCMCIA standards.
persona The permanent internal description of
an individual person that uses a particular
Newton PDA, or a particular public image of the
Newton owner. The owner is the obvious
example, but there can be many others.
Choosing a persona sets up information such as
name, title, birthday, phone numbers, e-mail
addresses, and so on. The plural is "personae."
picker A type of Newton view that pops up
and contains a list of items. The user can select
an item by tapping it. This type of view closes
when the user taps an item or taps outside the
list without making a selection.
picture A saved sequence of drawing
operations that can be played back later.
polygon
A shape defined by a sequence of
points representing the polygon's vertices,
connected by straight lines from one point to
the next.
pop-up See picker.
project The collected files and specifications
that NTK uses to build a package that can be
downloaded and executed on
the Newton.
proto A frame referenced through another
frame's
_proto
slot. With regard to views, a
proto is not intended to be directly instantiated--
you reference the proto from a template. The
system supplies several view protos, which an
application can use to implement user interface
elements such as buttons, input fields, and so on.
protocol An agreed-upon set of conventions
for communications between two computers,
such as the protocol used to communicate
between a desktop computer and a Newton device.
raw ink See ink.
receiver The frame that was sent a message.
The receiver for the invocation of a function
object is accessible through the pseudo-variable
self
. See also implementor.
recognized text Ink words processed by the
recognition system. Ink drawn by the user is
converted into recognized text when the user has
selected "Text" in the Recognition Preferences
slip or after deferred recognition takes place.
See also ink word.
rectangle A shape defined by two points--its
top-left and its bottom-right corners--or by four
boundaries--its upper, left, bottom, and right
sides.
reference A value that indirectly refers to an
array, frame, or binary object. See also
immediate.
region An arbitrary area or set of areas on the
coordinate plane. The outline of a region should
be one or more closed loops.
resource Raw data--usually bitmaps or
sounds--stored on the development system and
incorporated into a Newton application during
the project build.
restore To replace all the information in
a Newton with information from a file on
the desktop.
restricted entry field A field of a
protoCharEdit
view that accepts as user
input only the values specified in the view's

G L O S S A R Y
GL-6
template slot. For example, a field for entering
phone numbers might restrict acceptable user
input to numerals.
rich string A string object that contains
imbedded ink words. Rich strings create a
compact representation for strings that contain
ink words and can be used with most of the
string-processing functions provided in the
system software. See also rich string format.
rich string format The internal representation
used for rich strings. Each ink word is
represented by a special placeholder character
(
kInkChar
) in the string. The data for each ink
word is stored after the string terminator
character. The final 32 bits in a rich string
encode information about the rich string.
root view The topmost parent view in the
view hierarchy. All other views descend from
the root view.
rounded rectangle A rectangle with rounded
corners. The shape is defined by the rectangle
itself, along with the diameter of the circles
forming the corners (called the diameter of
curvature).
routing format A frame that describes how to
format an object that is to be sent (routed).
Examples include print routing formats, which
describe how to visually format data, and frame
routing formats, which describe the internal
structure of a frame.
routing slip A view that looks like an
envelope. The transport displays this view after
the user selects a transport-based action from the
Action picker. This view is used by a transport
to collect information needed to send the item.
script icon An icon that executes a function
object when tapped.
self A pseudo-variable that is set to the current
receiver.
shape
A data structure used by the drawing
system to draw an image on the screen.
siblings Child frames that have the same
parent frame.
sketch ink See ink.
slot
An element of a frame or array that can
hold an immediate or reference.
soup
A persistently stored object that contains
a series of frames called entries. Like a database,
a soup has indexes you can use to access entries
in a sorted order.
soupervisor mechanism The system service
that presents the user with information about a
soup when the user taps its icon in the Extras
Drawer. It allows for filing or moving all soup
entries.
soup icon An icon that represents one or more
soups, usually in the Storage folder of the Extras
Drawer.
stationery Refers to the capability of having
different kinds of data within a single
application (such as plain notes and outlines in
the Notepad) and/or to the capability of having
different ways of viewing the same data (such as
the Card and All Info views in the Names file).
Implementing stationery involves writing data
definitions and view definitions. See also data
definition and view definition.
store A physical repository that can contain
soups and packages. A store is like a volume on
a disk on a personal computer.
store part A part that encapsulates a read-only
store. This store may contain one or more soup
objects. Store parts permit soup-like access to
read-only data residing in a package. Store parts
are sometimes referred to as package stores.

G L O S S A R Y
GL-7
target The object being acted upon.
Sometimes the target consists of multiple items,
for example, when multiple items are selected
from an overview for sending.
template A frame that contains the data
description of an object (usually a view). A
template is intended to be instantiated at run
time. See also proto.
text run A sequence of characters that are all
displayed with the same font specification. Text
is represented in paragraph views as a series of
text runs with corresponding style (font spec)
information. See also font spec.
tick A sixtieth of a second.
transport A NewtonScript object that
provides a communication service to the
Newton In/Out Box. It interfaces between the In/
Out Box and an endpoint. Examples include the
print, fax, beam, and mail transports. See also
endpoint.
transport A special type of Newton
application used to send and/or receive data.
Transports communicate with the In/Out Box on
one end and typically to an endpoint object on
the other end. Examples include the built-in
transports such as print, fax, and beam. See also
endpoint.
user proto A proto defined by an application
developer, not supplied by the system.
view The object instantiated at run time from a
template. A view is a frame that represents a
visual object on the screen. The
_proto
slot of
a view references its template, which defines its
characteristics.
view class A primitive building block on
which a view is based. All view protos are based
directly or indirectly (through another proto) on
a view class. The view class of a view is
specified in the
viewClass
slot of its template
or proto.
view definition A view template that defines
how to display data from a particular data
definition. A view definition is registered with
the system under the name of the data definition
to which it applies. The shortened term viewDef
is sometimes used. See also data definition.
wedge
A pie-shaped segment of an oval,
bounded by a pair of radii joining at the oval's
center. Contrast with arc.


IN-1
Index
A
accessing query results
11-16
accessing tasks in the To Do List application
19-24
Action button
21-3
accessing routing actions from
21-3
adding to user interface
21-4
minimum actions for including
21-9
placement of
21-4
action button
GL-1
action frames
18-5
Action picker
choosing a transport from
21-6
including a separator line in
21-23
types of routing actions
21-4
action template
18-5
AddAction
17-16
AddAlarm
17-11
AddAlarmInSeconds
17-11
AddAppointment, Dates method
19-11
AddArraySlot function
16-21
AddCard, Names method
19-6
AddCardData, Names method
19-6
AddEvent, Dates method
19-11
AddExtraIcon, Extras Drawer method
19-40, 19-42
adding a filing button
15-14
adding a new city to Time Zones
19-29
adding meetings or events to the Dates
application
19-11
adding views dynamically
3-33
AddLayout, Names method
19-6
address
converting e-mail to internet
22-9
address, user configuration variable
19-47
address class
22-6
AddStepView
3-35
AddUndoAction
17-8
AddUndoCall
17-8
AddUndoSend
17-8
alarm keys
17-11
retrieving
17-12
alarms
common problems
17-13
compatibility
17-5
creating
17-11
obtaining information about
17-12
periodic
17-4, 17-14
removing
17-13
AlarmsEnabled
17-14
alerting user
17-3, 17-11
alias
GL-1
aliases
advanced usage of
21-36
for routing target
21-13
allDataDefs slot
4-20
allLayouts
4-15
allViewDefs slot
4-20
alphaKeyboard
8-26
animating views
3-23
annotations in Dates application
19-10
appAll slot
15-10
creating
15-12
appearance of view
viewFormat slot
3-20, 3-48
AppFindTargets method
16-20
AppInstalled
21-32
AppleTalk functions
NetChooser function
24-22
AppleTalk functions and methods
24-12
AppleTalk tool
24-9
application
asynchronous operation of
23-2
base view
3-5
DeletionScript function
2-6
DoNotInstallScript function
2-5
InstallScript function
2-5
linking endpoint with
23-24
name
2-10
RemoveScript function
2-6
structure
2-1
symbol
2-11
synchronous operation of
23-3
application base view
GL-1

I N D E X
IN-2
application components
overview
1-15
application data class registry
21-33
application-defined routing actions
21-23
application extensions
5-1
application name
in appName slot
15-4
user-visible
15-4
application soup
16-10
appName slot
15-4, 15-10, 16-10
creating
15-11, 16-11
appObjectFileThisIn slot
15-4, 15-5, 15-10
creating
15-12
appObjectFileThisOn slot
15-4, 15-10
creating
15-12
appObjectUnfiled slot
15-10
creating
15-12
arc
13-4, GL-1
arglist array in endpoint options
23-5
array
GL-1
assistant
18-9
architectural overview
18-5
entries slot
18-11
input strings
18-2
input to
18-1
intelligent
18-1
introduction to
18-1
matching entire words
18-8
multiple verbs
18-2
ordering of words in
18-2
overview
1-8
phrases slot
18-11
system-supplied templates
18-11
assist slip
18-6
asynchronous cancellation in endpoints
23-21
asynchronous serial tool
24-1
asynchronous sound
14-7
automatic busy cursor
17-15
auto part
2-4
AutoPutAway
21-32
auxForm slot
21-15
auxiliary buttons
19-36
compatibility information
19-36
list of functions and methods
19-57
using
19-37
auxiliary view
displaying
21-15
instantiating with BuildContext
21-15
Away City
19-27
away city
GL-1
B
base view
3-5, GL-1
basic endpoint
23-1, 23-8
BatteryCount
17-26
battery information
17-26
BatteryStatus
17-26
BcCreditCards, Names method
19-7
BcCustomFields, Names method
19-7
BcEmailAddress, Names method
19-7
BcEmailNetwork, Names method
19-7
BcPhoneNumber, Names method
19-7
behavior of view
3-9, 3-47
binary object
GL-1
bitmaps
13-17
capturing portions of a view into
13-18
flipping
13-19
rotating
13-19
storing compressed
13-18
Book Maker
overview
1-10
Book Reader
overview
1-10
books
advantages and disadvantages
2-3
Boolean
GL-1
bounds
finding and setting
3-39
screen-relative
3-12
BuildContext
3-36
built-in applications
application program interfaces
19-1
built-in fonts
8-19
built-in keyboards
8-26
built-in tasks
18-3
button host
19-37, GL-1
button protos
7-6
button provider
19-37, GL-1
buttons
in Find slip
16-2

I N D E X
IN-3
C
calendar
versus the term Dates
19-9
Calendar Notes soup
19-22
Calendar soup
19-22
callback functions
15-3
registering
15-11
registering for folder changes
15-8
callback spec
GL-1
defining
23-2
calling
18-3
Call transport
opening routing slip for
21-29
cancelling endpoint requests
23-21
asynchronously
23-21
synchronously
23-22
cancelling task slip
18-4
CancelRequest
22-13
CanPutAway
22-18
card
GL-1
card-based application
4-6
cardfile
versus the term Names
19-2
caret insertion writing mode
8-3, 8-38
disabling
8-3
enabling
8-3
caret pop-up menu
8-38
case sensitivity
18-8
change notifications
17-2, 17-10
checking-off tasks in the To Do List application
19-25
checklist in Find slip
16-3
checklists
Notes stationery
19-30, 19-33
CheckOutbox
22-9
child
GL-1
child template
3-2, 3-3
child views
closing obsolete
3-43
laying out
3-43
chooser function
24-22
cities
adding to Time Zones application
19-29
obtaining information about in Time Zones
application
19-28
cityZip, user configuration variable
19-47
class
GL-1
view
3-9, 3-47, GL-7
ClassAppByClass
21-33
class constants
clEditView
3-47
clGaugeView
3-47
clKeyboardView
3-47
clMonthView
3-47
clOutlineView
3-47
clParagraphView
3-47
clPickView
3-47
clPictureView
3-47
clPolygonView
3-47
clRemoteView
3-47
clView
3-47
ClearUndoStacks
17-9
clEditView
8-4, 8-6, 8-8, 13-15
clEditView class
ViewAddChildScript method
9-25
clipping
clipping of view
3-12
clipping region
13-12
controlling
13-12
clKeyboardView
8-4, 8-28
cloning sound frames
14-5
closing a view
3-29
clParagraphView
8-4, 8-10
clPictureView
13-15
clPolygonView
features
13-14
clRemoteView
13-15
clView
2-2
communications architecture
1-11
communication tools
built-in
24-1
serial
24-1
company, user configuration variable
19-47
compatibility information
auxiliary buttons
19-36
Dates application
19-9
Endpoint interface
23-7
Extras Drawer
19-39
Filing service
15-9
Find service
16-6
Formulas roll
19-36
Names application
19-3
Notes application
19-31
Prefs roll
19-36
routing
21-8
Time Zones application
19-27
To Do List application
19-23

I N D E X
IN-4
completion
CompletionScript
23-18
handling unexpected in endpoints
23-18
compressed images
storing
13-18
configuration string usage
25-7
confirm
18-4
confirming task slip
18-4
conflict-resolution mechanism
18-16
constant
GL-1
controlling clipping
13-12
controlling recognition in views
9-8
controls
compatibility
7-1
protos
7-2 to 7-15
coordinate system
3-6
copying functions
summary of
26-2
correcting intelligent assistant input
18-4
countries
obtaining information about a city or country
19-28
country, user configuration variable
19-47
countrySlot, user configuration variable
19-47
CreateToDoItem, To Do List method
19-24
CreateToDoItemAll, To Do List method
19-24
creating
19-42
creating and removing tasks in the To Do List
application
19-24
creating a shape object
13-9
creating a view
3-28
creating new meeting types in the Dates
application
19-17
creating notes in Notes application
19-32
creating sound frames
14-5
currentAreaCode, user configuration variable
19-47
currentCountry, user configuration variable
19-48
currentEmporium, user configuration variable
19-48
current format
21-8
currentPersona, user configuration variable
19-48
currentPrinter, user configuration variable
19-48
cursor
11-5, GL-2
part cursor
19-40
custom fill
3-21
CustomFind method
16-11, 16-24, 16-28
customizing folder tab views
15-15
custom sound frames
creating
14-4
using
14-4
custom view frame pattern
3-21
D
dataDef
5-2
allSoups slot
5-6
creating
5-8
MakeNewEntry example
5-9
StringExtract example
5-10
TextScript example
5-11
using FillNewEntry
5-6
using MakeNewEntry
5-9
using StringExtract
5-9
using TextScript
5-9
data definition
GL-2
dataDefs
registering in a NewtApp application
4-20
data form
GL-2
data forms in endpoints
23-4
binary data
23-20
tagging data with
23-4
template
23-5
uses of
23-5
data in endpoints
filter options
23-16
formatting
23-13
sampling incoming
23-18
sending
23-11
streaming
23-20
use of PartialScript with
23-18
dataRect
7-4
data shapes
translating
13-16
data storage system
overview
1-5
data termination in endpoints
conditions for
23-14
ending with particular data
23-14
sequence for
23-15
use of termination slot with
23-14
use of useEOP slot with
23-15
data types for routing
21-7
dataTypes slot
21-5
date find
16-7
DateFind method
16-7, 16-10, 16-28
example
16-18
implementing
16-18
returning results
16-21
date find mode
16-6
DateFindTargeted method
16-20

I N D E X
IN-5
dateKeyboard
8-27
Dates
compatibility information
19-9
versus the term calendar
19-9
Dates application
19-8
adding meetings or events
19-11
controlling display features
19-21
creating new meeting types
19-17
deleting meetings or events
19-12
finding meetings or events
19-13
getting and setting information for meetings or
events
19-15
getting a reference to
19-10
list of methods
19-54
moving meetings or events
19-14
soup format
19-52
soups
19-22
date search
description
16-2
declareSelf slot
3-24
declaring a template
GL-2
declaring a view
3-27
DecodeRichString
8-24
deferred reception of data
22-10
deferred recognition
8-2, GL-2
defining keys in a keyboard view
8-30
defining tabbing order
8-36
DeleteAppointment, Dates method
19-12
DeleteEvent, Dates method
19-12
DeleteRepeatingEntry, Dates method
19-12
DeleteTransport
22-6
deleting a sound channel
14-6
deleting meetings or events from the Dates
application
19-12
DeletionScript function
2-6
dependent views
3-43
desktop
GL-2
developer-defined methods
for Find overview support
16-21
developer signature
2-9
dialingPrefix, user configuration variable
19-48
dialog view
creating
3-38
dial tones
generating
14-8
digital books
advantages and disadvantages
2-3
dirtying views
3-33
DisplayDate, Dates method
19-20
displaying graphics shapes
13-14
displaying scaled images
13-15
displaying text and ink
8-14
displaying views
3-33
doAutoAdd, user configuration variable
19-48
do button
18-3
doCardRouting slot
15-4, 15-5, 15-11
creating
15-18
doInkWordRecognition, user configuration
variable
19-48
DoNotInstallScript function
2-5
dontStartWithFolder slot
15-5, 15-11
DoProgress
17-16
cancelling
17-18
vs. protoStatusTemplate
17-18
doShapeRecognition, user configuration
variable
19-48
doTextRecognition, user configuration variable
19-48
drawing
how to
13-9
non-default fonts
13-20
optimizing performance
13-22
drawing views
3-44
dynamically adding views
3-33
E
e-mail address
converting to internet
22-9
emailPassword, user configuration variable
19-48
emporium
GL-2
emporium popup proto
19-8
endpoint
GL-2
about
23-1
binary data
23-20
canceling requests
23-21
compatibility
23-7
constants
23-25
data filter options
23-16
data forms
23-4
data structures
23-26
data termination conditions
23-14
description of
23-1
error handling
23-23
functions and methods
23-30

I N D E X
IN-6
endpoint
(continued)
input form
23-13
input spec
23-12
input target
23-13
input time-out
23-16
instantiating
23-10
linking to application
23-24
protoBasicEndpoint
23-1
protos
23-28
protoStreamingEndpoint
23-20
rcvOptions slot
23-17
setting options
23-8
summary of
23-25
terminating
23-10
using
23-8
endpoint interface
overview
1-14
endpoint option
GL-2
endpoint options
setting
23-10
specifying
23-8
EnsureVisibleTopic, To Do List method
19-26
entries
11-4
entries slot
18-11
entry
GL-2
entry alias
GL-2
enumerated dictionary
GL-2
EOP
GL-2
error handling
in transports
22-20
establishing an endpoint connection
with Connect
23-11
with Listen
23-11
evaluate slot
GL-2
event
GL-2
event-related sounds
how to play
14-3
slots for
14-2
events
in Dates application
19-8
Everywhere buttton
16-2
exceptions
handling in endpoints
23-23
extending an application with stationery
5-7
extending the intelligent assistant
18-1
extending the Names application
19-2
ExtractRangeAsRichString
8-24
Extras Drawer
19-38
compatibility information
19-39
getting a reference to
19-39
list of methods
19-58
part cursors
19-40
F
faxing
18-3, 21-19
preparation for
21-9
sequence of events for
21-19
faxPhone, user configuration variable
19-48
fax profile option
25-2
fax soup entries
19-34
field
GL-2
fields slot
21-15
file button
15-6
FileThis method
15-9, 15-11
implementing
15-15
filing
15-1
implementing
15-10
overview
1-11, 15-5
target
15-1
user interface illustrated
15-3
filing button
15-2, 15-11
adding
15-14
FilingChanged method
15-9
filing compatibility information
15-9
filing filter
15-7
filing functions
RegFolderChanged
15-3
UnRegFolderChanged
15-3
filing functions and methods
15-22
developer-supplied
15-22
filing protos
15-21
filing received items
21-34
filing services
15-1
filing slip
buttons in
15-3
filing categories in
15-3
illustrated
15-5
routing from
15-18
filing target
15-10
filterChanged method
15-9

I N D E X
IN-7
filter options
23-16
use of byteProxy slot with
23-16
use of filter slot with
23-16
Find
global
16-3
local
16-3
overview
1-10
Find, targeted
16-19
FindAppointment, Dates method
19-13
finder
GL-2
finder frame
16-11
finder proto
choosing
16-11
ROM_CompatibleFinder
16-7
soupFinder
16-7
FindExactlyOneAppointment, Dates method
19-13
finding
18-3
finding meetings or events in the Dates
application
19-13
Find method
16-7, 16-10, 16-28
returning results
16-21
Find overview
filing, deleting, moving items from
16-9
illustrated
16-4
Find service
compatibility information
16-6
date find
16-6
DateFind method
16-18
introduction to
16-1
overview list
16-4
registering
16-3, 16-25
reporting progress in
16-4
result frame
16-12
ROM_CompatibleFinder proto
16-12
ROM_SoupFinder proto
16-7, 16-12
search method
16-6, 16-14
search mode
16-6
soups and
16-10
text find
16-6
title slot
16-7
unregistering
16-25
Find slip
and foremost application
16-4
checklist in
16-3
Everywhere button in
16-2
Find button in
16-9
kind of search in
16-2
Look For menu in
16-5
radio button
16-11
replacing
16-4, 16-11, 16-24
Selected button in
16-2, 16-3
status message in
16-5
system-supplied
16-2
FindSoupExcerpt method
16-7, 16-10, 16-21, 16-28
example
16-22
implementing
16-21
Find status message
illustrated
16-5
FindTargeted method
16-20
firstDayOfWeek, Dates variable
19-21, 19-46
flag
GL-3
flags
vApplication
3-47
vCalculateBounds
3-47
vClickable
3-47
vClipping
3-47
vFloating
3-47
vNoFlags
3-47
vNoScripts
3-47
vReadOnly
3-47
vVisible
3-47
vWriteProtected
3-47
folder change
registering callback functions
15-8
folderChanged
15-9
folder-change notification service
15-11
using
15-18
folder change registry
15-9
folders
global
15-19
local
15-19
folder tab
15-7
folder tab popup list
15-8
folder tab views
15-11
adding
15-14
customizing
15-15
fonts
built-in
8-19
constraining style of
8-17
drawing non-default
13-20
family symbols
8-18
font frame
8-18
for text and ink display
8-3
packed integer specification
8-19
packing constants
8-21
specifying
8-17

I N D E X
IN-8
fonts (continued)
specifying for a view
3-24
style numbers
8-18
font spec
8-3, GL-3
font specification
8-17
packed integer format
8-19
font styles
8-18, 8-25
constraining in view
8-17
forceNewEntry slot
4-16
format picker
in routing slip
22-27
formatting endpoint data
23-13
Formulas roll
19-35, 19-57
compatibility information
19-36
frame
3-2, 11-2, GL-2, GL-3
framed asynchronous serial tool
24-4
frame functions and methods
26-7
frame routing format
creating
21-21
frame types
18-16
free-form entry field
GL-3
fromRef slot
setting in item frame
22-14
function object
GL-3
functions and methods
AddAction
17-16
AddAlarm
17-11
AddAlarmInSeconds
17-11
AddAppointment, Dates method
19-11
AddCard, Names method
19-6
AddCardData, Names method
19-6
AddEvent, Dates method
19-11
AddExtraIcon, Extras Drawer method
19-40, 19-42
AddLayout, Names method
19-6
AddStepView
3-35
AddUndoAction
17-8
AddUndoCall
17-8
AddUndoSend
17-8
AlarmsEnabled
17-14
AppInstalled
21-32
AutoPutAway
21-32
BatteryCount
17-26
BatteryStatus
17-26
BcCreditCards, Names method
19-7
BcCustomFields, Names method
19-7
BcEmailAddress, Names method
19-7
BcEmailNetwork, Names method
19-7
BcPhoneNumber, Names method
19-7
BuildContext
3-36
CancelRequest
22-13
CanPutAway
22-18
CheckOutbox
22-9
ClassAppByClass
21-33
ClearUndoStack
17-9
CreateToDoItem, To Do List method
19-24
CreateToDoItemAll, To Do List method
19-24
DecodeRichString
8-24
DeleteAppointment, Dates method
19-12
DeleteEvent, Dates method
19-12
DeleteRepeatingEntry, Dates method
19-12
DeleteTransport
22-6
DisplayDate, Dates method
19-20
DoProgress
17-16
EnsureVisibleTopic, To Do List method
19-26
ExtractRangeAsRichString
8-24
FindAppointment, Dates method
19-13
FindExactlyOneAppointment, Dates method
19-13
GetActiveView
21-30
GetAlarm
17-12
GetAppAlarmKeys
17-12
GetAppPrefs
19-45
GetCityEntry
19-28
GetCountryEntry
19-28
GetDefaultFormat
21-11
GetExtraIcons, Extras Drawer method
19-41
GetMeetingIconType, Dates method
19-16
GetMeetingInvitees, Dates method
19-15
GetMeetingLocation, Dates method
19-15
GetMeetingNotes, Dates method
19-15
GetPartCursor, Extras Drawer method
19-40
GetPartEntryData, Extras Drawer method
19-40
GetRichString
8-24
GetRouteScripts
21-23
GetSelectedDates, Dates method
19-20
GetTargetCursor
21-24
GetTargetInfo
21-10
GetTaskShapes, To Do List method
19-26
GetToDoEntry, To Do List method
19-24
GetToDoItemsForRange, To Do List method
19-24
GetToDoItemsForThisDate, To Do List
method
19-24
GetToDoShapes, To Do List method
19-26
GetTransportScripts
22-17
GetUserConfig
19-45
InstallScript
22-5
IsRichString
8-24

I N D E X
IN-9
functions and methods (continued)
ItemCompleted
22-16
KillAction
17-16
LastVisibleTopic, To Do List method
19-26
LaunchPartEntry, Extras Drawer method
19-40
LocObj
20-1 to 20-5
MakeRichString
8-24
MakeTextNote, Notes method
19-32
MeasureString
20-6
NewCity, Time Zones method
19-29
NewItem
22-13
NewNote, Notes method
19-32
NextToDoDate, To Do List method
19-25
NormalizeAddress
22-9
Notify
17-3, 17-11
OpenKeyPadFor
8-36
OpenMeetingSlip, Dates method
19-21
OpenTo, Names method
19-6
PeriodicAlarm
17-15
PointToCharOffset
8-38
PointToWord
8-38
PutAwayScript
21-33
QueueRequest
22-12
QuietSendAll
22-9
ReceiveRequest
22-9
RegAppClasses
21-33
RegAuxButton
19-37
RegInboxApp
21-34
RegInfoItem, Dates method
19-21
RegisterOpenKeyboard
8-36
RegLogin
17-25
RegMeetingType, Dates method
19-17
RegNamesRouteScript, Names method
19-6
RegPowerOff
17-25
RegPowerOn
17-24
RegPrefs
19-36
RegTransport
22-5
RegUserConfigChange
19-45
RemoveAlarm
17-13
RemoveAppAlarms
17-13
RemoveExtraIcon, Extras Drawer method
19-41,
19-43
RemoveOldToDoItems, To Do List method
19-24
ReplaceInkData, Names method
19-6
RouteScript
21-24
SafeRemoveLayout, Names method
19-6
Send
21-26
SendRequest
22-8
SetDefaultFormat
21-11
SetDone, To Do List method
19-25
SetEntryAlarm, Dates method
19-15
SetExtrasInfo, Extras Drawer method
19-40
SetLocalizationFrame
20-4
SetLocation, Time Zones method
19-30
SetMeetingIconType, Dates method
19-16
SetMeetingInvitees, Dates method
19-15
SetMeetingLocation, Dates method
19-15
SetMeetingNotes, Dates method
19-15
SetPriority, To Do List method
19-26
SetRepeatingEntryStopDate, Dates method
19-15
SetStatusDialog
22-23
SetUpIdle
17-9
SetupItem
21-12
SetValue
8-14
ShowBusyBox
17-15
ShowFoundItem, Names method
19-6
StripInk
8-24
TargetIsCursor
21-24
TransportChanged
22-7
TransportNotify
22-19
UnRegAppClasses
21-31
UnRegAuxButton
19-37
UnRegFormulas
19-36
UnRegInboxApp
21-34
UnRegInfoItem, Dates method
19-21
UnregisterOpenKeyboard
8-36
UnRegLogin
17-25
UnRegPowerOff
17-26
UnRegPowerOn
17-24
UnRegTheseAppClasses
21-33
UnRegTransport
22-6
UnRegUserConfigChange
19-45
VerifyRoutingInfo
21-10
ViewIdleScript
17-9
ViewSetupChildrenScript
8-7
G
generating dial tones
14-8
gesture
GL-3
GetActiveView
21-30
GetAlarm
17-12
GetAppAlarmKeys
17-12
GetAppPrefs
19-45

I N D E X
IN-10
GetCityEntry
19-28
GetCountryEntry
19-28
GetDefaultFormat
21-11
GetDefs
5-8
GetExtraIcons, Extras Drawer method
19-41
GetMeetingIconType, Dates method
19-16
GetMeetingInvitees, Dates method
19-15
GetMeetingLocation, Dates method
19-15
GetMeetingNotes, Dates method
19-15
GetPartCursor, Extras Drawer method
19-40
GetPartEntryData, Extras Drawer method
19-40
GetRichString
8-24
GetRouteScripts
21-23
GetSelectedDates, Dates method
19-20
GetTargetCursor
21-24
GetTargetInfo
18-20, 21-10
GetTargetInfo method
15-6, 15-10
default behavior
15-2
overriding
15-13
GetTaskShapes, To Do List method
19-26
getting and setting information for meetings or events
in the Dates application
19-15
GetToDoEntry, To Do List method
19-24
GetToDoItemsForRange, To Do List method
19-24
GetToDoItemsForThisDate, To Do List method
19-24
GetToDoShapes, To Do List method
19-26
GetTransportScripts
22-17
GetUserConfig
19-45
global
GL-3
global finds
16-3, 16-9
'globalFind symbol
16-10
global folders
15-9, 15-11, 15-19
globalFoldersOnly slot
15-4, 15-19
glossary
GL-1
grammar
GL-3
graphics
shape-based
13-2
graphic shapes
displaying
13-14
grouping transports
22-7
H
handling input events
8-38
heap
NewtonScript
1-3
help book
18-19
hidden view
showing
3-34
hideSound
14-2
hiding views
3-33
Highlighting
3-42
HitShape
using
13-16
Home City
19-27
setting
19-30
home city
GL-3
homePhone, user configuration variable
19-48
how to draw
13-9
I, J
idler object
17-2, 17-9
imaging system
overview
1-9
immediate value
GL-3
implementor
GL-3
importing PICT resources
13-20
in box
21-1
application data class registry
21-33
application registry
21-31, 21-34
receiving items
21-31
routing
21-3
sorting items
21-2
storing incoming data
21-2
viewing items
21-34
infrared tool
24-8
inheritance
GL-3
inheritance links
_parent slot
3-24
_proto slot
3-24
stepChildren slot
3-24
viewChildren slot
3-24
ink
8-1, GL-3
displaying
8-14
in views
8-14, 8-15
ink text
ViewAddChildScript method
9-25
ink word
GL-3
ink words
8-2
scaling
8-16
styling
8-16
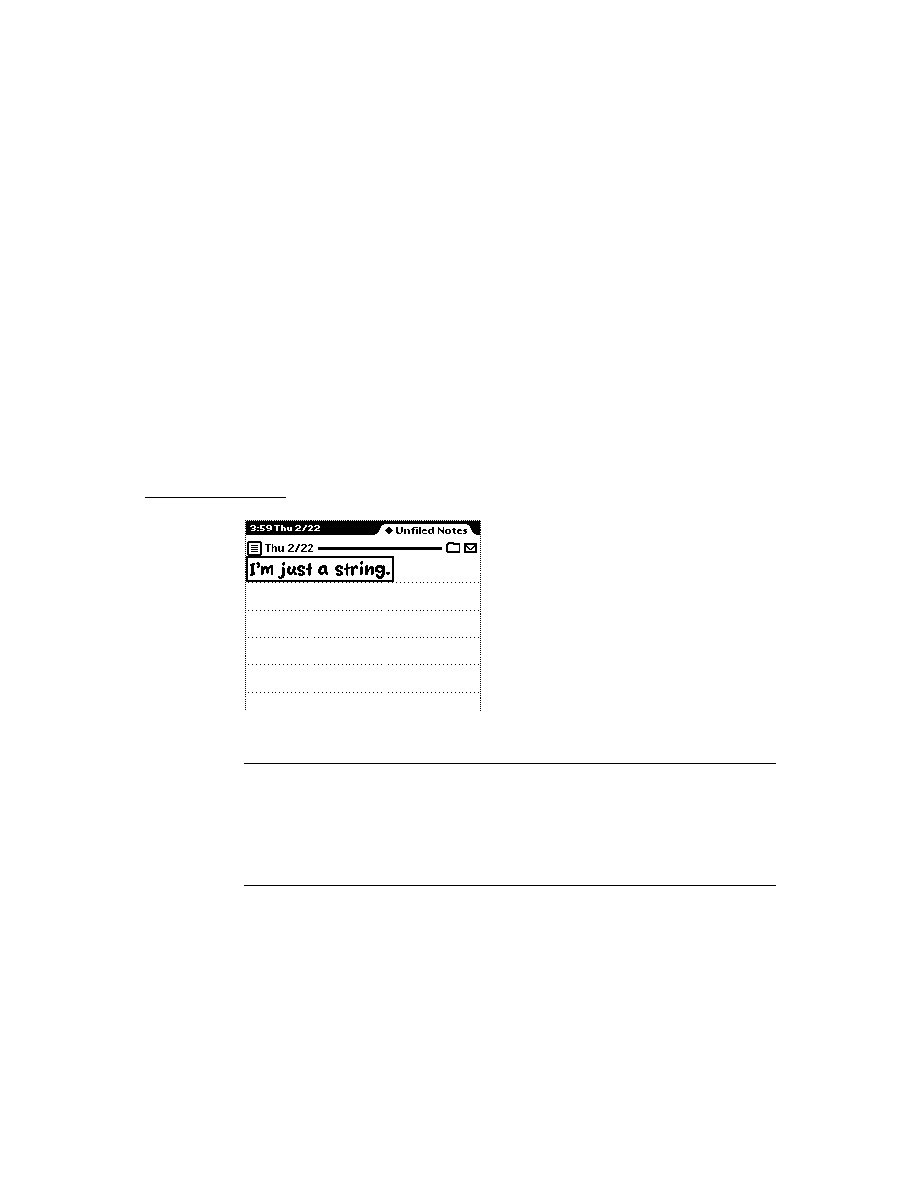
I N D E X
IN-11
In/Out Box
1-13, GL-3
extending the user interface
22-17
input
termination of in endpoints
23-17
use of InputScript message for
23-17
input buffer for endpoints
removing data from
23-18
input data forms for endpoints
23-12
input events
handling
8-38
input line protos
8-4, 8-12
input spec
23-12, GL-3
components of
23-12
data filter
23-16
data termination
23-14
flushing input
23-18
input form
23-13
input target
23-13
input time-out
23-16
receive options
23-17
setting up
23-18
slot applicability
23-12, 23-13
uses for
23-3
input string
18-3, 18-4
multiple matches in
18-8
multiple verbs
18-2
no word matches
18-8
partial matches in
18-8
unmatched words in
18-8
input to assistant
correcting
18-4
missing information
18-4
input views
tabbing order for
8-36
insertion caret
8-38
InstallScript function
2-5, 18-19
InstallScript transport method
22-5
instantiate
GL-3
instantiation
view
3-26
intelligent assistant
18-1
about matching
18-8
action frames
18-5
action template
18-5
ambiguous or missing information
18-4
canceling the task
18-4
matching process
18-8
multiple verbs
18-2
overview
1-8
preconditions slot
18-10
primary action
18-18
signature
18-10
supporting
21-30
target frames
18-5
target template
18-5
task template
18-5
use of GetActiveView with
21-30
words that match multiple templates
18-8
IR Tool
24-8
IsRichString
8-24
ItemCompleted
22-16
item frame
GL-4
item frame for routing
22-2
creating
22-13
K
key
alarm
17-11
keyboard
context sensitive
8-36
double-tap
8-36
keyboard protos
8-28
keyboard registry
8-5
using
8-36
keyboard views
8-4, 8-26
alphaKeyboard
8-26
built-in types
8-26
dateKeyboard
8-27
defining keys in
8-30
key definitions array
8-31
key descriptor
8-34
key dimensions
8-35
key legend for
8-32
key result
8-33
numericKeyboard
8-27
phoneKeyboard
8-27
key definitions array
8-31
key descriptor
8-34
key dimensions
8-35
key legend
8-32
keypad proto
8-29
key result
8-33

I N D E X
IN-12
keys
alarm
17-12
KillAction
17-16
L
labelsChanged parameter
15-16
labels filter
15-8
labelsFilter slot
15-8, 15-10
creating
15-14
labels slot
15-1, 15-6, 15-10
creating
15-11
lastFormats slot
21-12
LastVisibleTopic, To Do List method
19-26
latitude values
19-30
LaunchPartEntry, Extras Drawer method
19-40
laying out multiple child views
3-43
learningEnabledOption, user configuration
variable
19-48
leftHanded, user configuration variable
19-48
letterInFieldsOption, user configuration
variable
19-48
lettersCursiveOption, user configuration
variable
19-48
letterSetSelection, user configuration variable
19-48
letterSpaceCursiveOption, user configuration
variable
19-48
lexical dictionaries
18-2
lexical dictionary
GL-4
lightweight paragraph views
8-4, 8-11
line
13-2, GL-4
lined paper effect
8-8
line patterns
defining
8-9
list of functions
19-57
local finds
16-3, 16-25
'localFind symbol
16-10
local folders
15-19
localFoldersOnly slot
15-4, 15-19
localization
15-10
local variable
GL-4
location, user configuration variable
19-48
LocObj function
20-4 to 20-5
logging
in transports
22-16
login screen functions
17-25
longitude values
19-30
Look For popup menu
16-5
M
magic pointer
1-17, GL-4
mailAccount, user configuration variable
19-48
mailing
18-3
mailNetwork, user configuration variable
19-48
mailPhone, user configuration variable
19-48
MakeNewEntry
5-9
MakeRichString
8-24
MakeTextNote, Notes method
19-32
manipulating sample data
14-10
manipulating shapes
13-7
margins slot
21-18
masterSoupSlot
4-19
MeasureString function
20-6
meeting
18-3, GL-4
in Dates application
19-8
meetings
18-3
meeting types in Dates application
19-17
memory
affected by system resets
2-7
conserving use of
2-8
system overview
1-3
usage by views
3-45
menuLeftButtons
4-18
menuRightButtons
4-19
message
GL-4
method
3-2, GL-4
MinimalBounds
5-14
MNP compression
serial tool
24-4
modal views
3-38
creating
3-39
opening
3-39
modem setup
configuration string usage
25-7
definition
25-5
general information
25-5
general information constants
25-9
operation
25-3
package
25-1
preferences constants
25-9
preferences option
25-5

I N D E X
IN-13
modem setup (continued)
process
25-3
profile constants
25-9
profile option
25-6, 25-7
user interface
25-2
modem setup package
25-1
modem setup service
25-1
about
25-1
required modem characteristics
25-1
user interface
25-1
modem tool
preferences option
25-2
profile option
25-2
requirements
25-4
moving meetings or events in the Dates
application
19-14
N
name, user configuration variable
19-48
name reference
22-4, GL-4
creating
21-27
example of
21-28
Names
compatibility information
19-3
versus the term cardfile
19-2
Names application
19-2
adding auxiliary buttons to
19-37
adding card layout style
19-5
adding dataDefs
19-4
adding layouts to
19-6
adding new data item
19-4
adding new type of card
19-4
adding viewDefs
19-4
getting a reference to
19-6
list of methods
19-53
Names soup
19-7
soup format
19-49
names card layouts
19-46
nested arrays
transform slot
13-11
NetChooser function
24-22
New button, definition of
5-2
NewCity, Time Zones method
19-29
NewFilingFilter method
15-8, 15-9, 15-11
implementing
15-8, 15-16
NewItem
22-13
overriding to add slots
22-15
NewNote, Notes method
19-32
NewtApp
advantages and disadvantages
2-2
allDataDefs slot
4-20
allSoups slot
4-16
allViewDefs slot
4-20
Default Layout
4-19
Entry Views
4-19
forceNewEntry slot
4-16
InstallScript
4-21
layout protos, using
4-16
layouts, controlling menu buttons
4-18
masterSoupSlot
4-19
menuRightButtons
4-19
newtFalseEntryView
4-22
RemoveScript
4-21
NewtApp application
constructing
4-12
NewtApp application framework
4-12
NewtApp entry view protos
4-8
NewtApp framework
4-1
NewtApp layout protos
4-5
newtApplication
4-4, 4-14
allSoups slot
5-6
NewtApp protos
4-2
NewtApp slot views
4-9
newtFalseEntryView
4-22
Newton 2.0
overview of changes
1-18
NewtonScript
heap
1-3, GL-4
language overview
1-18
newtOverLayout
4-17
newtSoup
4-5
NextToDoDate, To Do List method
19-25
nil
GL-4
noise words in assistant
18-9
no match in input string
18-8
NormalizeAddress
22-9
notes
Notes stationery
19-30, 19-33
Notes application
19-30
adding auxiliary buttons to
19-37
adding stationery
19-33
compatibility information
19-31
creating new notes
19-32

I N D E X
IN-14
Notes application
(continued)
list of methods
19-57
soup
19-33
soup format
19-53
versus term paperroll
19-31
Notes stationery
19-30, 19-33
notifications
17-2, 17-10
Notify
17-3, 17-11
notify icon
adding action to
17-16
numericKeyboard
8-27
O
object
GL-4
object storage system
overview
1-5
object system functions and methods
26-7
obtaining information about a city or country in Time
Zones application
19-28
online help
17-10, 18-3
'onlyCardRouting symbol
15-5
OpenKeyPadFor
8-36
OpenMeetingSlip, Dates method
19-21
OpenTo, Names method
19-6
operating system
overview
1-1
option frame
GL-4
option frame for endpoints
example of
23-9
result slot
23-10
options
resource arbitration
24-10
options for endpoints
setting
23-7
specifying
23-8
ordering of words in assistant
18-2
orientation slot
21-18
origin
GL-4
out box
21-1
receiving items
21-31
routing actions
21-3
sorting items
21-2
transmitting data
21-3
viewing items in
21-34
outlines
19-30, 19-33
output spec
23-2, GL-4
oval
13-4, GL-4
overviews
6-1
routing from
21-14
owner information
using in routing slip
22-30
owner slot
16-8
P
package
1-4, GL-4
activation
2-5
deactivation
2-6
loading
2-5
name
2-11
package file
GL-4
package store
GL-4
package store. See
store part
packed integer font specification
8-19
page-based application
4-6
page layout in print formats
controlling orientation of
21-18
layout of multiple items
21-19
margins slot
21-18
paperroll
versus the term Notes
19-31
paper roll-style application
4-6
paperSize, user configuration variable
19-48
paperSizes, user configuration variable
19-48
paragraph views
8-10
parent
3-2, GL-4
parent slot
3-4, 3-25
parent template
3-2, 3-3
ParseUtter function
18-8
ParseUtter result
phrases slot
18-11
part
GL-5
part cursors
19-40
part frame
GL-5
partially-matched phrases
18-8
parts
soup
12-4
store
12-4
PCMCIA
GL-5
performance optimization
3-44
PeriodicAlarm
17-15

I N D E X
IN-15
periodic alarms
17-4, 17-14
persistent storage
1-3
persona
GL-5
persona popup proto
19-7
phone, user configuration variable
19-48
phoneKeyboard
8-27
phrases slot
18-11
picker
GL-5
pickers
6-1
about
6-1
compatibility
6-2
date
6-17
location
6-17
map
6-8
number
6-21
time
6-17
PickItems array
specifying
6-37
PICT
swapping during run-time
13-21
picture
GL-5
pictures
13-6
setting a default
13-21
storing compressed
13-18
pitch shifting
14-9
pixel
3-6
playing event related sounds
14-3
playing sound
global sound functions
14-5
sound channel
14-5
please menu
built-in tasks
18-3
please slip
18-3
pop-up menu in
18-3
PointToCharOffset
8-38
PointToWord
8-38
polygon
13-5, GL-5
pop-up
GL-5
pop-up menu
in Find slip
16-2
popups
6-1
about
6-1
compatibility
6-2
pop-up views
3-37
PostParse method
18-6, 18-17
power information
17-26
power-off functions
17-25
power-off handling for endpoints
23-23
power-on functions
17-24
power registry
17-7, 17-24
login screen functions
17-25
power-off functions
17-25
power-on functions
17-24
preconditions array
relationship to signature array
18-10
preconditions slot in intelligent assistant
18-10
preferences
for transports
22-17
storing application preferences in system
soup
19-45
preferences template for transports
22-33
Prefs roll
19-35
adding and removing items
19-36
compatibility information
19-36
list of functions
19-57
primary_act slot
18-6
primary action
18-18
printer
slot in item frame
21-28
specifying for routing
21-28
printing
18-3, 21-19
overview
1-9
preparation for
21-9
sequence of events for
21-19
progress
reporting to the user
16-24
progress indicators
17-15, 17-16
progress slip
16-4
creating
17-18
illustrated
16-4
project
GL-5
protection slot
21-35
proto
3-4, GL-5
protoActionButton
21-4
protoAddressPicker
22-31
protoAlphaKeyboard
8-28, 8-30
protoBasicEndpoint
23-8
features of
23-1
protoClockFolderTab
15-6, 15-9
illustrated
15-3
TitleClickScript method of
15-7
protocol
GL-5
protoDateKeyboard
8-28, 8-30
protoEmporiumPopup
19-8
protoFilingButton proto
15-9
protoFilingButton view
15-14

I N D E X
IN-16
protoFolderTab proto
15-9
protoFrameFormat
21-21
protoFullRouteSlip
22-27
protoInputLine
8-12, 8-13, 8-14
protoKeyboard
8-28
protoKeyboardButton
8-28, 8-29
protoKeypad
8-28, 8-29
protoLabelInputLine
8-13
protoListPicker
using
6-26
protoNewFolderTab
15-6, 15-9
protoNewFolderTab view
15-11
protoNumericKeyboard
8-28, 8-30
protoPeriodicAlarmEditor
17-4, 17-14
protoPersonaPopup
19-7
protoPhoneKeyboard
8-28, 8-30
protoPrinterChooserButton
21-29
protoPrintFormat
21-18
protoRoutingFormat
21-22
proto slot
3-4, 3-24
protoSmallKeyboardButton
8-28, 8-30
protoStaticText
8-13
protoStatusTemplate
17-18, 22-21
vs. DoProgress
17-18
protoStreamingEndpoint
23-20
proto templates
buttons and boxes
7-6
for keyboards
8-28
for text
8-4
input line
8-4, 8-12
protoActionButton
21-4
protoAddressPicker
22-31
protoAlphaKeyboard
8-28, 8-30
protoBasicEndpoint
23-8
protoDateKeyboard
8-28, 8-30
protoFrameFormat
21-21
protoFullRouteSlip
22-27
protoInputLine
8-12, 8-13, 8-14
protoKeyboard
8-28
protoKeyboardButton
8-28, 8-29
protoKeypad
8-28, 8-29
protoLabelInputLine
8-13
protoNumericKeyboard
8-28, 8-30
protoPeriodicAlarmEditor
17-14
protoPhoneKeyboard
8-28, 8-30
protoPrinterChooserButton
21-29
protoPrintFormat
21-18
protoRoutingFormat
21-22
protoSmallKeyboardButton
8-28, 8-30
protoStaticText
8-13
protoStatusTemplate
17-18, 22-21
protoStreamingEndpoint
23-20
protoTransport
22-5
protoTransportHeader
22-25
protoTransportPrefs
22-33
scrollers
7-2 to 7-6
protoTransport
22-5
protoTransportHeader
22-25
protoTransportPrefs
22-33
punctuation pop-up
8-5
PutAwayScript
19-34, 21-33
putting away received items
automatically
21-31
filing items
21-34
manually
21-33
Q
queries
accessing results
11-16
QueueRequest
22-12
QuietSendAll
22-9
R
raw ink
8-2, GL-5
rcBaseInfo frame, example
10-15
rcGridInfo frame, example
10-15
recConfig frame, example
10-15
receiver
GL-5
ReceiveRequest
22-9
receiving data
appSymbol slot
21-32
AutoPutAway method
21-32
foreign data
21-34
PutAwayScript method
21-33
receiving endpoint data
alternative methods of
23-19
flushing data
23-19
looking at incoming data
23-19
preparing for
23-13
specifying flags for
23-15
with Input
23-19

I N D E X
IN-17
receiving large objects
23-20
recognition flags
vAddressField
9-31
vAnythingAllowed
9-32
vCapsRequired
9-31
vClickable
9-32
vCustomDictionaries
9-31
vDateField
9-33
vGesturesAllowed
9-32
vLettersAllowed
9-31
vNameField
9-31
vNoSpaces
9-32
vNothingAllowed
9-32
vNumbersAllowed
9-31, 9-33
vPhoneField
9-33
vPunctuationAllowed
9-31
vShapesAllowed
9-32
vSingleUnit
9-32
vStrokesAllowed
9-32
vTimeField
9-33
recognition functions
10-54
recognition menu
8-14
recognition system
overview
1-7
recognized text
8-1, GL-5
rectangle
13-3, GL-5
redrawing views
3-44, 13-10
reference
GL-5
RegAppClasses
21-33
RegAuxButton
19-37
RegFindApps function
16-25, 16-28
RegFolderChanged function
15-3, 15-8, 15-10, 15-18
RegInboxApp
21-34
RegInfoItem, Dates method
19-21
region
13-6, GL-5
registering the task template
18-19
registering with Find service
16-3
RegisterOpenKeyboard
8-36
RegLogin
17-25
RegMeetingType, Dates method
19-17
RegNamesRouteScript, Names method
19-6
RegPowerOff
17-25
RegPowerOn
17-24
RegPrefs
19-36
RegTaskTemplate function
18-19
RegTransport
22-5
RegUserConfigChange
19-45
remembering
18-3
remote transport items
22-10
RemoveAlarm
17-13
RemoveAppAlarms
17-13
RemoveExtraIcon, Extras Drawer method
19-41,
19-43
RemoveOldToDoItems, To Do List method
19-24
RemoveScript function
2-6
Repeat Notes soup
19-22
ReplaceInkData, Names method
19-6
replacing the system-supplied Find slip
16-4, 16-11
reset, system
2-7
resource
GL-5
resource arbitration options
24-10
restore
GL-5
restricted entry field
GL-5
result frame
16-12
results array
16-8, 16-21
Find service
16-7
result slot in endpoint option frame
23-10
rich string
GL-6
rich string format
8-2, 8-23, GL-6
rich strings
8-2, 8-22
conversion of
8-23
format of
8-2, 8-23
functions for
8-24
usage considerations
8-23
rollScrolling slot
21-36
ROM_CalendarNotesName
19-22
ROM_CalendarSoupName
19-22
ROM_CompatibleFinder proto
16-8, 16-12
and routing
16-9, 16-10
example of use
16-17
ShowFakeEntry
16-23
ShowFoundItem
16-23
vs. ROM_SoupFinder
16-10
ROM_rcSingleCharacterConfig frame, example
10-15
ROM_RepeatMeetingName
19-22
ROM_RepeatNotesName
19-22
ROM_SoupFinder proto
16-7, 16-10, 16-12, 16-21,
16-26, 16-27
example of use
16-16
ShowFoundItem method
16-22
using
16-18
vs. ROM_CompatibleFinder
16-10
root view
3-6, GL-6
rotating a bitmap
13-19
rounded rectangle
13-5, GL-6
routeFormats slot
21-9

I N D E X
IN-18
RouteScript
21-24
example of
21-25
routeScripts slot
21-22, 21-23, 21-24
defining a method identified by
21-24
routing
about
21-1
application-specific
21-22
compatibility
21-8
current format
21-8
data types
21-7
dataTypes slot
21-5
formats
21-5
handling multiple items
21-14, 21-24
in box
21-1
lastFormats slot
21-12
out box
21-1, 21-3
programmatic sending
21-26
protoActionButton
21-4
protoFrameFormat
21-21
protoPrinterChooserButton
21-29
protoPrintFormat
21-18
protoRoutingFormat
21-22
providing transport-based actions
21-9
receiving data
21-31
routeFormats slot
21-9
routeScripts slot
21-22
sending items programmatically
21-26
transport-related
21-9
using
21-8
using aliases
21-13, 21-36
view definition registration
21-16
view definitions
21-34
viewing items in In/Out box
21-34
routing actions
application-specific
21-22
building
21-4
disabling application-specific
21-25
performing
21-24
routing format
GL-6
routing formats
creating new
21-22
example of
21-16
functions to use
21-17
registering
21-7, 21-16, 21-17
use of built in
21-7
routing functions and methods
AppInstalled
21-32
AutoPutAway
21-32
ClassAppByClass
21-33
GetActiveView
21-30
GetDefaultFormat
21-11
GetRouteScripts
21-23
GetTargetCursor
21-24
GetTargetInfo
21-10
PutAwayScript
21-33
RegAppClasses
21-33
RegInboxApp
21-34
RouteScript
21-24
Send
21-26
SetDefaultFormat
21-11
SetupItem
21-12
TargetIsCursor
21-24
UnRegAppClasses
21-31
UnRegInboxApp
21-34
UnRegTheseAppClasses
21-33
VerifyRoutingInfo
21-10
routing interface
overview
1-13
routing slip
18-3, 22-26, GL-6
opening programmatically
21-29
picking address in
22-31
positioning child views in
22-30
using owner information in
22-30
S
SafeRemoveLayout, Names method
19-6
sample action template
18-16
sample data
manipulating
14-10
sample target template
18-16
scaled images
displaying
13-15
use of clRemoteView
13-15
scheduling
18-3
scope parameter
16-10
script icon
GL-6
script icons
19-38, 19-42
scrollAmounts
7-5
scrollDownSound
14-2
scrollers
7-2 to 7-6
advancing
7-5
scroller slots
7-3, 7-4, 7-5

I N D E X
IN-19
scrolling
controlling in In/Out Box view def
21-36
speeding up
3-46
scrollRect
7-3
scrollUpSound
14-2
search method
16-7
search methods
16-6, 16-10
examples
16-16
implementing
16-15
returning results of
16-21
scope parameter to
16-10
StandardFind
16-15
Selected button
16-2, 16-3
selected Finds
16-9
targeted find
16-19
selection hits
testing for
8-38
self
GL-6
Send
21-26
send button
in routing slip
22-28
sending data with endpoints
23-11
sending large objects
23-20
SendRequest
22-8
serial options
24-2, 24-5
serial tool
24-1
framed asynchronous
24-4
MNP compression
24-4
standard asynchronous
24-1
summary of serial options
24-2, 24-5
SetDefaultFormat
21-11
SetDone, To Do List method
19-25
SetEntryAlarm, Dates method
19-15
SetExtrasInfo, Extras Drawer method
19-40
SetLocalizationFrame
20-4
SetLocation, Time Zones method
19-30
SetMeetingIconType, Dates method
19-16
SetMeetingInvitees, Dates method
19-15
SetMeetingLocation, Dates method
19-15
SetMeetingNotes, Dates method
19-15
SetMessage method
16-24, 16-28
SetPriority, To Do List method
19-26
SetRepeatingEntryStopDate, Dates method
19-15
SetStatusDialog
22-23
setting target
in GetTargetInfo method
15-2
setting target view
in GetTargetInfo method
15-2
setting up the application soup for
newtApplication
4-15
SetUpIdle
17-9
SetupItem
21-12
SetUserConfig
19-45
SetValue
8-14
shape
GL-6
finding points within
13-16
manipulating
13-7
nested arrays of
13-10
structure
13-2
transforming
13-13
shape-based graphics
13-2
shape objects
13-2
arc
13-4
creating
13-9
line
13-2
oval
13-4
polygon
13-5
rectangle
13-3
rounded rectangle
13-5
shape recognition
ViewAddChildScript method
9-25
ShowBusyBox
17-15
Show button, definition of
5-3
ShowFakeEntry
16-10, 16-23
ShowFoundItem
16-8, 16-10, 16-21, 16-23, 16-28
example
16-22
ShowFoundItem, Names method
19-6
showing a hidden view
3-34
showSound
14-2
siblings
GL-6
sibling views
3-13
signature
18-10
signature, user configuration variable
19-48
signature guidelines
2-9
signature slot
relationship to preconditions array
18-10
sketch ink
8-2, GL-6
slot
GL-6
global
GL-3
sound
asynchronous
14-7
overview
1-9
pitch shifting
14-9
playing
14-5
playing on demand
14-6
responding to user input
14-7

I N D E X
IN-20
sound (continued)
synchronous
14-7
waiting for completion
14-7
sound channel
characteristics of
14-2
creating for playback
14-6
deleting
14-6
using
14-5
sound chip
14-8
sound frame
cloning
14-5
creating
14-5
setting sampling rate
14-9
sounds
event related
14-2
for predefined events
14-2
in ROM
14-2
sound slots
hideSound
14-2
scrollDownSound
14-2
scrollUpSound
14-2
showSound
14-2
sound structures
sound frame
14-3
sound result frame
14-3
sound techniques
advanced
14-8
soup
11-3, GL-6
affected by system resets
2-7
Dates
19-22
Names
19-7
Notes application
19-33
system
19-44
storing application preferences in
19-45
To Do List
19-26
union soup
11-3
soup change notification
16-9
soupervisor mechanism
19-39, GL-6
using
19-43
soupervisor slot
19-44
soup icon
19-38, GL-6
soup icons
adding
19-40
removing
19-41
special-format objects for assistant
18-12
specifying the target for filing
15-13
speedCursiveOption, user configuration
variable
19-48
StandardFind method
16-15, 16-28
stationery
1-8, GL-6
buttons
5-2
definition
5-1
implemented in an auto part
5-13
InstallScript
5-13
registration
5-4
RemoveScript
5-13
status slips
17-6, 17-16
cancelling
17-24
defining component views
17-19
opening
17-23
reporting progress
17-23
using
17-18
statusTemplate for transports
22-21
statusTemplate subviews
vBarber
22-21
vConfirm
22-21
vGauge
22-21
vProgress
22-21
vStatus
22-21
vStatusTitle
22-21
stepChildren array
3-25
adding to at run time
3-34
storage
persistent
1-3
storage system
overview
1-5
store
11-3, GL-6
storeChanged parameter of FileThis method
15-16
store part
12-4, GL-6
stores
package stores
12-4
stores filter
15-8
storesFilter slot
15-8, 15-11
creating
15-14
storing compressed images
13-18
streaming endpoint
23-20
StringExtract
5-9
StripInk
8-24
stroke data
8-2
style frame
13-7
superSymbol slot
using GetDefs to determine it
5-7
synchronization
view
3-43
synchronous cancellation in endpoints
23-22
synchronous sound
14-7

I N D E X
IN-21
synonyms
18-3
system data
19-44
list of functions
19-58
system messages
in automatic views
8-8
system resets
2-7
system services
16-1, 17-1
alarms
17-3
automatic busy cursor
17-5
filing
15-1
idling
17-2, 17-9
notify icon
17-5
online help
17-3
power registry
17-7
status slips
17-6
undo
17-1, 17-8
user alerts
17-3
system soup
storing application preferences
19-45
T
tabbing order
8-36
tags
15-1
target
GL-7
getting and verifying for routing
21-10
of filing
15-1
of routing
21-3
specifying for filing
15-13
target frames
18-5
target information frame
15-20
TargetIsCursor
21-24
target slot
15-10
creating
15-13
target templates
18-5
system-supplied
18-11
target view
15-2
overview as
15-5
setting in GetTargetInfo method
15-2
targetView slot
15-10
creating
15-13
task frame
18-6
task slip
18-4
task template
18-5, 18-18, 18-22
primary_act slot
18-6
registering
18-19
registering with assistant
18-5
unregistering
18-5, 18-19
template
3-2, GL-7
child
3-2
declaring
GL-2
parent
3-2
proto
3-4
template data form for endpoints
23-5
arglist array
23-5
setting options
23-7
typelist array
23-5
template-matching conflicts in assistant
18-13
text
displaying
8-14
in views
8-15, 8-25
keyboard input
8-4
styles
8-25
views
8-14
text find
16-7
text find mode
16-6
text functions and methods
DecodeRichString
8-24
ExtractRangeAsRichString
8-24
GetRichString
8-24
IsRichString
8-24
MakeRichString
8-24
OpenKeyPadFor
8-36
PointToCharOffset
8-38
PointToWord
8-38
RegisterOpenKeyboard
8-36
SetValue
8-14
StripInk
8-24
UnregisterOpenKeyboard
8-36
ViewSetupChildrenScript
8-7
text input and display
views and protos for
8-6
text run
8-25, GL-7
TextScript
5-9
text searches
16-2
text views
and lined paper effect
8-8
text views and protos
8-4
tick
GL-7
time
18-3
timeoutCursiveOption, user configuration
variable
19-48
timeStamp slot
setting for received items
22-11

I N D E X
IN-22
Time Zones application
19-27
adding a city
19-29
compatibility information
19-27
getting a refernce to
19-28
list of functions and methods
19-57
obtaining information about a city or country
19-28
TitleClickScript method
15-7
defining
15-15
title slot
16-7, 16-10
and Find overview
16-7
creating
16-11
todo items
18-3
To Do List application
19-22
accessing tasks
19-24
checking-off tasks
19-25
compatibility information
19-23
creating and removing tasks
19-24
getting a reference to
19-23
list of methods
19-56
soup format
19-53
To Do List soup
19-26
transfer mode
3-22, 3-49
transfer modes
at print time
13-12
default
13-12
problems with
13-12
transforming a shape
13-13
translating data shapes
13-16
transport
21-2, 22-1, GL-7
canceling an operation
22-13
communication with applications
22-19
deferring reception of data
22-10
displaying status to user
22-21
error handling
22-20
grouping
22-7
group picker
22-29
installing
22-5
parts
22-2
power-off handling
22-20
preferences template
22-33
queueing a new request
22-12
receiving data
22-9
remote items
22-10
routing information template
22-25
routing slip template
22-26
sending data
22-8
status template
22-21
storing preferences
22-17
uninstalling
22-6
TransportChanged
22-7
transport functions and methods
CancelRequest
22-13
CanPutAway
22-18
CheckOutbox
22-9
DeleteTransport
22-6
GetTransportScripts
22-17
InstallScript
22-5
ItemCompleted
22-16
NewItem
22-13
NormalizeAddress
22-9
QueueRequest
22-12
QuietSendAll
22-9
ReceiveRequest
22-9
RegTransport
22-5
SendRequest
22-8
SetStatusDialog
22-23
TransportChanged
22-7
TransportNotify
22-19
UnRegTransport
22-6
transport interface overview
1-14
TransportNotify
22-19
transport object
22-5
transport protos
protoAddressPicker
22-31
protoFullRouteSlip
22-27
protoStatusTemplate
22-21
protoTransport
22-5
protoTransportHeader
22-25
protoTransportPrefs
22-33
transport templates
preferences
22-33
routing information
22-25
routing slip
22-26
status
22-21
typelist array in endpoint options
23-5
U
undo capability
17-1, 17-8
union soup
11-3
unmatched words in input to assistant
18-8, 18-9
UnRegAppClasses
21-31
UnRegAuxButton
19-37
UnRegFindApps function
16-25, 16-28

I N D E X
IN-23
UnRegFolderChanged function
15-3, 15-10, 15-18
UnRegFormulas
19-36
UnRegInboxApp
21-34
UnRegInfoItem, Dates method
19-21
unregistering the task template
18-19
UnregisterOpenKeyboard
8-36
UnRegLogin
17-25
UnRegPowerOff
17-26
UnRegPowerOn
17-24
UnRegTheseAppClasses
21-33
UnRegTransport
22-6
UnRegUserConfigChange
19-45
user alert
17-3, 17-11
user configuration data
19-45
user configuration variables
address
19-47
cityZip
19-47
company
19-47
country
19-47
countrySlot
19-47
currentAreaCode
19-47
currentCountry
19-48
currentEmporium
19-48
currentPersona
19-48
currentPrinter
19-48
dialingPrefix
19-48
doAutoAdd
19-48
doInkWordRecognition
19-48
doShapeRecognition
19-48
doTextRecognition
19-48
emailPassword
19-48
faxPhone
19-48
homePhone
19-48
learningEnabledOption
19-48
leftHanded
19-48
letterInFieldsOption
19-48
lettersCursiveOption
19-48
letterSetSelection
19-48
letterSpaceCursiveOption
19-48
location
19-48
mailAccount
19-48
mailNetwork
19-48
mailPhone
19-48
name
19-48
paperSize
19-48
paperSizes
19-48
phone
19-48
signature
19-48
speedCursiveOption
19-48
timeoutCursiveOption
19-48
userFont
19-48
userFont, user configuration variable
19-48
user proto
GL-7
user-visible application name
15-4, 16-11
user-visible folder names
15-19
useWeekNumber, Dates variable
19-21, 19-46
utility functions
26-1
V
vAddressField
9-31
value
immediate
GL-3
reference
GL-5
vAnythingAllowed
9-32
vApplication flag
3-47
variables
global
GL-3
local
GL-4
vBarber
22-21
vCalculateBounds flag
3-47
vCapsRequired
9-31
vCharsAllowed
9-31
vClickable
3-47, 9-32
vClipping flag
3-47
vConfirm
22-21
vCustomDictionaries
9-31
vDateField
9-33
VerifyRoutingInfo
21-10
vFixedInkTextStyle flag
8-17
vFixedTextStyle flag
8-17
vFloating flag
3-47
vGauge
22-21
vGesturesAllowed
9-32
view
3-4, GL-7
adding dynamically
3-33
alignment
3-13
animating
3-23
base
3-5
behavior
3-9, 3-47
capturing
13-18
closing
3-29
controlling recognition in
9-29
coordinate system
3-6

I N D E X
IN-24
view
(continued)
creating
3-28
custom fill pattern
3-21
custom frame pattern
3-21
declareSelf slot
3-24
declaring
3-27
defining characteristics of
3-8
dependencies between
3-43
dirtying
3-33
displaying
3-33
finding bounds
3-39
hiding
3-33
highlighting
3-42
idler for
17-2, 17-9
laying out multiple children
3-43
limiting text in
3-17
memory usage
3-45
modal
3-38
optimizing performance
3-44
origin offset
3-20
pop-up views
3-37
redrawing
3-44, 13-10
root
3-6, GL-6
screen-relative bounds
3-12
showing hidden
3-34
sibling views
3-13
size relative to parent
3-12
speeding up scrolling
3-46
synchronization
3-43
viewClass slot
3-9
viewFlags slot
3-9
viewFont slot
3-24
viewOriginX slot
3-20
viewOriginY slot
3-20
viewTransferMode slot
3-22, 3-49
ViewAddChildScript method
9-25
view alignment
3-10, 3-13
view bounds
finding
3-39
setting
3-39
viewChildren slot
3-25
view class
3-9, 3-47, GL-7
view classes
clEditView
8-4, 8-6, 8-8, 13-15
clKeyboardView
8-4, 8-28
clParagraphView
8-4, 8-10
clPictureView
13-15
clPolygonView
13-14
clRemoteView
13-15
clView
2-2
viewClass slot
3-9
viewDef
5-2
creating
5-11
MinimalBounds example
5-14
registering in a NewtApp application
4-20
view definition
GL-7
for viewing items in In/Out box
21-34
hiding from In/Out Box
21-35
protection slot
21-35
registering formats as
21-16
viewEffect constants
fxBarnDoorCloseEffect
3-50
fxBarnDoorEffect
3-50
fxCheckerboardEffect
3-50
fxColAltHPhase
3-49
fxColAltVPhase
3-49
fxColumns
3-49
fxDown
3-49
fxDrawerEffect
3-49
fxFromEdge
3-50
fxHStartPhase
3-49
fxIrisCloseEffect
3-50
fxIrisOpenEffect
3-50
fxLeft
3-49
fxMoveH
3-49
fxMoveV
3-49
fxPopDownEffect
3-50
fxRevealLine
3-50
fxRight
3-49
fxRowAltHPhase
3-49
fxRowAltVPhase
3-49
fxRows
3-49
fxSteps
3-50
fxStepTime
3-50
fxUp
3-49
fxVenetianBlindEffect
3-49
fxVStartPhase
3-49
fxWipe
3-50
fxZoomCloseEffect
3-50
fxZoomOpenEffect
3-50
fxZoomVerticalEffect
3-50
view effects
3-23
viewEffect slot
3-23
viewFlags
vAddressField
9-31
vAnythingAllowed
9-32

I N D E X
IN-25
viewFlags (continued)
vApplication
3-47
vCalculateBounds
3-47
vCapsRequired
9-31
vClickable
3-47, 9-32
vClipping
3-47
vCustomDictionaries
9-31
vDateField
9-33
vFixedInkTextStyle
8-17
vFixedTextStyle
8-17
vFloating
3-47
vGesturesAllowed
9-32
vLettersAllowed
9-31
vNameField
9-31
vNoFlags
3-47
vNoScripts
3-47
vNoSpaces
9-32
vNothingAllowed
9-32
vNumbersAllowed
9-31, 9-33
vPhoneField
9-33
vPunctuationAllowed
9-31
vReadOnly
3-47
vShapesAllowed
9-32
vSingleUnit
9-32
vStrokesAllowed
9-32
vTimeField
9-33
vVisible
3-47
vWriteProtected
3-47
viewFlags slot
3-9, 9-29
viewFont slot
3-24
viewFormat
3-20
view frame
3-21
viewFramePattern
3-21
view functions and methods
AddStepView
3-35
BuildContext
3-36
viewHelpTopic slot
18-19
ViewIdleScript
17-9
view instantiation
description
3-26
view location
3-10
viewOriginX slot
3-20
viewOriginY slot
3-20
viewRect
7-4
views
about
3-1
and system messages
8-8
displaying text and ink in
8-14
for text
8-4
lined paper effect in
8-8
mixing text and ink in
8-15
paragraph
8-10
view system overview
1-6
views and protos for text
8-4
ViewSetupChildrenScript
8-7
view size
3-10
viewTransferMode constants
modeBic
3-49
modeCopy
3-49
modeMask
3-49
modeNotBic
3-49
modeNotCopy
3-49
modeNotOr
3-49
modeNotXor
3-49
modeOr
3-49
modeXor
3-49
viewTransferMode slot
3-22, 3-49
vLettersAllowed
9-31
vNameField
9-31
vNoFlags flag
3-47
vNoScripts flag
3-47
vNoSpaces
9-28, 9-29, 9-32
vNothingAllowed
9-32
vNumbersAllowed
9-31, 9-33
vPhoneField
9-33
vProgress
22-21
vPunctuationAllowed
9-31
vReadOnly flag
3-47
vShapesAllowed
9-32
vSingleUnit
9-32
vStatus
22-21
vStatusTitle
22-21
vStrokesAllowed
9-32
vTimeField
9-33
vVisible flag
3-29, 3-47
vWriteProtected flag
3-47
W, X, Y, Z
wedge
GL-7
who_obj
18-11
written input formats
8-2

T H E A P P L E P U B L I S H I N G S Y S T E M
This Apple manual was written, edited, and
composed on a desktop publishing system
using Apple Macintosh computers and
FrameMaker software. Proof pages were
created on an Apple LaserWriter Pro 630
printer. Final page negatives were output
directly from the text and graphics files. Line
art was created using Adobe
TM
Illustrator.
PostScript
TM
, the page-description language
for the LaserWriter, was developed by Adobe
Systems Incorporated.
Text type is Palatino
®
and display type is
Helvetica
®
. Bullets are ITC Zapf Dingbats
®
.
LEAD WRITER
Christopher Bey
WRITERS
Bob Anders, Christopher Bey,
Cheryl Chambers, Gary Hillerson,
John Perry, Jonathan Simonoff,
Yvonne Tornatta, Dirk van Nouhuys,
Adrian Yacub
PROJECT LEADER
Christopher Bey
ILLUSTRATOR
Peggy Kunz
EDITORS
Linda Ackerman, David Schneider,
Anne Szabla
PRODUCTION EDITOR
Rex Wolf
PROJECT MANAGER
Gerry Kane
Special thanks to J. Christopher Bell,
Gregory Christie, Bob Ebert, Mike Engber,
Dan Peterson, Maurice Sharp, and Fred Tou.
NEWTON PROGRAMMER'S REFERENCE
CD TEAM
Gary Hillerson, Gerry Kane, Christopher Bey